Leo Men’s Top Down Crewneck Sweater Knitting Pattern
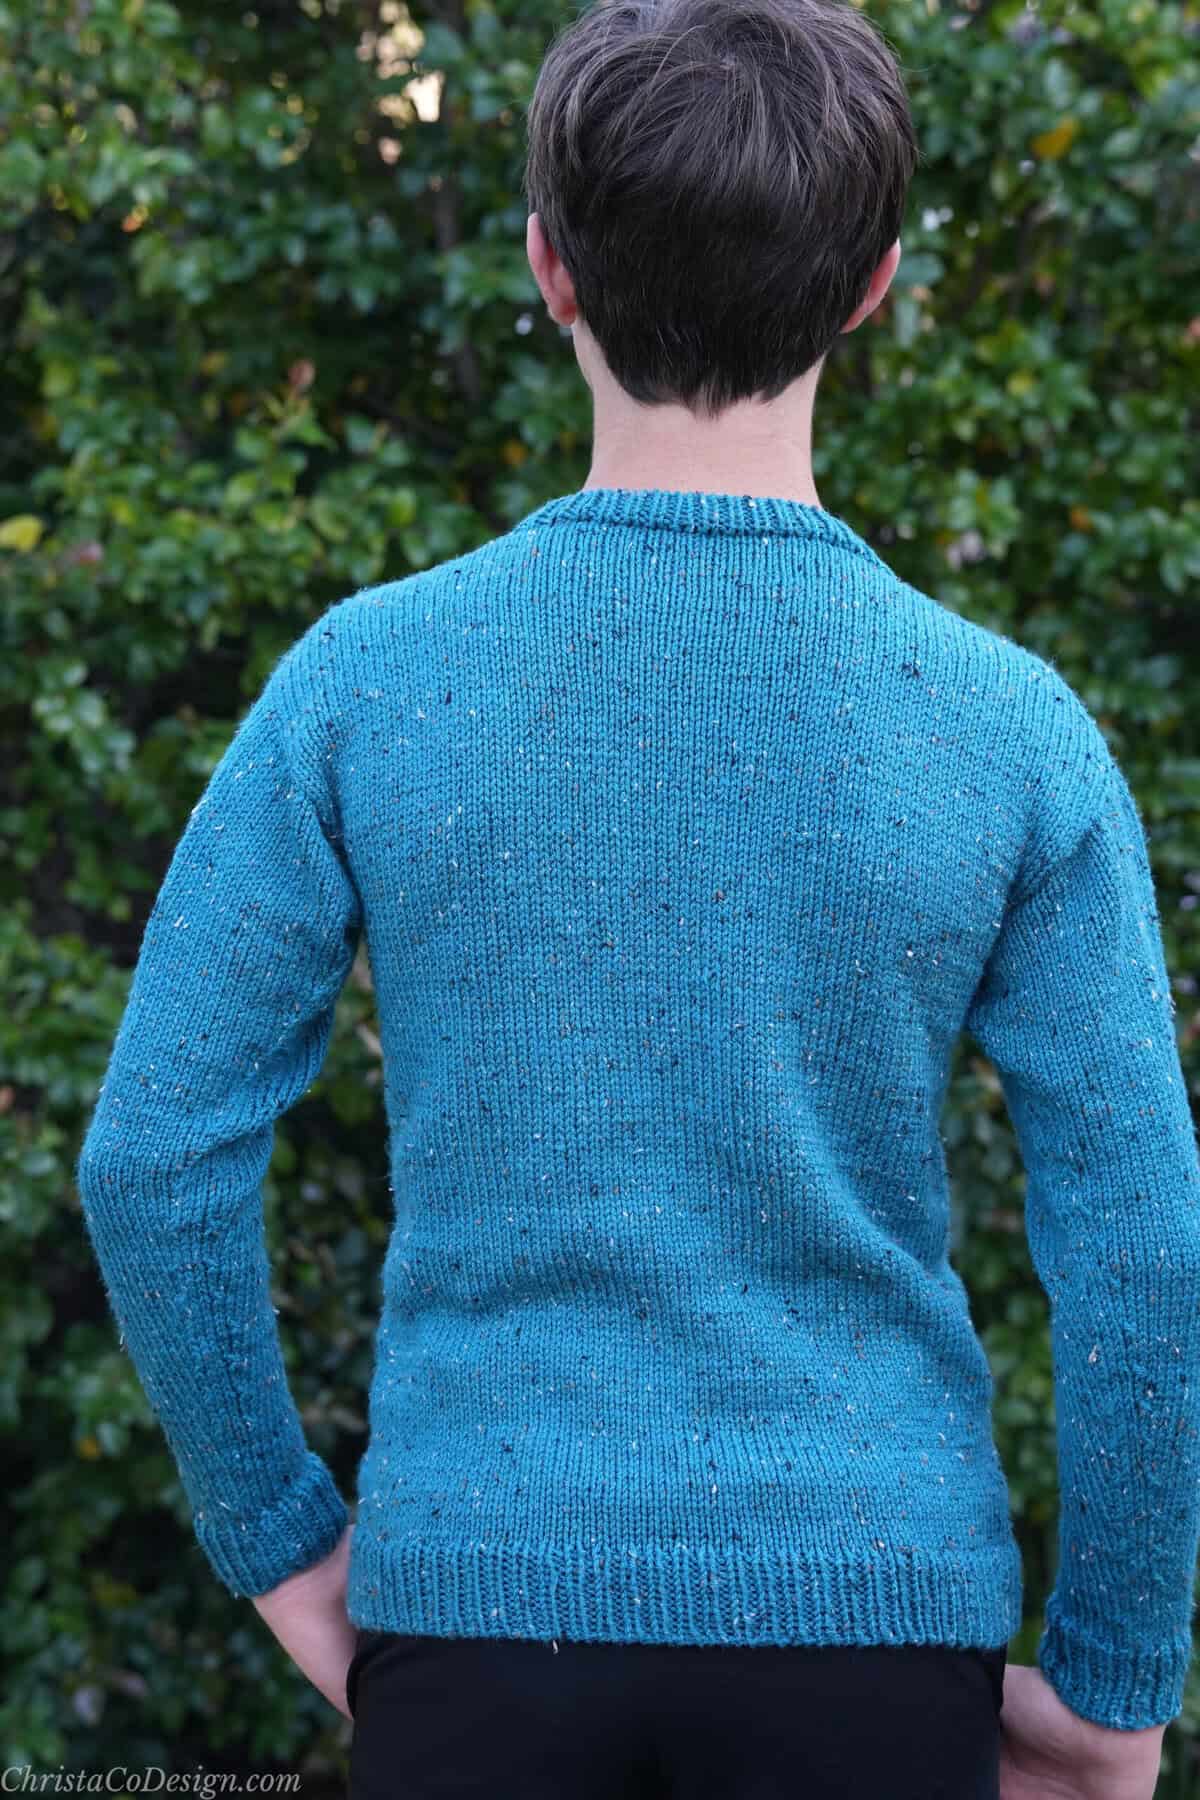
The Leo is a classic men’s pullover sweater with long sleeves and a round neckline. This timeless pullover is worked in stockinette stitch with 1×1 ribbed cuffs and hem.
This easy knitting pattern features a construction that gives you a great fit. The yoke is knit flat to shape the round neckline, while the body and sleeves are worked in the round for a seamless finish.
This project creates a soft, drapey fabric that’s cozy and comfy. If substituting yarn, choose one with good drape and be sure to match the specified gauge.

This post contains affiliate links, I may earn a fee. Read more disclosure policy.

Join the ChristaCoDesign Newsletter
Never miss a pattern!
Purchase the ad-free, well formatted printable PDF Pattern from my shop. Scroll down for the free pattern!
There’s a children’s version of this round neck sweater, the Rino here!
Purchase My Ad-Free PDF Patterns In Your Favorite Shop Here:
Try this quick Christmas Tree knitting pattern to add on as gift tags or holiday decor.
Materials
- KnitPick’s Brava Tweed* #4 medium worsted weight yarn (97% premium acrylic, 3% viscose, 218 yd (199 m) per 100 g skein) in shade Kenai: 5 [6, 6, 7, 7, 8, 8, 9, 10] skeins.
- 4 mm (US 6) 40” (101.5 cm) circular knitting needles & 4.5 mm (US 7) 40” (101.5 cm) circular needle* (or size needed to meet gauge).
- Measuring tape, yarn needle, stitch markers (2) and scissors.
Yarn By Size
- XS – 1157 yd (1058 m)
- S – 1221 yd (1117 m)
- M – 1250 yd (1143 m)
- L – 1358 yd (1242 m)
- XL – 1476 yd (1350 m)
- 2X – 1552 yd (1419 m)
- 3X – 1669 yd (1526 m)
- 4X – 1889 yd (1728 m)
- 5X – 2041 yd (1866 m)
Skill Level
Easy
Construction
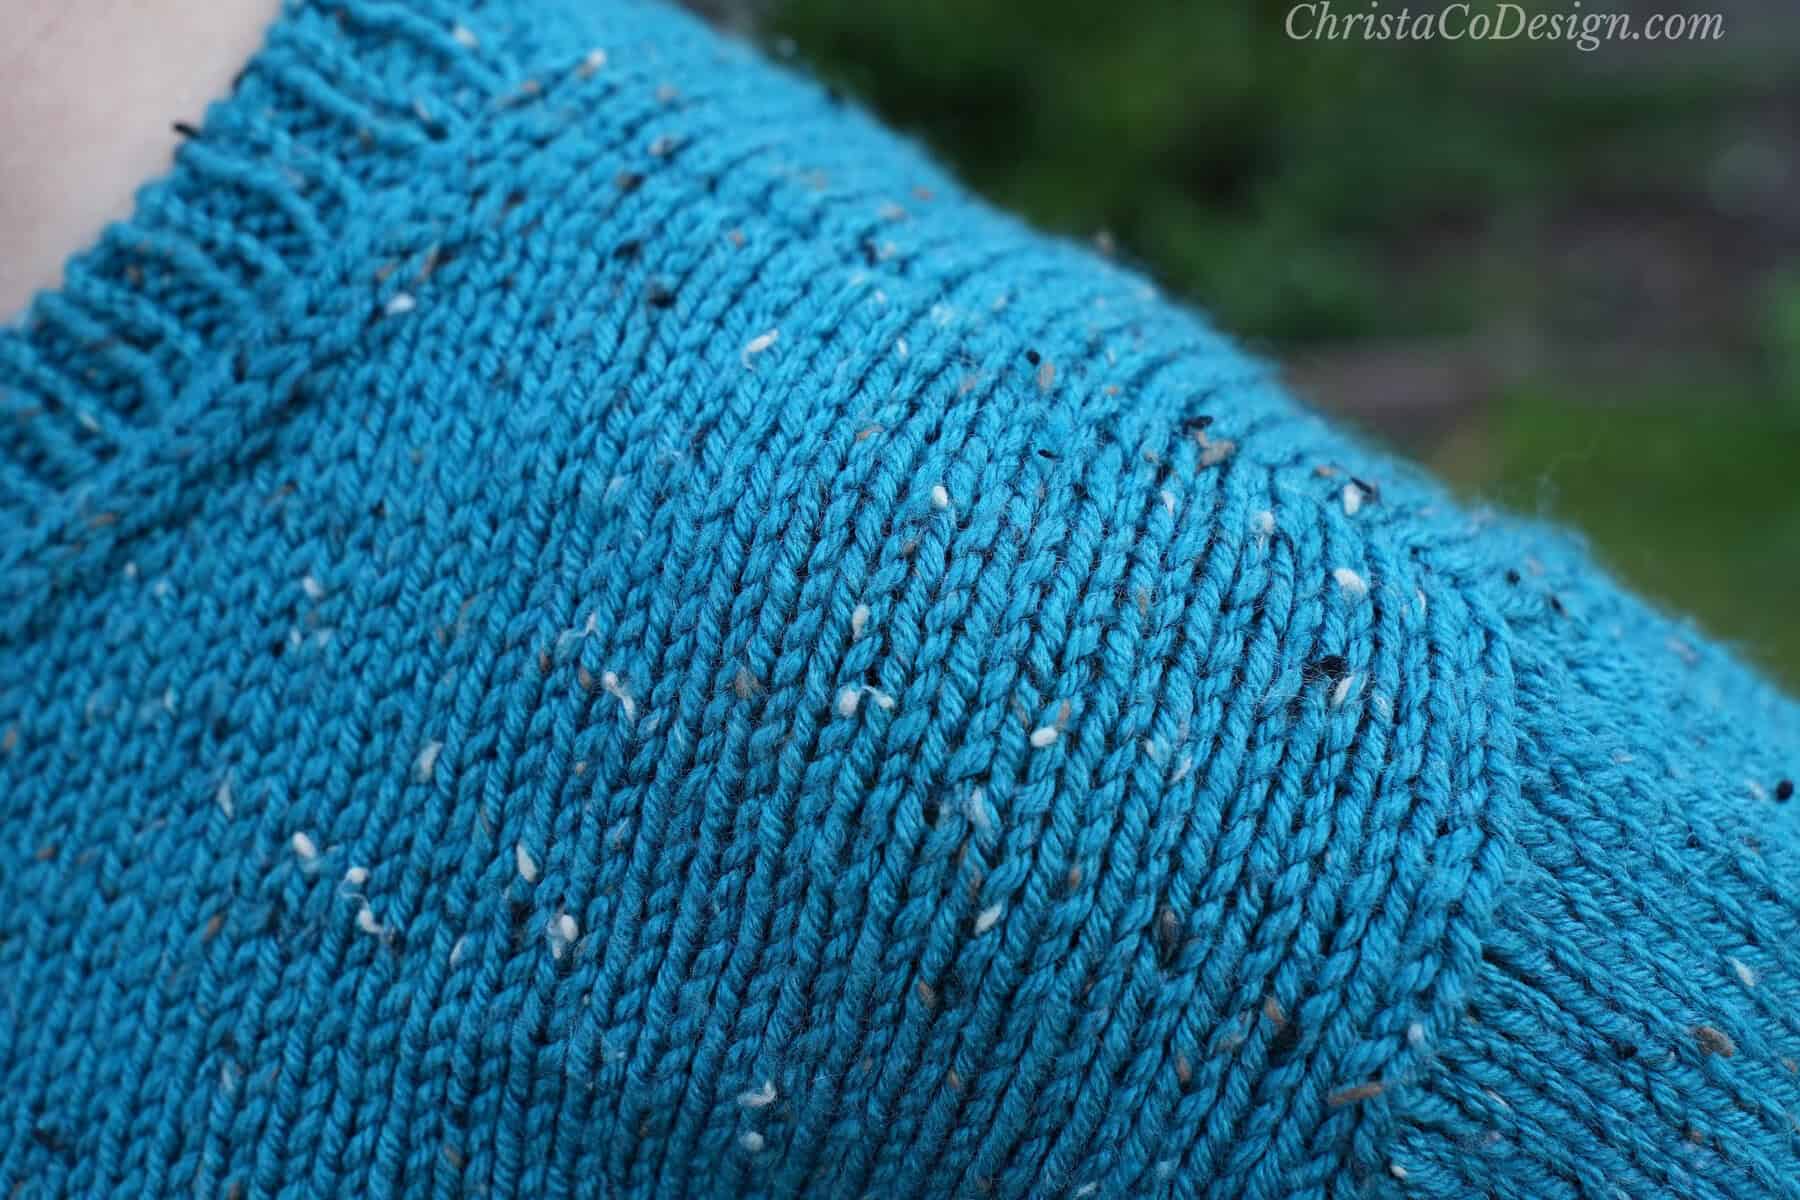
The upper back of this crew neck sweater is worked flat, top down. Stitches are picked up for the shoulders at each side of the cast-on edge and knit flat. The two shoulder pieces are joined to form the v-neck yoke and the front chest is knit flat before joining with the upper back in the round. From there, the lower body is knit in the round. The sleeves are picked up and knit in the round.
Ravelry Library
Save Your Favs!
Add this pattern to your Ravelry queue.
Tutorials
These are recommended for the best look, however, you can substitute them with a different technique if needed.
If you’re looking for more sweater knitting patterns check them out here!
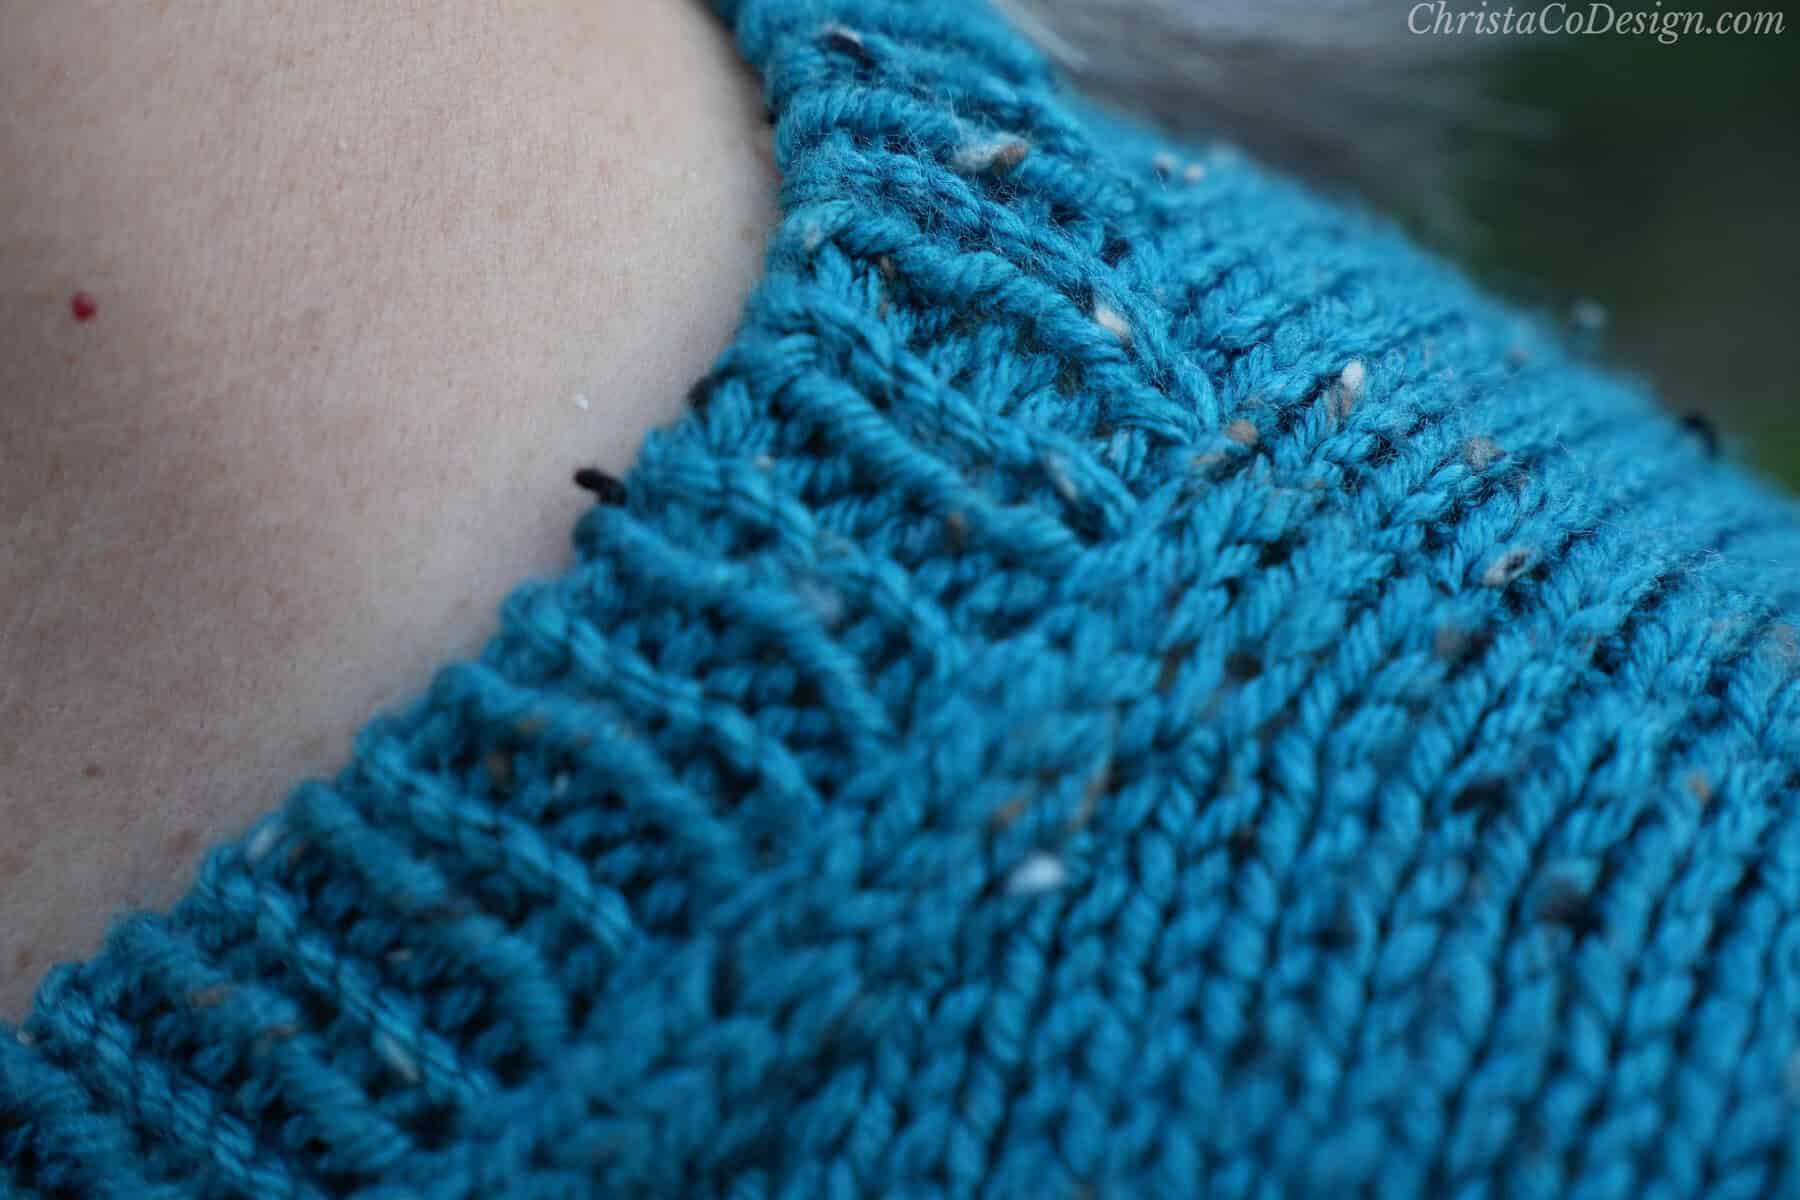
Gauge
17 sts x 25 rnds (after blocking) to 4” (10 cm) measured over St st using x 4.5 mm (US 7) needles
Sizing
XS [S, M, L, XL, 2X, 3X, 4X, 5X]
To fit 32” [36, 40, 44, 48, 52, 56, 60, 64] in (81 [91.5, 101.5, 111.5, 122, 132, 142, 152.5, 162.5] cm) circumference at chest.
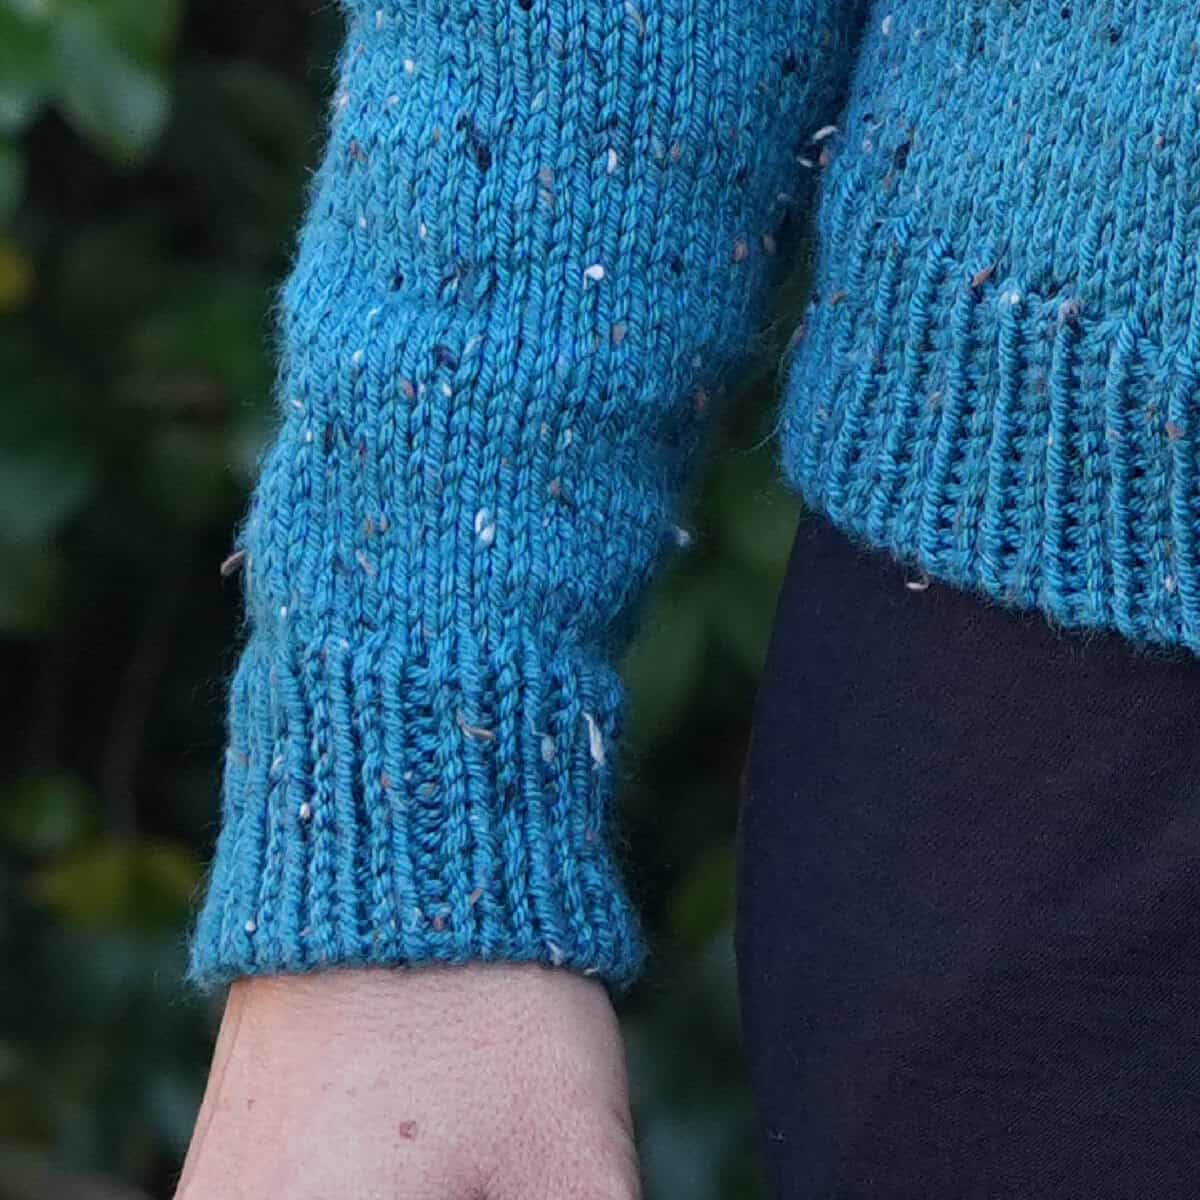
Stitches / Abbreviations
US Terms
BOR – beginning of round
dec – decrease
k – knit
k2tog – knit 2 together
m – marker
M1L – make one left increase
M1R – make one right increase
cdd – center double decrease – slip 2 sts tog as if to k2tog, k1, pass the 2 slipped set over.
p – purl
pm – place marker
rep – repeat
rnd – round
RS – right side
sm – slip marker
ssk – slip, slip, knit decrease
st(s) – stitch(es)
St st – stockinette stitch
tog – together
WS – wrong side
Finished Measurements
36” [41.5, 45, 50, 52.75, 57.5, 61, 65, 68.75]in (91.5 [105.5, 114.5, 127, 134, 146, 155, 165, 174.5] cm) circumference at the chest.
Intended to be worn with 4 – 6“ (10 – 15 cm) of positive ease at the chest.
The model wears size XS on a 32” chest with 4” (10 cm) of positive ease at the chest.
Notes
- Please read through all notes and pattern before you begin.
- Please check gauge first by knitting at least a 6” (15cm) square in stockinette with your chosen yarn + needles, block your swatch + measure. Compare it to the listed gauge and adjust your needle size if needed. Stitch gauge is more important than row gauge for this pattern.
- Pattern is written for multiple sizes where the first number given is the smallest size and larger sizes come next in parenthesis. For example: CO 81 [85, 94, 102, 111, 119, 128, 136, 145] sts indicates to cast on 85 sts for the S size, 94 sts for M, 111 sts for XL size, etc. Where no size is indicated, instructions apply to all sizes.
- Stitch multiple is 2.
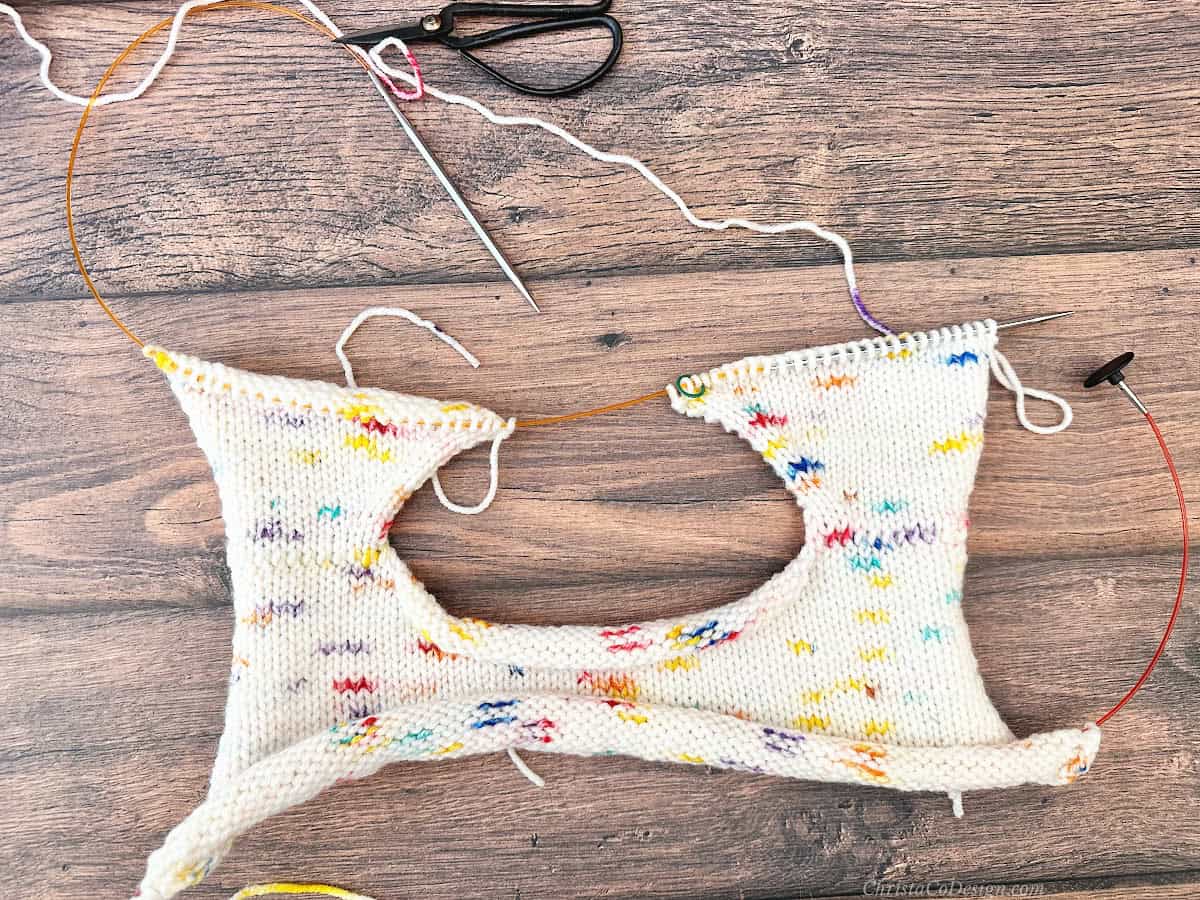
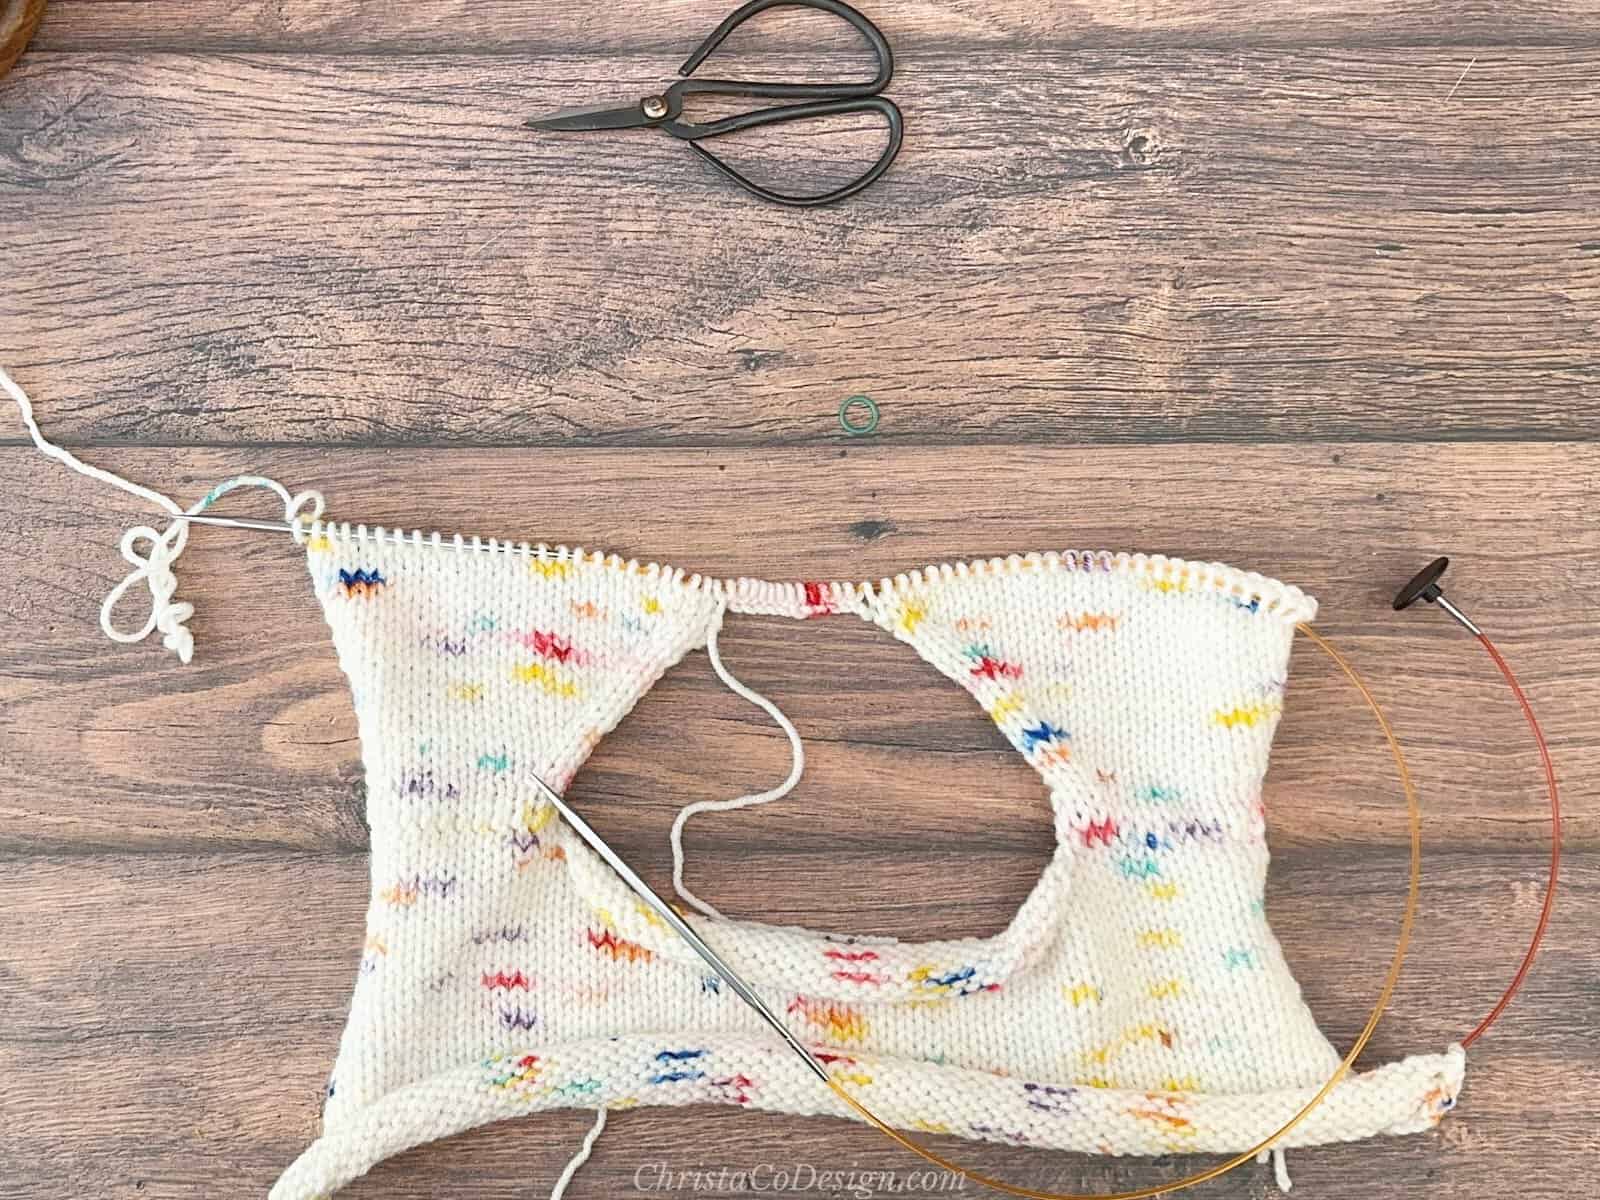
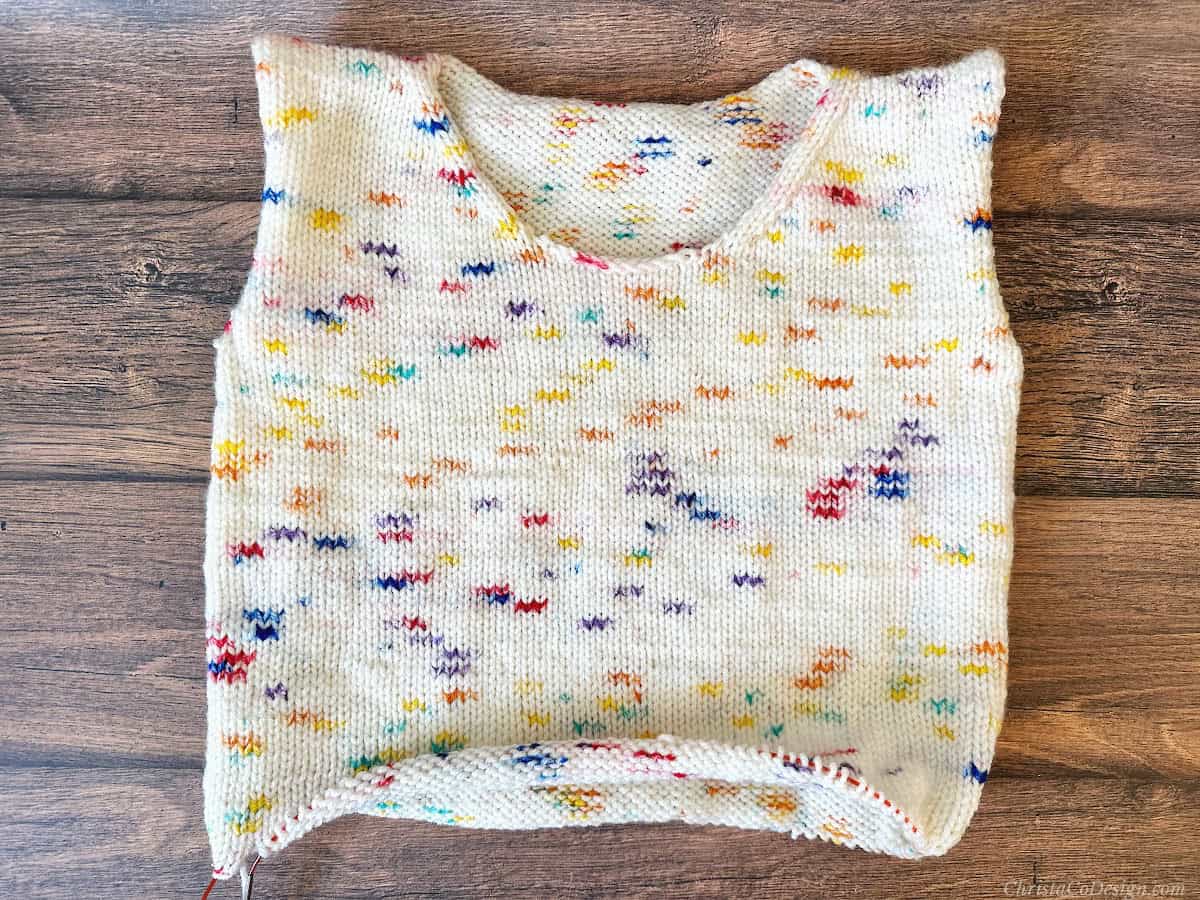
- You’ll see video links throughout the pattern that reference the Bosa Children’s Sweater, which uses the same construction method. While I’m including these as they may be helpful to watch, there isn’t a dedicated video for this exact sweater. Likewise the included pictures are from the children’s version, but helpful for understanding the construction.

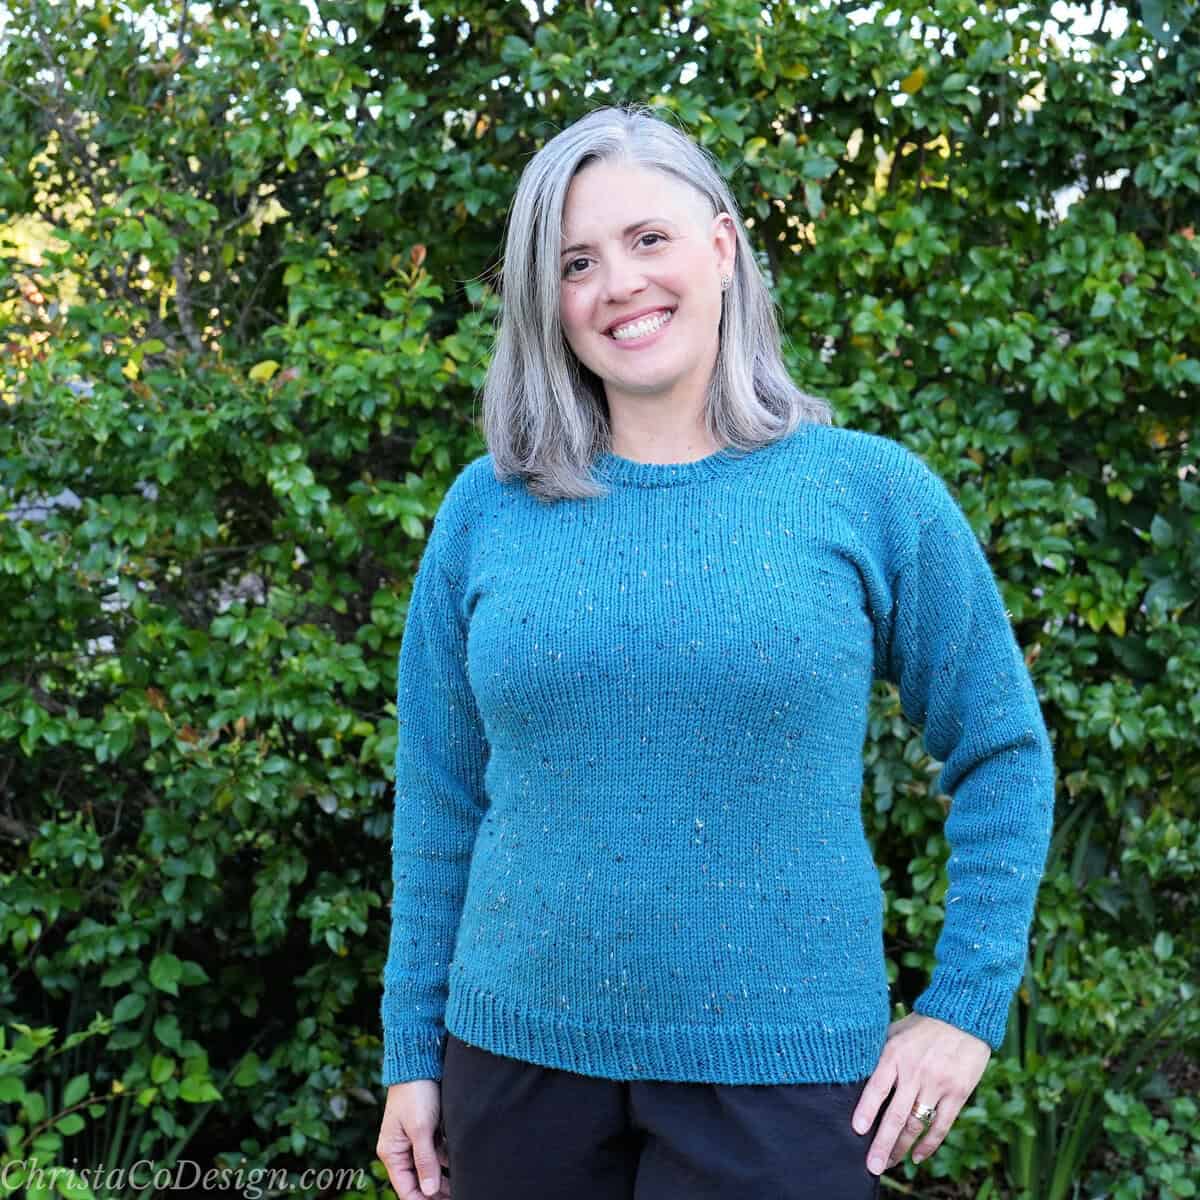
Who wore it better? Wait, don’t answer that. Here I’m wearing the same sweater as my son, a men’s XS. It becomes a fitted sweater on me.
I often get questions about whether you can make a men’s sweater for a woman. And the answer is yes, absolutely.
Many sweater patterns for women use shaping at the waist. This one does not. So for a more fitted look you can go down a size (or 2). It is sized for men’s chest, so you just need to choose the size that most closely meets your sizing.
Pattern Instructions
Upper Back
Using larger needles, cast on 81 [85, 94, 102, 111, 119, 128, 136, 145] sts using the cable cast-on.
Set-up Row (RS): K 25 [26, 28, 31, 34, 36, 39, 41, 44], place locking stitch marker through cast-on edge, k 31 [33, 38, 40, 43, 47, 50, 54, 57], place locking stitch marker through cast-on edge, k to end.
These markers indicate the placement of the back neck.
Row 1 (WS): K1,p until last st, k1.
Row 2 (RS): K all.
Rep Rows 1 & 2: 26 [27, 29, 30, 32, 33, 35, 37, 38] more times, then rep row 1 one more time. Total rows = 55 [57, 61, 63, 67, 69, 73, 77, 79] measuring 8.75” [9, 9.75, 10, 10.75, 11, 11.75, 12.5, 12.75]” from cast-on edge.
Cut yarn and place 81 [85, 94, 102, 111, 119, 128, 136, 145] sts for the Upper Back on a stitch holder or waste yarn. In this video I show you how.
With RS facing, turn the Upper Back so that the cast-on edge is at the top and the live sts are at the bottom. The edge to the left of the back neck is the Left Shoulder and the edge to the right is the Right Shoulder.

Left Shoulder
In this video I show you how to do the shoulders through chest.
Using larger needles and with RS facing, pick up and knitK 25 [26, 28, 31, 34, 36, 39, 41, 44] sts along the Left Shoulder, removing the locking stitch marker at the neck edge.
Row 1 (WS): K1,p until last st, k1.
Row 2 (RS): K all.
Set-Up Row (WS): K1, P 21 [22, 24, 27, 30, 32, 35, 37, 40], pm, p2, k1.
Increase
Row 1 (RS): K to m, sm, M1L, k to end. 1 st increased.
Row 2 (WS): K1,p until last st, k1.
Rep Rows 1 & 2: 9 [9, 11, 12, 12, 14, 15, 16, 17] more times until you have 34 [35, 39, 43, 46, 50, 54, 57, 61] sts total.
Total rows = 24 [24, 28, 30, 30, 34, 36, 38, 40] = neck depth 4.5” [4.5, 4.5, 4.5, 4.5, 5, 5.5, 6, 6]
Cut yarn and place the 34 [35, 39, 43, 46, 50, 54, 57, 61] sts for the Left Shoulder on a stitch holder/waste yarn, removing the stitch marker.
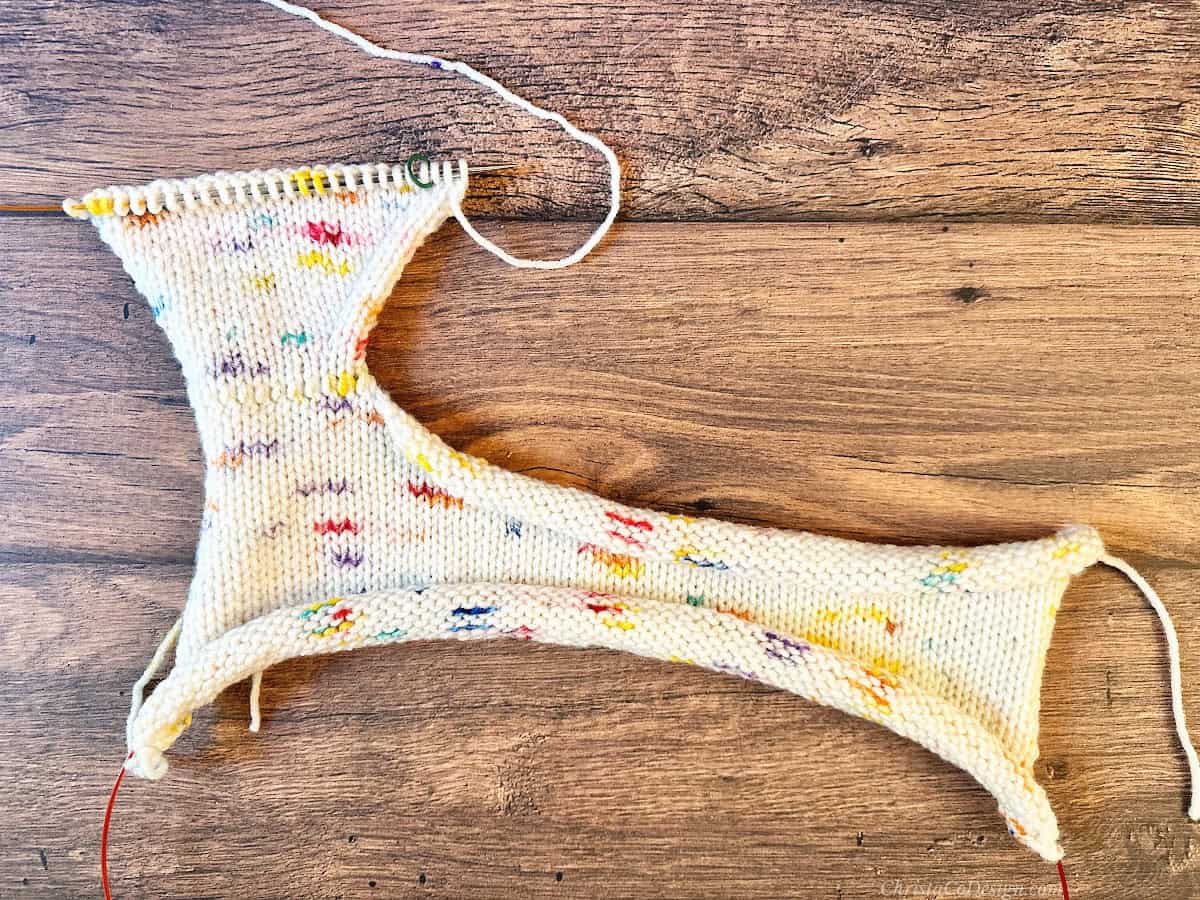
Right Shoulder
Using larger needles and with RS facing, pick up and knit 25 [26, 28, 31, 34, 36, 39, 41, 44] sts along the Right Shoulder, removing the locking stitch marker at the neck edge.
Row 1 (WS): K1,p until last st, k1.
Row 2 (RS): K all.
Set-up Row (WS): K1, p2, pm, p until last st, k1.
Increase
Row 1 (RS): K to m, M1R, sm, k to end.
Row 2 (WS): K1,p until last st, k1.
Rep Rows 1 & 2: 9 [9, 11, 12, 12, 14, 15, 16, 17] more times until you have 34 [35, 39, 43, 46, 50, 54, 57, 61] sts total.
Do not cut yarn. Place 34 [35, 39, 43, 46, 50, 54, 57, 61] sts for the Left Shoulder behind the 34 [35, 39, 43, 46, 50, 54, 57, 61] sts for the Right Shoulder on the left needle, removing the stitch marker. 68 [70, 78, 86, 92, 100, 108, 114, 122] sts. See how to do it in the video.
Chest
On next RS row K 34 [35, 39, 43, 46, 50, 54, 57, 61] sts, turn and using the cable cast on CO 13 [15, 16, 16, 19, 19, 20, 22, 23] sts, turn and knit to end. 81 [85, 94, 102, 111, 119, 128, 136, 145] sts
Row 1 (WS): K1,p until last st, k1.
Row 2 (RS): K all.
Rep Rows 1 & 2: 13 [14, 16, 17, 19, 18, 19, 19, 20] more times then rep row 1 one more time.
Total rows = 55 [57, 61, 63, 67, 69, 73, 77, 79] to match upper back.
Lower Body
Watch the video here.
Place the 81 [85, 94, 102, 111, 119, 128, 136, 145] sts for the Upper Back on the left needle, after the 81 [85, 94, 102, 111, 119, 128, 136, 145] sts for the chest, preparing the stitches for magic loop. You will now be working the Lower Body in the round. 162 [170, 188, 204, 222, 238, 256, 272, 290] sts.
Set-up Rnd: Join to knit in the round. Pm to mark BOR. K all. You will join again as you come to the second armhole.


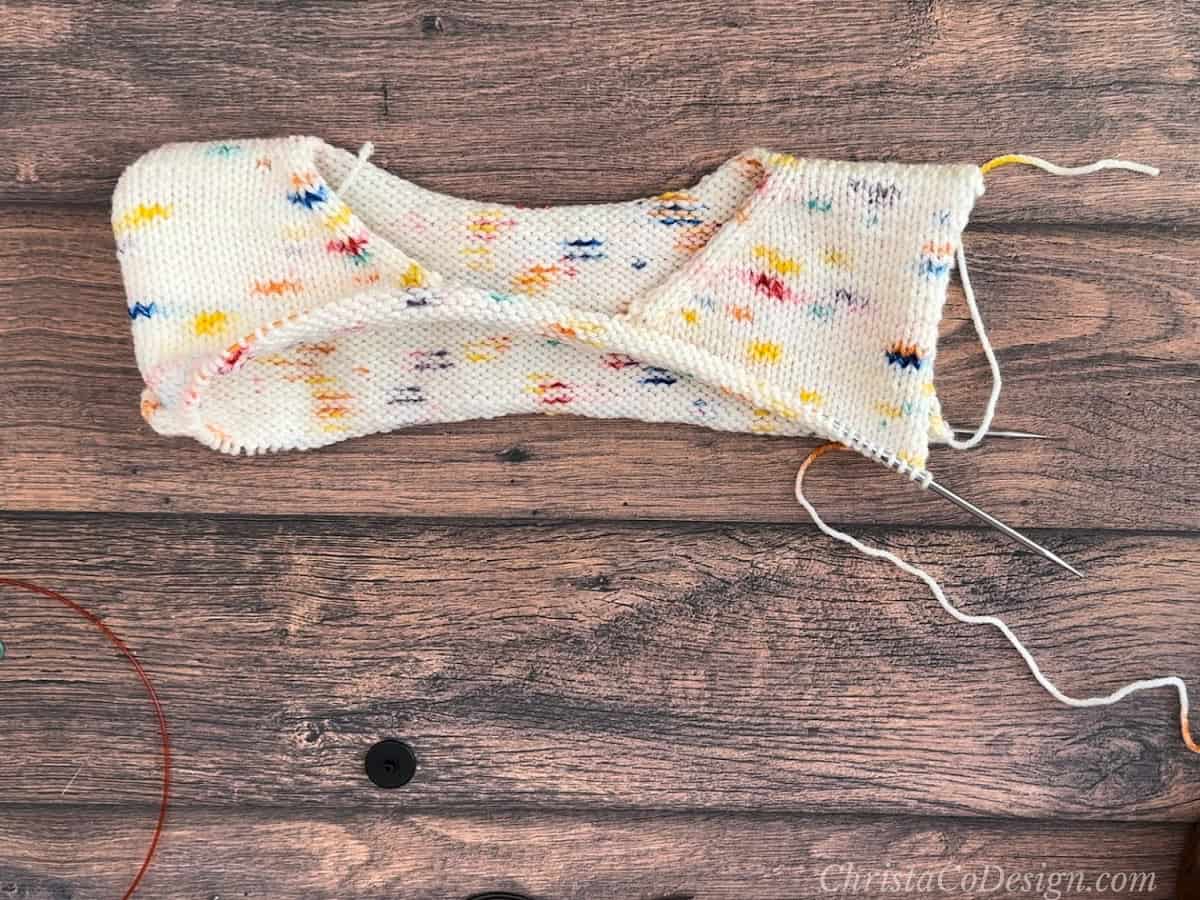
Knit for 82 [93, 95, 98, 101, 104, 101, 104] more rnds or until the sweater is the desired length.
Note that the hem adds 2” to length. Target length 22” [24, 26.25, 27.25, 28, 29, 30, 30, 31]in.
Hem
Change to smaller needles.
Next rnd: *K1, p1; rep from * to end.
Rep last rnd 11 more times. Bind off in the round using the Tubular Bind-Off.
Sleeves (Both)
Watch the video here.
Using larger needles and with RS facing, pick up and knit 78 [84, 90, 94, 98, 102, 108, 114, 116] sts around the armhole, starting at the underarm. Pm to mark BOR.

Knit for 7 [9, 7, 8, 8, 8, 8, 6, 8] rnds.
Dec Rnd: K1, ssk, k to last 3 sts, k2tog, k1. 2 sts decreased.
Size XS Rep Dec Rnd every 6th rnd 7 more times, then every 6th rnd 10 more times. 34 sts.
Size S Rep Dec Rnd every 4th rnd 22 more times, then every 7th rnd 2 more times. 36 sts.
Size M Rep Dec Rnd every 4th rnd 23 more times, then every 7th rnd 2 more times. 40 sts.
Size L Rep Dec Rnd every 4th rnd 26 more times, then every 2nd rnd 2 more times. 40 sts.
Size XL Rep Dec Rnd every 3rd rnd 5 more times, then every 4th rnd 24 more times. 40 sts.
Size 2X Rep Dec Rnd every 3rd rnd 6 more times, then every 4th rnd 24 more times. 42 sts.
Size 3X Rep Dec Rnd every 3rd rnd 18 more times, then every 4th rnd 15 more times. 42 sts.
Size 4X Rep Dec Rnd every 3rd rnd 20 more times, then every 4th rnd 14 more times. 46 sts.
Size 5X Rep Dec Rnd every 3rd rnd 26 more times, then every 4th rnd 9 more times. 46 sts.
Cuff
Change to smaller needles.
Next rnd: *K1, p1; rep from * to end.
Rep last rnd 12 more times.
Bind off in the round using the Tubular Bind-Off.

Neckband
Watch the video here.
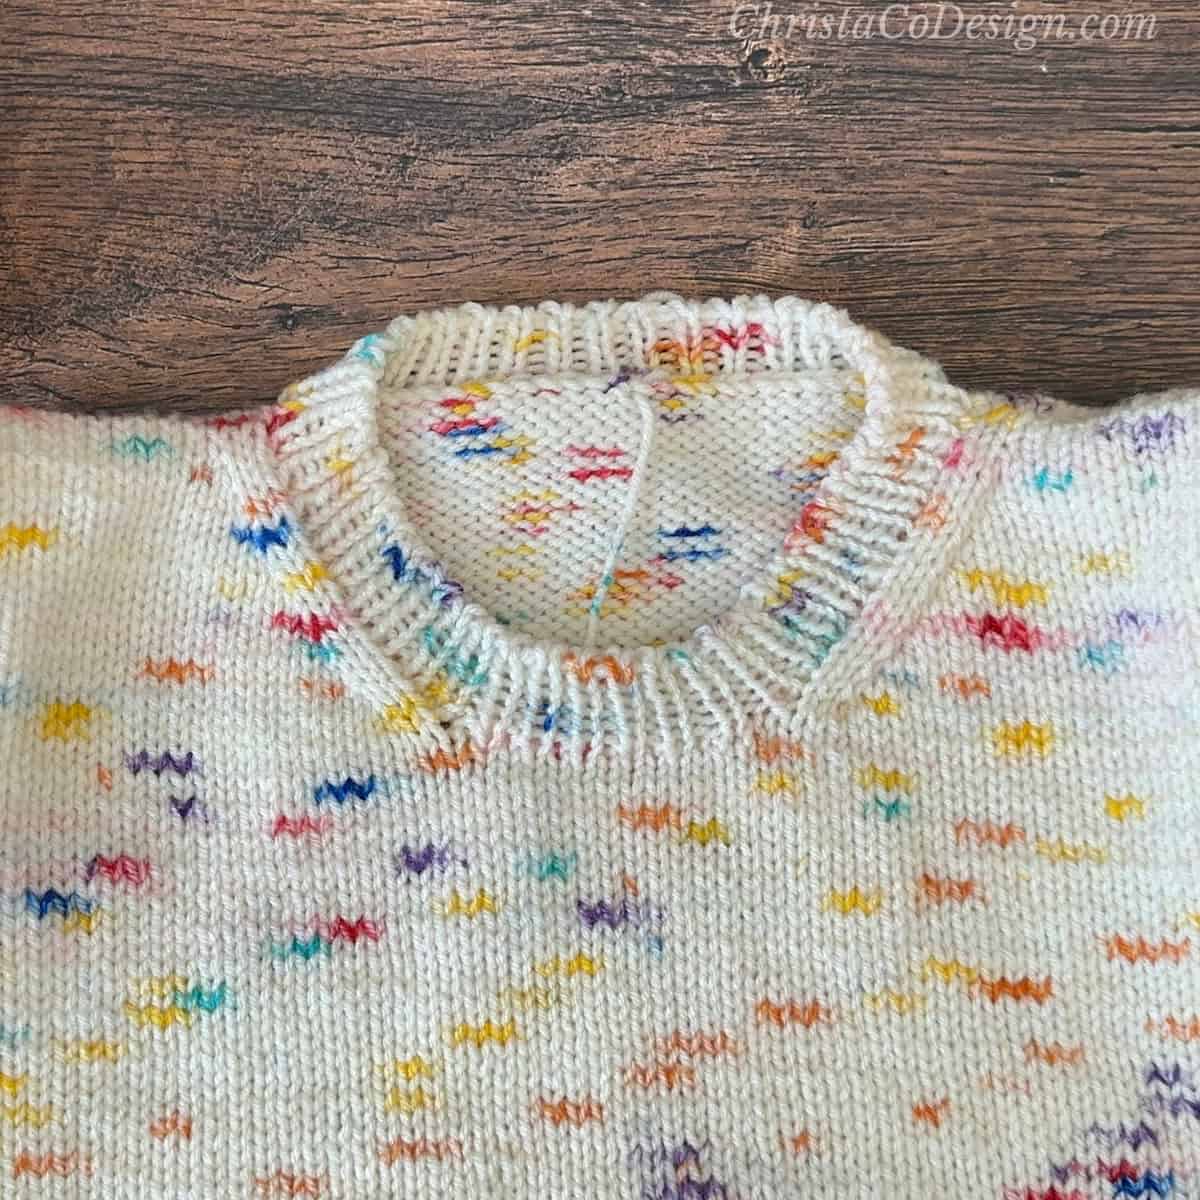
Using smaller needles and with RS facing, pick up and knit 51 [53, 60, 64, 67, 73, 78, 82, 87] sts around the Front Neck and 31 [33, 38, 40, 43, 47, 50, 54, 57] sts around the Back Neck. Along the neck’s cast-on edges, pick up approx. stitch for stitch and along the shaped edges, pick up approx. 4 sts every 5 rows. Pm to mark BOR. 88 [92, 104, 110, 116, 126, 134, 142, 150] sts.
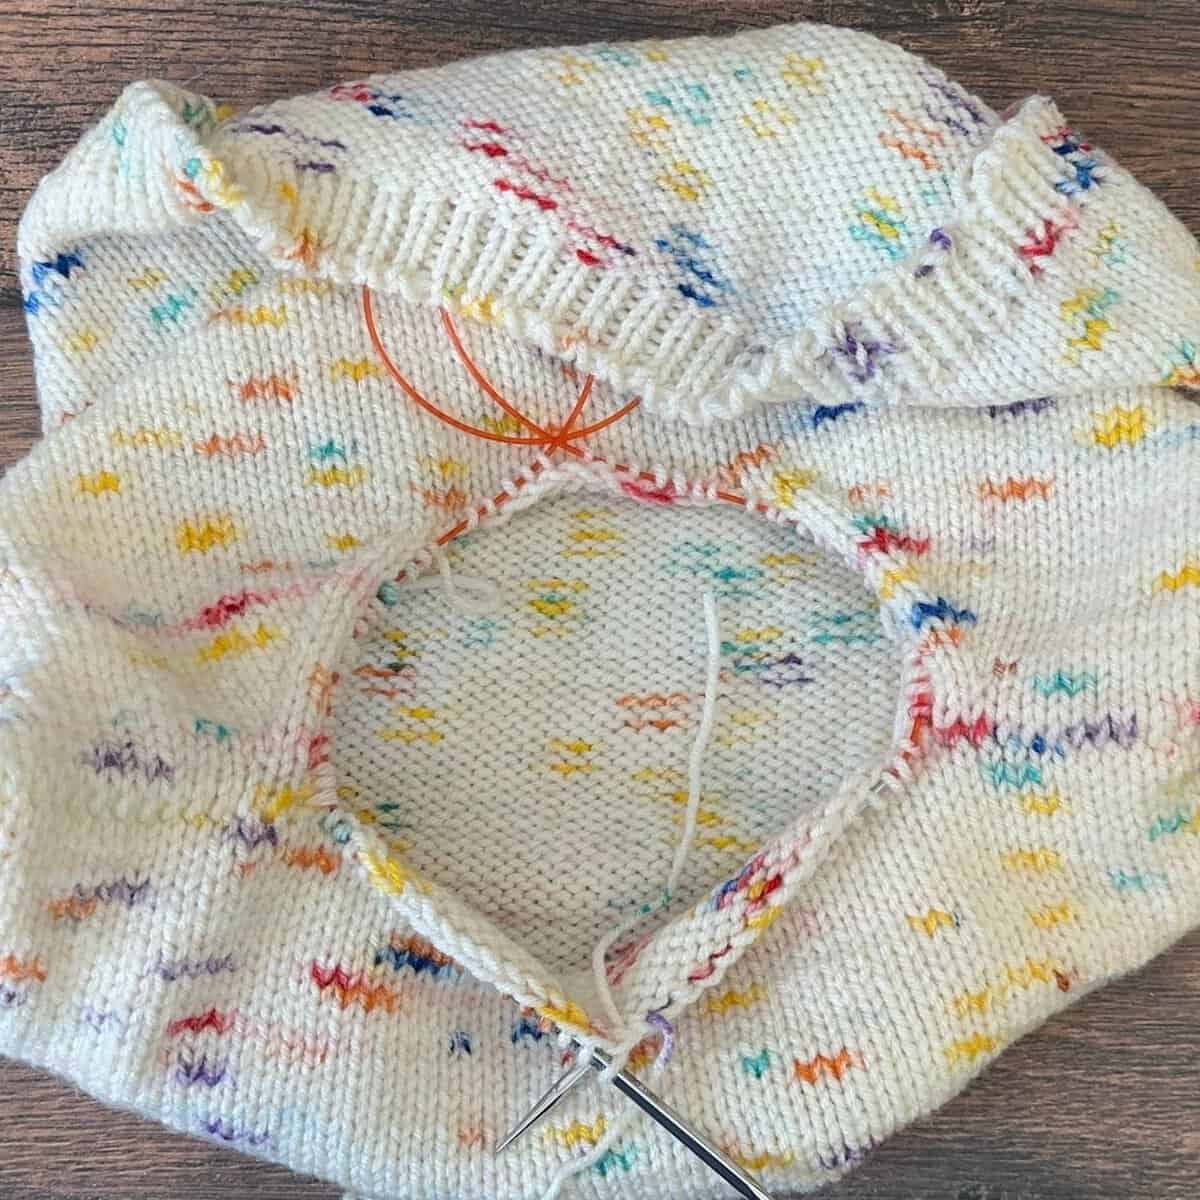
Next rnd: *K1, p1; rep from * to end.
Rep last rnd 4 more times.
Bind off in the round using the Tubular Bind-Off.
Finishing
Weave in all ends and block using your preferred blocking method.

How To Knit Men's Crewneck Sweater
The Leo is a classic-fitting sweater with long sleeves and a round neckline.
Materials
- 4 worsted weight yarn, see yarn amounts by size above.
Tools
- 4 & 4.5mm needles
Instructions
Upper Back
Using larger needles, cast on 81 [85, 94, 102, 111, 119, 128, 136, 145] sts using the cable cast-on.
Set-up Row (RS): K 25 [26, 28, 31, 34, 36, 39, 41, 44], place locking stitch marker through cast-on edge, k 31 [33, 38, 40, 43, 47, 50, 54, 57], place locking stitch marker through cast-on edge, k to end.
These markers indicate the placement of the back neck.
Row 1 (WS): K1, p until last st, k1.
Row 2 (RS): K all.
Rep Rows 1 & 2: 26 [27, 29, 30, 32, 33, 35, 37, 38] more times, then rep row 1 one more time. Total rows = 55 [57, 61, 63, 67, 69, 73, 77, 79] measuring 8.75” [9, 9.75, 10, 10.75, 11, 11.75, 12.5, 12.75]” from cast-on edge.
Cut yarn and place 81 [85, 94, 102, 111, 119, 128, 136, 145] sts for the Upper Back on a stitch holder or waste yarn. In this video I show you how.
With RS facing, turn the Upper Back so that the cast-on edge is at the top and the live sts are at the bottom. The edge to the left of the back neck is the Left Shoulder and the edge to the right is the Right Shoulder.
Left Shoulder
In this video I show you how to do the shoulders through chest.
Using larger needles and with RS facing, pick up and knit K 25 [26, 28, 31, 34, 36, 39, 41, 44] sts along the Left Shoulder, removing the locking stitch marker at the neck edge.
Row 1 (WS): K1, p until last st, k1.
Row 2 (RS): K all.
Set-Up Row (WS): K1, P 21 [22, 24, 27, 30, 32, 35, 37, 40], pm, p2, k1.
Increase
Row 1 (RS): K to m, sm, M1L, k to end. 1 st increased.
Row 2 (WS): K1, p until last st, k1.
Rep Rows 1 & 2: 9 [9, 11, 12, 12, 14, 15, 16, 17] more times until you have 34 [35, 39, 43, 46, 50, 54, 57, 61] sts total.
Total rows = 24 [24, 28, 30, 30, 34, 36, 38, 40] = neck depth 4.5” [4.5, 4.5, 4.5, 4.5, 5, 5.5, 6, 6]
Cut yarn and place the 34 [35, 39, 43, 46, 50, 54, 57, 61] sts for the Left Shoulder on a stitch holder/waste yarn, removing the stitch marker.
Right Shoulder
Using larger needles and with RS facing, pick up and knit 25 [26, 28, 31, 34, 36, 39, 41, 44] sts along the Right Shoulder, removing the locking stitch marker at the neck edge.
Row 1 (WS): K1, p until last st, k1.
Row 2 (RS): K all.
Set-up Row (WS): K1, p2, pm, p until last st, k1.
Increase
Row 1 (RS): K to m, M1R, sm, k to end.
Row 2 (WS): K1, p until last st, k1.
Rep Rows 1 & 2: 9 [9, 11, 12, 12, 14, 15, 16, 17] more times until you have 34 [35, 39, 43, 46, 50, 54, 57, 61] sts total.
Do not cut yarn. Place 34 [35, 39, 43, 46, 50, 54, 57, 61] sts for the Left Shoulder behind the 34 [35, 39, 43, 46, 50, 54, 57, 61] sts for the Right Shoulder on the left needle, removing the stitch marker. 68 [70, 78, 86, 92, 100, 108, 114, 122] sts. See how to do it in the video.
Chest
On next RS row K 34 [35, 39, 43, 46, 50, 54, 57, 61] sts, turn and using the cable cast on CO 13 [15, 16, 16, 19, 19, 20, 22, 23] sts, turn and knit to end. 81 [85, 94, 102, 111, 119, 128, 136, 145] sts
Row 1 (WS): K1, p until last st, k1.
Row 2 (RS): K all.
Rep Rows 1 & 2: 13 [14, 16, 17, 19, 18, 19, 19, 20] more times then rep row 1 one more time.
Total rows = 55 [57, 61, 63, 67, 69, 73, 77, 79] to match upper back.
Lower Body
Watch the video here.
Place the 81 [85, 94, 102, 111, 119, 128, 136, 145] sts for the Upper Back on the left needle, after the 81 [85, 94, 102, 111, 119, 128, 136, 145] sts for the chest, preparing the stitches for magic loop. You will now be working the Lower Body in the round. 162 [170, 188, 204, 222, 238, 256, 272, 290] sts.
Set-up Rnd: Join to knit in the round. Pm to mark BOR. K all. You will join again as you come to the second armhole.
Knit for 82 [93, 95, 98, 101, 104, 101, 104] more rnds or until the sweater is the desired length.
Note that the hem adds 2” to length. Target length 22” [24, 26.25, 27.25, 28, 29, 30, 30, 31]in.
Hem
Change to smaller needles.
Next rnd: *K1, p1; rep from * to end.
Rep last rnd 11 more times. Bind off in the round using the Tubular Bind-Off.
Sleeves (Both)
Watch the video here.
Using larger needles and with RS facing, pick up and knit 78 [84, 90, 94, 98, 102, 108, 114, 116] sts around the armhole, starting at the underarm. Pm to mark BOR.
Knit for 7 [9, 7, 8, 8, 8, 8, 6, 8] rnds.
Dec Rnd: K1, ssk, k to last 3 sts, k2tog, k1. 2 sts decreased.
Size XS Rep Dec Rnd every 6th rnd 7 more times, then every 6th rnd 10 more times. 34 sts.
Size S Rep Dec Rnd every 4th rnd 22 more times, then every 7th rnd 2 more times. 36 sts.
Size M Rep Dec Rnd every 4th rnd 23 more times, then every 7th rnd 2 more times. 40 sts.
Size L Rep Dec Rnd every 4th rnd 26 more times, then every 2nd rnd 2 more times. 40 sts.
Size XL Rep Dec Rnd every 3rd rnd 5 more times, then every 4th rnd 24 more times. 40 sts.
Size 2X Rep Dec Rnd every 3rd rnd 6 more times, then every 4th rnd 24 more times. 42 sts.
Size 3X Rep Dec Rnd every 3rd rnd 18 more times, then every 4th rnd 15 more times. 42 sts.
Size 4X Rep Dec Rnd every 3rd rnd 20 more times, then every 4th rnd 14 more times. 46 sts.
Size 5X Rep Dec Rnd every 3rd rnd 26 more times, then every 4th rnd 9 more times. 46 sts.
Cuff
Change to smaller needles.
Next rnd: *K1, p1; rep from * to end.
Rep last rnd 12 more times.
Bind off in the round using the Tubular Bind-Off.
Neckband
Watch the video here.
Using smaller needles and with RS facing, pick up and knit 51 [53, 60, 64, 67, 73, 78, 82, 87] sts around the Front Neck and 31 [33, 38, 40, 43, 47, 50, 54, 57] sts around the Back Neck. Along the neck's cast-on edges, pick up approx. stitch for stitch and along the shaped edges, pick up approx. 4 sts every 5 rows. Pm to mark BOR. 88 [92, 104, 110, 116, 126, 134, 142, 150] sts.
Next rnd: *K1, p1; rep from * to end.
Rep last rnd 4 more times.
Bind off in the round using the Tubular Bind-Off.
Finishing
Weave in all ends and block using your preferred blocking method.
Recommended Products
As an Amazon Associate and member of other affiliate programs, I earn from qualifying purchases.