
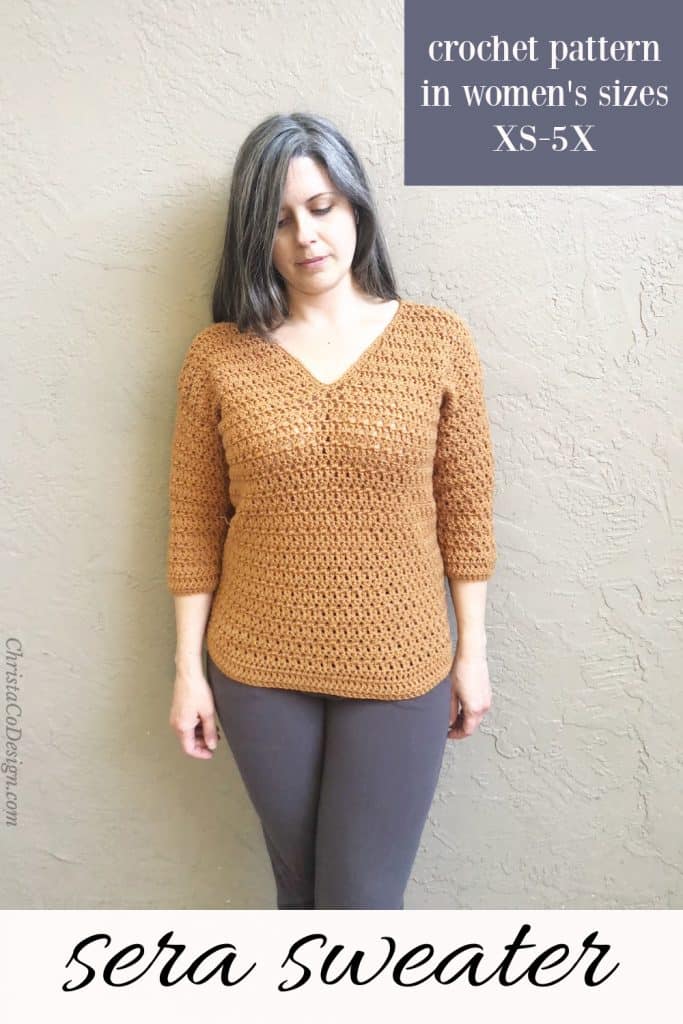
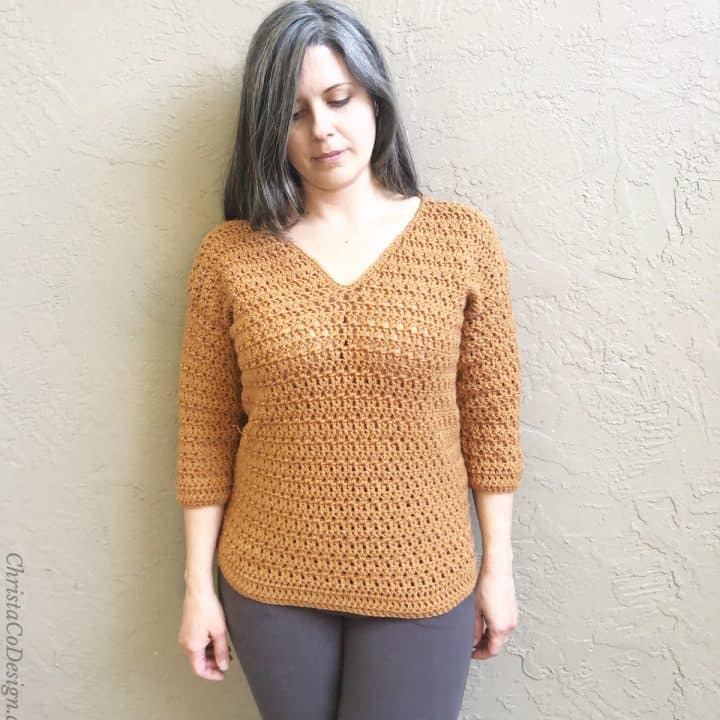
Sera Sweater a Lightweight Crochet V-Neck Sweater Pattern
The Sera Sweater is a free crochet pattern with a classic fit and v-neck. This easy pattern includes women’s sizes XS – 5X. This sweater is crocheted bottom up with minimal seaming.

This post contains affiliate links, I may earn a fee. Read more disclosure policy.
Join the ChristaCoDesign Newsletter
Never miss a pattern!
I love my Sera Cardigan so much. It’s been my best fitting piece to date. Since I had the same yarn, but in a different color I decide to design a pullover featuring the same stitch.
This lightweight crochet sweater includes 3/4 sleeves, with an easy option to lengthen them. The overall length of the sweater is easy to adjust also.

Purchase the ad-free, well formatted printable PDF Pattern from my shop. Scroll down for the free pattern!
If you prefer a looser fit, you can go up a size in the pattern. Likewise, you can make the size down for a snugger fit.
For reference the sweater in the picture is size S on 34″ bust model.

To crochet this sweater with minimal seams, we’ll join and turn. If you haven’t used this technique before, you’ll want to check out my tutorial on it. How to join and turn crochet.
This leaves just sewing the shoulders together, and sewing the sleeves to the armholes.

More Crochet Patterns
The Sera Cardigan is the sister this pullover sweater. I love the fit and easy to wear nature of the Sera Cardigan. Get this women’s sweater pattern in sizes XS-5X.
For a fast make, a chunky sweater is the way to go! The Briones Bobble Sweater features that eye catching bobble stitch front and center and is paired with easy half double crochets.
For the coziest cowl neck ever, check out the Sunset Sweater. I chose large blocks of color, but it’s just as stunning in a solid.
If you enjoy working with #3 lightweight yarn then you might like the Eileen Blanket and Bettie Bear patterns.
The Bryce Canyon Cardigan is a kids’ sweater in #4 medium weight yarn.
The Stitch
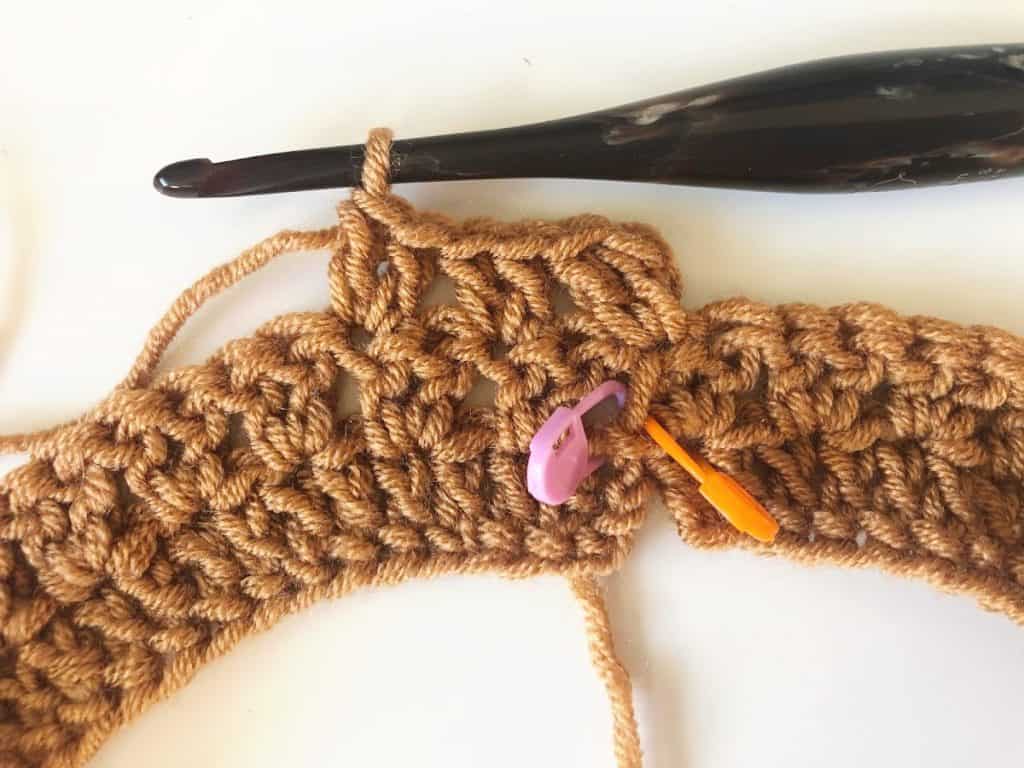
A little about the stitch pattern I use in this pullover. It’s a simple 2 double crochet cluster. Skip one stitch, place two.
What’s important to remember is the 2 double crochets go in the second dc of the set. Points to remember this when you get started, when you divide for front and back, and when you’re working the v-neck.
Since we are joining and turning, once you get a few rows in the stitch patterns ‘looks’ it jumps back and forth from the first to second stitches. However that is just a result of turning the rounds. So always place the 2 dc in the second dc and you’ll be set!
There are plenty of notes and pictures in the pattern to help with these bits, but I find understanding the overall stitch pattern helps too.
Add this pattern to your Ravelry queue here.
Materials
- WeCrochet’s Gloss DK* a #3 lightweight yarn (70% Merino Wool, 30% Silk, 123 yd (113 m) per 50 g ball) in shade Harvest: 9 [9, 10, 11, 12, 13, 14, 15, 16] balls.
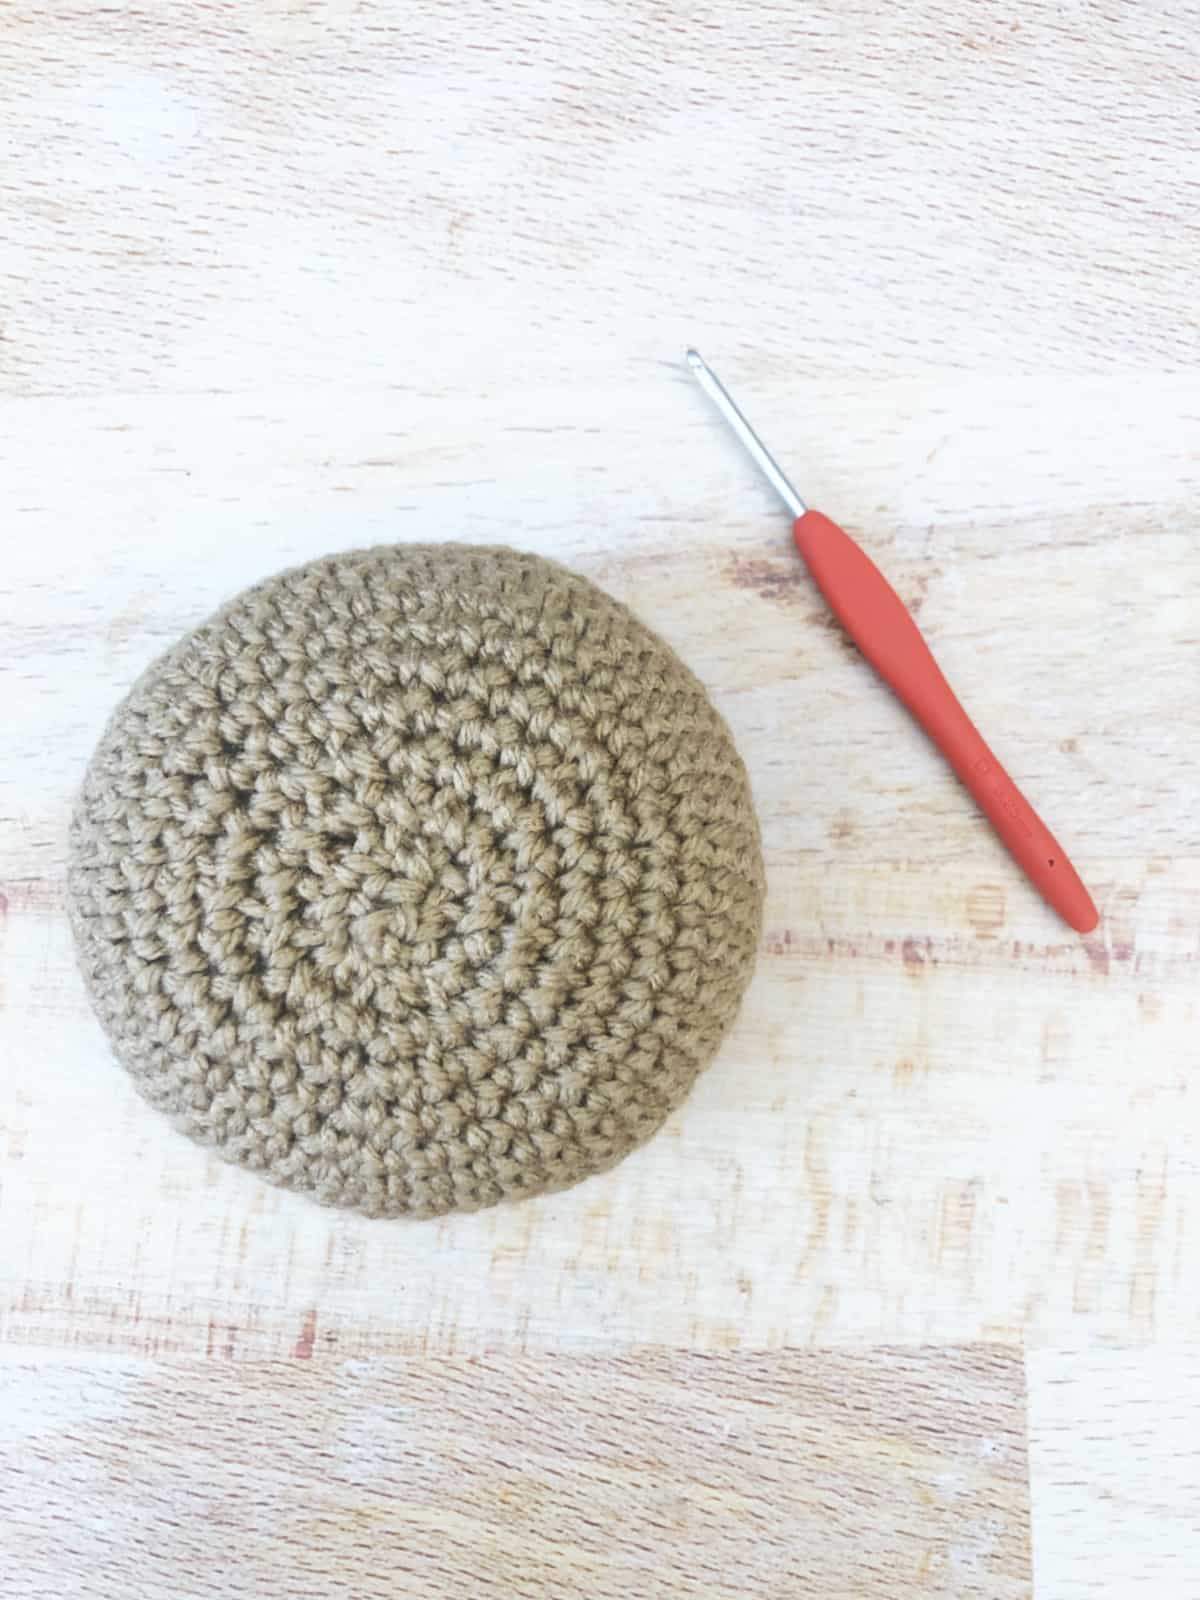
- 5 mm US size H–8 crochet hook,* or size needed to meet gauge.
- Yarn needle, measuring tape, scissors, stitch marker(s).
Yarn By Size
- XS – 1000 yds (914 m)
- SM – 1100 yds (1006 m)
- MED – 1225 yds (1120 m)
- LG – 1300 yds (1189 m)
- XL – 1450 yds (1326 m)
- 2X – 1600 yds (1463 m)
- 3X – 1700 yds (1555 m)
- 4X – 1800 yds (1646 m)
- 5X – 1950 yds (1783 m)
Notes
- Please read through all notes and pattern before you begin.
- Work up a gauge swatch using the provided gauge information. If your gauge matches, great continue on. If not, change your hook size and swatch again. If your stitches are smaller, go up a hook size, if they’re larger, go down a hook size.
- Stitch multiple is an even number.
- Ch 3 counts as a stitch, I highly recommend using a ch 3 alternative, here are my favorites.
- Pattern is written for multiple sizes where the first number given is the smallest size and larger sizes come next in parenthesis.
Stitches/Abbreviations
ch(s) – chain(s)
dc – double crochet
fdc – foundation double crochet
rep – repeat
rnd(s) – round(s)
rs – right side
sc – single crochet
sk – skip the indicated stitch
sl st – slip stitch
st(s) – stitch(es)
ws – wrong side
Tutorials
Gauge
13 sts x 8 rows (after blocking) to 4” (10 cm) measured in dc.
Please swatch carefully, as incorrect gauge will cause the sweater to come out the wrong size.
Gauge is after blocking. You can read more on how to check gauge here.
Skill Level
Easy
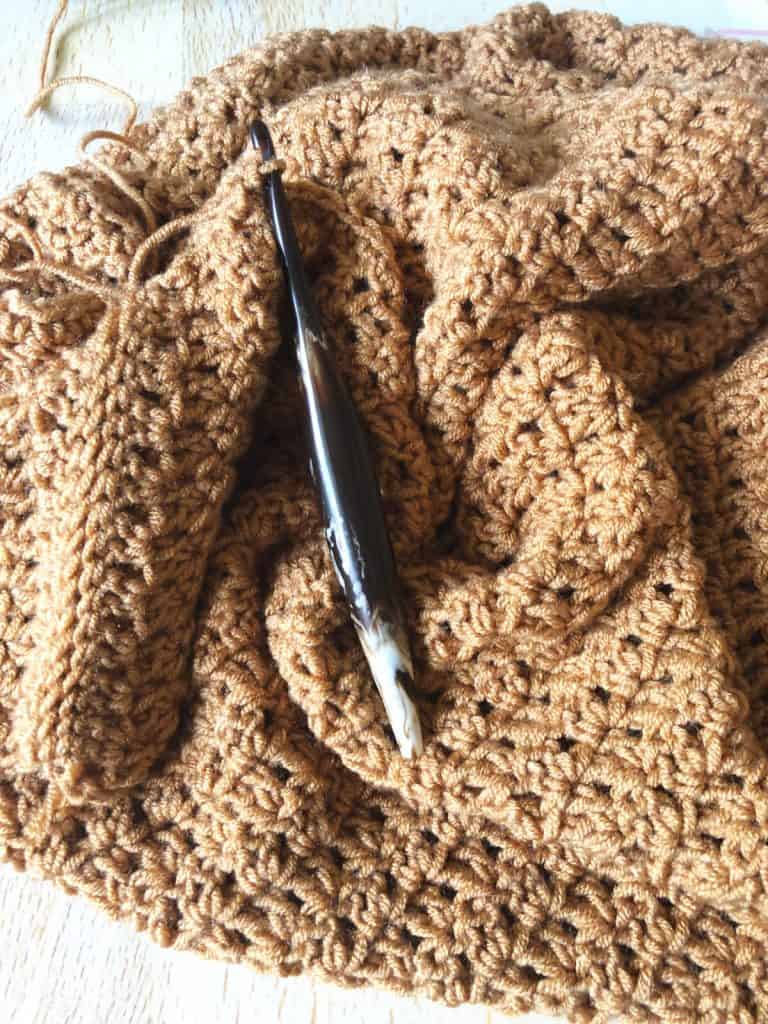
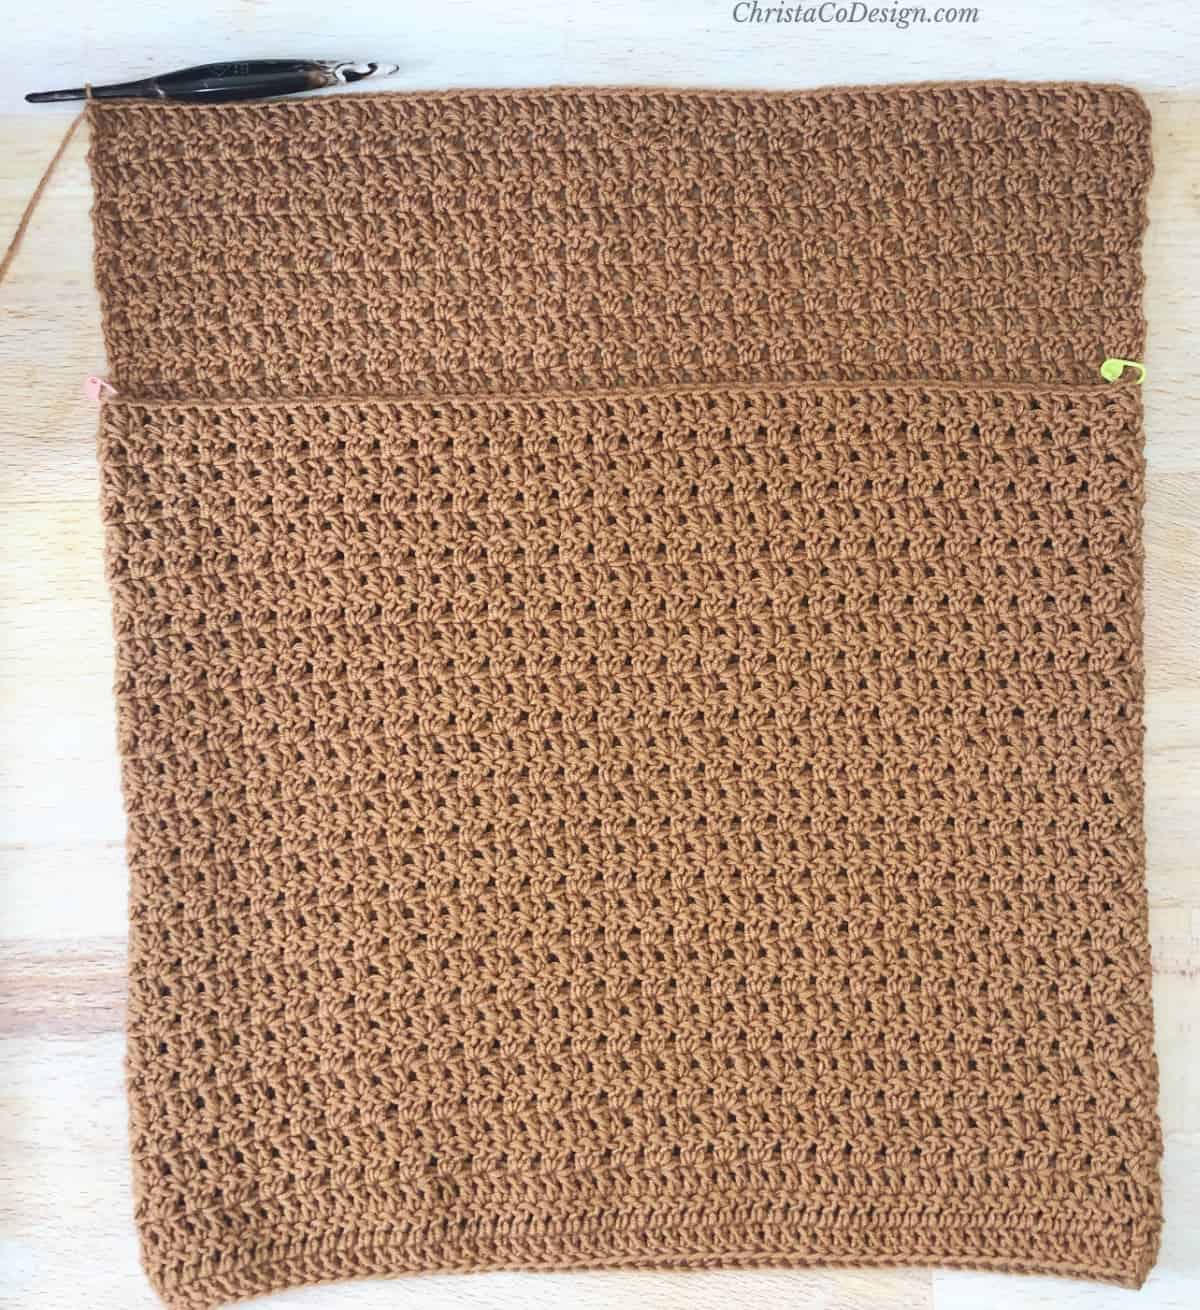
Construction
The main body is crocheted as one piece, bottom up. It’s joined in the round and turned so you will work on both sides of the fabric. Once it is time to divide for the front and back panels, they are worked in flat rows.
You will seam the it together at the shoulder. The sleeves are worked separately, from the wrist up and in the round, and turned as the body was. The sleeves are seamed on at the armholes.

Finished Measurements
After blocking 32″ [37, 42, 44.5, 49.5, 54.25, 56.75, 61.5, 64] in (81.5 [94, 106.5, 113, 125.5, 138, 144, 156, 162.5] cm) bust circumference.
Intended to be worn with 2 – 4” (5 – 10 cm) of positive ease at the bust.
The model is 5’ 2” and wears size M with 2” (5 cm) of positive ease at the bust.
Sweater is 21.5″ [22.5, 23, 23.5, 23.5, 24.5, 24.5, 25.5, 25.5] in (54.5 [57, 58.5, 59.5, 59.5, 62, 62, 65, 65] cm) length.

Adjustments
Pattern adds 2 – 4” (5 – 10 cm) of ease to bust measurement, for a classic fit. For a looser fit, go up a size, for a snugger fit, go down a size. To adjust length of sweater add or subtract rows before dividing. Measure from your underarm to where you want the sweater to stop. This is your desired length before dividing.
Add this pattern to your Ravelry queue here.
Pin It
Pattern Instructions
Sera Crochet Sweater Pattern
The Sera Sweater is a free crochet pattern with a snug fit and v-neck. This easy pattern includes women's sizes XS-5X.
Materials
- Vanna's Style Yarn a #3 light weight yarn (100% acrylic, 3.5 oz/100g, 254 yd/232m) color: camel; (XS & S) 4, (M & L) 5, (XL & 2X) 6, (3X & 4X) 7, (5X) 8.
Tools
- 5mm US size (H)-8 hook, or hook needed to meet gauge.
- stitch markers, yarn needle, measuring tape, scissors
Instructions
XS [S, M, L, XL, 2X, 3X, 4X, 5X]
Rnd 1. Fdc 104 [120, 136, 144, 160, 176, 184, 200, 208] or if you’re unfamiliar with fdc you can ch 106 [122, 138, 146, 162, 178, 186, 202, 210], dc in the 4th ch and in each ch across, join with a sl st and turn. 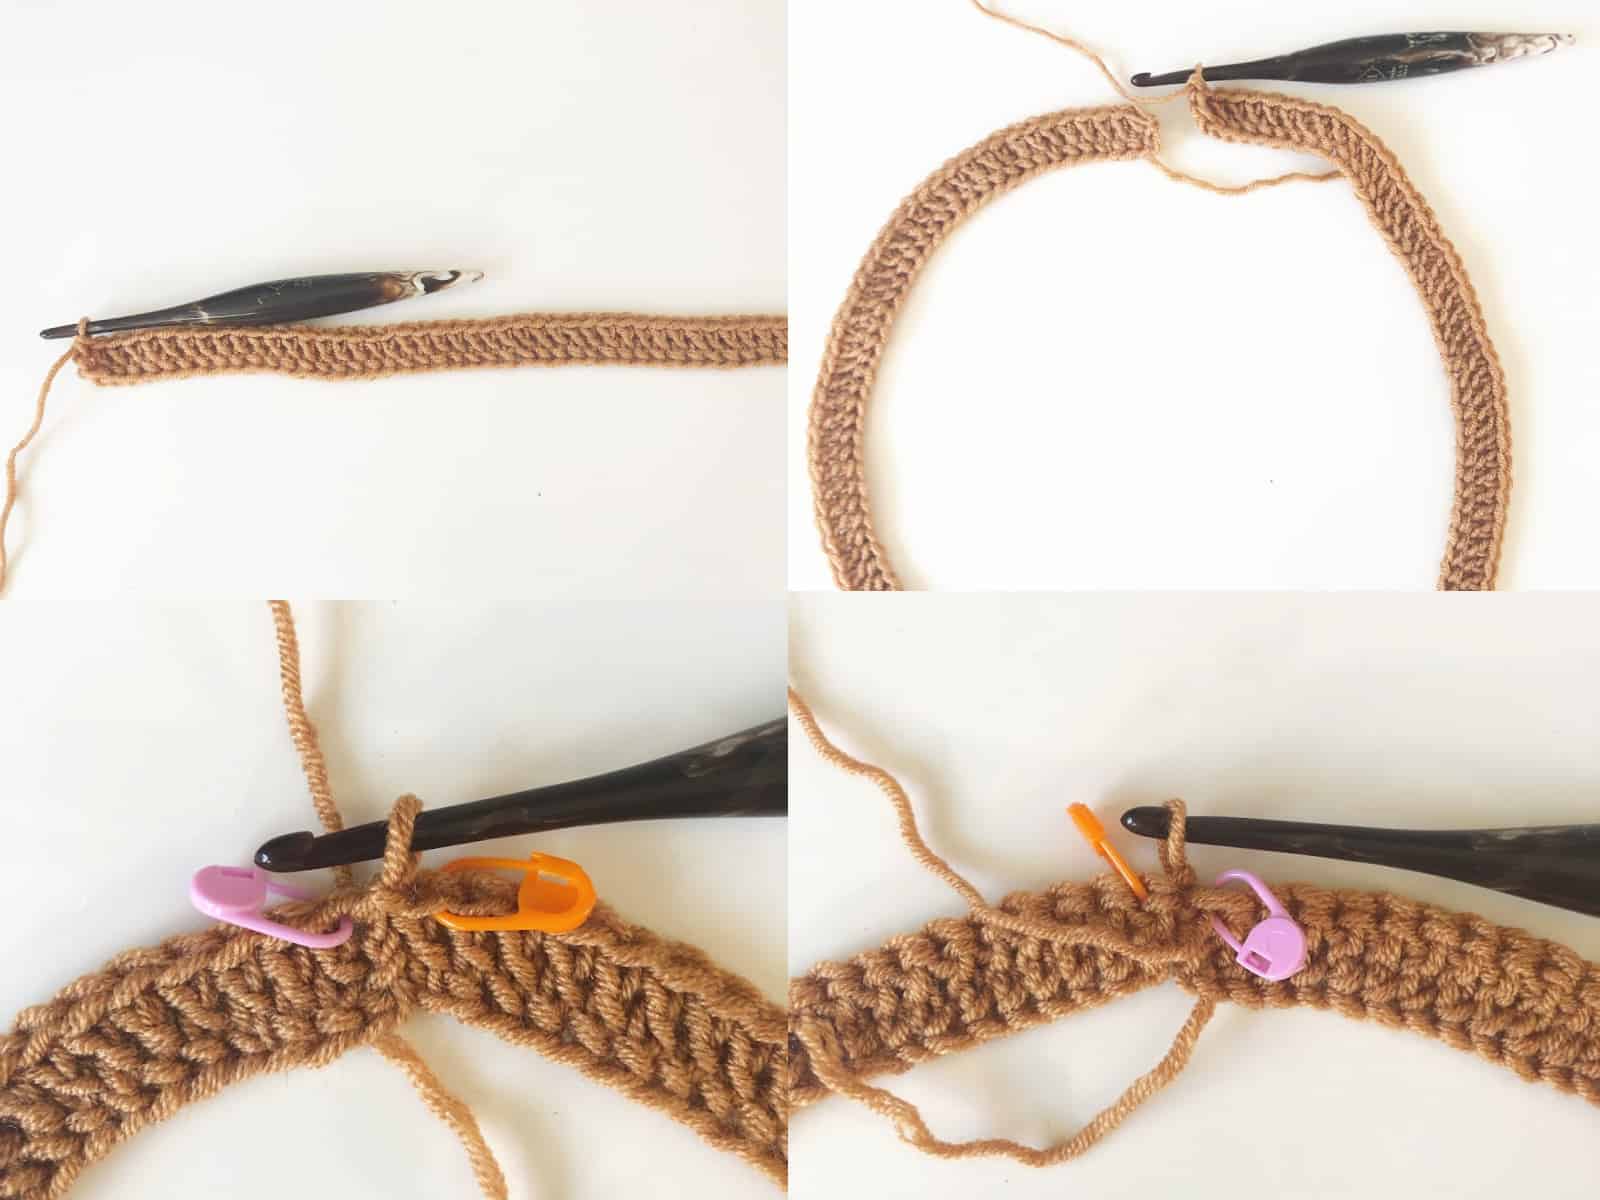 Picutre shows Rnd 1: top left - row of dc complete. Top RIght - Bring first and last sts together. Bottom left - Join with a sl st Bottom Right - Turn your work.
Rnd 2. Ch 3, dc in next st and in each st around, join with a sl st and turn.
Rnd 3. Rep rnd 2.
 Rnd 4. Ch 3, in same st dc, *{sk next st, 2 dc in next st} rep from * around, sk last st, join to 3rd ch with a sl st, turn. (104, 120, 136, 144, 160, 176, 184, 200, 208) sts
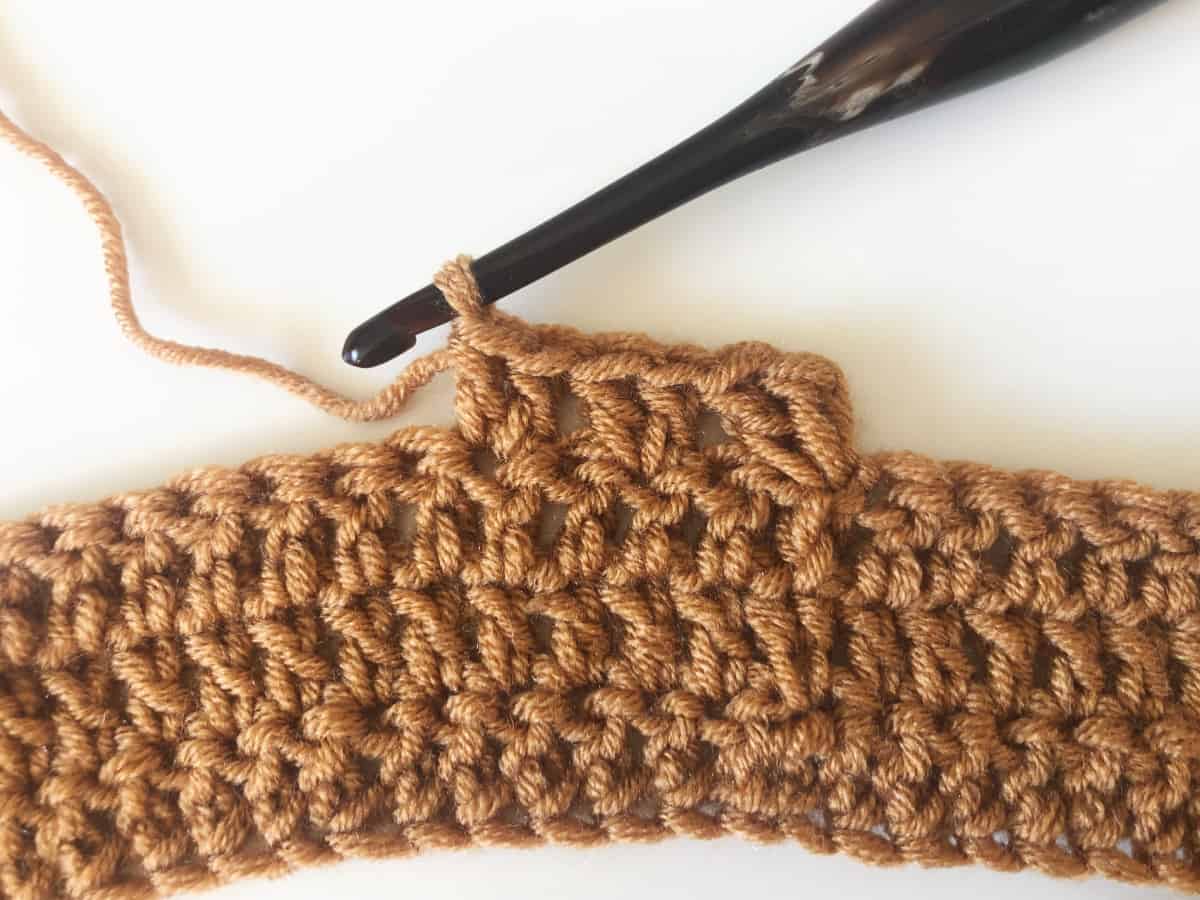
Rnds 5-31. Rep rnd 4.If you would like a longer sweater add more rows here, end on an odd row. *We will add 6” [7, 7.5, 8, 8, 9, 9, 10, 10] in (15 [18, 19, 20.5, 20.5, 23, 23, 25.5, 25.5] cm) to the length once panels are divided.
Divide
*Check stitch count before dividing.
Mark half stitches for front and half for back.
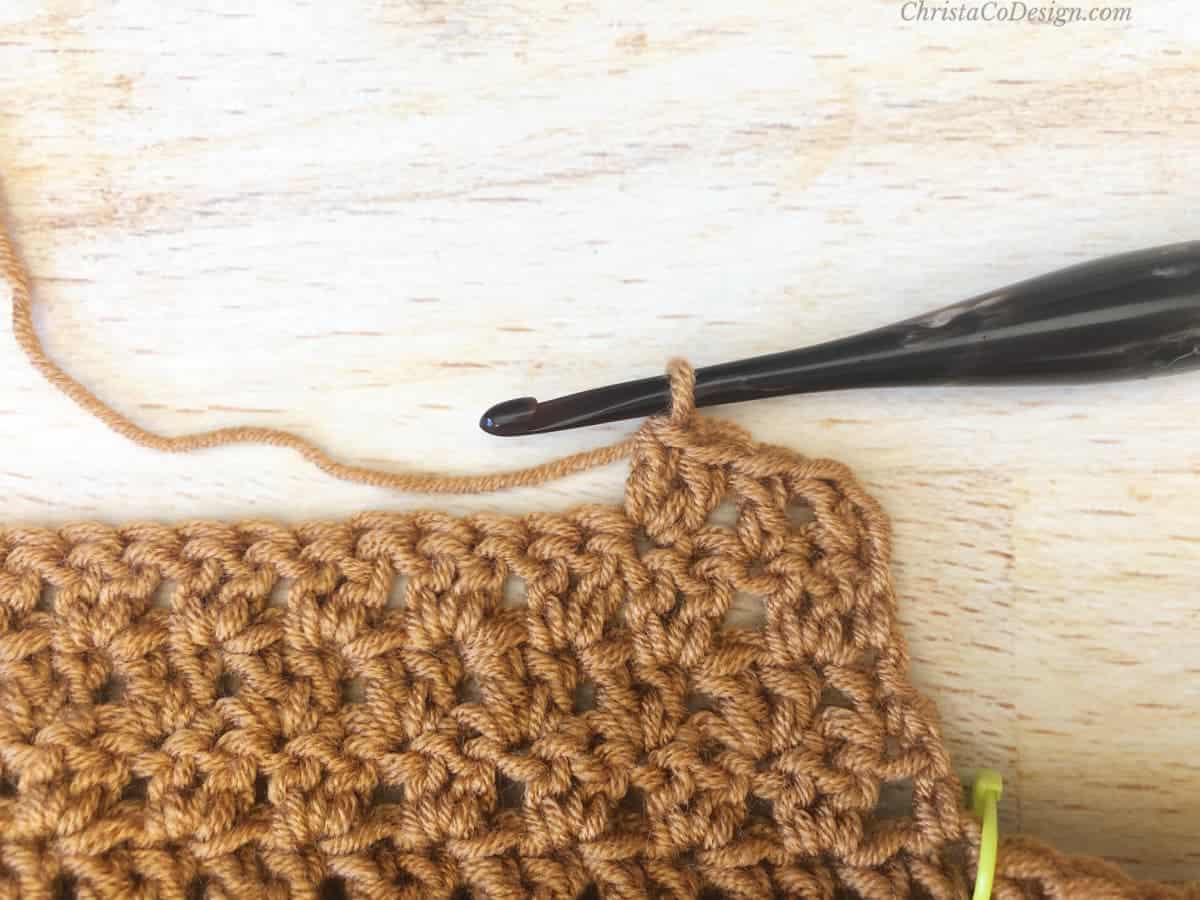
Move seam (1st st) to right underarm. (Like green stitch marker)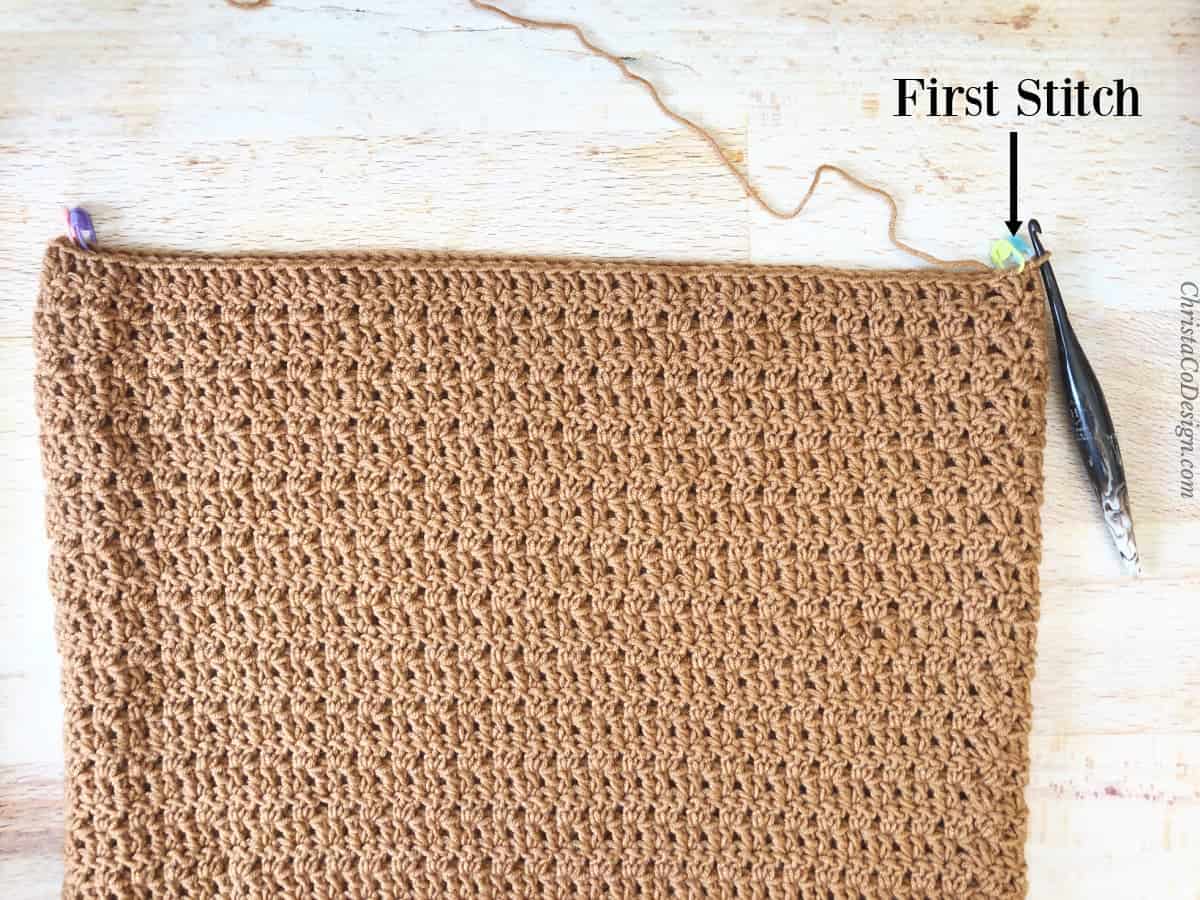 Picture shows: Half stitches are for the front panel and half are for the back panel. Move the seam to the side. The green stitch marker indicates the first stitch.
Back Panel
Now you’ll be working in rows. Row count starts over. Keep working in the same direction, always placing the 2 dc in the 2nd dc of the set.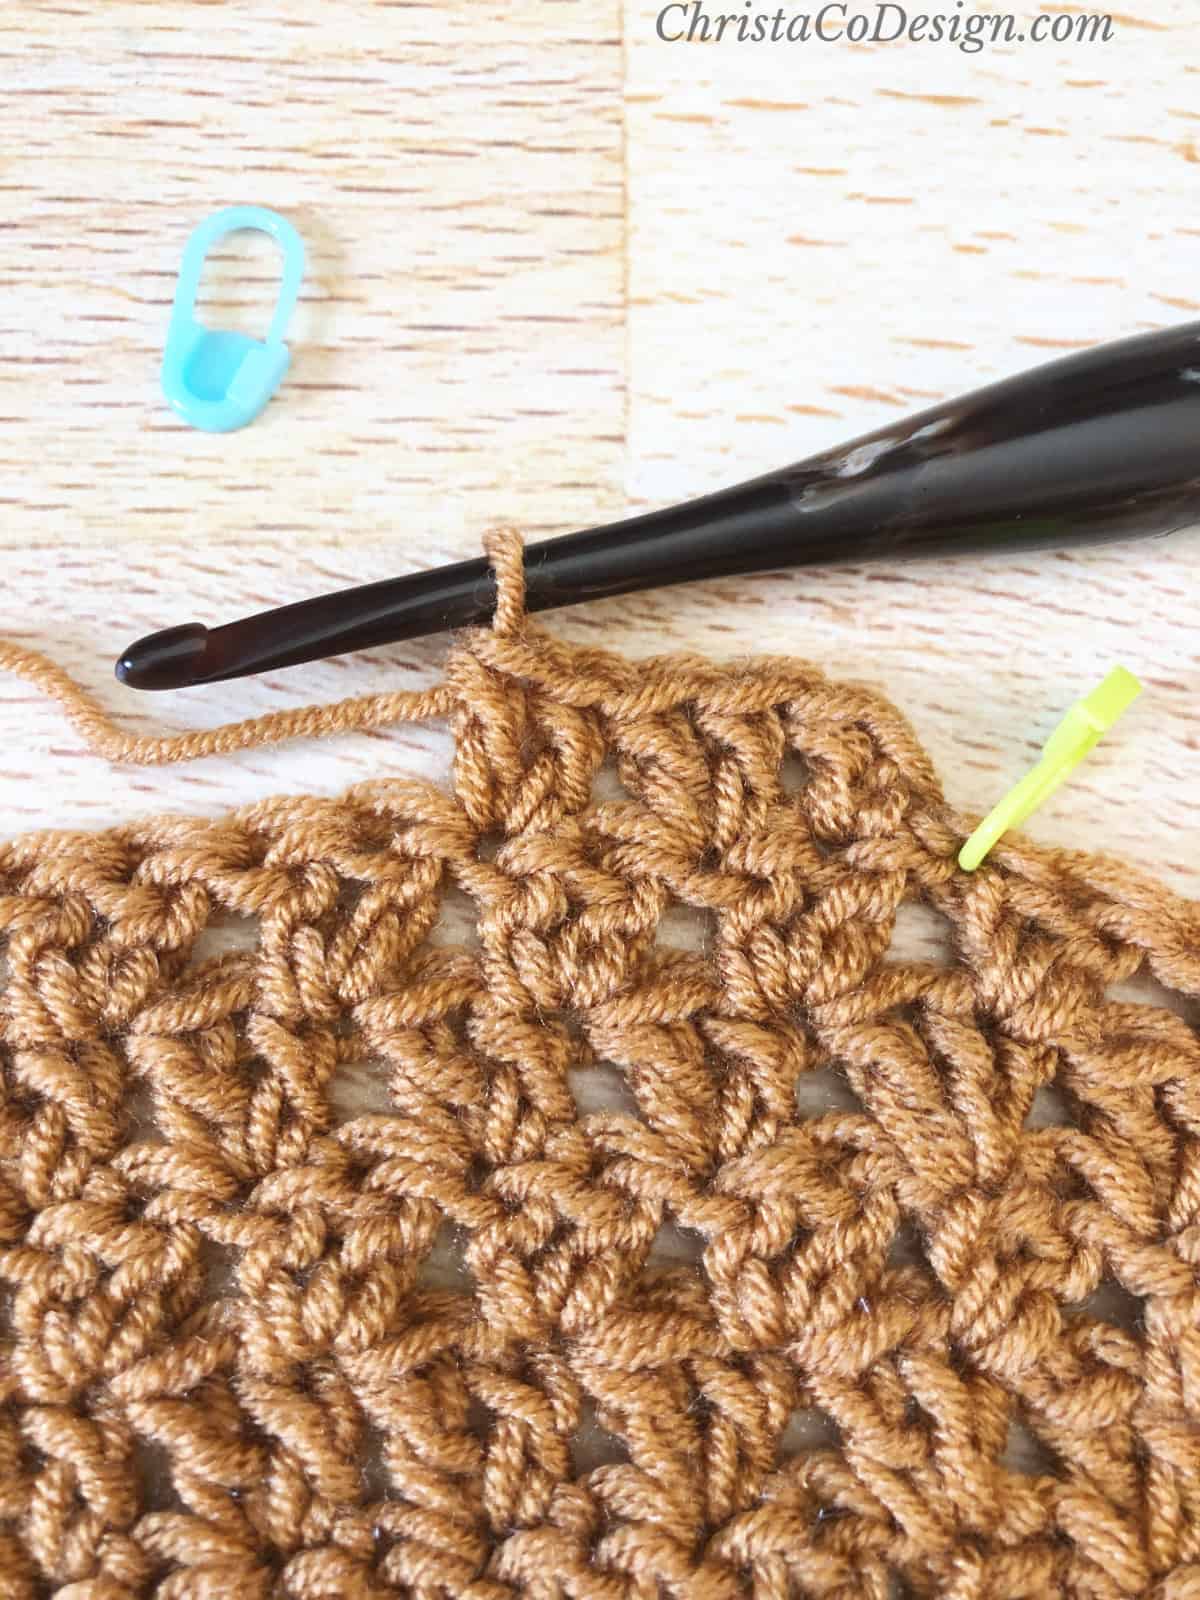 Picture shows: First 5 stitches of row 1.
Row 1. (RS) Ch 3, 2 dc in next st, *sk 1, 2 dc in next st; rep from * across (last 2 will be in the marked st/half the sts), turn. [53, 61, 69, 73, 81, 89, 93, 101, 105 sts] 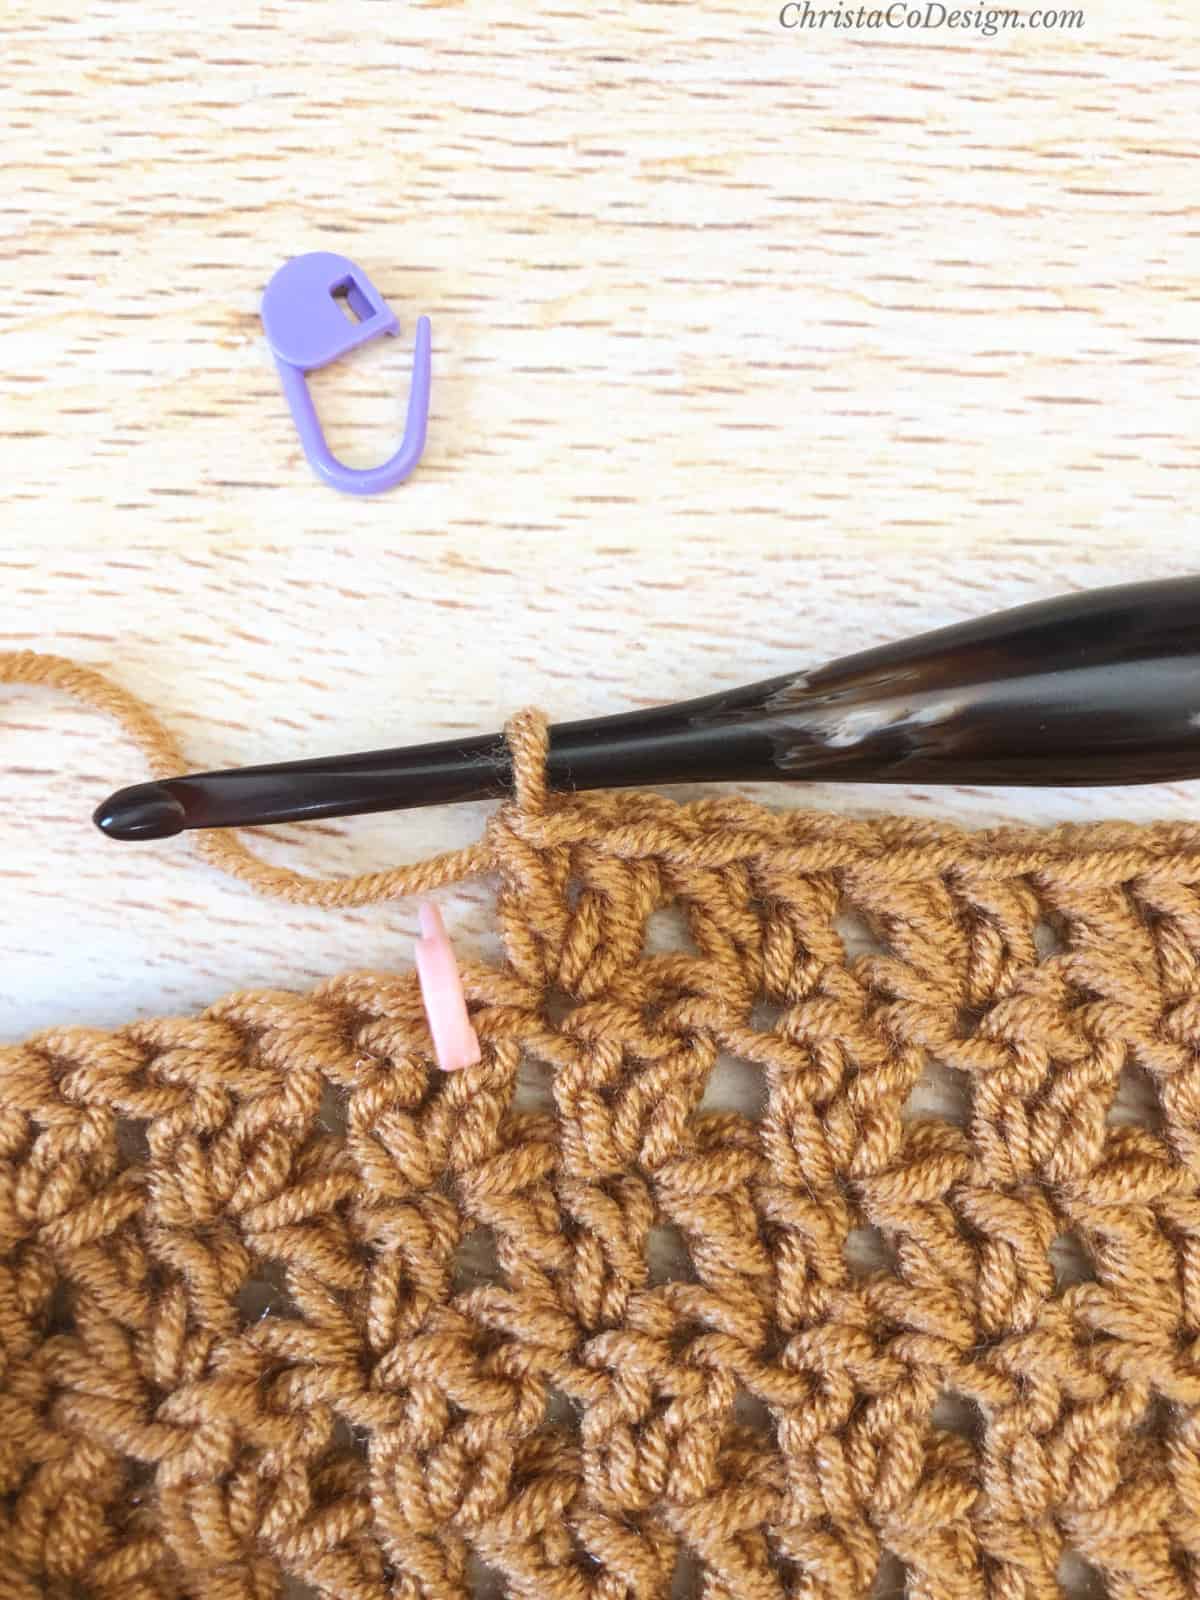 Picture shows: Last stitches of row 1.
 Picture shows: First 7 stitches of row 2. Row 2. Ch 3, 2 dc in next st, *sk 1, 2 dc in next st; rep from * across until 1 st left, dc in last st, turn. [54, 62, 70, 74, 82, 90, 94, 102, 106 sts]
Row 3. Ch 3, 2 dc in next st, *sk 1, 2 dc in next st; rep * across until 2 sts left, sk 1, dc in last st, turn. [54, 62, 70, 74, 82, 90, 94, 102, 106 sts]
Row 4. Ch 3, *{2 dc in next st, sk 1} rep * across until 2 sts left, sk 1, dc in last st, turn. [54, 62, 70, 74, 82, 90, 94, 102, 106 sts]
Rep Row 4 until you have 12 [14, 15, 16, 16, 18, 18, 20, 20] rows total from the divide = 6” [7, 7.5, 8, 8, 9, 9, 10, 10] in (15 [18, 19, 20.5, 20.5, 23, 23, 25.5, 25.5] cm) of length from the divide.
Total Panel Length (if you did not add rows): 21.5”[22.5, 23, 23.5, 23.5, 24.5, 24.5, 25.5, 25.5] in (54.5 [57, 58.5, 59.5, 59.5, 62, 62, 65, 65] cm). Cut yarn and leave a long tail for seaming shoulders.
Cut yarn and leave a long tail for seaming shoulders.
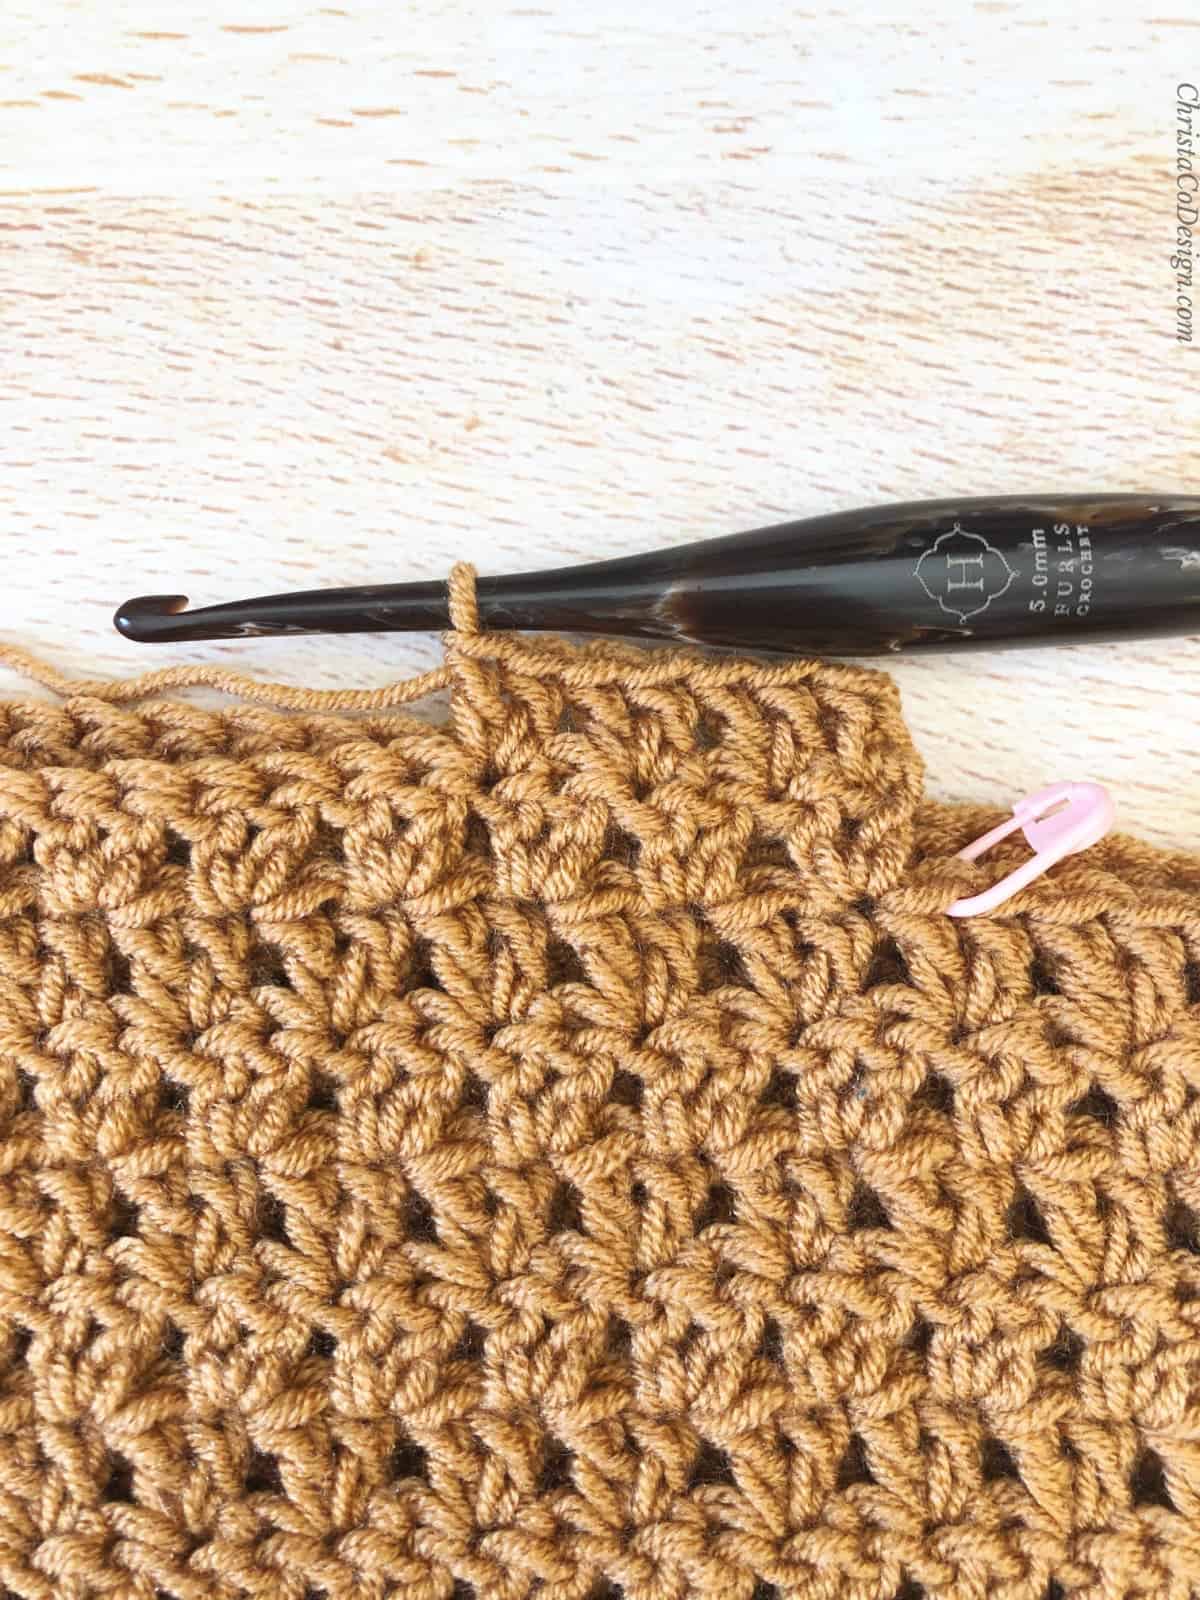
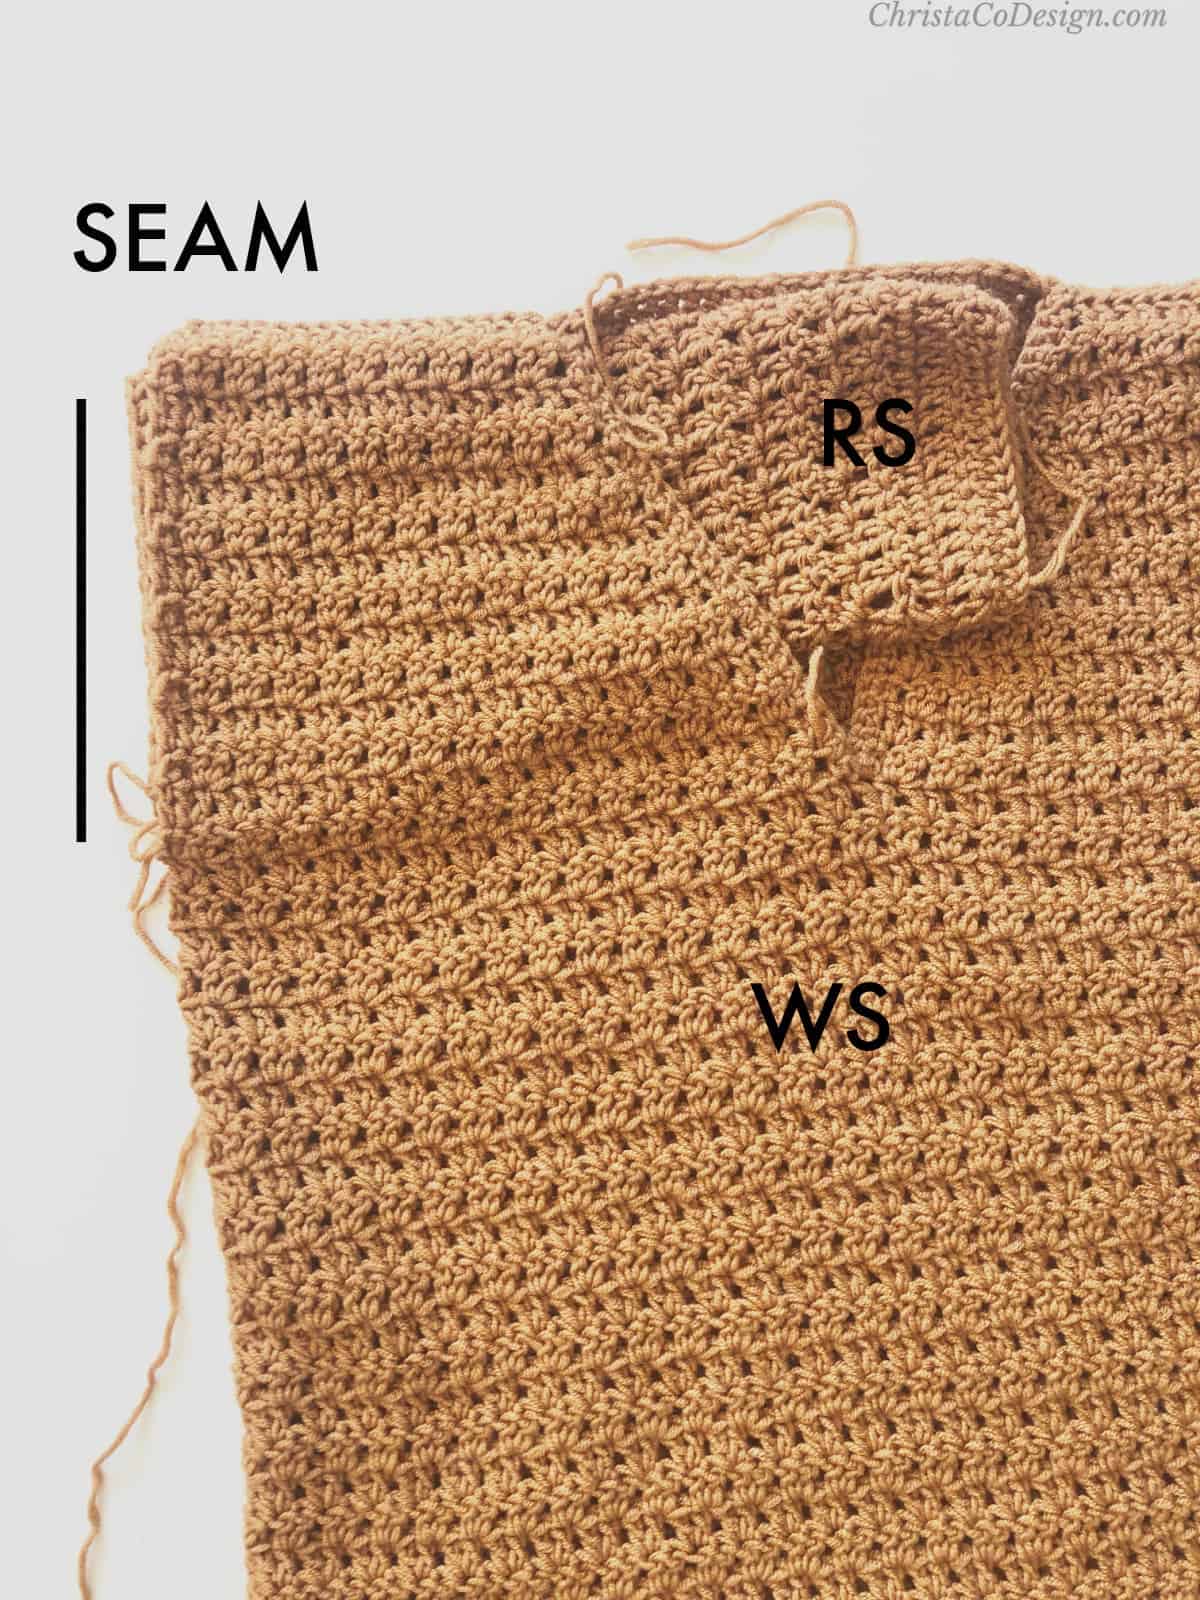
 Back panel complete, seam on side with lime stitch marker.
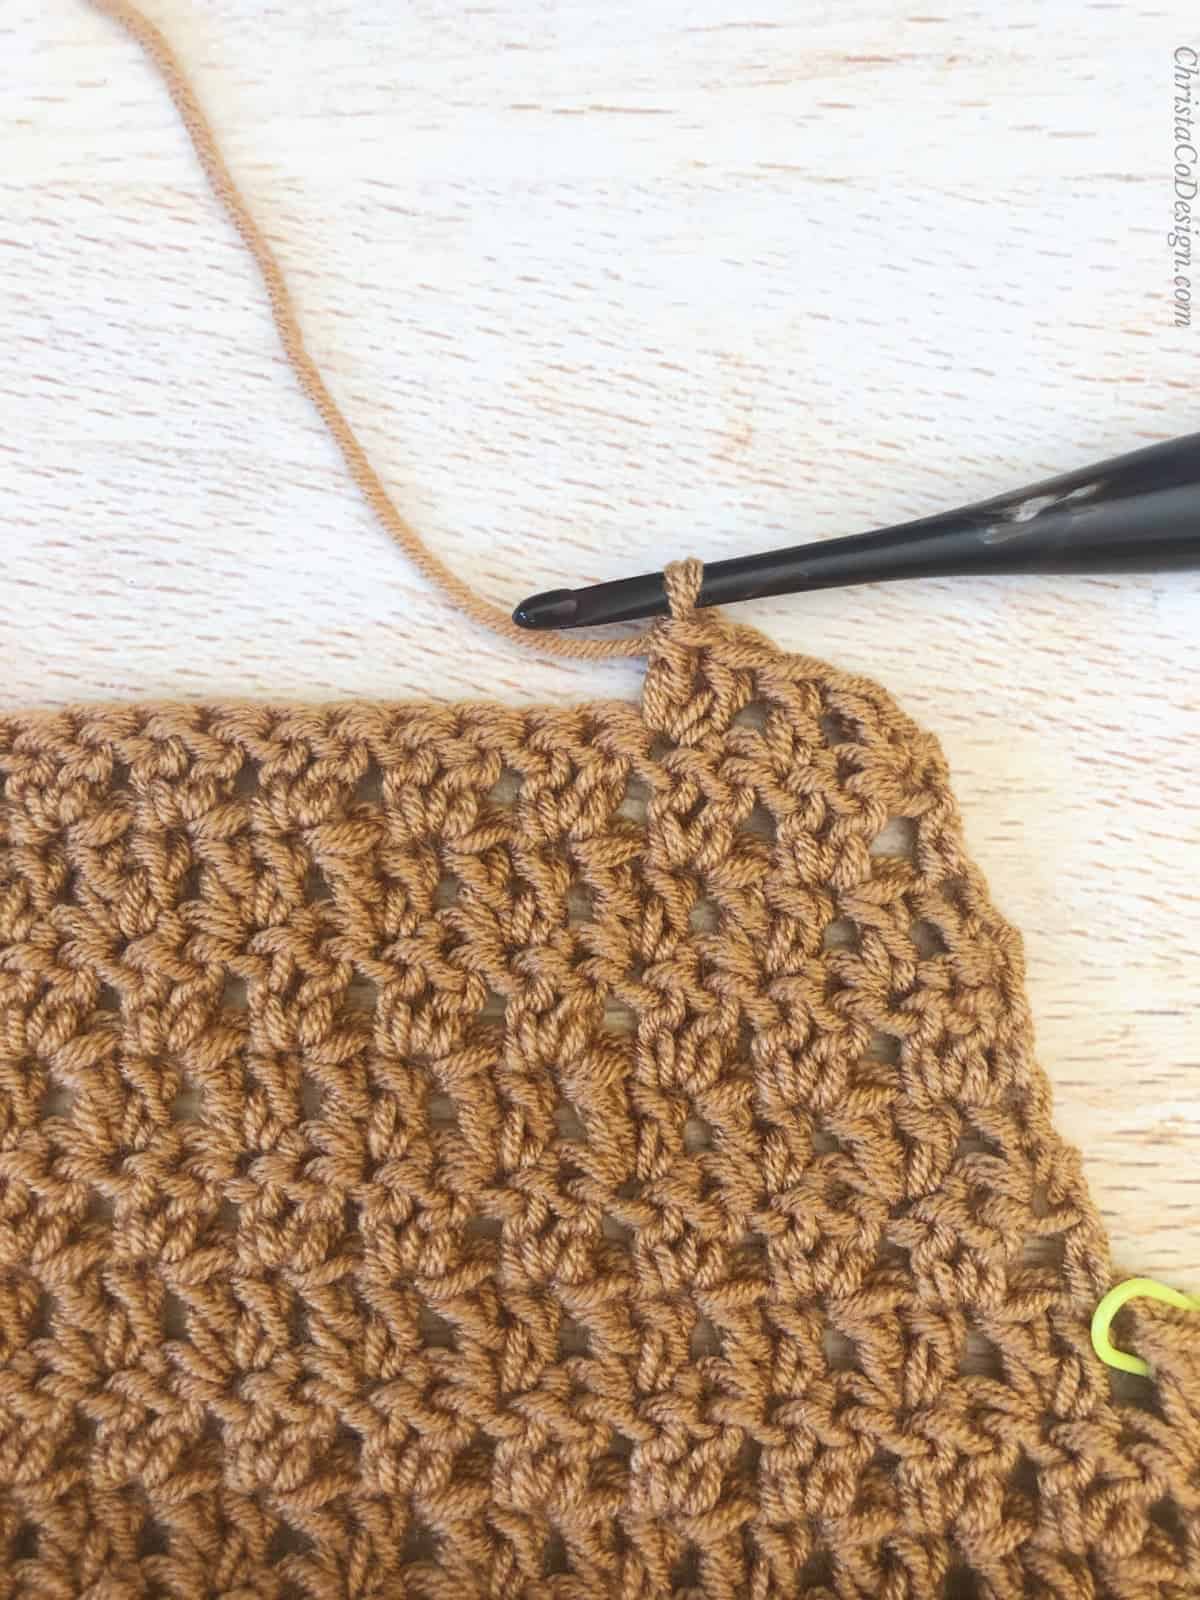
 Right side of back panel marked with green stitch marker and folded down.
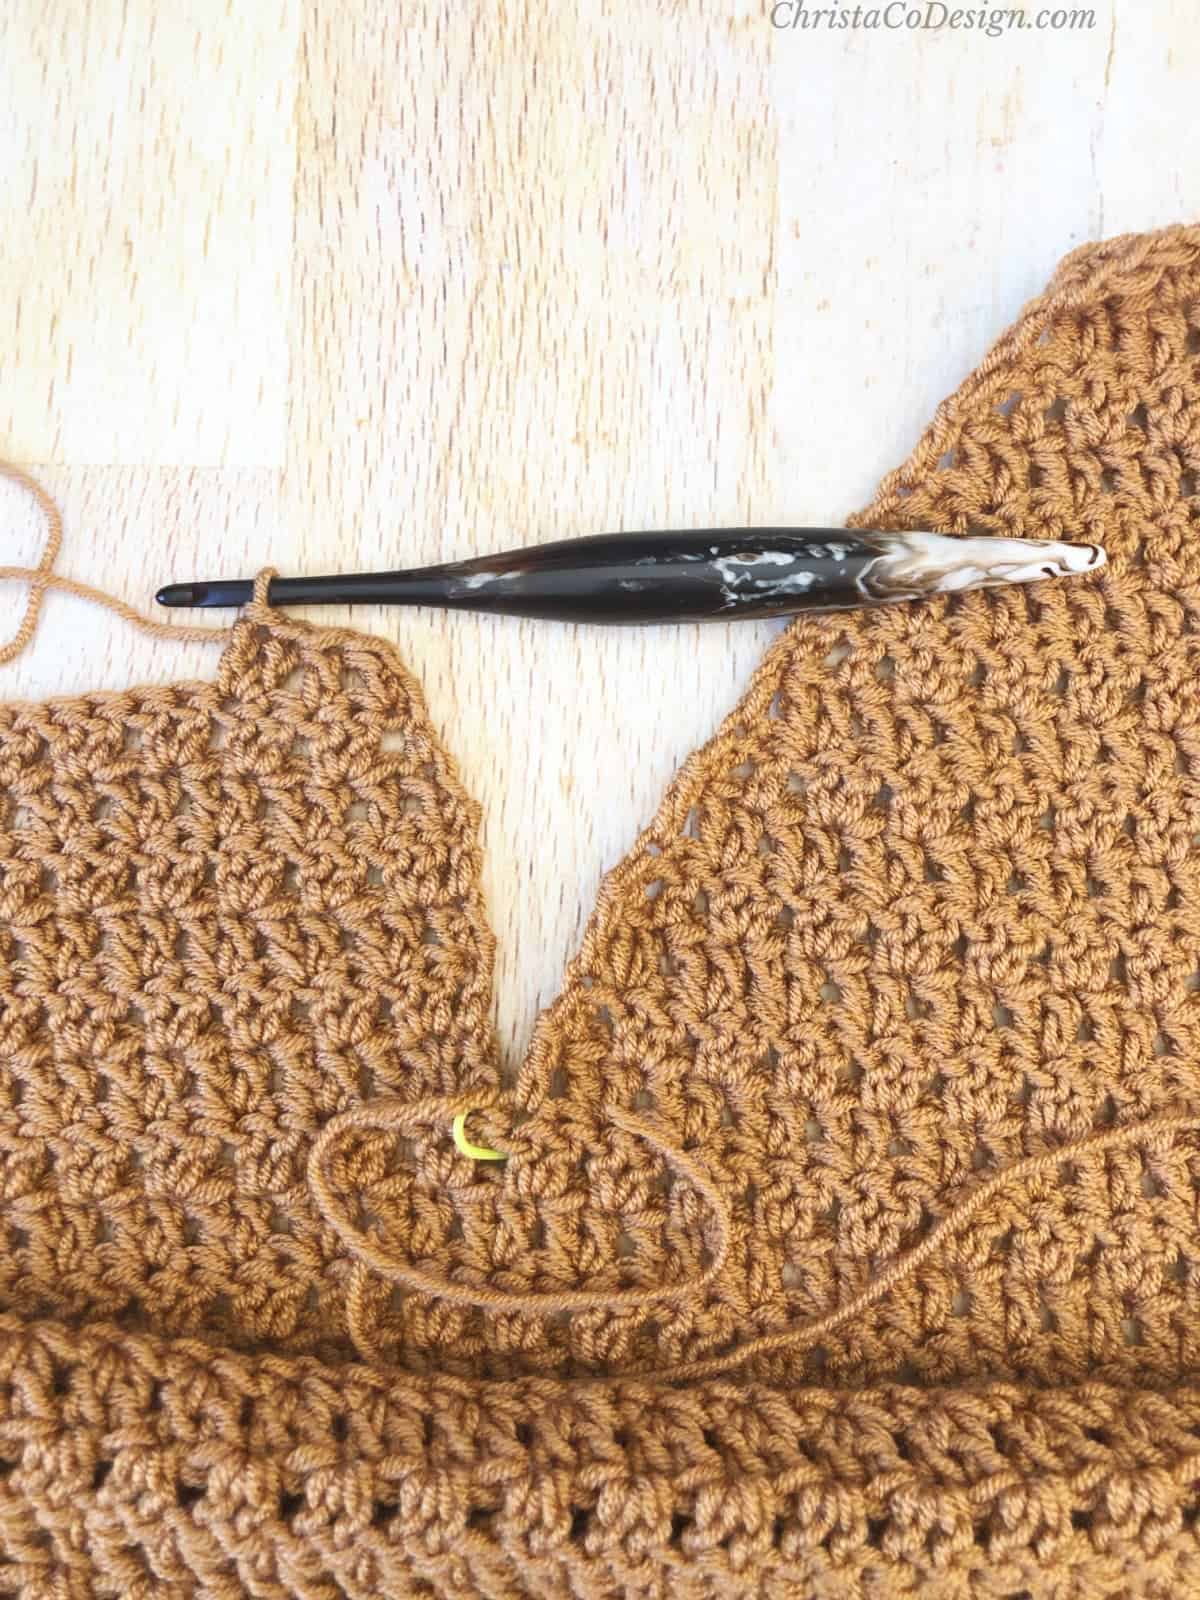
Front Panel Notes
- It’s important to start in the same direction you were working when you stopped this section, in order to keep the row texture the same, always placing the 2 dc in the 2nd dc of the set.
- Join on RS for front panel on the first stitch, marked here by a green stitch marker. The seam is on the opposite side.
- Count off half of the stitches for one side of the v-neck place st marker after last st and leave theother half unworked for now.
- Due to the nature of the stitch pattern, one side starts decreases a row later, but you will end with the same number of stitches on both.
Row 1. (RS) Ch 3, 2 dc in next st, 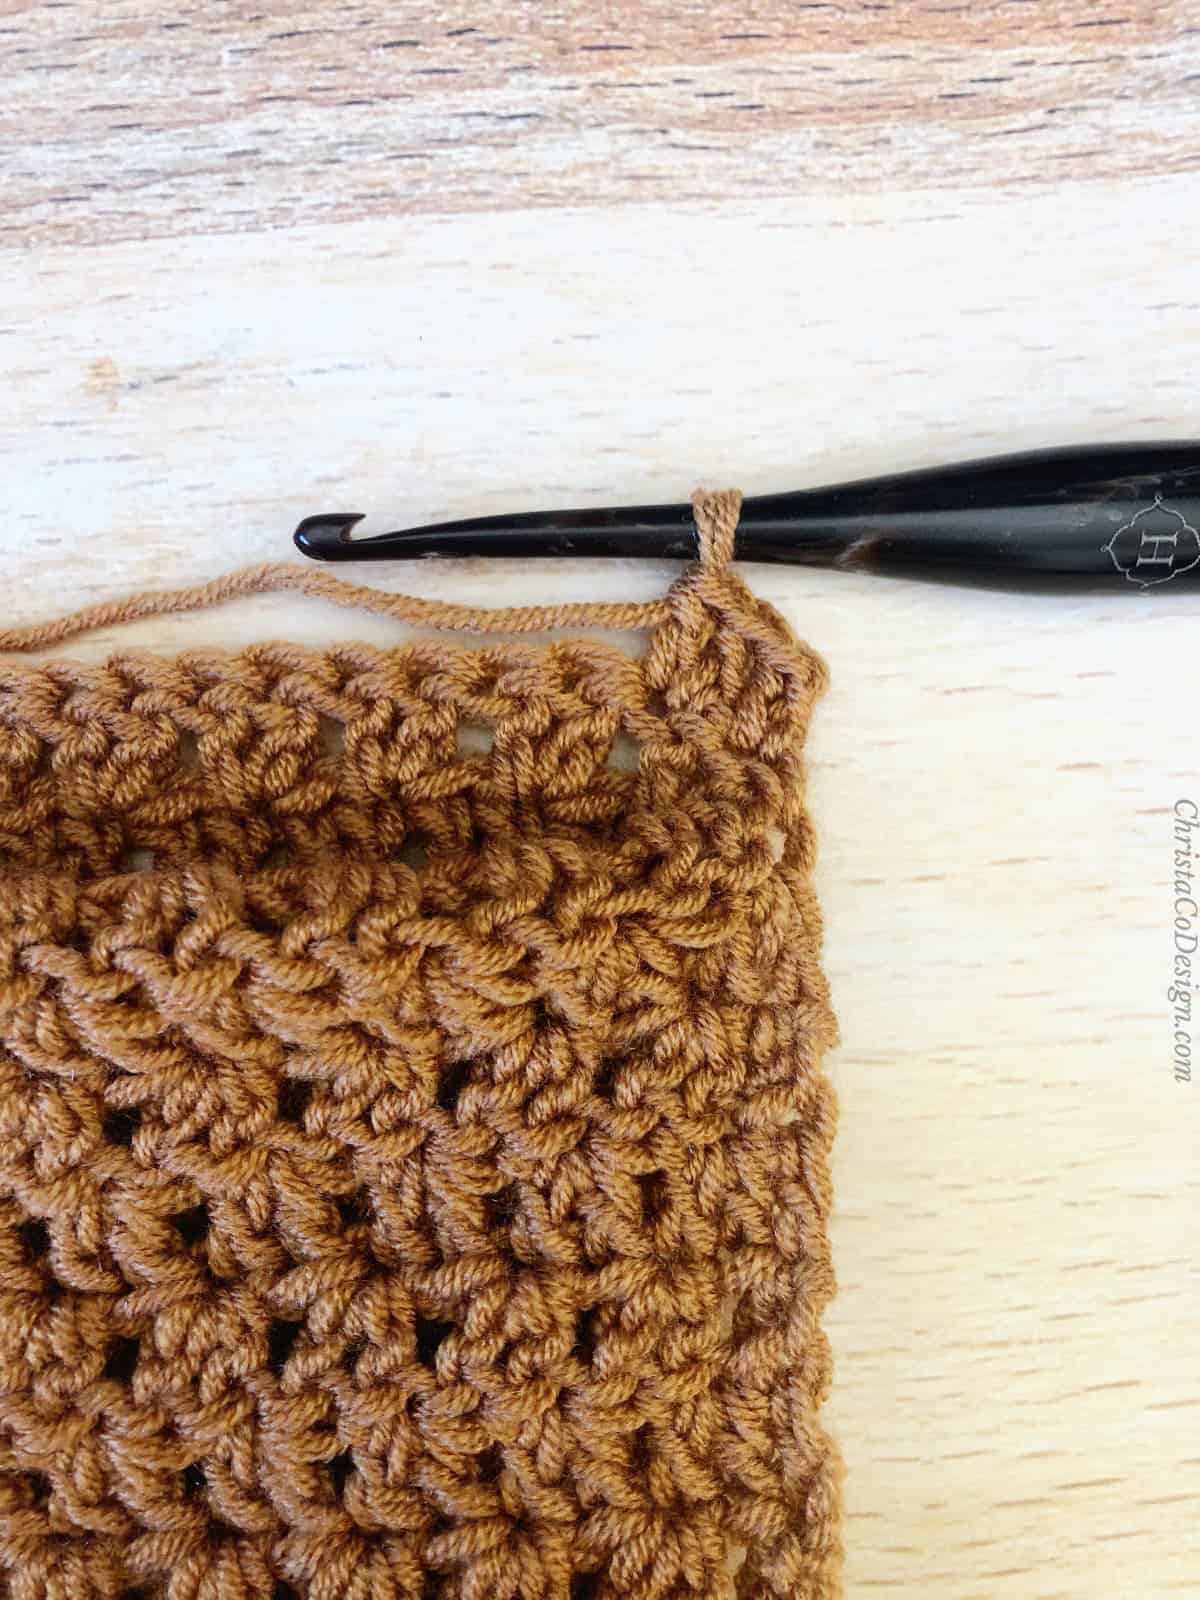 *sk 1, 2 dc in next st; rep from * to last 2 sts before st marker, sk 1, dc in last, turn.
 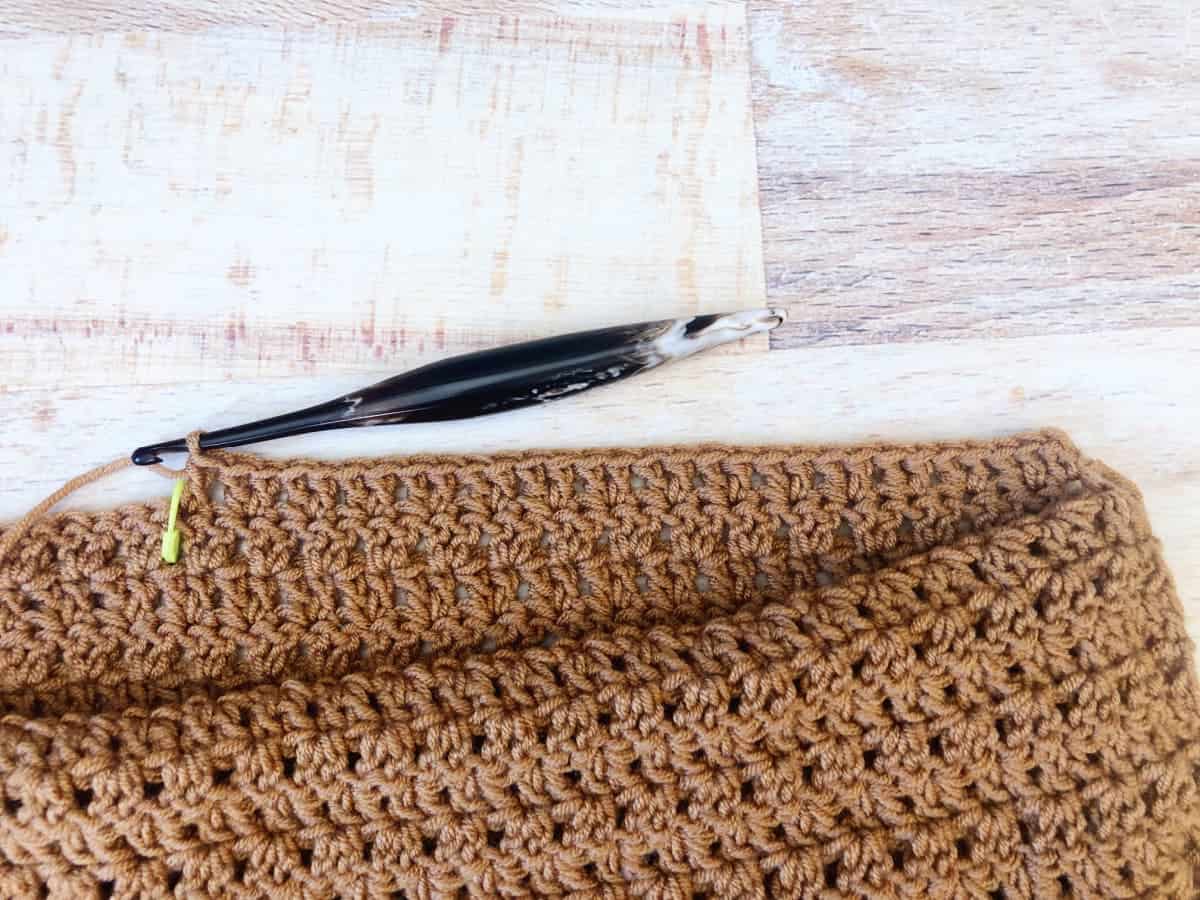 [26, 30, 34, 36, 40, 44, 46, 50, 52 sts]
Row 2. Ch 3, *sk 1, 2 dc in next; rep from * to 1 st left, dc in last st, turn. [26, 30, 34, 36, 40, 44, 46, 50, 52 sts]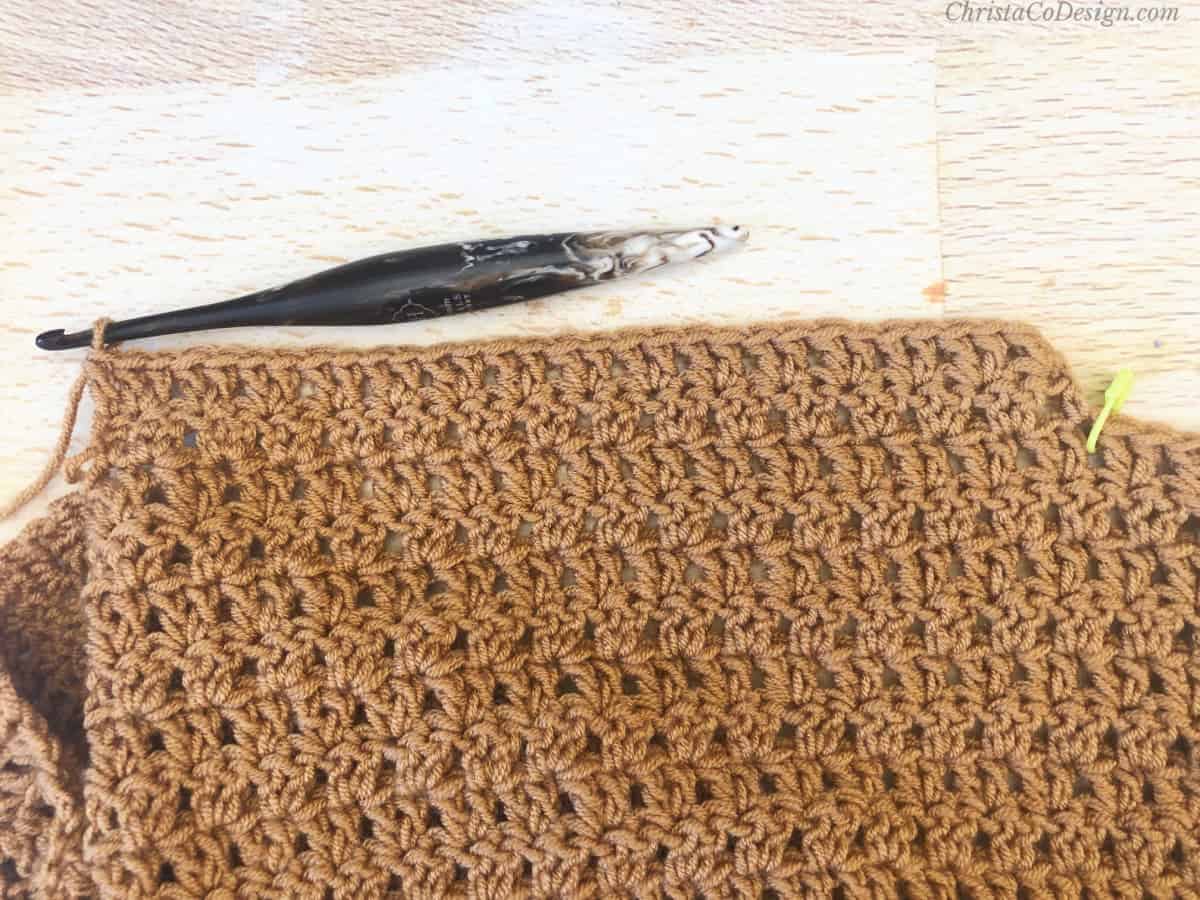
Row 3. Ch 3, *sk 1, 2 dc in next st; 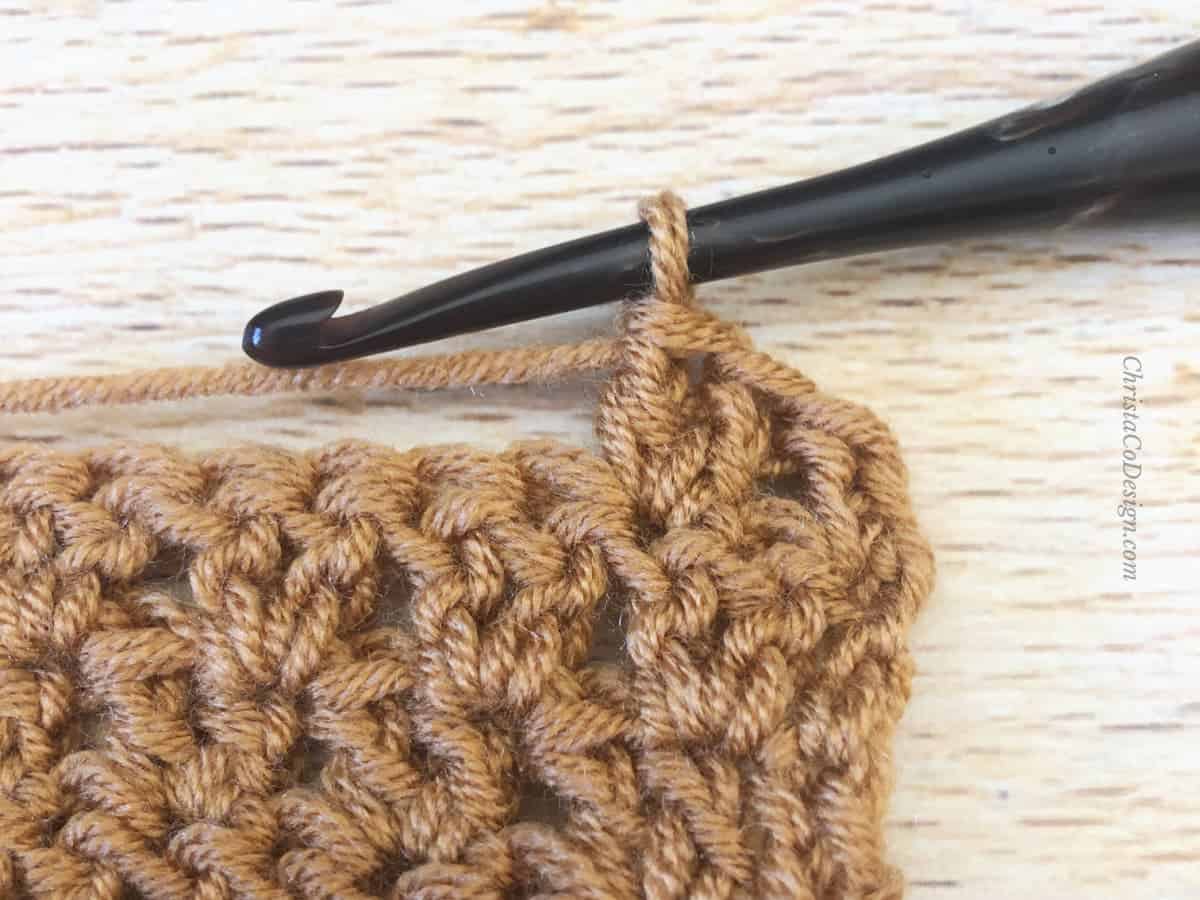 rep from * to 1 st left, dc in last st, turn. [26, 30, 34, 36, 40, 44, 46, 50, 52 sts]
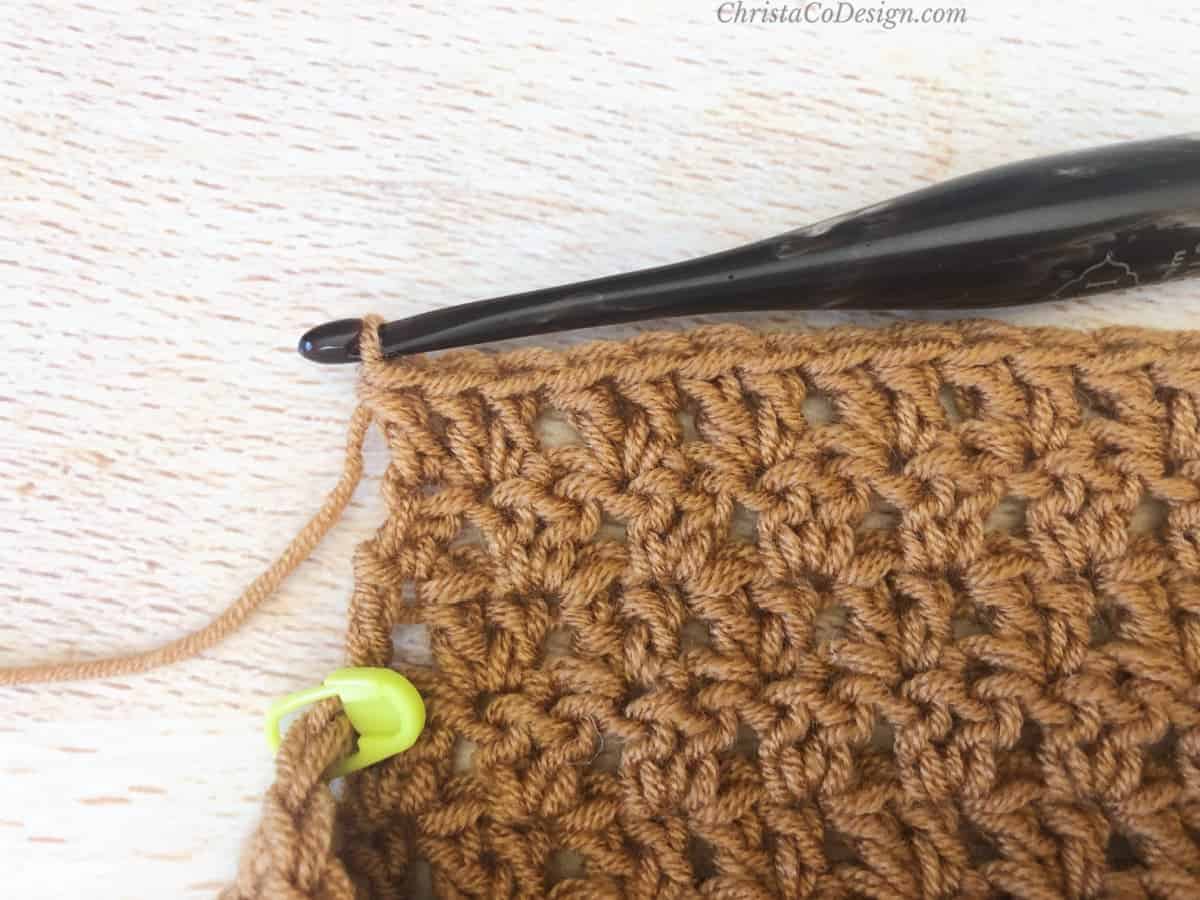
 (Decrease row) Row 4. Ch 3, sk 1, 1 dc in next st, *sk 1, 2 dc in next st; rep from * to 2 sts left, sk 1, dc in last st, turn. [25, 29, 33, 35, 39, 43, 45, 49, 51 sts]
Row 5. Ch 3, *sk 1, 2 dc in next st; rep from * to 2 sts left, sk 1, dc in last st, turn. [24, 28, 32, 34, 38, 42, 44, 48, 50 sts]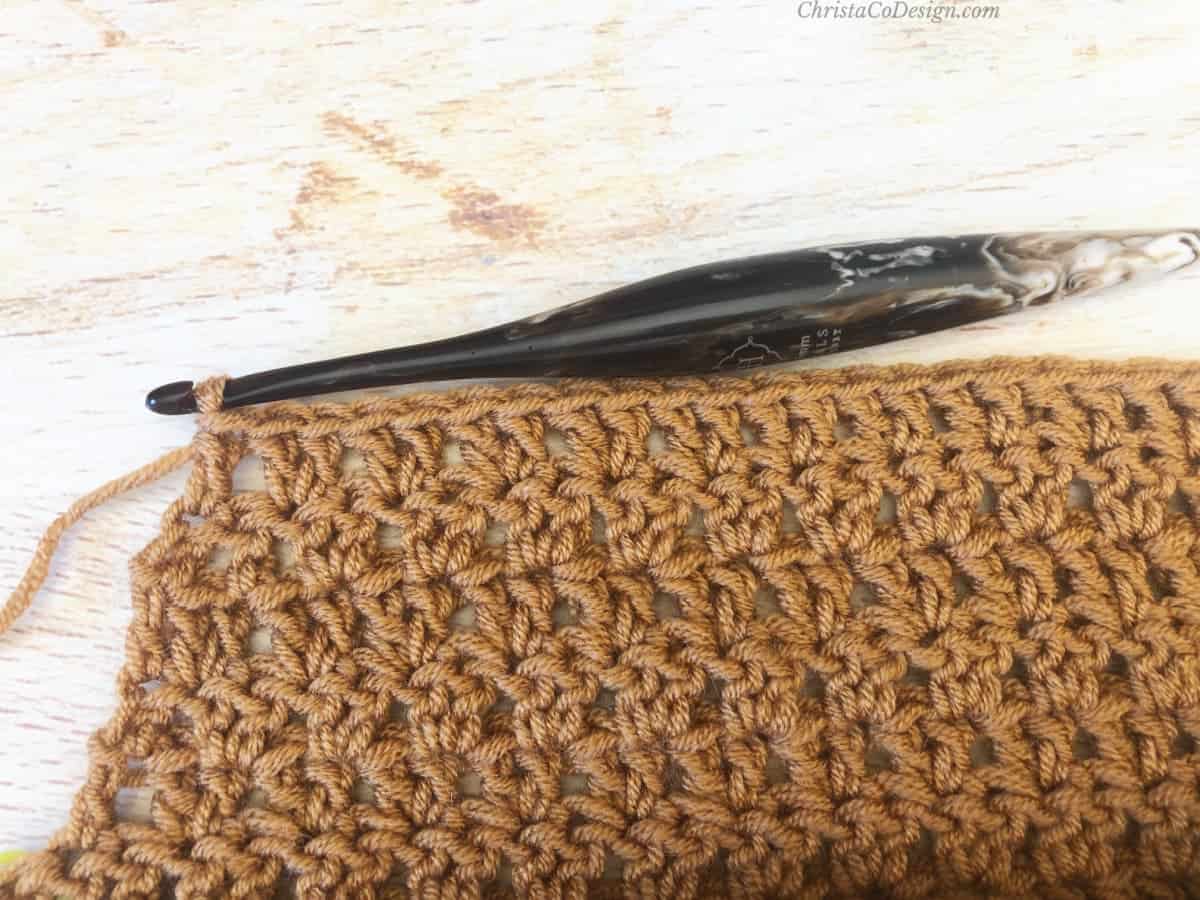
 Continue to repeat Rows 4-5 until you have 11 [13, 14, 15, 15, 17, 17, 19, 19] rows total from the divide and 16 [20, 24, 26, 30, 34, 36, 40, 42 sts].
Then repeat Row 2 until you have 12 [14, 15, 16, 16, 18, 18, 20, 20] rows total from the divide = 6” [7, 7.5, 8, 8, 9, 9, 10, 10] in (15 [18, 19, 20.5, 20.5, 23, 23, 25.5, 25.5] cm) of length from the divide. Cut yarn and leave a long tail to seam shoulders.
2nd Side of V-Neck
On RS, start at center.
Join to center stitch left of st marker, so you’re going in the same direction.
In this row we’re making sure all our 2 dc are in the 2nd dc to keep the pattern.
Row 1. Ch 3, *2 dc in next st, sk 1;  rep from * until 2 sts left, sk 1, dc in last st, turn. [26, 30, 34, 36, 40, 44, 46, 50, 52 sts]
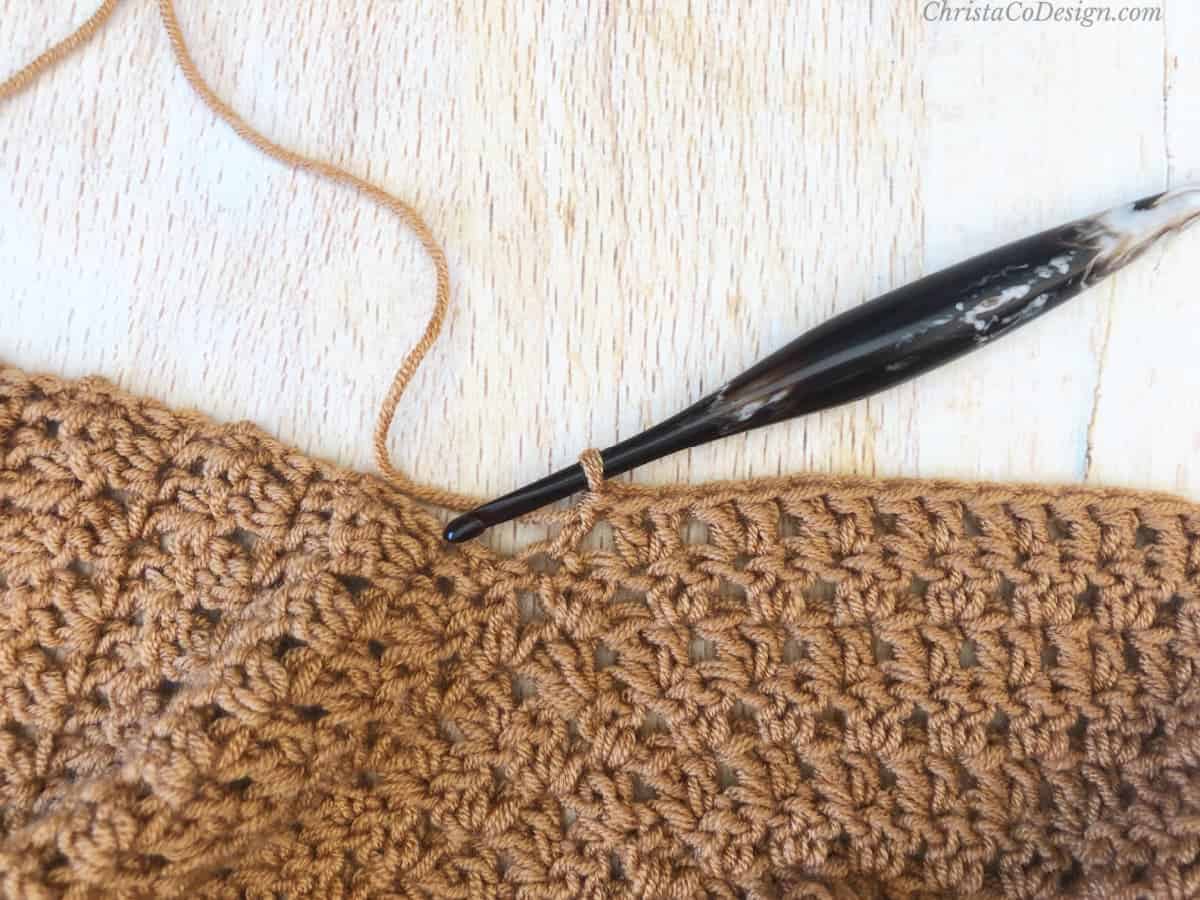
Row 2. Ch 3, sk 1, *2 dc in next st, sk 1; rep from * 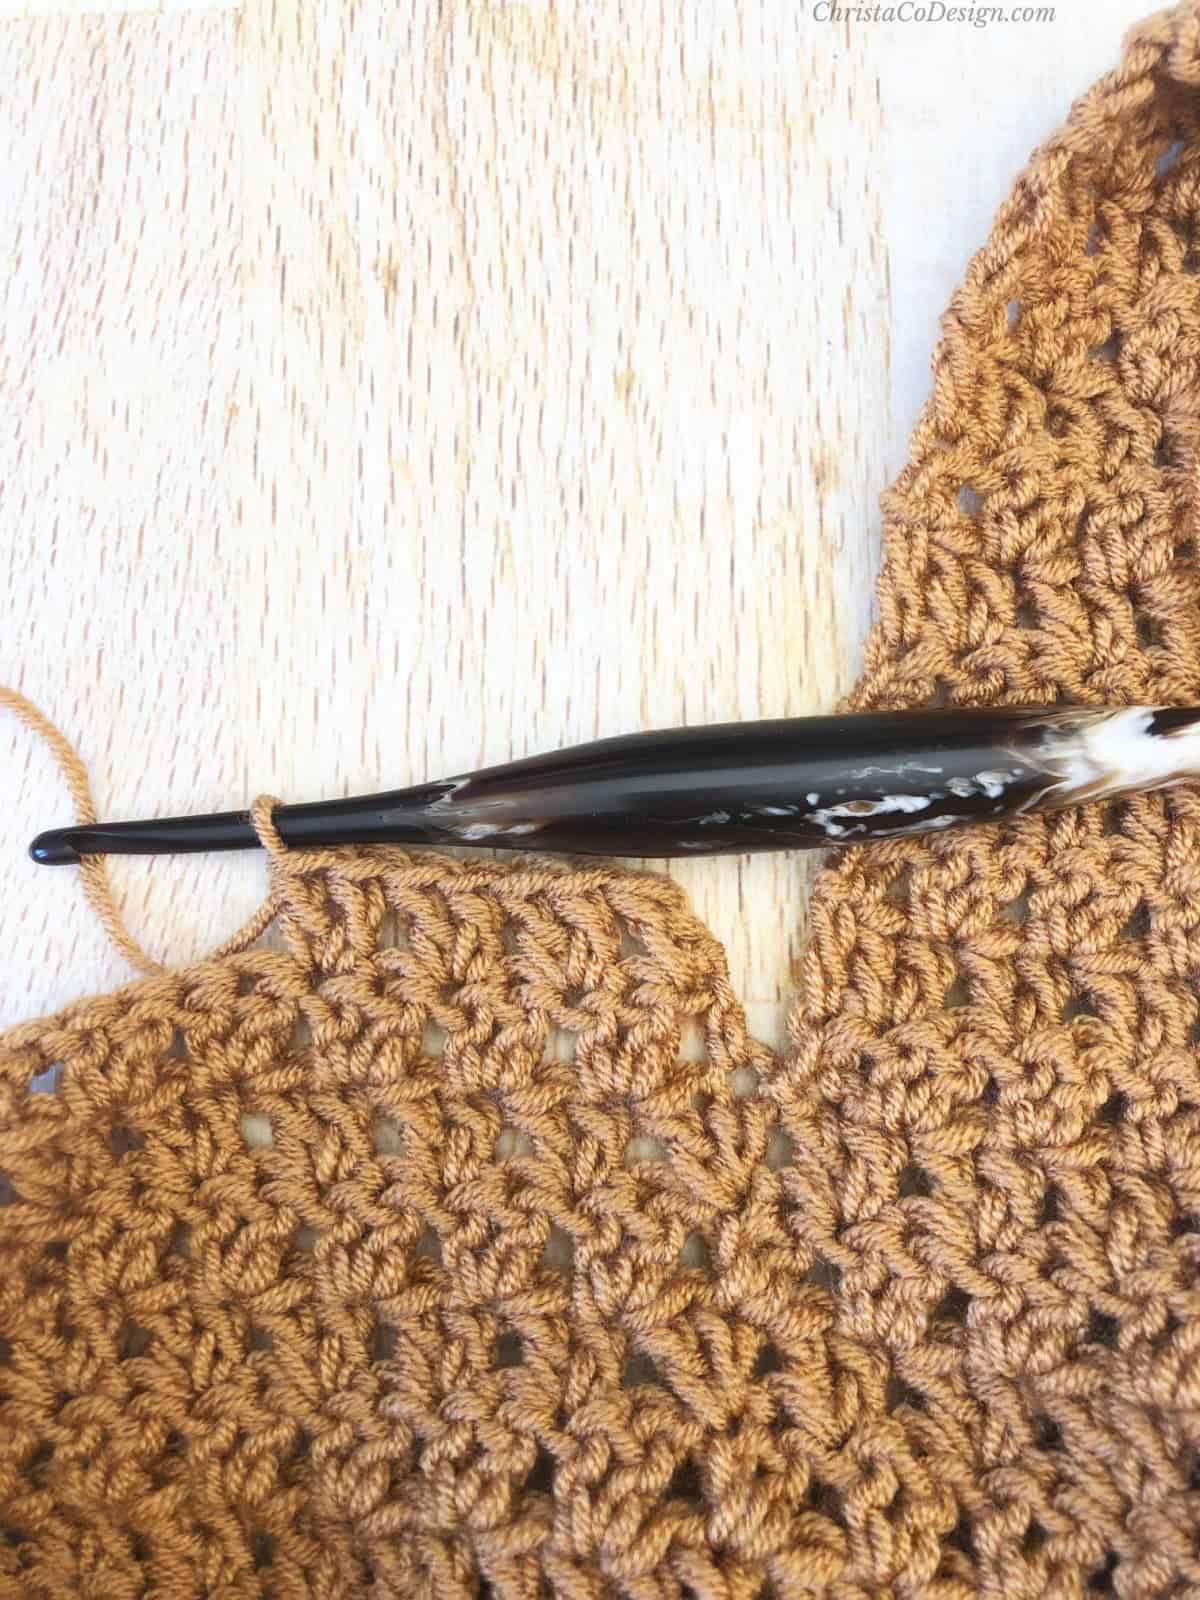 until 2 sts left, 2 dc in next st, 1 dc in last st, turn. [26, 30, 34, 36, 40, 44, 46, 50, 52 sts]
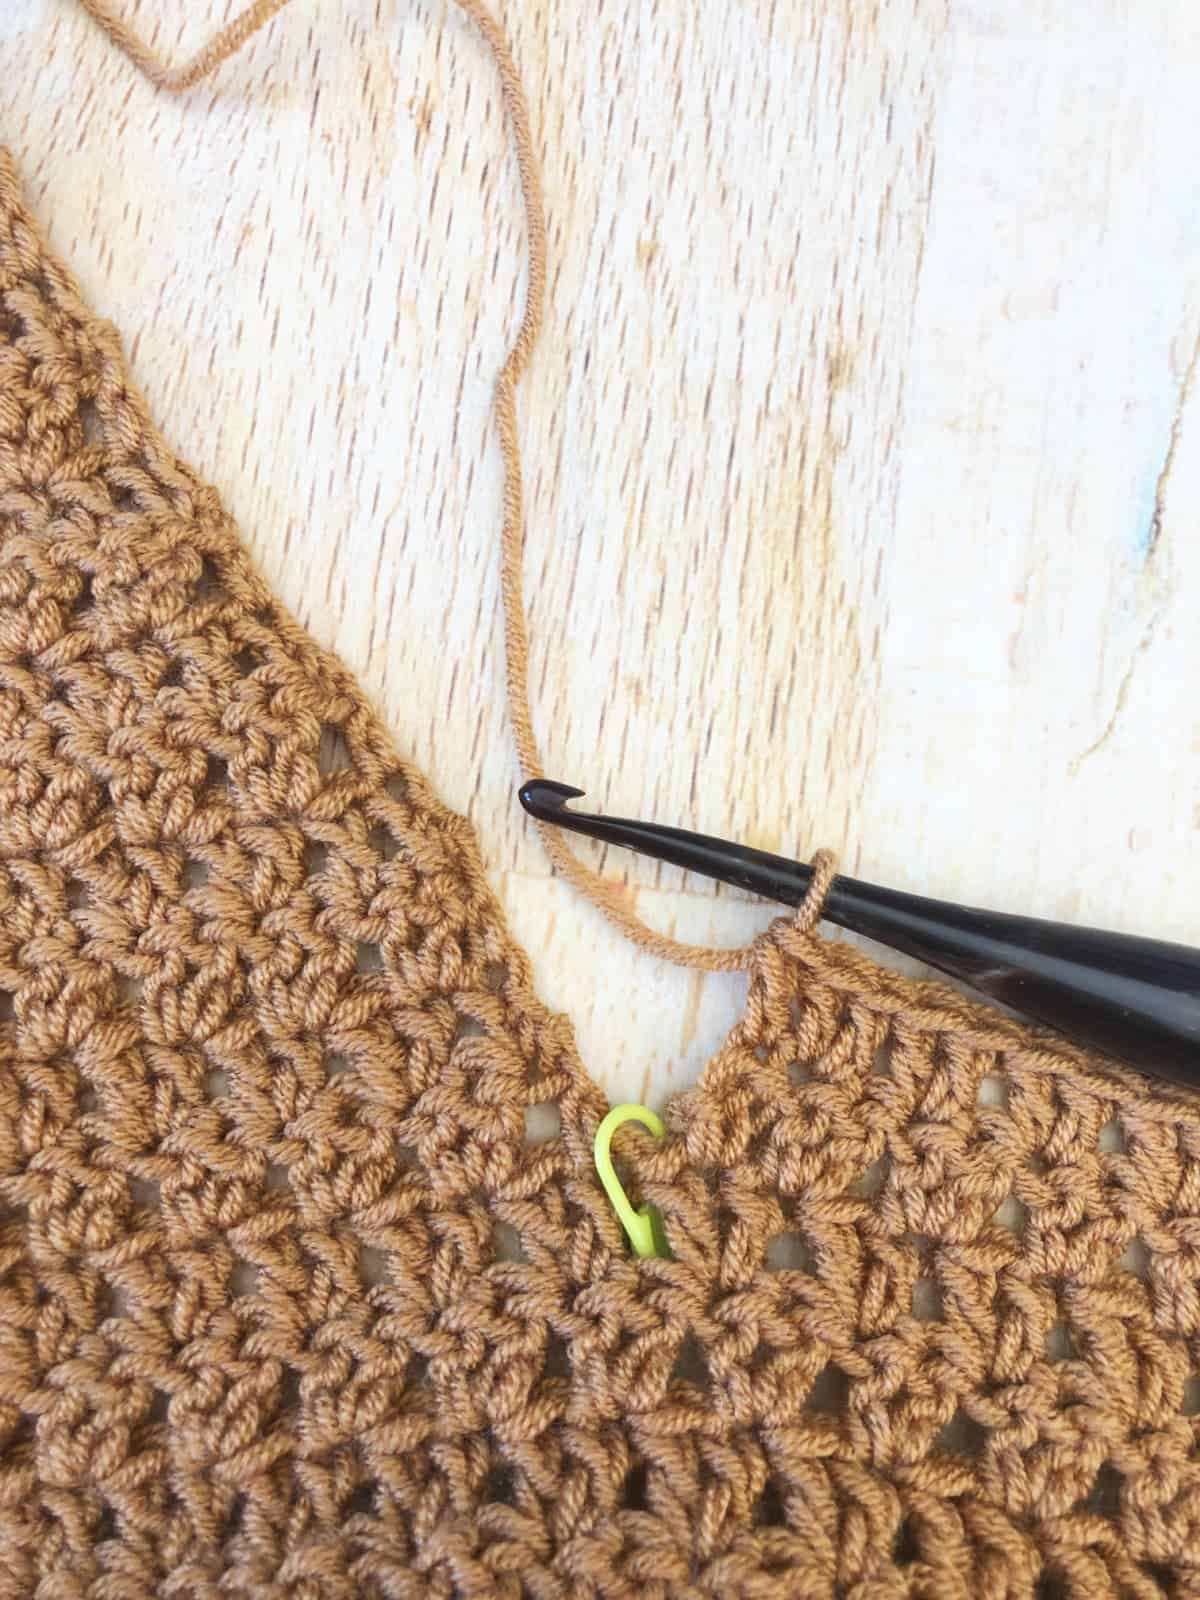
Row 3. Ch 3, sk 1, *2 dc in next st, sk 1; rep from * 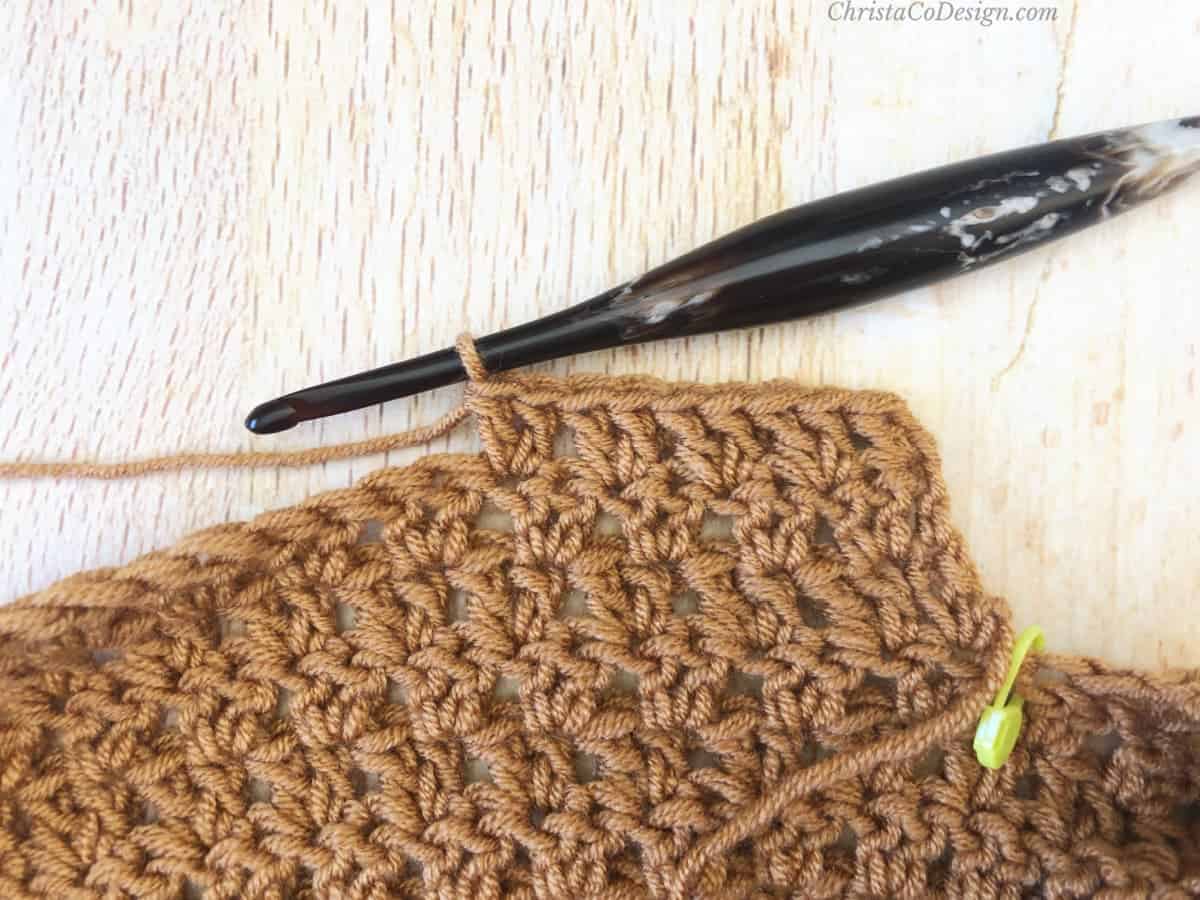 until last 2 sts, 2 dc in next, 1 dc in last st, turn. [26, 30, 34, 36, 40, 44, 46, 50, 52 sts]
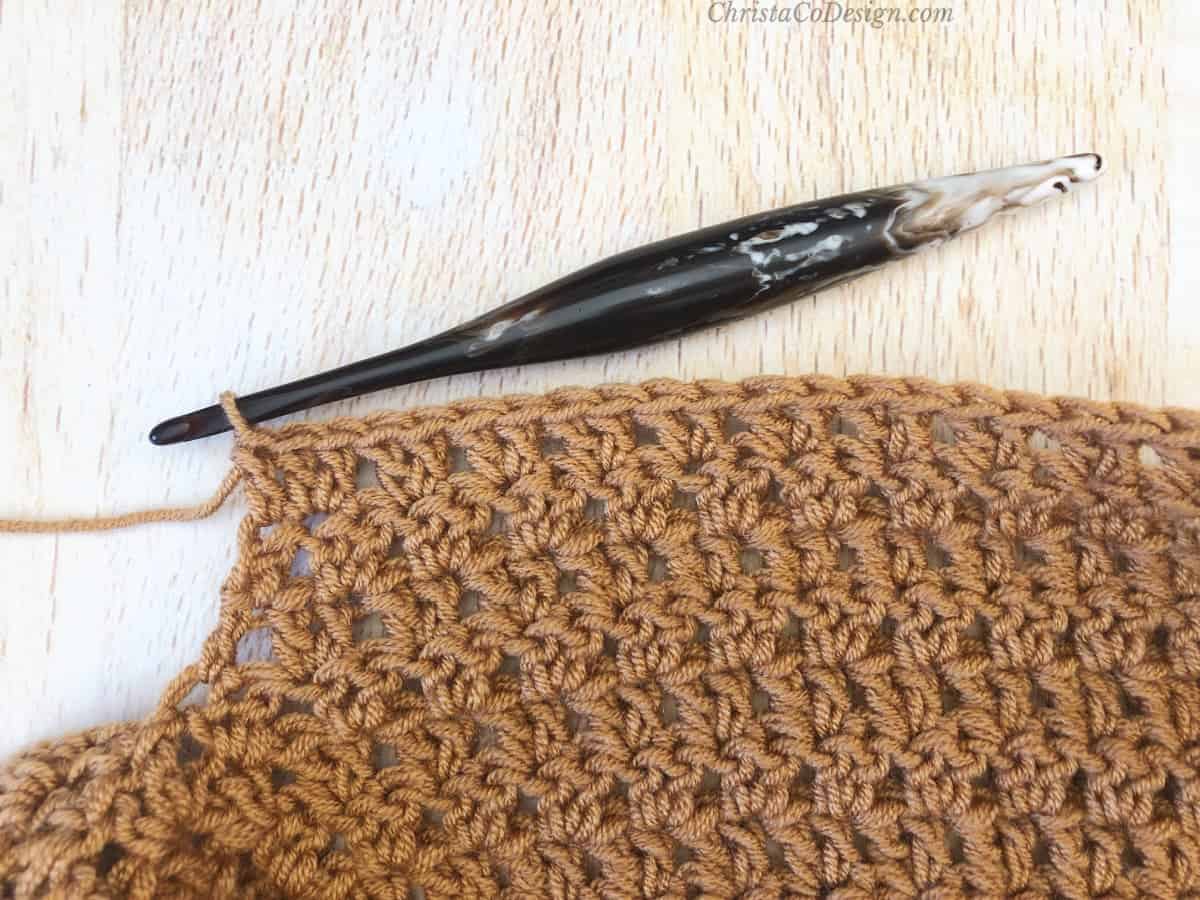
Row 4. Ch 3, *sk 1, 2 dc in next st; rep from * until 1 st left, dc in last st, turn. [26, 30, 34, 36, 40, 44, 46, 50, 52 sts]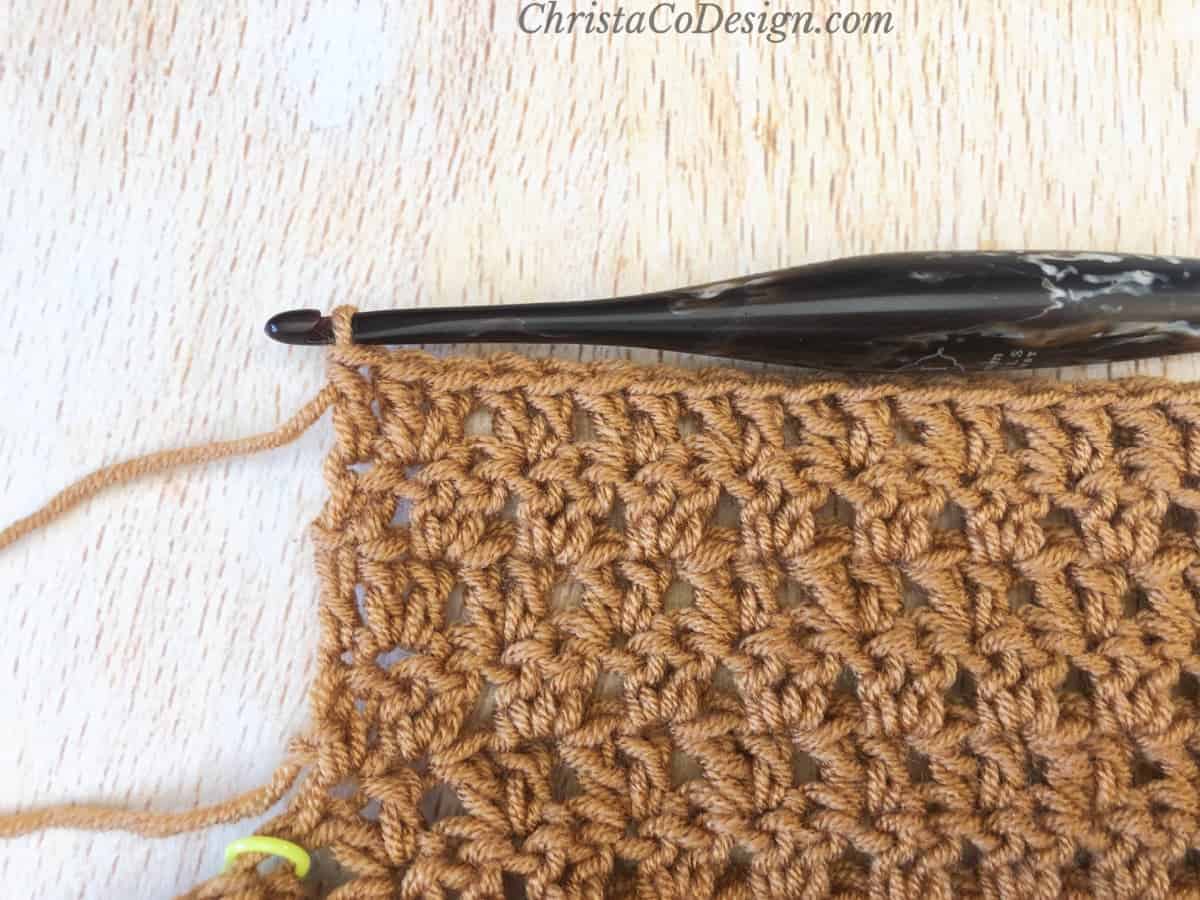
(Decrease row) Row 5. Ch 3, sk 1, 1 dc in next st, *sk 1, 2 dc in next st; 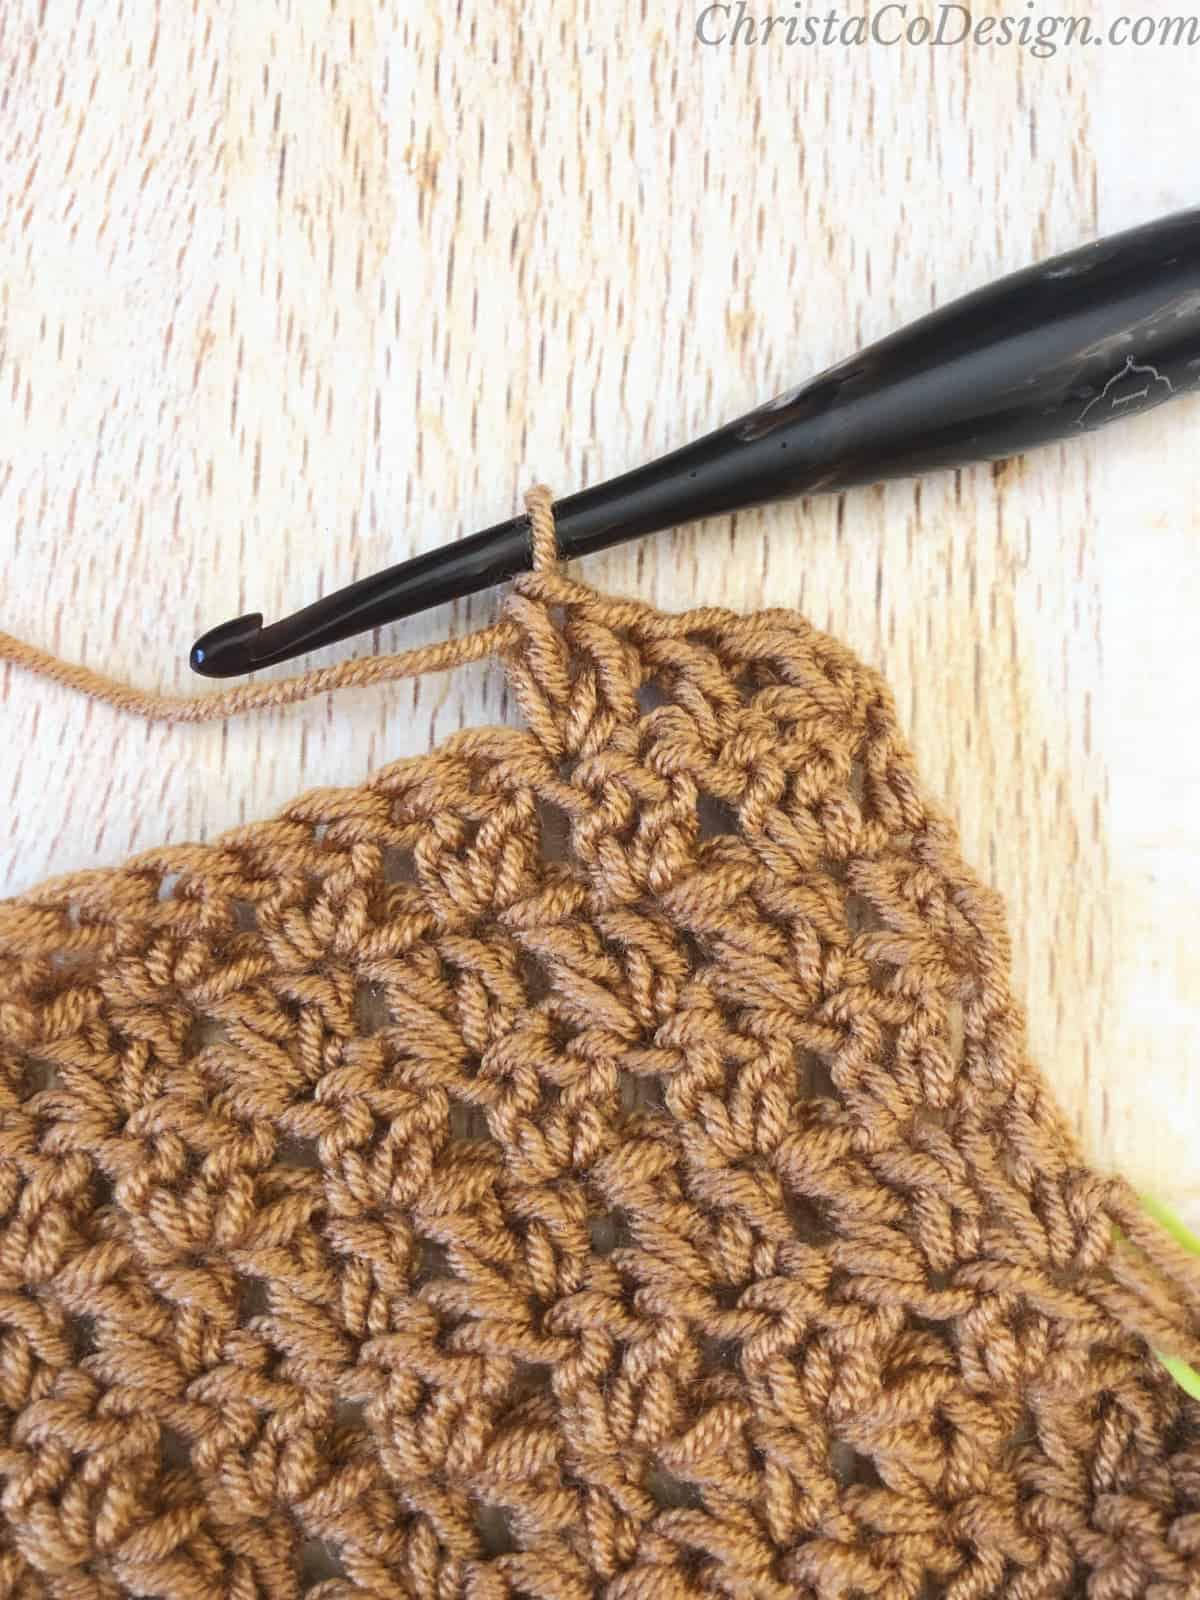 rep from * until 1 st left, 1 dc in last st, turn. [25, 29, 33, 35, 39, 43, 45, 49, 51 sts]
Row 6. Ch 3, *sk 1, 2 dc in next st; rep from * until 2 sts left, sk 1, dc in last st, turn. [24, 28, 32, 34, 38, 42, 44, 48, 50 sts]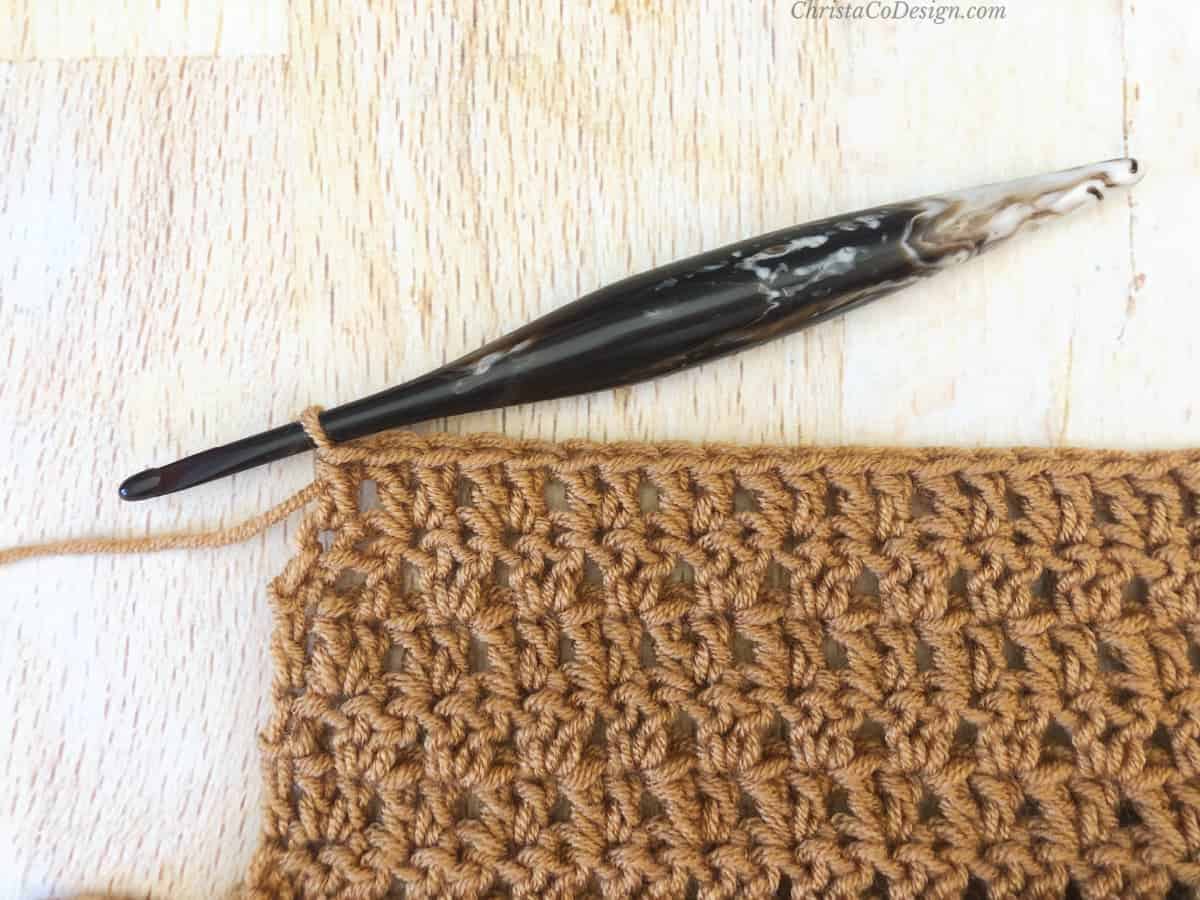
 Continue to repeat Rows 5 – 6 until you have 12 [14, 15, 16, 17, 18, 18, 20, 20] rows total from the divide and 16 [20, 24, 26, 30, 34, 36, 40, 42 sts] = 6” [7, 7.5, 8, 8, 9, 9, 10, 10] in (15 [18, 19, 20.5, 20.5, 23, 23, 25.5, 25.5] cm) of length from the divided. Cut yarn and leave a long tail to seam shoulders.
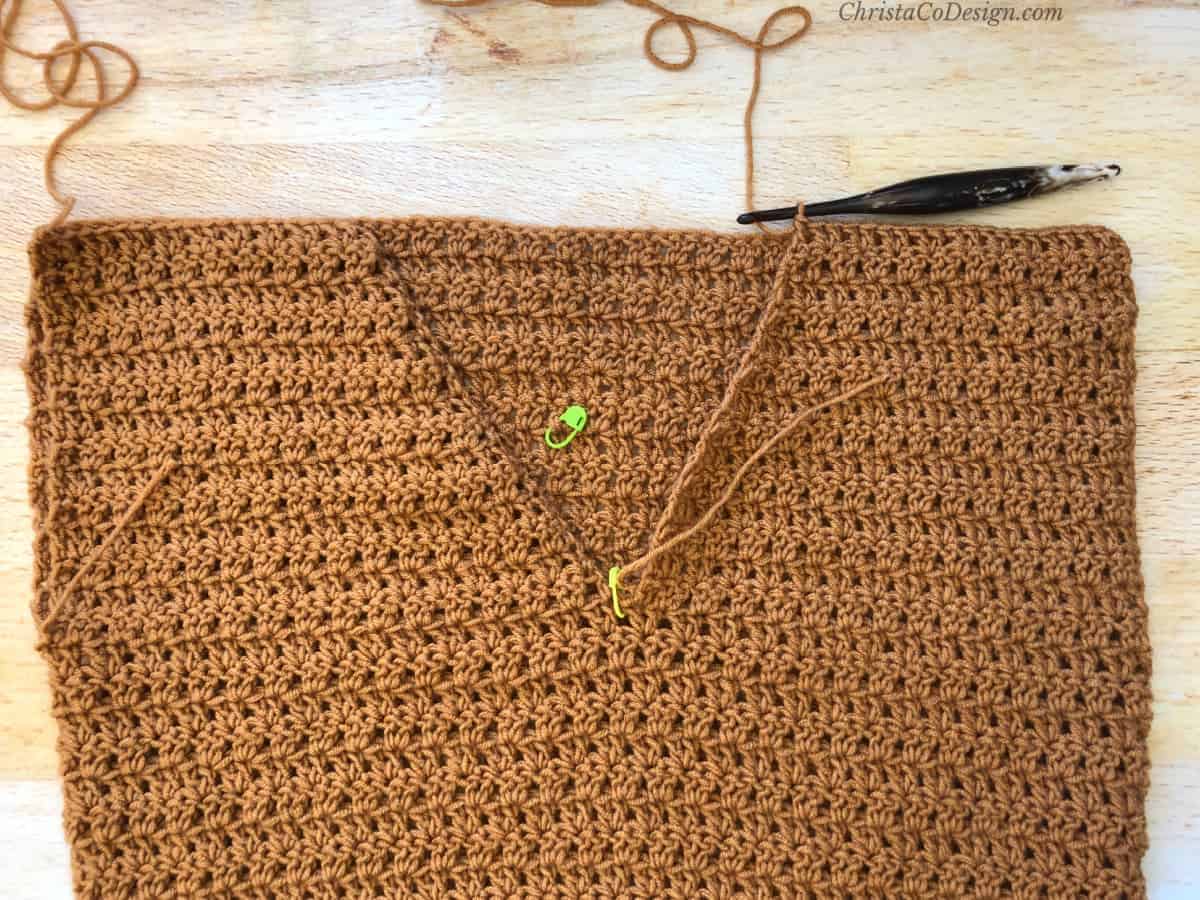
Cut yarn and leave a long tail to seam shoulders.
Seam Shoulders
- Turn WS out so RS are touching.
- Line up shoulders to back panel.
- Use the mattress stitch or your preferred method to sew shoulders to back panel.
- Cut yarn.
- Now is a good time to try it on and make any adjustments.
Sleeves
Make 2
-Join and turn each round.
-Sleeves are worked from the wrist up, so you can try them on at anytime and add or subtract increases as needed.
-We will increase on either side of the join, at this point the stitch pattern will look a little different, but this will be our faux seam so it will be on the underside.
-To adjust your sleeve length: try on your sleeveless sweater, measure from the shoulder edge down to where you want your sleeves to end. This is your desired sleeve length. You can add or subtract rounds according to your need. Keep in mind sleeves tend to lengthen over time.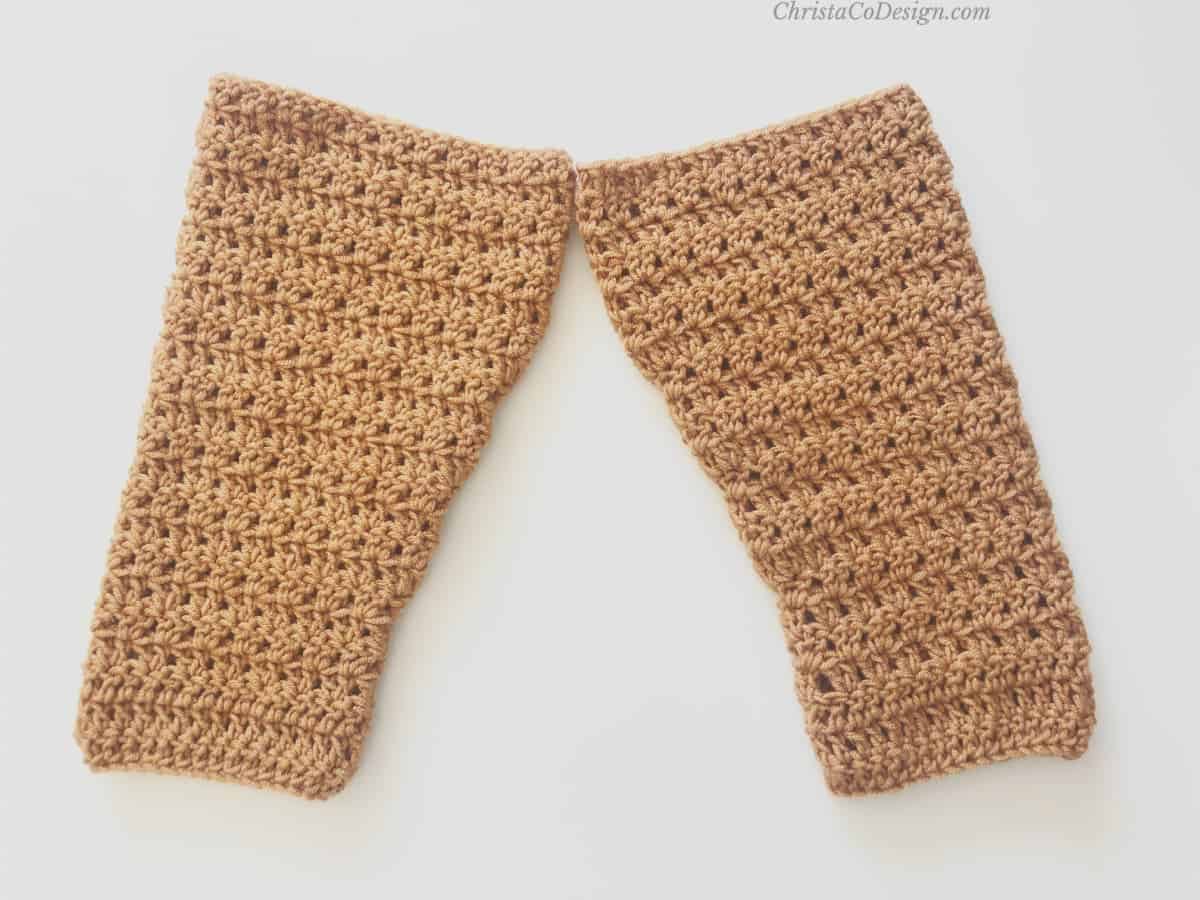
- Rnd 1. FDC 32 (32, 34, 34, 36, 36, 38, 38, 42), or ch 34 ( 34, 36, 36, 38, 38, 40, 40, 44) and dc in the 4th ch from your hook and in each ch across, join with sl st to first st and turn. (32, 32, 34, 34, 36, 36, 38, 38, 42 sts)
- Rnd 2. Ch 3, dc in each st around, sl st to first st to join, turn.
- Rnd 3. Rep last rnd.
- Rnd 4. Ch 3, dc in same st, *{sk next st, 2 dc in next st} rep from * to one st left, sk last st, sl st to first st to join, turn. (32, 32, 34, 34, 36, 36, 38, 38, 42 sts)
- Rnds 5-7. Rep Row 4.
Rnd 8. Ch 3, dc in same st, 2 dc in next 2 sts, *{sk next st, 2 dc in next st} rep from * to one st left, 2 dc in last st, sl st to first st to join, turn. (36, 36, 38, 38, 40, 40, 42, 42, 46 sts)
XS
3/4 Sleeves: Rnds 9-12. Rep Rnds 5-8 until you have 40 sts = (6”/15.2cm wide flat).
Rnds 13-22. Rep Rnd 4 until length = (11”/28cm). For long sleeves Rep Rnd 4 for 18.5”/47cm in length, or until you have reached your desired sleeve length. Leave a long tail for seaming, cut yarn.
S
3/4 Sleeves: Rnds 9-16. Rep Rnds 5-8 til you have 44 sts = (6.75”/17.2cm wide flat).
Rnds 17-23. Rep Rnd 4 until length = (11.5”/29.2cm). For long sleeves: Rep Rnd 4 for 18.5”/47cm in length, or until you have reached your desired sleeve length. Leave a long tail for seaming, cut yarn.
M
3/4 Sleeves: Rnds 9-20. Rep Rnds 5-8 til you have 50 sts = (7.7”/19.6cm wide flat).
Rnds 21-24. Rep Rnd 4 until length = (12”/30.5cm). For long sleeves: Rep Rnd 4 for 18.5”/47cm in length, or until you have reached your desired sleeve length. Leave a long tail for seaming, cut yarn.
L
3/4 Sleeves: Rnds 9-20. Rep Rnds 5-8 til you have 50 sts = (7.7”/19.6cm wide flat).
Rnds 21-24. Rep Rnd 4 until length = (12”/30.5cm). For long sleeves: Rep Rnd 4 for 18.5”/47cm in length, or until you have reached your desired sleeve length. Leave a long tail for seaming, cut yarn.
XL
3/4 Sleeves: Rnds 9-20. Rep Rnds 5-8 til you have 52 sts = (8”/20.3 cm wide flat).
Rnds 21-24. Rep Rnd 4 until length = (12”/30.5cm). For long sleeves: Rep Rnd 4 for 18.5”/47cm in length, or until you have reached your desired sleeve length. Leave a long tail for seaming, cut yarn.
2X
3/4 Sleeves: Rnds 9-24. Rep Rnds 5-8 til you have 56 sts = (8.6”/21.8cm wide flat).
Rnds 25-28. Rep Rnd 4 until length = (14”/35.6cm). For long sleeves: Rep Rnd 4 for 18.5”/47cm in length, or until you have reached your desired sleeve length. Leave a long tail for seaming, cut yarn.
3X
3/4 Sleeves: Rnds 9-24. Rep Rnds 5-8 til you have 58 sts = (9”/23cm wide flat).
Rnds 25-28. Rep Rnd 4 until length = (14”/35.6cm). For long sleeves: Rep Rnd 4 for 19”/48.3cm in length, or until you have reached your desired sleeve length. Leave a long tail for seaming, cut yarn.
4X
3/4 Sleeves: Rnds 9-28. Rep Rnds 5-8 til you have 62 sts = (9.5”/24cm wide flat).
Rnds 29-32. Rep Rnd 4 until length = (16”/40.6cm) For long sleeves: Rep Rnd 4 for 19”/48.3cm in length, or until you have reached your desired sleeve length. Leave a long tail for seaming, cut yarn.
5X
3/4 Sleeves: Rnds 9-28. Rep Rnds 5-8 til you have 66 sts = (10”/25.4cm wide flat).
Rnds 29-32. Rep Rnd 4 until length = (16”/40.6cm) For long sleeves: Rep Rnd 4 for 19”/48.3cm in length, or until you have reached your desired sleeve length. Leave a long tail for seaming, cut yarn.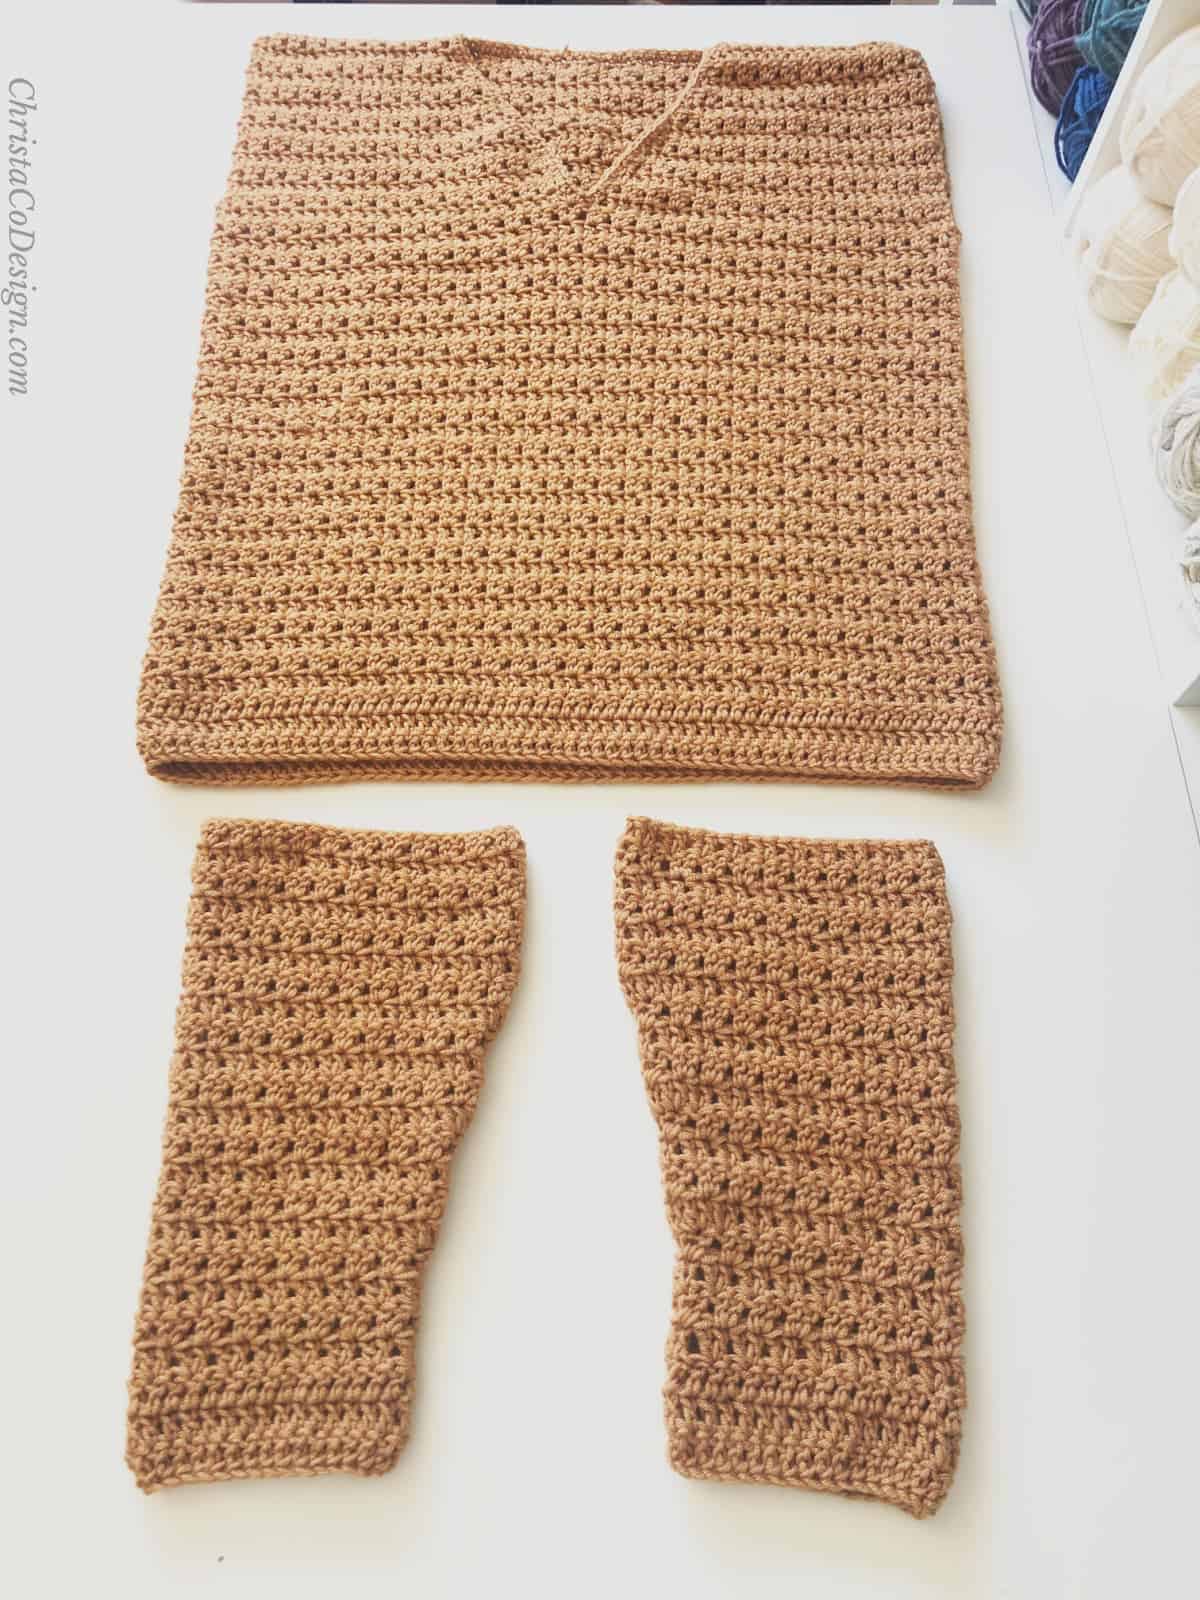
Seam
 With sweater body WS out and sleeve RS out, slide armhole end of sleeve into the sweater.
- Make sure the faux seam is on the bottom (where your elbow will be). Line up the armhole end of sleeve with the armhole opening.
- Sew sleeve to armhole with mattress stitch. If needed, seam side of armhole to close.
- Rep for both sleeves.
- Cut yarn. Weave in ends.
Finishing
- Turn sweater RS out. Join yarn with sl st to back of the neck.
- Ch 1, sc evenly round v-neck, placing 2 sc in the side of each dc row. Sl st back to first sc.
- Cut yarn. Weave in ends.
Recommended Products
As an Amazon Associate and member of other affiliate programs, I earn from qualifying purchases.


Regarding the Sera sweater….I read that you are working in the round, but I don’t see to join to make a circle in the directions.
Beginner and very confused!
Hi, sorry you’re having trouble, thanks for asking. You join the end of each round with a slip stitch and then turn. Here’s a tutorial on how to do this technique https://christacodesign.com/how-to-join-and-turn-crochet-tutorial/ if you need it. It looks like this part was only under the photo tutorial. I’ve added it to the pattern instructions as well. I hope this helps. Thanks again for reaching out so I could clarify it.
Crystal, I envy your ability to design and your creativity. I did a swatch for the Sera sweater using #5 bulky using the 5mm. I’m not familiar with this swatch write up so I divided 113 by 8 to get 14 stitches across and did 6 rows. Did I do that correctly? Across was 4” but 6 rows was 4” not the 8 rows if using #3 yarn. I tried a 4mm and felt the hook was too small. I tried a 4.5mm hook and liked that but because this is my second sweater I’m not sure what direction to take since I want to use a #5 acrylic yarn.Thank you!
Hi Cindy, thanks for your kind words. It’s look like there was a typo under the gauge which is 13 sts x 8 rows in dc. Unfortunately it’s not recommended to use a different yarn weight as this pattern is written for #3 dk/lightweight yarn. As you can see it totally changes the measurements and calculations so you risk making a sweater that is way too big or too small. And you’ve already tried adjusting the hook size for your yarn and you can’t really adjust it any further. Your swatch is larger so the only thing I can suggest is to make a size (or 2?) smaller in the pattern. This is highly risk though! You might try a hook size that works well with your yarn and choose 2 sizes in the pattern smaller than you would normally make. Work the first row 1 and see does it fit around your body like you would want it to fit? If yes, continue and check again after a few rounds. If not you can try the size up or down and see. I hope this helps! Otherwise you might try finding sweater patterns you like that work with #5 bulky yarn. I have two: https://christacodesign.com/nebbia-sweater-free-crochet-pattern/
and https://christacodesign.com/briones-bobble-sweater-crochet-pattern/
Good luck!