Nebbia Chunky Crochet Sweater Free Pattern
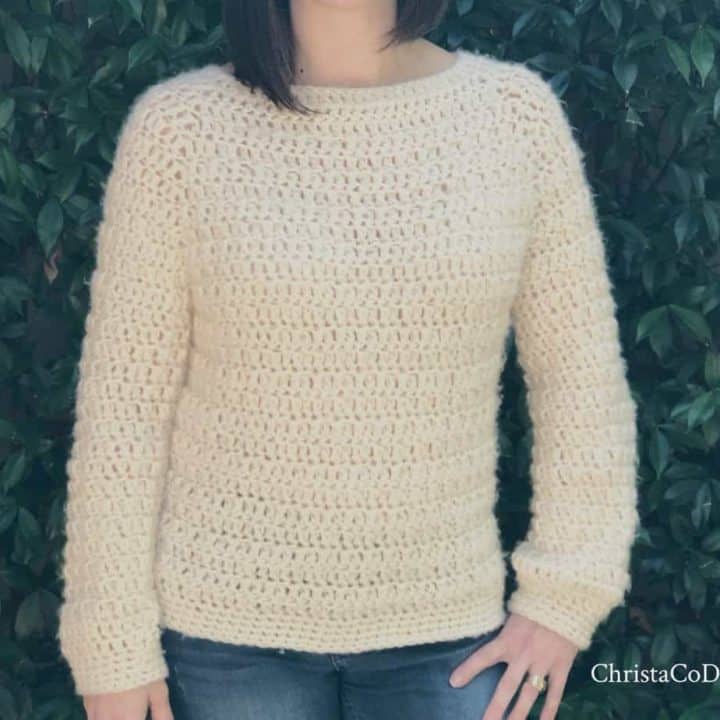
The Nebbia Chunky Crochet Sweater is an easy crochet pattern. Worked top down, this chunky sweater works up quickly.
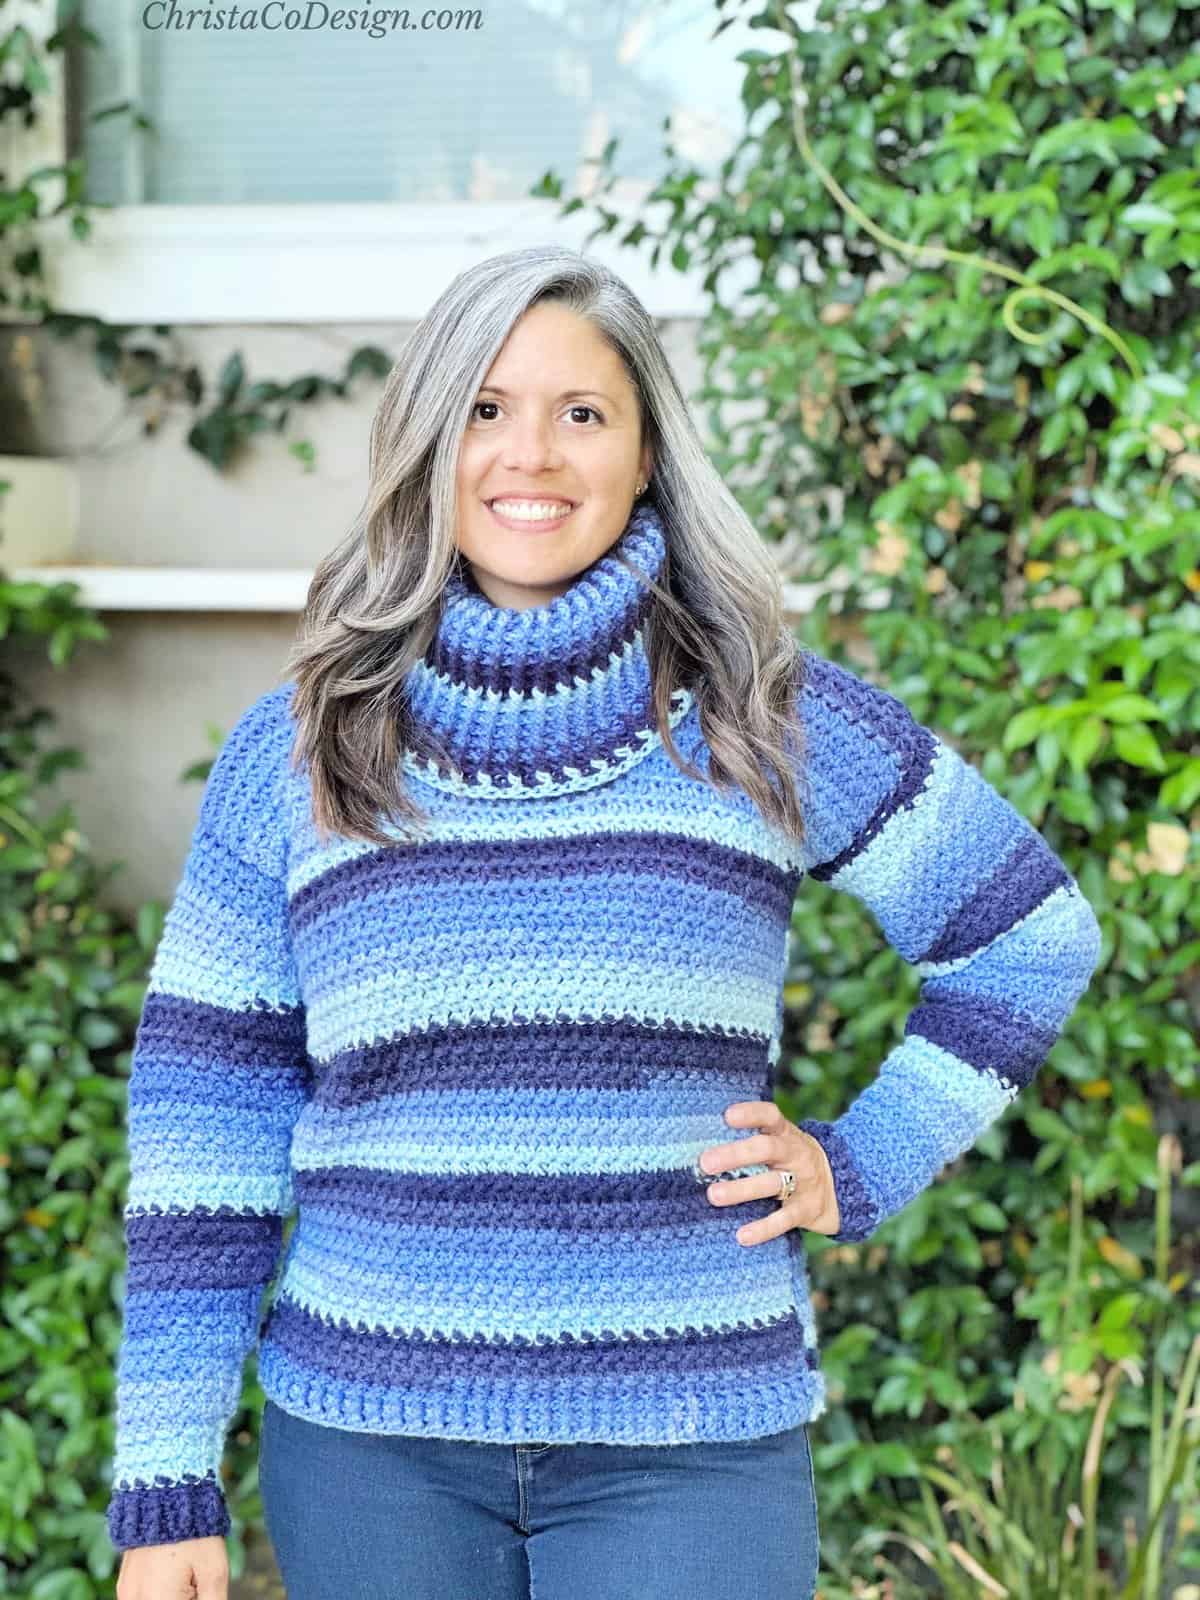
The Nebbia is a free crochet sweater pattern in sizes XS-5X. This is a raglan style pullover sweater and I’m so excited to introduce it to you.
The yarn I used for this one gives a cloudy halo effect. That’s why I chose to name this chunky sweater “Nebbia” which is Italian for “fog.”
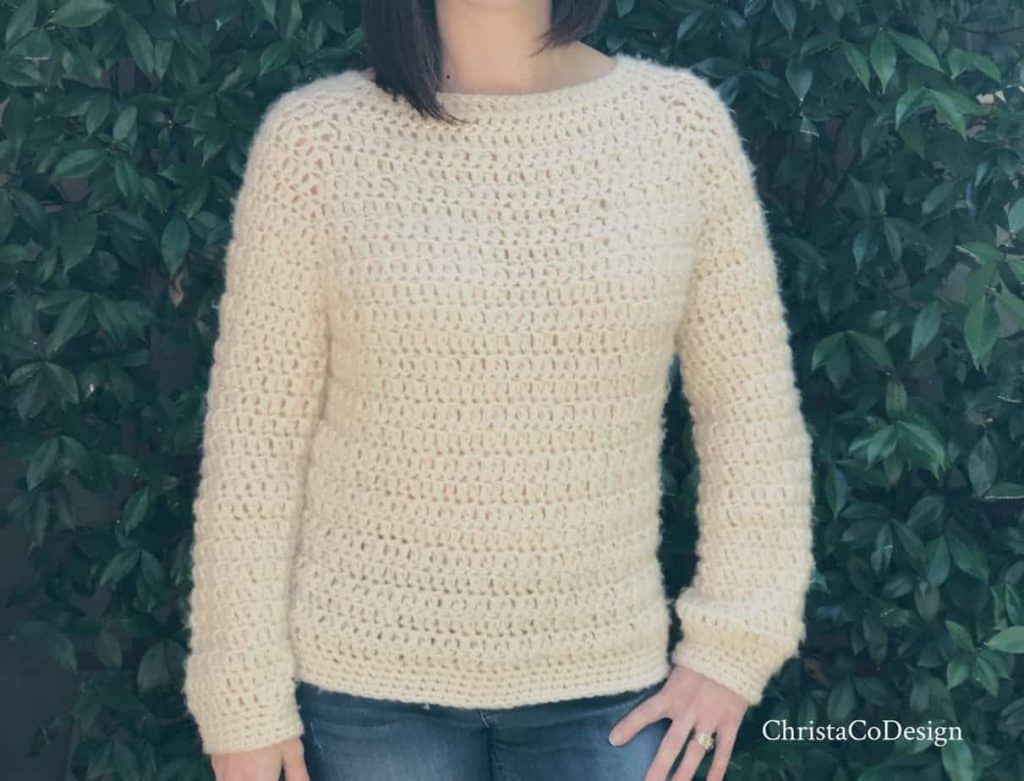
I really wanted to maximize on this brushed yarn. It’s gorgeous and the simple stitches showcase it.
I used an alternating front loop/back loop double crochet which allows plenty of movement and drape to show off this stunning yarn!
This chunky crochet sweater works up quickly in #5 bulky yarn. It’s a great crochet project for beginners or any crocheter who loves top down crochet sweaters.
You Can Purchase My Ad-Free PDF Patterns Here:
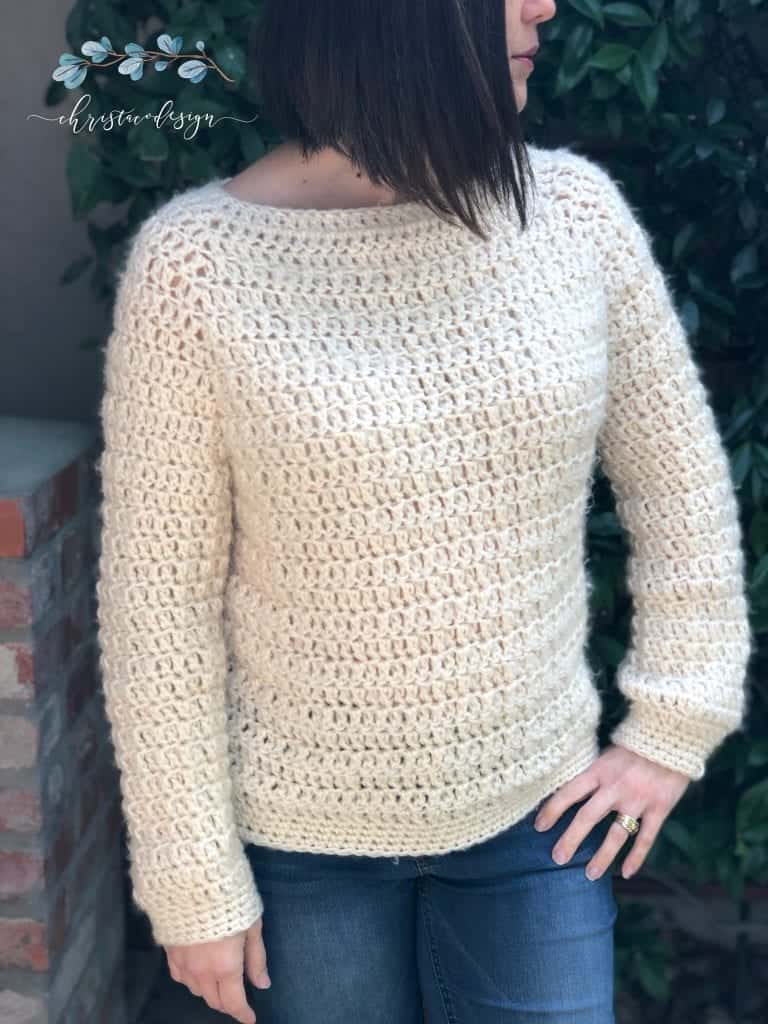
As you can see here I’ve styled it without another shirt, which is great for Spring since we have cool mornings and evenings.
In the winter I’ll have to add another layer too. I love the flexibility of this sweater for layering.
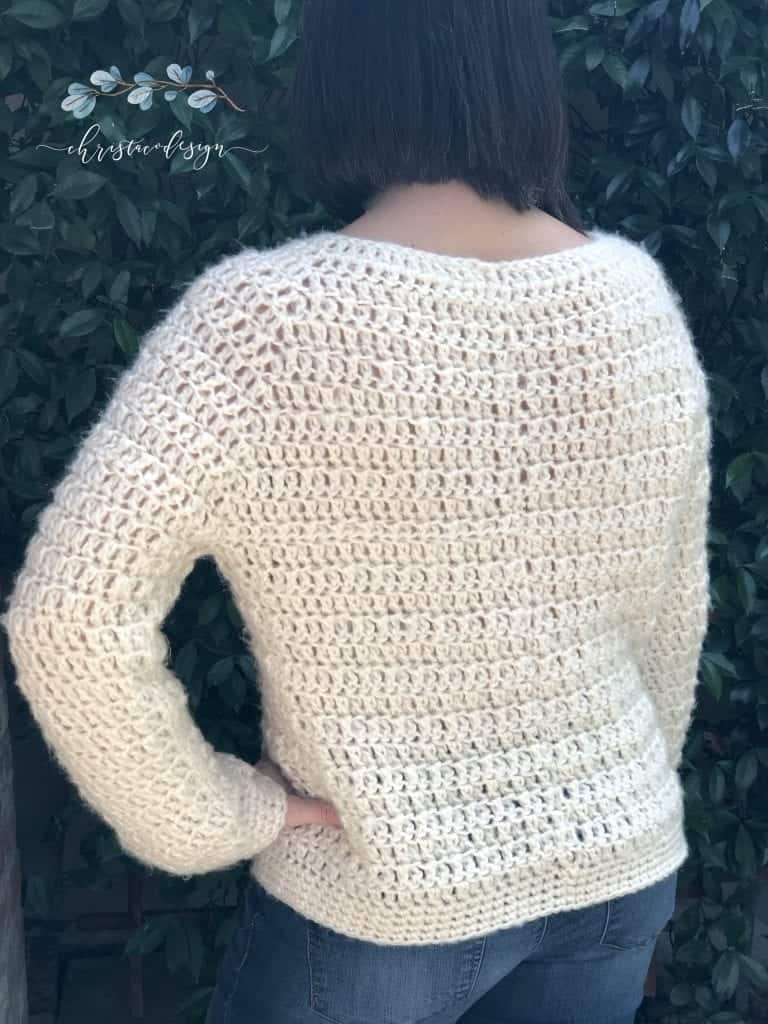
For this crochet sweater pattern I’ve included lots of notes and photos. Plus there’s even a video tutorial demonstrating how to divide the body and sleeves.
If you’ve never crocheted a top down sweater I know that can sound daunting, but it really is so easy. Many crocheters prefer this method.
More Free Crochet Patterns
The Briones Sweater pattern includes bobbles! And it works up in chunky #5 yarn too so it’s a quick sweater.
If you also knit and love a chunky weight yarn project the Giana Pocket Shawl is a cozy make that even beginners can tackle!
You can purchase the ad-free, well formatted PDF Pattern in one of my shops. Scroll down for the free pattern!
Save your favs!
Add this pattern to your Ravelry queue.
Materials
- #5 bulky yarn, I used Red Heart’s Dreamy in Ivory* {**note this yarn is mislabeled as a #4 med weight. See more.}
- Approximate yarn yardage/meters by size:
- (XS) 450 yd /411 m
- (S) 500 yd / 457 m
- (M) 625 yd / 572 m
- (L) 750 yd / 686 m
- (XL) 900 yd / 823 m
- (2X) 1100 yd / 1006 m
- (3X) 1600 yd / 1463 m
- (4X) 1700 yd / 1555 m
- (5X) 1800 yd / 1646 m
- 7 mm hook* US Size L crochet hook, or hook needed to meet gauge
- Yarn needle
- Measuring tape
- Scissors
Notes
- Pattern is divided into XS-2X and 3X-5X sections to start, then from the Body to the end pattern is written for all sizes.
- Ch 2 does not count as a st.
- Sweater is worked top down, raglan style.
- Each row is joined with a sl st and then turned to keep the seam straight.
- After each increase, move the stitch marker up to the next ch 1 space. This will be where you increase on the next row.
- From Row 4 and on use the alt dc (alternate double crochet): start with a flo dc, then a blo dc in the next st. You will always start a row with a flo dc and end a row with a blo dc. This stitch pattern requires an even stitch count.
- Watch for increases to change on some sizes, they are in bold.
- This sweater is worked in the round, however you will turn after joining each round so you will work on both sides. If you need to know how to join and turn here is a tutorial.
Stitches/Abbreviations
US Terms
Alt dc – alternate dc – start with a *{flo dc in next st, blo dc in next st}; row starts with a flo and ends with a blo. St needs an even st count.
ch(s) – chain(s)
dc – double crochet
fdc – Foundation double crochet-this is the recommended way to start top down garments, as it provides more ease, but chain start instructions are also included.
fhdc – foundation half double crochet
fsc – foundation single crochet
rep – repeat
sc – single crochet
sk – skip the indicated stitch
sl st – slip stitch
st(s) – stitch(es)
Gauge
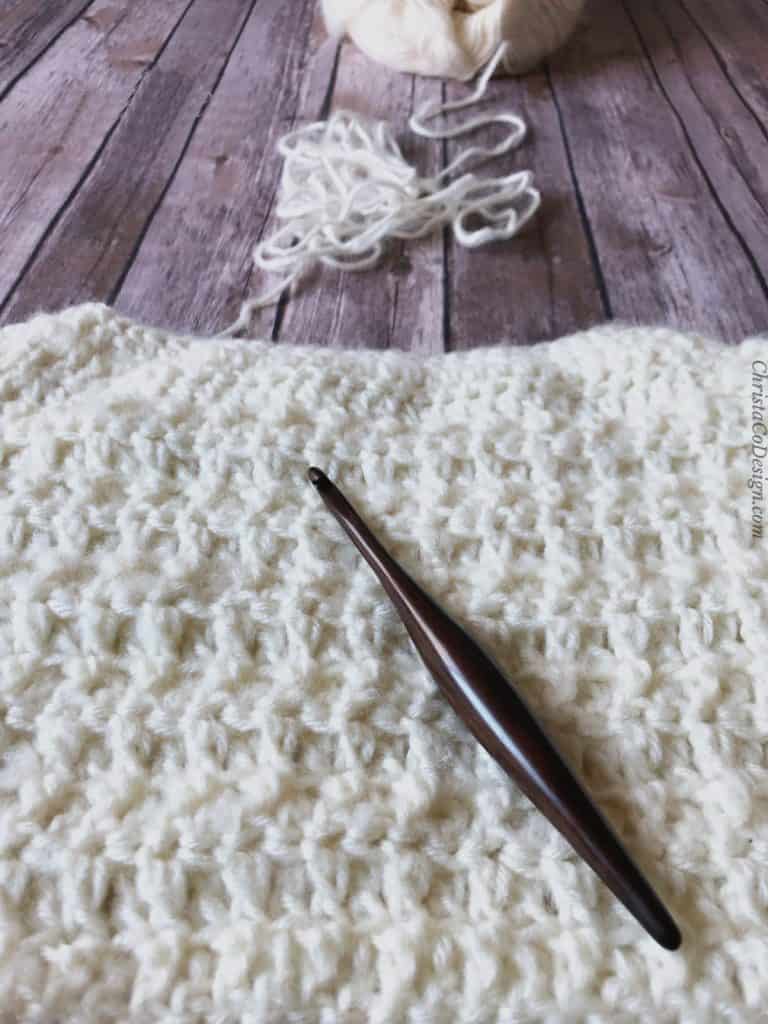
4” / 10 cm x 4” / 10 cm = 10 dc x 6 rows of dc
It is essential to work a gauge swatch and make any necessary adjustments before beginning your sweater. You want your garments to fit so take the time to check gauge!
Swatch
Fdc 12, OR Ch 14, dc in 3rd ch from hook and in each ch across, ch 2, turn.
Dc in same st and in each st across, ch 2, turn. (12) Repeat this row 5x.
Measure 4″ / 10 cm by 4″ / 10 cm in your swatch. If your measurements don’t match gauge, adjust your hook size.
Fit/Measurements
The Nebbia Sweater is comfortable and roomy with 2″/5cm-4″/10cm of ease added to bust measurements. The alternate dc stitch allows for plenty of movement. For an oversized fit, size up and for a more fitted sweater, size down.
To fit bust size
- (XS) 29″ / 73.5 cm
- (S) 34” / 86.5 cm
- (M) 38” / 96.5 cm
- (L) 41” / 104 cm
- (XL) 44” /112 cm
- (2X) 48″ / 122 cm
- (3X) 52” / 132 cm
- (4X) 58” /147.5 cm
- (5X) 62” / 157.5 cm
Finished bust size (includes 2″ / 5 cm – 4″ / 10 cm ease)
- (XS) 31″ / 78.5 cm
- (S) 36″ / 91.5 cm
- (M) 38″ / 96.5 cm
- (L) 43″ / 109 cm
- (XL) 46″ / 117 cm
- (2X) 50″ / 127 cm
- (3X) 54″ / 137 cm
- (4X) 62″ / 157.5 cm
- (5X) 65″ / 165 cm
Body Length from Neck to Hem
- (XS) 19″ / 48 cm
- (S) 20″ / 51 cm
- (M) 21″ / 53.5 cm
- (L) 22″ / 56 cm
- (XL) 23″ / 58 cm
- (2X) 24″ / 61 cm
- (3X) 25″ / 63.5 cm
- (4X) 26″ / 66 cm
- (5X) 27″ / 68.5 cm
Sleeve Length from Join
- (XS) 12.75″ / 32.5 cm
- (S) 13.5″ / 34.5 cm
- (M) 13.5″ / 34.5 cm
- (L) 14.75″ / 37.5 cm
- (XL) 14.75″ / 37.5 cm
- (2X) 15.5″ / 39.5 cm
- (3X) 15.5″ / 39.5 cm
- (4X) 16.25″ / 41.5 cm
- (5X) 16.25″ / 41.5 cm
To adjust fit for your needs:
(keep the stitch count even)
- add/subtract more stitches to the bust at raglan increases before dividing
- add/subtract more rows (or stitches) to the sleeves at any point
- lengthen/shorten torso by adding/subtracting rows before adding the hem
Nebbia Sweater Crochet Pattern
The Nebbia Chunky Crochet Sweater is an easy crochet sweater pattern in sizes XS-5X.
Materials
- #5 bulky yarn, I used Red Heart’s Dreamy in Ivory* {**note this yarn is mislabeled as a #4 med weight. See more.}
- Rec yds by size: (XS) 450, (S) 500, (M) 625, (L) 750, (XL) 900, (2X) 1100, (3X) 1600, (4X) 1700, (5X) 1800
Tools
- 7mm hook
- Yarn needle
- Measuring tape
- Scissors
Instructions
XS - 2X Pattern (3-5X scroll down)
Rnd 1. Fdc 11, fhdc 7, fsc 24, fhdc 7, fdc 11 OR ch 62 and dc in 3rd ch from your hook and in next 10 chs, hdc in next 7 chs, sc in next 24 chs, hdc in next 7 chs, dc in last 11 chs, sl st to first st to join, ch 2, turn. (60 sts)
Place a stitch marker in the 13th, 19th, 43rd and 49th stitches, these will be the increase stitches. To make increasing easier, continue to move the stitch marker up to the ch 1 sp made for each row.
Rnd 2. Dc in first 12 sts, (dc, ch 1, dc) in marked st, dc in next 5 sts, (dc, ch 1, dc) in ch 1 sp, dc in next 23 sts, (dc, ch 1, dc) in marked st, dc in next 5 sts, (dc, ch 1, dc) in marked st, dc in last 11 sts, sl st to first st to join, ch 2, turn. (68 sts)
Rnd 3. Dc in first 12 sts, (dc, ch 1, dc) in ch 1 sp, dc in next 7 sts, (dc, ch 1, dc) in ch 1 sp, dc in next 25 sts, (dc, ch 1, dc) in ch 1 sp, dc in next 7 sts, (dc, ch 1, dc) in ch 1 sp, dc in last 13 sts, sl st to first st to join, ch 2, turn. (76 sts)
From Rnd 4 and on use the alt dc (alternate double crochet): alternate between flo dc and blo dc. Continue in each row to blo dc into a flo dc and flo dc into a blo dc.
Rnd 4. Dc in first 14 sts, (dc, ch 1, dc) in ch 1 sp, dc in next 9 sts, (dc, ch 1, dc) in ch 1 sp, dc in next 27 sts, (dc, ch 1, dc) in ch 1 sp, dc in next 9 sts, (dc, ch 1, dc) in ch 1 sp, dc in last 13 sts, sl st to first st to join, ch 2, turn. (84 sts)
Rnd 5. Dc in first 14 sts, (dc, ch 1, dc) in ch 1 sp, dc in next 11 sts, (dc, ch 1, dc) in ch 1 sp, dc in next 29 sts, (dc, ch 1, dc) in ch 1 sp, dc in next 11 sts, (dc, ch 1, dc) in ch 1 sp, dc in last 15 sts, sl st to first st to join, ch 2, turn. (92 sts)
Rnd 6. Dc in first 16 sts, (dc, ch 1, dc) in ch 1 sp, dc in next 13 sts, (dc, ch 1, dc) in ch 1 sp, dc in next 31 sts, (dc, ch 1, dc) in ch 1 sp, dc in next 13 sts, (dc, ch 1, dc) in ch 1 sp, dc in last 15 sts, sl st to first st to join, ch 2, turn. (100 sts)
Rnd 7. Dc in first 16 sts, (dc, ch 1, dc) in ch 1 sp, dc in next 15 sts, (dc, ch 1, dc) in ch 1 sp, dc in next 33 sts, (dc, ch 1, dc) in ch 1 sp, dc in next 15 sts, (dc, ch 1, dc) in ch 1 sp, dc in last 17 sts, sl st to first st to join, ch 2, turn. (108 sts)
Rnd 8. Dc in first 18 sts, (dc, ch 1, dc) in ch 1 sp, dc in next 17 sts, (dc, ch 1, dc) in ch 1 sp, dc in next 35 sts, (dc, ch 1, dc) in ch 1 sp, dc in next 17 sts, (dc, ch 1, dc) in ch 1 sp, dc in last 17 sts, sl st to first st to join, ch 2, turn. (116 sts)
Rnd 9. Dc in first 18 sts, (dc, ch 1, dc) in ch 1 sp, dc in next 19 sts, (dc, ch 1, dc) in ch 1 sp, dc in next 37 sts, (dc, ch 1, dc) in ch 1 sp, dc in next 19 sts, (dc, ch 1, dc) in ch 1 sp, dc in last 19 sts, sl st to first st to join, ch 2, turn. (124 sts)
Rnd 10. Dc in first 20 sts, (dc, ch 1, dc) in ch 1 sp, dc in next 21 sts, (dc, ch 1, dc) in ch 1 sp, dc in next 39 sts, (dc, ch 1, dc) in ch 1 sp, dc in next 21 sts, (dc, ch 1, dc) in ch 1 sp, dc in last 19 sts, sl st to first st to join, ch 2, turn. (132 sts)
XS stop here & go to Body.
Rnd 11. Dc in first 20 sts, (dc, ch 1, dc) in ch 1 sp, dc in next 23 sts, (dc, ch 1, dc) in ch 1 sp, dc in next 41, (dc, ch 1, dc) in ch 1 sp, dc in next 23 sts, (dc, ch 1, dc) in ch 1 sp, dc in last 21 sts, sl st to first st to join, ch 2, turn. (140 sts)
Rnd 12. Dc in first 22 sts, (dc, ch 1, dc) in ch 1 sp, dc in next 25 sts, (dc, ch 1, dc) in ch 1 sp, dc in next 43 sts, (dc, ch 1, dc) in ch 1 sp, dc in next 25 sts, (dc, ch 1, dc) in ch 1 sp, dc in last 21 sts, sl st to first st to join, ch 2, turn. (148 sts)
S stop here & go to Body.
Rnd 13. Dc in first 22 sts, (dc, ch 1, dc) in ch 1 sp, dc in next 27 sts, (dc, ch 1, dc) in ch 1 sp, dc in next 45 sts, (dc, ch 1, dc) in ch 1 sp, dc in next 27 sts, (dc, ch 1, dc) in ch 1 sp, dc in last 23 sts, sl st to first st to join, ch 2, turn. (156 sts)
M stop here & go to Body.
Rnd 14. Dc in first 24 sts, (2dc, ch 1, 2dc) in ch 1 sp, dc in next 29 sts, (2dc, ch 1, 2dc) in ch 1 sp, dc in next 47 sts, (2dc, ch 1, 2dc) in ch 1 sp, dc in next 29 sts, (2dc, ch 1, 2dc) in ch 1 sp, dc in last 23 sts, sl st to first st to join, ch 2, turn. (172 sts)
L stop here & go to Body.
Rnd 15. Dc in first 25 sts, (2dc, ch 1, 2dc) in ch 1 sp, dc in next 33 sts, (2dc, ch 1, 2dc) in ch 1 sp, dc in next 51 sts, (2dc, ch 1, 2dc) in ch 1 sp, dc in next 33 sts, (2dc, ch 1, 2dc) in ch 1 sp, dc in last 26 sts, sl st to first st to join, ch 2, turn. (188 sts)
XL stop here & go to Body.
Rnd 16. Dc in first 28 sts, (2 dc, ch 1, 2 dc) in ch 1 sp, dc in next 37 sts, (2 dc, ch 1, 2 dc) in ch 1 sp, dc in next 55 sts, (2 dc, ch 1, 2 dc) in ch 1 sp, dc in next 37 sts, (2 dc, ch 1, 2 dc) in ch 1 sp, dc in last 27 sts, sl st to first st to join, ch 2, turn. (204 sts)
2X stop here & go to Body.
3X - 5X
Rnd 1. Fdc 13, fhdc 8, fsc 26, fhdc 8, fdc 13 OR ch 70 and dc in 3rd ch from your hook and in next 12 chs, hdc in next 8 chs, sc in next 26 chs, hdc in next 8 chs, dc in last 13 chs, sl st to first st to join, ch 2, turn. (68 sts) Place a stitch marker in the 14th, 22nd, 48th and 56th stitches, these will be the increase stitches. To make increasing easier, continue to move the stitch marker up to the ch 1 sp made for each row.
Rnd 2. Dc in first 13 sts, (dc, ch 1, dc) in marked st, dc in next 7 sts, (dc, ch 1, dc) in marked st, dc in next 25 sts, (dc, ch 1, dc) in marked st, dc in next 7 sts, (dc, ch 1, dc) in marked st, dc in last 12 sts, sl st to first st to join, ch 2, turn. (76 sts)
Rnd 3. Dc in first 13 sts, (dc, ch 1, dc) in ch 1 sp, dc in next 9 sts, (dc, ch 1, dc) in ch 1 sp, dc in next 27 sts, (dc, ch 1, dc) in ch 1 sp, dc in next 9 sts, (dc, ch 1, dc) in ch 1 sp, dc in last 14 sts, sl st to first st to join, ch 2, turn. (84 sts) * From Rnd 4 and on use the alt dc (alternate double crochet): alternate between flo dc and blo dc. Continue in each row to blo dc into a flo dc and flo dc into a blo dc.
Rnd 4. Dc in first 15 sts, (dc, ch 1, dc) in ch 1 sp, dc in next 11 sts, (dc, ch 1, dc) in ch 1 sp, dc in next 29 sts, (dc, ch 1, dc) in ch 1 sp, dc in next 11 sts, (dc, ch 1, dc) in ch 1 sp, dc in last 14 sts, sl st to first st to join, ch 2, turn. (92 sts)
Rnd 5. Dc in first 15 sts, (dc, ch 1, dc) in ch 1 sp, dc in next 13 sts, (dc, ch 1, dc) in ch 1 sp, dc in next 31 sts, (dc, ch 1, dc) in ch 1 sp, dc in next 13 sts, (dc, ch 1, dc) in ch 1 sp, dc in last 16 sts, sl st to first st to join, ch 2, turn. (100 sts)
Rnd 6. Dc in first 17 sts, (dc, ch 1, dc) in ch 1 sp, dc in next 15 sts, (dc, ch 1, dc) in ch 1 sp, dc in next 33 sts, (dc, ch 1, dc) in ch 1 sp, dc in next 15 sts, (dc, ch 1, dc) in ch 1 sp, dc in last 16 sts, sl st to first st to join, ch 2, turn. (108 sts)
Rnd 7. Dc in first 17 sts, (dc, ch 1, dc) in ch 1 sp, dc in next 17 sts, (dc, ch 1, dc) in ch 1 sp, dc in next 35 sts, (dc, ch 1, dc) in ch 1 sp, dc in next 17 sts, (dc, ch 1, dc) in ch 1 sp, dc in last 18 sts, sl st to first st to join, ch 2, turn. (116 sts)
Rnd 8. Dc in first 19 sts, (dc, ch 1, dc) in ch 1 sp, dc in next 19 sts, (dc, ch 1, dc) in ch 1 sp, dc in next 37 sts, (dc, ch 1, dc) in ch 1 sp, dc in next 19 sts, (dc, ch 1, dc) in ch 1 sp, dc in last 18 sts, sl st to first st to join, ch 2, turn. (124 sts)
Rnd 9. Dc in first 19 sts, (dc, ch 1, dc) in ch 1 sp, dc in next 21 sts, (dc, ch 1, dc) in ch 1 sp, dc in next 39 sts, (dc, ch 1, dc) in ch 1 sp, dc in next 21 sts, (dc, ch 1, dc) in ch 1 sp, dc in last 20 sts, sl st to first st to join, ch 2, turn. (132 sts)
Rnd 10. Dc in first 21 sts, (2 dc, ch 1, 2 dc) in ch 1 sp, dc in next 23 sts, (2 dc, ch 1, 2 dc) in ch 1 sp, dc in next 41, (2 dc, ch 1, 2 dc) in ch 1 sp, dc in next 23 sts, (2 dc, ch 1, 2 dc) in ch 1 sp, dc in last 20 sts, sl st to first st to join, ch 2, turn. (148 sts)
Rnd 11. Dc in first 22 sts, (2 dc, ch 1, 2 dc) in ch 1 sp, dc in next 27 sts, (2 dc, ch 1, 2 dc) in ch 1 sp, dc in next 45 sts, (2 dc, ch 1, 2 dc) in ch 1 sp, dc in next 27 sts, (2 dc, ch 1, 2 dc) in ch 1 sp, dc in last 23 sts, sl st to first st to join, ch 2, turn. (164 sts)
Rnd 12. Dc in first 25 sts, (2 dc, ch 1, 2 dc) in ch 1 sp, dc in next 31 sts, (2 dc, ch 1, 2 dc) in ch 1 sp, dc in next 49 sts, (2 dc, ch 1, 2 dc) in ch 1 sp, dc in next 31 sts, (2 dc, ch 1, 2 dc) in ch 1 sp, dc in last 24 sts, sl st to first st to join, ch 2, turn. (180 sts)
Rnd 13. Dc in first 26 sts, (2 dc, ch 1, 2 dc) in ch 1 sp, dc in next 35 sts, (2 dc, ch 1, 2dc) in ch 1 sp, dc in next 53 sts, (2 dc, ch 1, 2 dc) in ch 1 sp, dc in next 35 sts, (2 dc, ch 1, 2 dc) in ch 1 sp, dc in last 27 sts, sl st to first st to join, ch 2, turn. (196 sts)
Rnd 14. Dc in first 29 sts, (2 dc, ch 1, 2 dc) in ch 1 sp, dc in next 39 sts, (2 dc, ch 1, 2 dc) in ch 1 sp, dc in next 57 sts, (2 dc, ch 1, 2 dc) in ch 1 sp, dc in next 39 sts, (2 dc, ch 1, 2 dc) in ch 1 sp, dc in last 28 sts, sl st to first st to join, ch 2, turn. (212 sts)
Rnd 15. Dc in first 30 sts, (2 dc, ch 1, 2 dc) in ch 1 sp, dc in next 43 sts, (2 dc, ch 1, 2 dc) in ch 1 sp, dc in next 61 sts, (2 dc, ch 1, 2 dc) in ch 1 sp, dc in next 43 sts, (2 dc, ch 1, 2 dc) in ch 1 sp, dc in last 31 sts, sl st to first st to join, ch 2, turn. (228 sts) 3X Stop here & go to Body.
Rnd 16. Dc in first 33 sts, (3 dc, ch 1, 3 dc) in ch 1 sp, dc in next 47 sts, (3 dc, ch 1, 3 dc) in ch 1 sp, dc in next 65 sts, (3 dc, ch 1, 3 dc) in ch 1 sp, dc in next 47 sts, (3 dc, ch 1, 3 dc) in ch 1 sp, dc in last 32 sts, sl st to first st to join, ch 2, turn. (252 sts) 4X Stop here & go to Body.
Rnd 17. Dc in first 35 sts, (2 dc, ch 1, 2 dc) in ch 1 sp, dc in next 53 sts, (2 dc, ch 1, 2 dc) in ch 1 sp, dc in next 71 sts, (2 dc, ch 1, 2 dc) in ch 1 sp, dc in next 53 sts, (2 dc, ch 1, 2 dc) in ch 1 sp, dc in last 36 sts, sl st to first st to join, ch 2, turn. (268 sts) 5X Stop here & go to Body.
Body
All sizes, written as XS (S, M, L, XL, 2X, 3X, 4X, 5X)
Row count starts over.
Ch 1 from the increases count as a st.
To divide: Match up your first & last sk sts, sl st these together and remember to place 1 dc in each as they count as stitches. It is a good idea to try it on to check for fit.
Once divided you’ll need an even number of stitches on the body and both sleeves to continue the flo/blo dc pattern.
Video Tutorial
Check out the Nebbia Sweater Video for how to divide the body & sleeves.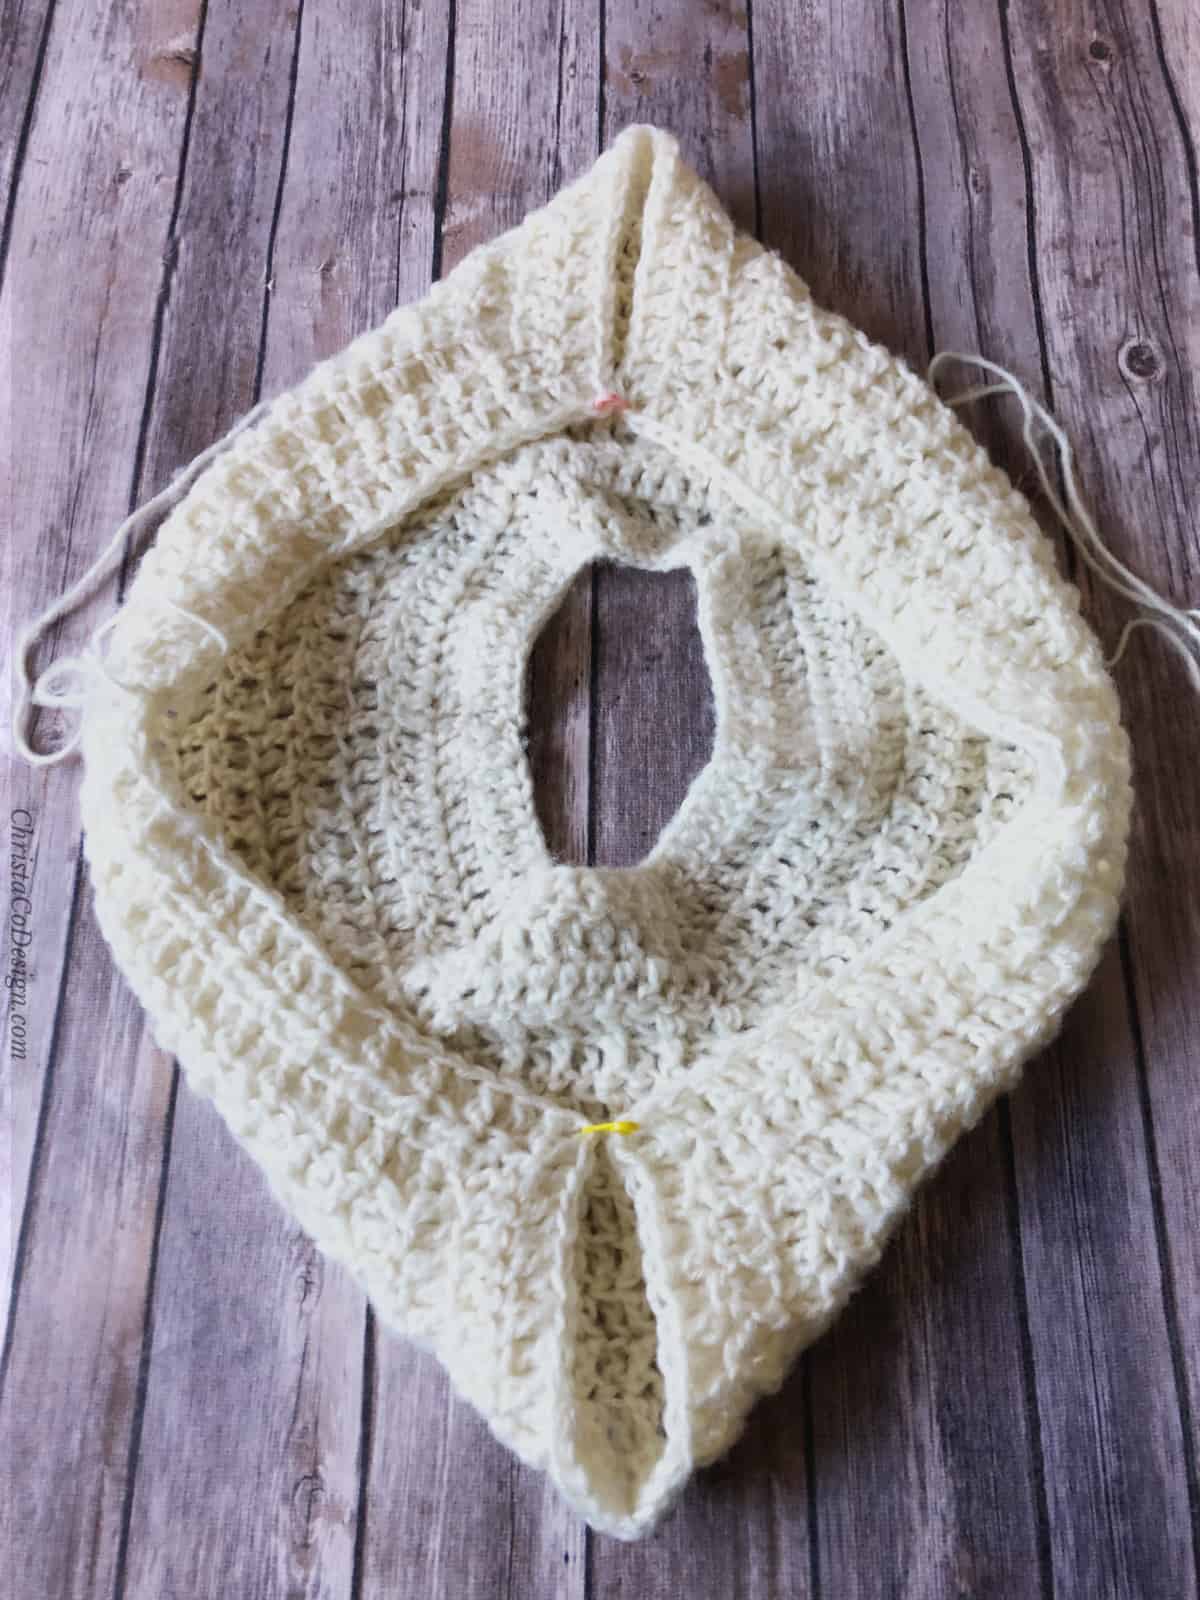 Picture of sweater with body up. Sleeve stitches have been counted and clipped together with a yellow stitch marker, to be skipped on the first round of dividing the body and sleeves.
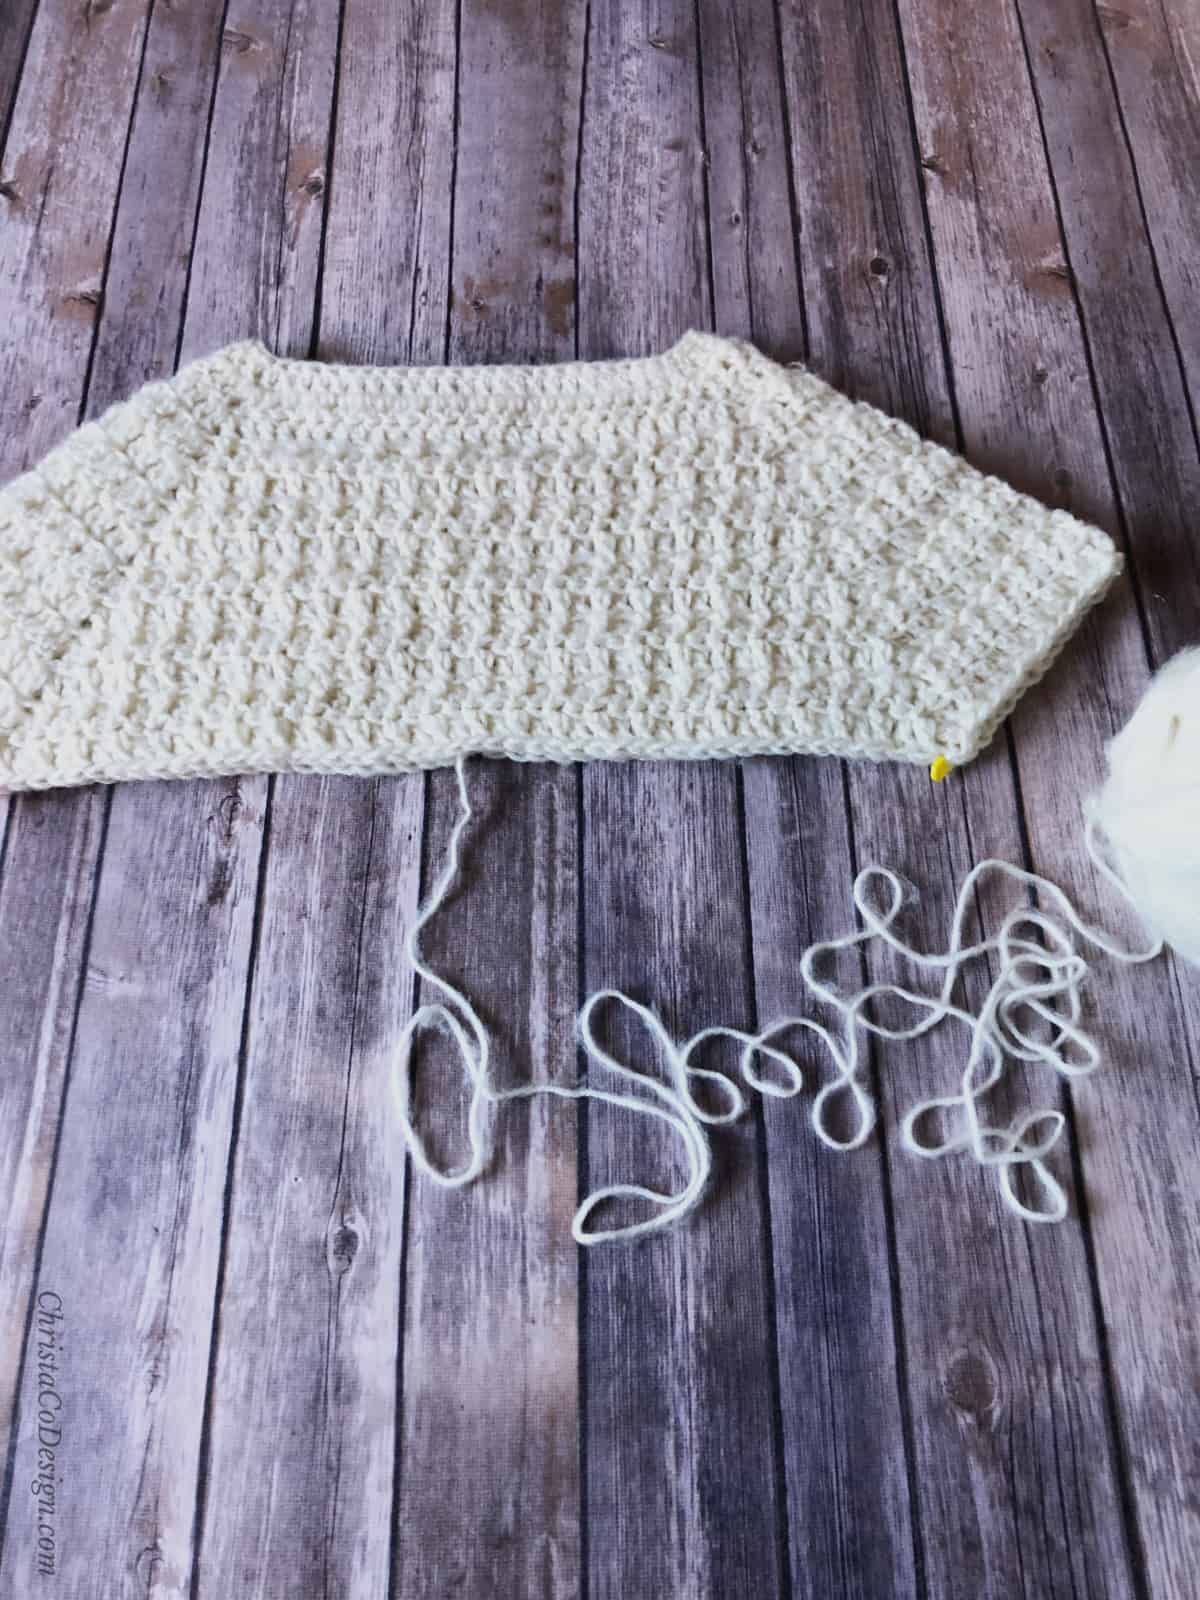 Picture of sweater flat. Sleeve stitches have been marked off with a yellow stitch marker-to be skipped on the next round.
Rnd 1. Dc in first 20 (23, 24, 27, 29, 31, 34, 38, 40) sts, sk next 26 (28, 30, 32, 36, 40, 46, 50, 54) sts (sleeve sts), dc in next 40 (46, 48, 54, 58, 62, 68, 76, 80) sts, sk next 26 (28, 30, 32, 36, 40, 46, 50, 54) sts (sleeve sts), dc in last 20 (23, 24, 27, 29, 31, 34, 38, 40) sts, sl st to first st to join, ch 2, turn.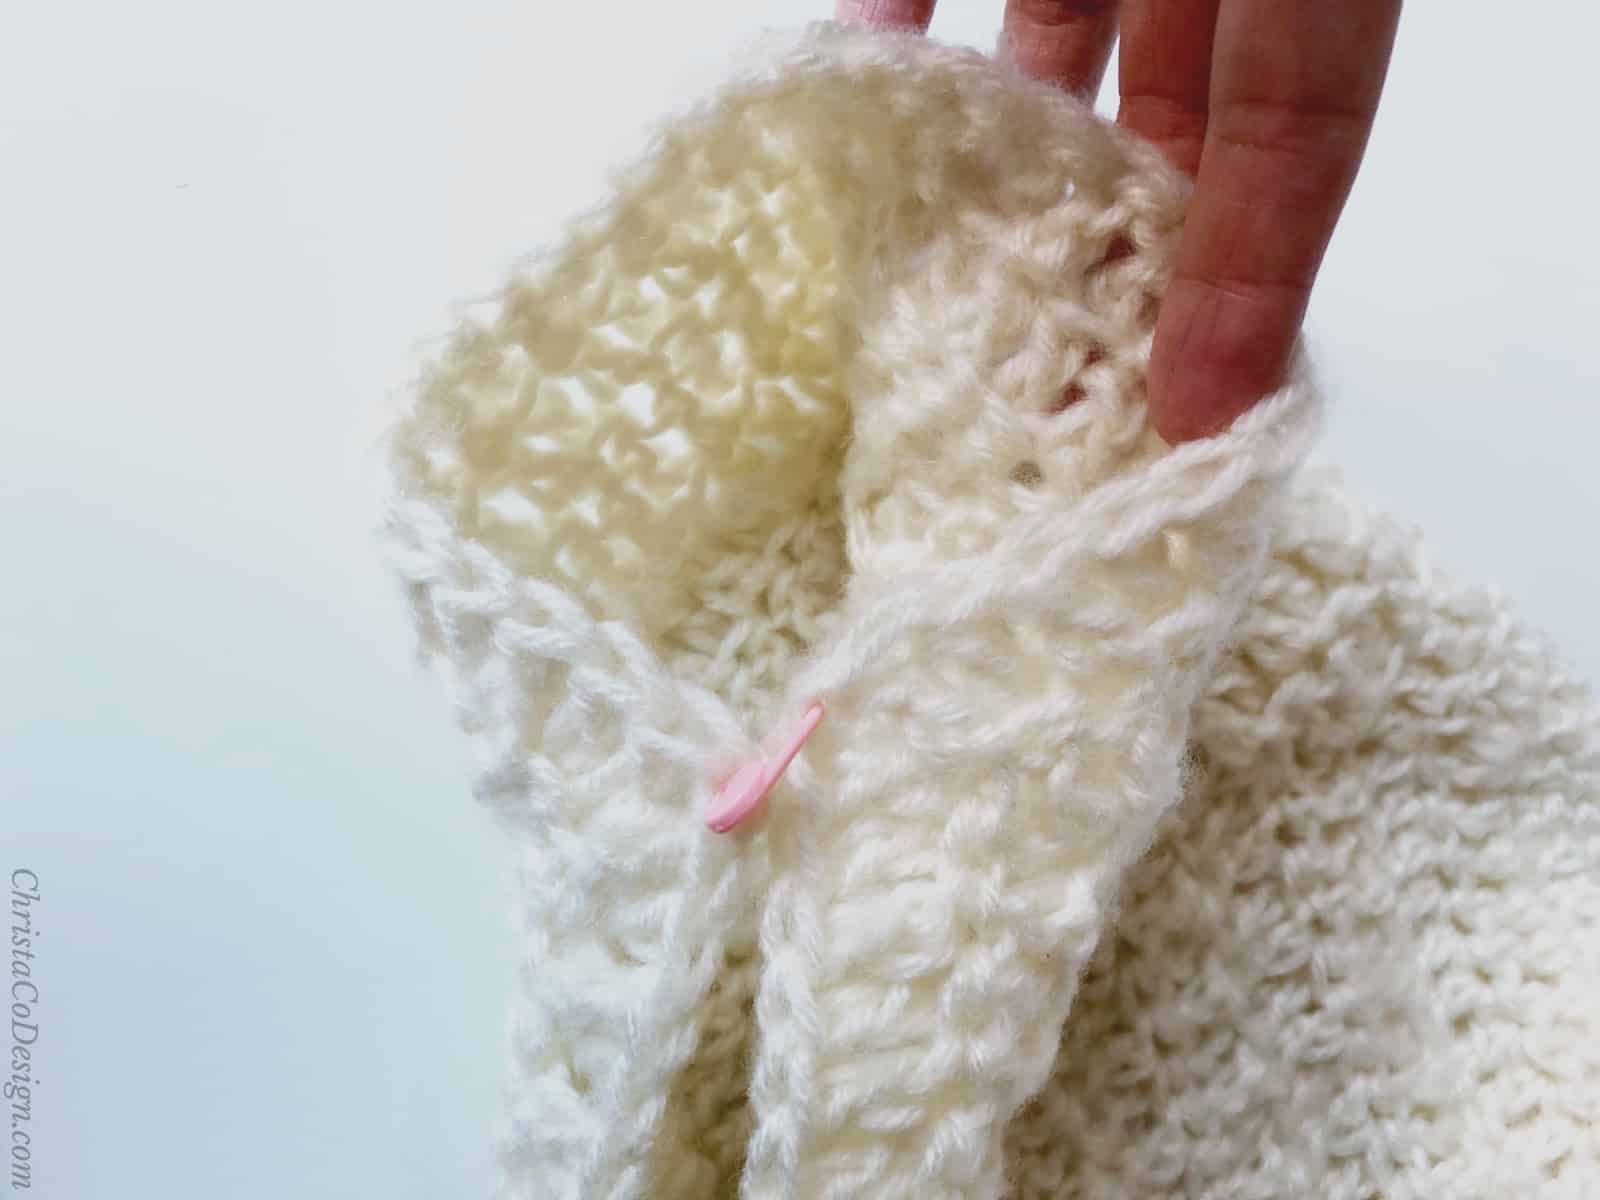 Picture of skipped sleeves stitches held up. They’re counted and clipped with a pink stitch marker.
XS: 132 sts divided into 80 body sts, 26 ea sleeve sts
S: 148 sts divided into 92 body sts, 28 ea sleeve sts
M: 156 sts divided into 96 body sts, 30 ea sleeve sts
L: 172 sts divided into 108 body sts, 32 ea sleeve sts
XL: 188 sts divided into 116 body sts, 36 ea sleeve sts
2X: 204 sts divided into 124 body sts, 40 ea sleeve sts
3X: 228 sts divided into 136 body sts, 46 ea sleeve sts
4X: 252 sts divided into 152 body sts, 50 ea sleeve sts
5X: 268 sts divided into 160 body sts, 54 ea sleeve sts
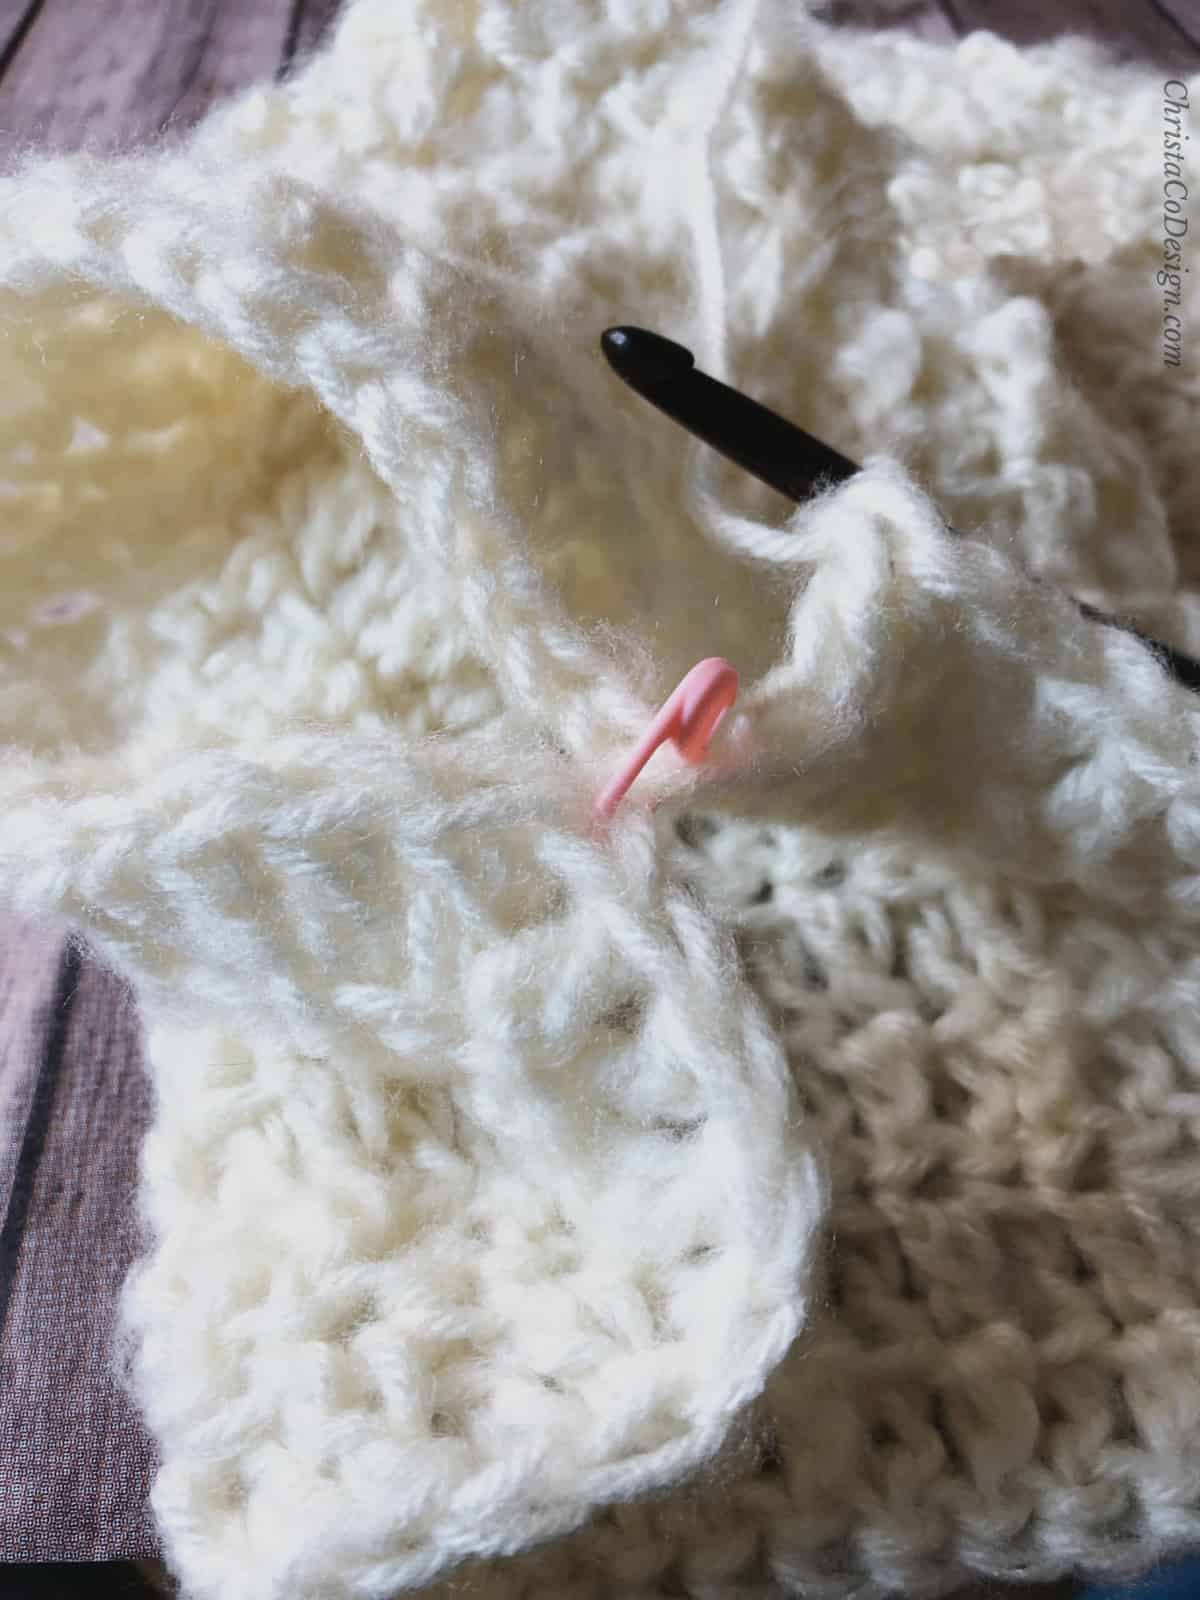 Picture shows crocheting around for the body, but skipping the sleeves stitches-which are clipped together with a pink stitch marker.
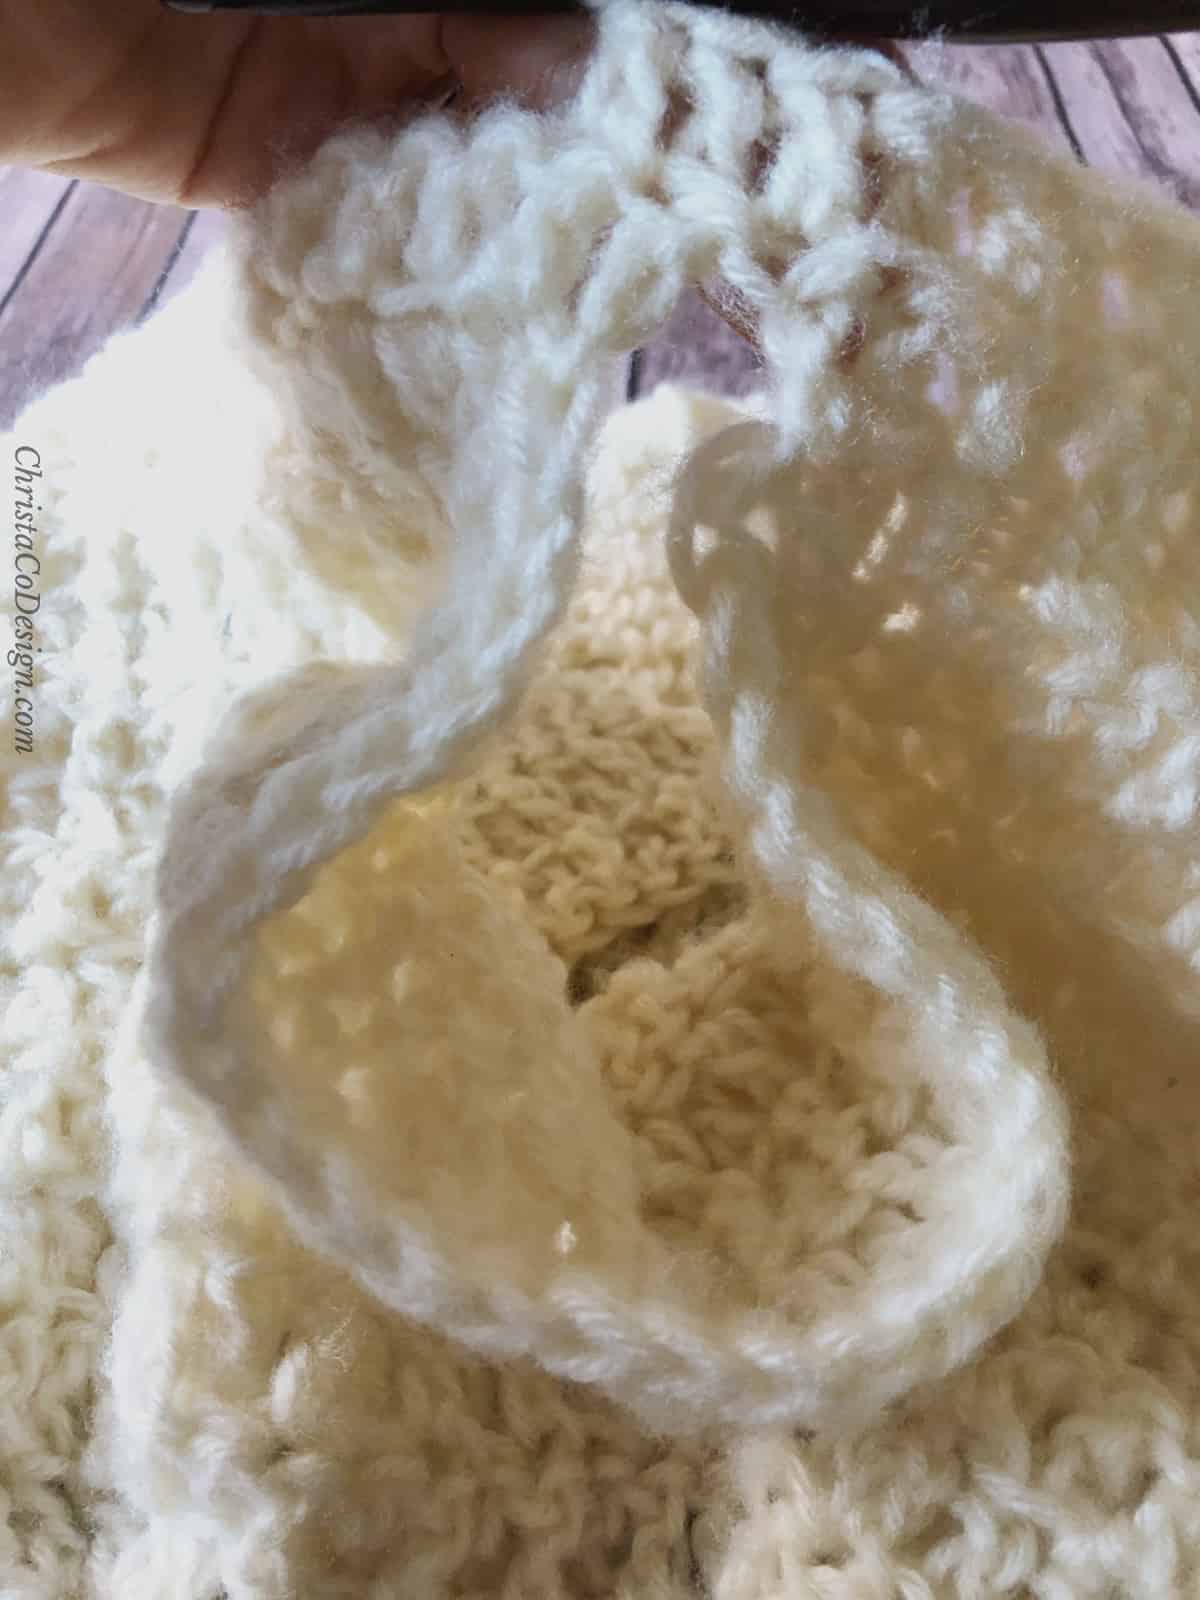 Picture shows the underarm (upside down) where body has been divided and Rnd 1 crocheted around. The sleeve stitches have been skipped. Later you will join and add on the sleeves.
Rnd 2. Dc in each st around, sl st to first st to join, ch 2, turn. (80, 92, 96, 108, 116, 124, 136, 152, 160 sts)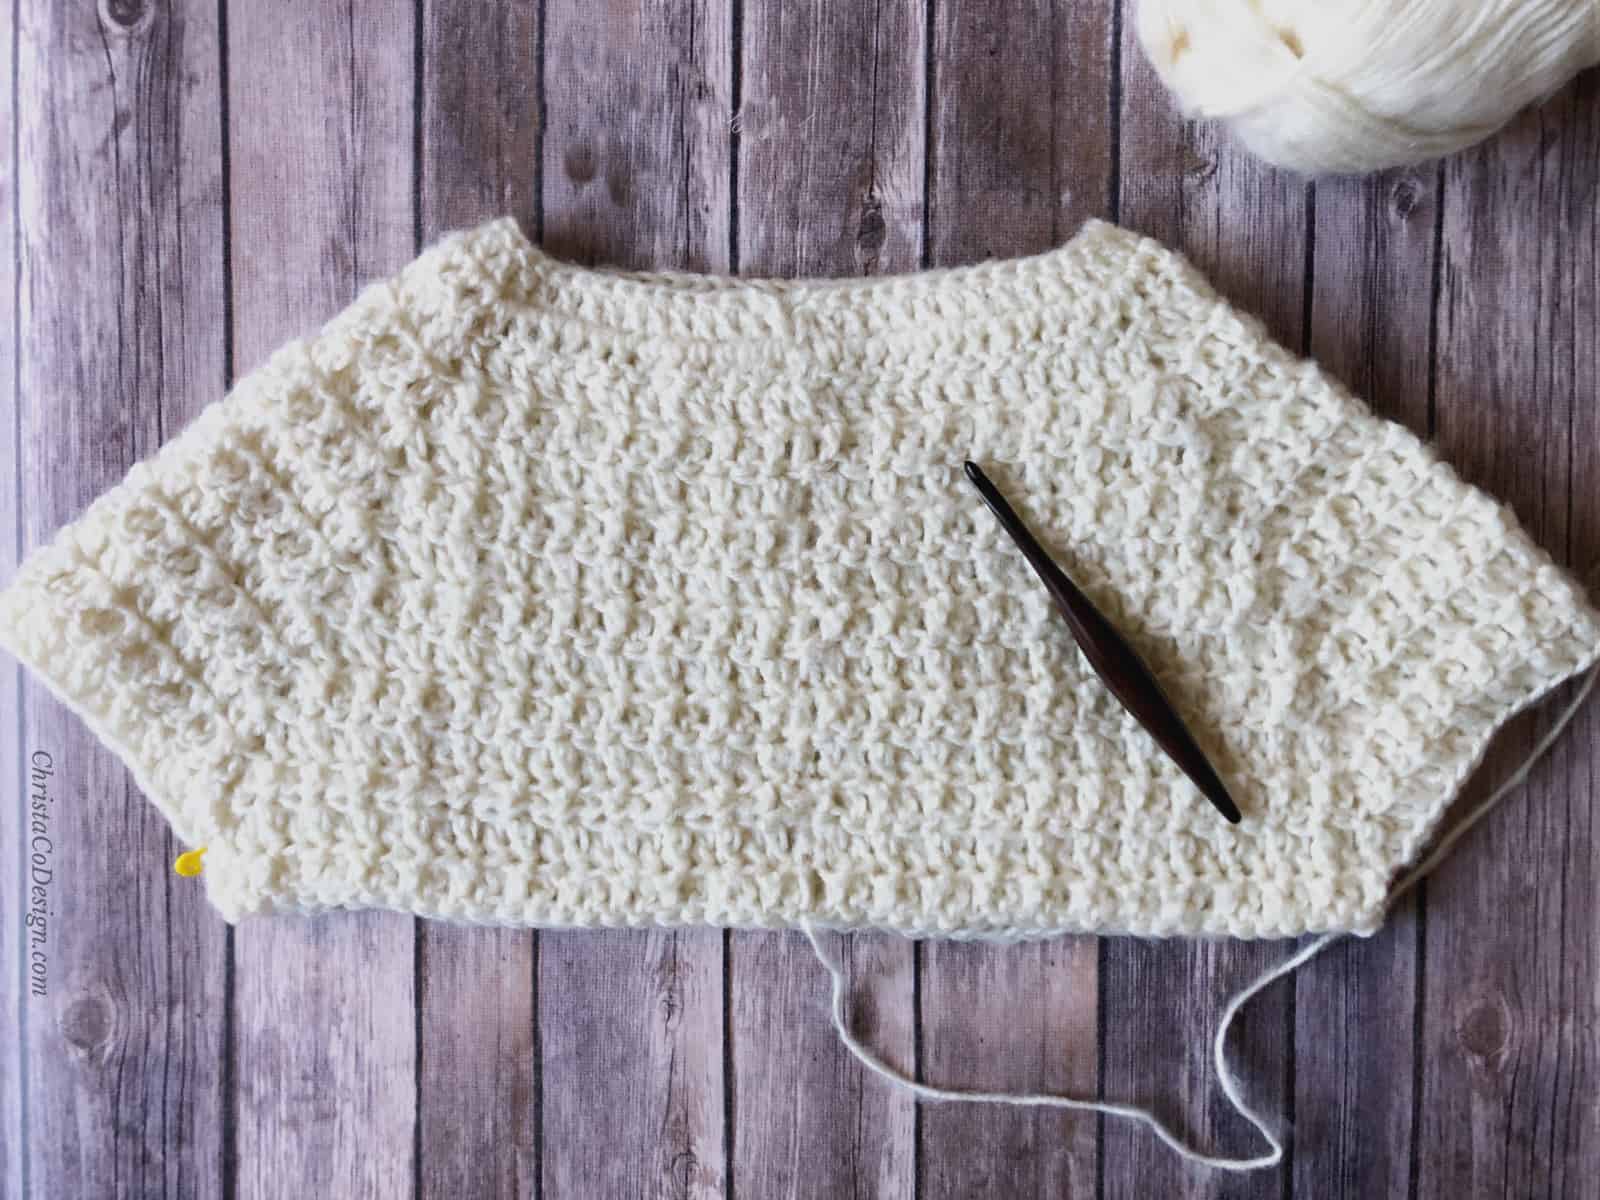 Picture shows sweater flat. Body is now divided and you will work around to complete the length. The sleeve stitches have been skipped. Later you will come back, join yarn at the underarm and crochet around to create the sleeves.
Rep last row for 10 (11, 12, 13, 14, 15, 16, 17, 18) more rows or 19 (20, 21, 22, 23, 24, 25, 26, 27)” or to desired length. Hem adds 1.5."
Hem
Ch 1, sc in same st and in each st around, sl st to first st to join, turn. Repeat last row for 4 rows total or 1.5” Fasten off & weave in ends.
Sleeves
Row count starts over.
Join yarn with sl st to the last st on the underside of sleeve. Sl st first and last st of sleeve together. Be sure to place a dc in each of these sts, as they count as sleeve stitches. There will be a small gap in the armpit, when finishing we will sew this closed.
Continue working in alternate flo/blo dc for the sleeves, except during the decrease section.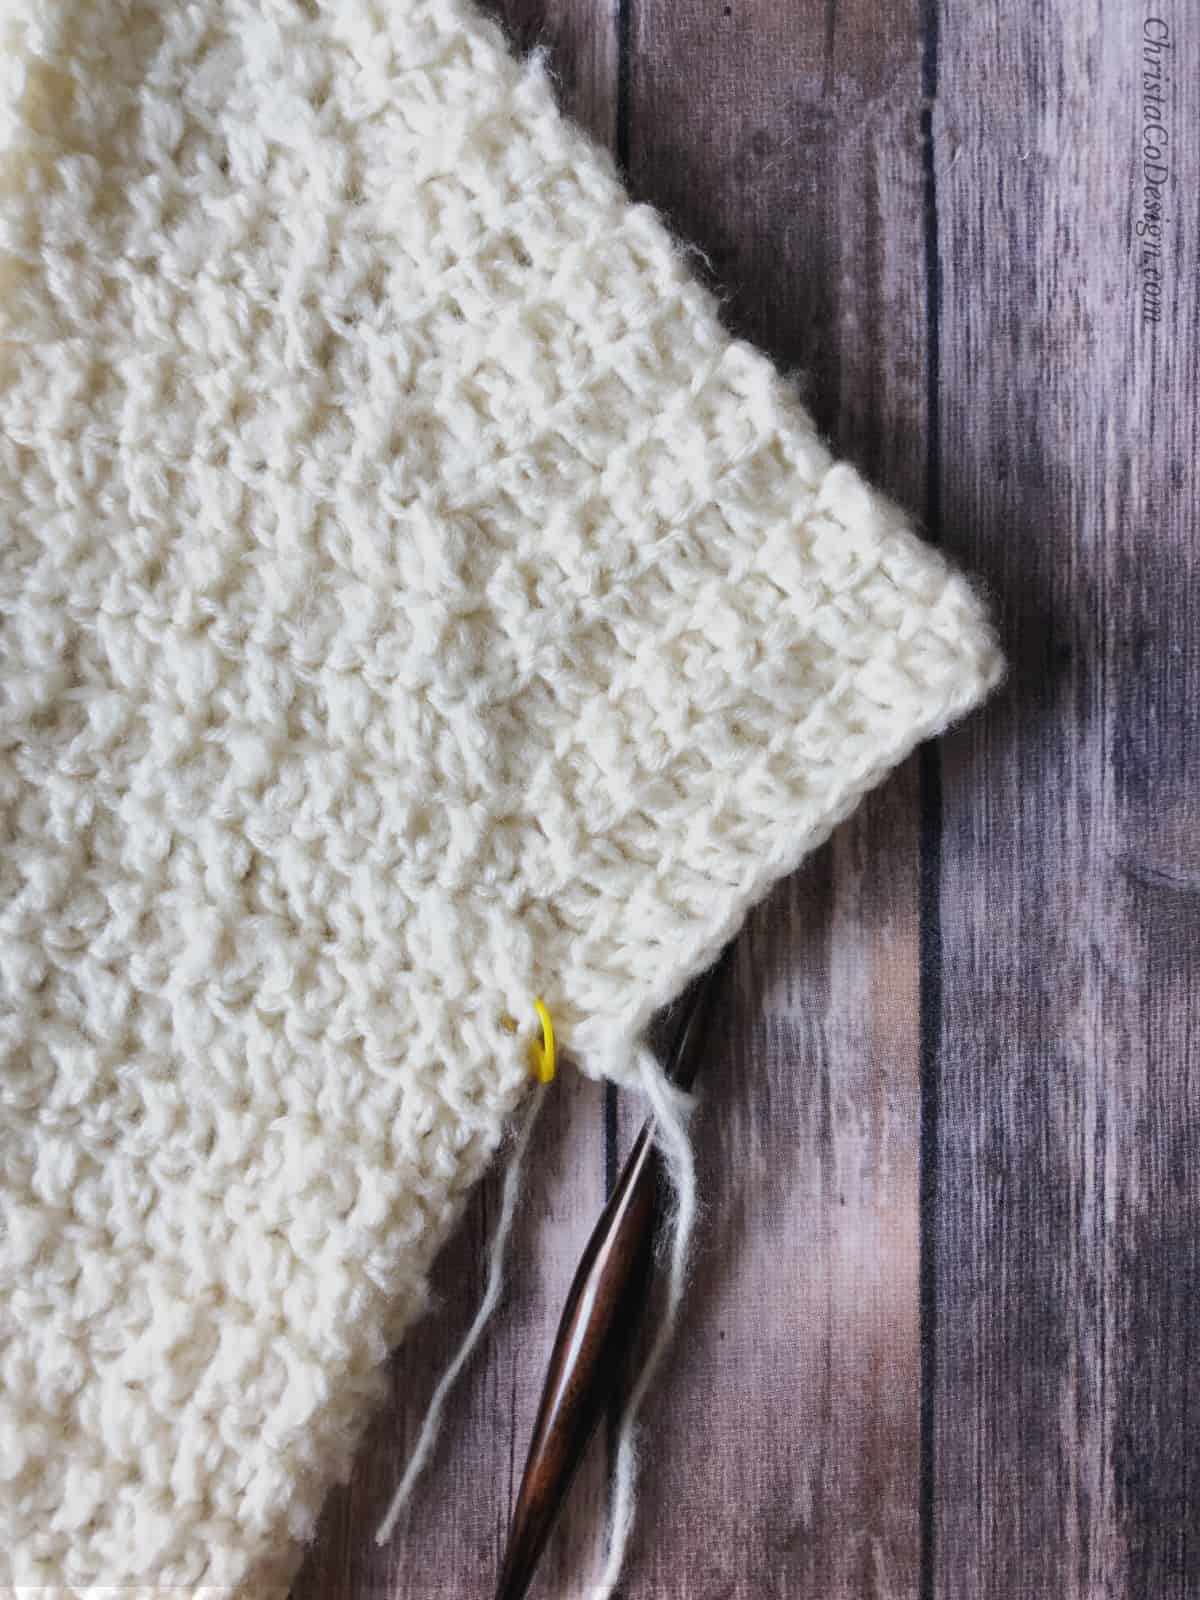 Picture shows yarn joined at underarm and first round crocheted of the sleeve.
Rnd 1. Ch 2, dc in same st and in each st around, sl st to 1st st to join, turn. (26, 28, 30, 32, 36, 40, 46, 50, 54 sts)
Rep Rnd 1 for 14 (15, 15, 16, 16, 17, 17, 18, 18) more rows (from the divide) or for 10 (11, 11, 12, 12, 13, 13, 14, 14)”
Decrease
Start the decrease about 3” above where you want your sleeve to end. I would recommend decreasing under both loops and not in flo/blo alternate dc.
XS Rnd 16. Ch 2, *{dc in 11 sts, dc2tog} rep from * again, sl st to first st to join, turn. (24 sts) Go to XS-L
S Rnd 17. Ch 2, *{dc in 5 sts, dc2tog} rep from * around, sl st to first st to join, turn. (24 sts) Go to XS-L
M Rnd 17. Ch 2, *{dc in 3 sts, dc2tog} rep from * around, sl st to first st to join, turn. (24 sts) Go to XS-L
L Rnd 18. Ch 2, *{dc in 6 sts, dc2tog} rep from * around, sl st to first st to join, turn. (28 sts)
Rnd 19. Ch 2, *{dc in 5 sts, dc2tog} rep from * around, sl st to first st to join, turn. (24 sts) Go to XS-L
XS - L
Next Rnd. Ch 2, *{dc in 4 sts, dc2tog} rep from * around, sl st to first st to join, turn. (20 sts)=8” Go to Cuff
XL Rnd 18. Ch 2, *{dc in 4 sts, dc2tog} rep from * around, sl st to first st to join, turn. (30 sts)
Rnd 19. Ch 2, *{dc in 3 sts, dc2tog} rep from * around, sl st to first st to join, turn. (24 sts)
Rnd 20. Rep Rnd 18. (20 sts)=8” Go to Cuff
2X Rnd 19. Ch 2, *{dc in 8 sts, dc2tog} rep from * around, sl st to first st to join, turn. (36 sts)
Rnd 20. Ch 2, *{dc in 4 sts, dc2tog} rep from * around, sl st to first st to join, turn. (30 sts)
Rnd 21. Ch 2, *{dc in 3 sts, dc2tog} rep from * around, sl st to first st to join, turn. (24 sts)=9.6” Go to Cuff
3X Rnd 19. Ch 2, *{dc in 21 sts, dc2tog} rep from * again, sl st to first st to join, turn. (44 sts) Go to 3X-5X
4X Rnd 20. Ch 2, *{dc in 8 sts, dc2tog} rep from * until 10 sts left, dc in 7 sts, dc3tog, sl st to first st to join, turn. (44 sts) Go to 3X-5X
5X Rnd 20. Ch 2, *{dc in 4 sts, dc2tog} rep from * until 6 sts left, dc in 3 sts, dc3tog, sl st to first st to join, turn. (44 sts) Go to 3X-5X
3X - 5X
Next Rnd. Ch 2, *{dc in 2 sts, dc2tog} rep from * until 4 sts left, dc in 1 st, dc3tog, sl st to first st to join, turn. (32 sts)
Last Rnd. Ch 2, *{dc in 2 sts, dc2tog} rep from * around, sl st to first st to join, turn. (24 sts)=9.6” Go to Cuff
Cuff
Ch 1, sc in the same and in ea st around, sl st to first st to join, turn.
Repeat last row for 4 rows total or 1.5”
Fasten off & weave in ends.
Repeat for the other sleeve.
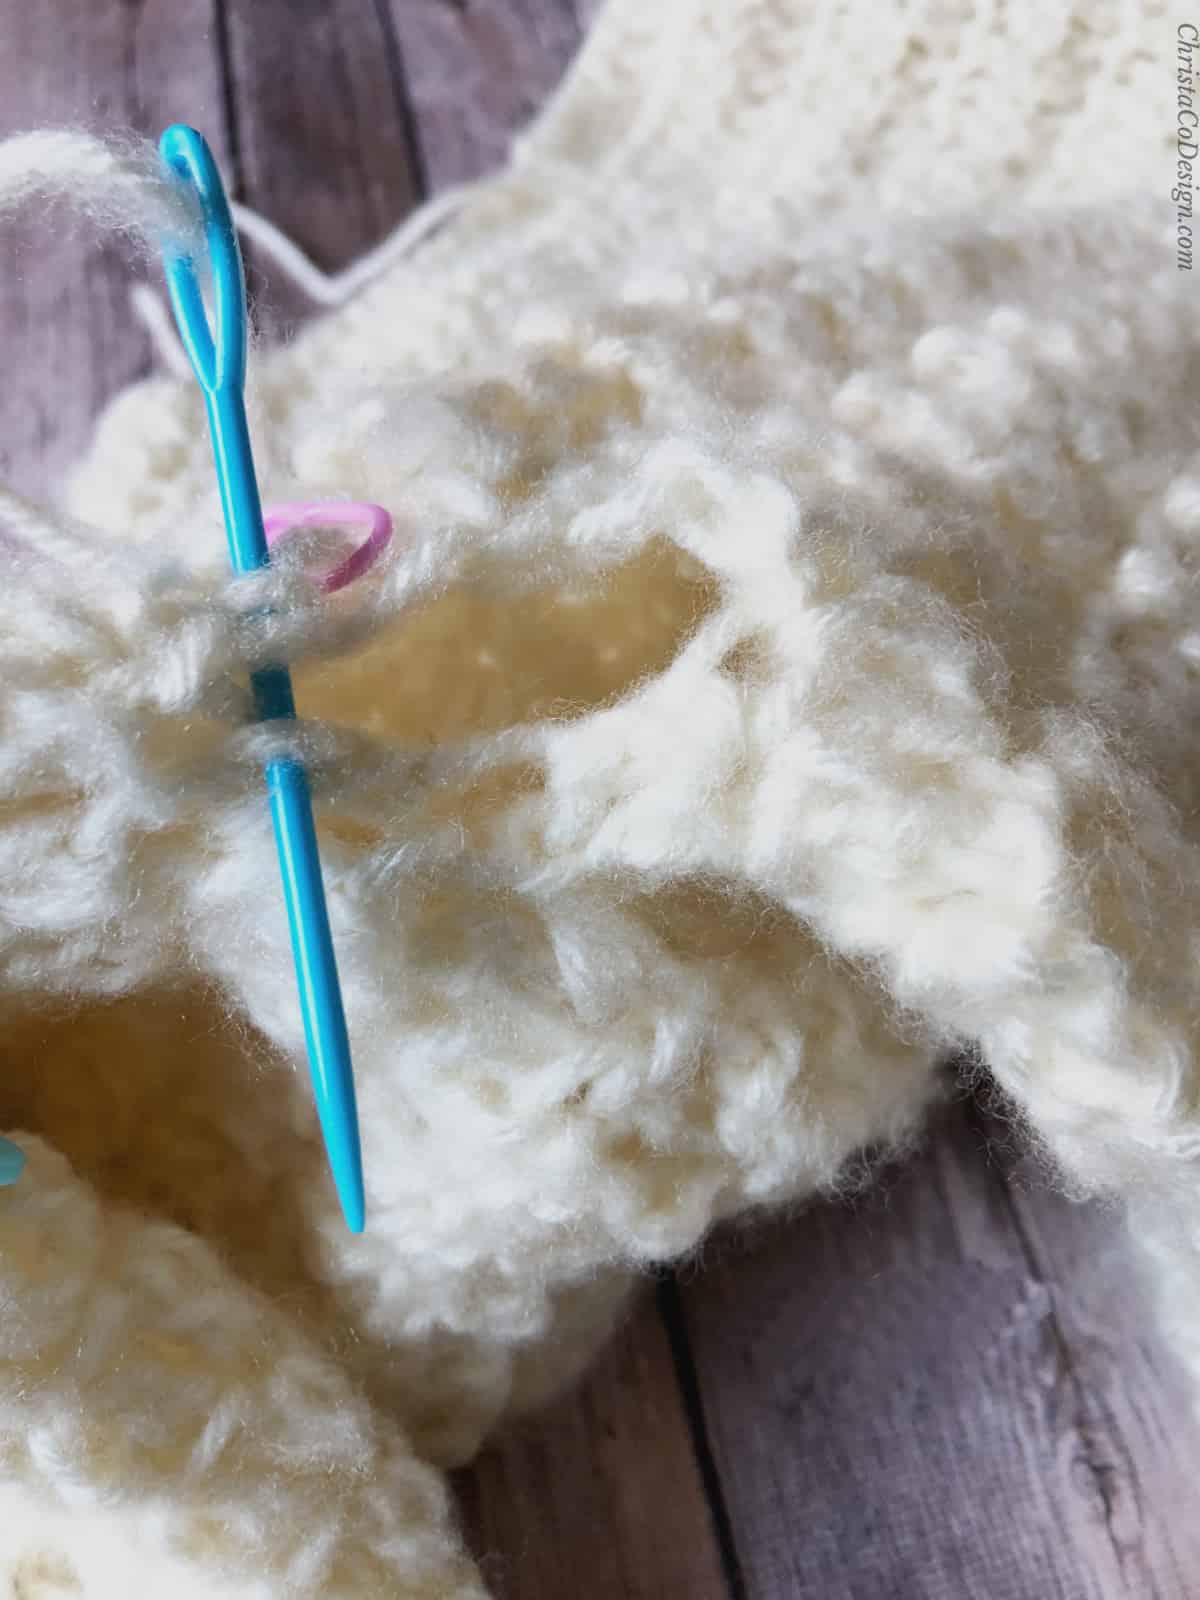 Picture shows seaming the underarms of sweater.
Finishing
Use tail from joining to sleeves (or a length of yarn) to seam armpit gap closed.
Weave in ends.
Recommended Products
As an Amazon Associate and member of other affiliate programs, I earn from qualifying purchases.



Love this sweater. Pinned it and looking forward to making it soon.
Love this sweater, and also that you offer patterns in plus sizes! ♥
I LOVE the structure of this sweater!
Very nice sweater,it’s so nice that I can make it in a larger size for myself.
Something is wrong with L size. In the first row of body, there isn’t enough stitches left in the last part. It should be 27, but I only have 20, so I’m stuck.
Hi Tatjana,
Sorry you’re stuck, thanks for reaching out. Do you have the correct stitch count for Row 15? Check that you continued to follow the pattern as written for Rows 11-15. Notice that Rows 14 & 15 are increases of (2 dc, ch 1, 2dc) it’s easy to miss. If you still need help don’t hesitate to email me at [email protected] I’m happy to help!
OMG! Thanks! Sorry for bothering you! Thanks a lot!
No problem, thanks for asking. I hope it goes smoothly! I love mine and wore it again yesterday ?
Hello ! I’m trying out your pattern and am stuck on the FDC at the very beginning. Did you use a n.7 hook for that as well ? or should I use the size adapted for my yarn (n.5) ? Thank you for the nice work !
Hi! I used the same hook size for the fdc. I would recommend working up a gauge swatch in the yarn and hook you plan to use so you can make adjustments from there.
Hello and thank you for your reply. I’m sorry to bother you again but I’m now on row 3 and everything seems okay except that I don’t have the same stitch count, I get 4 less. So I’m trying to figure out if I’m not adding the correct amount of increases or if my count is okay. When you write ” (dc, ch 1, dc) in ch 1 sp” isn’t that just adding 1dc to the count ? I’m sorry, I’m really just a beginner who just can’t figure this one out. Thank you for your time !
Hi! Thanks for asking. The stitch count includes all three of the (dc, ch 1, dc) stitches. So in the 1 ch sp you’re now placing 3 sts. So it increases by 2 more. Just include the ch in your st count. If you count the top of each stitch (including chs) it should work out correctly.
Thank you so much for replying ! I wasn’t counting that ch1 in my stitch count ! the 3 first rounds look nice, so I’m happy everything is alright. Learning lots from this (as a beginner). Nice to day to you from France 🙂
Great! I’m glad you’re giving it a go! And please don’t hesitate to ask if you have more questions! We might be in on different timelines but I’m happy to help ?
I’m just reviewing the pattern; I haven’t made it yet. I noticed under the Decrease heading, there are two sets of instructions for row 16. Which paragraph is correct?
Hi Sheila, so sorry for that mistake. The first one should be Row 15 & the next one is Row 16. There are two rows of decreases. I’ve updated it now. Thank you for letting me know so I could correct it.
Hi Christal
Thanks for this lovely pattern which I have started working up with Malabrigo Mecha. Can you clarify: when you say alternate dc into flo and blo, do you mean on every stitch or alternate every row?
Thanks
Hi Eliz-Anne,
Thanks for your question. It’s alternate a flo dc in one stitch, and blo dc in the next stitch.
I hope that helps. Your yarn sounds lovely!
Thank you,
Crystal
Hi from Norway 😊
Thank you for a great pattern.
I started this sweater and so far so good😊 But I have a question. When starting alternating dc. How do I go about with the corners/ increase ?
In the chain one space I’m I suppose to go around, finding it difficult to do Flo / Blo there.. or am I missing something 🙈
Hi Stine!
Thanks for your question. For the corner increases just go into the space like a normal stitch, don’t worry about the front loop or back loop. Only use the alternating loops when you are working regular dc stitches around, not on the increases.
I hope this helps!
Crystal