Crochet Pumpkin Pattern a Free Crochet Pattern
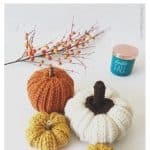
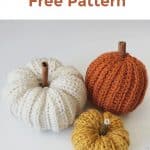
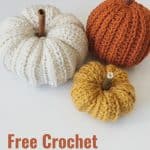

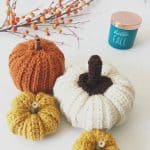
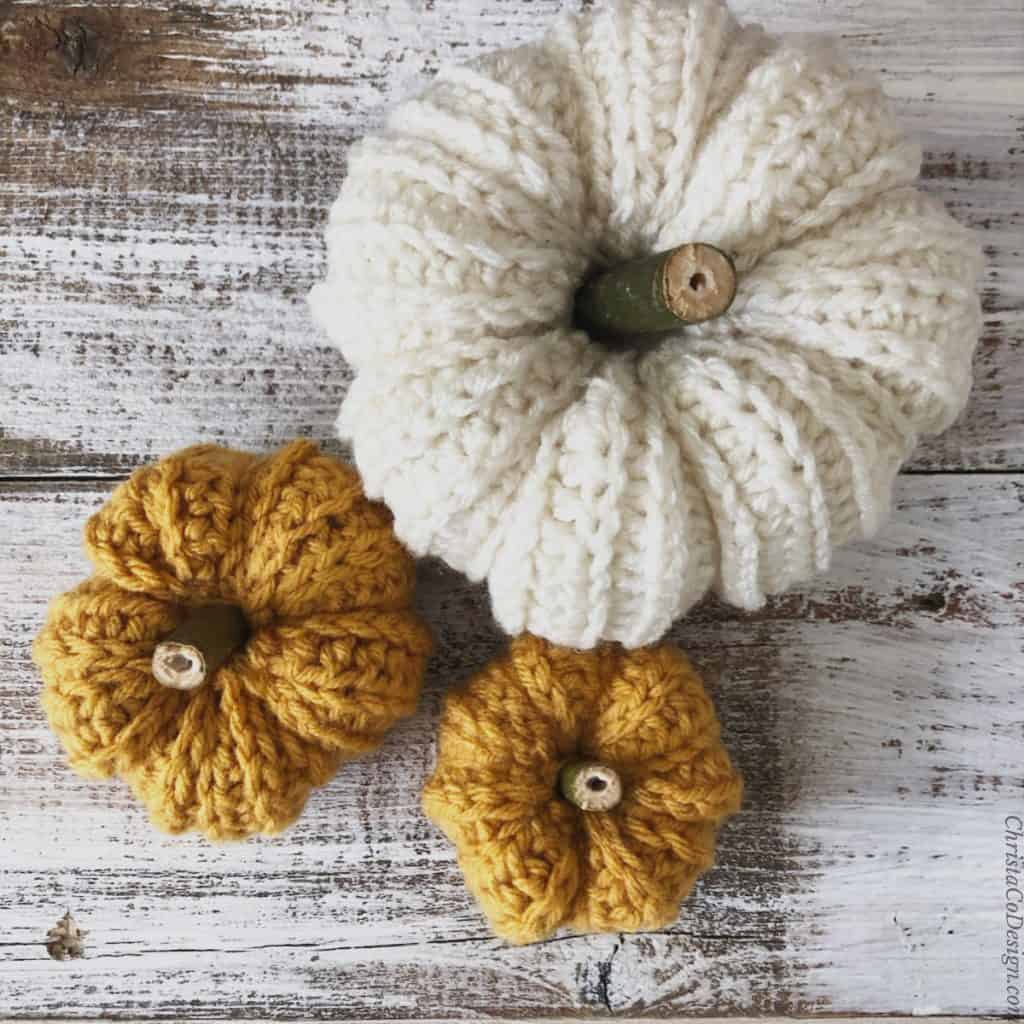
This crochet pumpkin pattern features a ribbed pumpkin perfect for your fall home decor. These crochet pumpkins are so fun to make and to decorate with around the house.

Join the ChristaCoDesign Newsletter
Never miss a pattern!
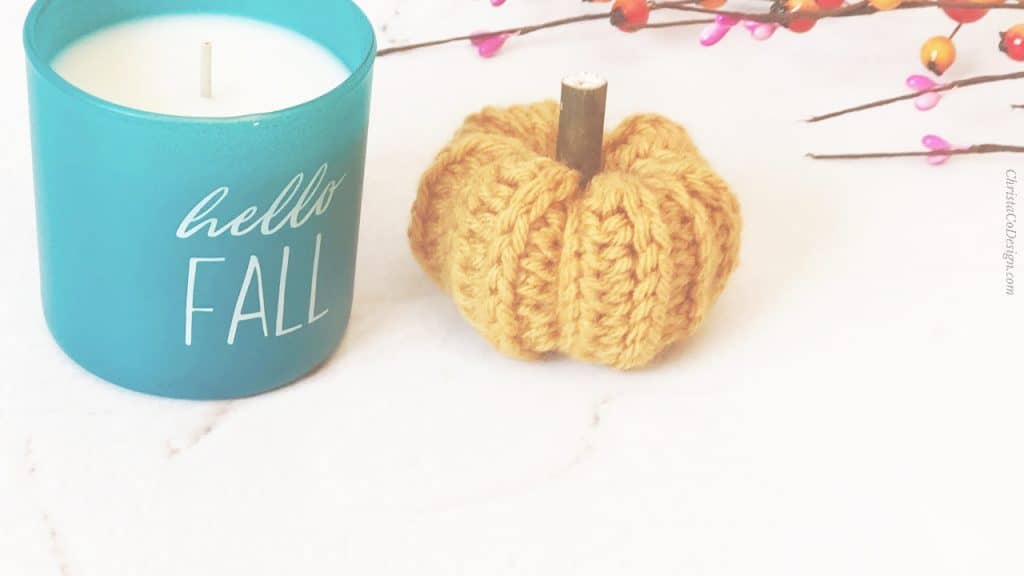
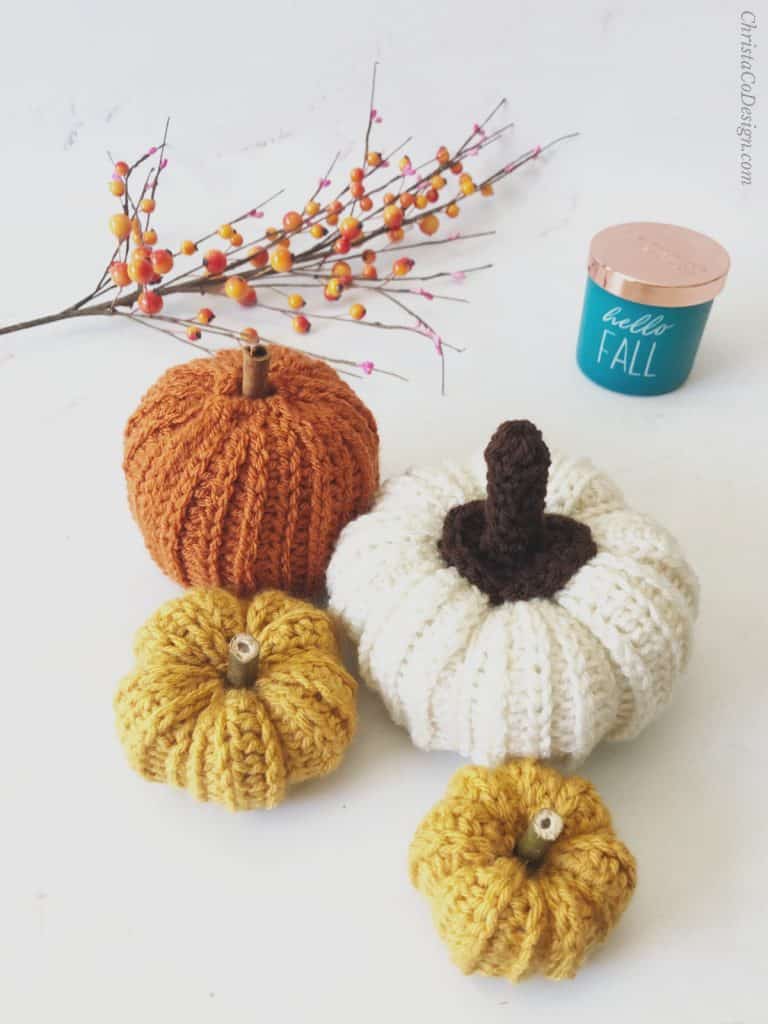
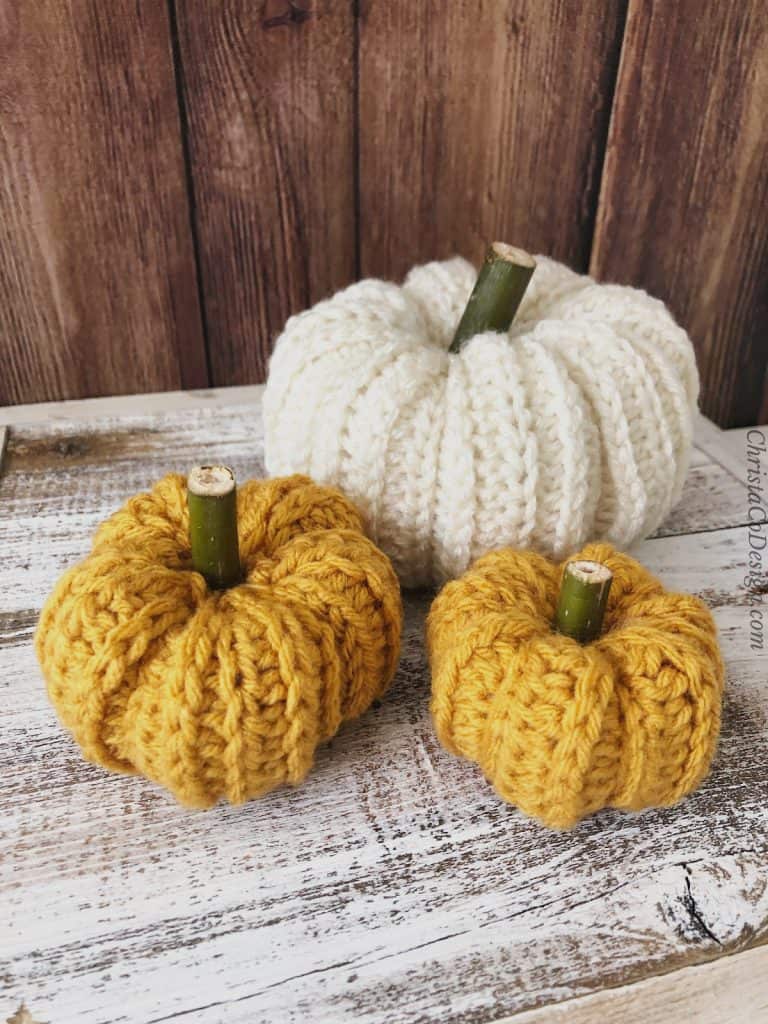
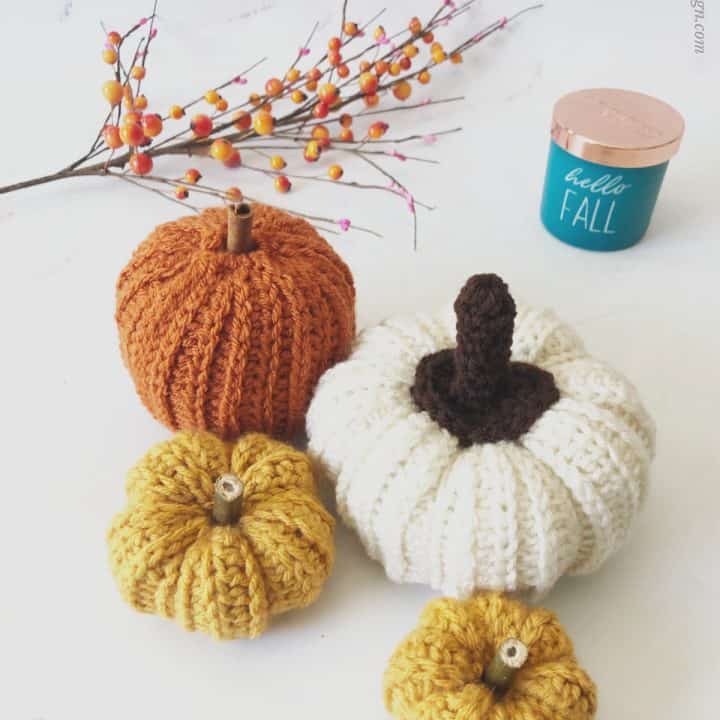
You can crochet a pumpkin in 3 different sizes! Which makes crocheting several pumpkins in all your favorite falls colors extra fun.
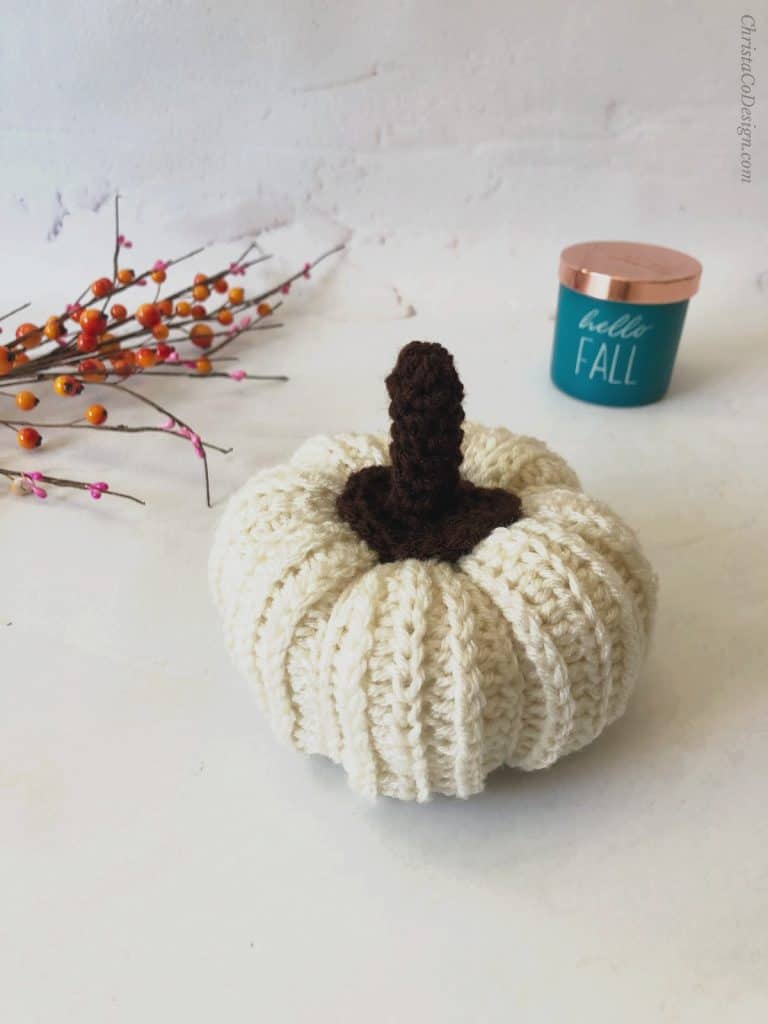
I include a crochet pumpkin stem pattern for the top of the pumpkin. Or you can get really festive and use cinnamon sticks for your pumpkin stems.
It seems like fall can never get here soon enough. Everyone is eagerly awaiting the cooler weather, the lingering sunset and pumpkin… everything. We even try to start fall as early as possible, just a hint of August and the fall fanatics come out.
Now crocheters enjoy fall as much as everyone else, but this is like our ultimate season. Sweaters, hats, scarves, shawls, blankets, place settings, pumpkins… just crochet everything.
Purchase the ad-free, well formatted printable PDF Pattern from my shop. Scroll down for the free pattern!
And boy, aren’t we ready for a break in the weather. Many of us crochet all year round. I can distinctly remember being 7 mos pregnant with #4, sitting outside in the sweltering summer heat watching my kids play in the water… and crocheting a snowflake blanket. Oh, the irony.
Well, it may technically be fall, but it’s still hot, hot, hot here. So what better way for a crocheter to get her fall crocheting on, than with some, small + fast crochet pumpkins!
So satisfying to finish up those little crochet projects quickly. And I just love using up those little bits of yarn too. I had quite a rude awakening, when I thought I ran out of fall colored yarn!
But I didn’t. And really, the fall decor palette is broader than oranges and mustards, of course. Those are just our go to colors.
My kids adore these pumpkins. They love stacking them. They love putting them on display, even if that means all down the hallway.
I think I’ll have to crochet some in their favorite colors. They would go nuts to have their own crochet pumpkin at their desks. Maybe they’ll leave mine alone. Haha, nope, doubt it.
Yarn
You can use any #4 medium worsted weight yarn* for these crochet pumpkins. These little pumpkins only use about 10-15 yds each, depending on the size. This is a great stash busting crochet pattern for using up leftover yarns in your stash.
I used Joann’s Big Twist Yarn for the mustard yellow crochet pumpkin. Big Twist has so many fab colors, and some amazing fall colors to choose from. I’ve used Big Twist in my Hygge Homebody Crochet Cardigan Pattern and my Sunset Sweater Crochet Pattern.
The medium pumpkin is crocheted with Red Heart Super Saver*. I was running low on fall colored leftovers and had to break into a new skein of Red Heart, in a classic neutral.
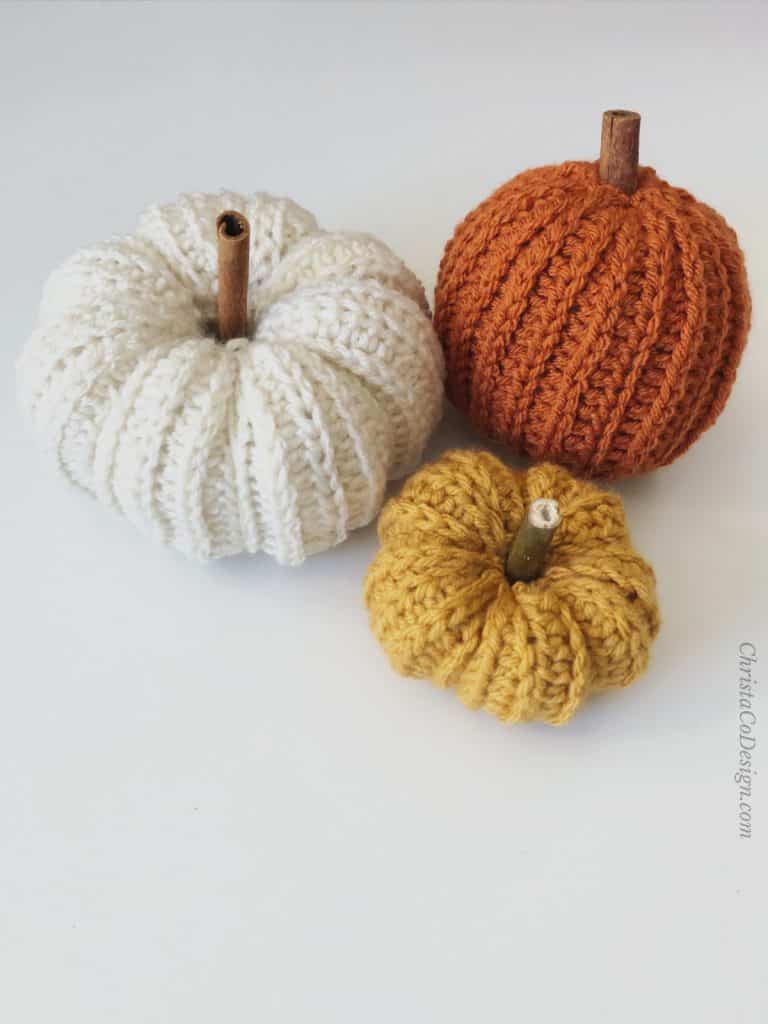
Thankfully I found a rusty orange in Hobby Lobby’s I Love This Yarn and was able to crochet another small pumpkin. I left this one unsegmented so you can see the difference.
I definitely like the segments. They give a more true pumpkin shape.
Can you substitute yarns?
Of course, you can substitute any worsted weight yarn to crochet this pumpkin pattern. You could even try different weight yarns. A bulky yarn would make a larger chunky pumpkin. Your sizes will come out different, but that only adds to the charm of a cluster of handmade crochet pumpkins.
Stitch
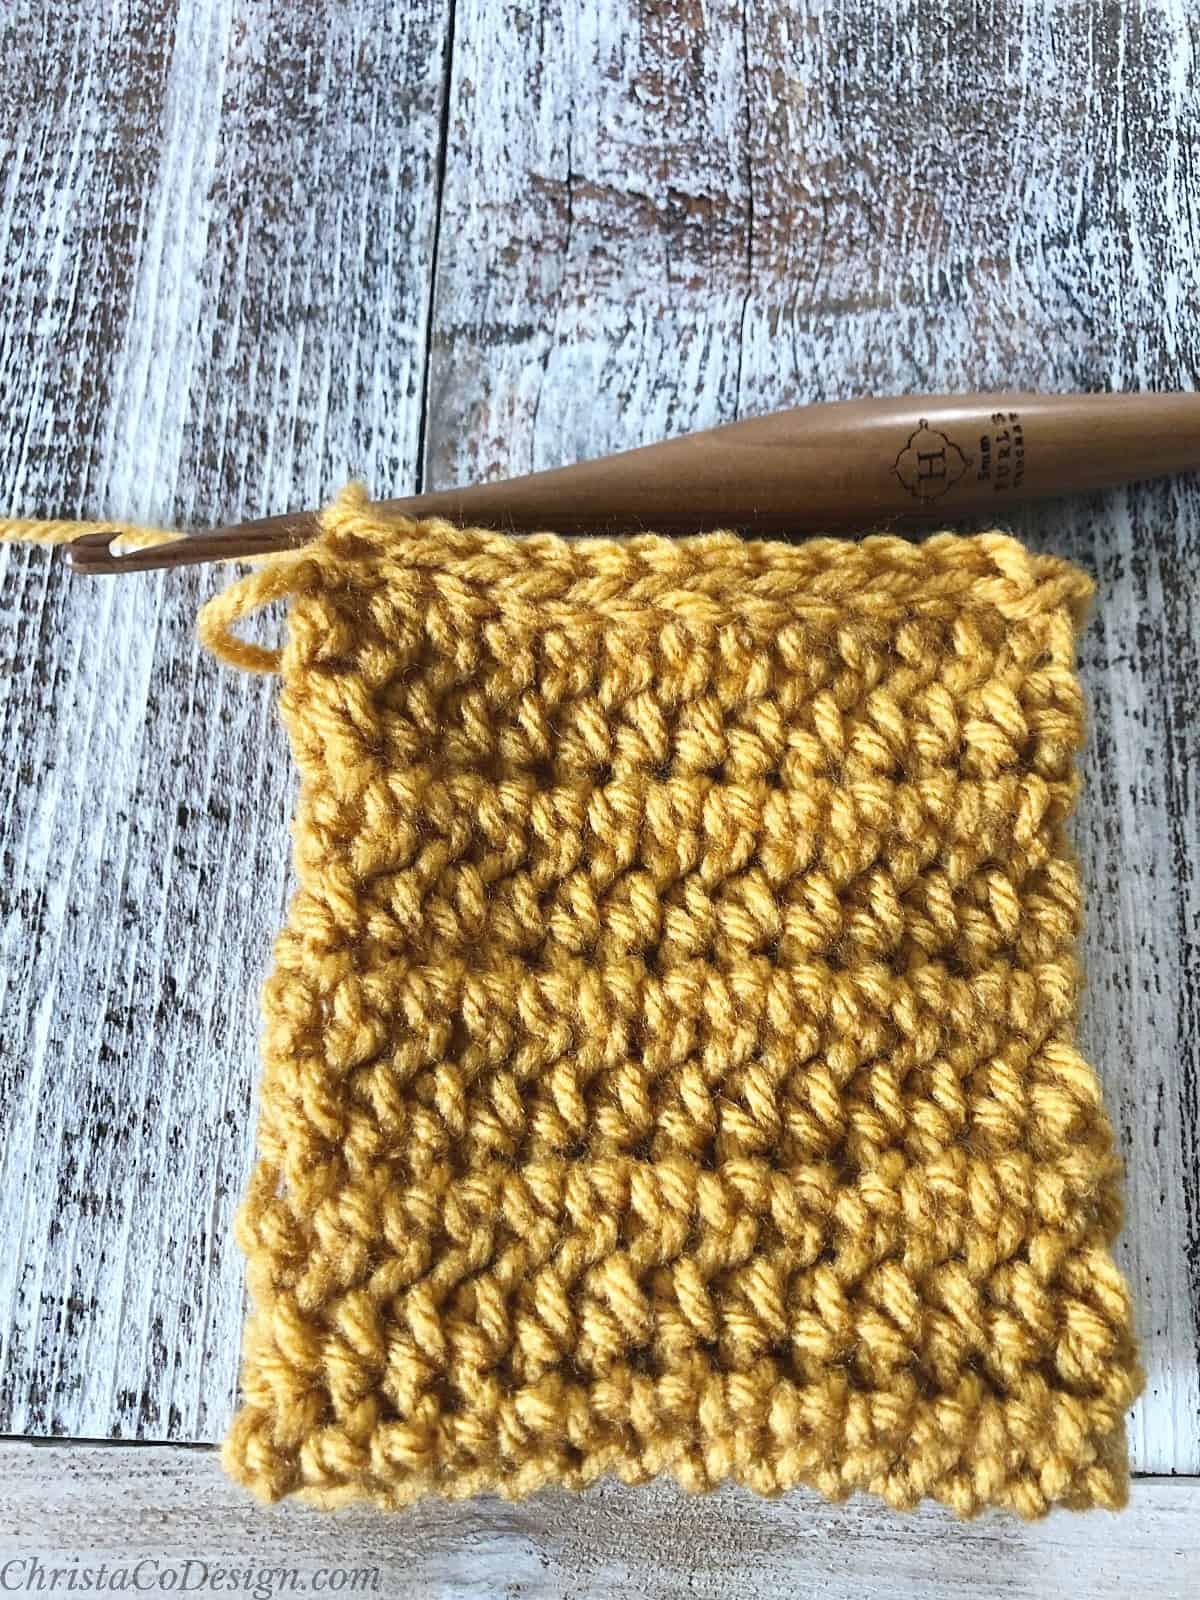
To get the ribbed textured for these crochet pumpkins I use basic stitches and the 3rd loop half double crochet stitch, sometimes known as the camel stitch. Since this makes quite a stretchy ribbing, I paired it with a regular back loop only half double crochet.
More Free Crochet Patterns For Fall
Pixie Spice Hat a free crochet pixie hat pattern in all sizes, from baby to adult.
If you’re looking for more free pumpkin crochet patterns try the Crochet Pumpkin Hat Pattern. It features a ribbed texture and comes in all sizes too, so make one for everyone in the family!
What else do love making for fall? This Fluffy Clouds Infinity Scarf Pattern from Mary at Croyden Crochet looks like a fun squishy make!
If you also knit, you may like this super easy pumpkin knitting pattern too!
Materials
- 45 yds (41 m) Red Heart* With Love a #4 medium worsted weight yarn (100% Acrylic, 370 yd (338 m) per 198 g skein) in shades aran & cornsilk: 1 skein.
- 5 mm US Size H – 8 crochet hook,* or size needed to meet gauge.
- Yarn needle, measuring tape, scissors.
- Polyfill for stuffing.*
- Optional cinnamon stick, or similar for stem, crochet stem pattern included.
Notes
- Ch 2 to start a row does not count as a st.
- Pattern is written for 3 sizes, with the smallest size given first and the larger pumpkin sizes next.
Stitches/Abbreviations
US Terms
ch(s) – chain(s)
hdc – half double crochet
mc – magic circle
rep – repeat
rnd – round
RS – right side
sc – single crochet
sk – skip the indicated stitch
st(s) – stitch(es)
Special Stitches
3rd loop hdc (camel stitch) this is stitch we use to make the ribbing, check out the tutorial if it’s new for you!
blo – back loop only – insert your hook into the back, or loop that is farthest away from you. Normally you would insert your hook under both top loops, for blo you crochet into only the back loop.
Gauge
13 sts x 9.5 rows to [after blocking] to 4” (10 cm) measured in hdc.
Construction
This crochet pumpkin pattern is worked as a flat rectangle. Then you will slip stitch the short ends to seam the fabric into a tube. Next you will close the bottom of the pumpkin with a yarn and needle.
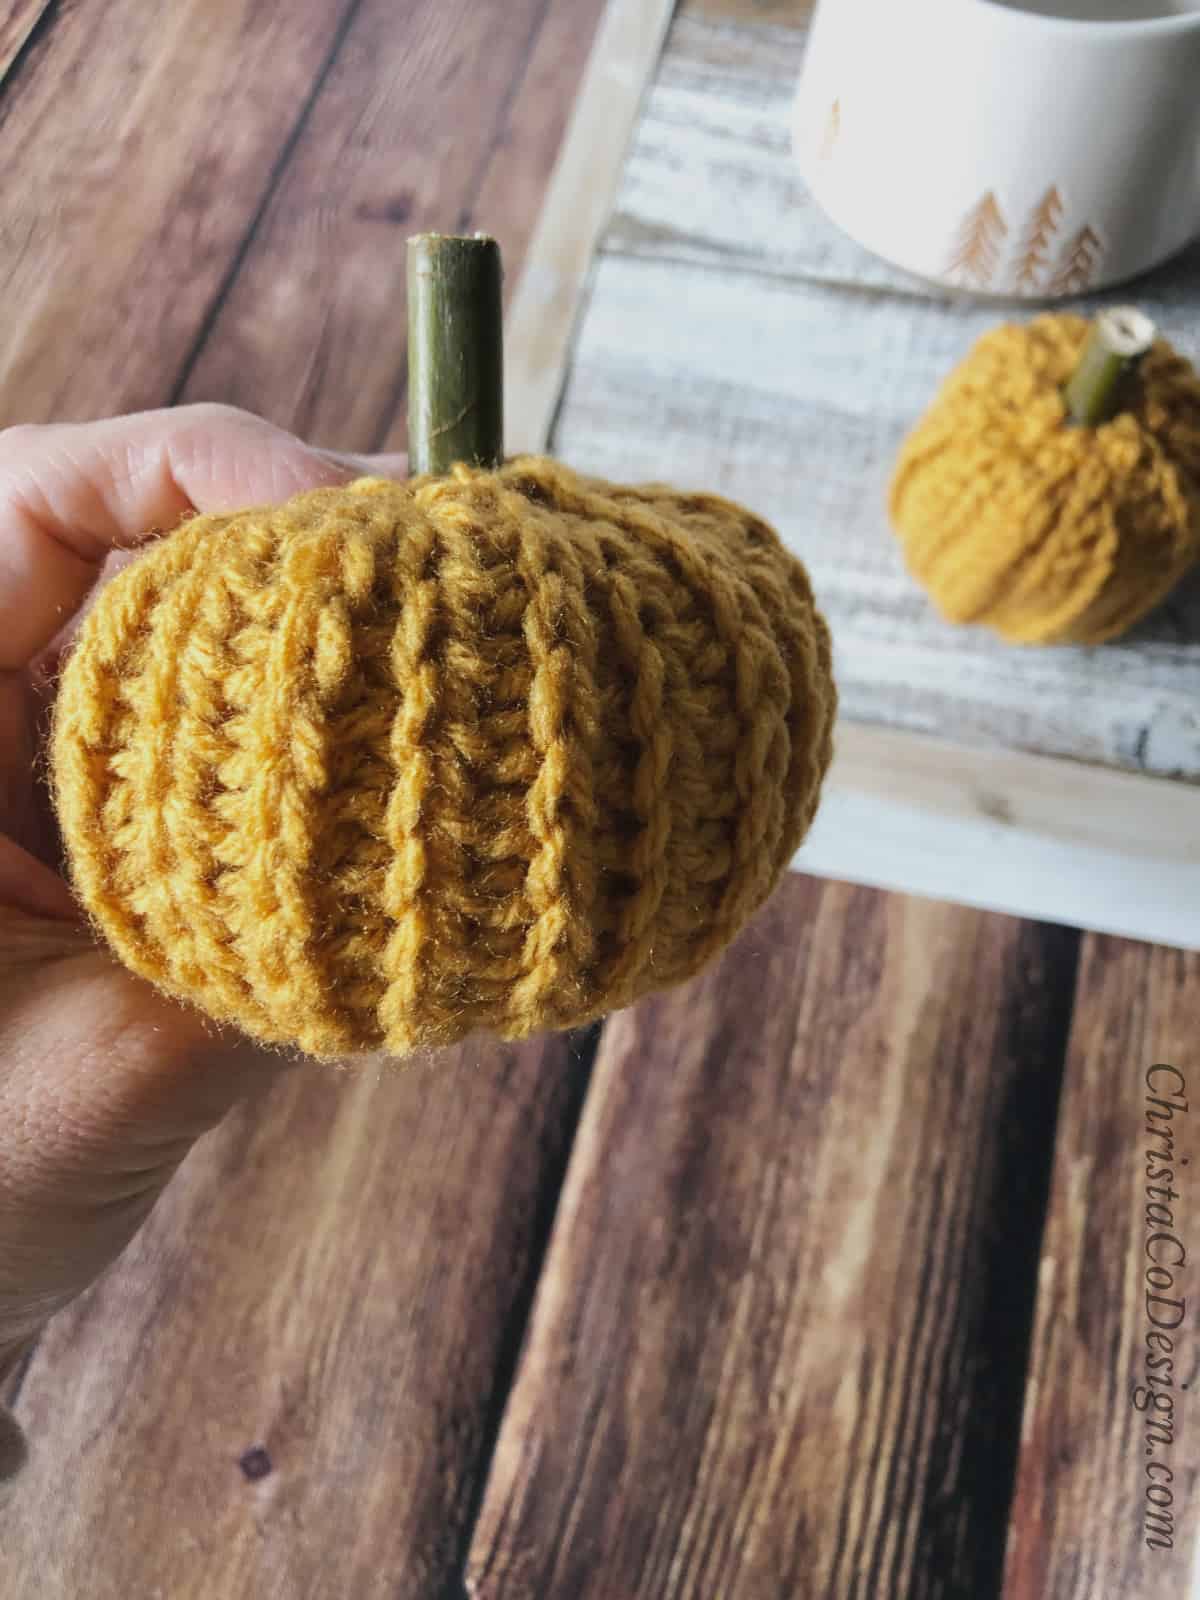
Now it’s time to stuff your little pumpkin. Finish the top the same way as the bottom, but you will leave it a little open to add the stick to serve as a stem. I also include a crochet pumpkin stem pattern for those who prefer to crochet one.
If you crochet the pumpkin stem, you will make it separately and then sew it on the top your little pumpkin.
Sizing
This small crochet pumpkin pattern features three sizes, from mini pumpkins to medium pumpkins. Below are the finished dimensions of the flat rectangles you will crochet to make the pumpkins. I also include a finished pumpkin meaurement.
The finished size of the pumpkin will vary depending on how much you stuff the pumpkin, and your finishing options. I include both unsegmented (the rust colored pumpkin) and segmented pumpkin instructions.
The tighter you segment your crochet pumpkin, the smaller and more compact it will be.
Finished Dimensions
mini pumpkin – 5” (12.5 cm) long x 4” (10 cm) wide rectangle = 1.5” (4 cm) tall x 2.5” (6 cm) wide finished pumpkin
small pumpkin – 8.5” (21.5 cm) long x 5.5” (14 cm) wide rectangle = 2” (5 cm) tall x 3” (7.5 cm) wide finished pumpkin
medium pumpkin – 12” (30.5 cm) long x 7” (18 cm) wide rectangle = 3” (7.5 cm) tall x 5.5” (14 cm) wide finished pumpkin
Adjustment
You can make the pumpkins any height you want, by increasing the number of stitches. Keep in mind that you will lose some height when seaming. So our smallest flat rectangle measures 4” / 10 cm wide, but ends up being only a 1.5” / 4 cm tall pumpkin after seaming and stuffing.
To make your pumpkin wider or more narrow crochet a longer or shorter rectangle by adding or subtracting another repeat row until it’s as wide around as you like.
Video Tutorial
You can watch the full video tutorial on my YouTube channel here.

Scroll down for the crochet pumpkin pattern.
Pattern Instructions
Crochet a Pumpkin
Crochet pumpkin in 3 sizes!
Materials
- #4 medium worsted weight yarn in fall colors, or any colors! If you would like to crochet your pumpkin stems, then you'll want colors for those as well. Use rust, mustard and cream for the crochet pumpkins and dark brown and green for the crochet pumpkin stems.
- polyfill
- optional cinnamon sticks or similar for stem
Tools
- US Size H-8/5mm hook, or hook needed to meet gauge
- Yarn needle
- Measuring tape
- Scissors
Instructions
Crochet Pumpkin Pattern Mini (Sm, Med)
Ch 15 (20, 26)
- Hdc in 3rd ch from hook (skipped chs do not count) and each chain across, turn. (13, 18, 24 sts)
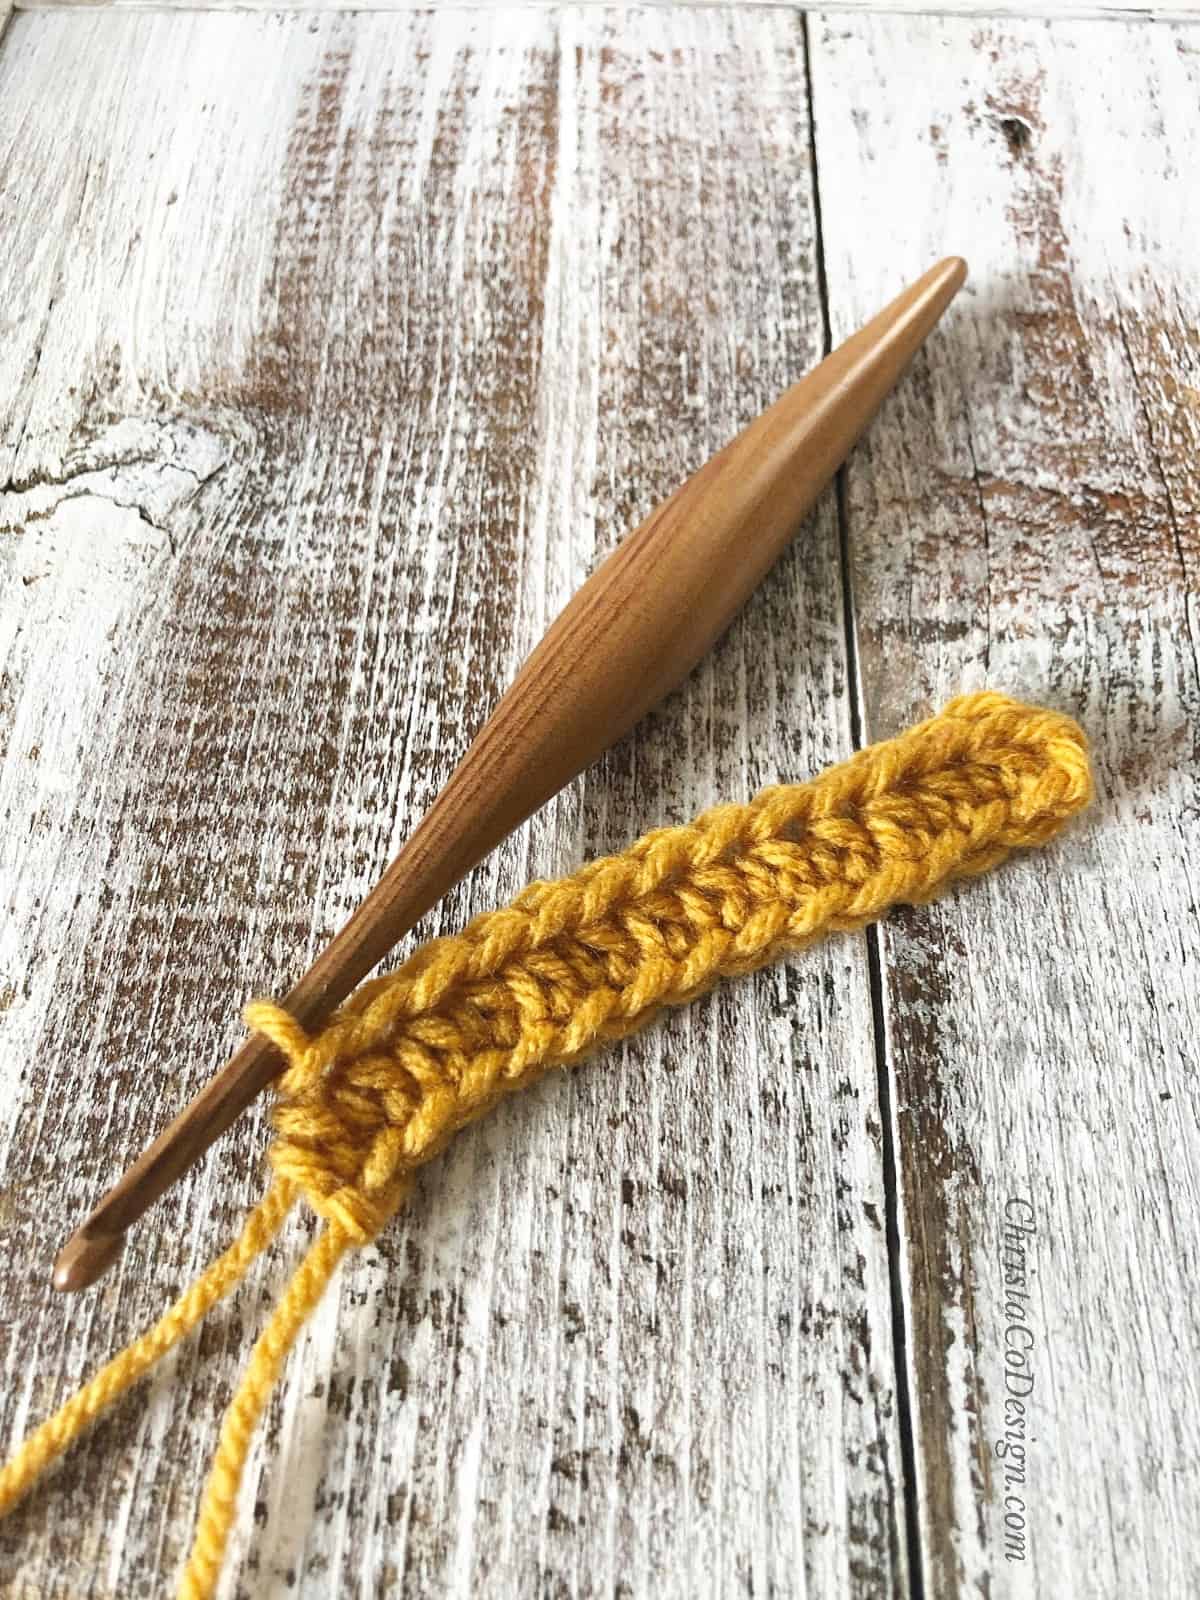
- Ch 2, starting in same st hdc in 3rd loop,
 continue to hdc in 3rd loop of each st across, turn. (13, 18, 24 sts)
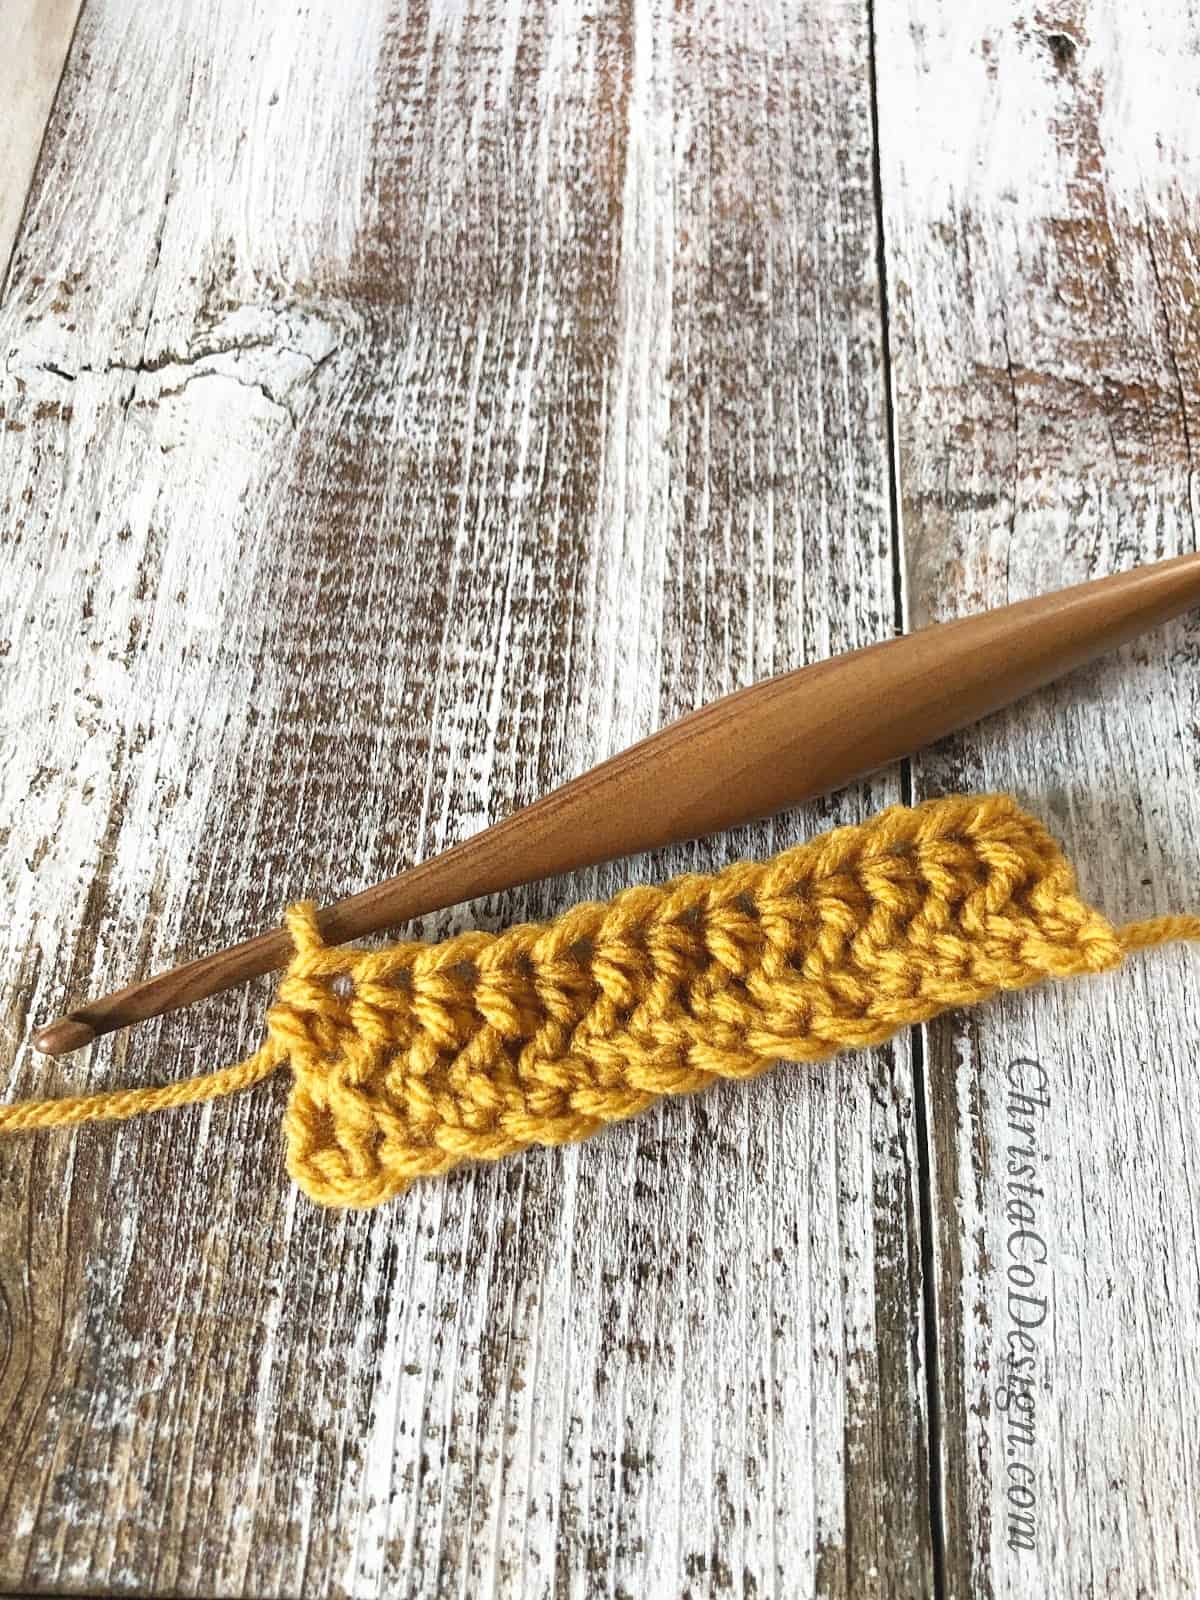
- (RS) Ch 2, starting in same st hdc in blo,
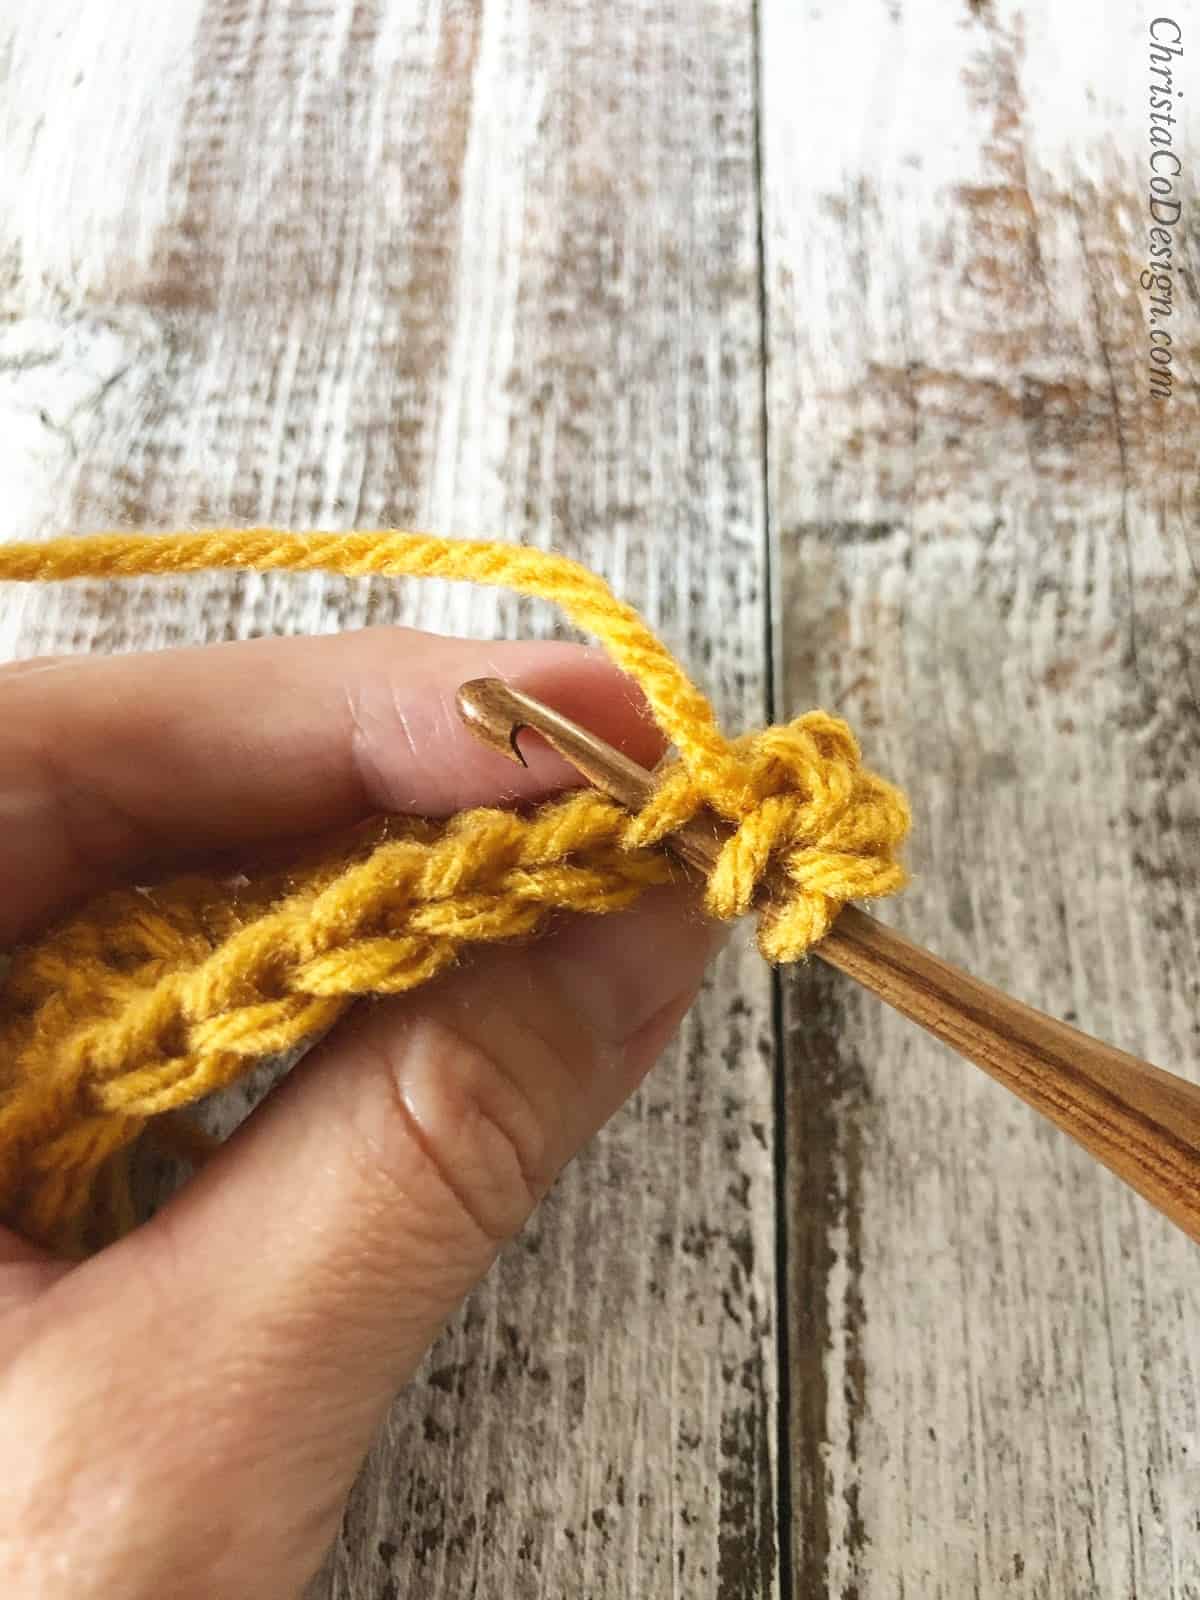 continue to hdc in blo of each st across, turn. (13, 18, 24 sts)
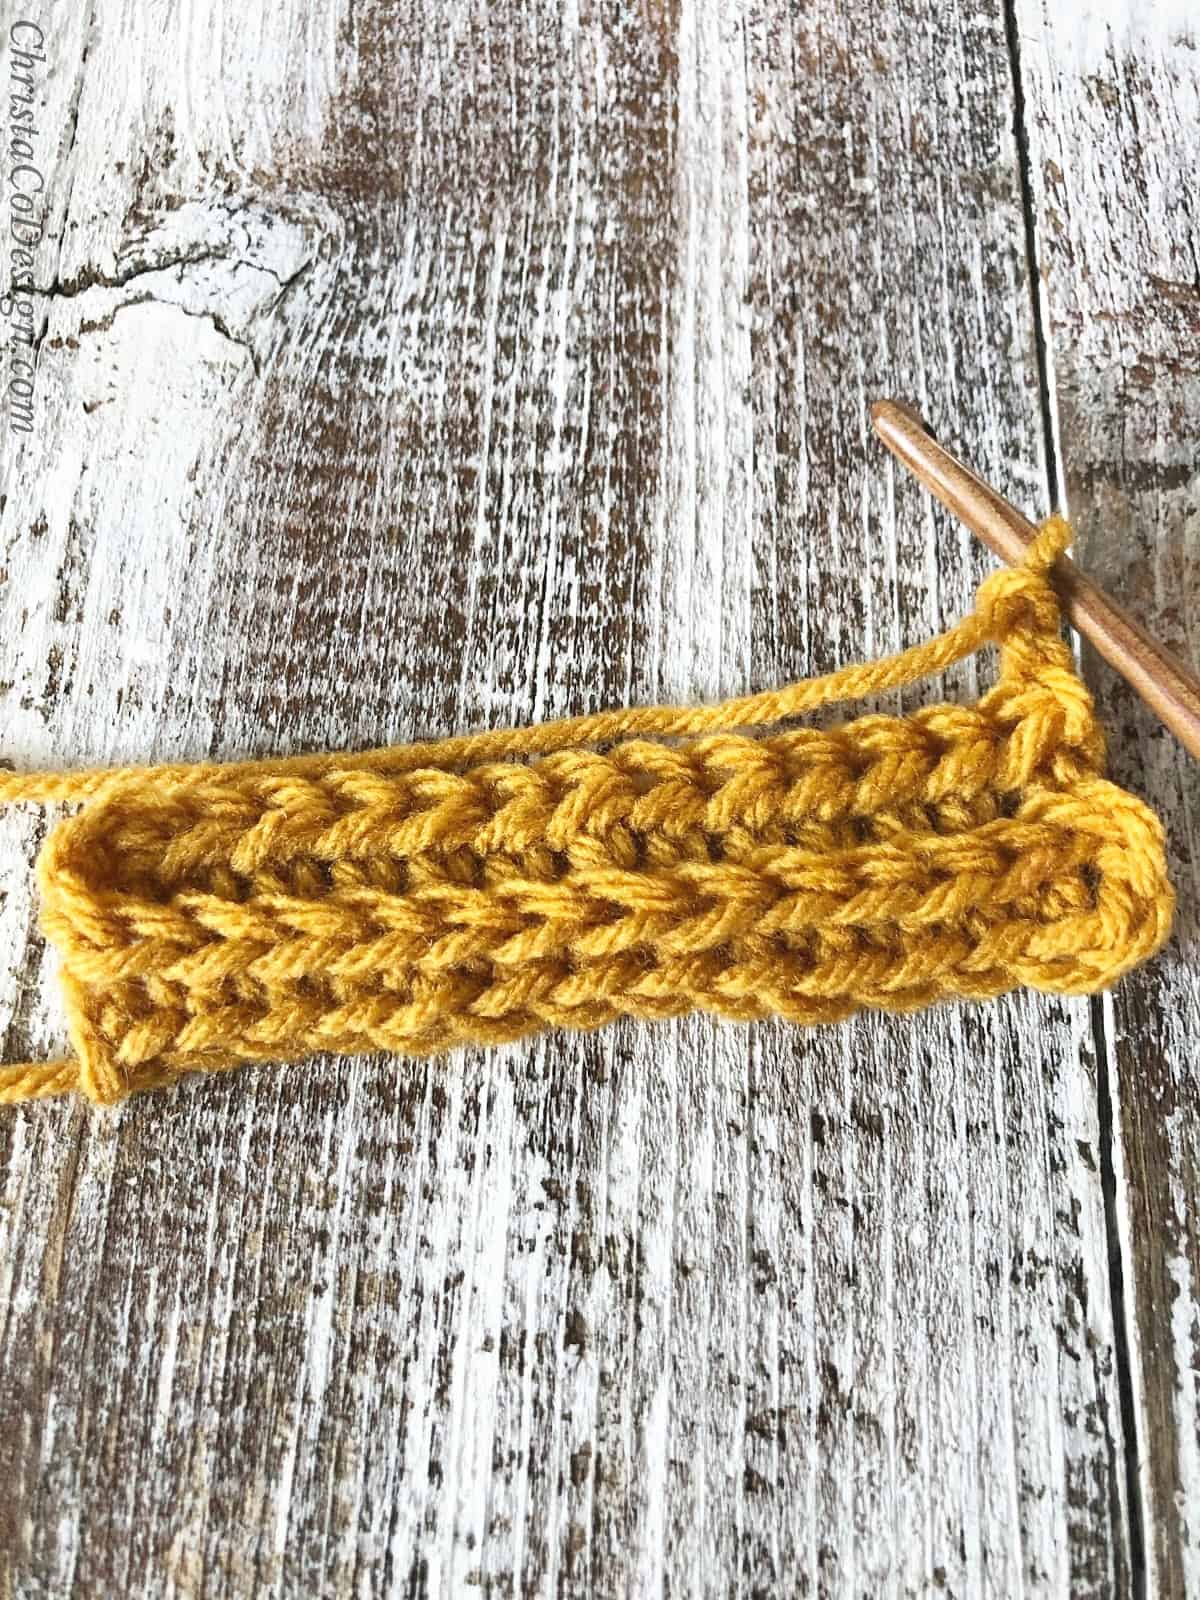
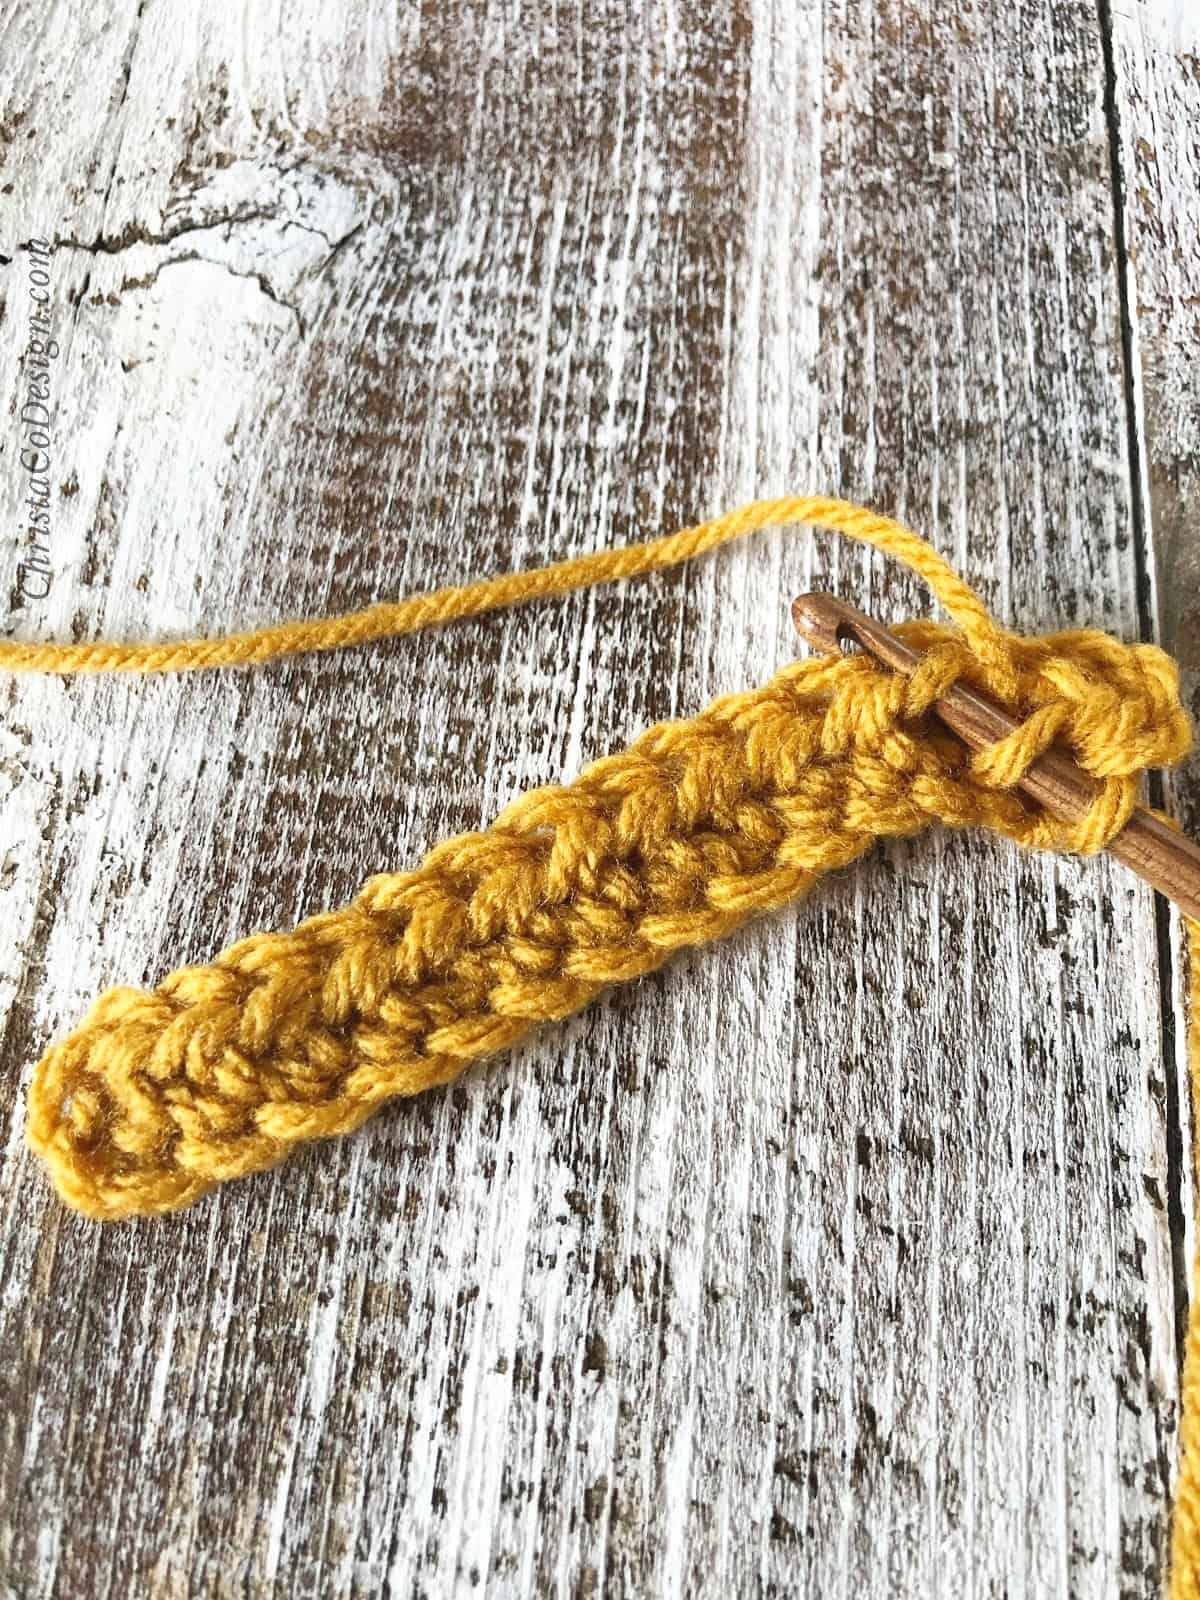
- Rep Rows 2 - 3 until length is 5”/12.5cm (8.5”/21.5cm, 12”/30cm). Do not cut yarn.
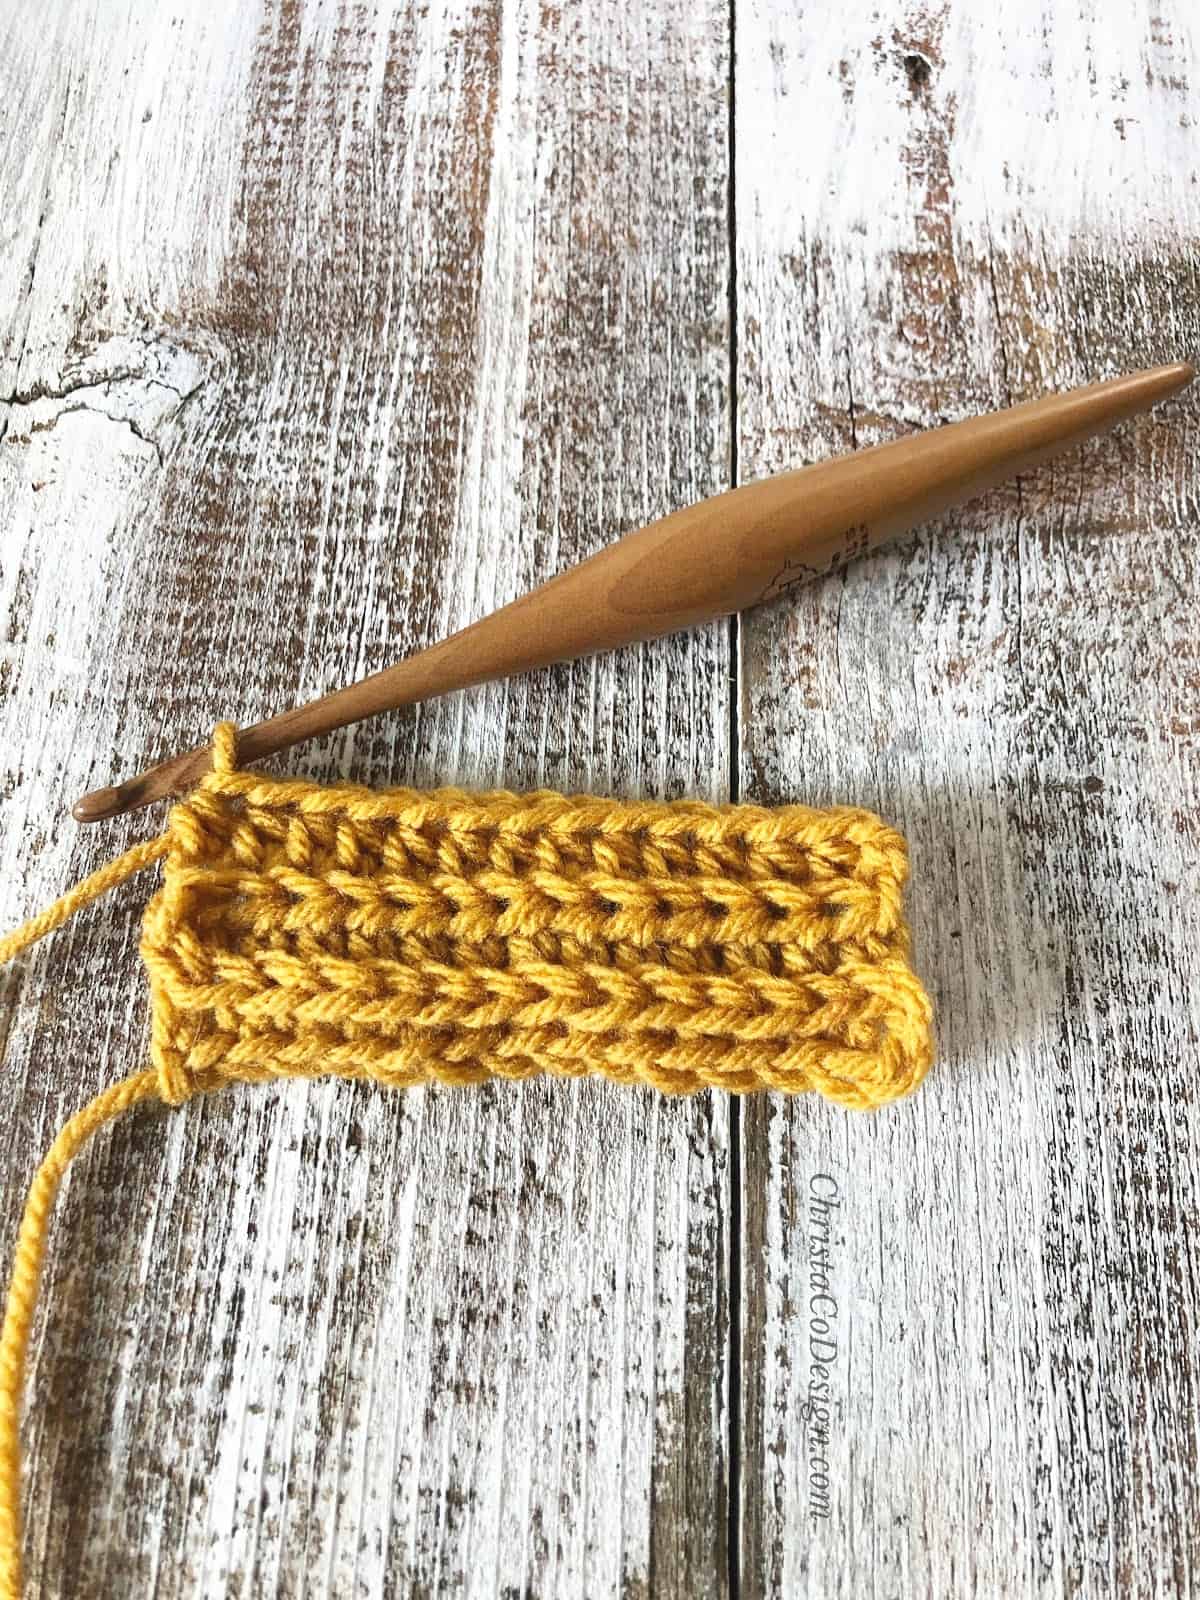
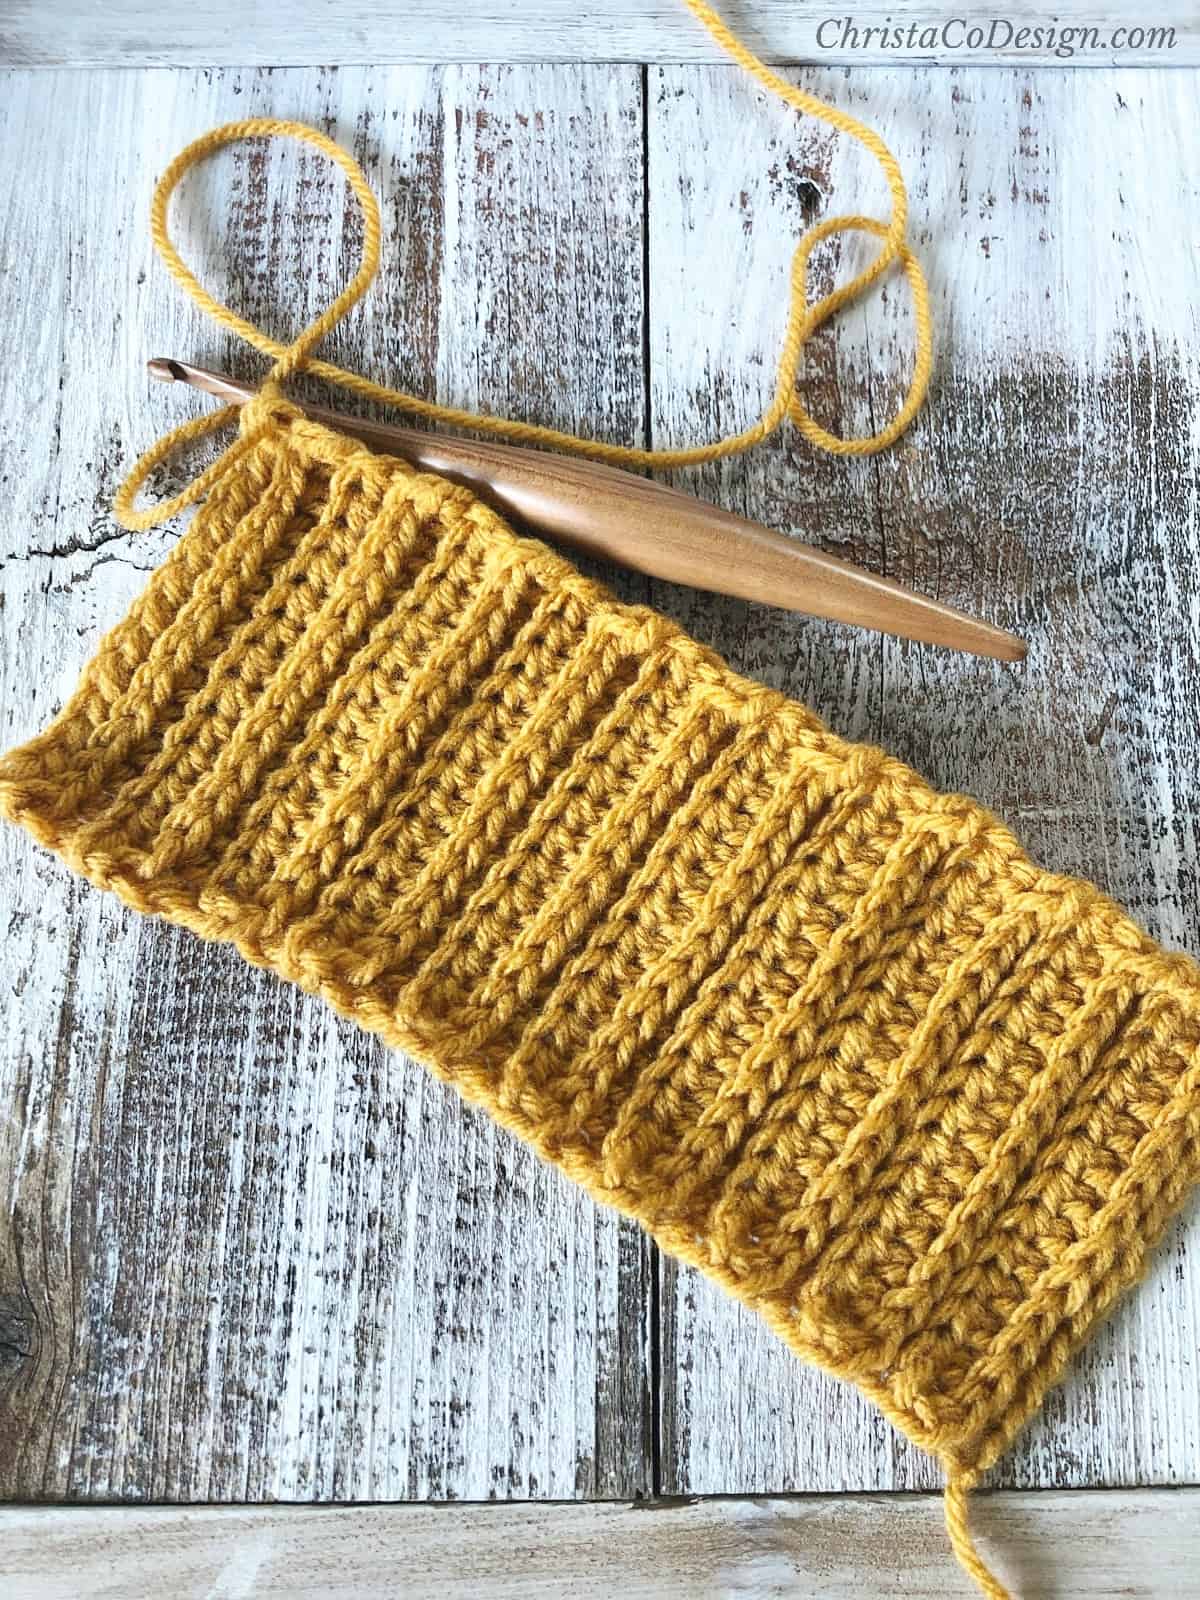
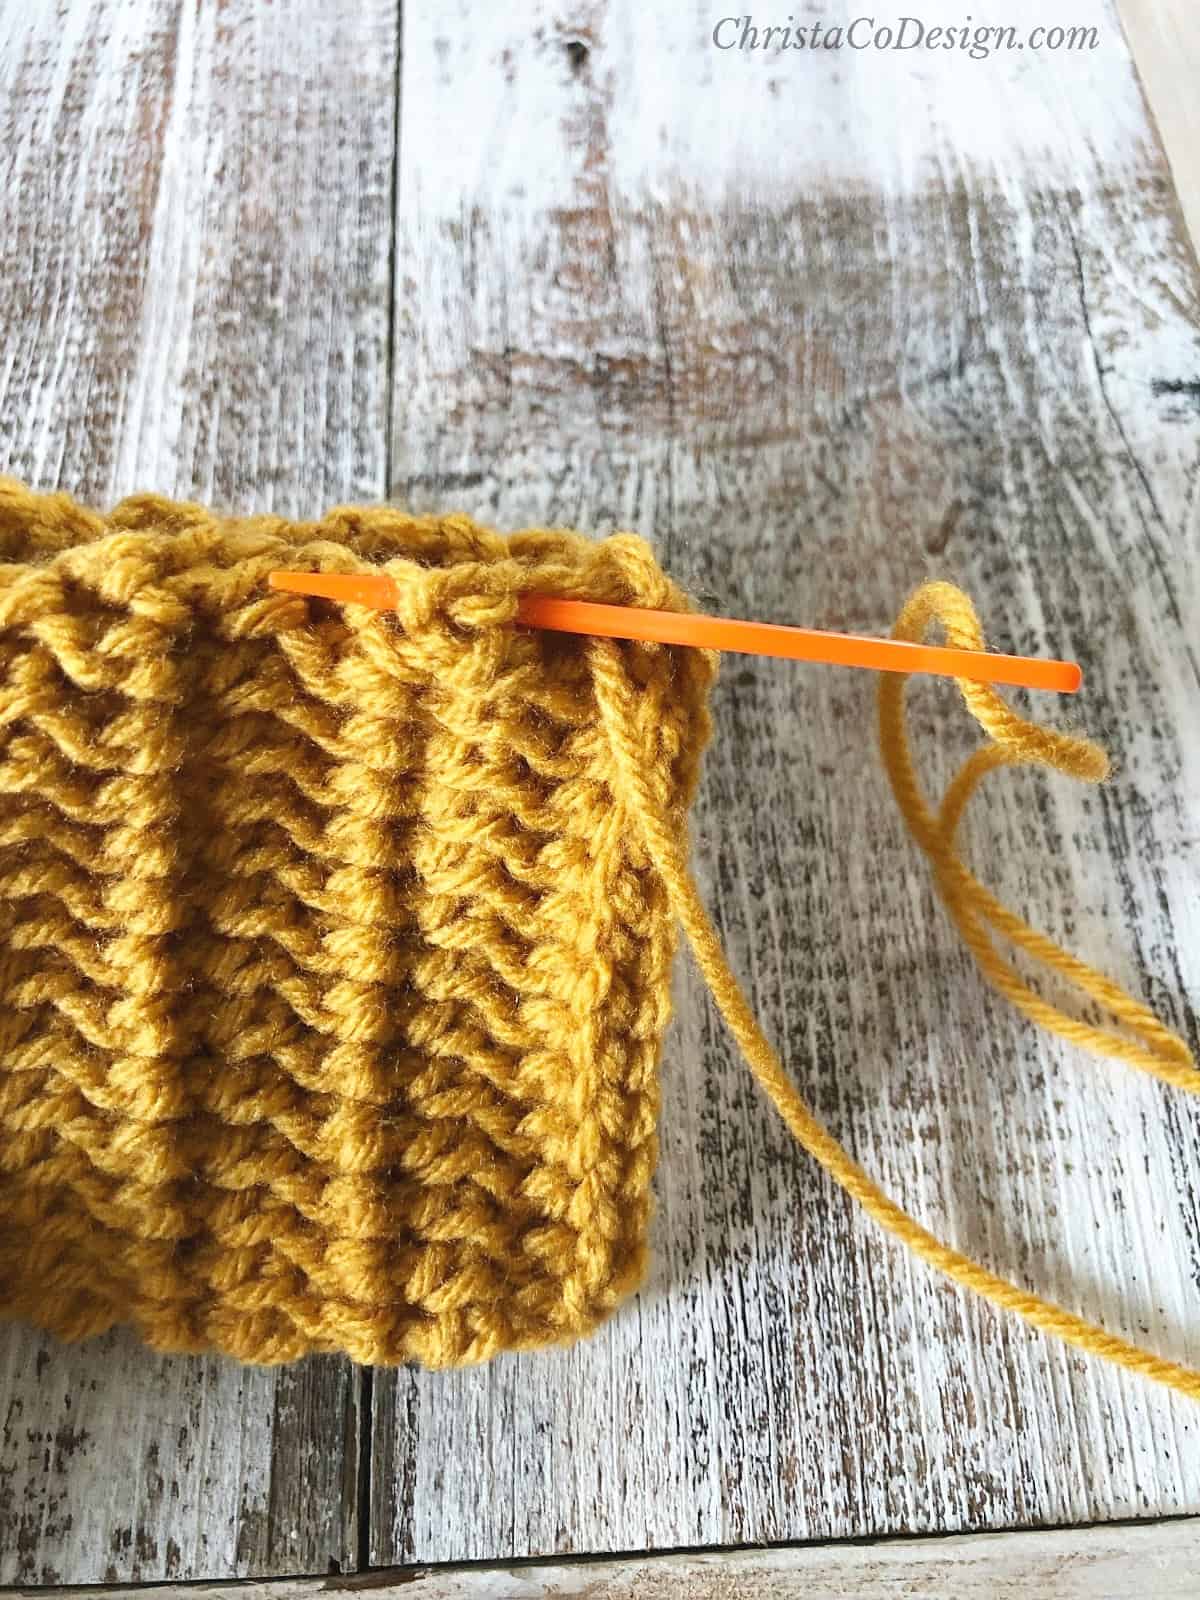
Create the Tube
- Match short ends together. You can sl st on the wrong side or the right side. I prefer how the exposed sl st looks on a ridged pattern like this.
- Use a slip stitch to seam the ends together.
- Cut yarn, leaving a long tail for seaming.
Sew Bottom
- Thread the yarn needle with your long tail.
- Use a running stitch to weave yarn in and out of the stitches to close the bottom.
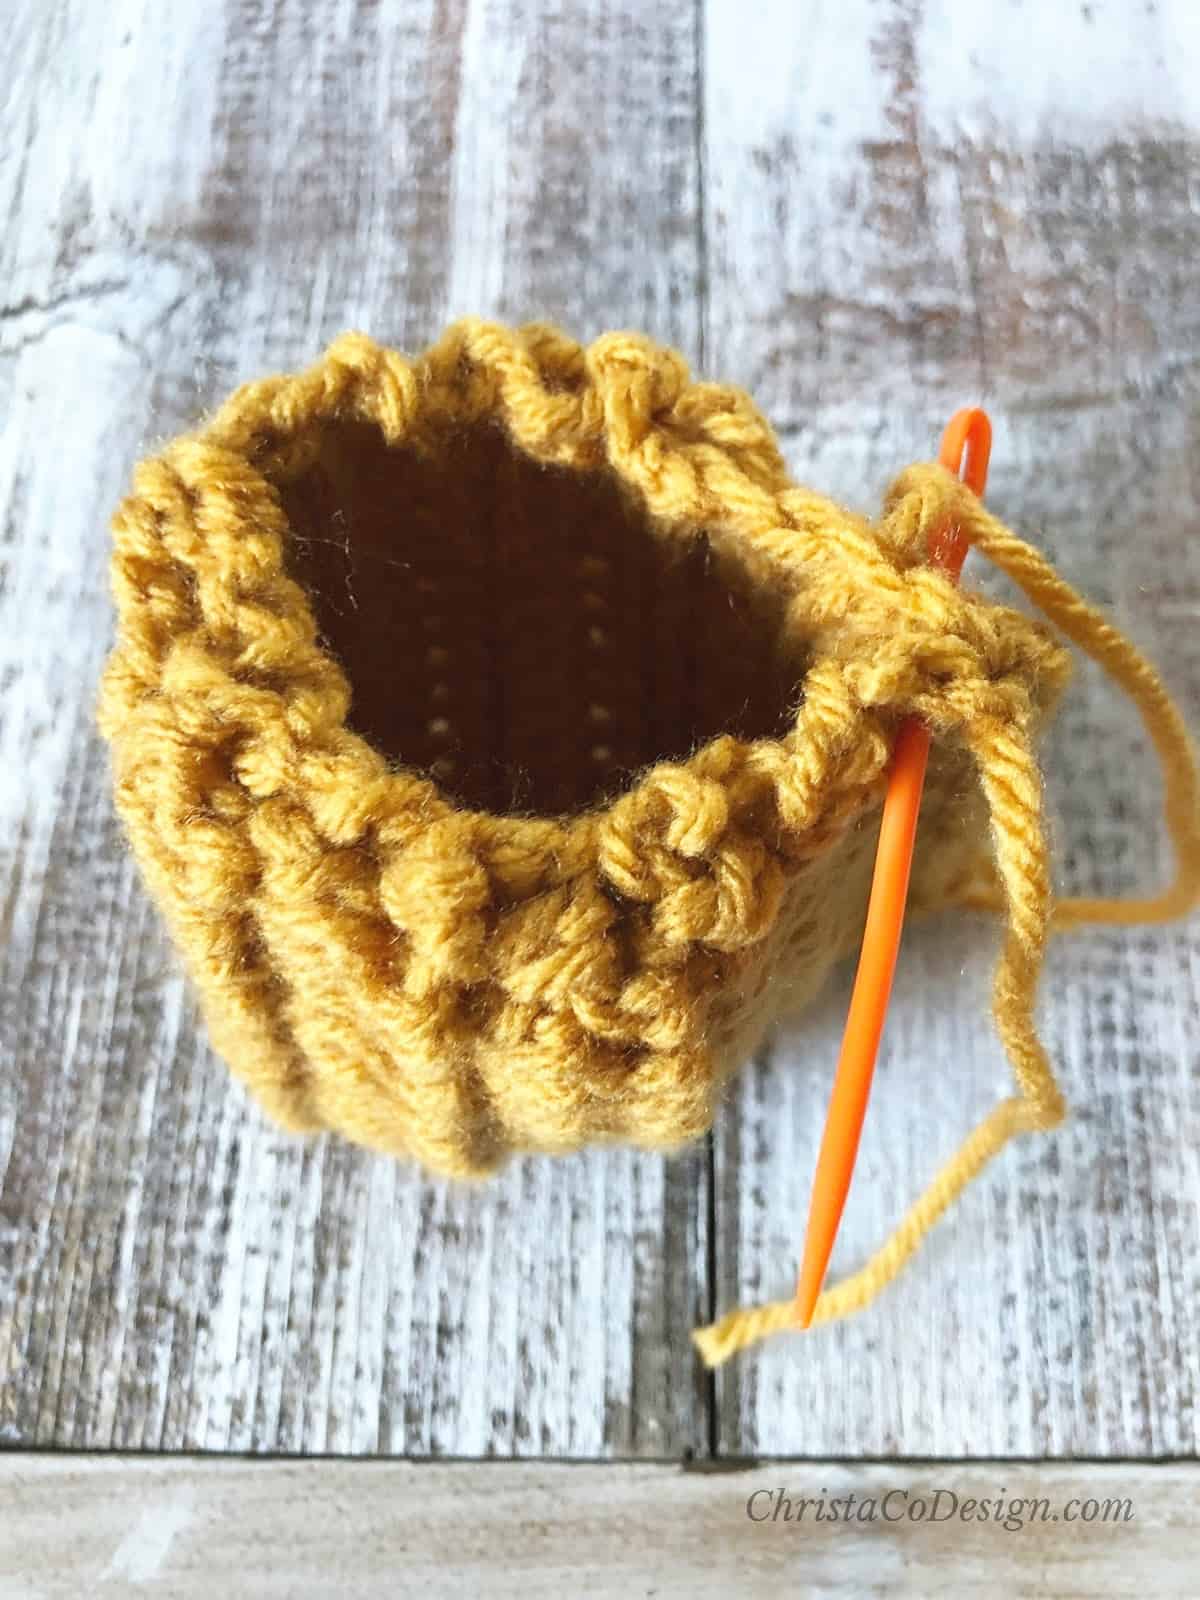
- Weave the yarn back and forth over the hole.
 Cut yarn and weave in end.
Stuff
- If you need to turn it right side out do that now.

- Use polyfill to stuff pumpkin. You want it full, but not bulging so the ridges stay in place.
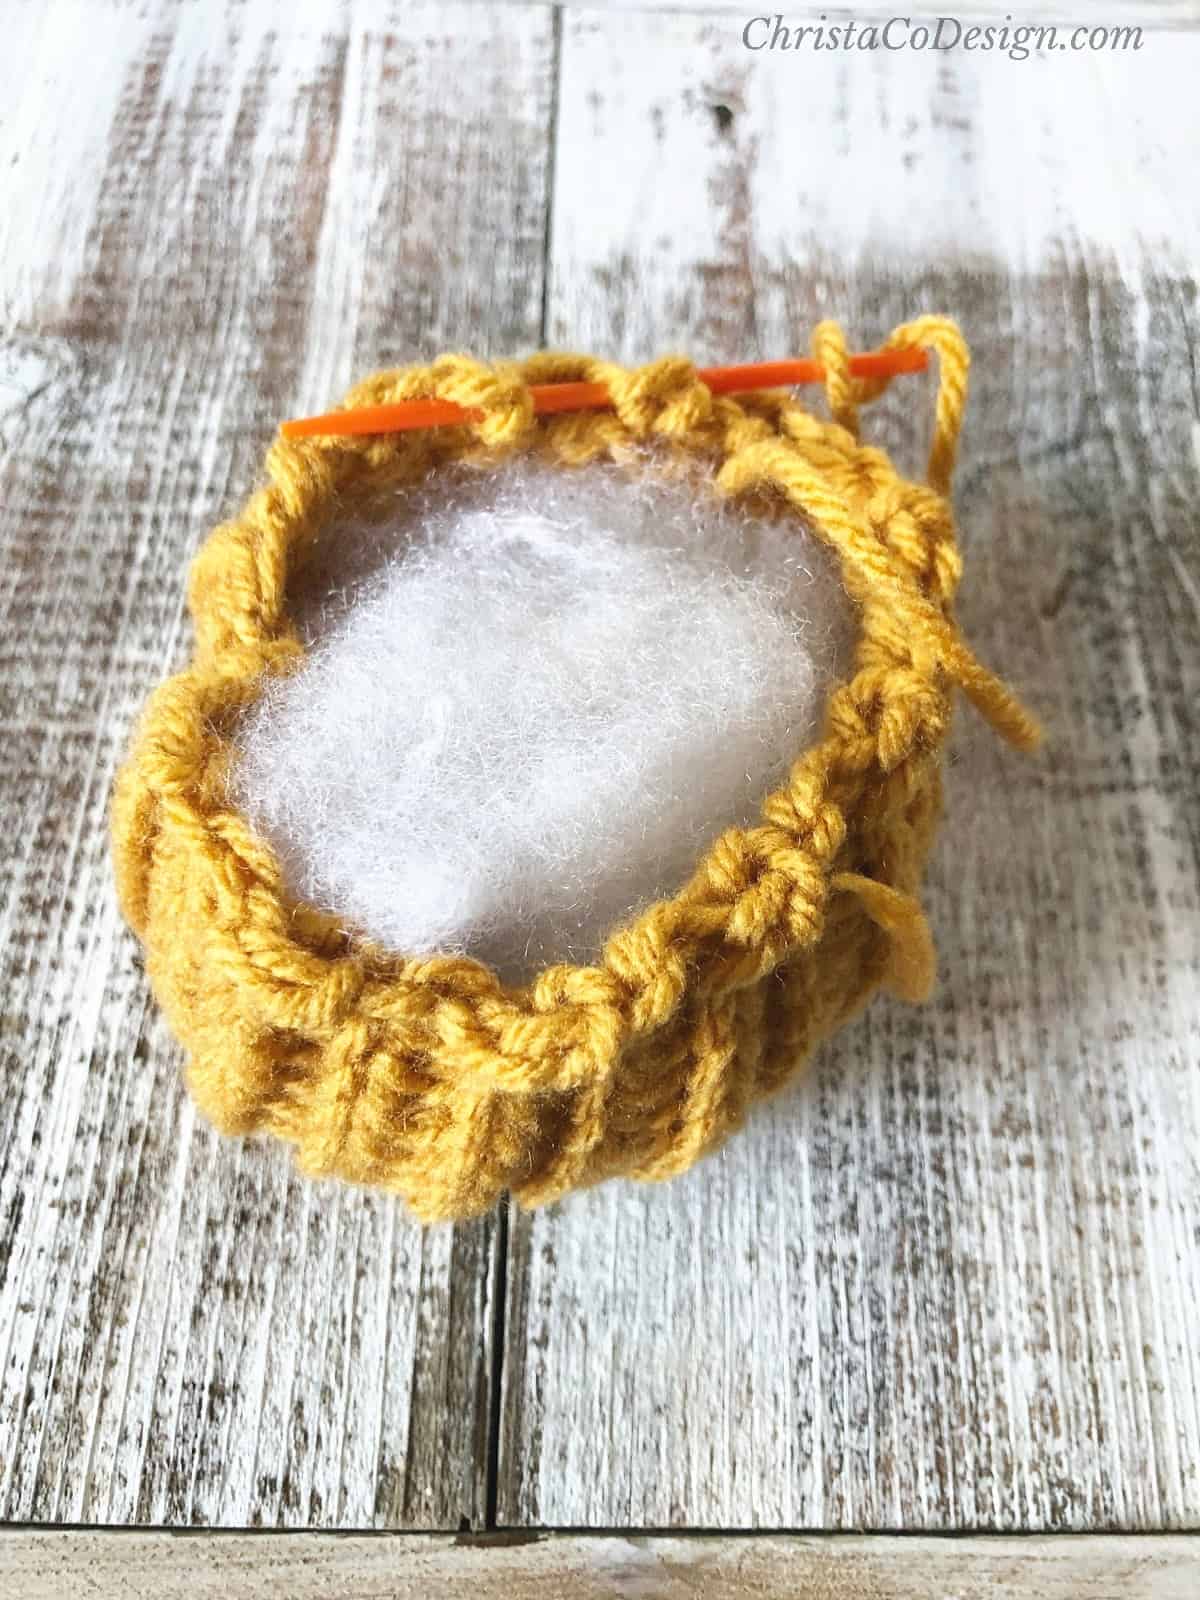
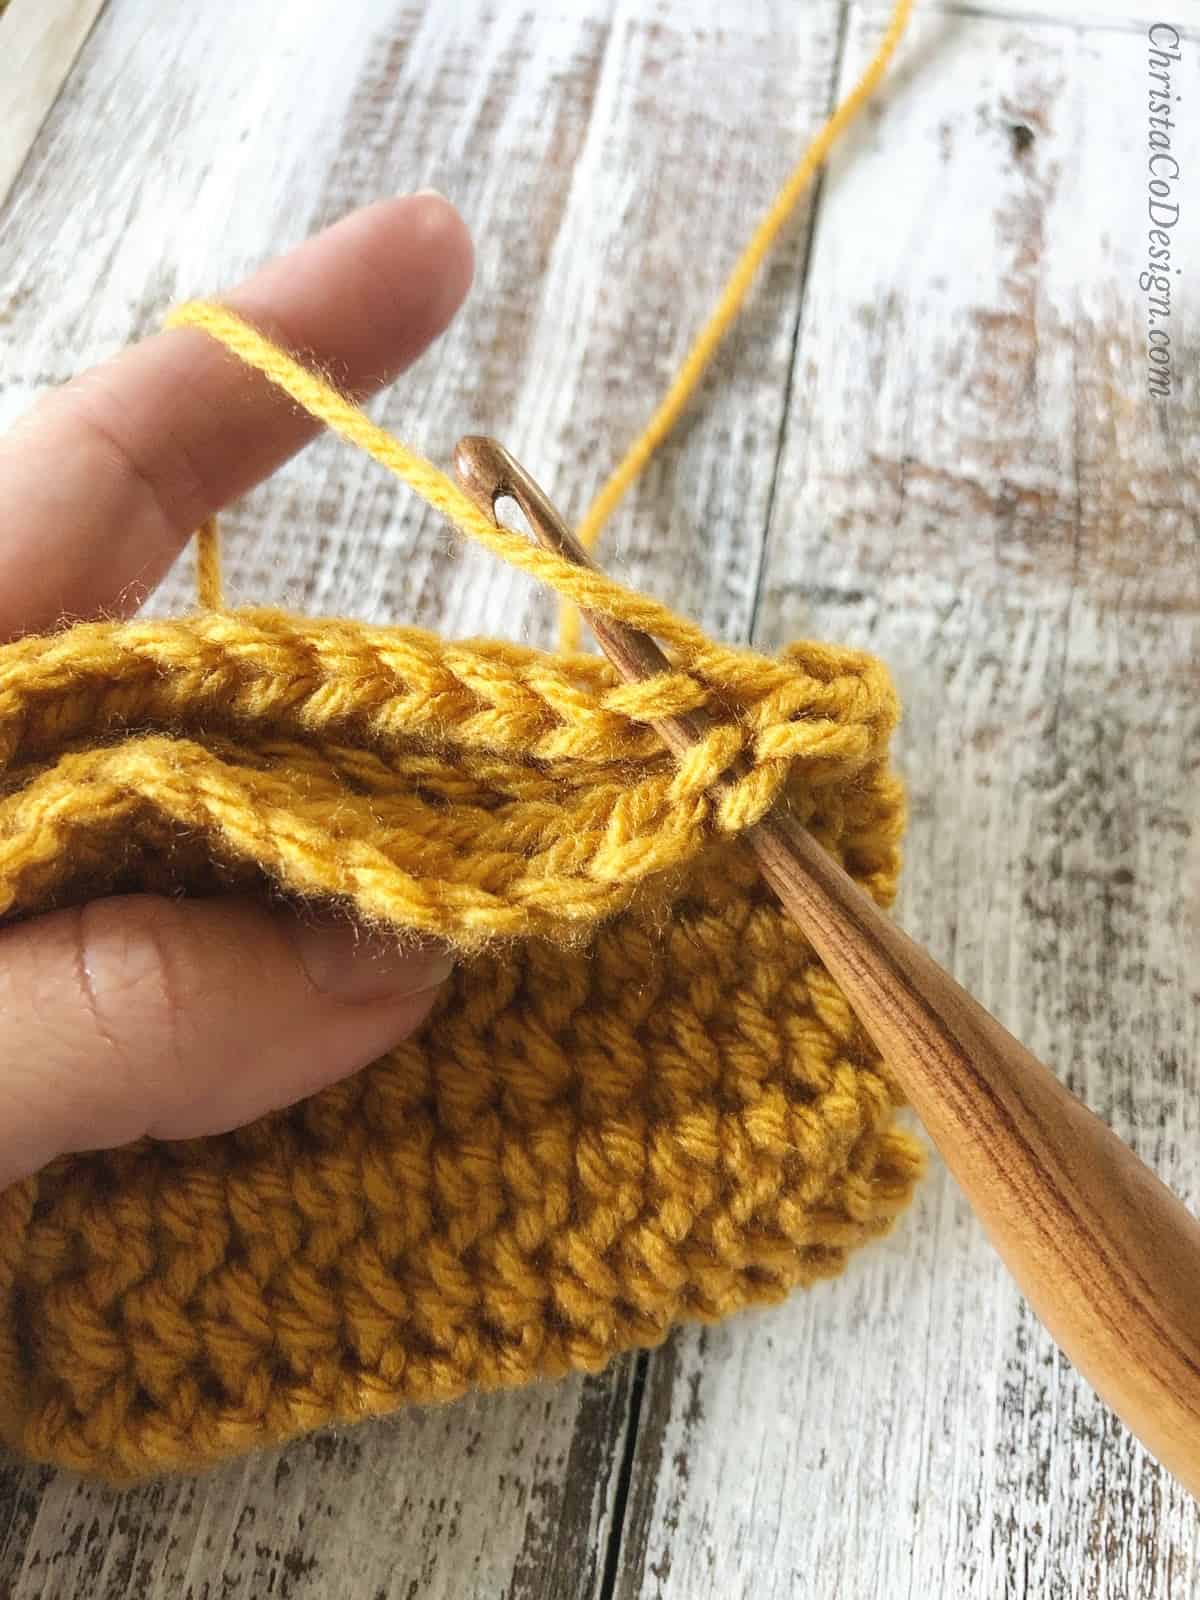
Sew Top
- Thread the needle with an extra long piece of yarn and weave around the top.
- Use the running stitch to close top.
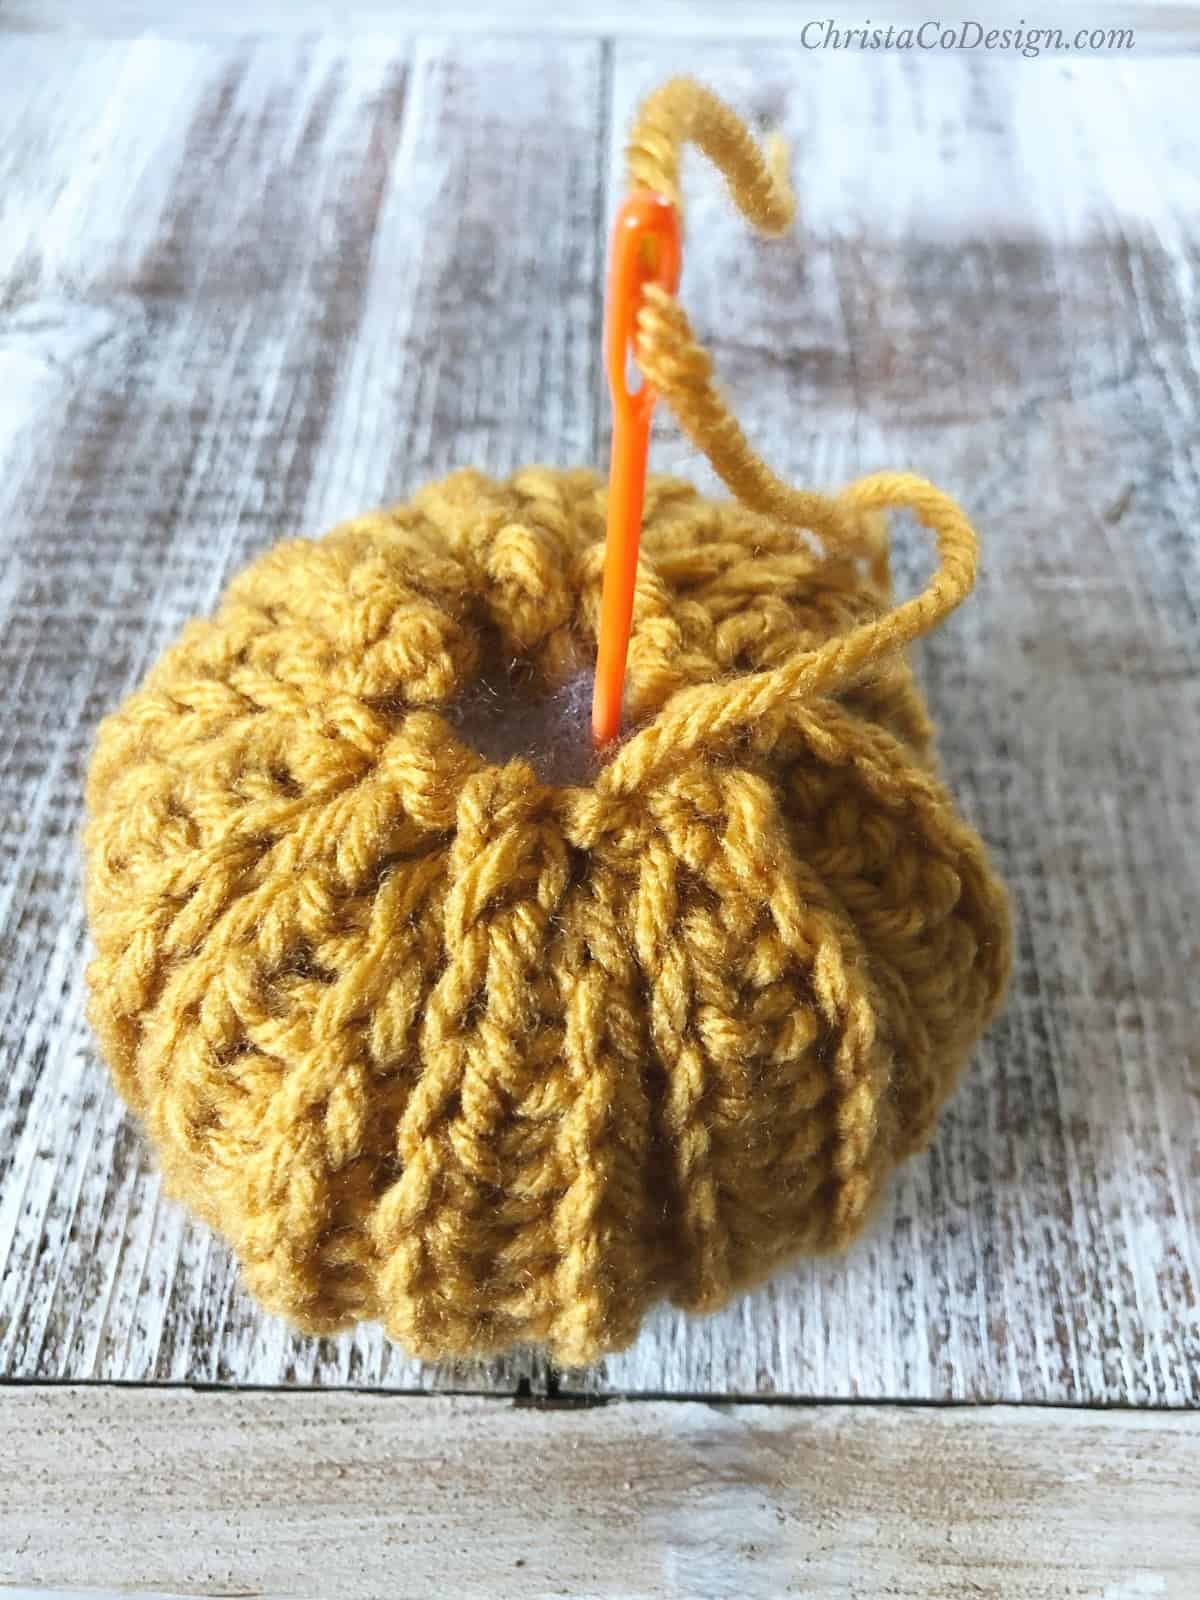
 Leave top slightly open with a small hole to fit your chosen stem.
Do not cut yarn. If you want a more rounded pumpkin then you can stop here. For a more segmented look continue below.
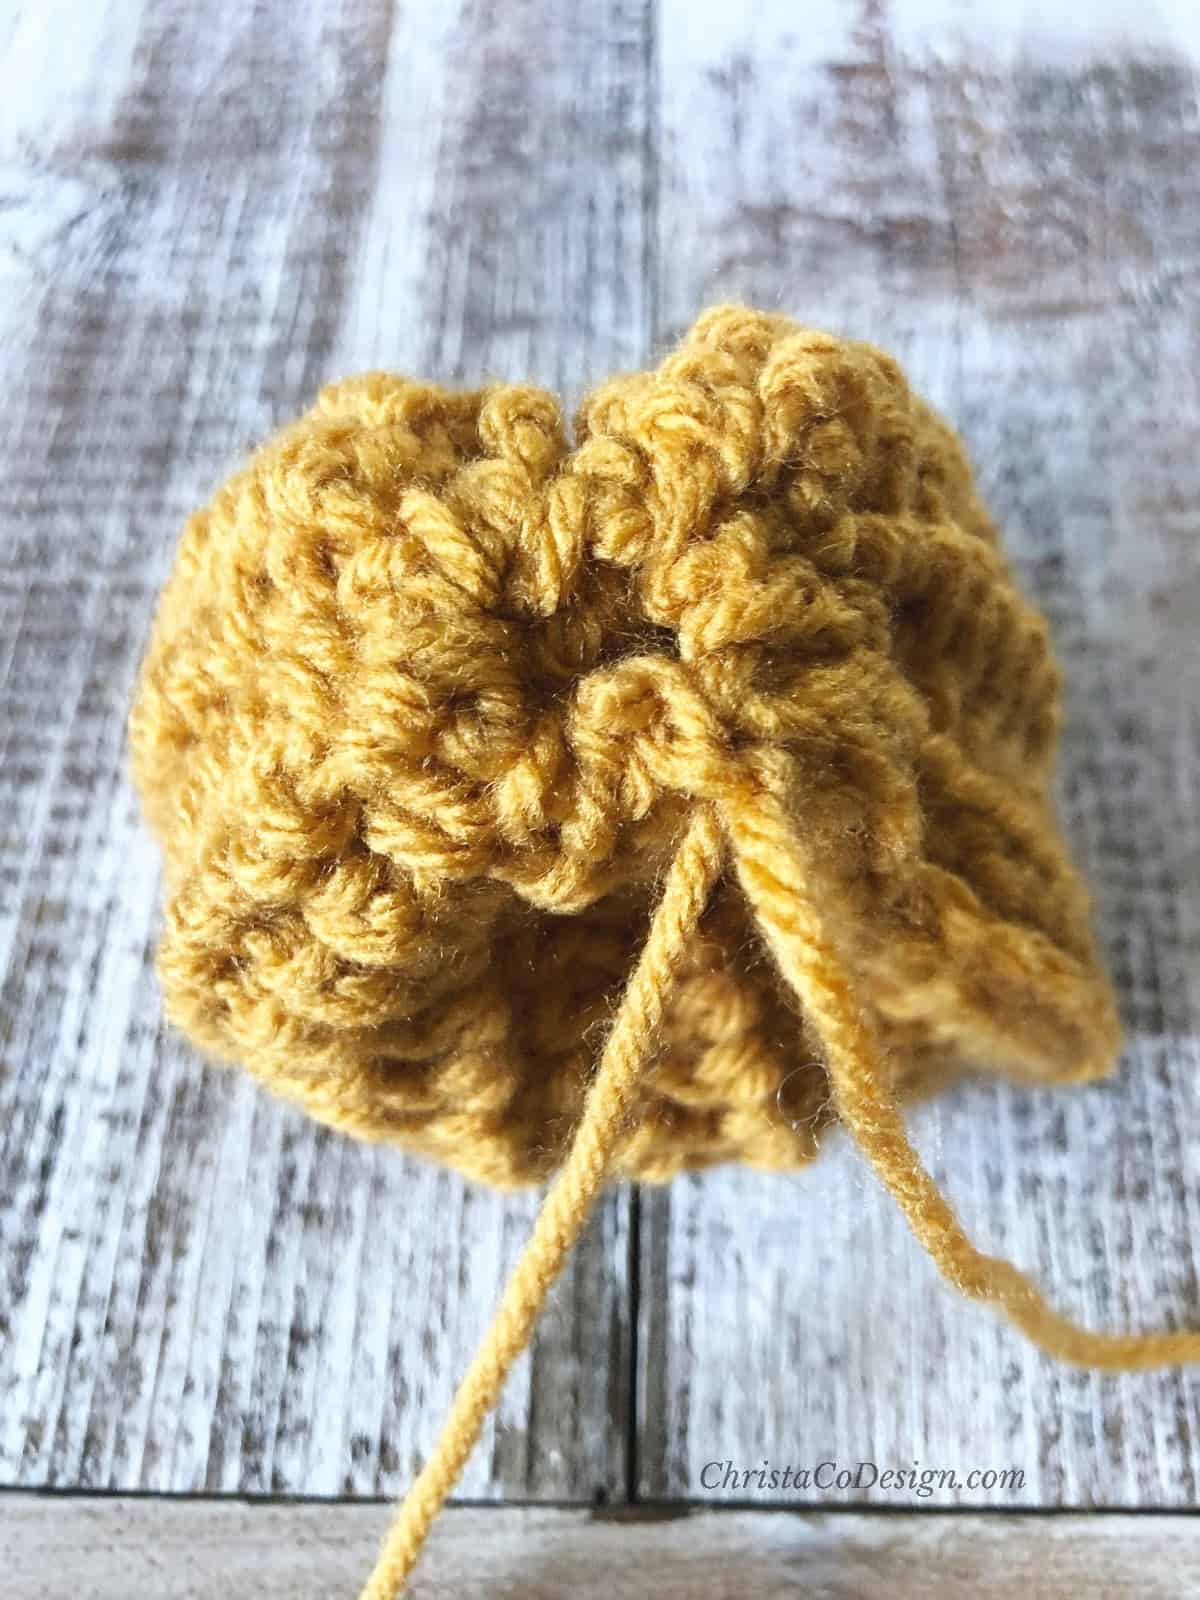
Segment
- To create the segments, with matching yarn and needle thread needle straight down, through filling and out the bottom.
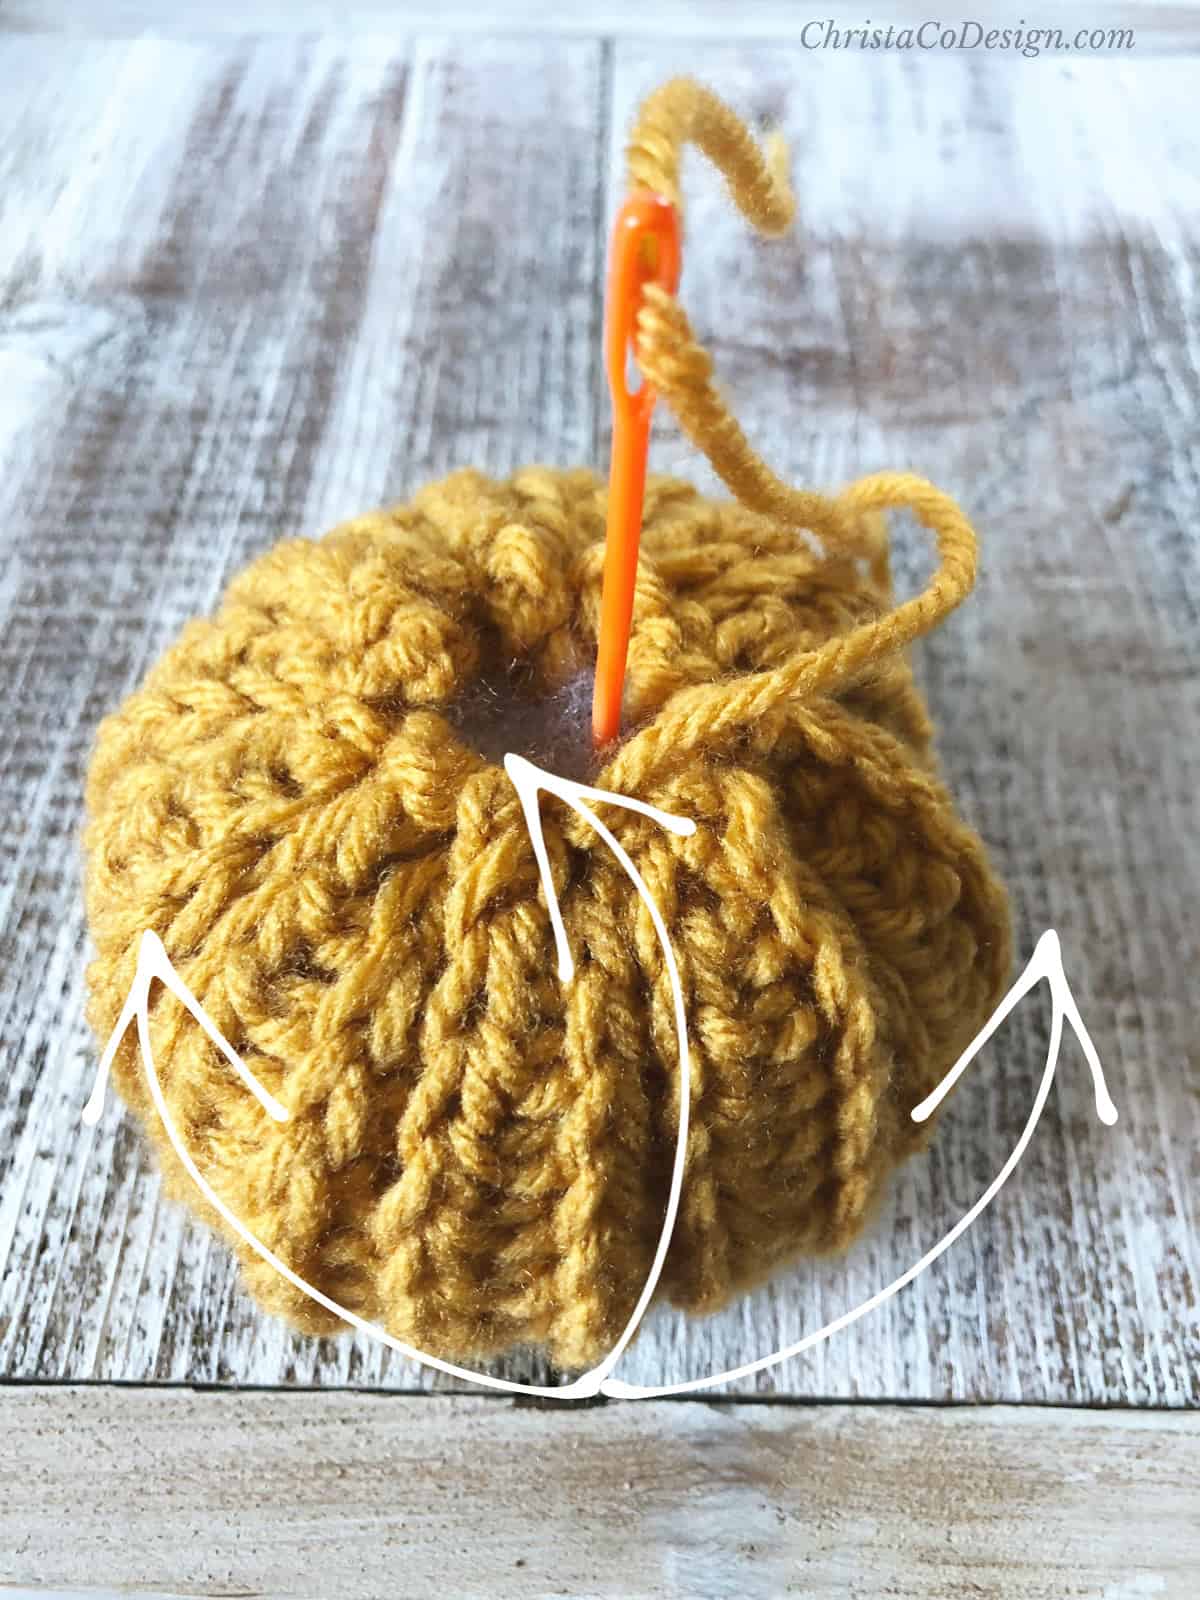
- Pull the needle and yarn out of the bottom, wrap it around the outside of the pumpkin and back down into the center.
- Continue to repeat around the outside of pumpkin for the number segments you want. Remember to leave room for your stem in the center.
Crochet Stem
Work in continuous rounds. Don’t join, mark first st of each round.
Start with a mc.
Rnd 1. 6 sc into the mc. (6 sts)
Rnds 2-7. Sc in each st around. (6 sts)
Rnd 8. 2 sc in each sc around. (12 sts)
Rnd 9. 2 sc in first st, sc in next st, *{2 sc in next st, sc in next st} rep from * around. (18 sts)
Rnd 10. 2 sc in first st, sc in each of next 2 sts, *{2 sc in next st, sc in each of next 2 sts} rep from * around. (24 sts)
Rnd 11. Sc in each sc around, sl st over twice.
Leave a long tail.
Sew stem to top of pumpkin, over the hole.

Finishing
Cut yarn, weave in ends.
If not crocheting the stem, add a small cinnamon stick or similar to the center for the stem.
Notes
You can crochet these pumpkins in differnet yarn weights and get such unique results.
Recommended Products
As an Amazon Associate and member of other affiliate programs, I earn from qualifying purchases.