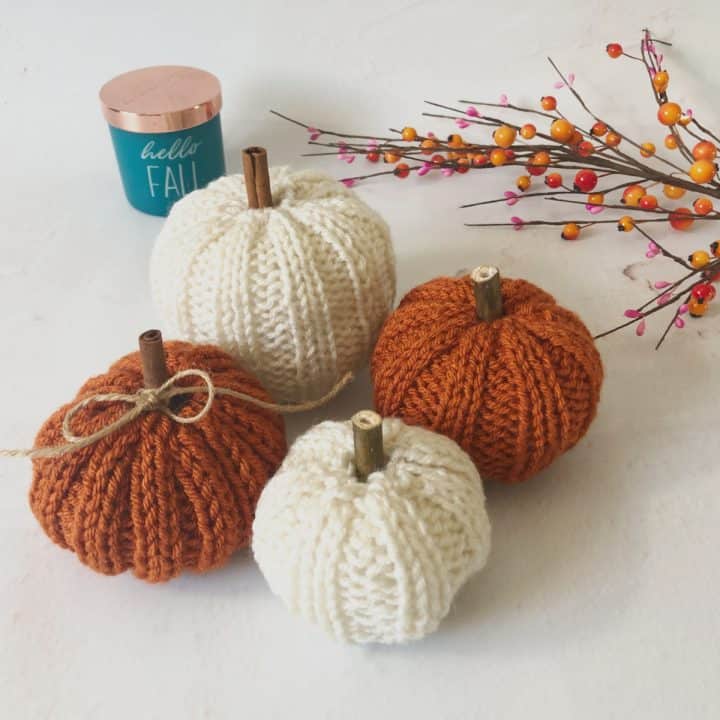
Free Pumpkin Knitting Pattern-Beginner Friendly
Learn how to knit these pumpkins for your fall home decorating. This pumpkin knitting pattern includes three sizes.

This post contains affiliate links, I may earn a fee. Read more disclosure policy.
Join the ChristaCoDesign Newsletter
Never miss a pattern!
Whether you knit on straight needles or prefer knitting on a circular needle in the round, this pumpkin pattern has you covered. It’s a quick, worsted weight knit pumpkin pattern.
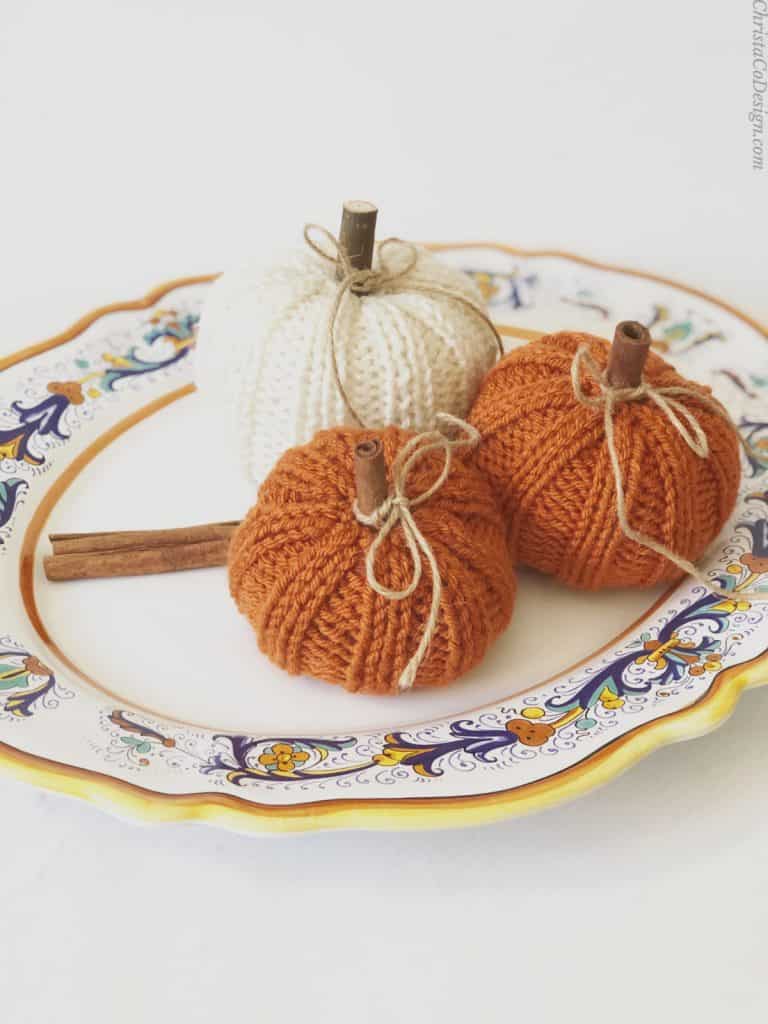
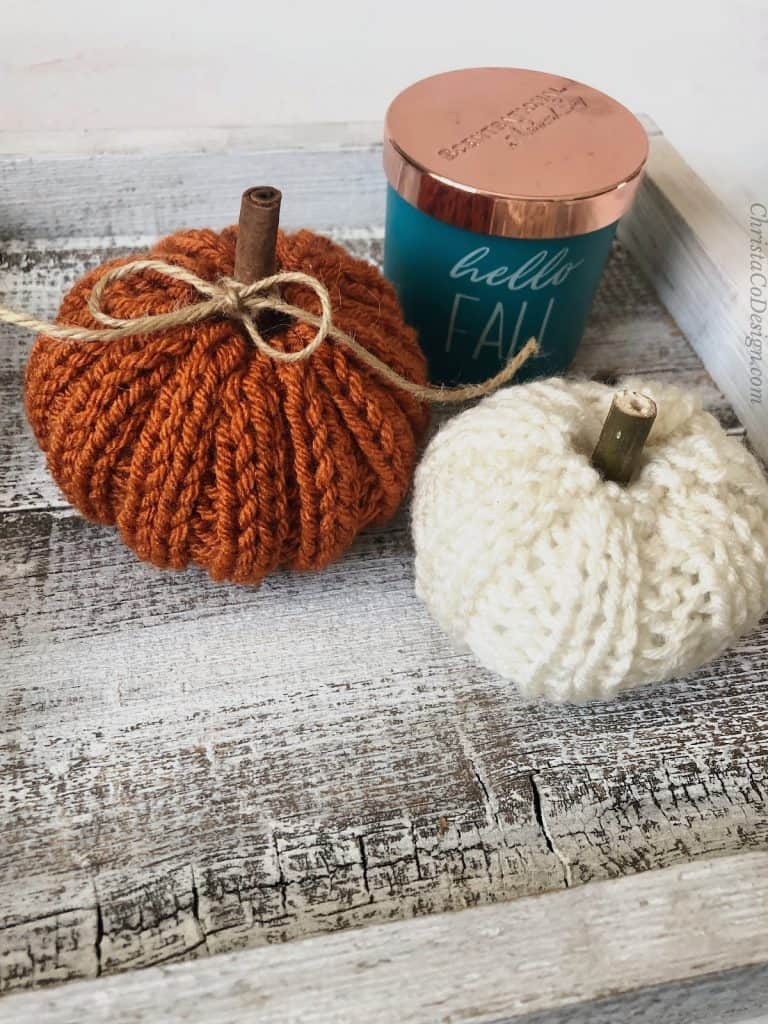
The easy knitted pumpkin pattern is a free pattern. Plus the pattern includes directions for knitting these pumpkins flat or in the round. Grab all the yummy mustard, burnt orange and cinnamon colored yarn to knit up for this harvest of pumpkins.
Purchase the ad-free, well formatted printable PDF Pattern from my shop. Scroll down for the free pattern!
Purchase My Ad-Free PDF Patterns In Your Favorite Shop Here:
There are three pumpkin sizes to choose from. Or you can make them all and fill your home with colorful knit pumpkins for the season. This knitting pattern is beginner friendly.
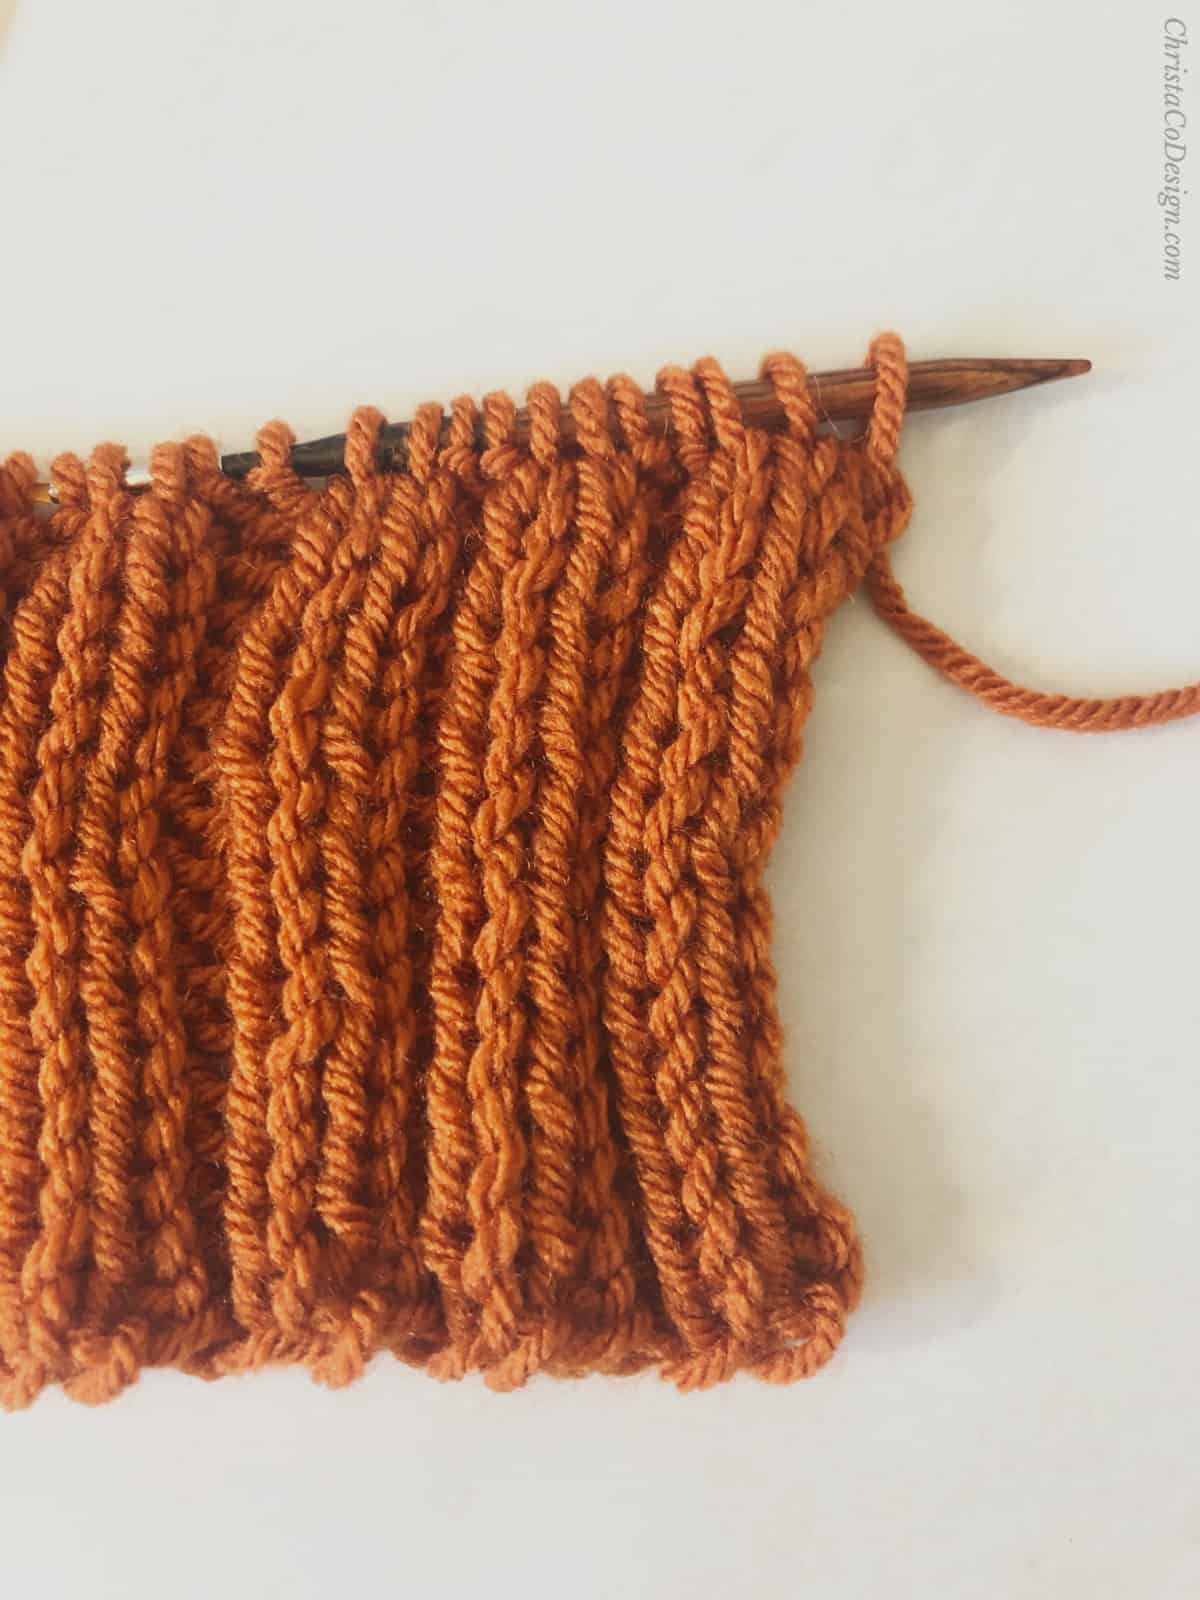
Knit a simple 2×2 rib to make these pumpkins. The pattern is easy to adjust, if you’d like to make a larger or smaller pumpkin. Read on for more pattern details and what you need to get started.
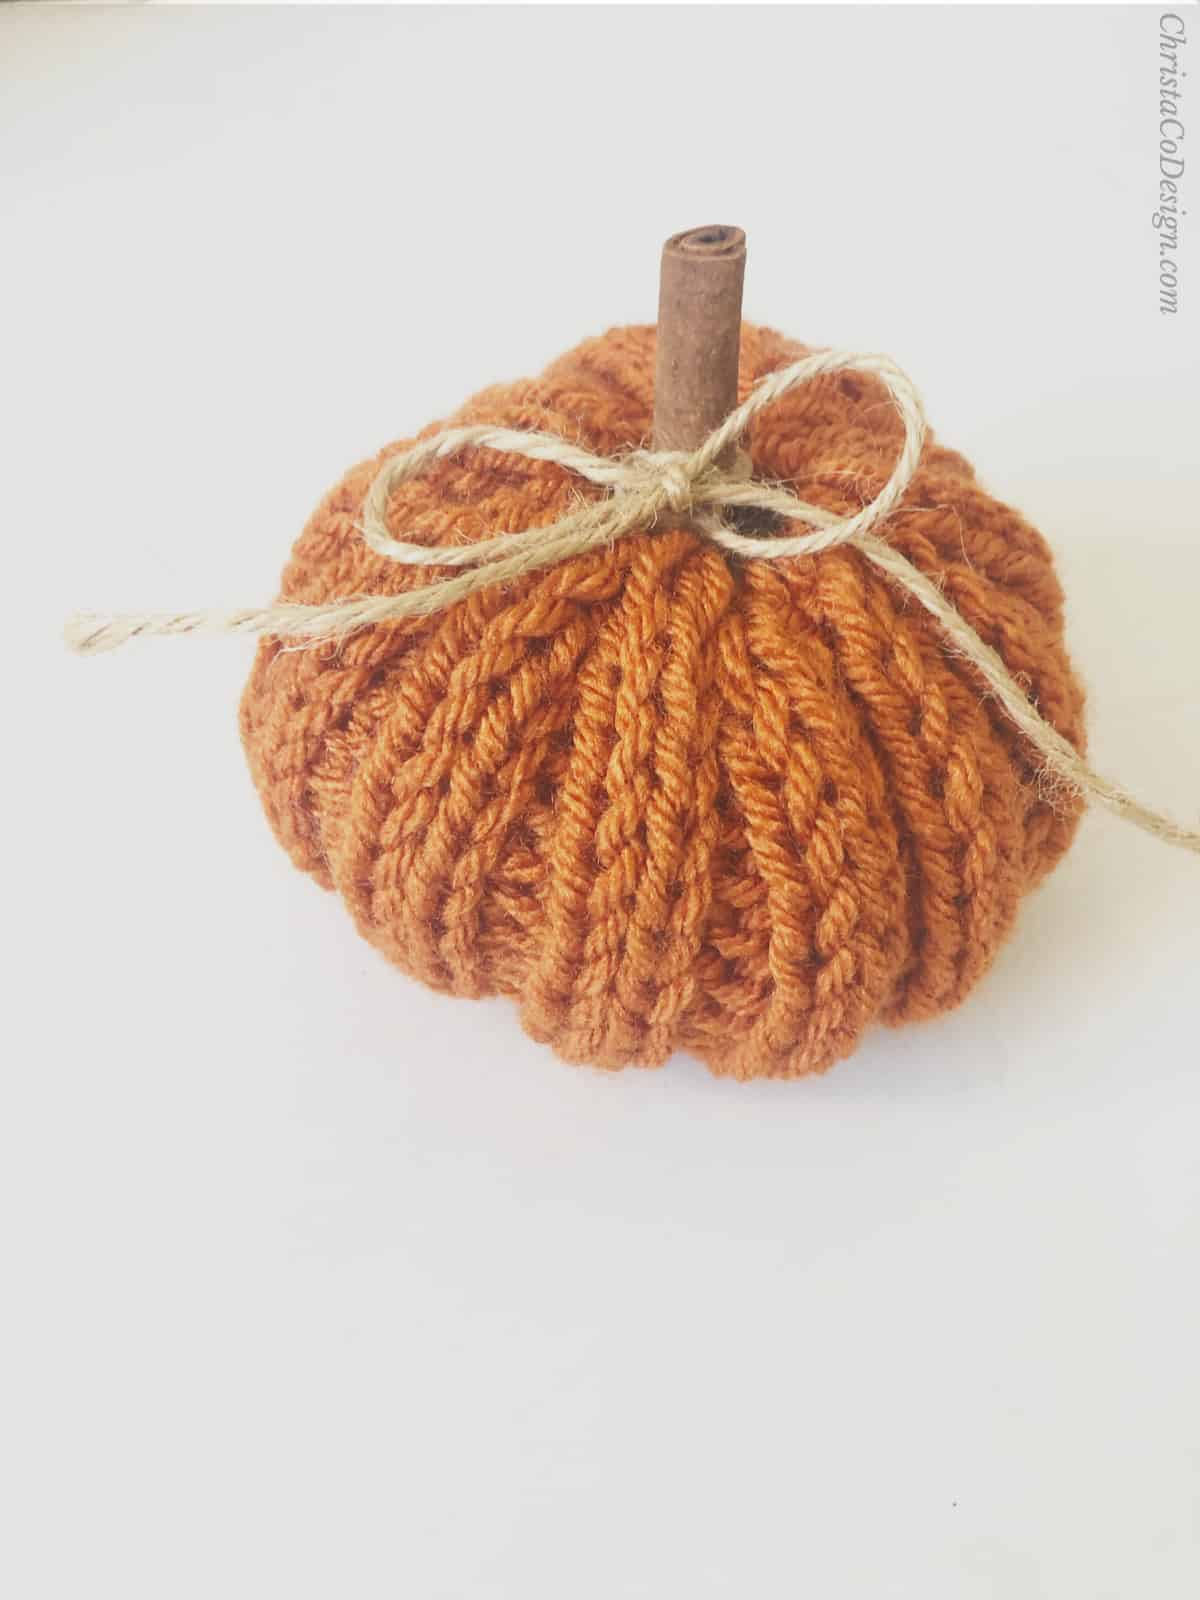
Top off your simple knitted pumpkins with cinnamon sticks and a bow. I love the double whammy of pumpkin season love with this combination.

More Fall Favorite Free Knitting Patterns
- Chunky Knit Earwarmer makes a great one skein (or less) knit gift.
- Bella Vita Easy Knit Blanket is a gorgeous chunky blanket knit in super bulky yarn.
- Giana Knit Pocket Shawl is a classic beauty in easy, beginner garter stitch.
Never Miss a Pattern
Be sure to join my newsletter for my weekly emails + access to my Resource Library.
The Yarn I Used For These Knit Pumpkins
You can use any worsted weight yarn to knit these pumpkins. I used various yarns I had in my stash.
The rusty color is from Hobby Lobby I Love This Yarn. The cream colored yarn is Red Heart’s Super Saver in the color Aran.
I used up all my mustard colored yarns making my Ribbed Crochet Pumpkins. If you’re also a crocheter you’re sure to love this crochet pumpkin pattern!
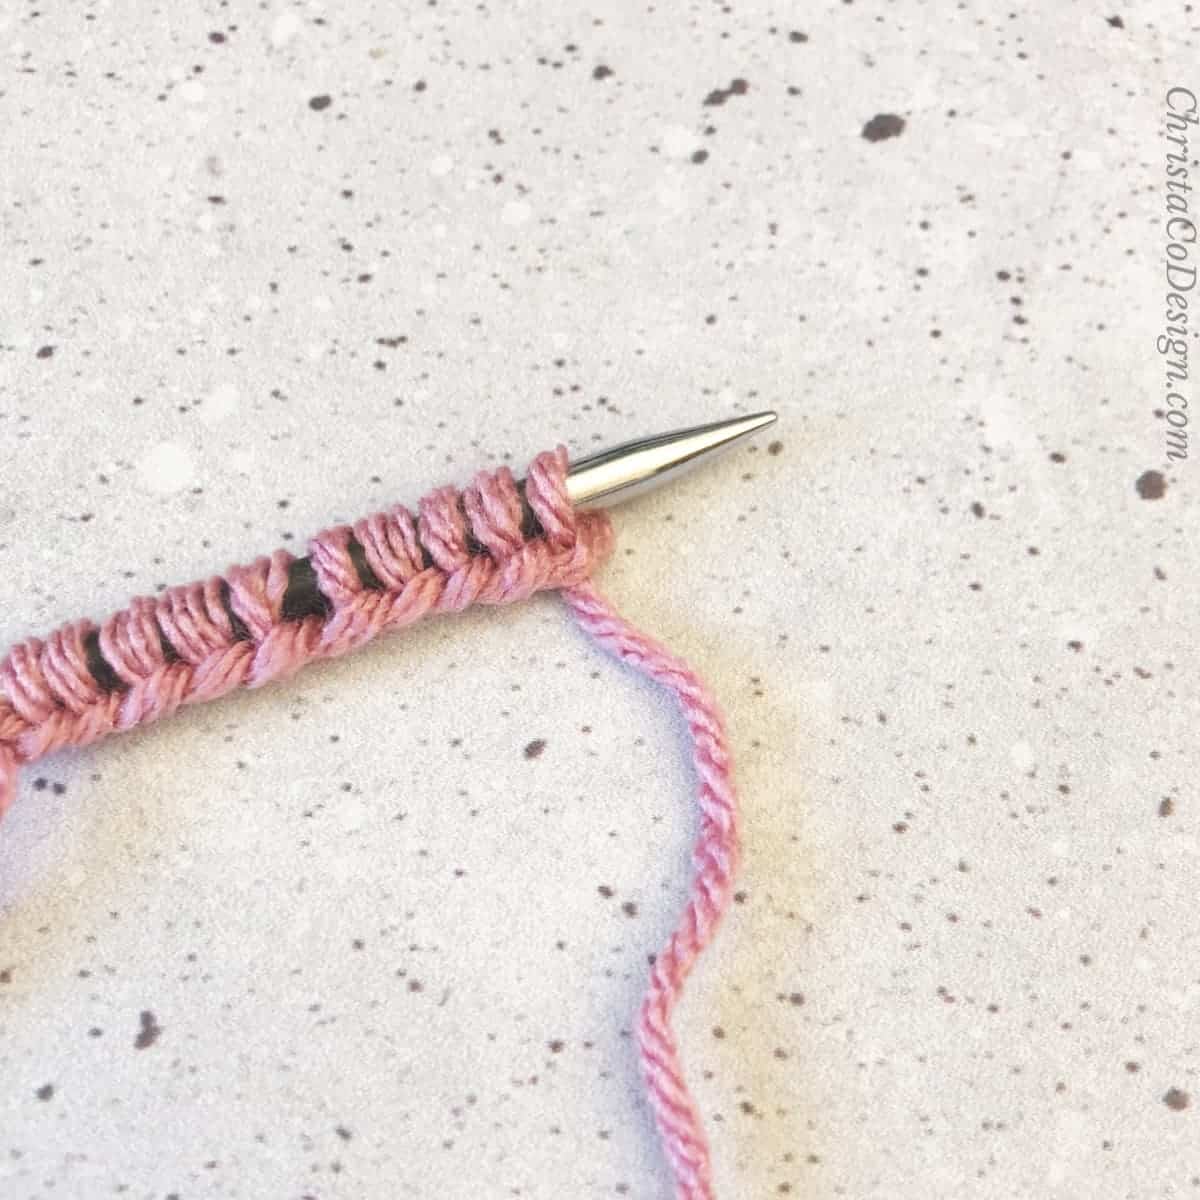
Stitch
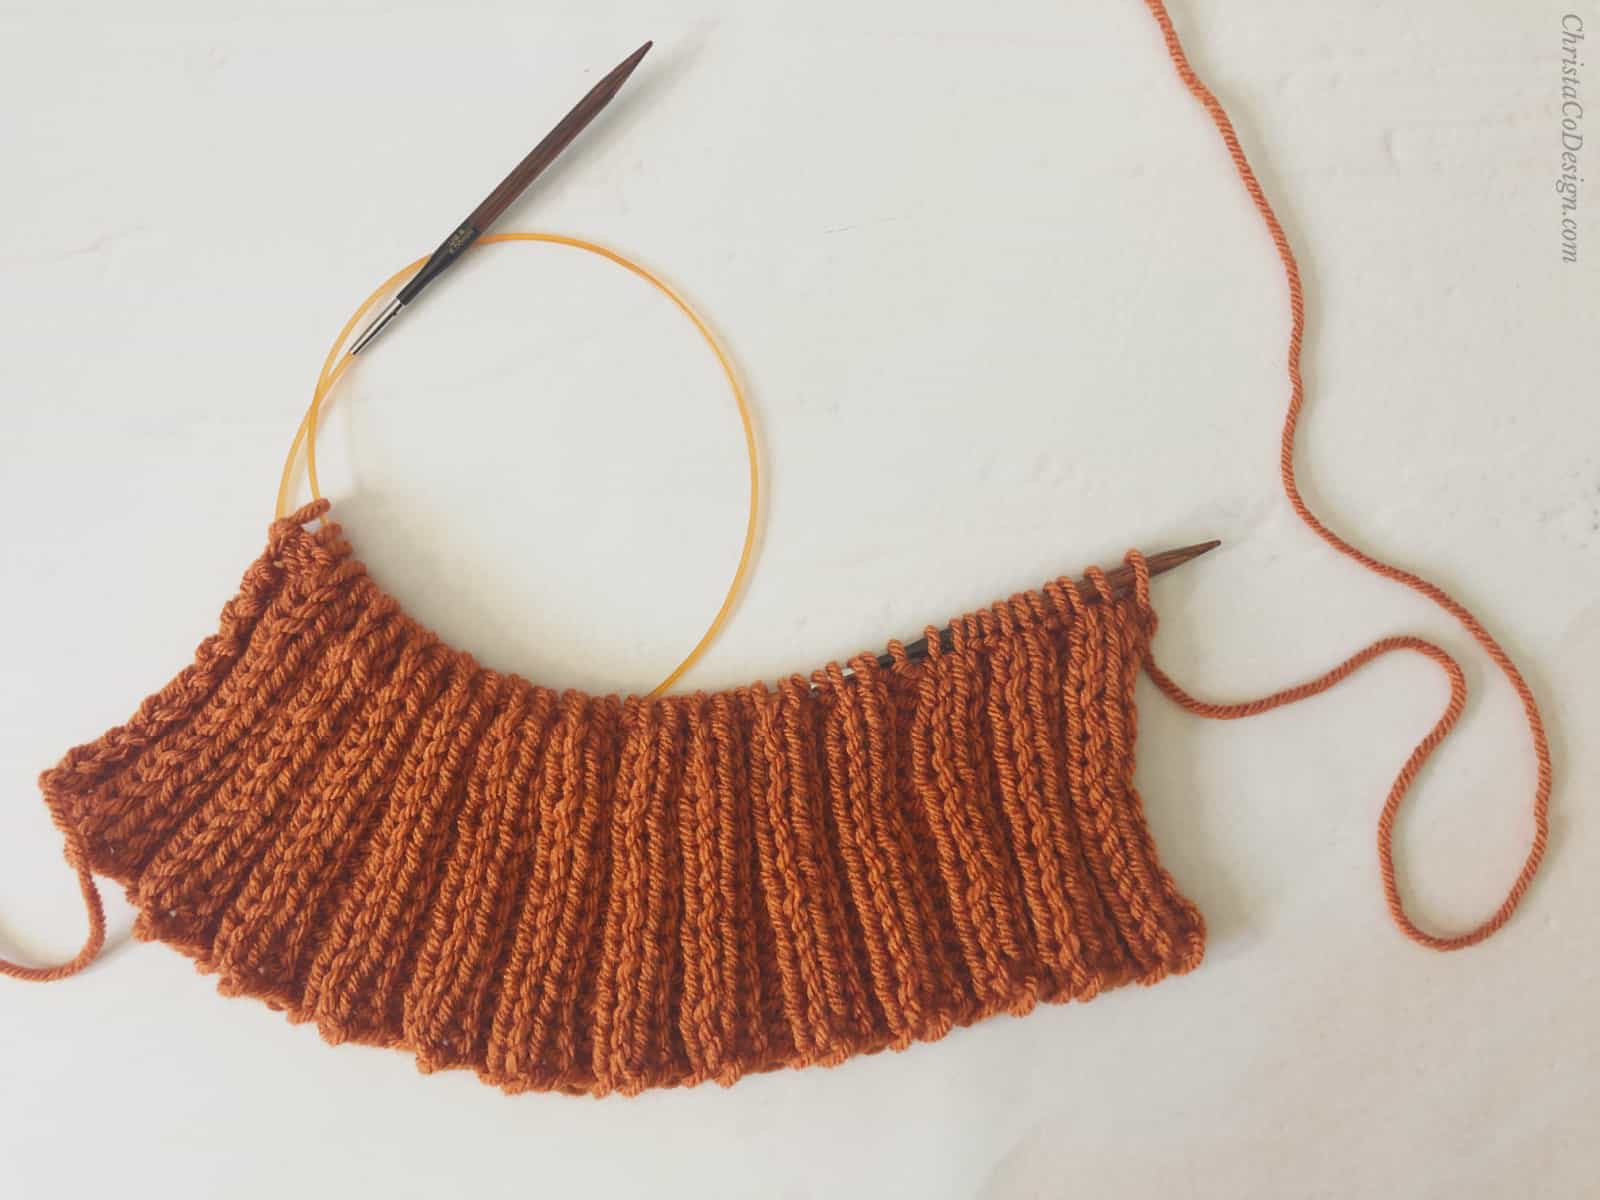
For these pumpkins I used a 2 x 2 ribbing. This is an easy way to create the ridges of a pumpkin. I love that you can knit the ribbing flat or in the round.
If you choose to knit the pumpkins in the round you will need circular needles or DPNs. If you choose to knit them flat then you’ll want to seam them with an invisible vertical seam, so your ribbing stays uniform around.
Materials
- 50 yds/46m total of #4 medium worsted weight yarn*
- US 7/4.5mm knitting needles;* straight knitting needles for working this one flat, or circular knitting needles for working this pattern in the round.
- Yarn needle, Measuring tape, Scissors
- Cinnamon stick, or similar for stem
- Polyfill to stuff
- Optional stitch marker if working in the round
Notes
- Worked flat st multiple is 4+6
- Worked in the round st multiple is 4.
- Pattern is written for 3 sizes where the smallest is given first and the larger sizes follow in parenthesis.
Stitches/Abbreviations (US Terms)
st(s)- stitch(es)
rep- repeat
CO- Cast On
K- knit
P- purl
Gauge
4 ”/10cm x 4”/10cm = 26 sts x 19 rows in 2×2 rib
Level
Easy
Construction
If working as a flat rectangle you will sew edges to create a tube. If working in the round, you will knit the tube. Next you will sew the bottom closed. The top will be finished the same way, but you will also add the stick to serve as a stem.
Finished Dimensions
Makes finished pumpkins knit to approximately:
3.5”/9cm wide x 2”/5cm tall
4”/10cm wide x 3”/7.6cm tall
5”/12.7cm wide x 4”/10cm tall
Adjustment
Cast on more stitches for a wider pumpkin.
If working flat, cast on in multiple of 4 and then add 6.
If working in the round, cast on in multiples of 4.
Knit more rows for a taller pumpkin.
Purchase the ad-free, well formatted printable PDF Pattern from my shop. Scroll down for the free pattern!
The pattern begins with how to work pumpkin flat. Scroll down for how to knit these pumpkins in the round.
Scroll down for the free Knit Pumpkin Pattern.
Pattern Instructions
How to Knit a Pumpkin
Learn how to knit an easy pumpkin with 2 x 2 ribbing.
Materials
- 50 yds/46m of #4 medium worsted weight yarn
- Cinnamon stick, or similar for stem
- Polyfill to stuff
- Optional ribbons or bows
Tools
- US 7/4.5mm needles
- Optional stitch marker if working in the round
- Yarn needle
- Measuring tape
- Scissors
Instructions
To work this pattern flat:
- CO 38 (46, 54)
- K3, *(P2, K2) rep from * until. 3 sts left, P3.
- Rep last row until work is 5”/12.7cm (6”/15.2cm, 6.5”/16.5cm) tall.
 Do not bind off, go to Close Bottom section.
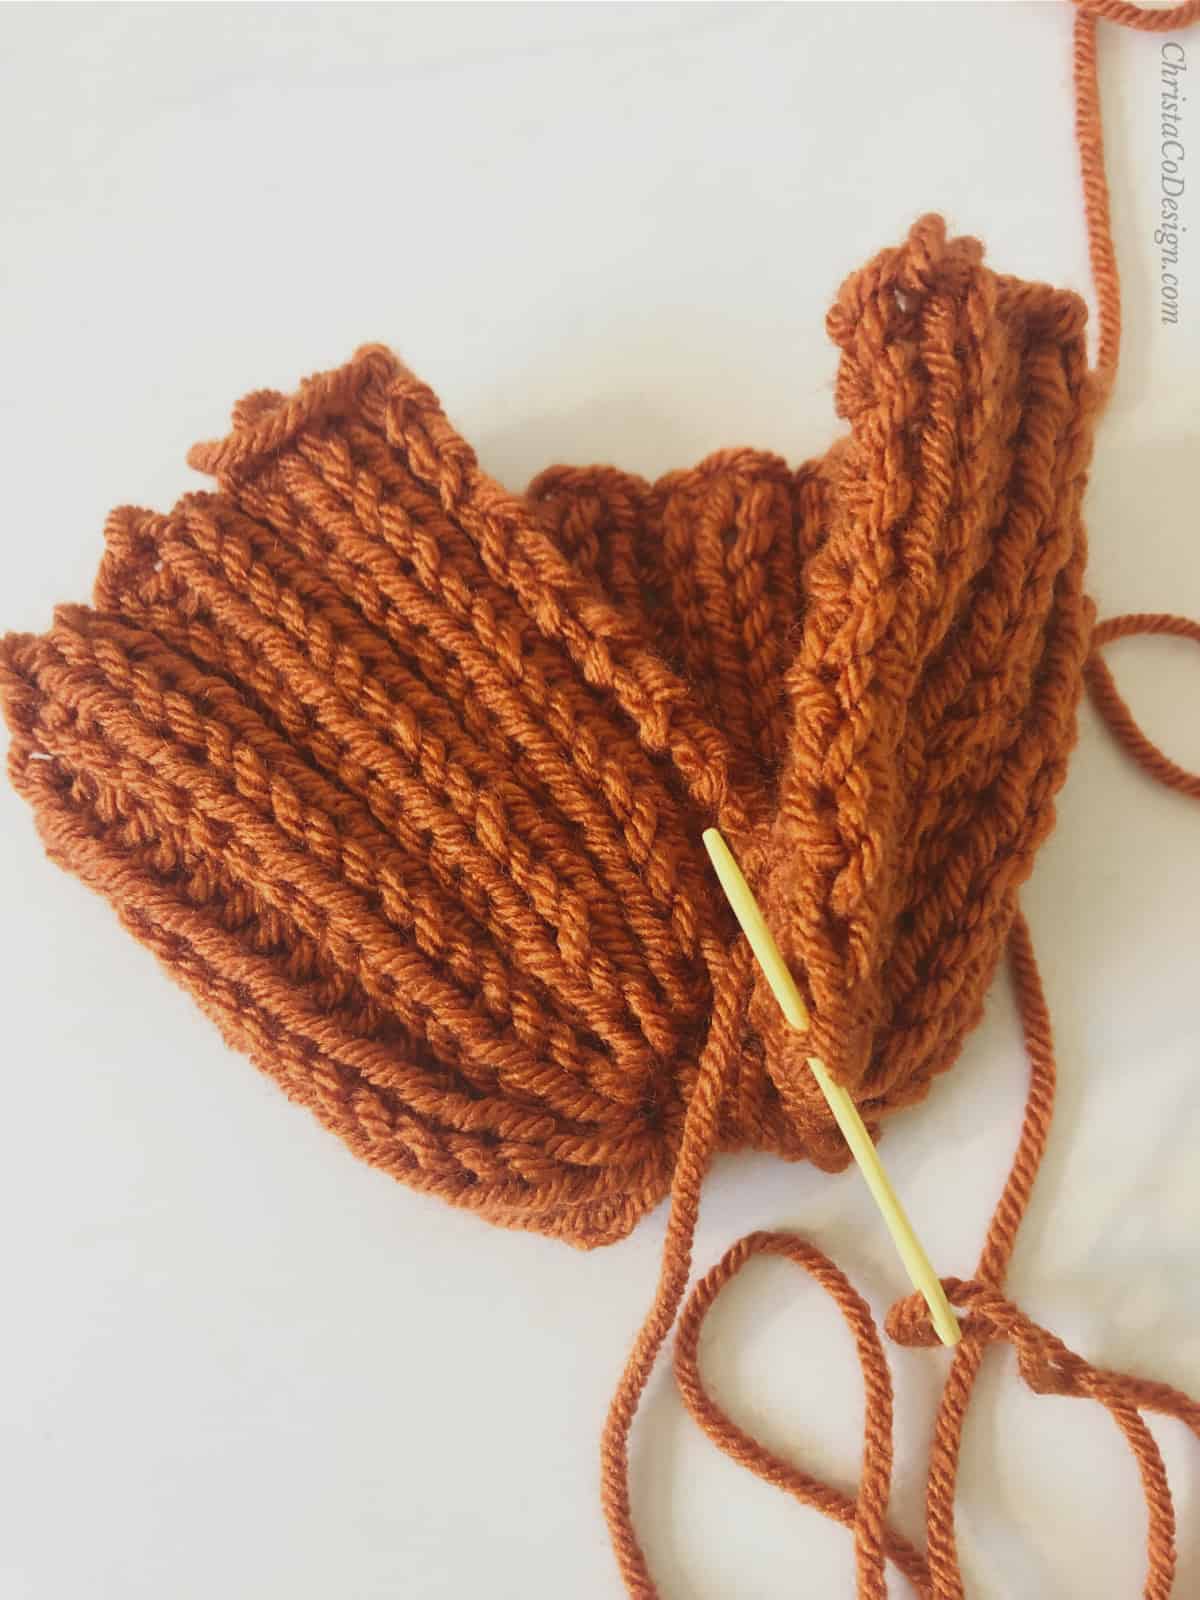
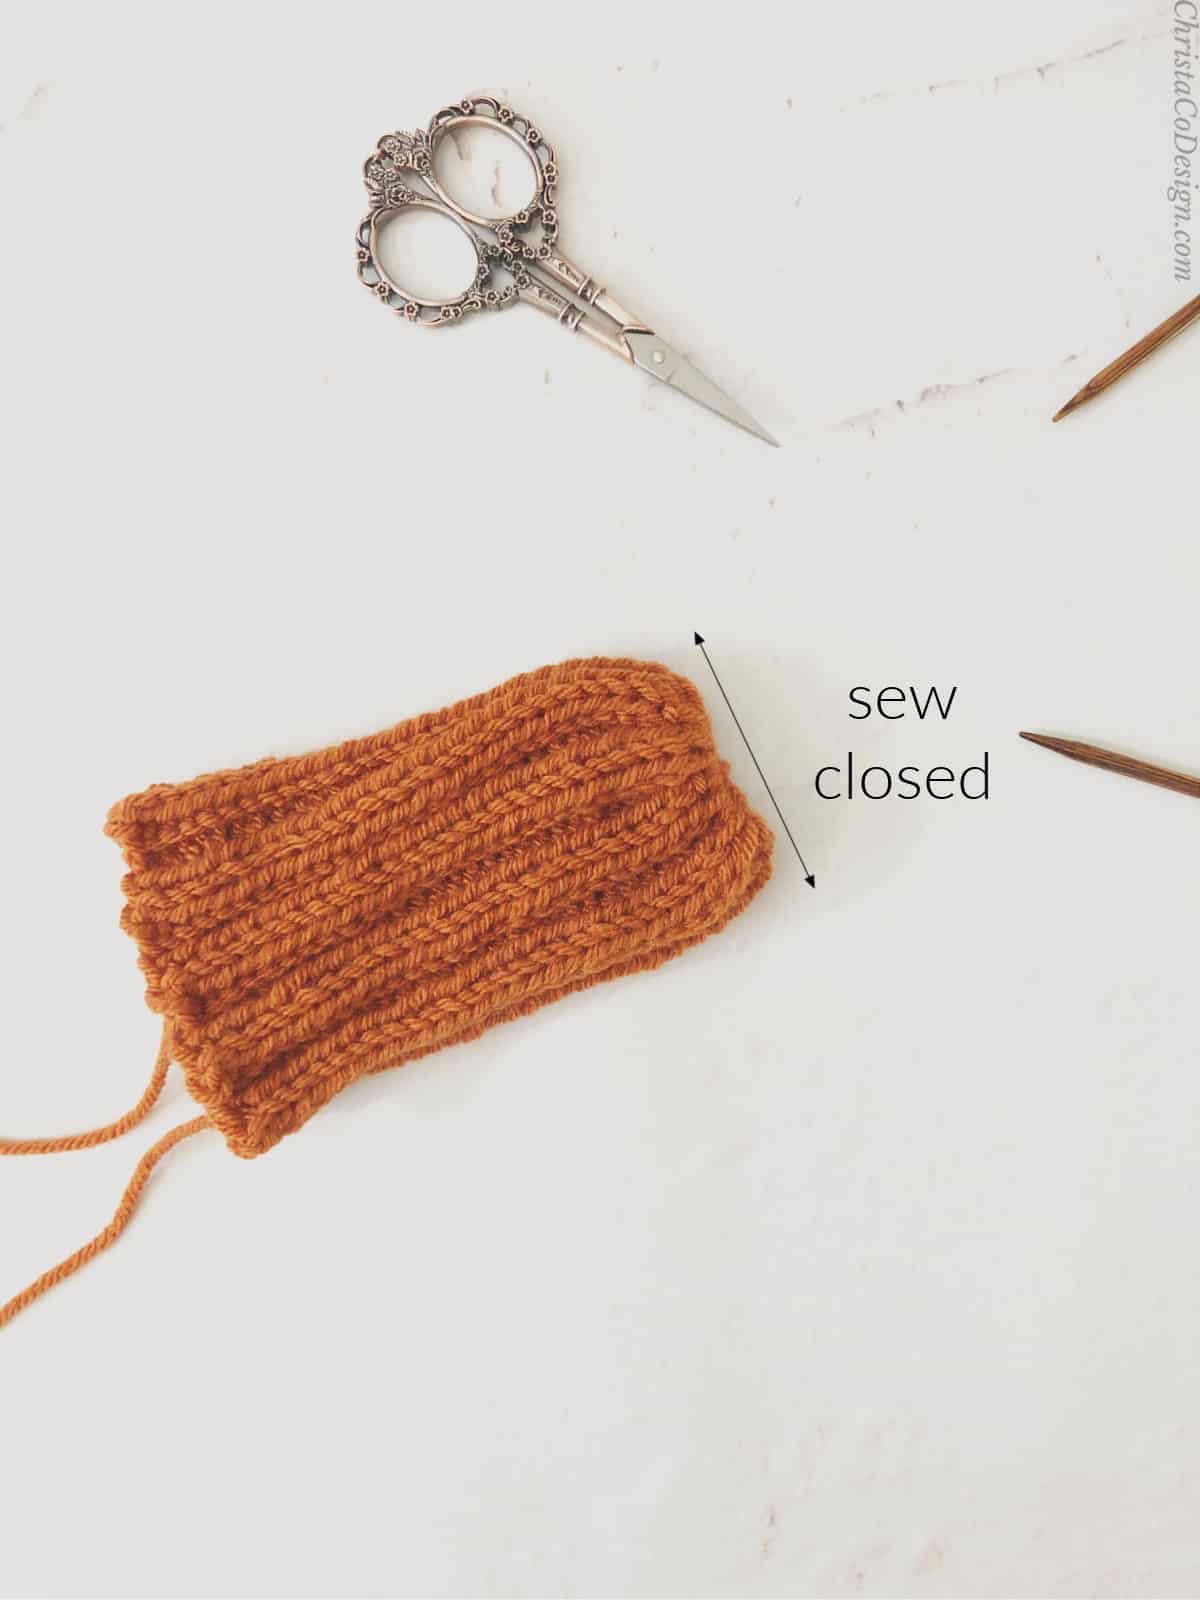
Close Bottom
- Cut a long tail. Weave yarn needle through all the live stitches on your needle.
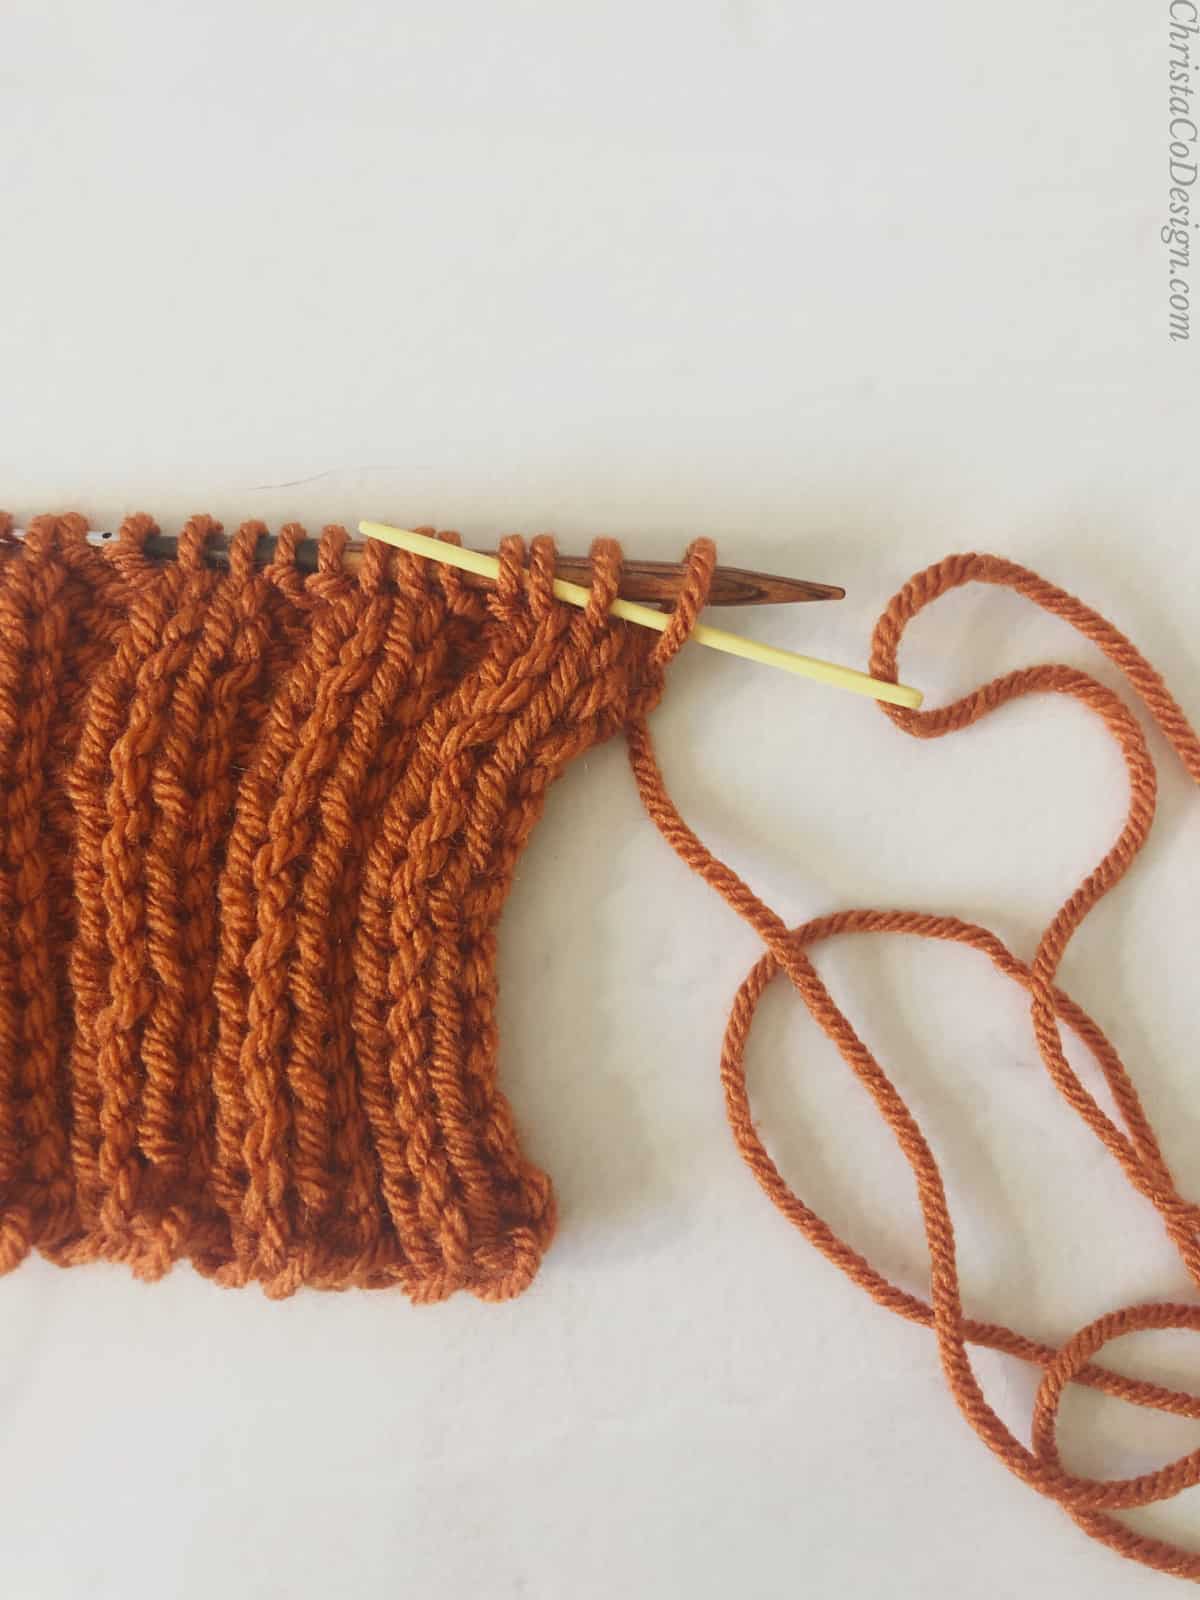
- Pull yarn through to close, but not too tightly.
Sew closed forming the bottom of your pumpkin.
Weave away end.
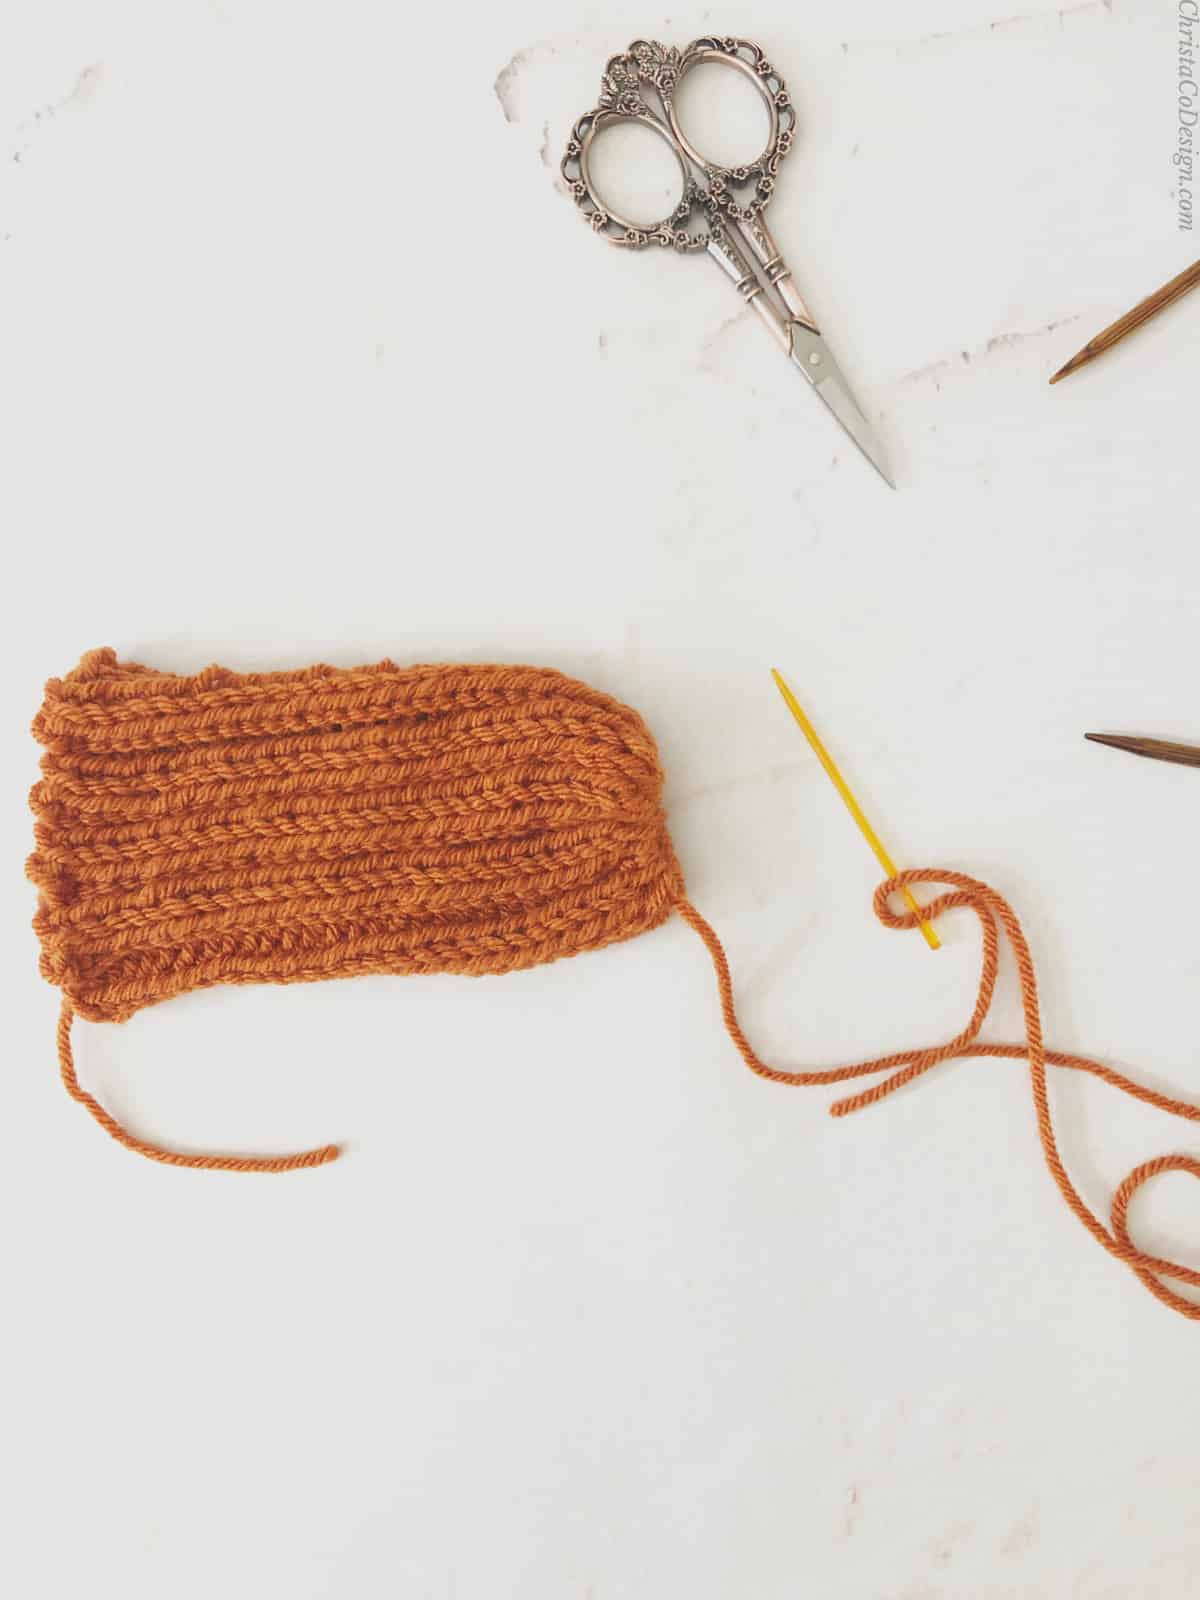
Create the Tube
- Use an invisible vertical seam (mattress stitch) to sew sides together.
- Cut yarn, leaving a long tail for seaming the bottom.

Go to Stuff.
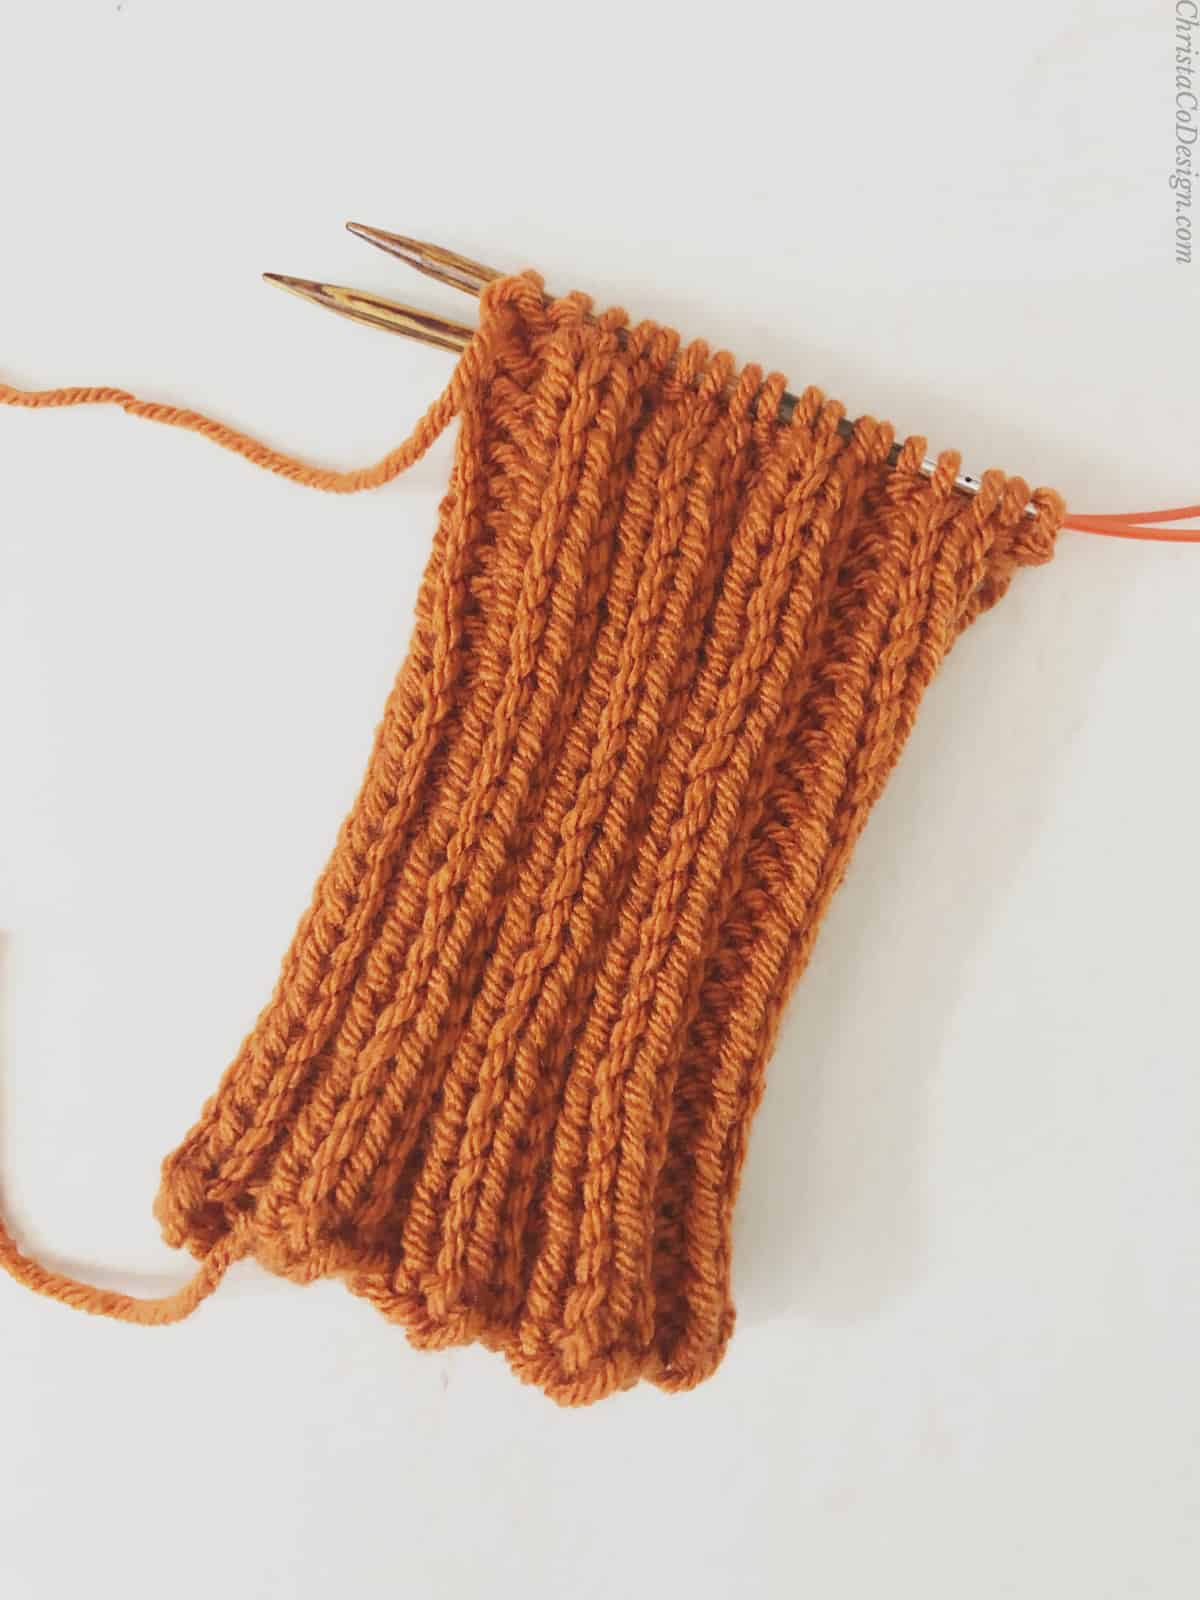
To work this pattern in the round:
- CO 36 (44, 52) Join in the round, mark first st.
- *(K2, P2) rep from * around.
- Rep Rnd 1 for 19 (26, 31) rows or until work is 5”/12.7cm (6”/15.2cm, 6.5”/16.5cm) tall. Do not bind off.
Close Bottom
- Cut a long tail. Weave yarn needle through all the live stitches on your needle.
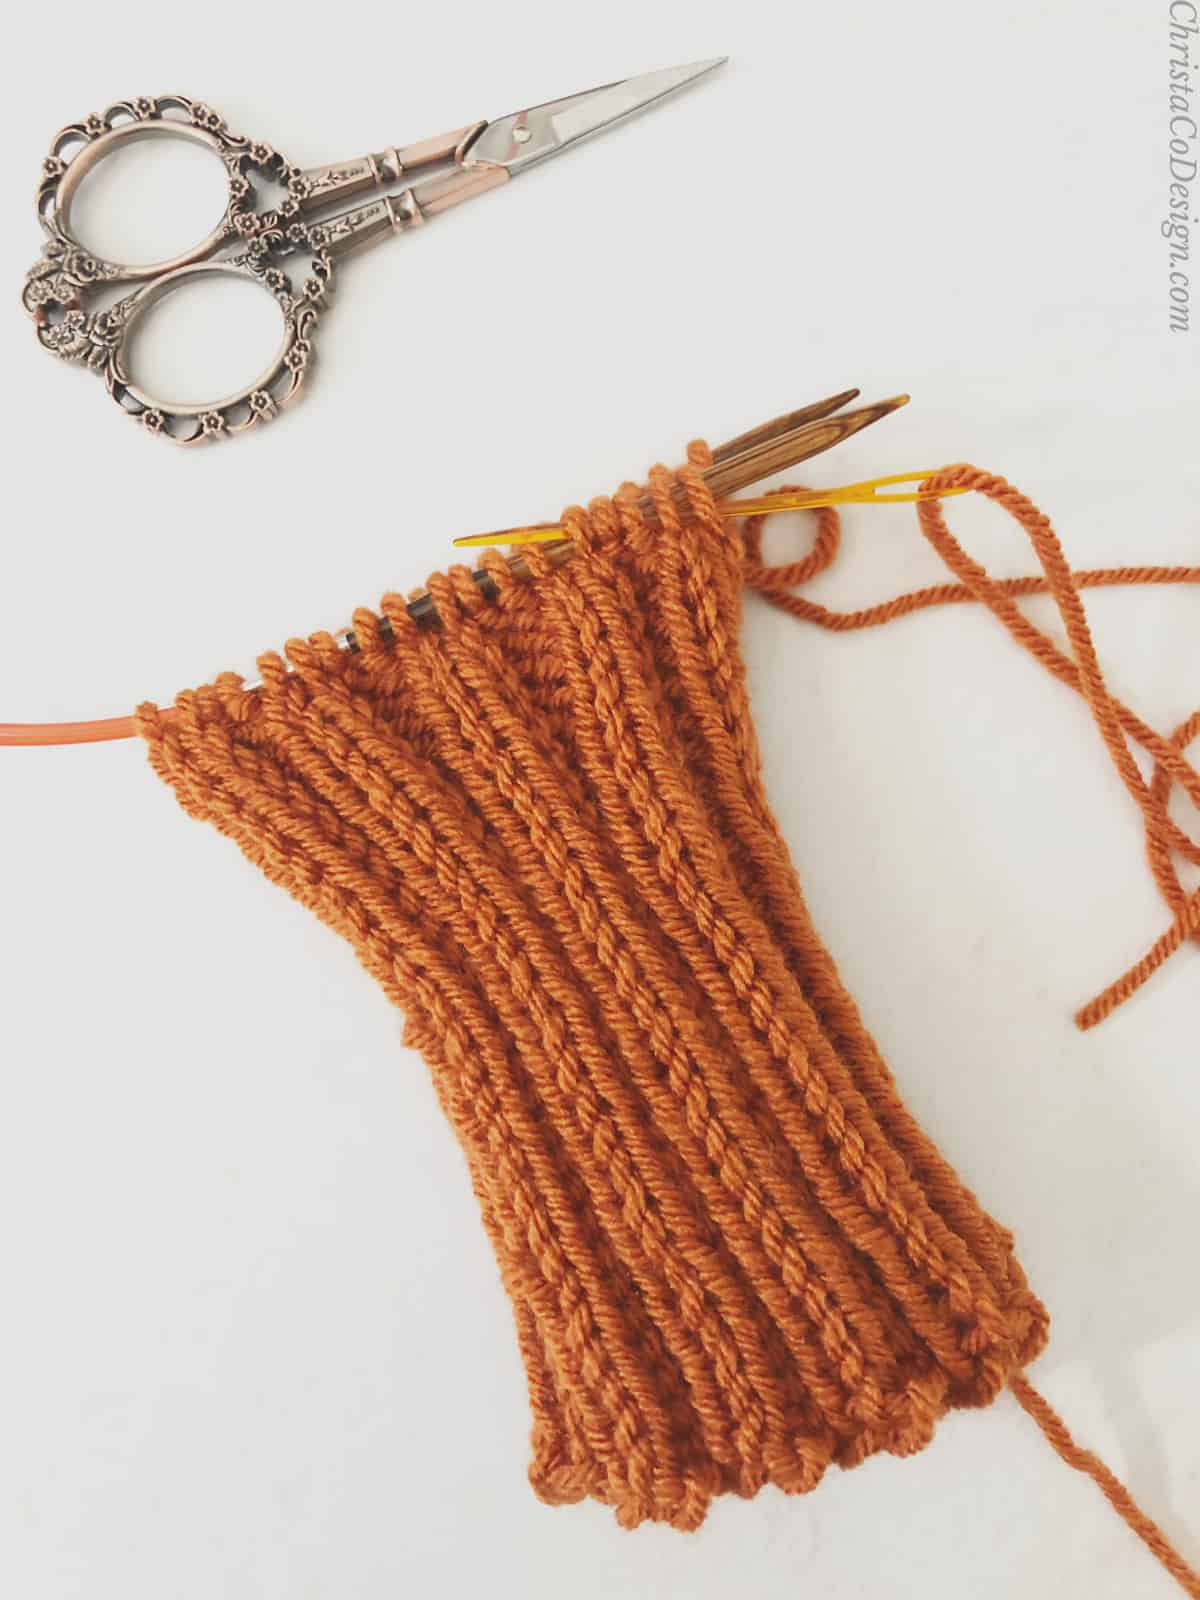
- Pull yarn through to close, but not too tightly.
- Sew hole closed forming the bottom of your pumpkin. Weave away end.
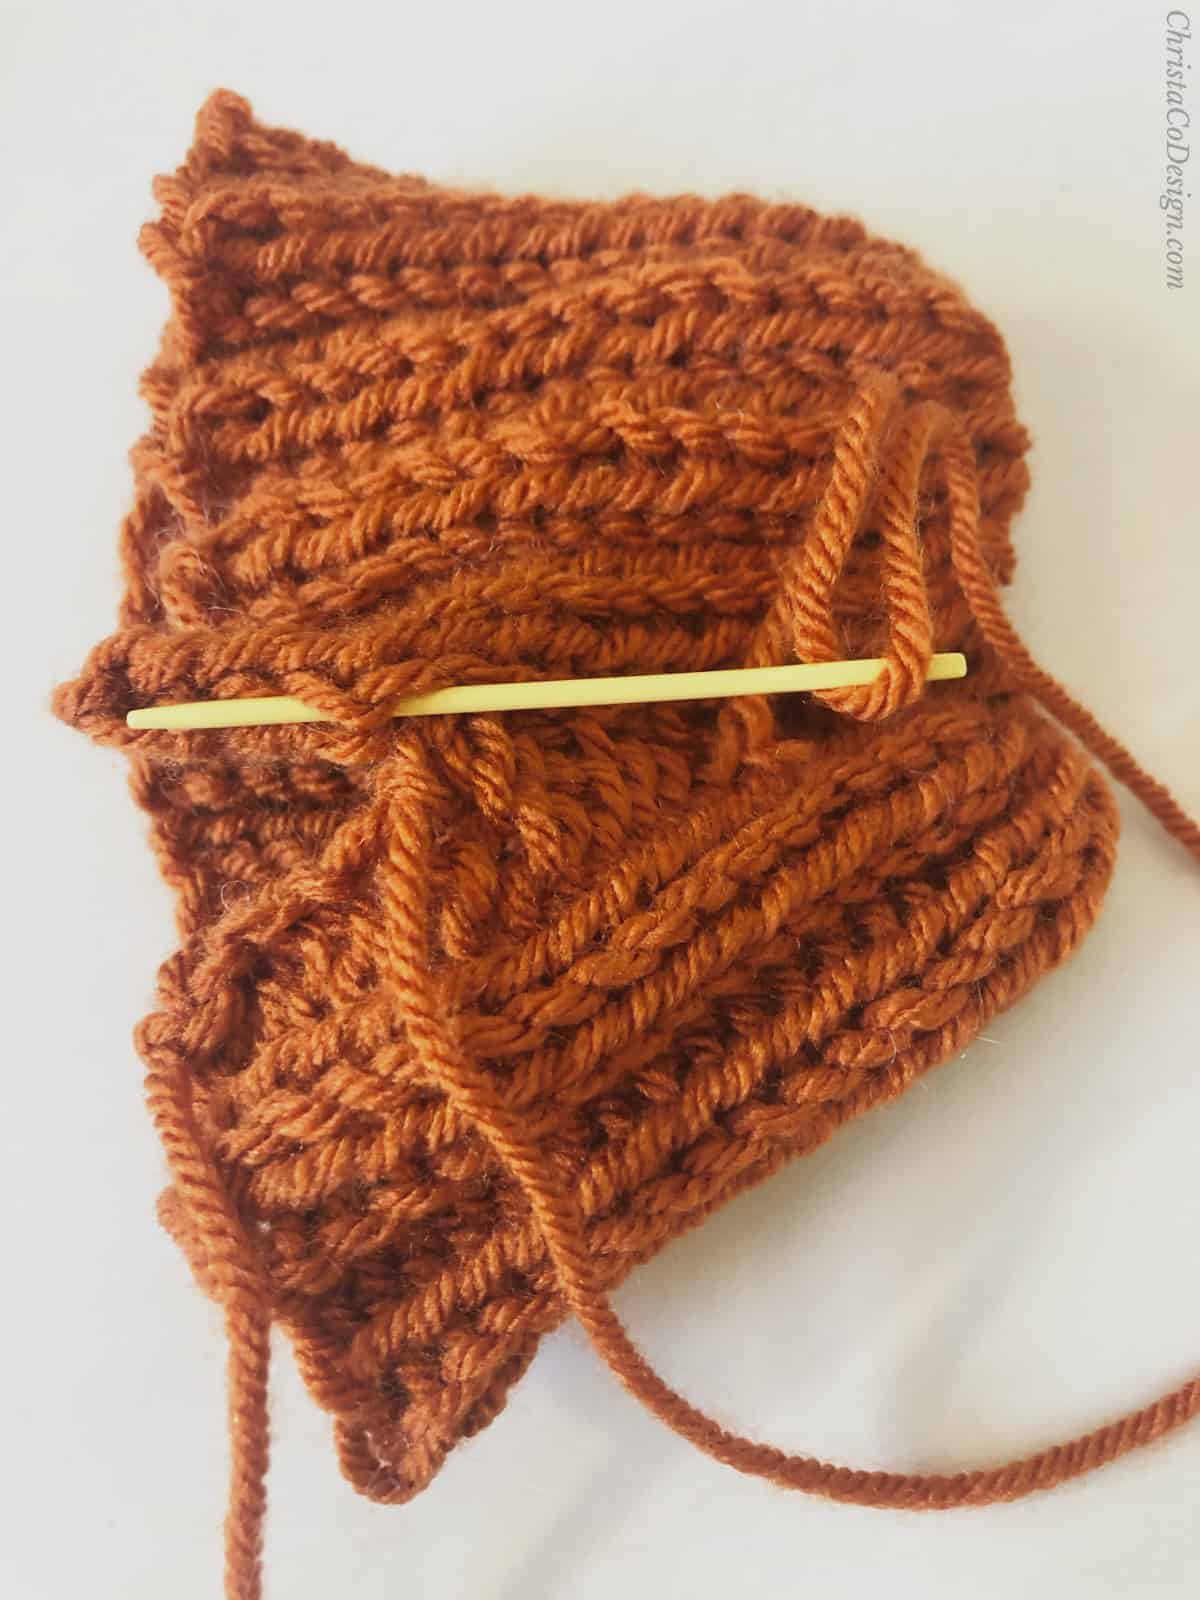
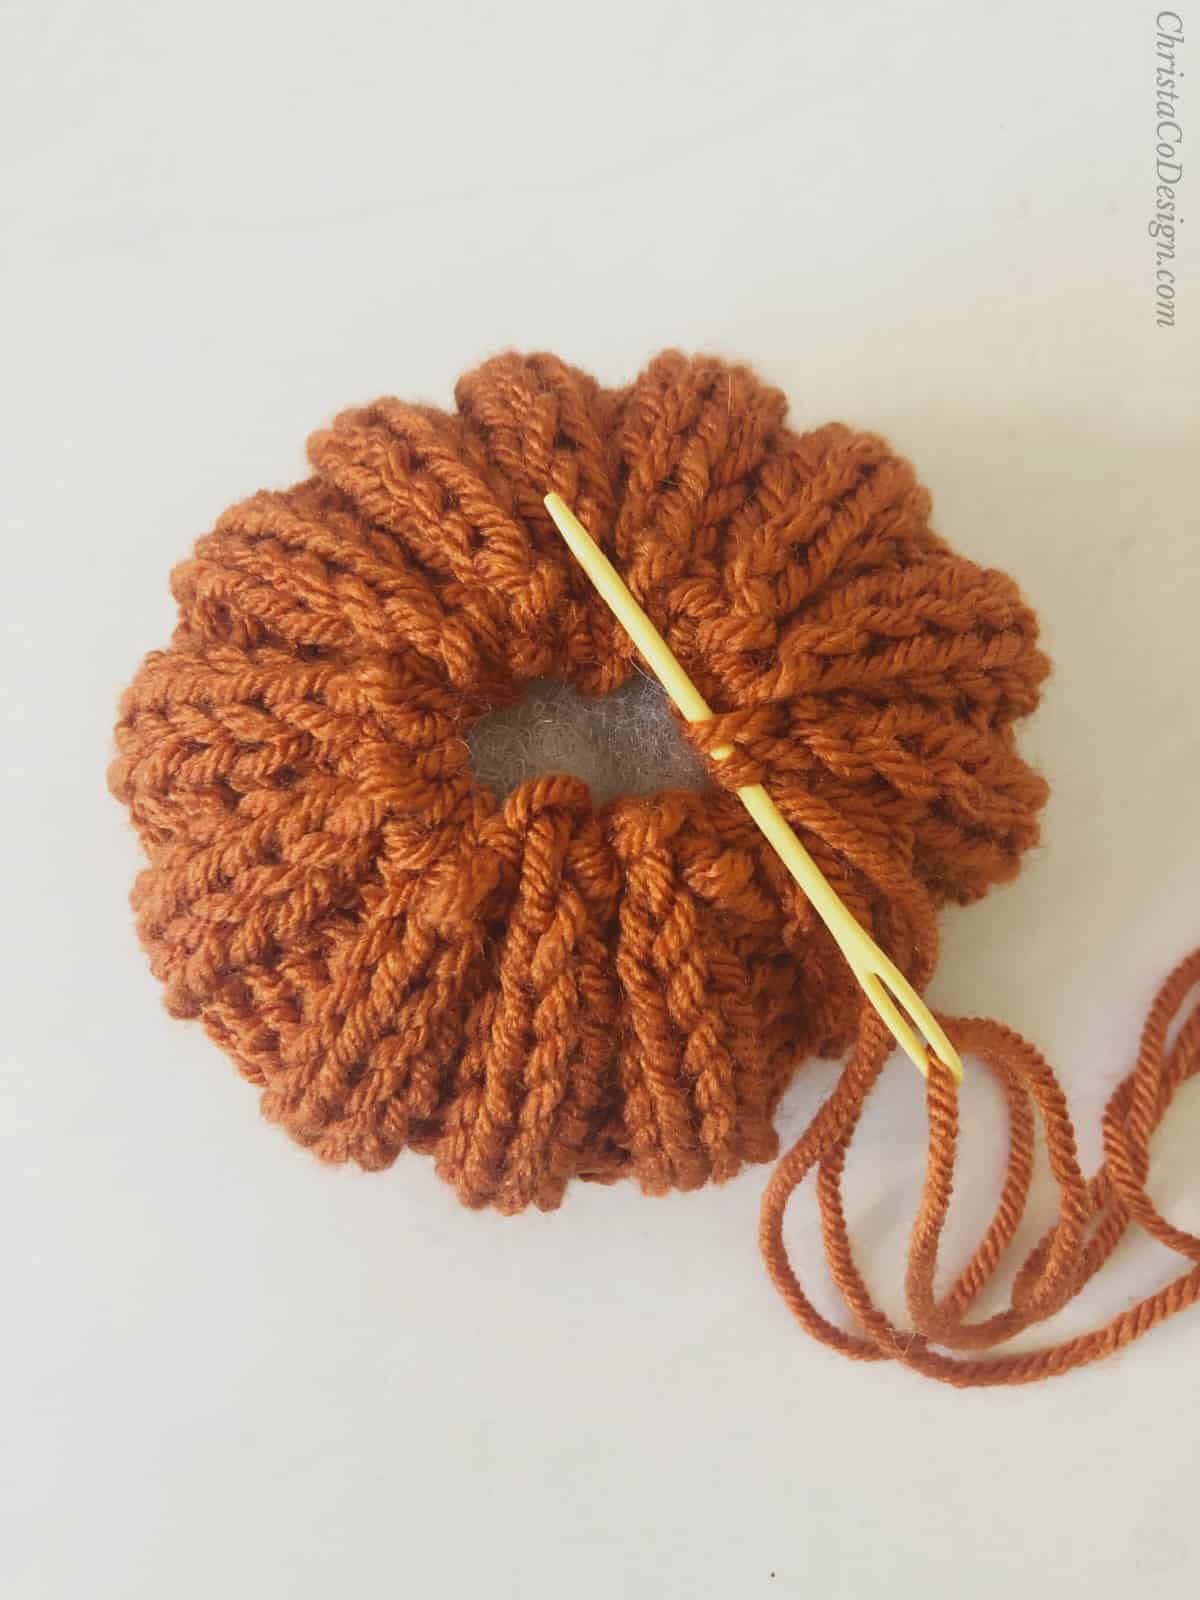
Stuff
- Use polyfill to stuff pumpkin. You want it full, but not bulging so the ridges stay in place.
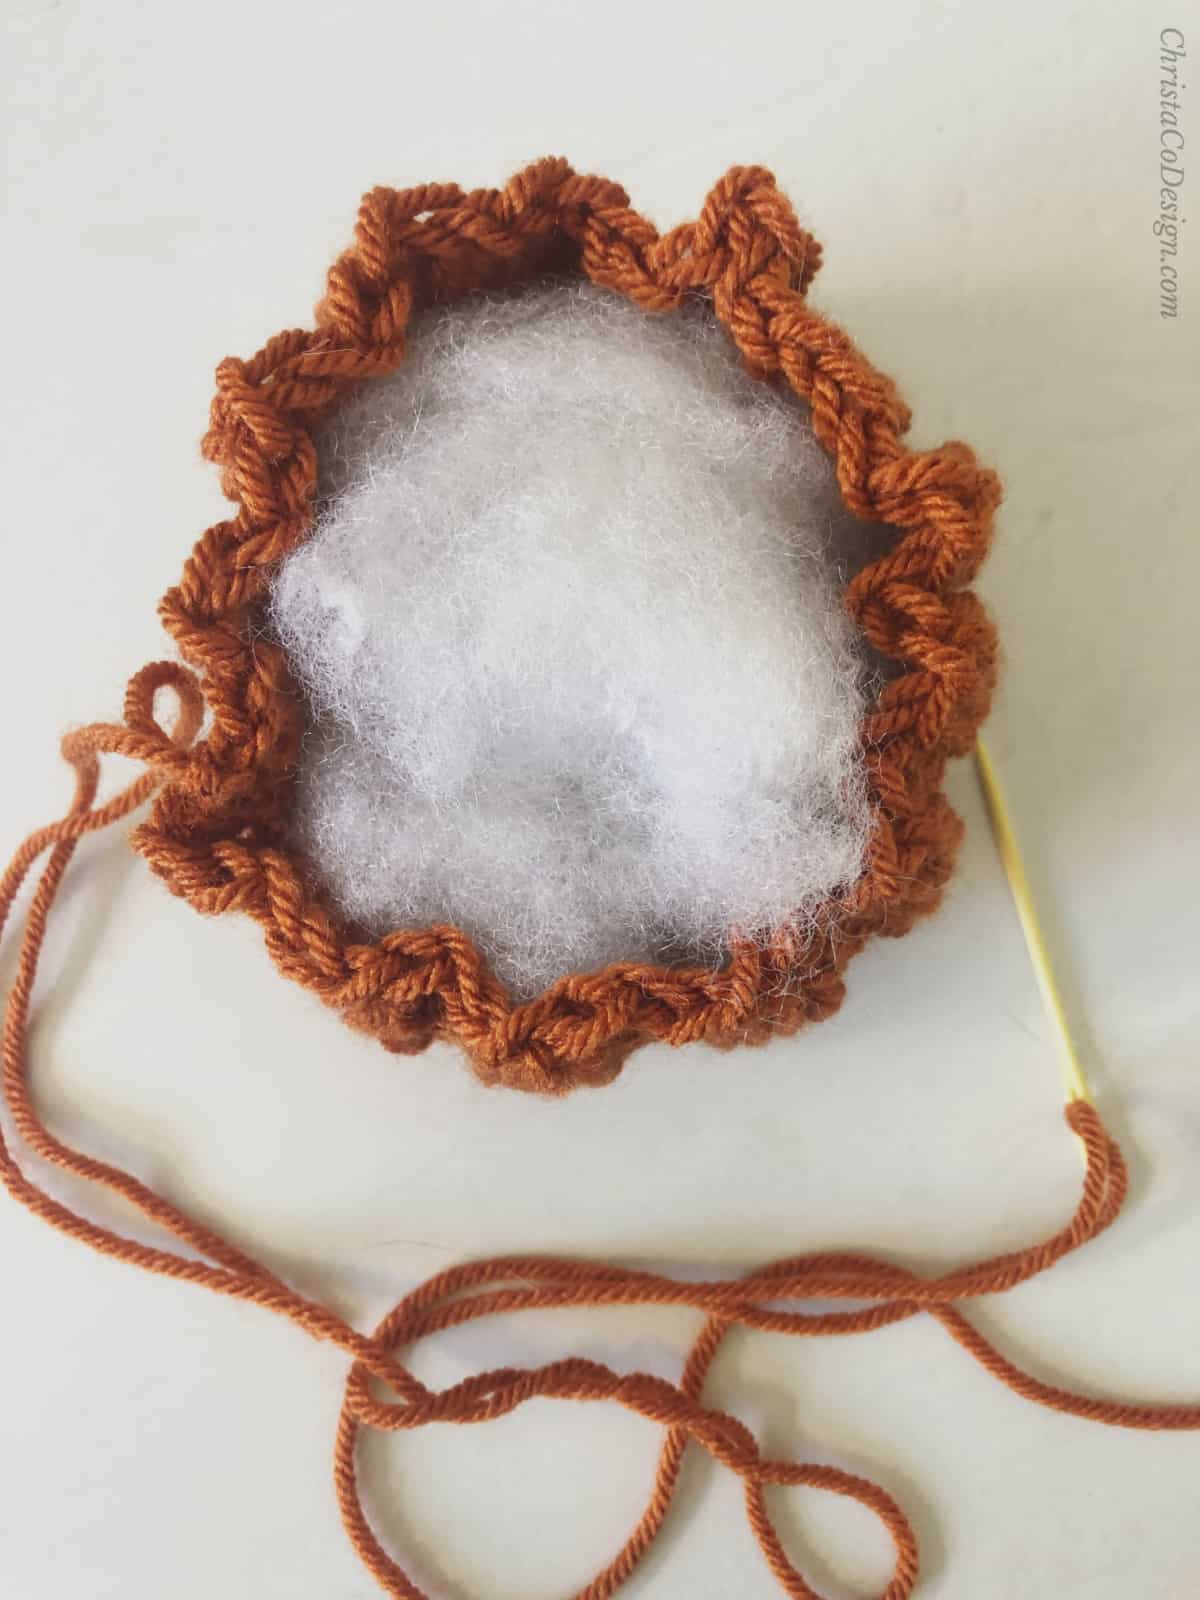 Picture shows how the bottom looks after seaming (and stuffing).
Sew Top
- Thread the needle with an extra long piece of yarn and weave around the top. Use the running stitch to close top.
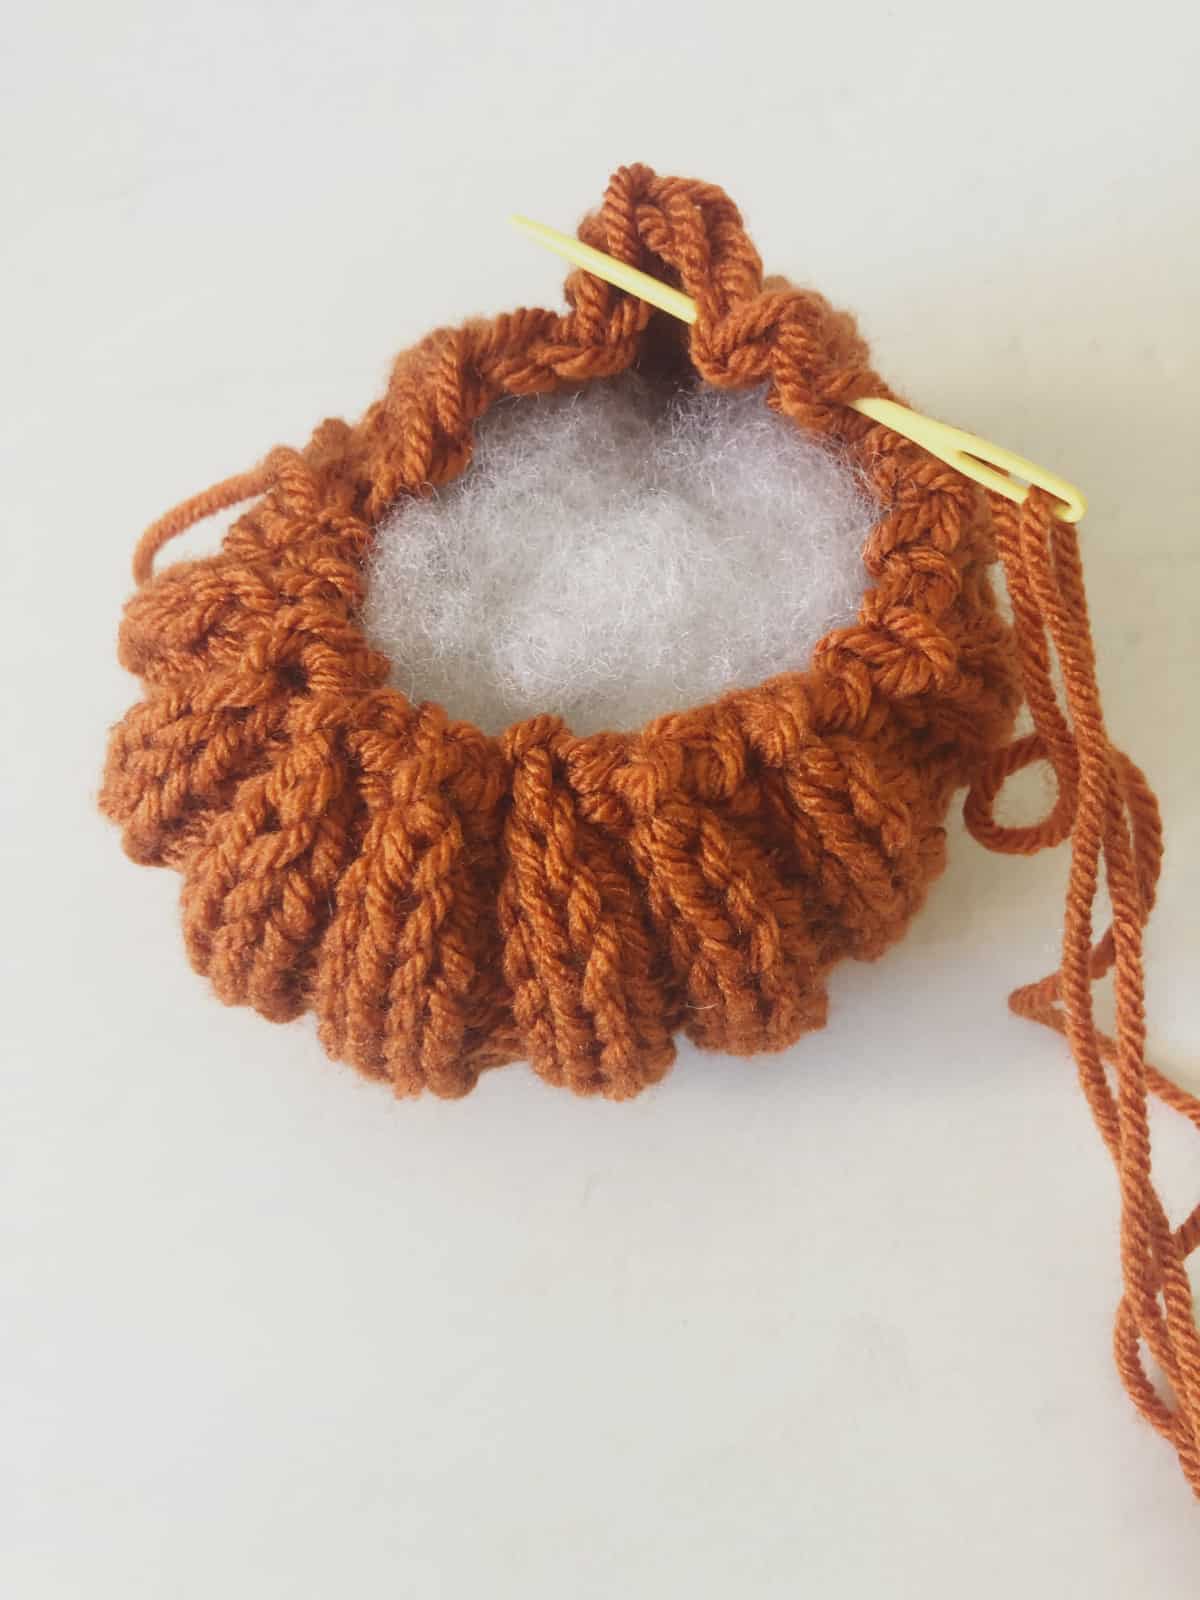
- Leave top slightly open to fit your chosen stem. Do not cut yarn.
Finishing
- Cut yarn, weave in ends.
- Add a small cinnamon stick or similar to the center for the stem.
Recommended Products
As an Amazon Associate and member of other affiliate programs, I earn from qualifying purchases.