
Cozy Crochet Cardigan Hygge Homebody Pattern
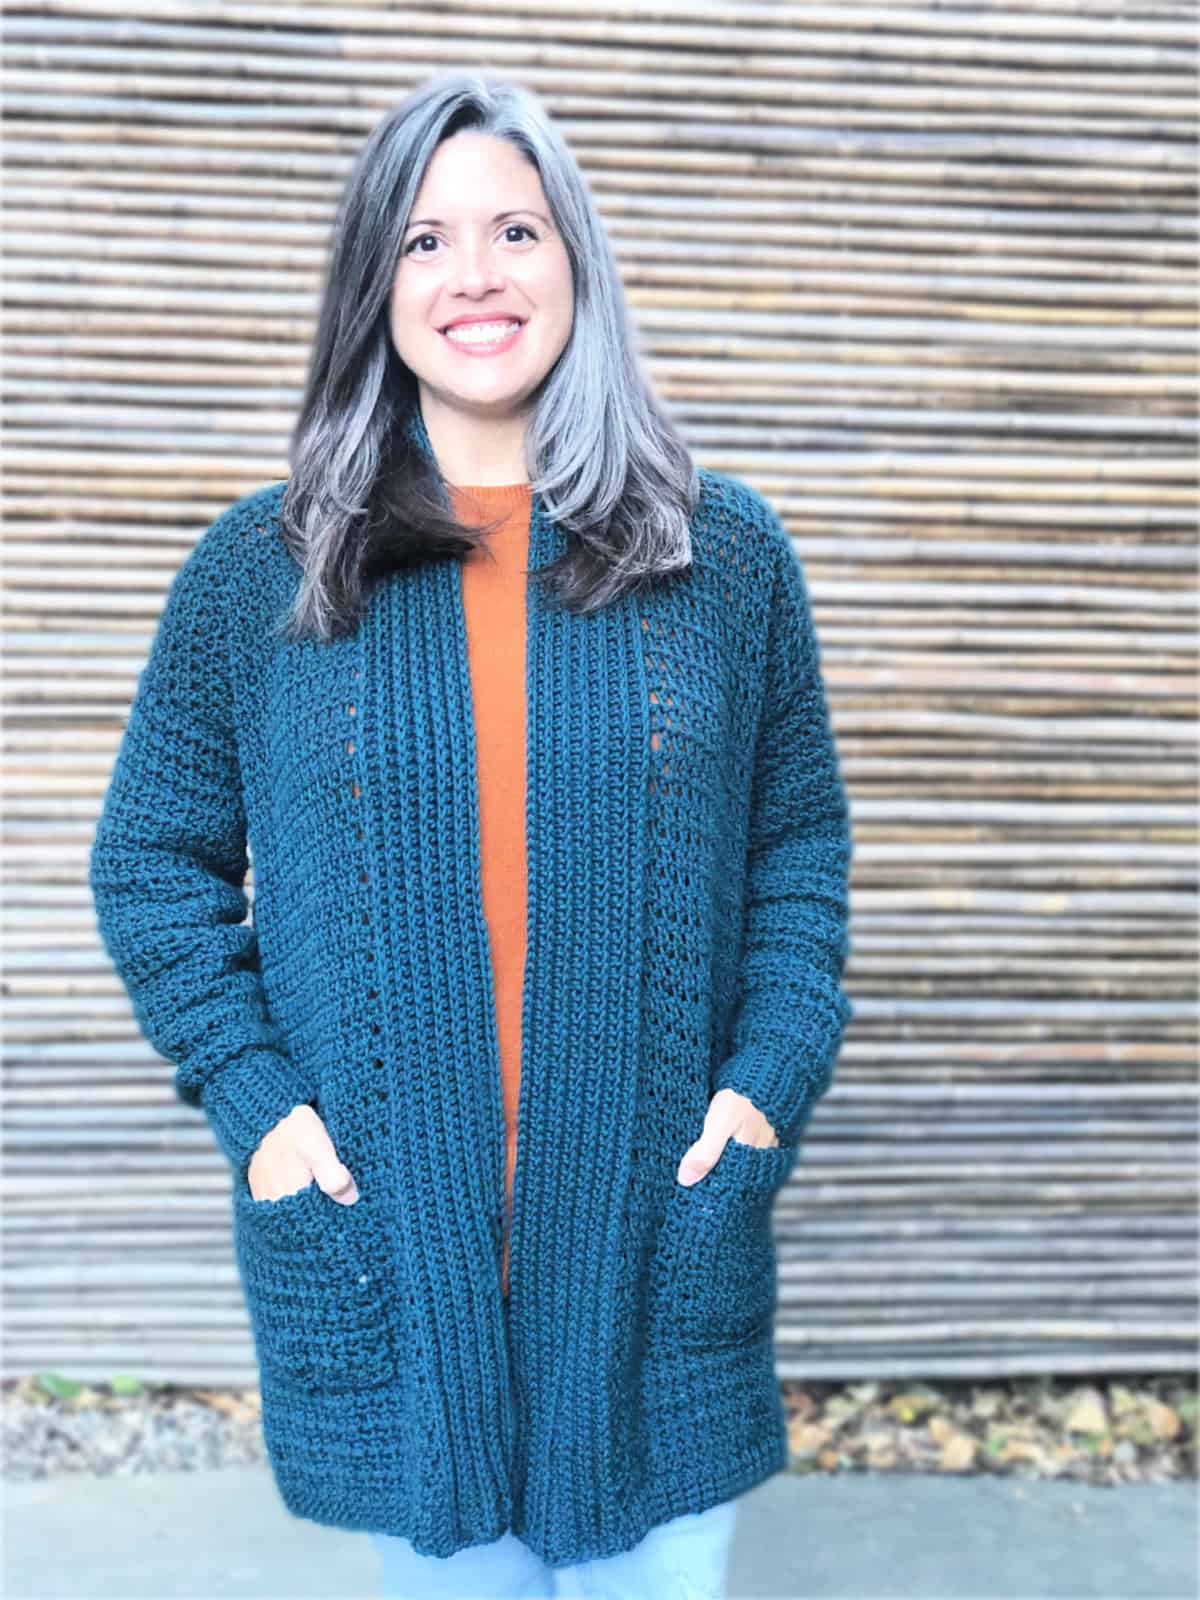
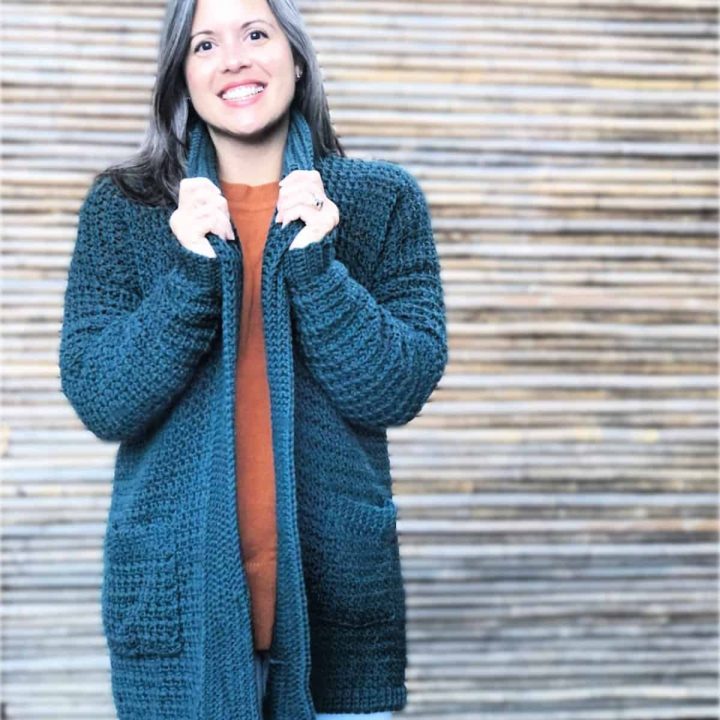
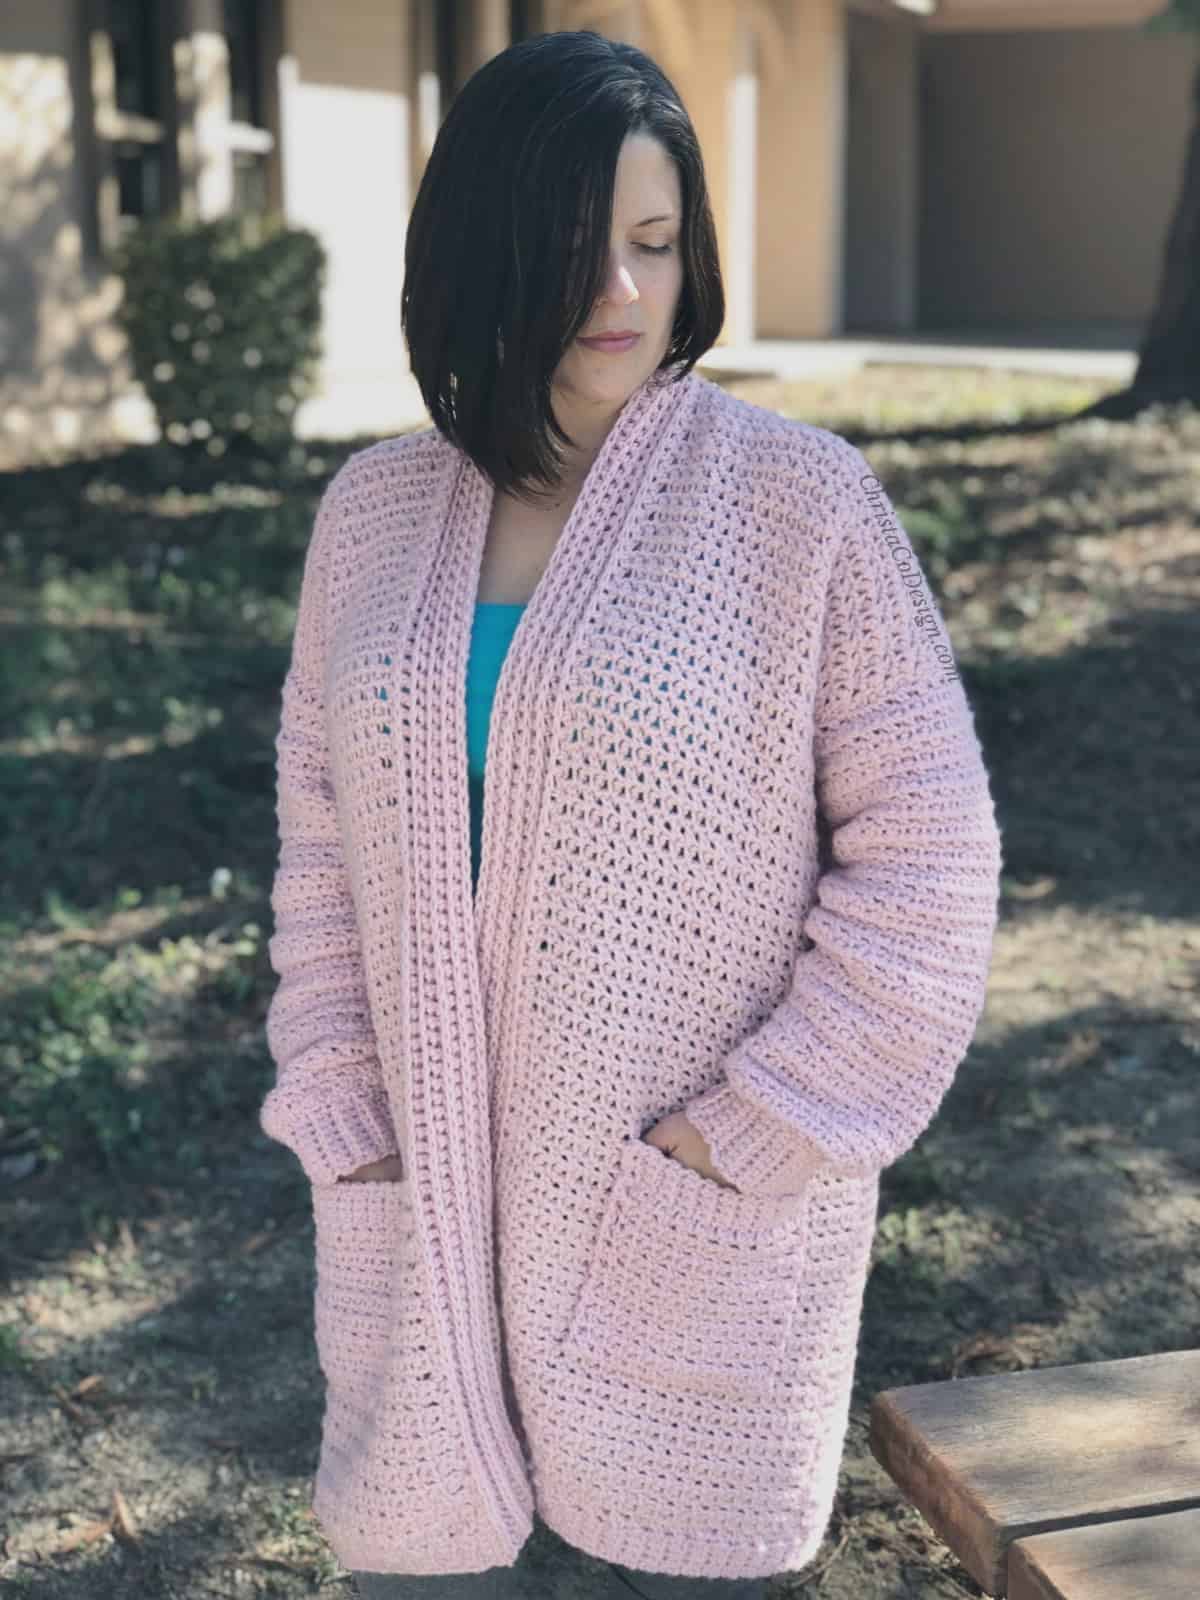
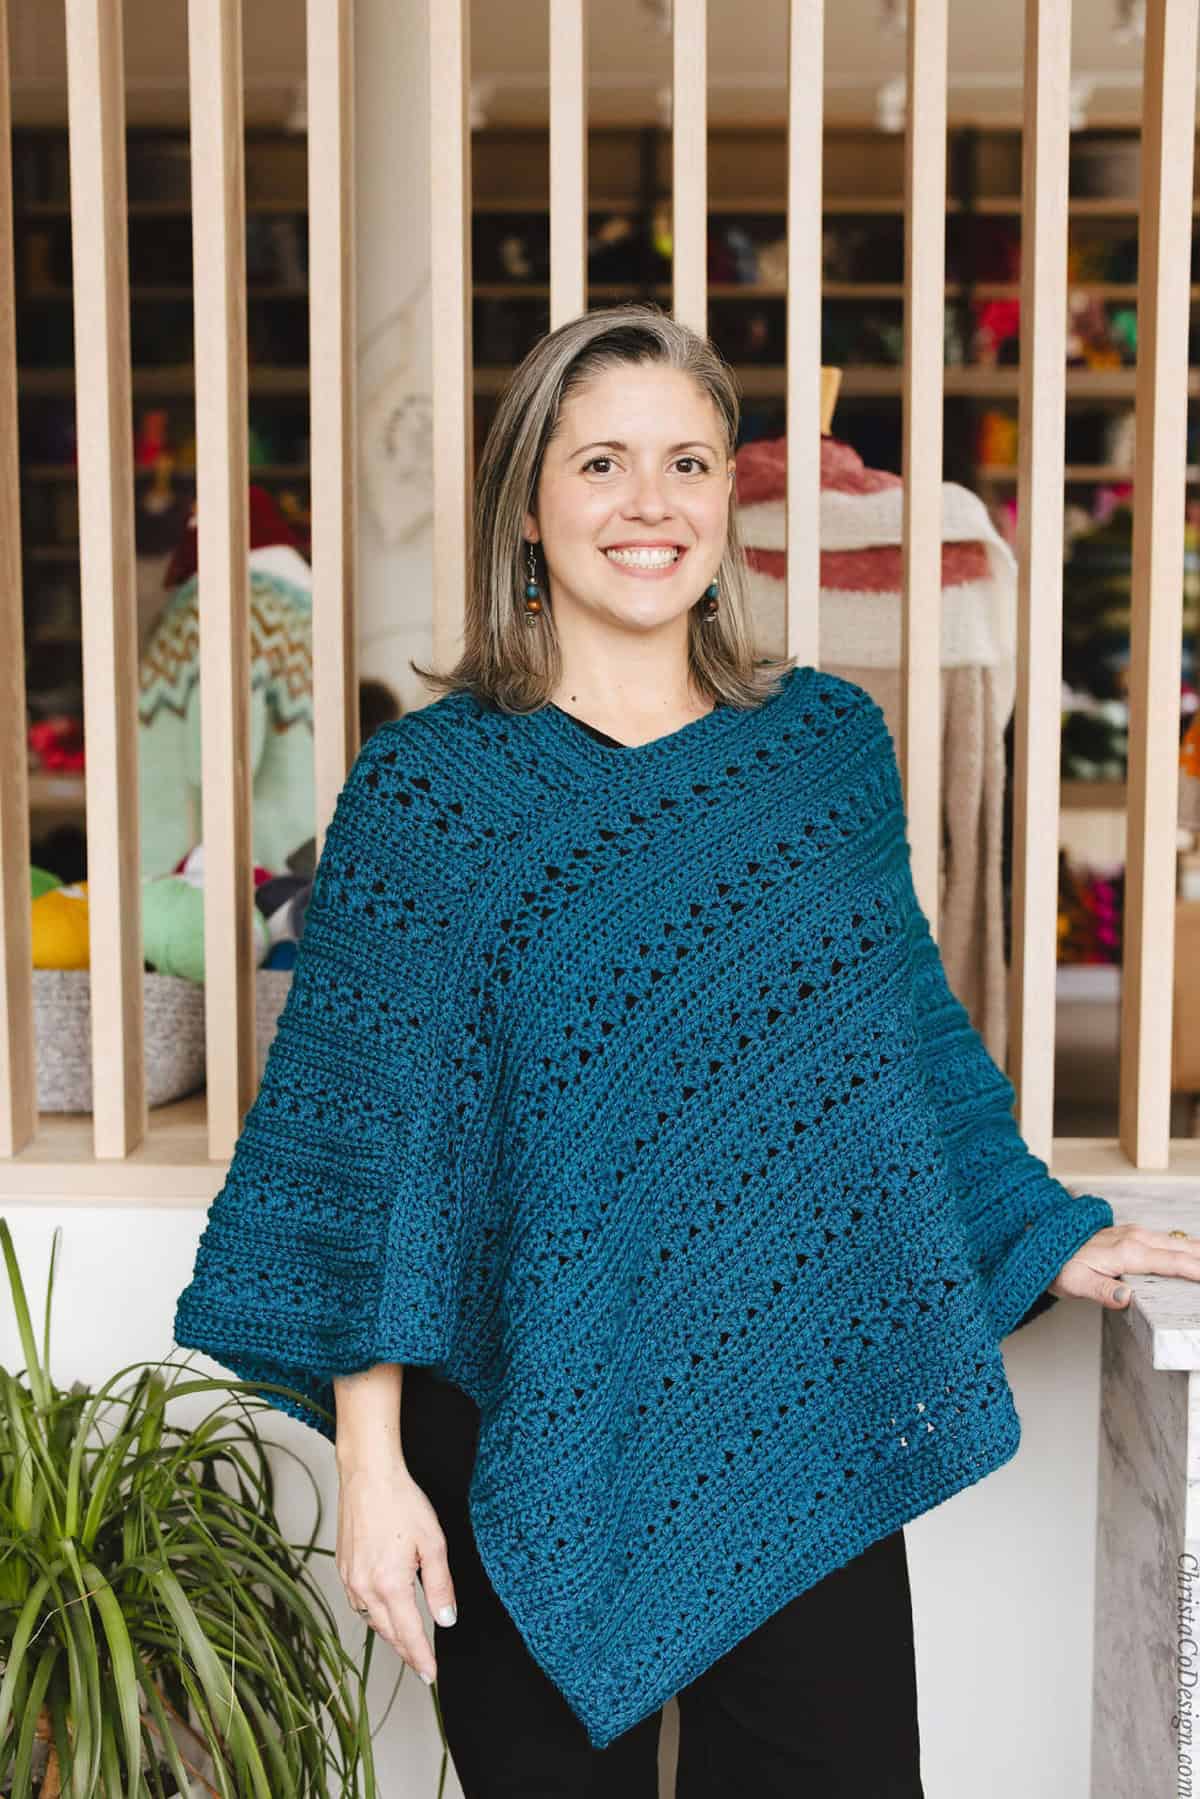
The Hygge Homebody is a cozy crochet cardigan that’s great for at home or a night out. The long length makes this comfy cardigan a perfect with leggings.

This post contains affiliate links, I may earn a fee. Read more disclosure policy.
Join the ChristaCoDesign Newsletter
Never miss a pattern!
The Hygge Homebody Cardigan is available in women’s sizes S-5X. The easy pattern includes written instructions, pictures and video tutorials.
Just as the name implies, it’s like wearing a big hug! Hygge, pronounced hue-ga is a Danish term that has to do with all things snuggly and comfortable. And I just could not think of a better term to fit this oversized cardigan.
Thanks to WeCrochet for sending me the yarn to make this pattern.
Purchase the ad-free, well formatted printable PDF Pattern from my shop. Scroll down for the free pattern!
Purchase My Ad-Free PDF Patterns In Your Favorite Shop Here:
At home
My kids and I love cuddling on the couch in this cozy crochet cardigan. I tend to wear mine in the morning and evening, when the weather is cooler. And all day in the colder months.
These also happen to be the times when my kids want to snuggle most. They love to wrap up in it so we can read a book.
Wearing it out
Recently we took the kids to see a movie and it was one of those theaters that has the reclining chairs. I didn’t realize it before hand, and I was debating on whether to wear my Hygge Homebody Cardigan because it was warmer that day.
I decided to bring it just in case I was cold, and I’m so glad I did! Those reclining chairs were made for this oversized crochet cardigan pattern. I was so comfy and relaxed, partly due to my cozy cardigan and partly due to a movie that captured my kids’ attention!
If it’s cool in the mornings (and it is almost everyday still) I wear my cozy crochet cardigan out to drop kids off at school. When I want to wear it all day, it pairs beautifully with leggings or skinny jeans.
It has plenty of *ahem* backside coverage, haha. I’m sure there are plenty of you lovely ladies who can pull off leggings without a long cardigan, but I am not one of those!
Save your favs!
Add this pattern to your Ravelry queue.
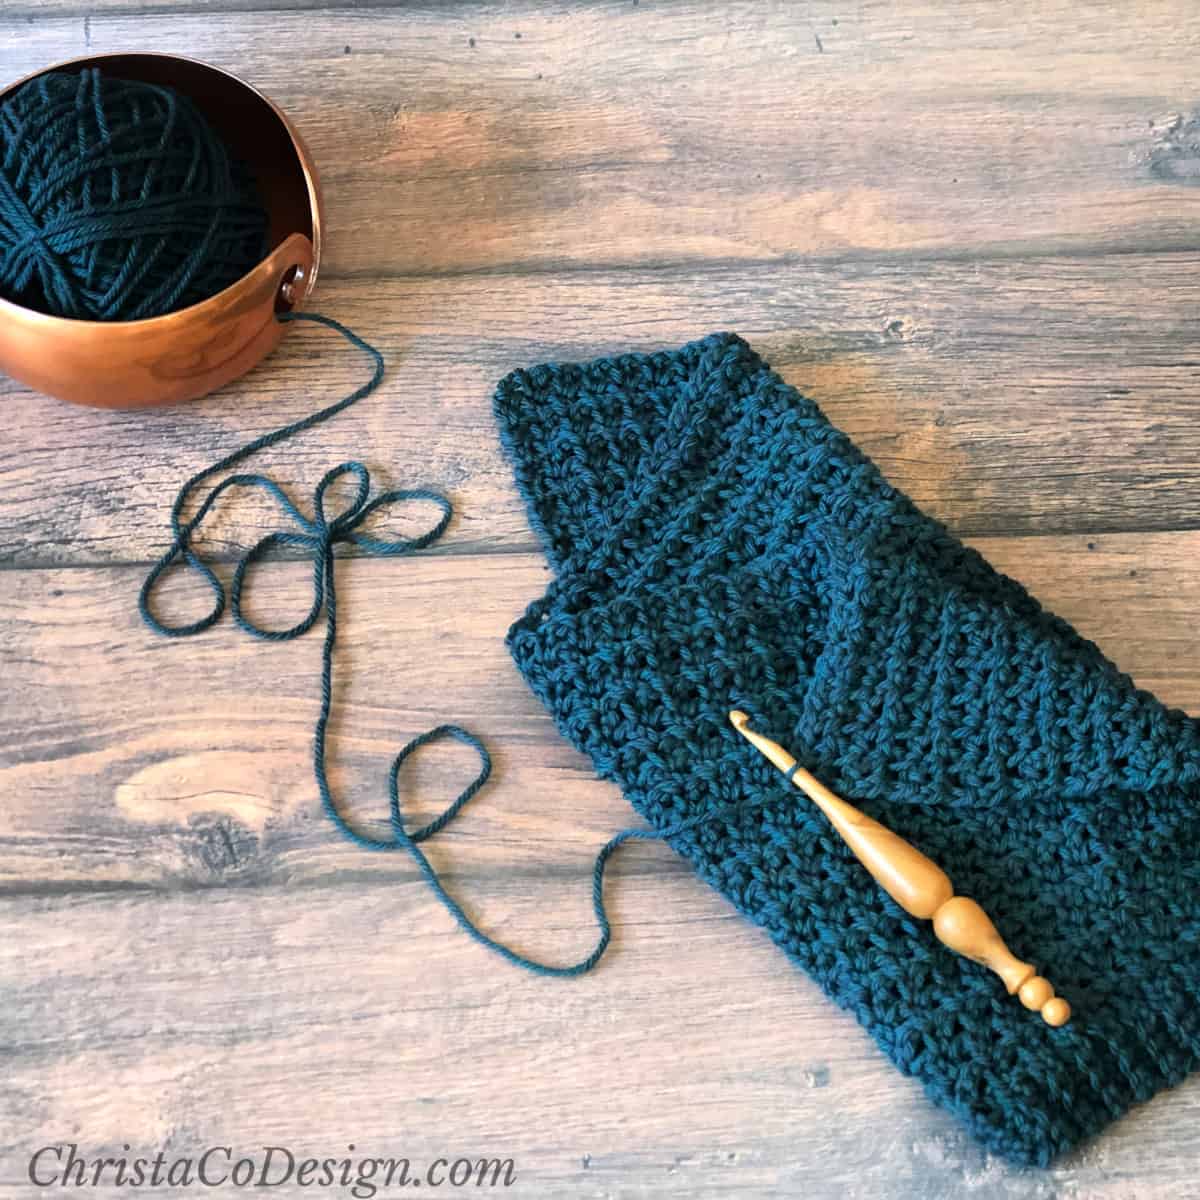
The Yarn
This lovely blue green yarn is Swish worsted* in Rainforest Heather from the generous folks at WeCrochet. It’s 100% super wash merino wool that is oh so soft!
You can substitute any #4 medium worsted weight yarn. Be sure to check gauge for the best results.
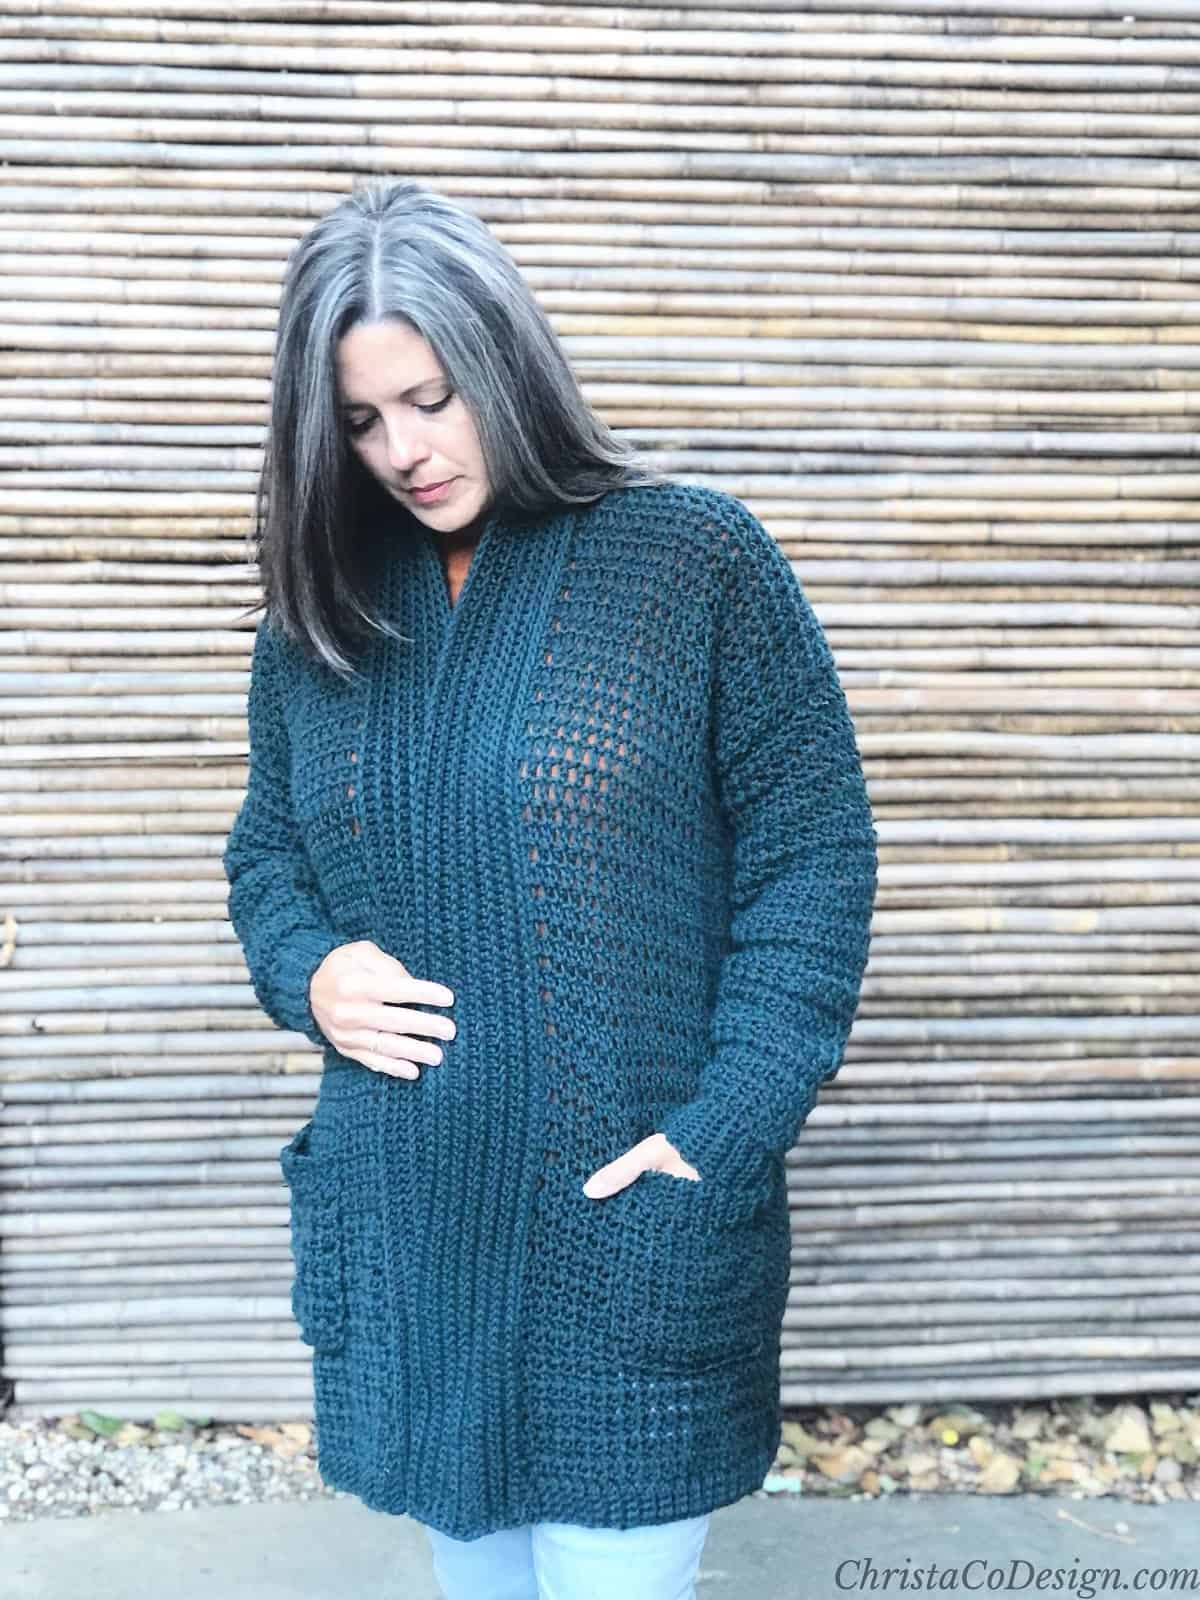
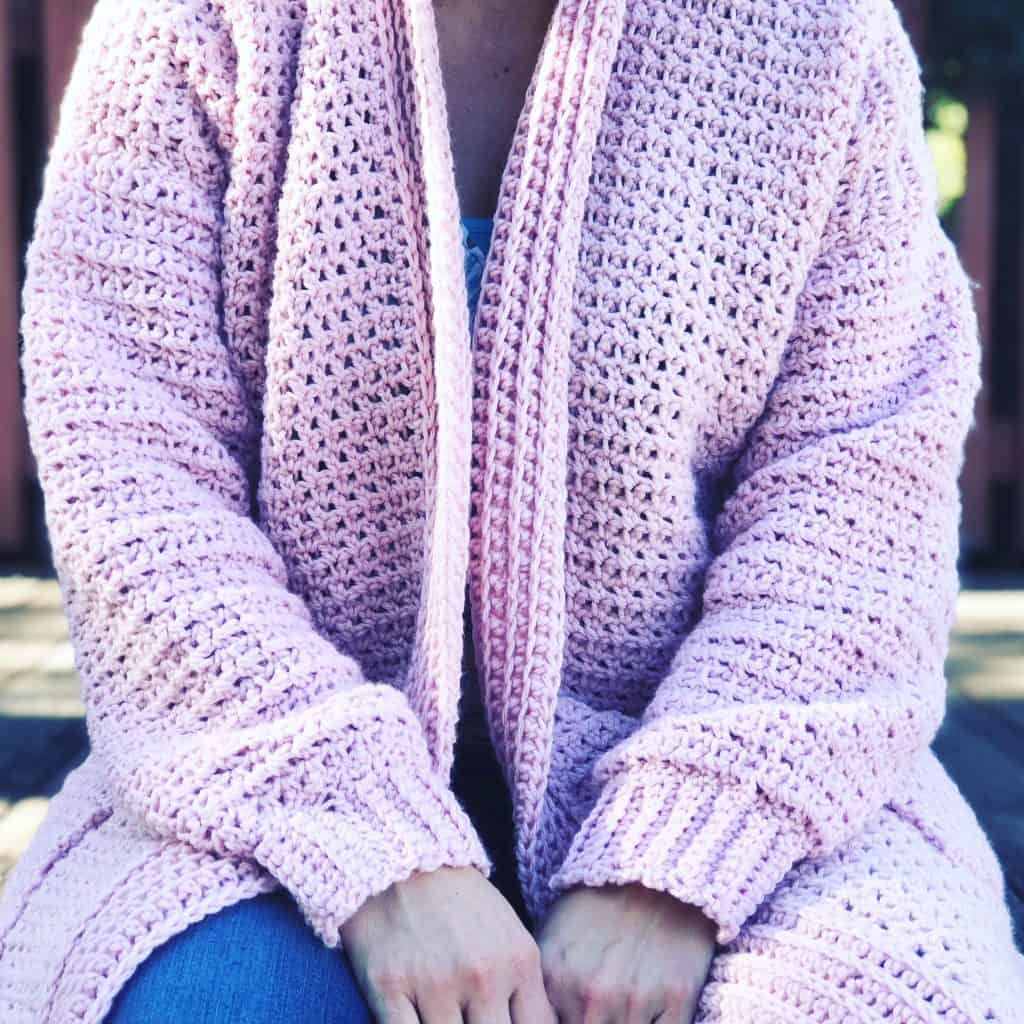
The Stitch
The stitch pattern I chose for this comfy crochet cardigan is easy with gorgeous drape. The Pike Stitch is made of simple stitches, just chains and single crochets. Truly, once you get the rhythm even beginner crocheters will be able to crochet this with your eyes closed.
I won’t tell you how I could crochet this stitch in the near dark, with only the bathroom light on, while I waited for my littles to fall asleep because that would be bad advice! But it is that easy! Which means your large pieces work up fast.
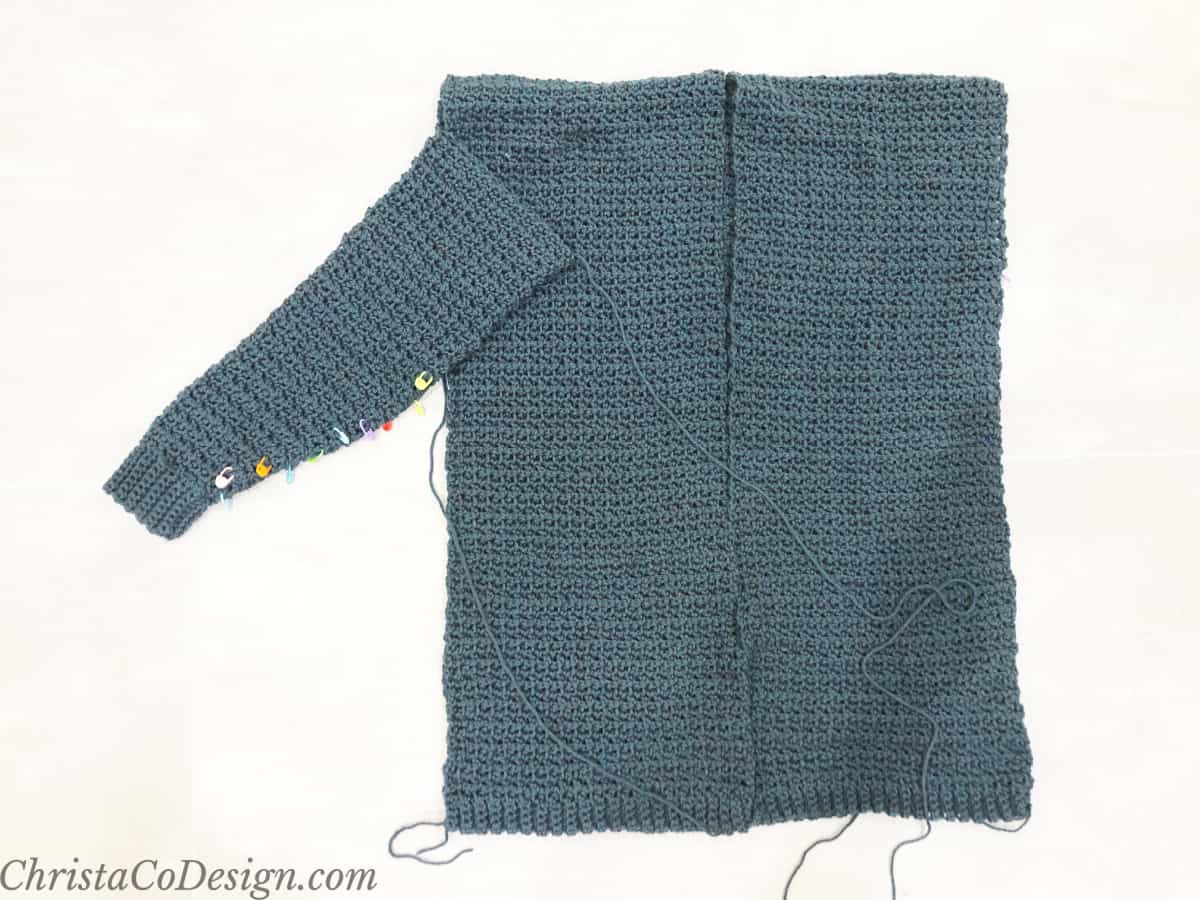
The Construction
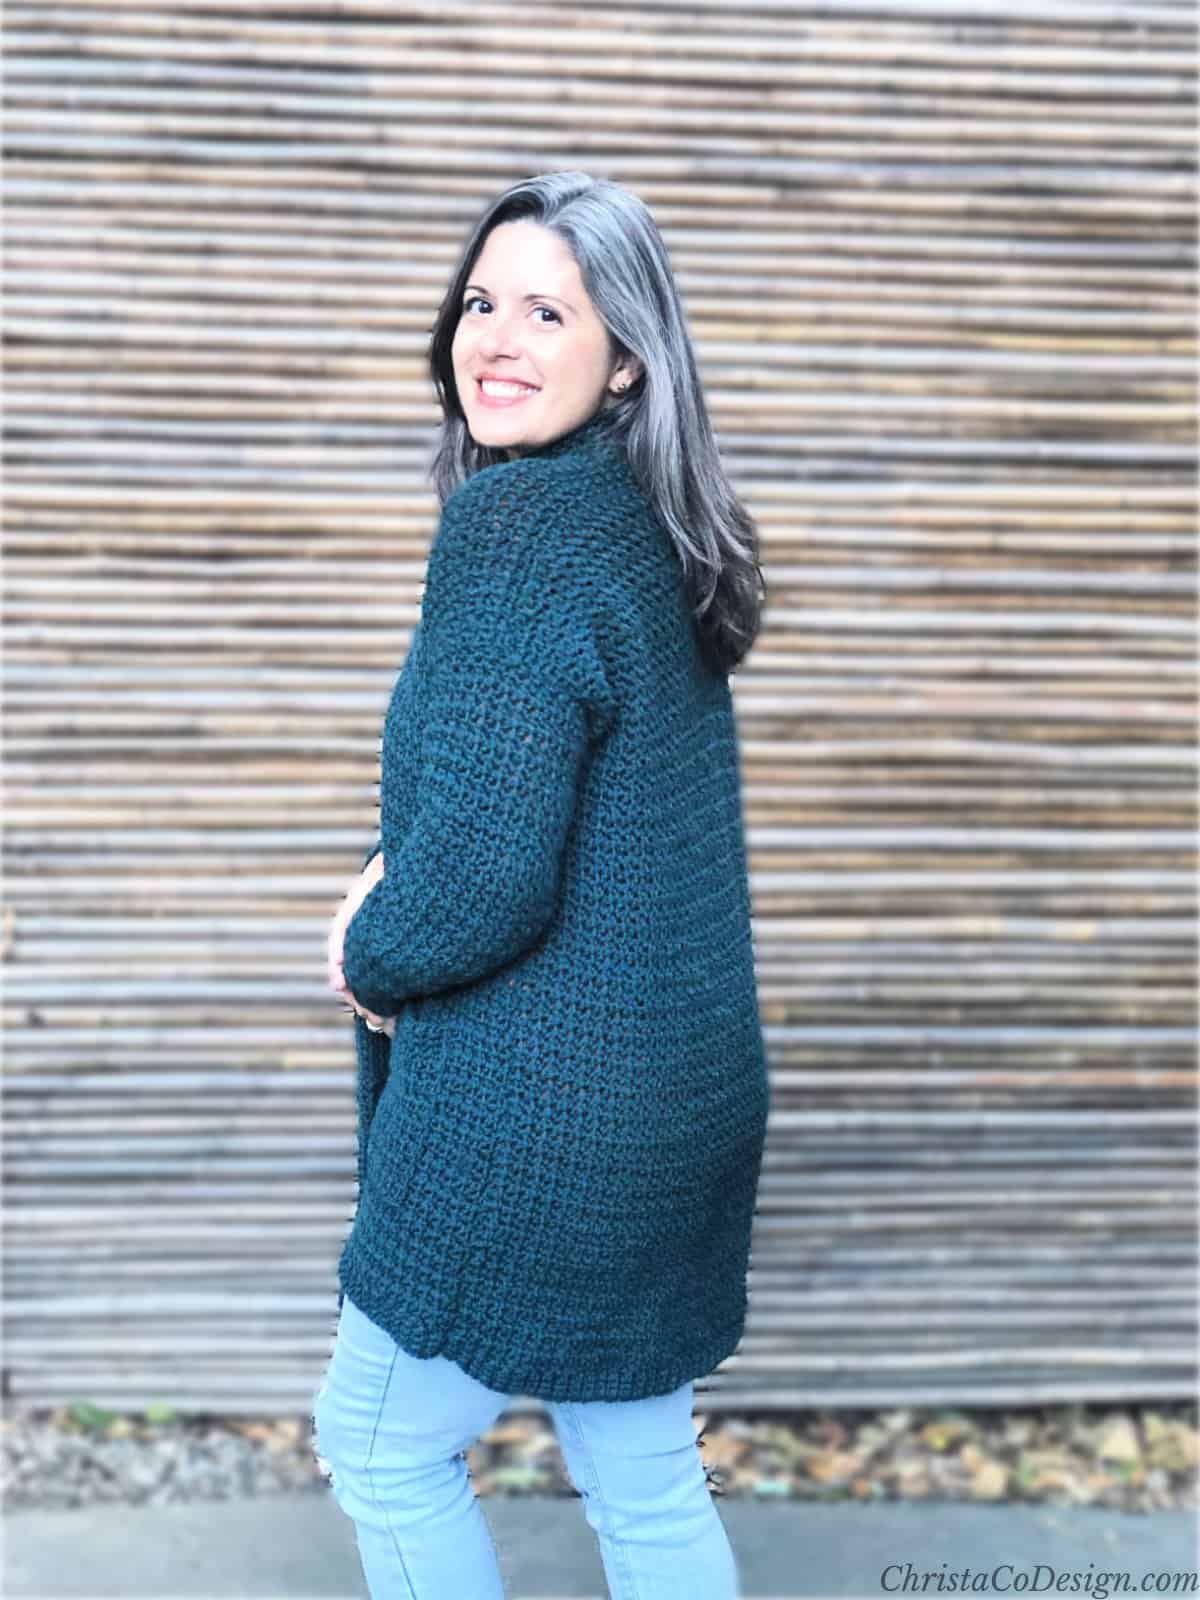
This crochet cardigan has a simple construction. You crochet up simple rectangles, just like you would work a blanket.
The sleeves are worked in the round from the wrist up. This makes them super simple to try on as you go. Then you’ll seam them to the armholes.
You’ll sew the shoulder seams and sides together. Here’s a quick seaming video, if you haven’t done that before. A simple sewing stitch I like is the mattress stitch. Plus I include a full video tutorial.
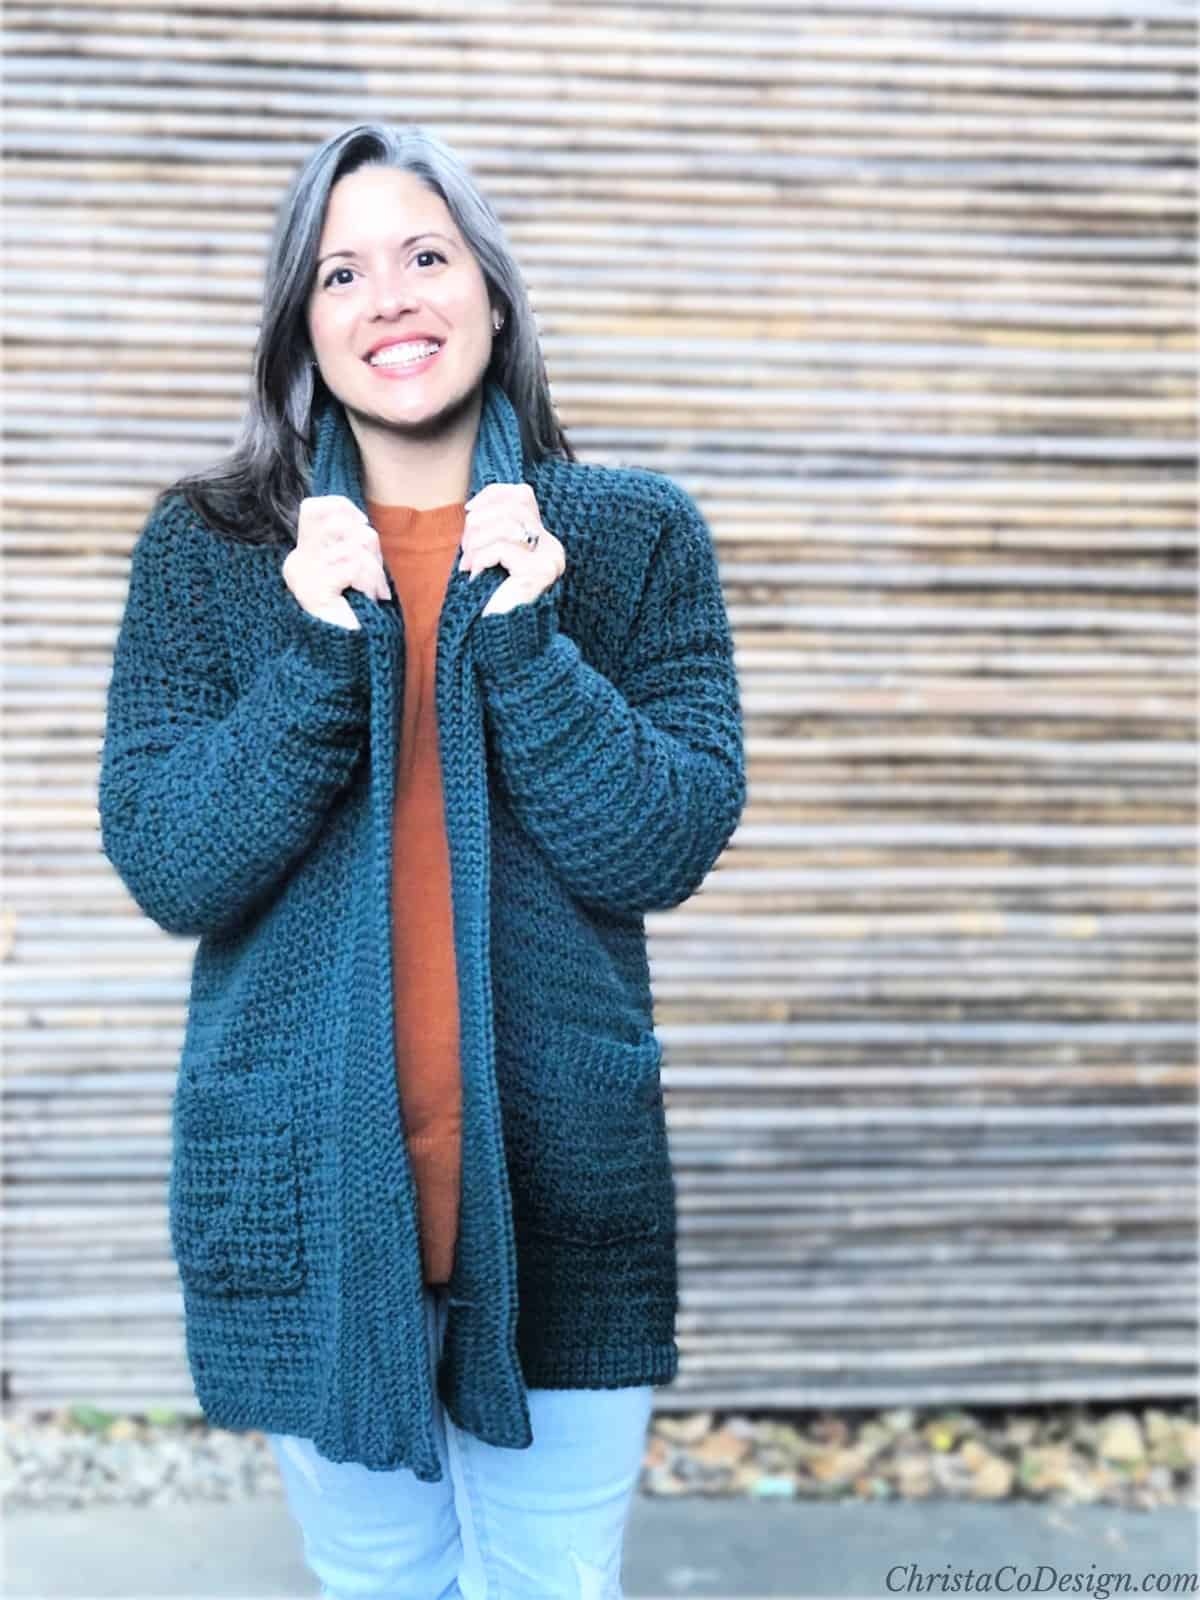
The neck of the Hygge Homebody Cardigan may be my favorite part. It’s soft and squishy and just what I want warming my neck. It’s what makes this cozy crochet cardigan so comfy.
Our Favorite
Free Crochet Cardigan Patterns
- The Positano crochet cardigan features pockets in the seams.
- The Spring Cardi is a top down cardigan with no seaming.
- The Sera Cardigan is a bottom up crochet cardigan with a classic fit.
- There is also a matching Sera crochet sweater pullover with v-neck.
Materials
- 5.5 mm crochet hook* (US size I-9), or hook needed to meet gauge, yarn needle, measuring tape, scissors, stitch marker optional
- #4 medium worsted weight yarn, shown in Swish Worsted Yarn* (100% Superwash Merino Wool, 110 / yd / 50 g ), color: Rainforest Heather 14 (15, 16, 17, 18, 19, 20, 21) balls.
Yarn By Size
- (S) 1450 yd / 1326 m
- (M) 1560 yd / 1427 m
- (L) 1670 yd / 1527 m
- (XL) 1780 yd / 1628 m
- (2X) 1890 yd / 1728 m
- (3X) 2000 yd / 1829 m
- (4X) 2110 yd / 1930 m
- (5X) 2220 yd / 2030 m
Notes
- Please read through entire pattern and create a gauge swatch before beginning.
- Pattern is written for multiple sizes, where the first number given is the smallest size and the larger sizes follow in parenthesis. For example, “Rep row 2 for 50 (52, 54, 56, 58, 60, 62, 64) rows” means size small would repeat row 2 for 50 times and size 4X would repeat row 2 for 62 times. Where no size is indicated instruction apply to all.
- Stitch counts are given at the end of the instructions with all sizes within the parenthesis (72, 82, 90, 98, 104, 110, 116, 124 sts).
- Ch 3 counts as an exsc + ch 1.
- This stitch naturally relaxes with wash and wear.
Skill Level
Easy
Stitches / Abbreviations – US Terms
blo – back loop only
ch(s) – chain(s)
exsc – extended single crochet-insert hook in stitch, yarn over & pull up a loop, yo and pull through 1 loop, yo and pull through 2 loops
hdc – half double crochet
hdc in the 3rd loop (camel stitch) – Work under the horizontal “3rd loop” on the back of each hdc.
pike st – exsc + ch 1
rep-repeat
rnd (s) – round(s)
RS – right side
sk – skip the indicated stitch
sl st – slip stitch
st (s) – stitch(es)
WS – wrong side
yo – yarn over
Gauge
4” / 10cm x 4” / 10cm = 14 sts x 10 rows in pattern, before blocking. To check gauge ch 20 and follow pattern from Back Panel Row 1.
Construction
This sweater pattern is worked in pieces: 2 front panels, 1 back panel, and two sleeves. The panels are seamed at the shoulders and sides. The sleeves are worked separately and seamed on to the body of the cardigan.
Fit / Sizing
To Fit Actual Bust Size
34” (S), 38” (M), 42” (L), 46” (XL), 50” (2X), 54” (3X), 58” (4X), 62” (5X)
Finished Bust Size
This pattern includes a positive ease of 6-8″ where the finished bust size is larger than the actual bust.
40” (S), 46” (M), 50” (L), 54” (XL), 58” (2X), 62” (3X), 66” (4X), 70” (5X)
Adjustments
You can easily adjust the length of this pattern by making more or less rows. If you change the number of rows be sure to make both the back and front panels the same length.
The fit of this cardigan can be adjusted by going down a size for a more snug fit. For an even more oversized fit go up a size.
Video Tutorial
The full step by step Video Tutorial is available on my YouTube.
Scroll down for the cozy Crochet Cardigan Pattern!
Cozy Crochet Cardigan Hygge Homebody Pattern
The Hygge Homebody is a cozy crochet cardigan that’s great for at home or a night out. The long length makes this comfy cardigan a perfect with leggings.
Materials
- #4 medium worsted weight yarn, shown in Swish Worsted Yarn (100% Superwash Merino Wool, 110 / yd / 50 g ), color: Rainforest Heather 14 (15, 16, 17, 18, 19, 20, 21) balls.
- Yarn By Size
- (S) 1450 yd / 1326 m
- (M) 1560 yd / 1427 m
- (L) 1670 yd / 1527 m
- (XL) 1780 yd / 1628 m
- (2X) 1890 yd / 1728 m
- (3X) 2000 yd / 1829 m
- (4X) 2110 yd / 1930 m
- (5X) 2220 yd / 2030 m
Tools
- I/5.5 mm hook, or hook needed to meet gauge
- tapestry needle
- scissors
- pins
- measuring tape
Instructions
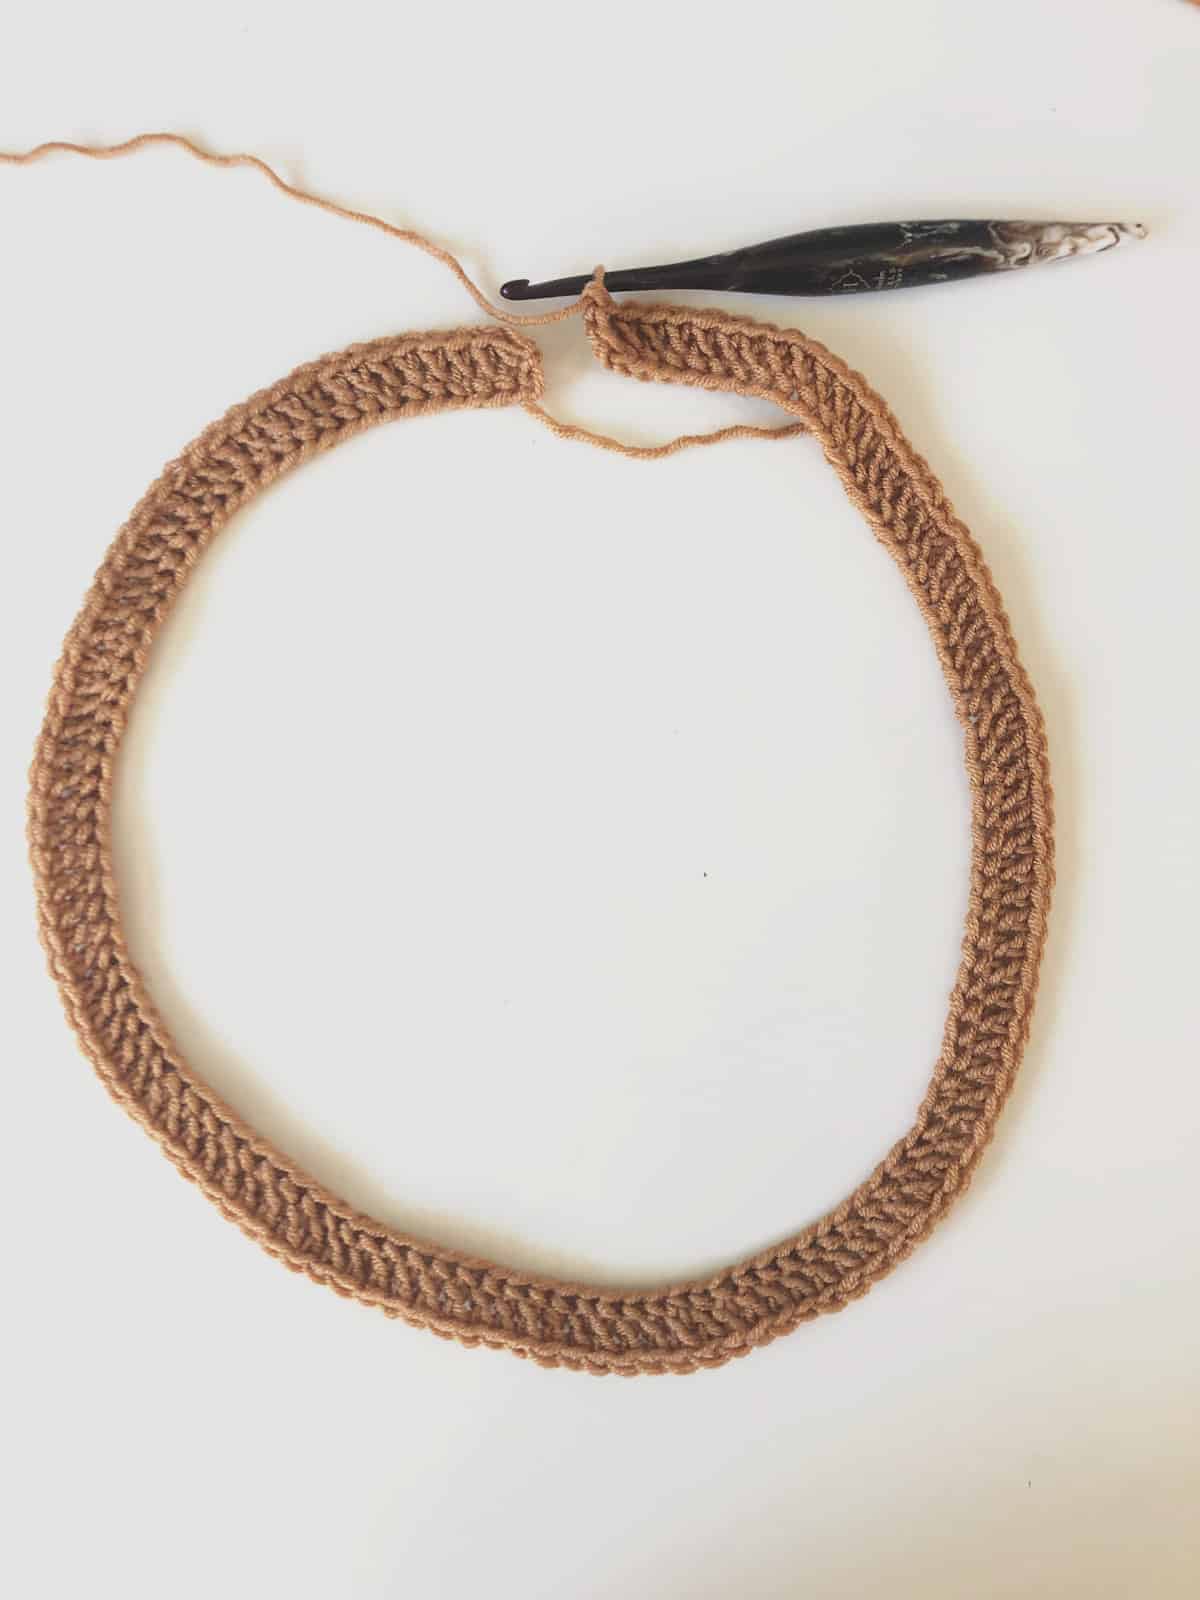
Back Panel Ribbing
Pike stitch tutorial
Ch 5,
Row 1. Sc in 2nd ch from your hook and in each ch across, turn. (4 sts) 1.5” wide ribbing
Row 2. Ch 1, blo sc in each st across, turn. (4 sts)
Rep Row 2 until you have 72 (82, 90, 98, 104, 110, 116, 124) rows of ribbing total.
Now turn and work into the side of the ribbing.
Back Panel
Row 1. Ch 3, *{sk 1 row, work 1 exsc into the side of the next row, ch 1} rep from * across, 1 exsc in last row, turn. (73, 83, 91, 99, 105, 111, 117, 125 sts)
Row 2. (RS) Ch 3, *{sk the ch 1, exsc in next exsc, ch 1} rep from * across to last 2 sts, sk next ch, exsc in last sc, turn.
Hip Length:
Row 3. Rep row 2 for 50 (52, 54, 56, 58, 60, 62, 64) rows, or until total length (including ribbing) is 21”, (22”, 23”, 24”, 24.5”, 25.5”, 26”, 27”) long, or to desired length.
Longer Length:
Row 3. Rep row 2 for 80 (82, 84, 86, 88, 90, 92, 94) rows, or until total length (including ribbing) is 34” (35”, 36”, 36.5”, 37.5”, 38”, 39”, 42”) long, or to desired length.
Add / subtract rows here for a longer / shorter length. Cut yarn and leave a long tail for seaming.
Front Panel Ribbing
Make 2.
Ch 5,
Row 1. Sc in 2nd ch from your hook and in each ch across, turn. (4 sts) 1.5” wide ribbing
Row 2. Ch 1, blo sc in each st across, turn. (4 sts)
Rep Row 2 until you have 36 (42, 46, 50, 52, 56, 60, 62) rows of ribbing total.
Now turn and work into the side of the ribbing.
Front Panel
Row 1. Ch 3, *{sk 1 row, work 1 exsc into the side of the next row, ch 1} rep from * across, 1 exsc in last row, turn. (37, 43, 47, 51, 53, 57, 61, 63) sts
Row 2. (RS) Ch 3, *{sk the ch 1, exsc in next exsc, ch 1} rep from * across to last 2 sts, sk next ch, exsc in last sc, turn.
Row 3. Rep row 2 to match your back panel in length.
Cut yarn and leave a long tail for seaming.

Sleeves Notes
Sleeves need an even stitch count.
Sleeves are constructed from the wrist up, which makes trying it on to fit easy.
After joining the ribbing, the sleeves are worked in the round, but you will join and turn each round, working on both sides just like the panels.
Sleeves will increase gradually by adding a stitch to the first ch sp after the ch 3, as written per your size.
The sleeves tend to lengthen with wash and wear so you may consider crocheting them shorter. Mine increased about 2” after washing.
Sleeves Ribbing
Make 2.
Ch 9,
Row 1. Sc in 2nd ch from your hook and in each ch across, turn. (8 sts) 2” wide ribbing
Row 2. Ch 1, blo sc in each st across, turn. (8 sts)
Rep Row 2 until you have 24 (24, 24, 28, 32, 32, 32, 32) rows. Ribbing should stretch to fit your wrist comfortably (8” - 10”).
Join short ends of ribbing together with sl sts. Turn and work along the edge of ribbing.Sewing your pieces together:
Sleeves
In the first round, you will work (32, 32, 32, 36, 40, 40, 40, 40 sts) evenly around the ribbing by working a pike st into the ch sp after every 3rd set of stitches, as instructed below.
Rnd 1. Ch 3, *{(sk next row, exsc in next row, ch 1) rep instructions in ( ) 3x total, then place 1 exsc + ch 1 in next ch sp} rep from * around, sl st to 2nd ch of ch 3 to join and TURN. + 8 (32, 32, 32, 36, 40, 40, 40, 40 sts)
Rnd 2. Ch 3, place 1 exsc + ch 1 in next ch sp, *{in next exsc place 1 exsc, ch 1, sk next ch 1} rep * around, sl st to 2nd ch and TURN. +2 (34, 34, 34, 38, 42, 42, 42, 42 sts)
Rnd 3. Ch 3, *{sk next ch sp, exsc in next exsc, ch 1} rep * around, sl st to 2nd ch and TURN.
Rnd 4. Ch 3, *{sk next ch sp, exsc in next exsc, ch 1} rep * until 1 ch sp left, place 1 exsc + ch 1 in last ch sp, sl st to 2nd ch and turn. +2 (36, 36, 36, 40, 44, 44, 44, 44 sts)
Rnd 5. Rep Rnd 3.
Rnd 6. Rep Rnd 3.
Rep Rnds 2-6. until you have 50 (52, 56, 58, 60, 64, 68, 70) sts or sleeve width measures 7” (7.5”, 8”, 8.5”, 8.5”, 9”, 9.75”, 10”) wide flat. To adjust sleeve width here for your best fit subtract / add st increases.
Continue to rep Rnd 3 until you have 42 (44, 46, 48, 50, 52, 54, 56) rnds, or sleeve length measures 18” (19”, 19.75”, 20.5”, 21.5”, 22”, 23”, 23.75”) long total including ribbing. Adjust sleeve length here for your best fit by subtracting / adding rnds.
Cut yarn, leave long tail for seaming.
Pockets
Ch 24 (= 6.5” wide)
Row 1. Sc in 2nd ch from hook, ch 1 *(sk 1 ch, exsc in next ch, ch 1) rep from * across to last ch, place 1 exsc in last ch, turn. (23 sts)
Row 2. Ch 3 (counts as an exsc + ch 1), sk next ch, exsc in next exsc, ch 1, *{sk next ch 1, exsc in next exsc, ch 1} rep from * across to last 2 sts, sk next ch, exsc in last sc, turn. (23 sts)
Repeat row 2 for 14 more rows, don’t finish off.
Top of Pocket Ribbing
Ch 5,
Row 1. Sc in 2nd ch fro hook and in each ch across. (4 sts)
Attach to pocket with sc2tog as you go, turn. Does not count as a st.
Row 2. Ch 1, sc in blo of each sc, turn. (4 sts)
Row 3. Ch 1, sc in blo of each sc, sc2tog to attach, turn. (4)
Repeat rows 2 and 3 across the pocket, leave a long tail to sew pocket on.
Finished pocket measures: 6″ tall by 6.5″ wide
Sewing your pieces together:
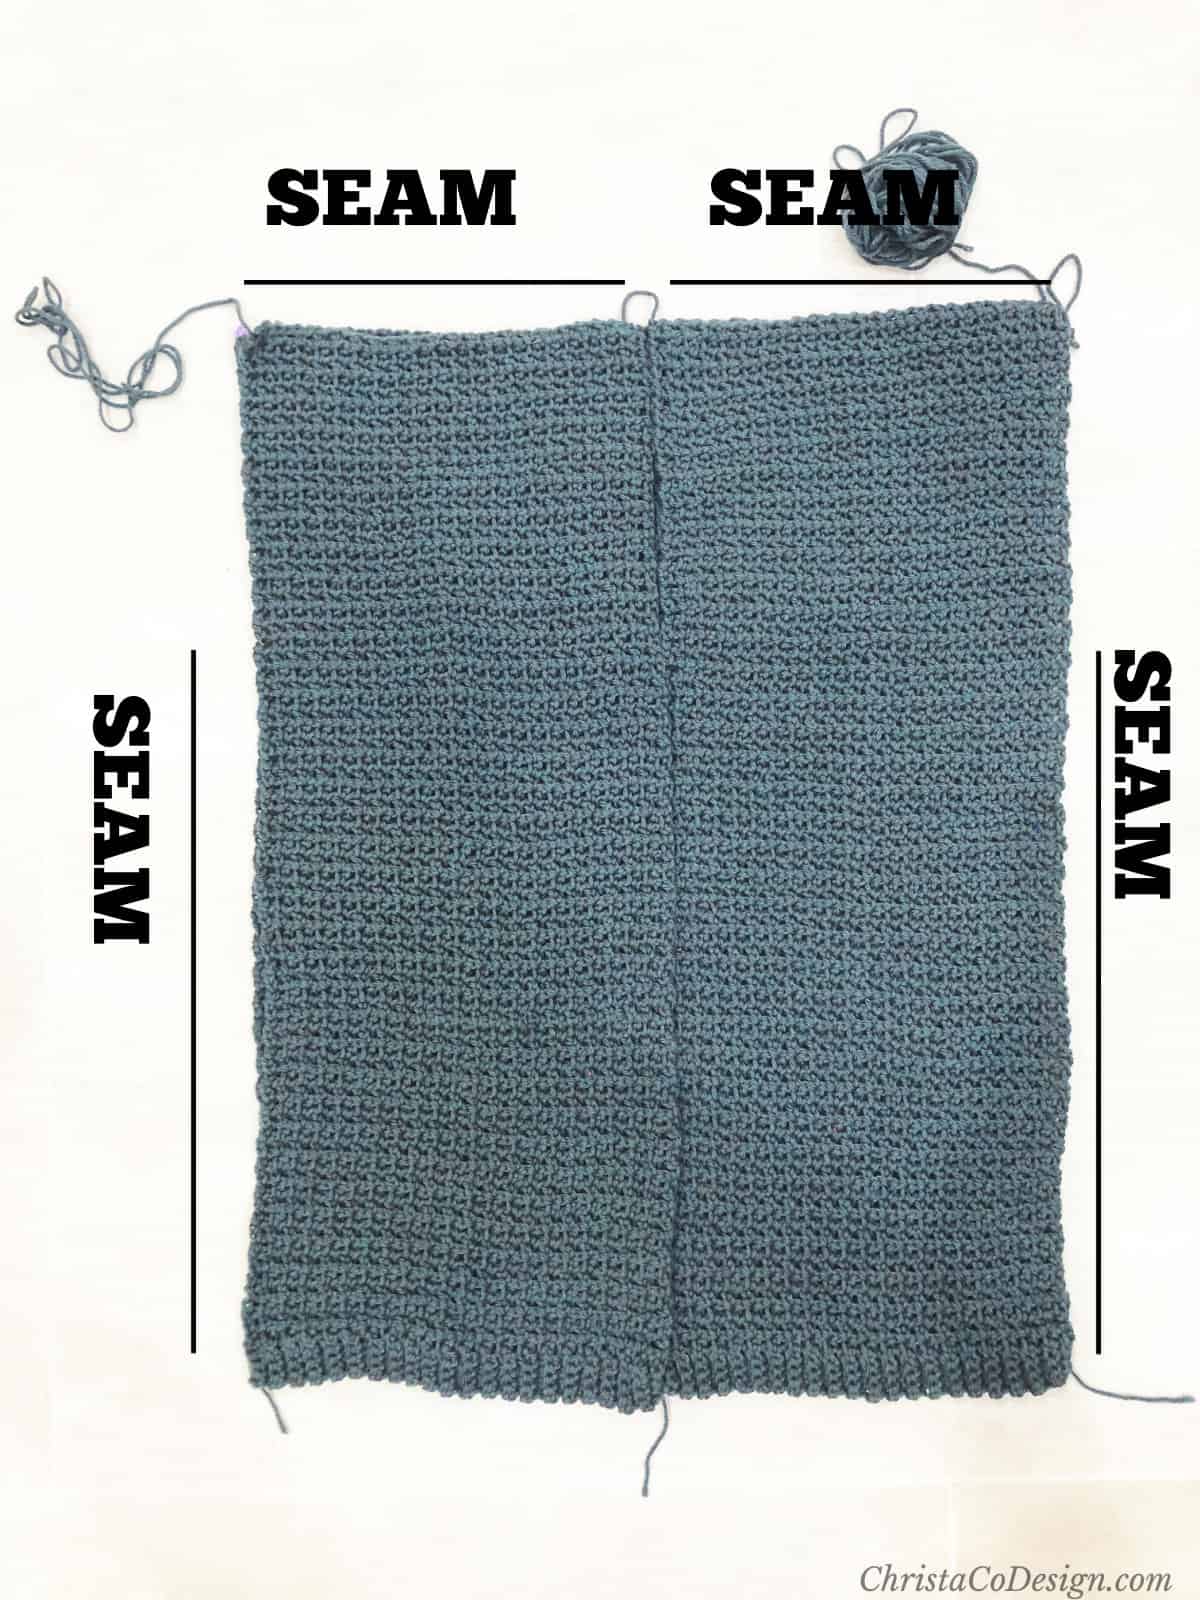
Use a yarn needle and length of yarn to sew. You may use either the whip stitch or mattress stitch.
Work on the WS. Lay panels on top of one another inside out, so front panels are on top of the back panel, and RS are touching.
Sew shoulders together.
Sew sides together. Start at the bottom and sew up, leave an opening of 7” (7.5”, 8”, 8.5”, 8.5”, 9”, 9.75”, 10”) at the top of the panels for the armholes. This is where you will attach the sleeves.
To attach sleeves to your sweater:

With cardigan body still inside out (you’re looking at the WS) and sleeve RS out, slide armhole end of sleeve into the cardigan.
Make sure the sleeve seam is on the bottom (where your elbow will be). Line up the armhole end of sleeve with the armhole opening.
Sew sleeve to armhole with mattress stitch. If needed, seam side of armhole close. Rep for both sleeves. Cut yarn. Weave in ends.
Position pocket at hip height, or desired placement. Line up the pocket row for row. Pin in place.
Sew pockets down along 3 edges, leaving top open. Cut yarn, weave in all ends.
Lapel
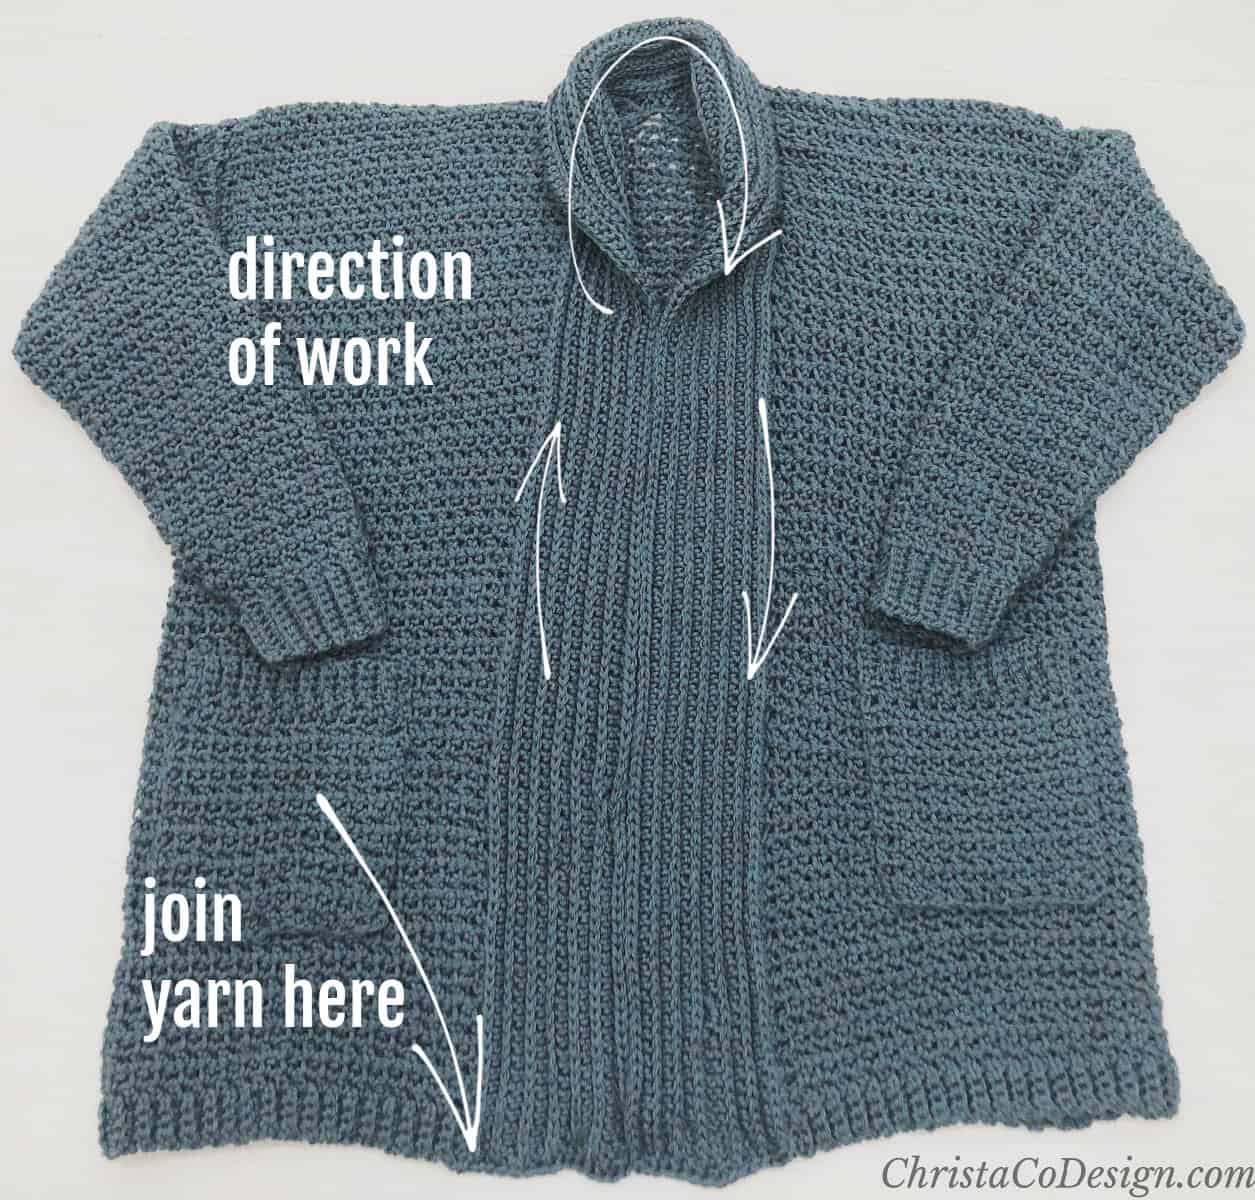
Turn cardigan RS out, lay it flat in front of you, position yourself at the bottom end of the cardigan and attach yarn with sl st at the bottom of the front panel on your left.
Row 1. Ch 1, hdc evenly up the front panel, around the neck and back down the opposite front panel, turn.
Looking at the back of your hdc stitches from rnd 1, there is a distinct horizontal line that runs across the stitch. This is considered the 3rd loop and where we’ll be inserting the hook for the rest of the rows. See the Camel Stitch Tutorial for more help on this step.
Row 2. Ch 1, hdc in 1st, hdc in 3rd loop of each hdc around, hdc in last, turn.
Repeat row 2 until lapel is 3” to 5” wide or to your desired width.
Cut yarn and weave in ends.
Recommended Products
As an Amazon Associate and member of other affiliate programs, I earn from qualifying purchases.
Pink pictured in Big Twist Value in Light Rose*


Hi Christa
My name is Jan
The Homebody Sweater is my first attempt At crocheting anything other than scarves and blankets and hats.
I am at the point of connecting the front panels to the back I don’t see any instructions on connecting the shoulders did I miss something?
Could you please explain on joining the shoulders to the front and back.
Hi Jan,
Thanks for your question. I’m sorry that info is missing. I’ve added a couple of pictures and this text: “Lay front panels on back panel with right sides touching. Sew top of front panels to back panel.”
I hope this helps. Please let me know if you have any questions.
Crystal
I have made 10 of these sweaters. Some were gifts and some for myself. I have shortened some and lengthened others. I love them all. Currently working on a winter white one for myself. Love this pattern and my sweaters thank you.
Thank you Debbie! I’m so glad to hear you love it so much, and especially that you’re making one for yourself too! Thanks so much for this it’s always encouraging to hear good feedback!
Have a great day,
Crystal
I just give up. I can find no place to put in the coupon code to get the free pdf. It just takes me to ravelry to pay.
Hi Bobbi,
Sorry you’re having trouble. I’ll try to help. When you arrive at Ravelry, add the pattern to your cart, then put the coupon code in the box (bottom left) that says apply coupon. Then it will be free and you can check out. I hope this helps.
Thanks,
Crystal
Crystal, thank you so much! I got it! Things have been so crazy here. You made my day!!!! Will I be able to view the video after today?
I have tried it several times with the code and it takes me directly to pay pal. This was one I was looking forward to.
Ginny B
Hi Ginny,
Sorry you’re having trouble. Here is the direct link to Ravelry, https://www.ravelry.com/patterns/library/hygge-homebody-cardigan add it to your cart and enter the code then check out. I hope this helps.
Thanks,
Crystal
Great! So glad you got it. Yes, the video will be available on my YouTube channel still so no worries there.
Thanks,
Crystal
I love cardigans, and very much look forward to making this one. I plan to change the stitch to a less-airy one (I spend most of the year cold), and wanted to thank you for putting in lengths for the different sizes. I’ll be able to make the cardigan by measuring as well as comparing the two swatch gauges for height and width of rows and stitches. And most of all, a big thank you for making it simple enough for someone to make who lacks the focus to make a long-term project.
Hi beautiful cardigan but I really have problems following tha pattern for the arms is there a easier way I remember the pattern for the same cardigan with Big twist pink yarn was easier
Hi Sybille,
I sent you an email about the sleeves!