
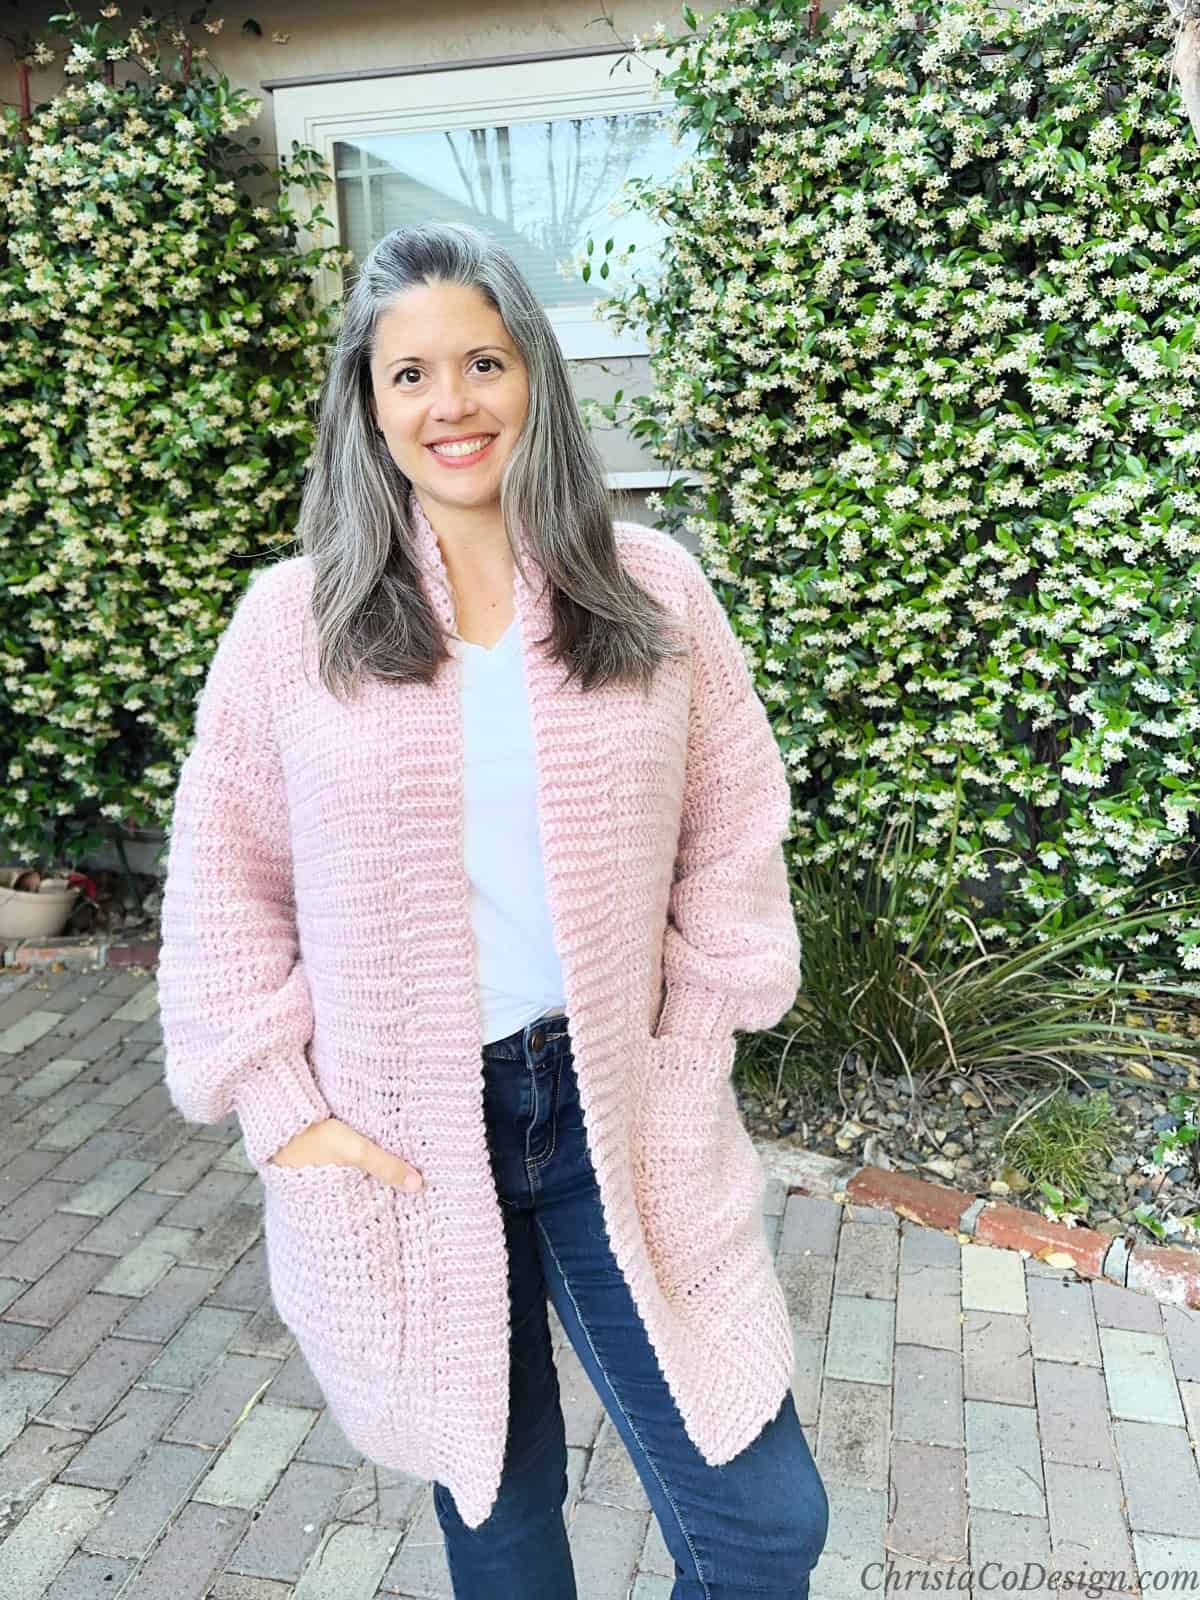
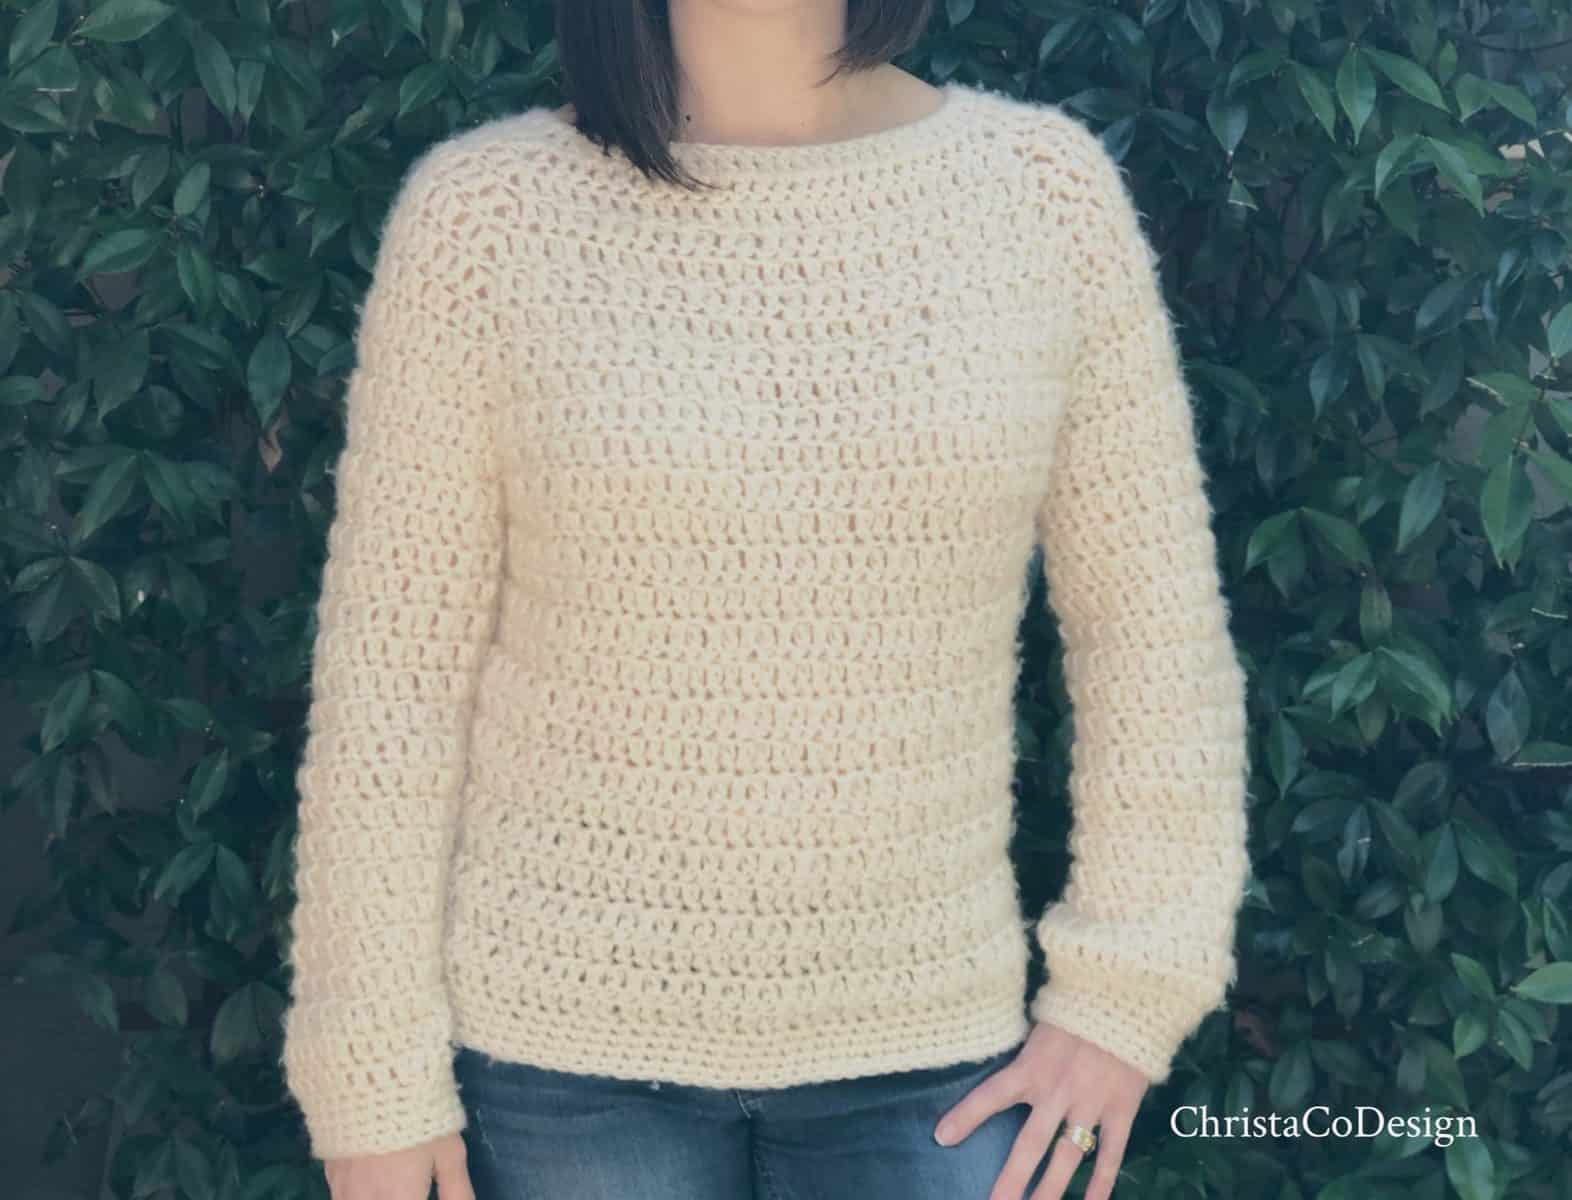
Easy Long Cardigan Free Crochet Pattern With Pockets
The Gia Cardigan is such a cozy cardigan with its squishy collar and patch pockets! This long crochet cardigan works up quickly in worsted weight yarn.

This post contains affiliate links, I may earn a fee. Read more disclosure policy.
Join the ChristaCoDesign Newsletter
Never miss a pattern!
The free pattern includes 9 different sizes to fit busts that are 29″ up to 61″. With the suggested ease adding 6″ – 8″ this oversized cardigan is ultra comfy.
Purchase the ad-free, well formatted printable PDF Pattern from my shop. Scroll down for the free pattern!
Purchase My Ad-Free PDF Patterns In Your Favorite Shop Here:
Free Crochet Cardigan Patterns
- The best part of the Positano Cardigan is the inseam pockets!
- The Sera Cardigan is made with double crochet stitches so it comes together quickly.
- Try a different sleeve length with the Spring Cardi in 3 sleeve options, plus the simple stitches give it a classic elegance.
- Summer Cardigans are so fun, the Summer’s End is my favorite with short sleeves in cotton yarn!
Be sure to check out my other crochet cardigan patterns!
Materials
- #4 medium worsted weight yarn, pictured in Lion Brand’s Touch of Alpaca* (90% acrylic, 10% alpaca 100 g / 3.5 oz, 207 yd / 190 m) color: blush. See yarn by size below.
- 5.5 mm/US size I-9 hook*, or hook needed to meet gauge.
- Yarn needle, Measuring tape, Scissors, 2 – 4 stitch markers
Yarn By Size
(XS) 1086 yd / 993 m
(S) 1263 yd / 1155 m
(M) 1468 yd / 1342 m
(L) 1673 yd / 1530 m
(XL) 1907 yd / 1744 m
(2X) 2174 yd / 1988 m
(3X) 2479 yd / 2267 m
(4X) 2826 yd / 2584 m
(5X) 3222 yd / 2946 m

Skill Level
Easy
Gauge
4” / 10 cm x 4” / 10 cm = 12 sts x 11 rows in pattern, after blocking.
Notes
- Please read through entire pattern and create a gauge swatch before beginning
- Pattern is written for multiple sizes, where the first number given is the smallest size and the larger sizes follow in parenthesis. For example, “Rep row 2 for 96 (108, 120, 132, 144, 156, 168, 180, 192) rows” means size small would repeat row 2 for 108 times and size 4X would repeat row 2 for 180 times. Where no size is indicated instructions apply to all.
- Stitch counts are given at the end of each row with all sizes within the parenthesis, like this: (96, 108, 120, 132, 144, 156, 168, 180, 192 sts)
- Ch 1 loosely to start a row. The ch 1 does not count as a stitch.
Construction
The body of this sweater pattern is worked bottom up. You’ll begin with ribbing for the full width of the sweater. Then you’ll work the main stitch pattern on the length of the ribbing.At the armholes you’ll divide it into 2 front panels and 1 back panel.
The two sleeves are crocheted separately from the wrist up. They are worked in the round, but you will turn after each round so you work on both sides of the fabric.
The panels are seamed at the shoulders. The sleeves are seamed on to the sweater at the armhole.

Sizing
To fit bust sizes 29″ (XS), 33″ (S), 37″ (M), 41″ (L), 45″ (XL), 49″ (2X), 53″ (3X), 57″ (4X), 61″ (5X).
Finished bust sizes 36″ (XS), 40″ (S), 44″ (M), 48″ (L), 52″ (XL), 56″ (2X), 60″ (3X), 64″ (4X), 68″ (5X).
The sweater length is 31.5″ (XS), 32″ (S), 32.5″ (M), 33″ (L), 33.5″ (XL), 34″ (2X), 34.5″ (3X), 35″ (4X), 35.5″ (5X)
Fit/Adjustments
This cardigan has an ease of 6-8” where the finished bust measurement is larger than the actual bust size.
You can easily adjust the length of this pattern by making more or less rows before dividing.
For a more snug fit, go down a size. Likewise, for a looser fit, go up a size.
Stitches/Abbreviations
US Terms
blo sc – back loop single crochet
ch (s) – chain (s)
exsc – extended single crochet-insert hook into the stitch to be worked, yarn over & pull up a loop, yo and pull through 1 loop, yo and pull through 2 loops
rep – repeat
rnd (s) – round (s)
RS – right side
sc2tog – single crochet two together
sk – skip the indicated stitch
sl st – slip stitch
sm – stitch marker
st (s) – stitch(es)
WS – wrong side
yo – yarn over
Pattern Instructions

How To Crochet Gia Easy Long Cardigan Pattern
Learn how to crochet this cardigan with long sleeves and pockets.
Materials
- #4 medium worsted weight yarn, pictured in Lion Brand’s Touch of Alpaca* (90% acrylic, 10% alpaca 100 g / 3.5 oz, 207 yd / 190 m) color: blush.
Tools
- 5.5 mm hook (US size I-9), or crochet hook size needed to meet gauge.
- Yarn needle, Measuring tape, Scissors, 2 - 4 stitch markers
Instructions
- Ribbing
Measures 2.5” tall.
Ch 11
Row 1. Sc in 2nd ch and in each ch across, turn. (10 sts)
Row 2. Ch 1, starting in same st blo sc in each st across, turn. (10 sts)
Rep row 2 for 96 (108, 120, 132, 144, 156, 168, 180, 192) rows.
Turn and work along the length of the ribbing. - Main Body
Row 1. Place 96 (108, 120, 132, 144, 156, 168, 180, 192) exsc evenly along ribbing, you can place one per row of ribbing.
Row 2. Ch 1, exsc in same st and in each st across, turn. (96, 108, 120, 132, 144, 156, 168, 180, 192 sts)
Rep row 2 until total length, including ribbing, is 22”, or to your desired length.
If you would like to lengthen your sweater, add more rows here. Measure from your underarm down to where you want your cardigan to stop. Remember if you lengthen you need more yarn. After dividing, you will add 7” (7.5, 8, 8.5, 9, 9.5, 10, 10.5, 11) inches to the length. - Divide
Count 24 (27, 30, 33, 36, 39, 42, 45, 48) sts and place sm in this st. These are the sts for one front panel. Count 48 (54, 60, 66, 72, 78, 84, 90, 96) sts these are the back panel sts. Place st marker in the next st, this sm begins the 24 (27, 30, 33, 36, 39, 42, 45, 48) sts of the other front panel. - Front Panel
Row 1. Ch 1, exsc in same st, exsc in next 23 (26, 29, 32, 35, 38, 41, 44, 47) sts, remove sm, turn. (24, 27, 30, 33, 36, 39, 42, 45, 48 sts)
Row 2. Ch 1, exsc in same st and in each st across, turn.
Rep Row 2 until you have 19 (21, 22, 24, 25, 26, 28, 29, 30) rows total for front panel (from divide) and armhole = 7” (7.5”, 8”, 8.5”, 9”, 9.5”, 10”, 10.5”, 11”) tall. If you would like to lengthen or shorten the armhole add or subtract rows here.
Cut yarn and leave a long tail for seaming.
Back Panel
Make sure you are on the correct side and working in the same direction as you were for the front panel. Join yarn with sl t to first stitch after front panel, st #25 (28, 31, 34, 37, 40, 43, 46, 49).
Row 1. Ch 1, exsc in same st, exsc in next 47 (53, 59, 65, 71, 77, 83, 89, 95) sts, remove sm, turn. (48, 54, 60, 66, 72, 78, 84, 90, 96 sts)
Row 2. Ch 1, exsc in same st and in each st across, turn.
Rep Row 2 until you have 19 (21, 22, 24, 25, 26, 28, 29, 30) rows total for back panel (from divide) and armhole = 7” (7.5”, 8”, 8.5”, 9”, 9.5”, 10”, 10.5”, 11”) tall. Remember to match your front panel if you made any changes.
Cut yarn and leave a long tail for seaming.
Second Front Panel
Make sure you are on the correct side and working in the same direction as you were for the back panel. Join yarn to st #72 (81, 90, 99, 108, 117, 126, 135, 144) with a sl st.
Row 1. Ch 1, exsc in same st, exsc in next 23 (26, 29, 32, 35, 38, 41, 44, 47) sts, turn. (24, 27, 30, 33, 36, 39, 42, 45, 48 sts)
Row 2. Ch 1, exsc in same st and in each st across, turn.
Rep Row 2 until you have 19 (21, 22, 24, 25, 26, 28, 29, 30) rows total for front panel (from divide) and armhole = 7” (7.5”, 8”, 8.5”, 9”, 9.5”, 10”, 10.5”, 11”) tall. Remember to match your other panels if you made any changes.
Cut yarn and leave a long tail for seaming.
Sleeves
Notes
Sleeves are constructed from the wrist up.
After joining the ribbing, the sleeves are worked in the round, but you will join and turn each row, working on both sides.
Ribbing
Measures 2.5” tall.
Make 2.
Ch 11,
Row 1. Sc in 2nd ch from your hook and in each ch across, turn. (10 sts)
Row 2. Ch 1, starting in same st blo sc in each st across, turn. (10 sts)
Rep Row 2 until you have 21 (23, 24, 26, 27, 29, 30, 32, 34) rows total and ribbing measures 5.25” (5.75, 6, 6.5, 6.75, 7.25, 7.5, 8, 8.5) inches long. If needed for a comfortable fit you may lengthen the ribbing to any size desired. If you do, only increase to the given stitch count on Rnd 2 of the sleeves below.
Join short ends of ribbing together with sl sts. Turn and work along the edge of ribbing.- Sleeves
Rnd 1. Ch 1, starting in same place exsc 21 (23, 24, 26, 27, 29, 30, 32, 34) sts evenly around the ribbing, join with a sl st and turn.
Rnd 2. Ch 1, starting in same st place 2 exsc in each st around, join with a sl st and turn. (42, 46, 48, 52, 54, 58, 60, 64, 68) sts
Rnd 3. Ch 1, exsc in same st and in each st around, join with a sl st and turn.
Rep Rnd 3 until sleeve measures 16” (16.5, 17, 17.5, 18, 18.5, 19, 19.5, 20) inches long total including the ribbing.
If you need to add more stitches to increase the width of your sleeve you may do so at any point by placing 2 sts in one. I recommend increasing by 1-2 sts per round until your sleeve is to the desired width.
Cut yarn, leave long tail for seaming. 
Sewing your pieces together:
Sew where indicated using a yarn needle and length of yarn. You may use either the whip stitch or mattress stitch.
Work on the wrong side. Fold front panels on top of the back panel.
Sew shoulders together.
- To attach sleeves to your sweater:
With cardigan body still inside out (WS) and sleeve RS out, slide sleeve into cardigan body and line up the armhole end of sleeve with the armhole opening of the cardigan. Make sure the seam is on the bottom (where your elbow will be).
Sew sleeve to armhole with mattress stitch. Rep for both sleeves. Cut yarn. Weave in ends.
- Front edge/collar:
For help on how to add the ribbing to the finished edge see this tutorial.
Measures 2” wide.
With cardigan laid flat, RS up facing you, position yourself at the bottom end of the cardigan and attach yarn with sl st at the bottom of the front panel on your left.
Ch 10,
Row 1. Sc in 2nd ch from your hook and in each ch across, join to edge of cardigan with a sc2tog, turn. (9 sts)
Row 2. Ch 1, sk the sc2tog, starting in same st place 1 blo sc in each st across, turn. (9 sts)
Row 3. Ch 1, place 1 blo sc in each st across, join to edge of cardigan with a sc2tog, turn. (9 sts)
When you get back to the cardigan edge join to the stitch where you are and the next stitch with a sc2tog.
Rep Rows 2 and 3 around, attaching the edging as you go with a sc2tog. Work evenly up the front panel, around the neck and back down the opposite front panel.
Cut yarn and weave in ends. - Pockets
Make 2.
7” wide by 8” tall.
You can adjust the width by using any number of chains, plus 1 for the turning chain. To adjust the length just work more or less row repeats.
Ch 21
Row 1. Exsc in 2nd ch from your hook and in each ch across, turn. (20 sts)
Row 2. Ch 1, exsc in same st and in each st across, turn.
Rep Row 2 until your pocket is 7” tall, or to your desired height. - Ribbing
Adds 1” to length.
Continue from where you are to add ribbing.
Ch 5
Row 1. Sc in 2nd ch from your hook and in each ch across, join to edge of pocket with a sc2tog, turn. (4 sts)
Row 2. Ch 1, sk the sc2tog, blo sc in each st across, turn. (4 sts)
Row 3. Ch 1, blo sc in each st across, join to edge of pocket with a sc2tog, turn. (4 sts)
Rep Rows 2 and 3 across the top of the pocket.
Cut yarn and leave a long tail for seaming.
Position pocket at hip height, or desired placement. I placed mine 6 rows up from the hem ribbing and 5 stitches in from the edge ribbing.
Line up the pocket row for row. Pin in place.
Sew pockets down along 3 edges, leaving top open.
Cut yarn, weave in all ends.
Recommended Products
As an Amazon Associate and member of other affiliate programs, I earn from qualifying purchases.


Hi! Love the Gia cardigan! Am I missing it? I don’t see the actual measurements for each size? Thanks!
Hi Sonia, thank you! Sorry, I left those numbers out. Thanks for asking I’ve updated them now. Here are the Finished bust sizes 36″ (XS), 40″ (S), 44″ (M), 48″ (L), 52″ (XL), 56″ (2X), 60″ (3X), 64″ (4X), 68″ (5X).
I’m doing the cardigan , I’m at the body at the DIVIDE ,,,
Why Exactly I’m I dividing ? SORRY , I just don’t see it ?
Is it for the sleeves? Thank you for your any advice , and also a big tks for the pattern ,I loved it
Hi Linda,
You’re dividing the sweater into a back panel and two front panels. If you scroll down under #5 and the title “Second Front Panel” there is a picture after it’s divided, that might help. So now instead of working all the way across you’re working it in three different sections so you can create openings where the sleeves will attach. I hope this helps.
Thanks,
Crystal