How To Crochet Ribbing For Hats With a Brim Tutorial
Learn how to crochet ribbing for hats and beanie brims. This easy single crochet ribbing tutorial for hats works up with simple techniques. Stretchy ribbing for your crochet hats is easy to make.

This post contains affiliate links, I may earn a fee. Read more disclosure policy.
Join the ChristaCoDesign Newsletter
Never miss a pattern!
I’ve included a written pattern, a step by step photo tutorial and video tutorial for this simple stretchy crochet ribbing. Be sure to check out the video, that’s where I’ll show you how to crochet around the edge of the ribbing.
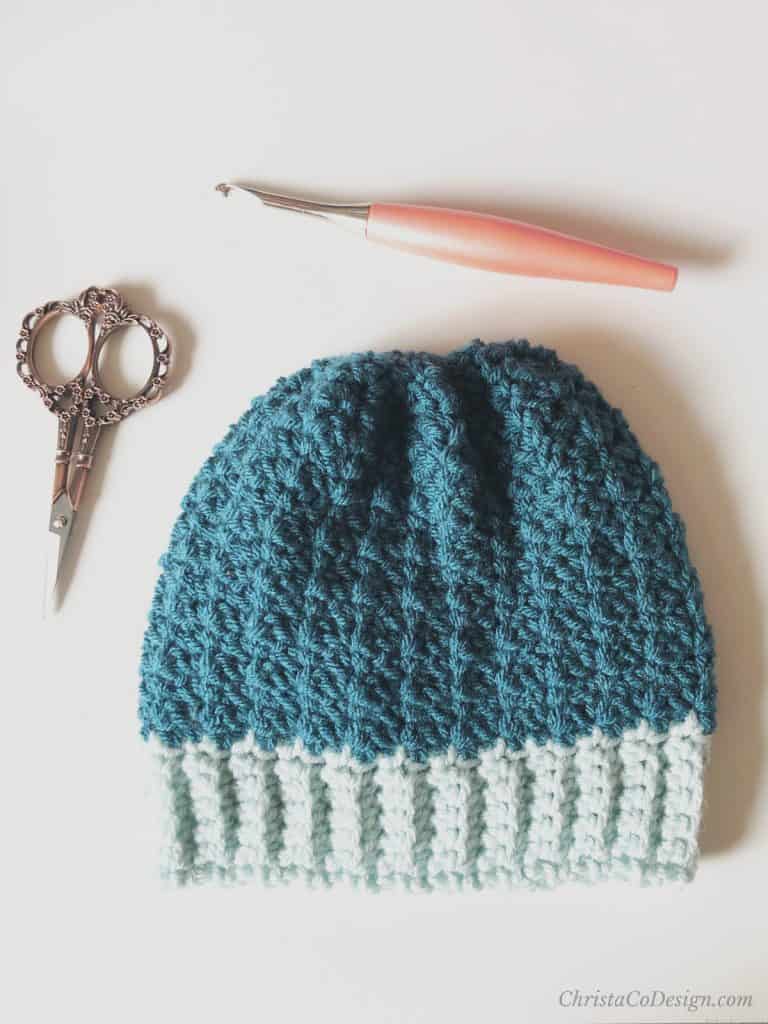
This beginner friendly crochet ribbing will have you crocheting hats in no time. Crocheting a bottom up hat starts with crochet ribbing. Then you can add any stitch to create your hat.
Yarn
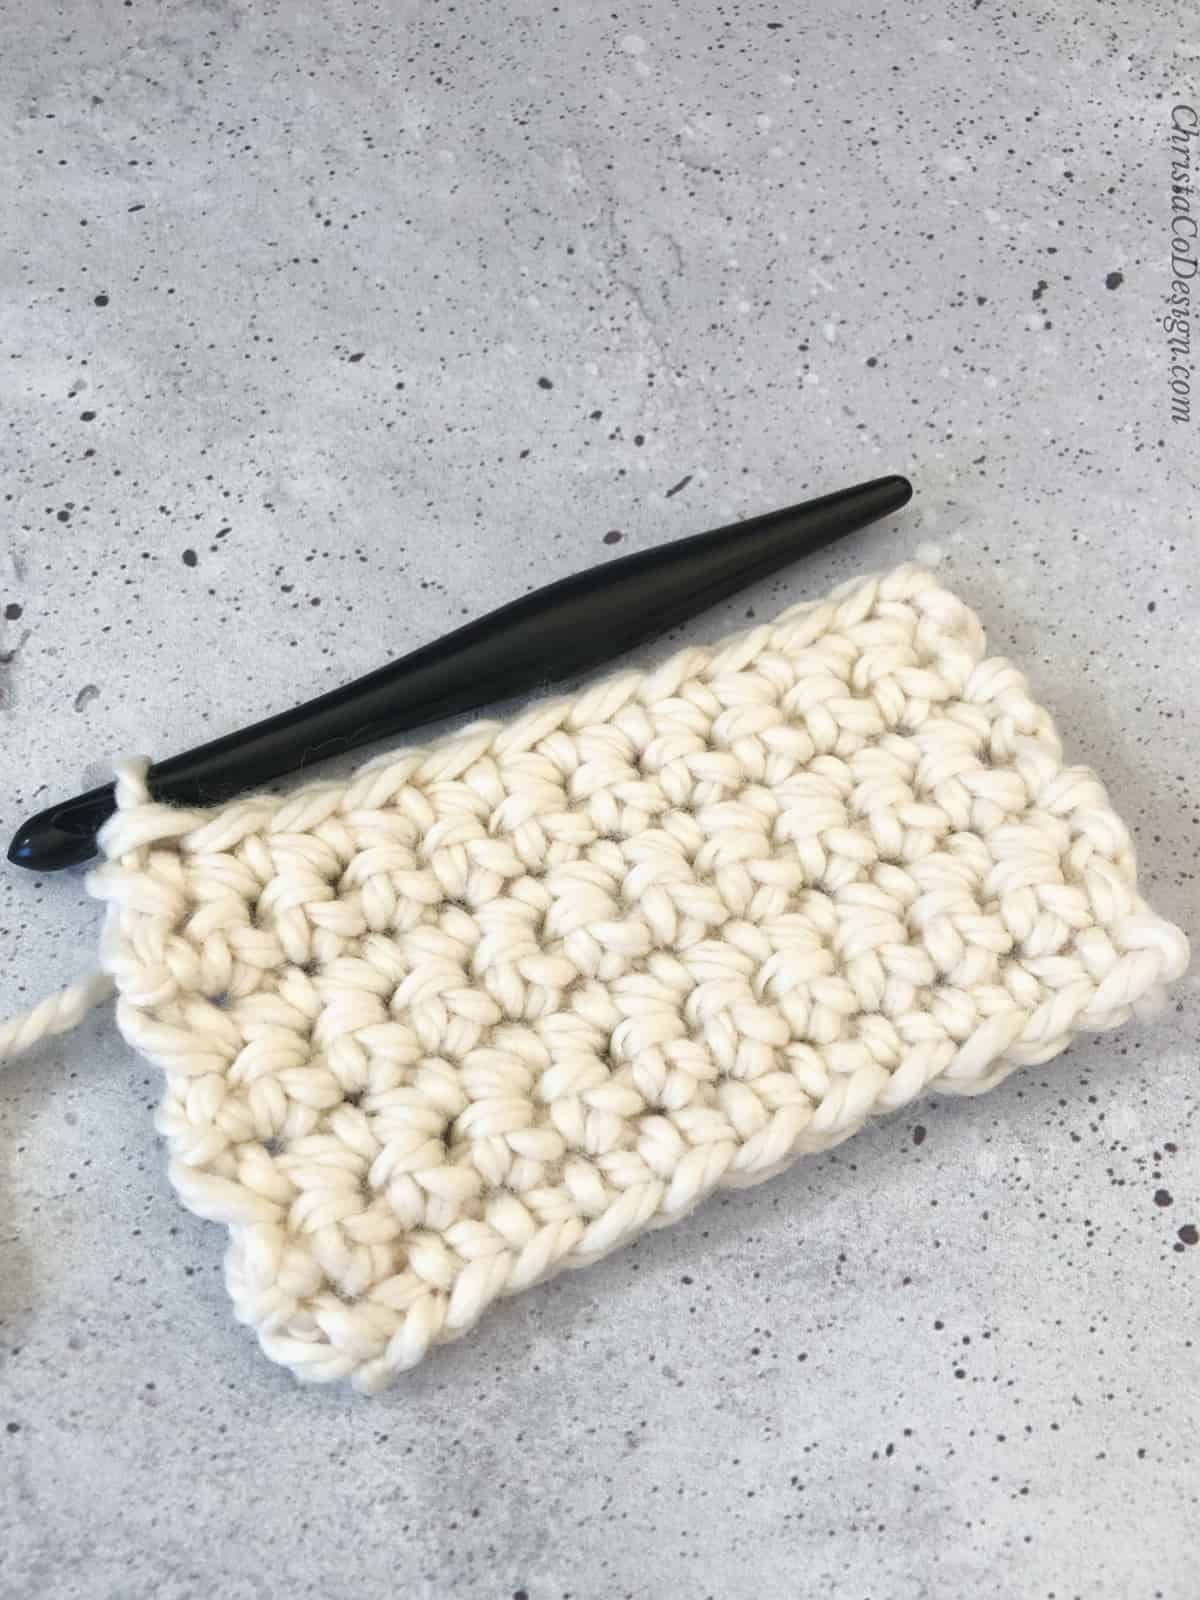
Crochet ribbing works fabulous in any size yarn. I’ve used it with dk/light weight yarns, medium worsted weight yarns, bulky/chunky yarns and superb bulky yarn. The yarn weight and fiber content will add to the uniqueness of each crochet ribbing you use them in.
Stitch
This easy ribbing technique uses chains and single crochets. The single crochet stitch ribbing is the simplest ribbing technique. Most of us learn the single crochet stitch first so this one is easy.
Materials
- Any yarn + compatible hook. Your pattern will dictate what you should use.
- I’m using Hobby Lobby’s I Love This Yarn a medium worsted weight yarn.
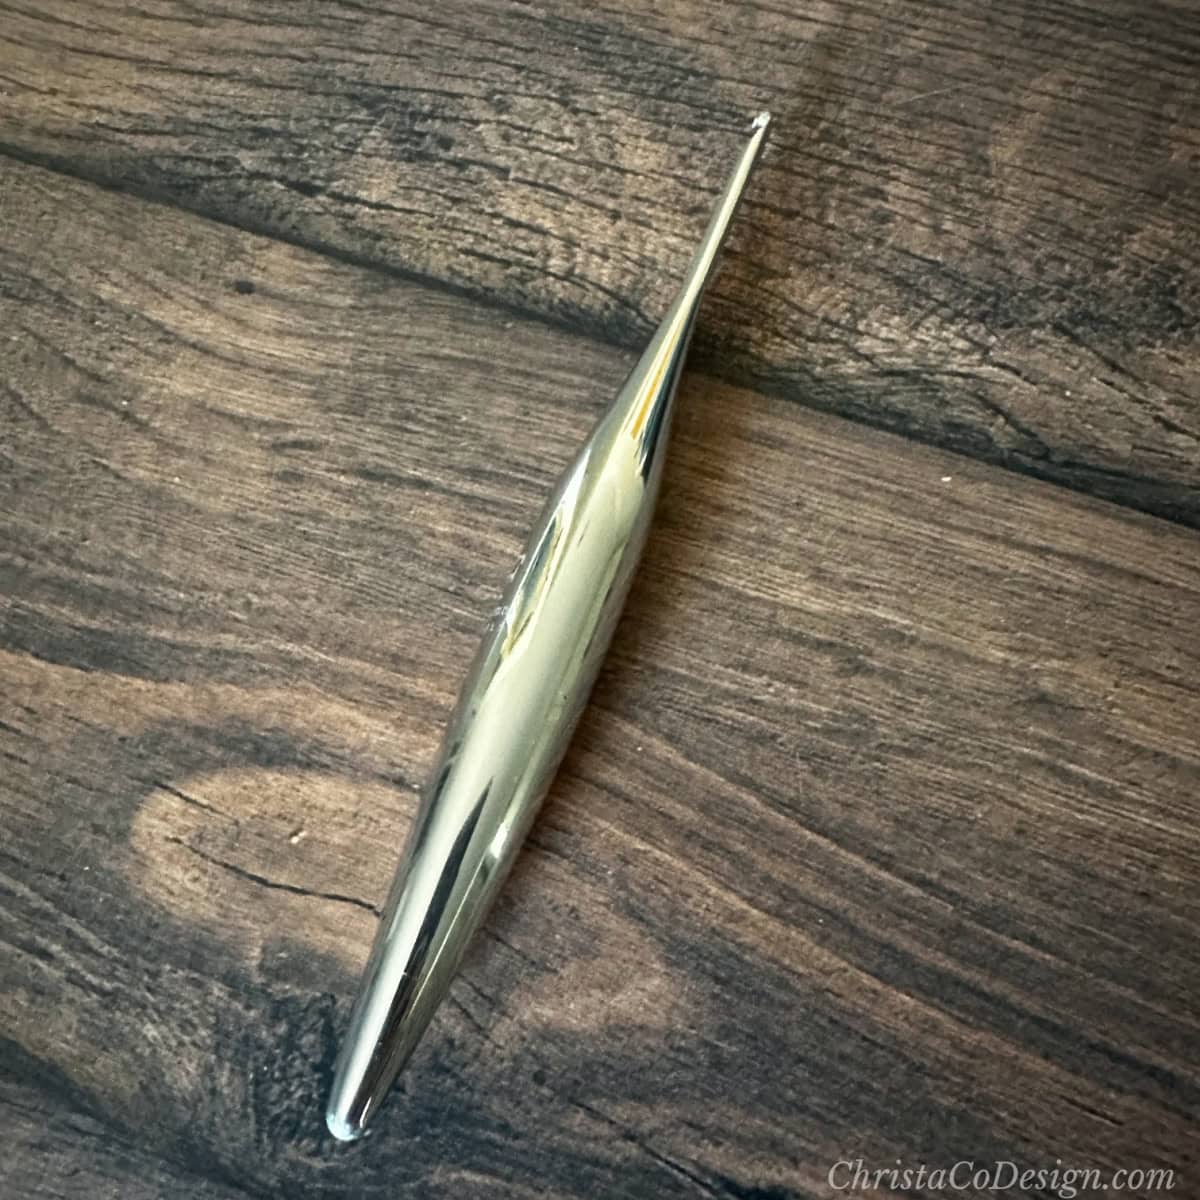
- The hook I’m using is my Furls* Odyssey 5mm in Peach.
- Yarn needle + scissors for weaving away ends.
Notes
- Ch 1 at the start of a row does not count as a stitch.
Stitches/Abbreviations
(US Terms)
You can click the link to these crochet terms for a more in depth tutorial on each one.
- ch(s)-chain(s)
- sc-single crochet
- sl st-slip stitch
Gauge
2″ x 2″ = 6 sc x 8 rows of sc ribbing
Construction
To crochet ribbing for hats, you’ll work the stitches in rows. Each row will be turned. Once the ribbing is crocheted to length, then you will slip stitch the short ends together.
This forms the circle of the hat brim. To crochet an actual hat, you’ll crochet stitches around that circle. Then continue to crochet up the “tube” or body of the hat.
This tutorial is dedicated to how to crochet the ribbing for the brim. However, in the video tutorial I do show you how to also crochet into the edge of that crochet ribbing.
Fit/Adjustment
To crochet ribbing to fit, you’ll need to crochet it to a length smaller than the actual head size. With stretchy crochet ribbing, there’s usually 2-3″ of negative ease taken into account. So this means the ribbing will be 2-3″ smaller than the actual head size.
I’ve included a handy chart to simplify this crochet ribbing measurement.
To Fit Age
Baby 0-3 mos-12″
Baby 3-6 mos-13″
Baby 6-12 mos-14″
Toddler-15″
Child-17″
Teen/Sm Adult-19″
Med Adult-20″
Large Adult-21″
Another way to adjust your ribbing is width. The crochet ribbing pattern here is 2″ wide. This is according to my hook, yarn and gauge. If you’re using a different yarn, hook and your gauge is different then your crochet ribbing will be wider or narrower.
To adjust the width of your ribbing, add or subtract chains. For a single crochet ribbing, you want to start with a chain that is 1 more than the number of single crochets you want.
For example, I want a 2″ ribbing. From practice I know that means I need 6-8 stitches, depending on my yarn + hook variables. So for this 2″ ribbing, I started with 7 chains, which means I’ll have 6 single crochets.
If I want a wider, 3″ ribbing then I would start with 10 chains. This would give me 9 single crochets, and about a 3″ width. You want 1 more chain to use as your first turning chain, so you skip it and start in the next chain.
Hat Patterns
With This Crochet Ribbing
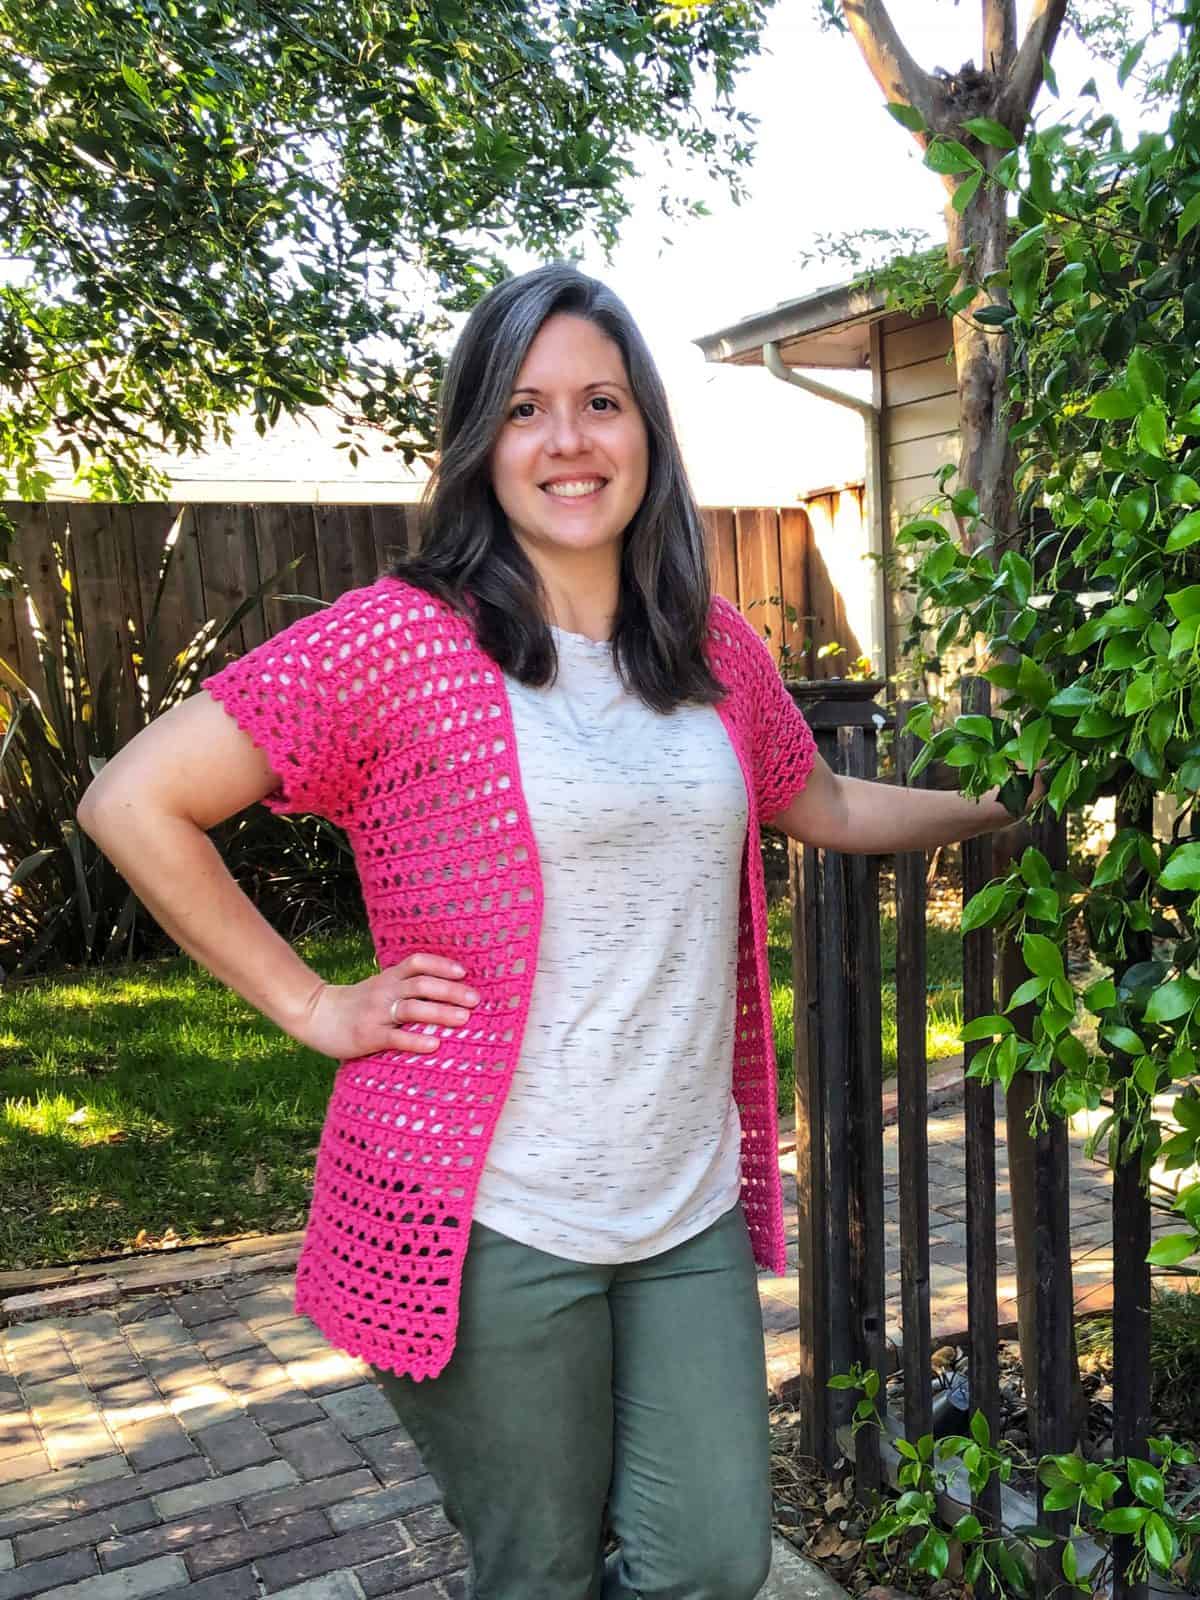
- The Positano Hat is a bottom up crochet hat that features this easy crochet ribbing. The stitch used to crochet the tube of the hat is called the spider stitch. You can also see this stitch in the Positano Crochet Cardigan pattern.
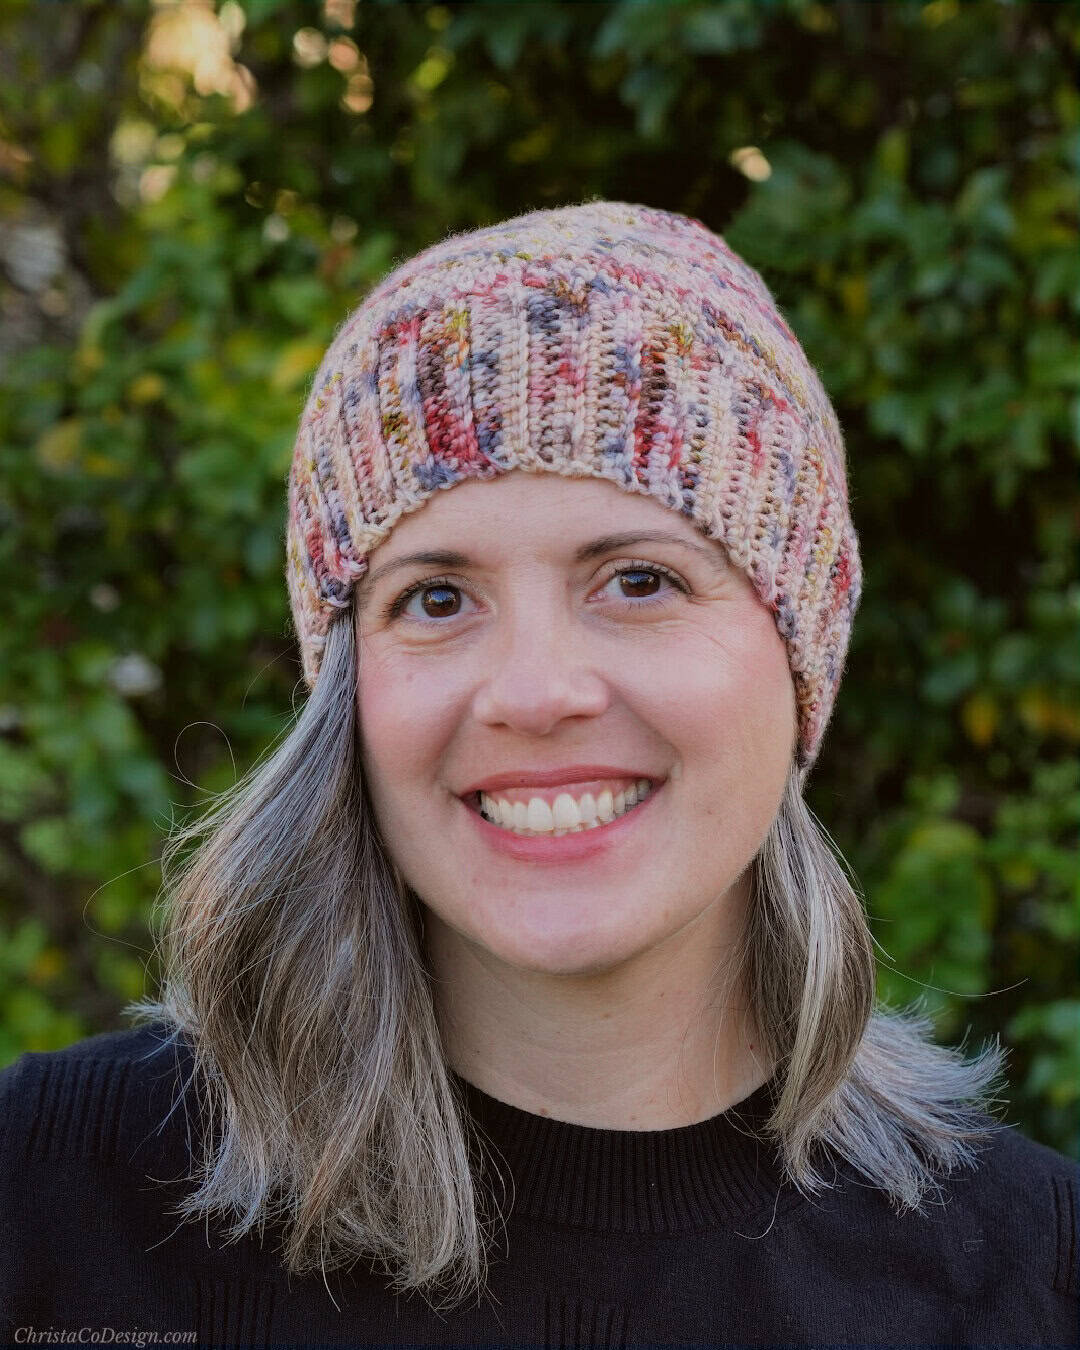
- The Lontano Beanie is also a bottom up hat that uses single crochet ribbing. This crochet hat pattern looks great in stripes. It can be topped with a pom or without.
- The Dakota Hat is an intermediate hat pattern that looks amazing in contrasting colors. There’s also a matching crochet scarf pattern to make the set!
- The Winter Pom Crochet Hat pattern is sized for children and teens. This cotton crochet hat pattern uses easy single crochet ribbing to get it started.
- The Striped Slouchy Hat is also crocheted in a cotton yarn. This bottom up hat is crocheted with a longer “tube” to create the slouchy look.
More Hats I Love
Love this vintage inspired Crochet Cloche Hat Pattern from Little John’s Yarn.
This Just Groovin’ crochet beanie from Elk Studio has amazing texture.
Level
Easy. This simple single crochet ribbing uses only chains and single crochets. It’s a great beginner crochet ribbing to get you started making bottom up hats.
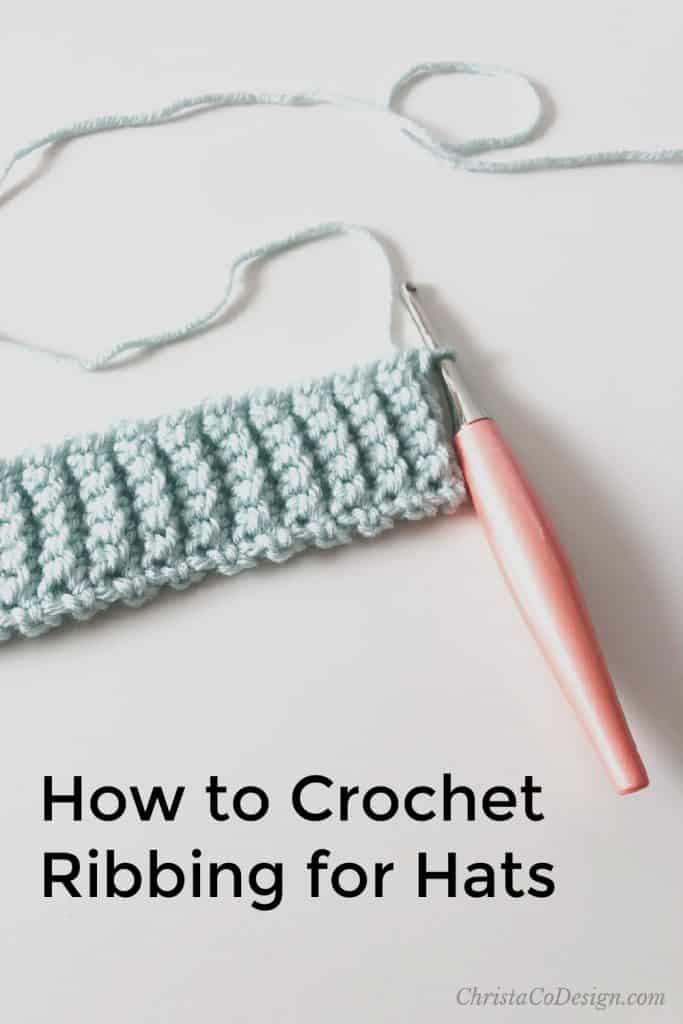
Written Pattern for Stretchy Single Crochet Ribbing
Chain 7,
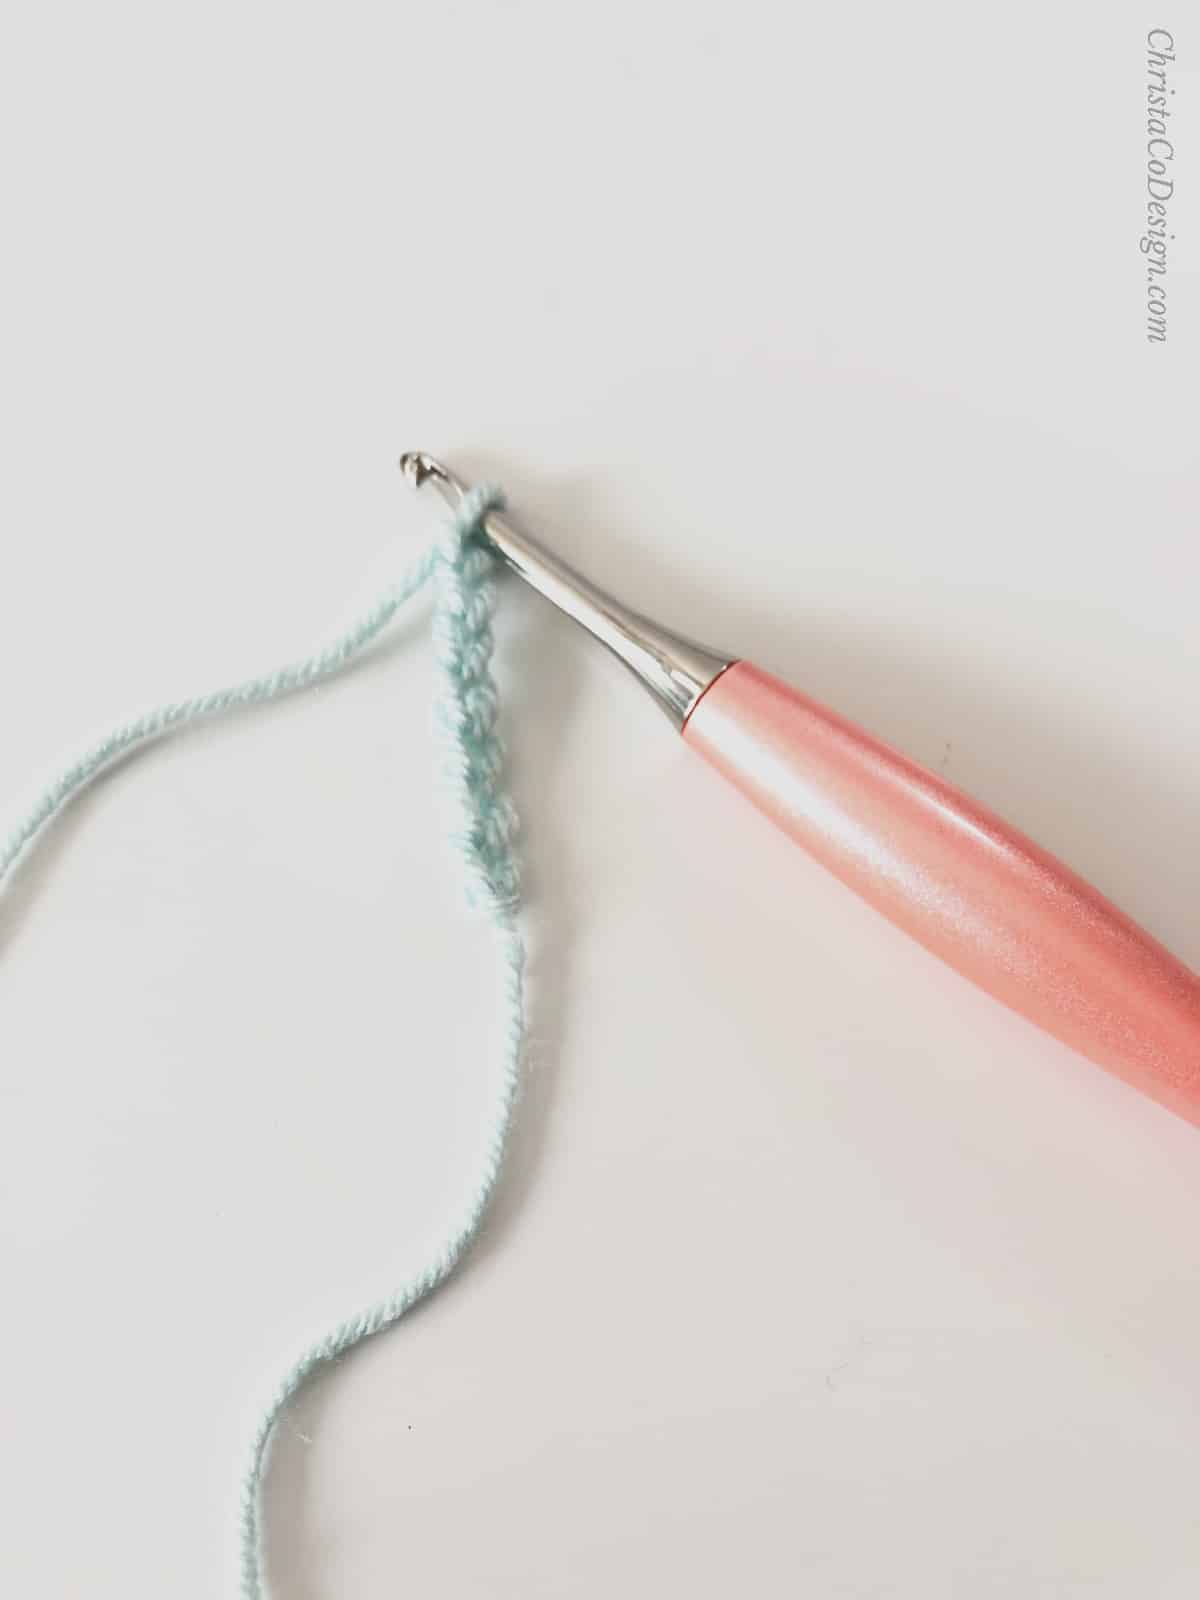
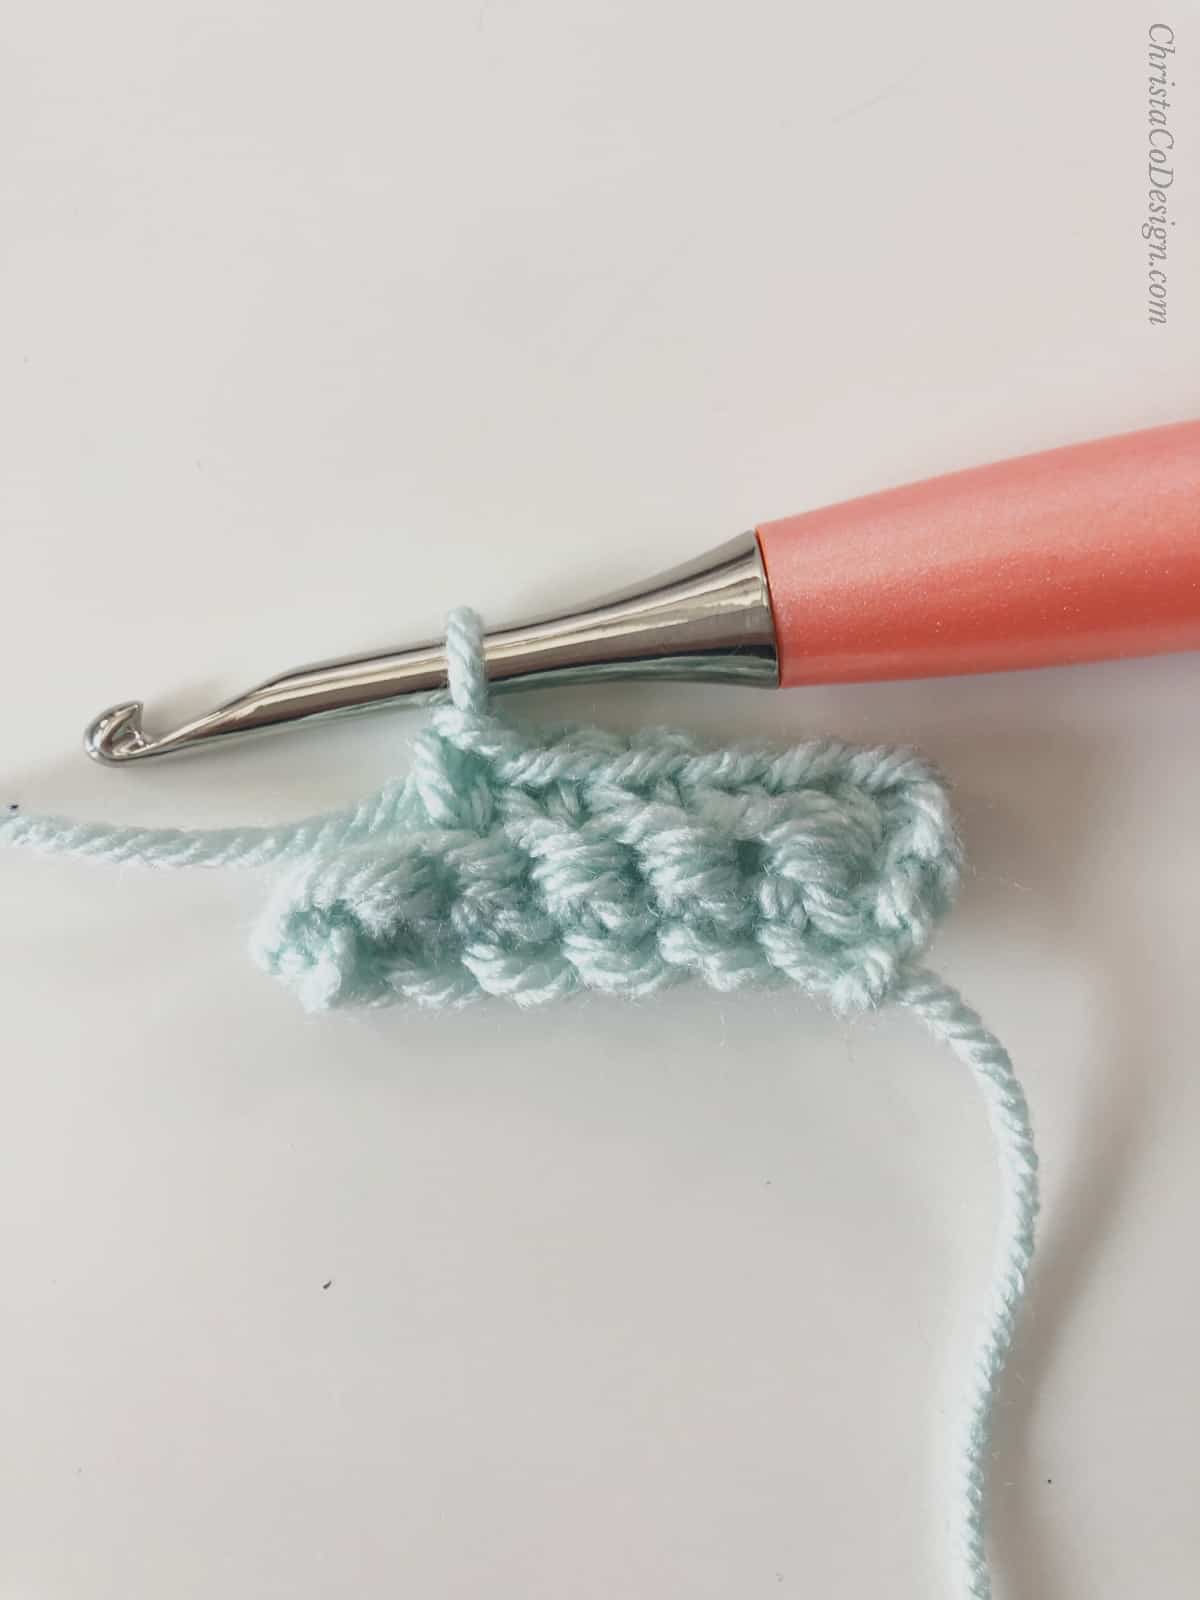
Row 1. Sc in 2nd ch from your hook and in each ch across, turn. (6 sts)
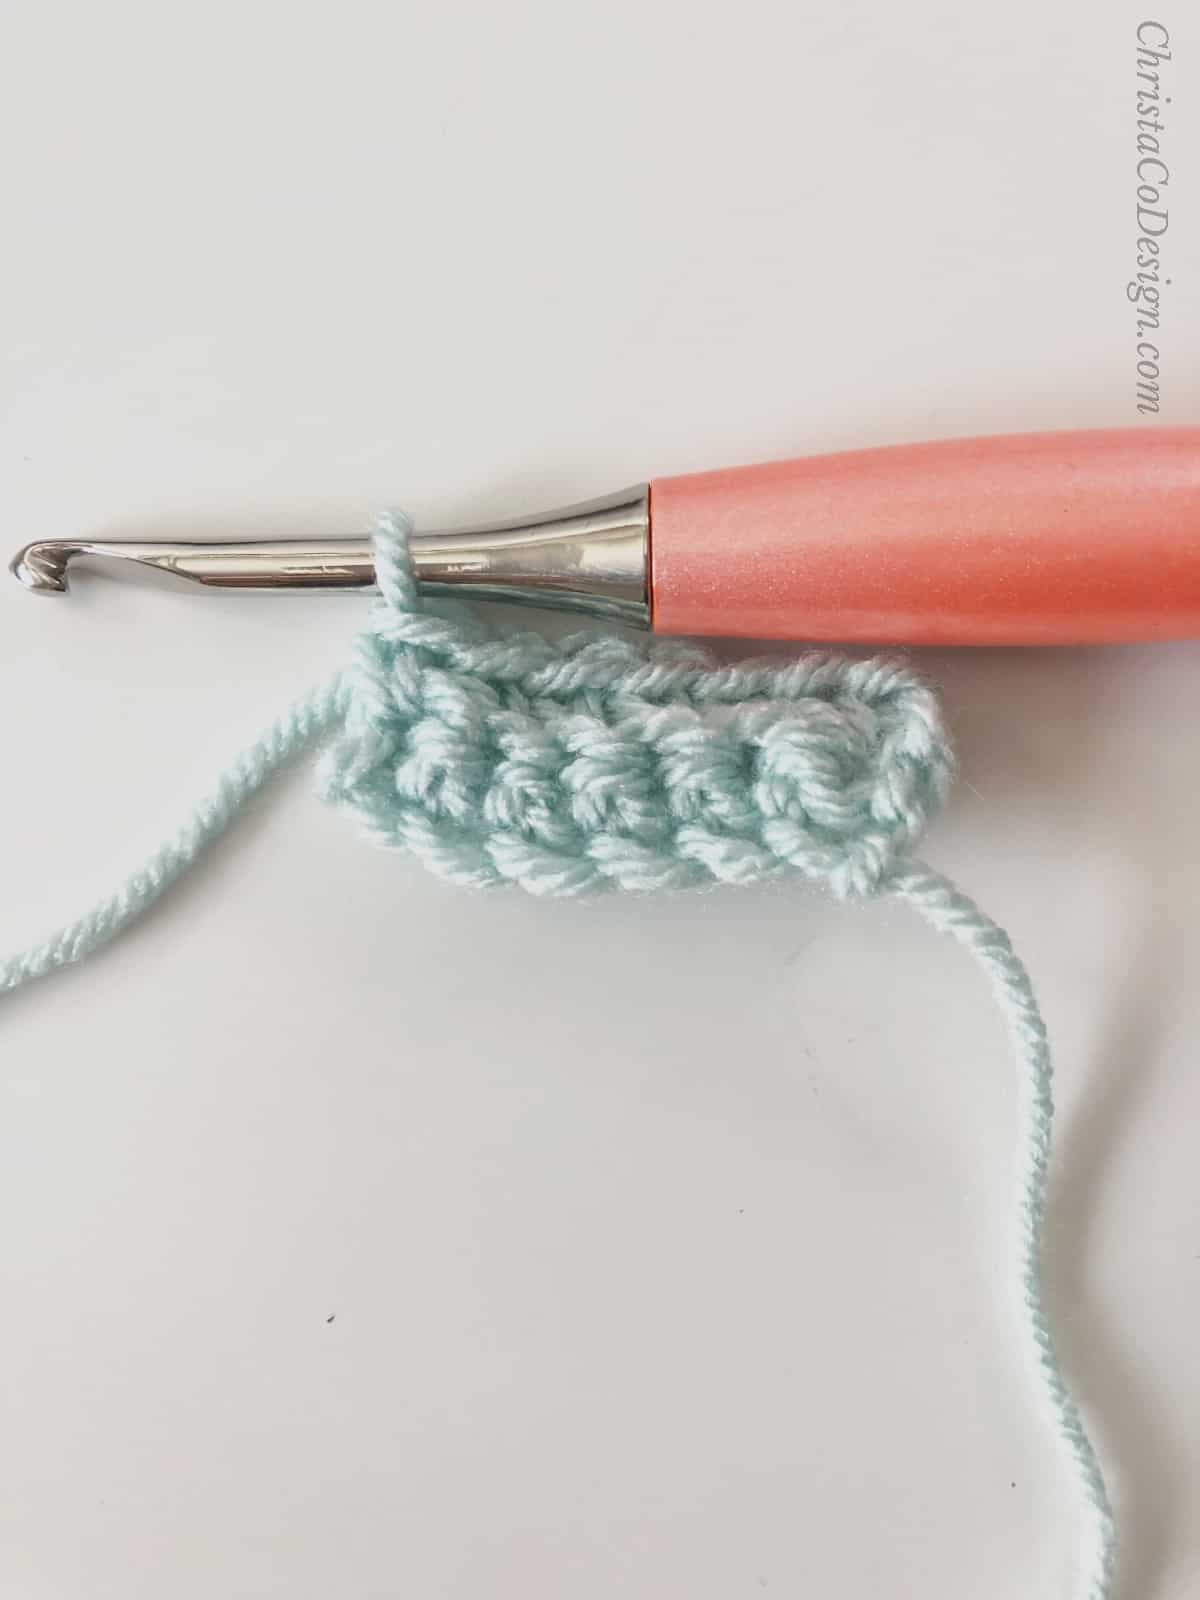
Row 2. Ch 1, in same st sc, in blo sc in each st until 1 st left, sc in last st, turn. (6 sts)
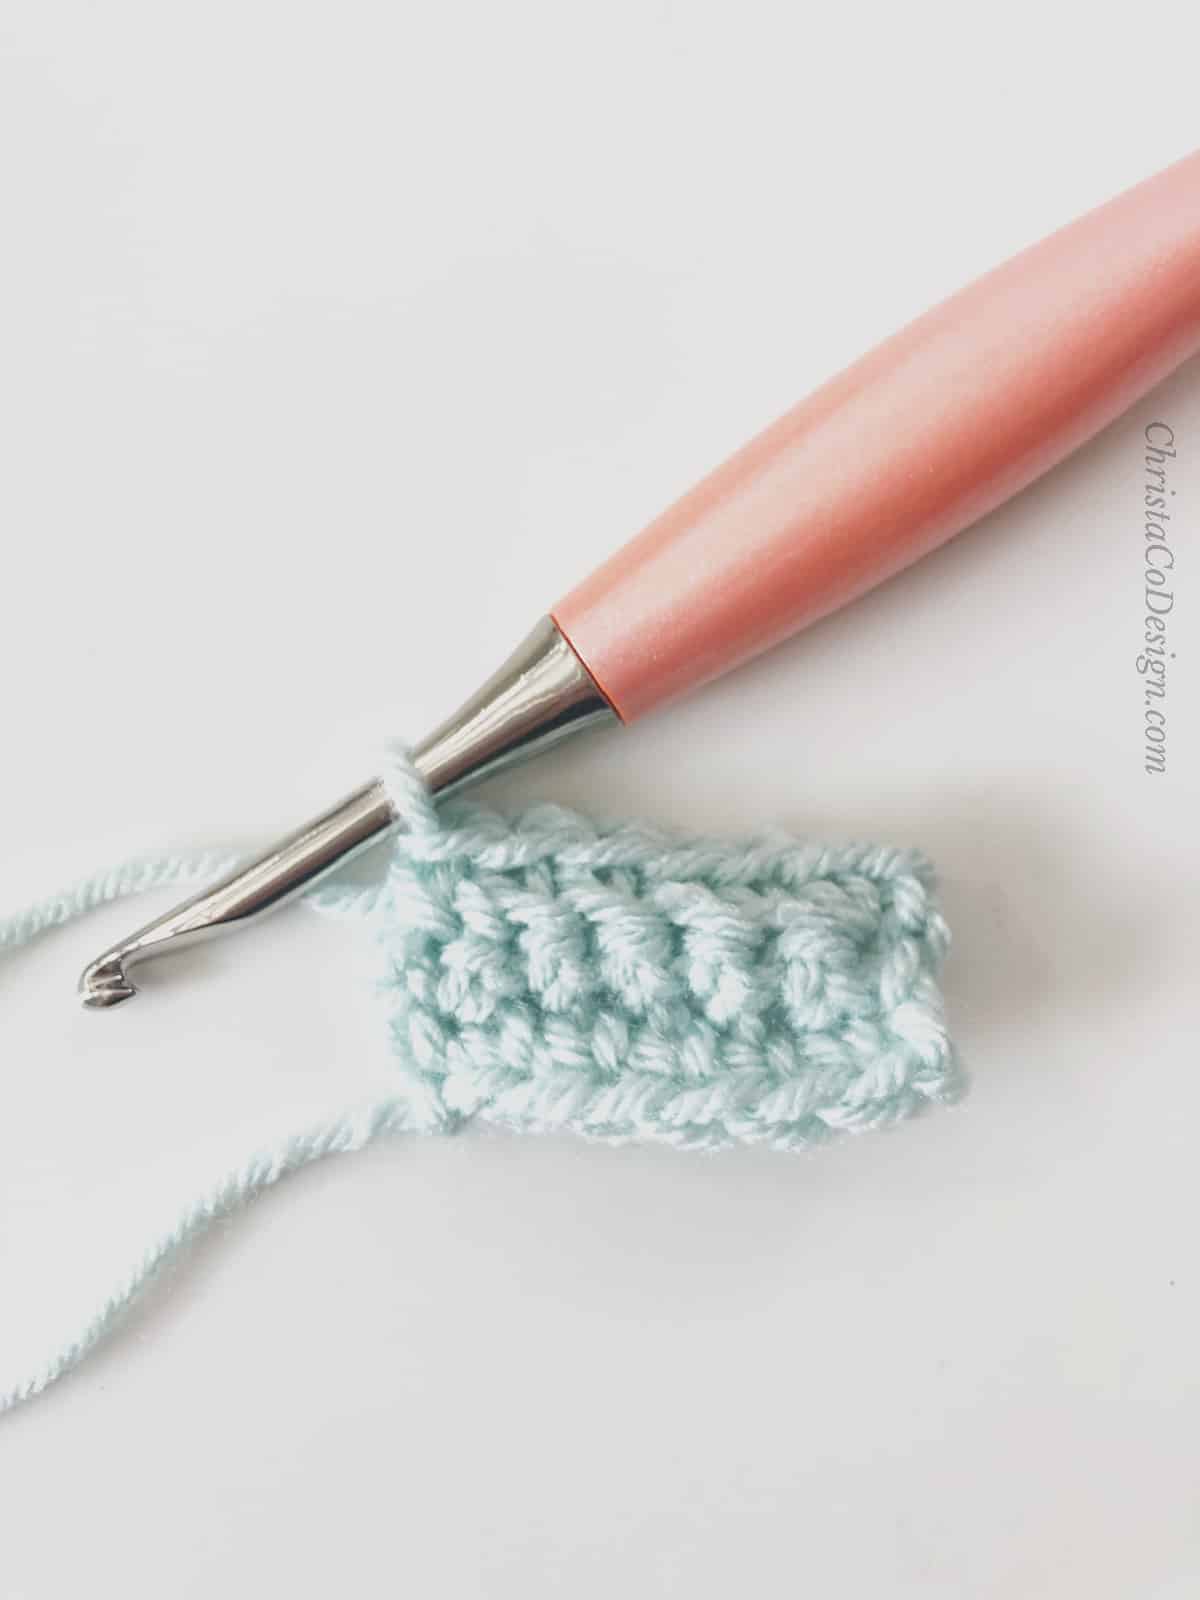
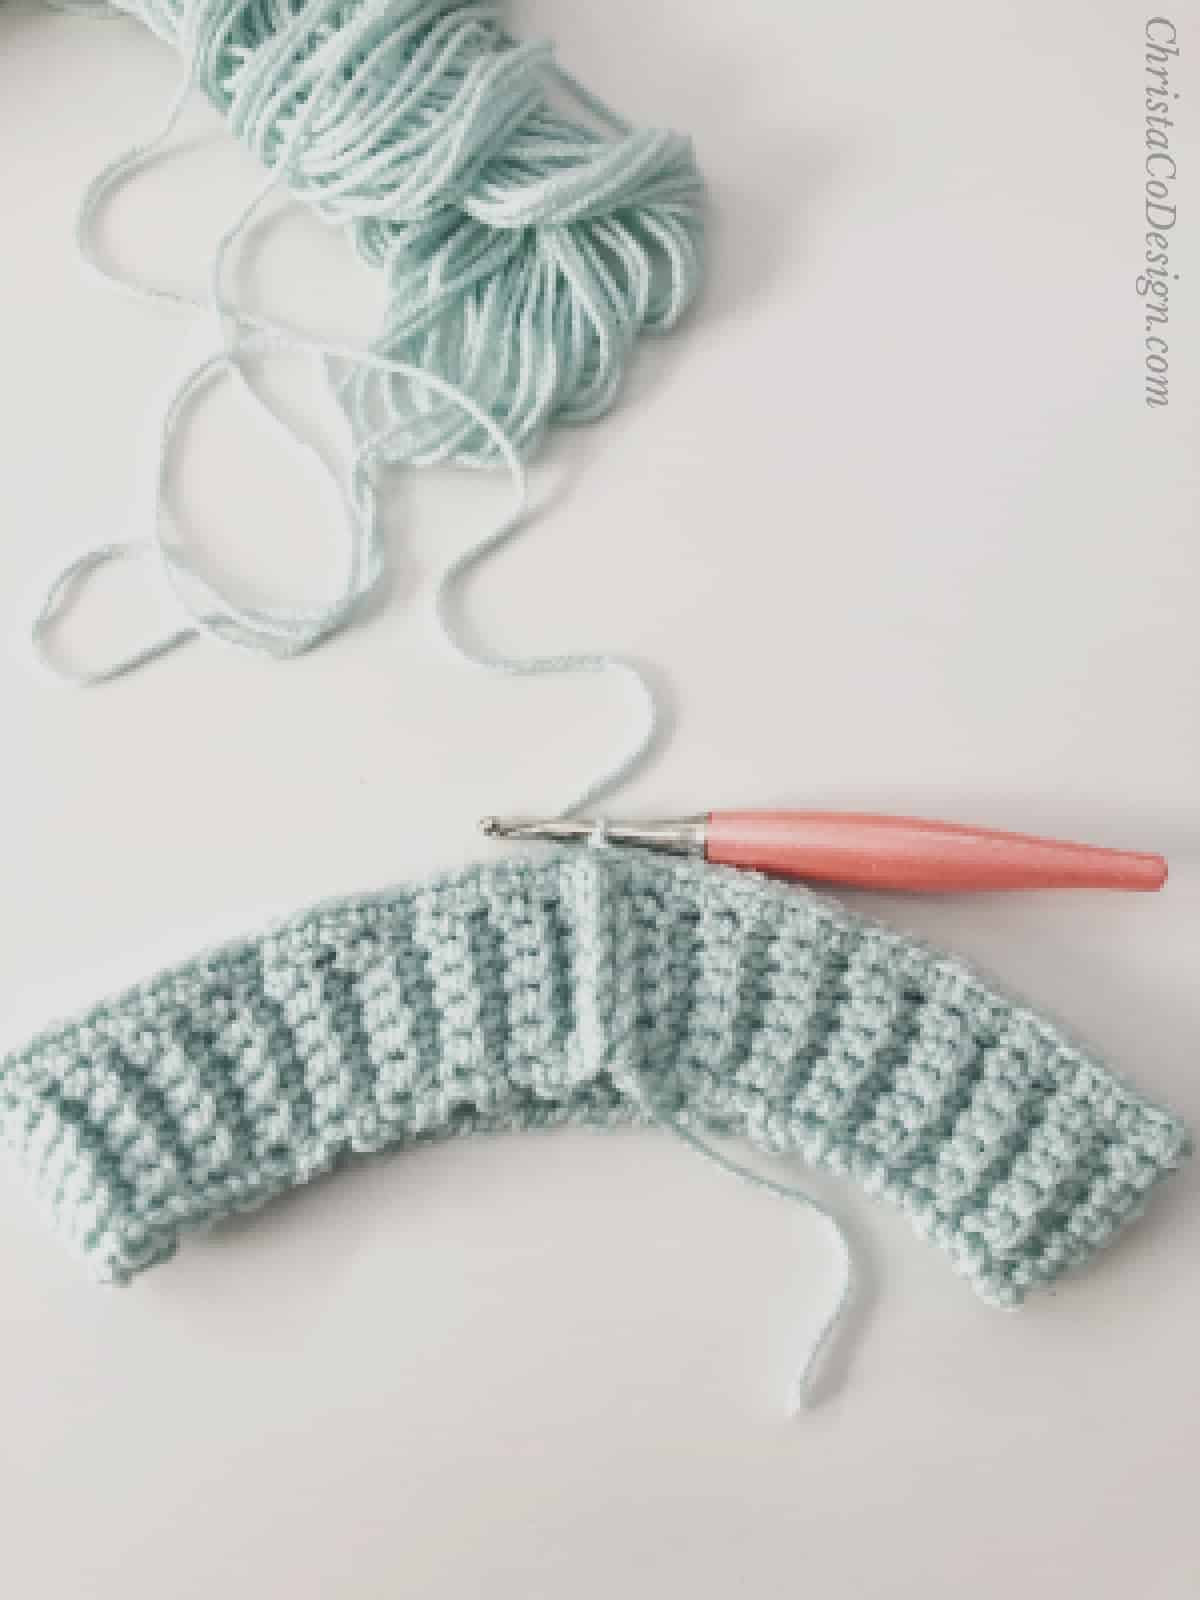
Row 3. Repeat Row 2 until your ribbing is the length needed.
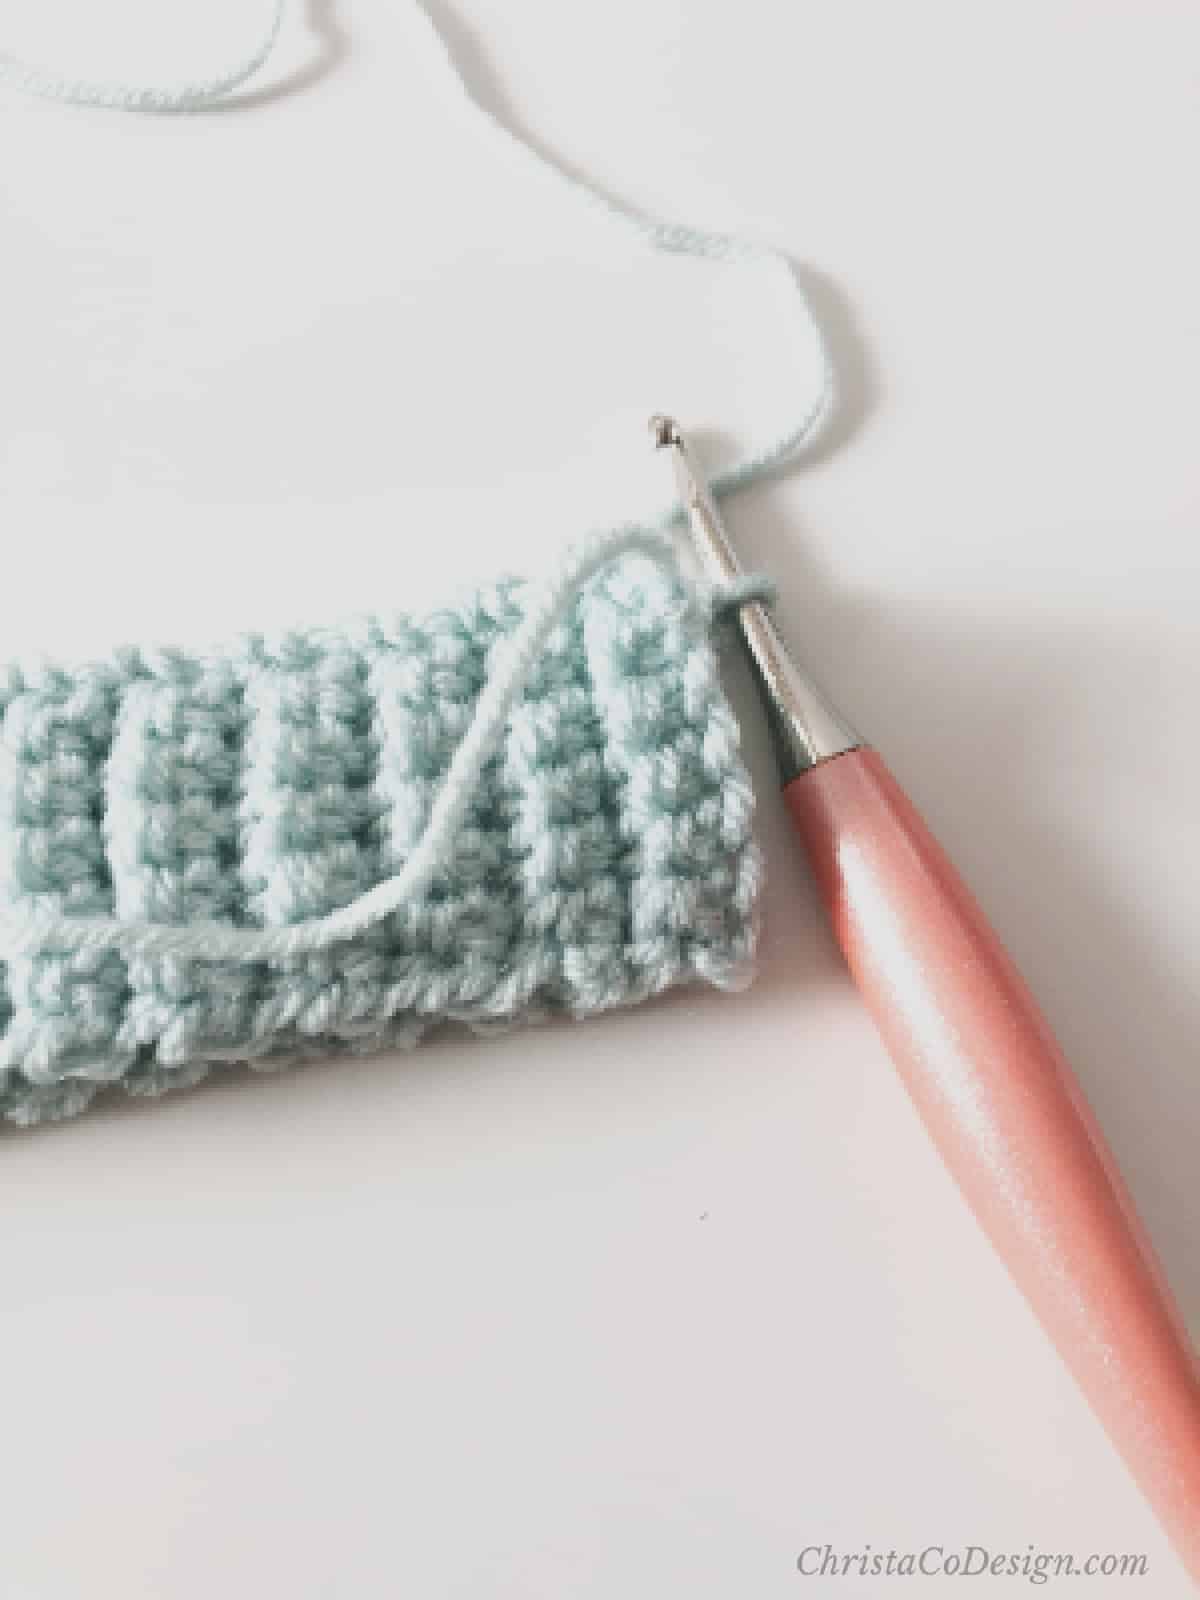
Without cutting yarn, match short ends together. Slip stitch together through each stitch. Be sure to catch both layers. You’ve now created the hat brim.
If you’re continuing in the same color To start a hat, begin crocheting around the top of the circle brim from where you are. You can use any stitch to create your hat. In the video I use the single crochet to show how to crochet into the edges of the ribbing.
If you’re changing colors, cut yarn. Join new yarn color with a slip stitch anywhere on circle edge of brim. I prefer to start before or after the slip stitched seam to avoid bulk.
Pin It
Video Tutorial For Single Crochet Ribbing
Watch the full video tutorial for this crochet hat ribbing on my YouTube.

How to Crochet Ribbing for a Hat Brim
Learn how to crochet ribbing for hats in any size. This easy single crochet ribbing is perfect for beginners and anyone who loves to crochet bottom up hats.
Materials
- Any weight yarn. In this tutorial I'm using #4 medium worsted weight yarn.
Tools
- Crochet hook compatible with your yarn. I'm using a 5mm hook here.
Instructions
- Start with a slip knot on your hook.
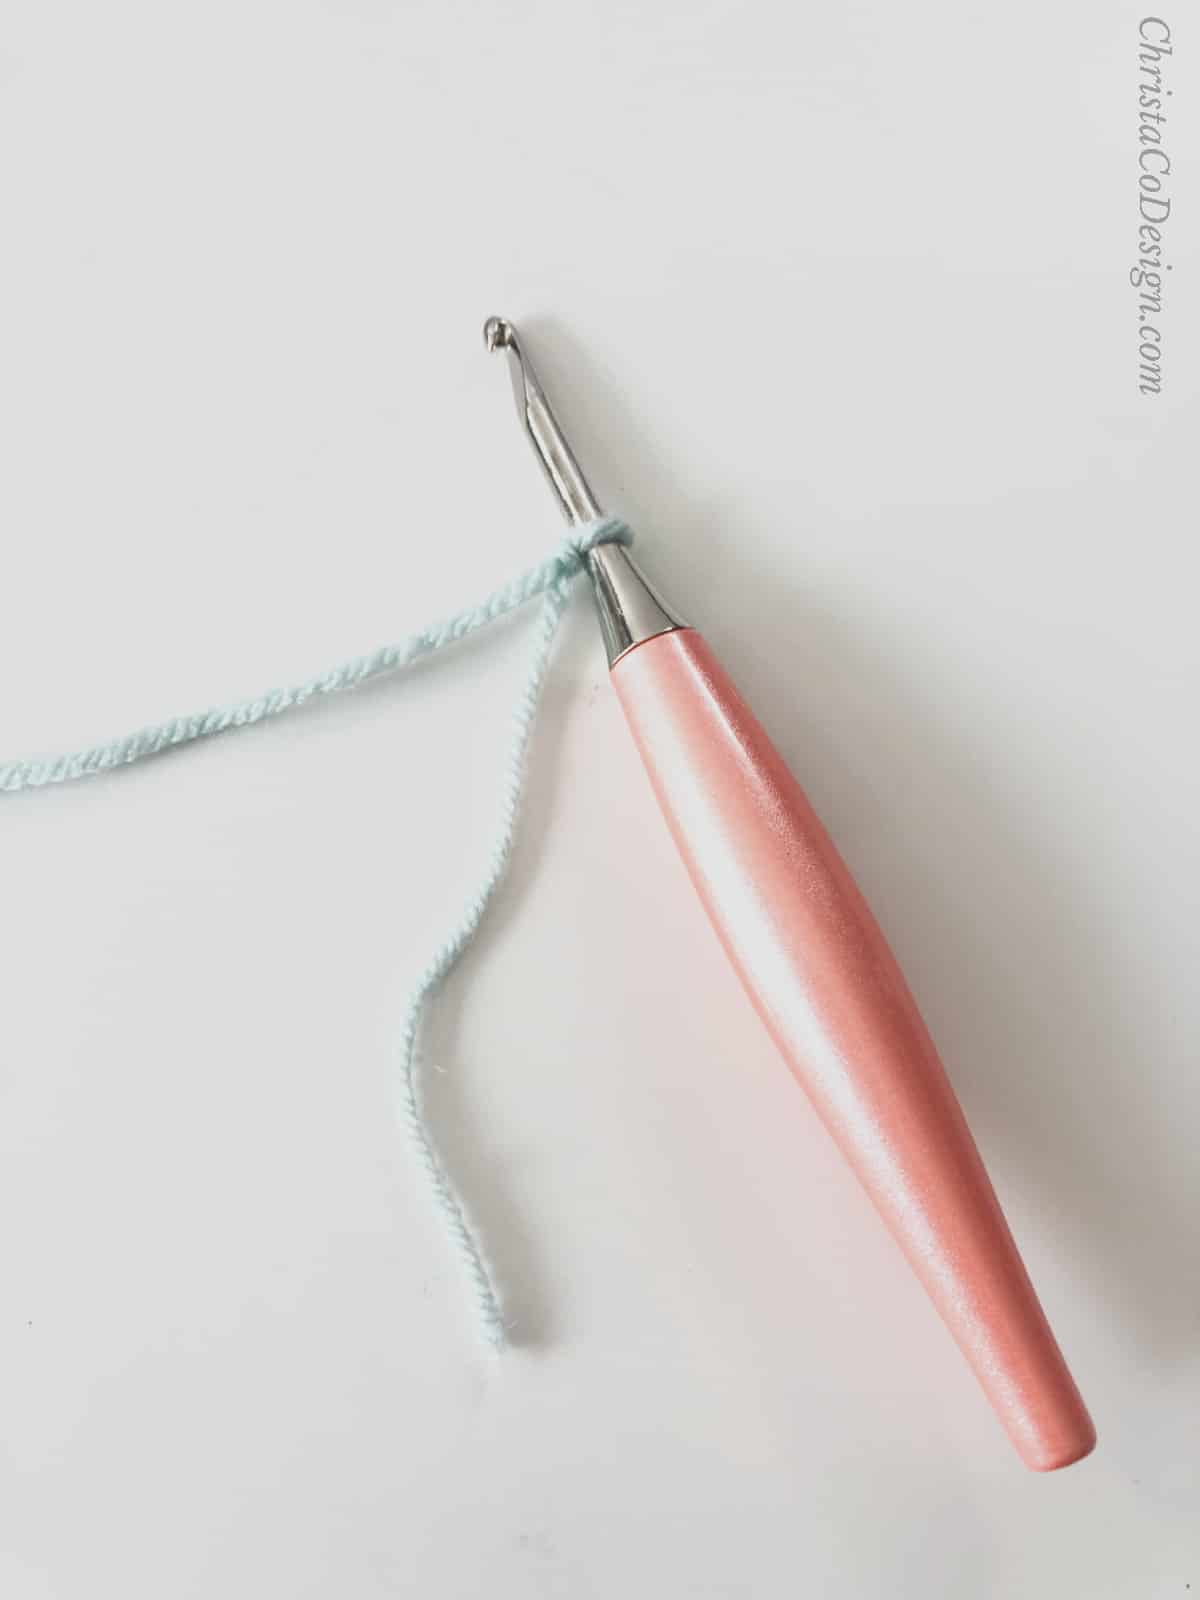
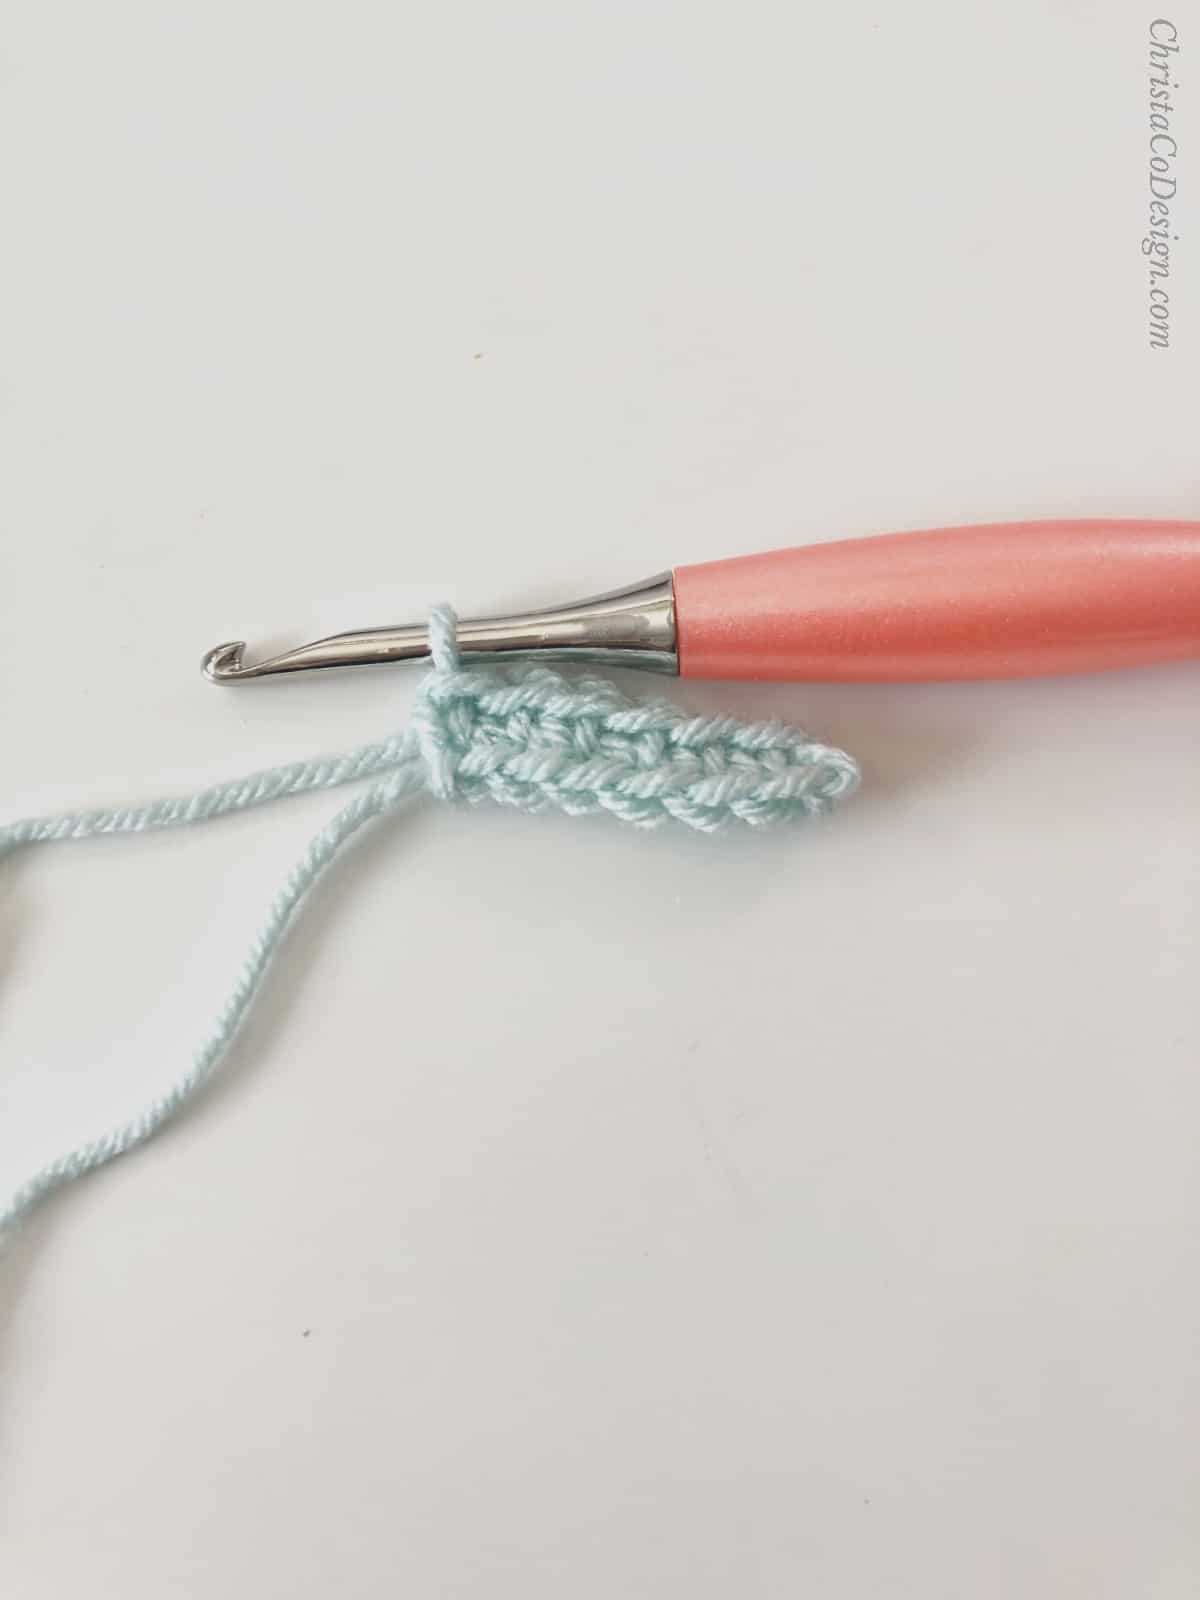
- Chain 7.
- Turn chain over and find the back bump of the 2nd chain from your hook,
- Single crochet into this 2nd chain,
- Continue to sc in each chain across, turn.
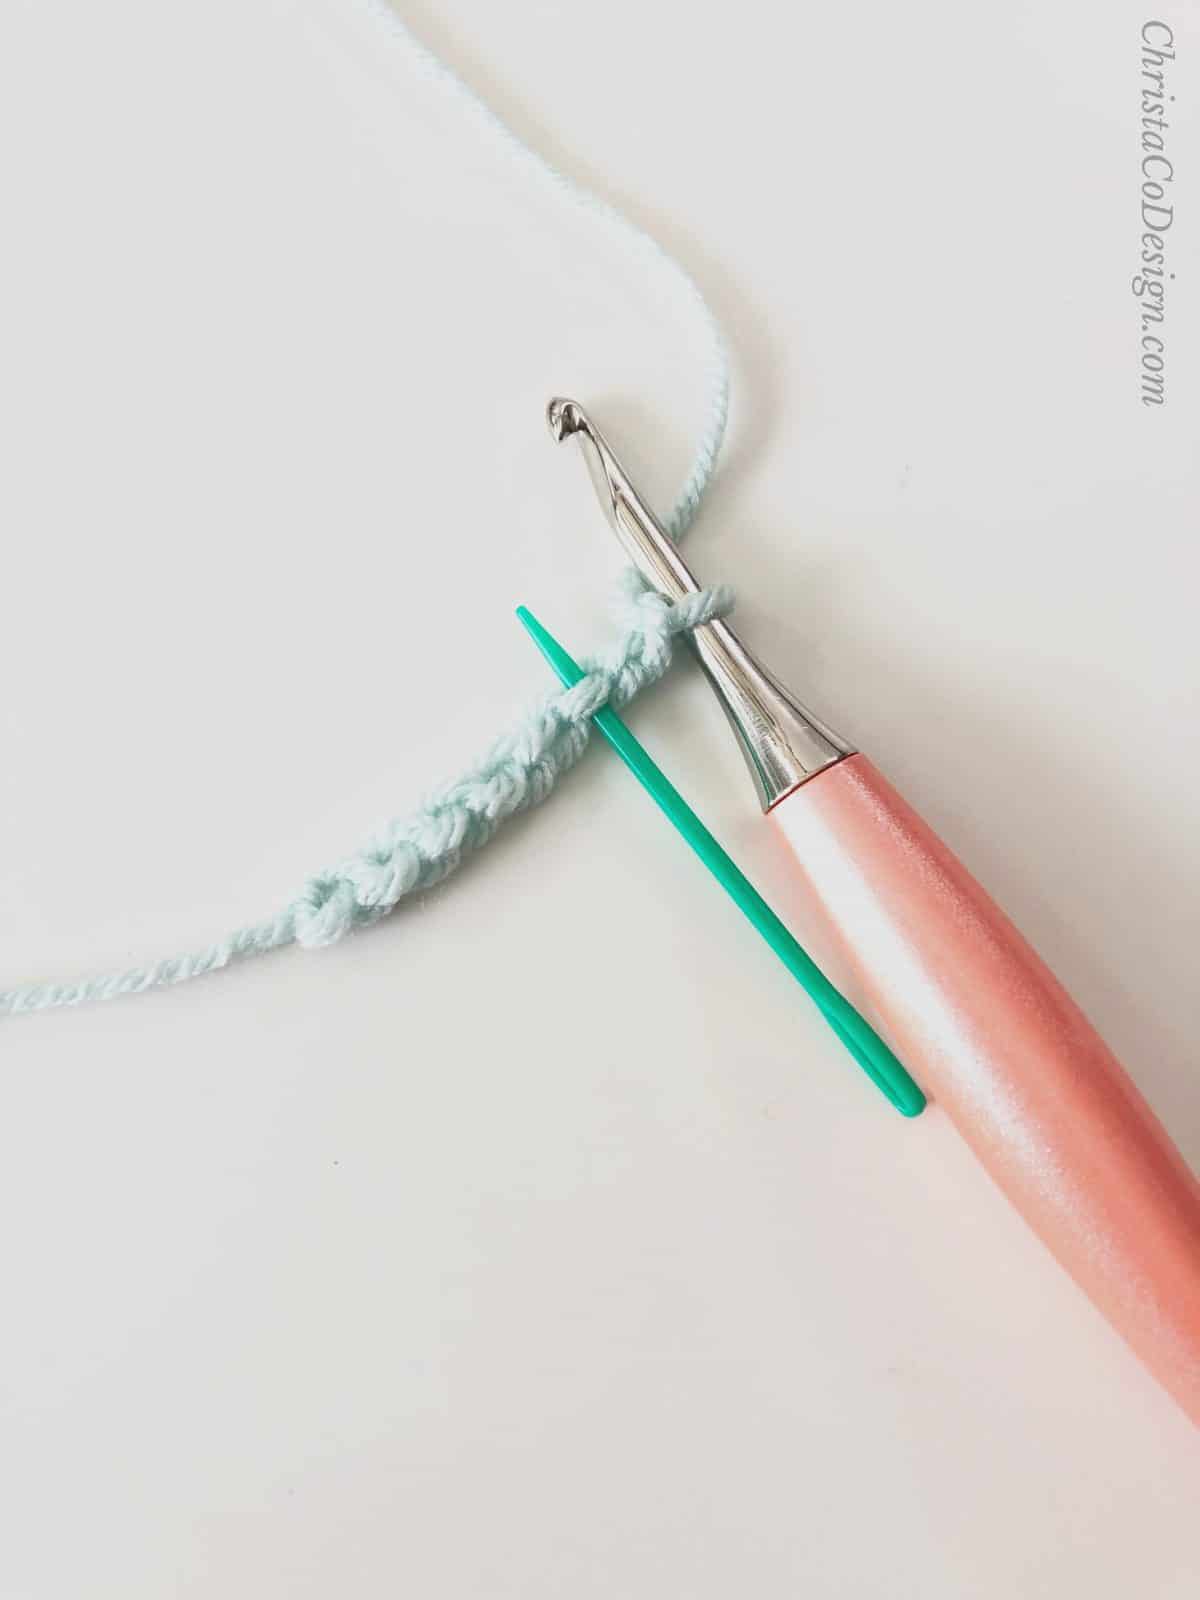
- Ch 1, sc in the first st, marked by the green needle here.
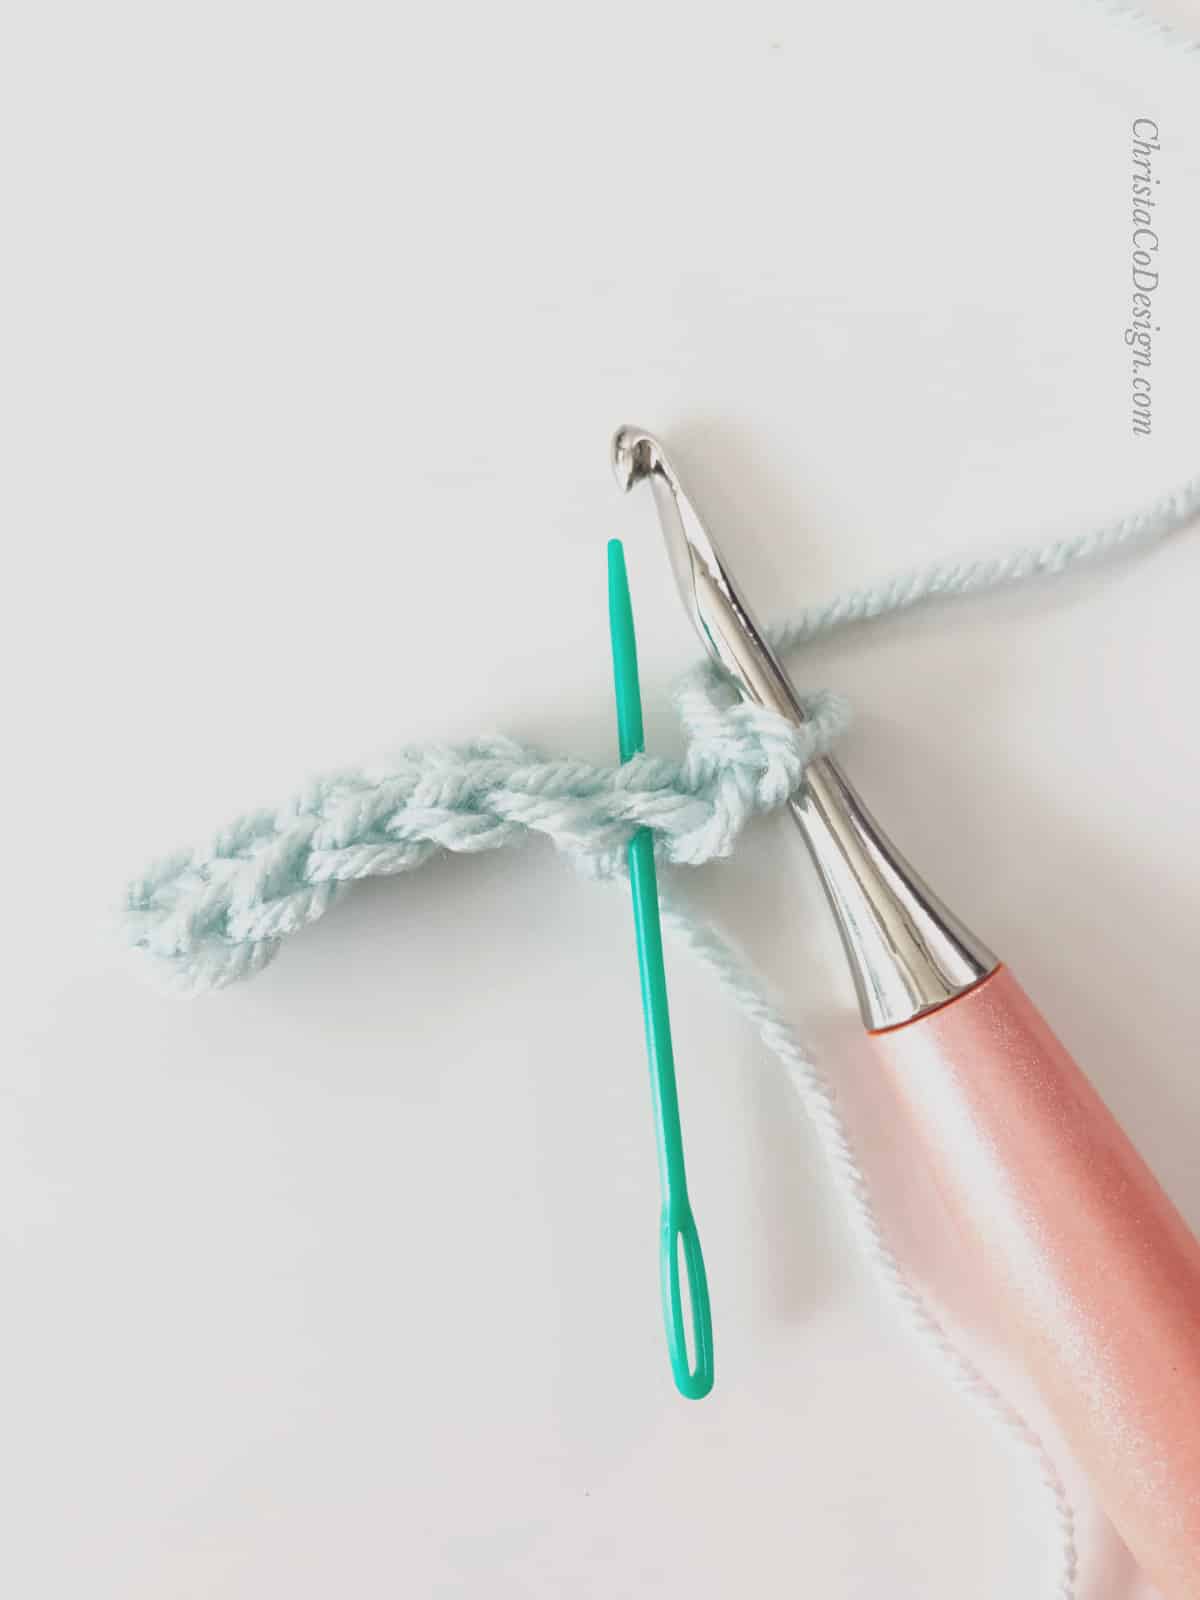
- In the back loop only (blo) of the next st, marked by the green needle here, place a single crochet (blo sc)
- Once you place the sc in the blo, you will see the front loop, marked here by the green needle.
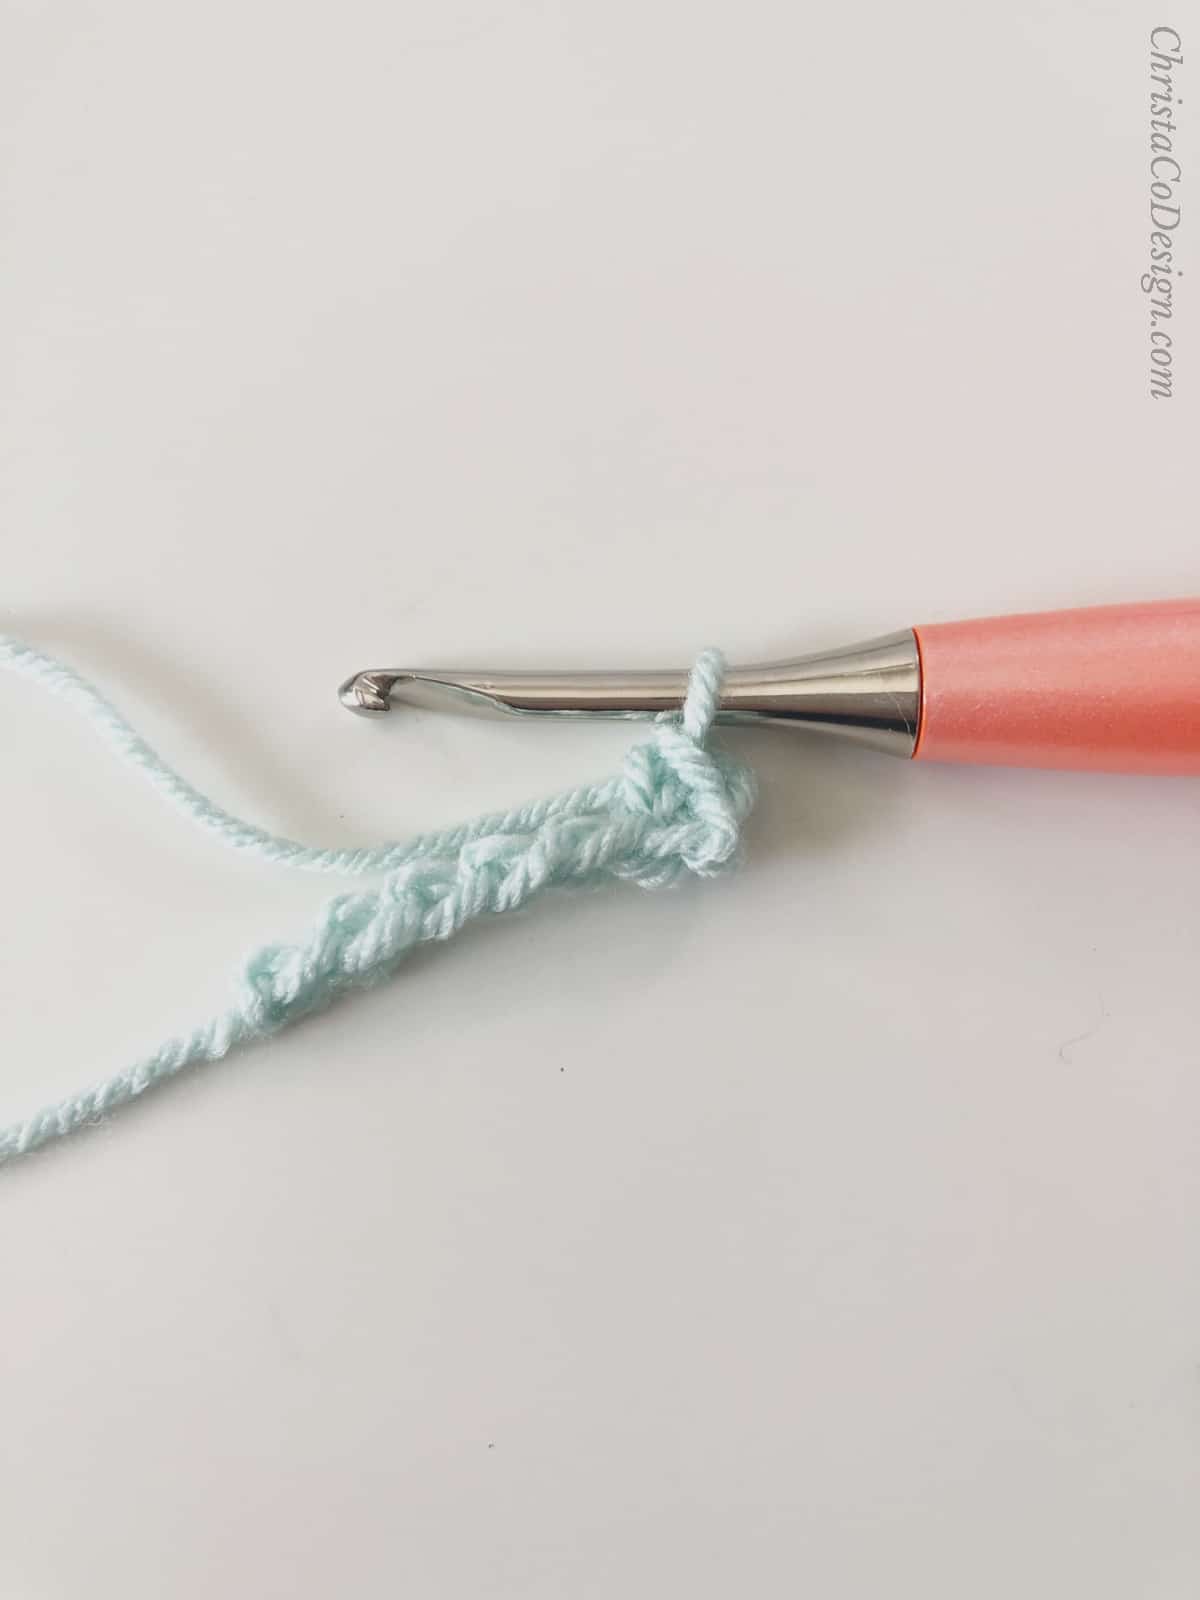
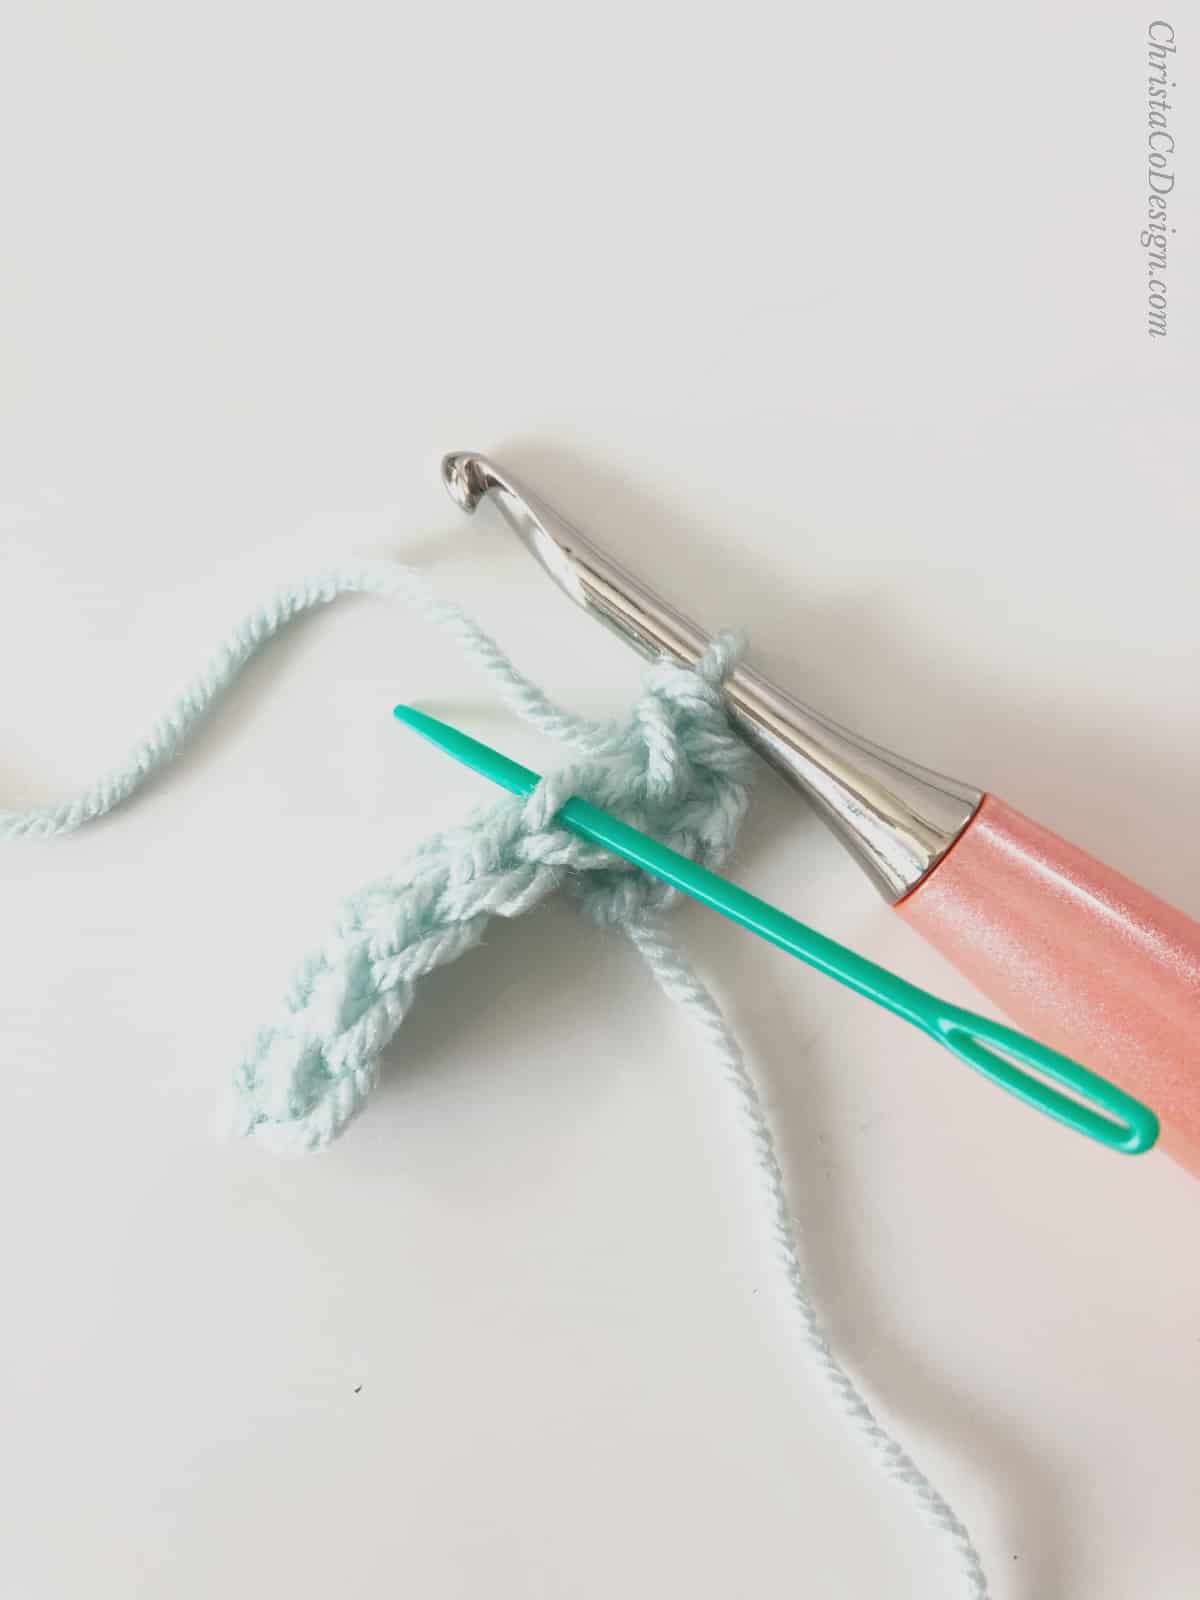
- Continue to blo sc in each st, until you have 1 st left.
- Sc normally in the last st, turn.
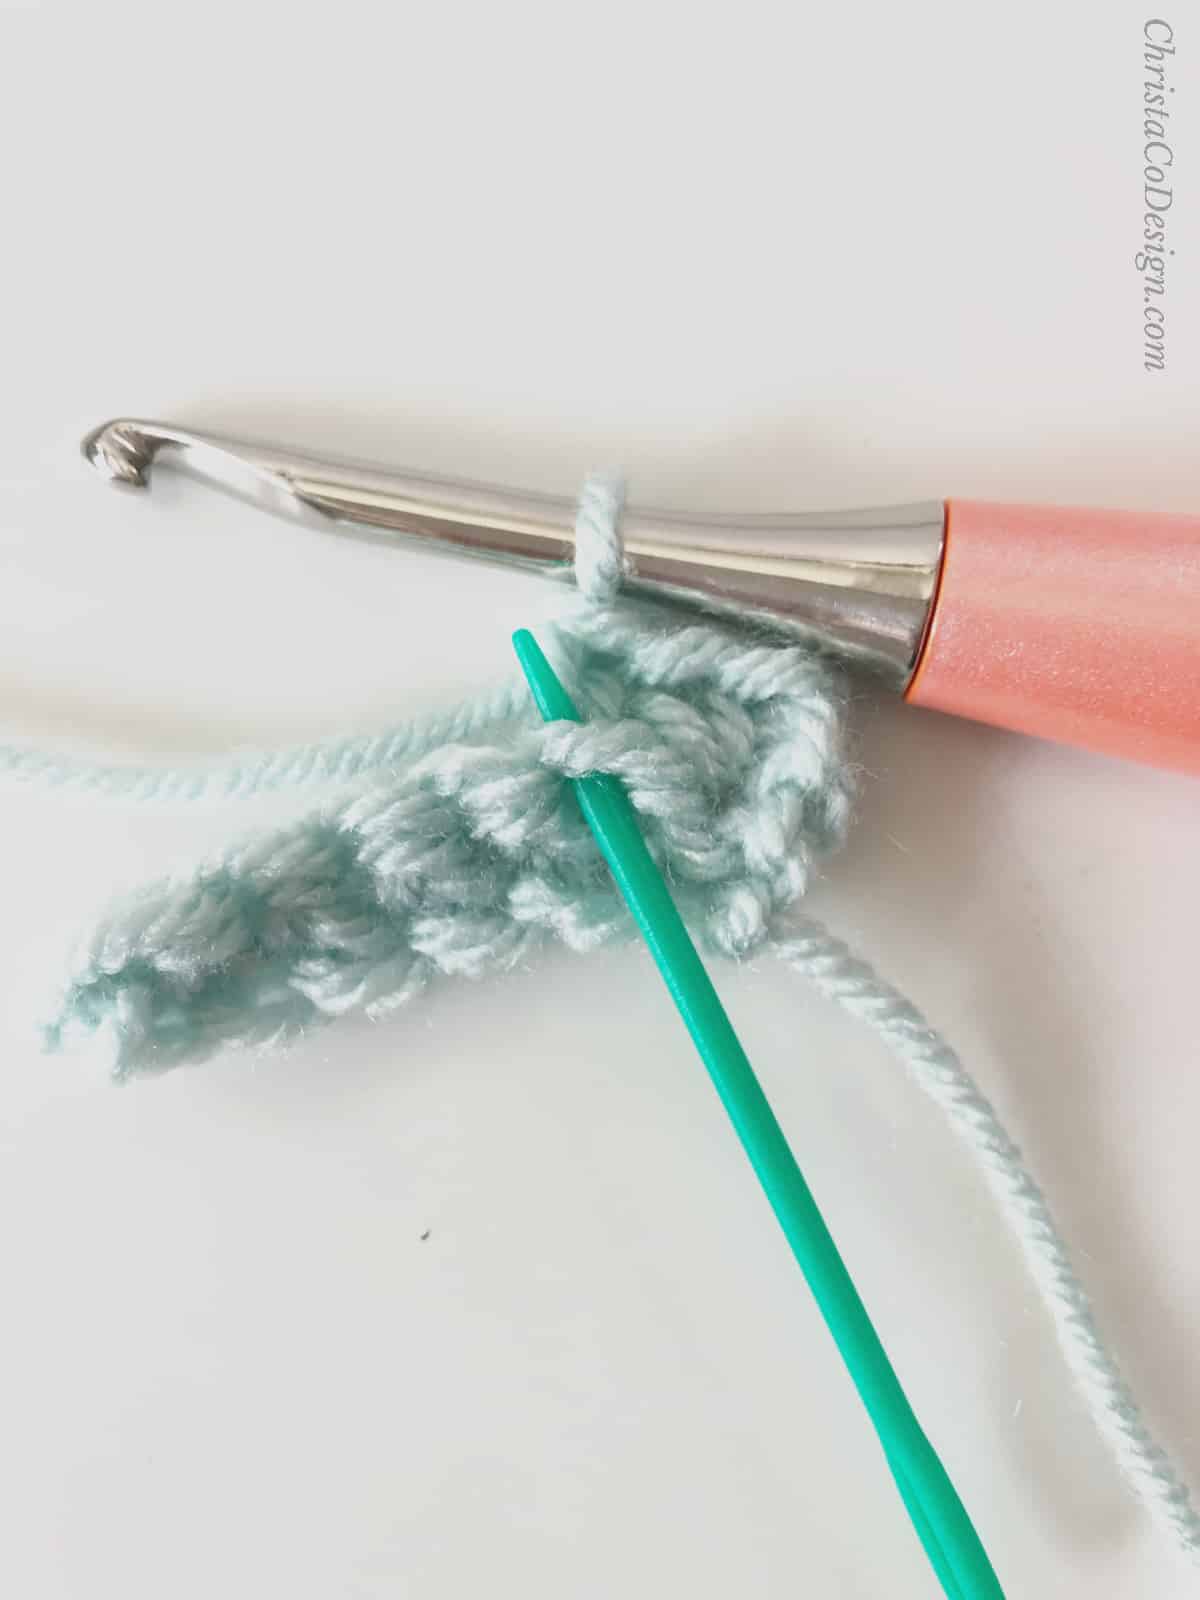
 You can see the front loops make a ridge, which will create the classic ribbing look.
- Repeat: Ch 1 (doesn't count), sc in same st, blo sc in next 5 sts, sc in last st, turn. (7 sts)
- Continue to repeat Step 11 until your ribbing is to length. See the chart for specific lengths by age.
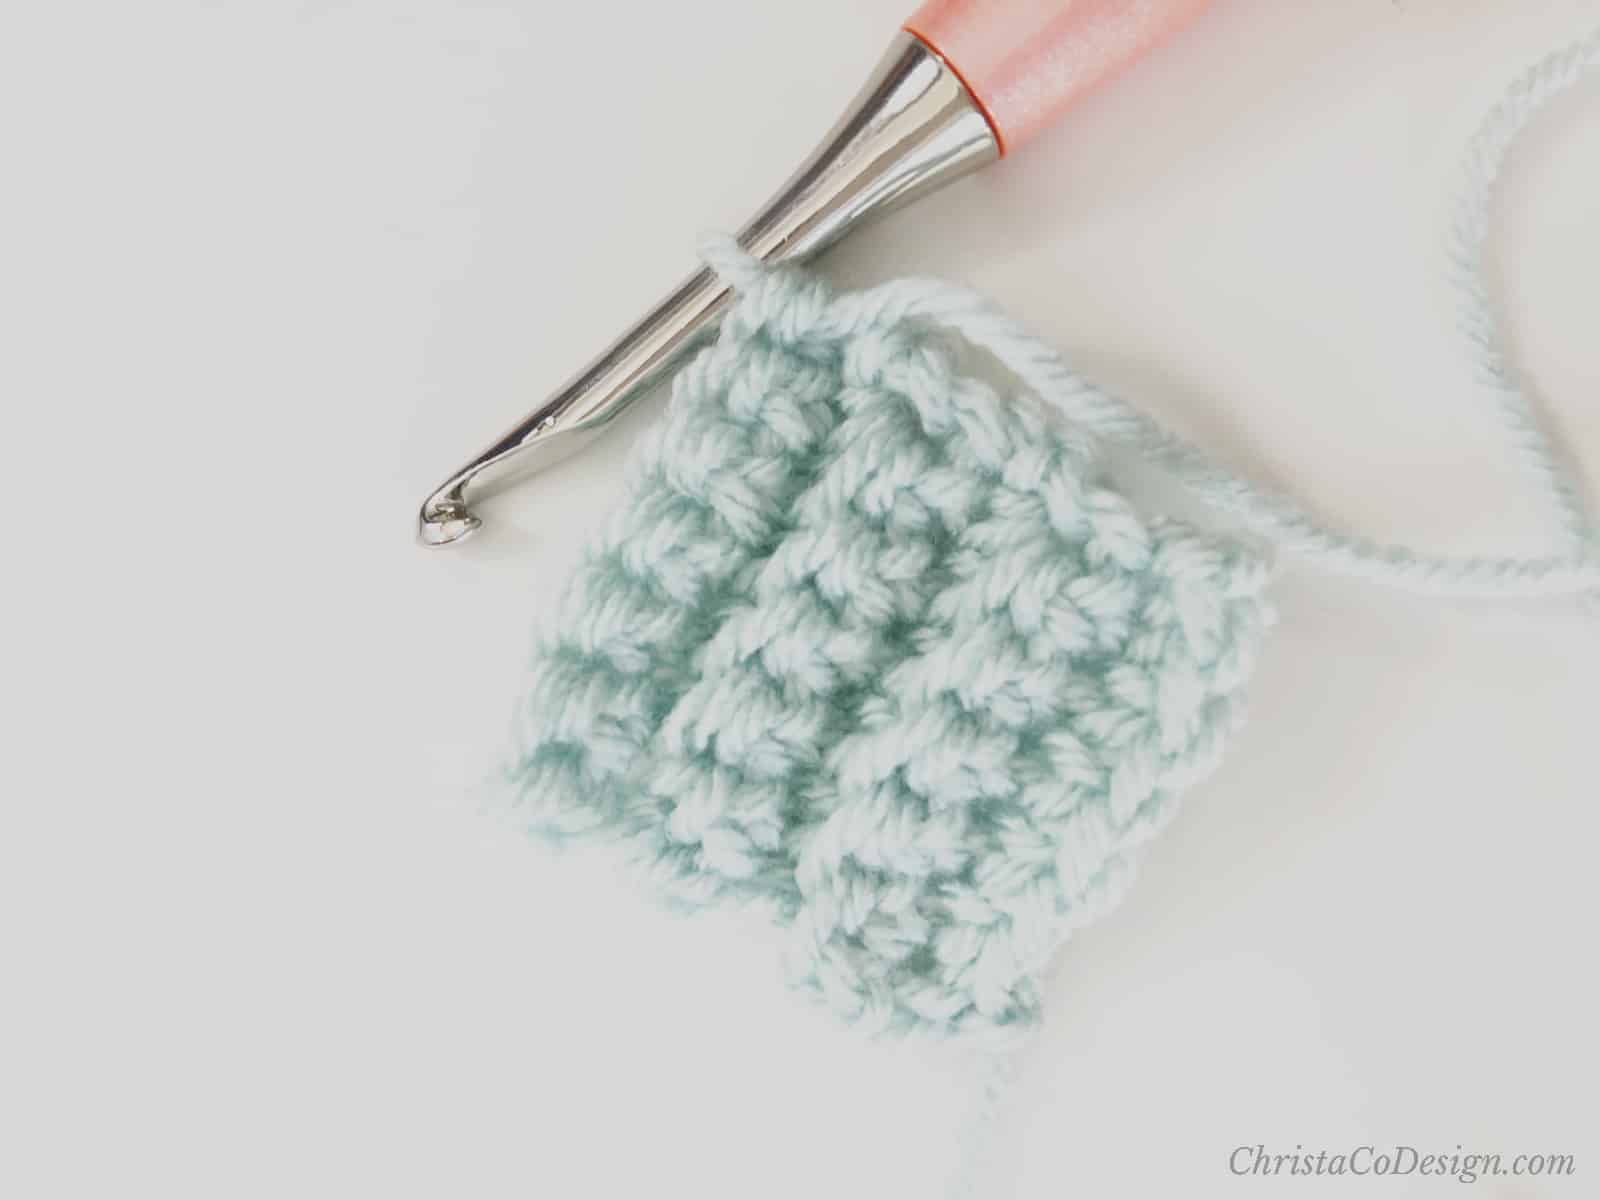
- Match short ends together and slip stitch to form a circle for the hat brim.
- Continue from where you are to crochet around the circle of the brim. Insert hook under two loops to crochet the stitches.
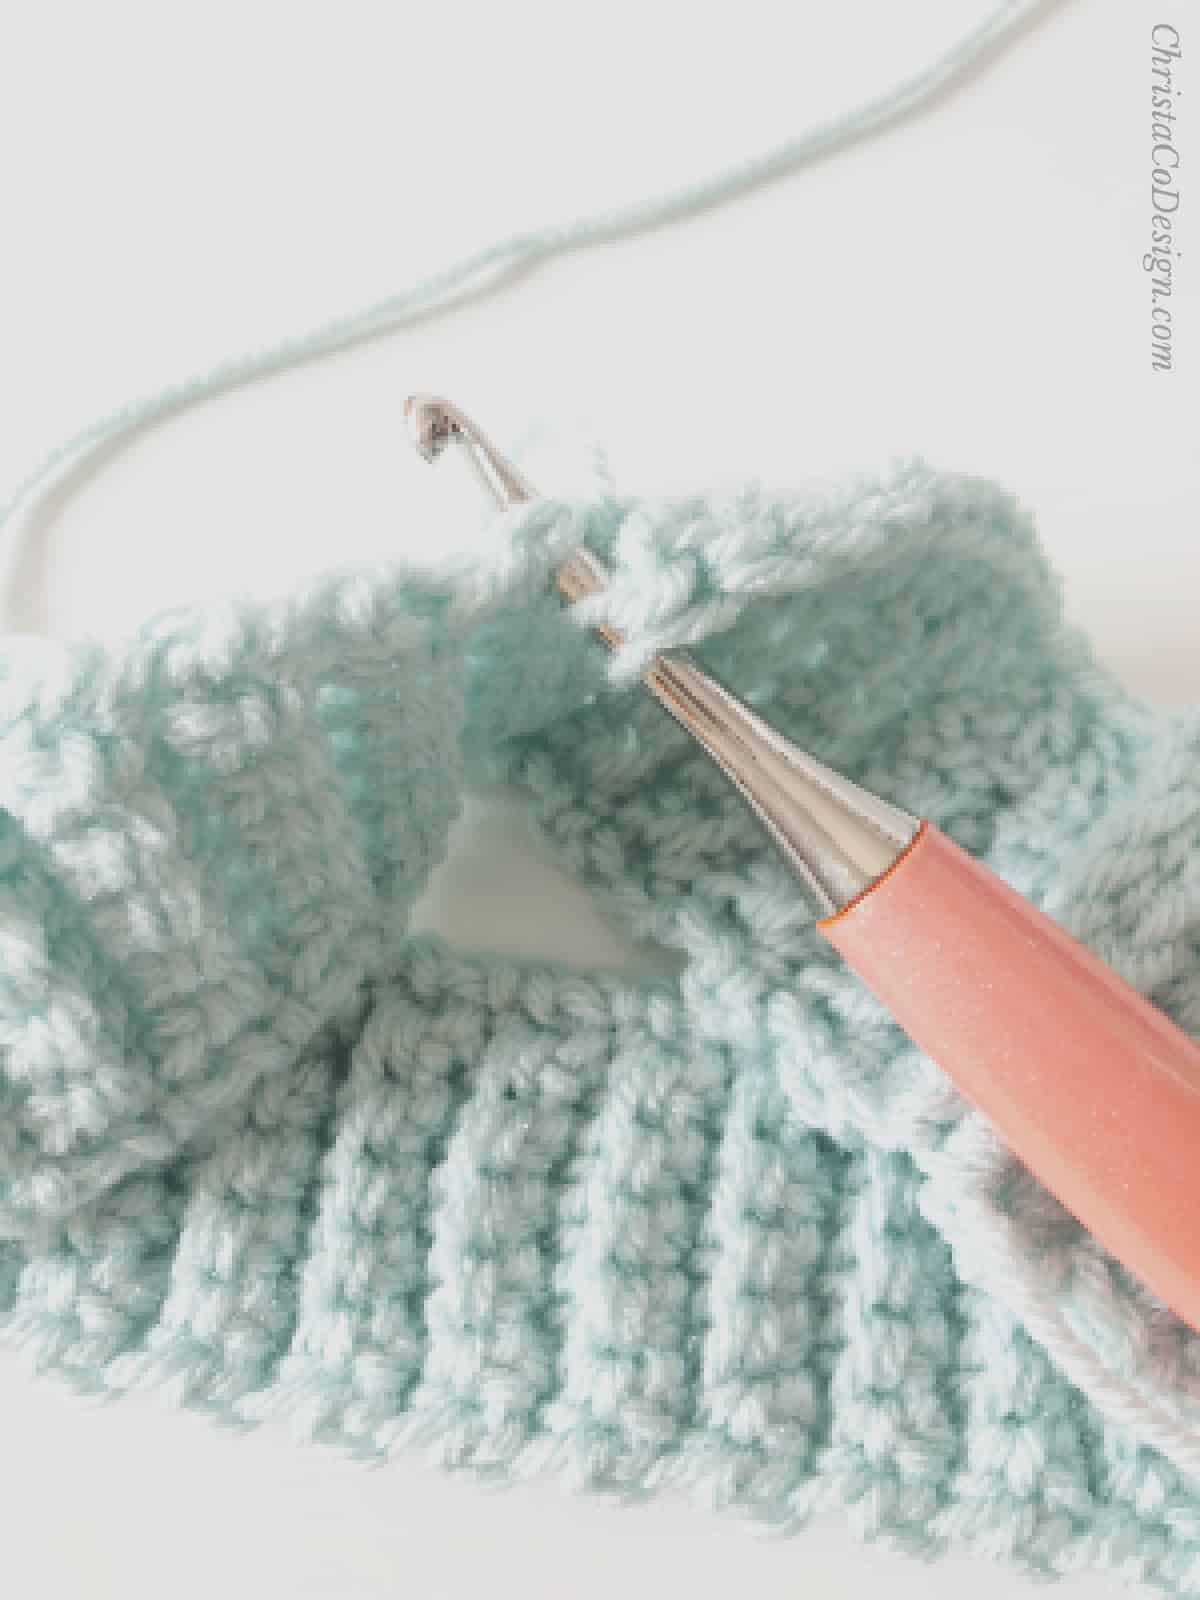
- In this way you will start to crochet the hat body or "tube" of the hat. What stitch you use will vary depending on your pattern. Here I have crocheted single crochets around.
Recommended Products
As an Amazon Associate and member of other affiliate programs, I earn from qualifying purchases.