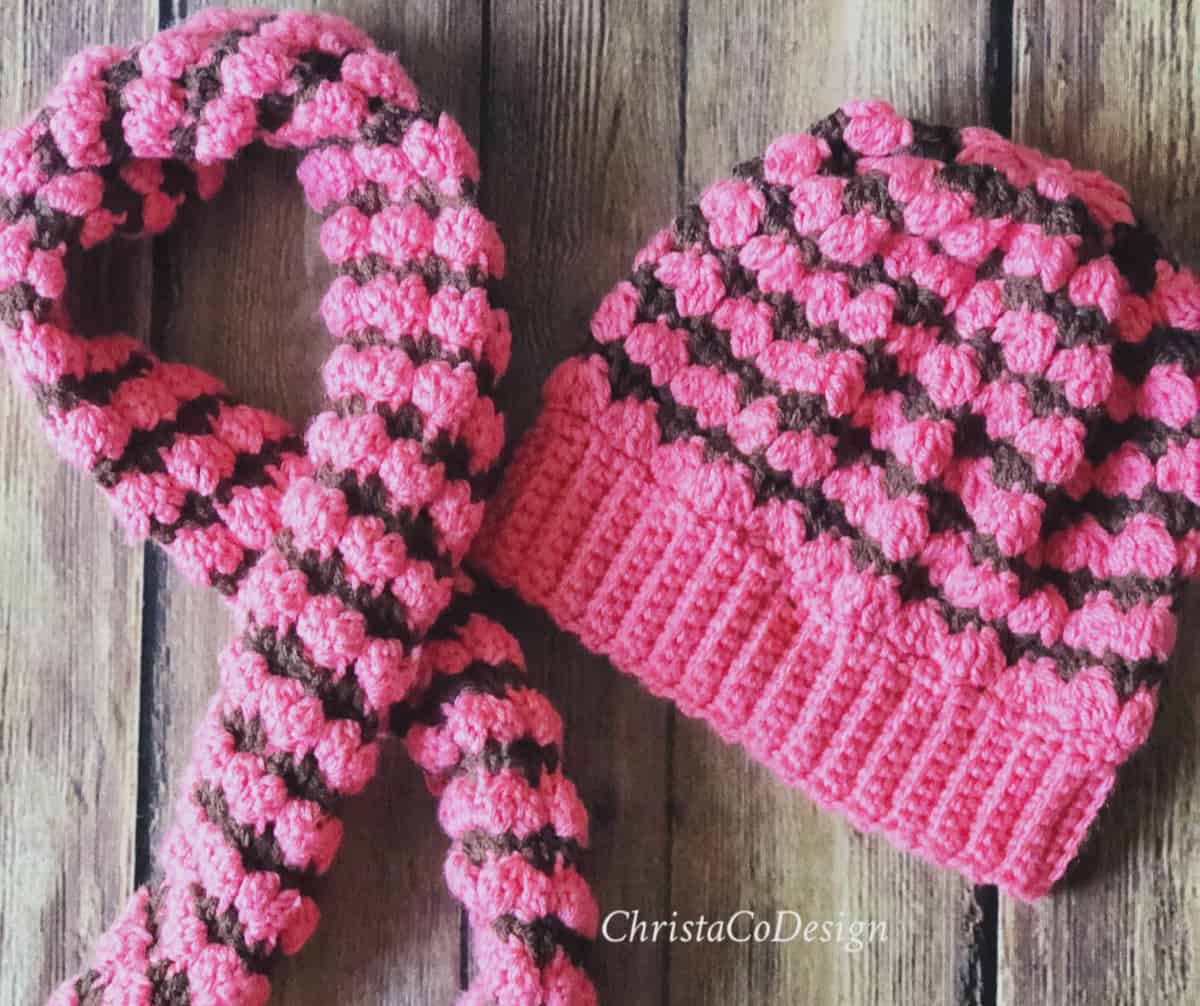
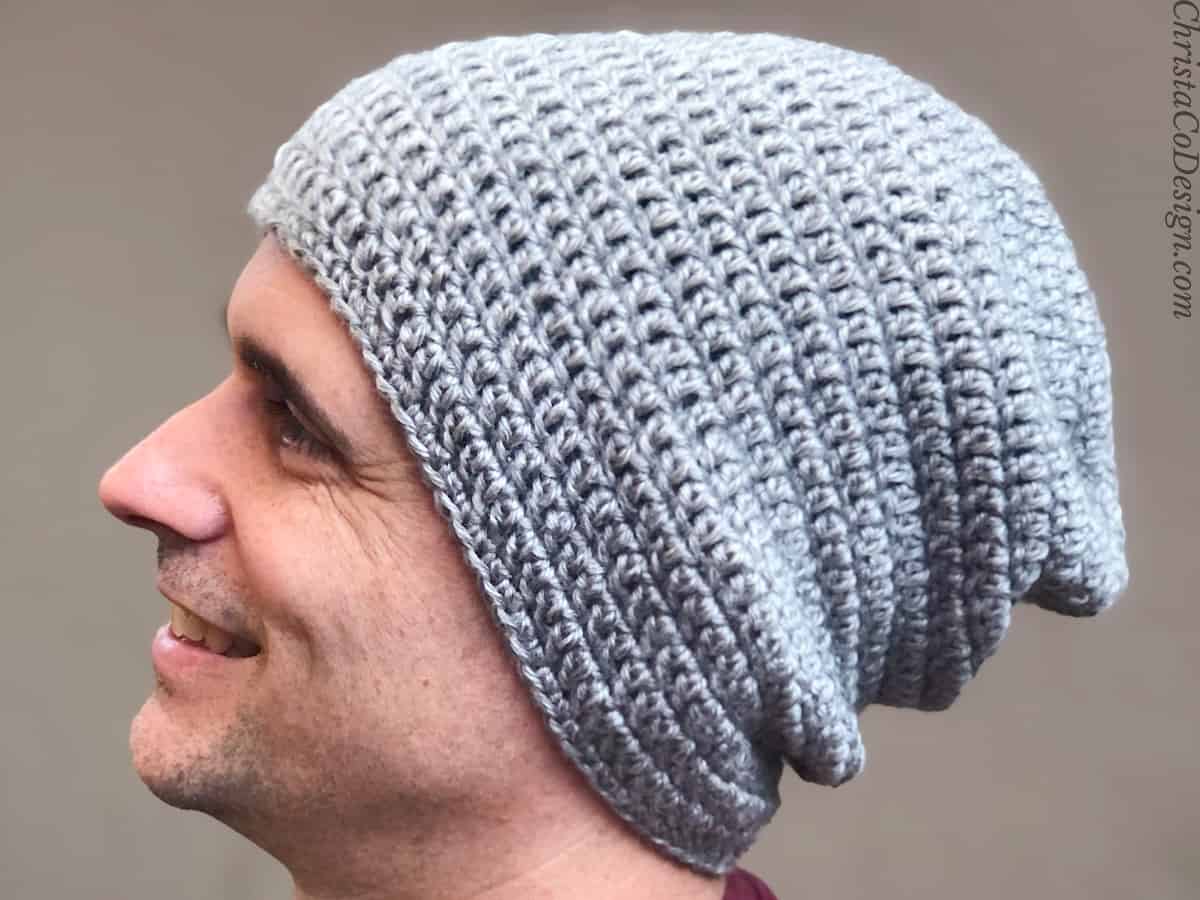
Simple Slouchy Beanie Free Crochet Pattern
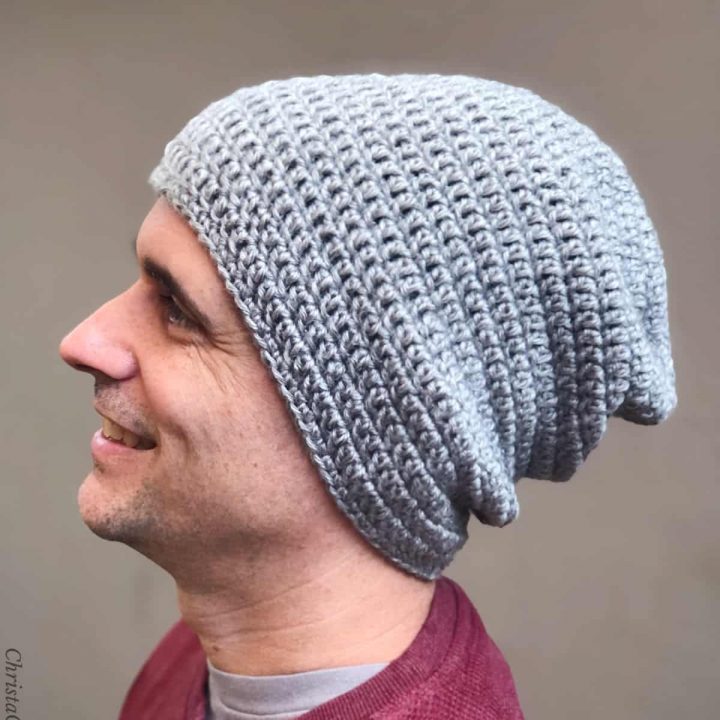
A simple slouchy beanie is the perfect gift for the guys in your life. This free slouchy hat crochet pattern gives him a stylish look while keeping him warm.

This post contains affiliate links, I may earn a fee. Read more disclosure policy.
Join the ChristaCoDesign Newsletter
Never miss a pattern!
An easy pattern, it’s crocheted top down in the round. To get the slouchy crochet beanie style there is extra length added. The pattern also includes how to make this beanie fitted, find those notes under adjustments.
Simple patterns like this one make a great slouchy beanie crochet pattern for guys. The pattern also includes different sizes to fit the whole family.
Purchase the ad-free, well formatted printable PDF Pattern from my shop. Scroll down for the free pattern!
Purchase My Ad-Free PDF Patterns In Your Favorite Shop Here:
MORE
Slouchy Hat Patterns

Materials
- #4 medium worsted yarn* pictured in Lion Brand’s Heartland (100% acrylic, 251 yd / 230 m, 5 oz / 142 g); color: Mount Rainier. See yarn yardage by size below.
5mm US Size H – 8 crochet hook* or hook needed to meet gauge. - yarn needle, scissors, measuring tape
Estimated yarn by size:
- Baby 0 – 3 mos ~ 124 yd (114 m)
- Baby 3 – 6 mos ~ 131 yd (120 m)
- Baby 6 – 12 mos ~ 138 yds (126 m)
- Toddler ~ 145 yd (133 m)
- Preschool ~ 150 yd (137 m)
- Child ~ 153 yd (140 m)
- Teen/Sm Adult ~ 160 yd (146 m)
- M/L Adult ~ 165 yd (151 m)
Stitches and Abbreviations in US Terms
Here are the stitches and abbreviations I use in this hat pattern. Click on any link below for an in depth, step by step tutorial on the crochet stitch.
ch (s) – chain(s)
dc (s) – double crochet stitches
mc – magic circle (magic ring)
rep – repeat
rnd – round
sc (s) – single crochet stitches
sl st (s) – slip stitches
st (s) – stitch(es)
Notes
Ch 3 counts as the first dc. I prefer to use a ch 3 alternative, here is my favorite one.
Save your favs!
Add this pattern to your Ravelry queue.
Gauge
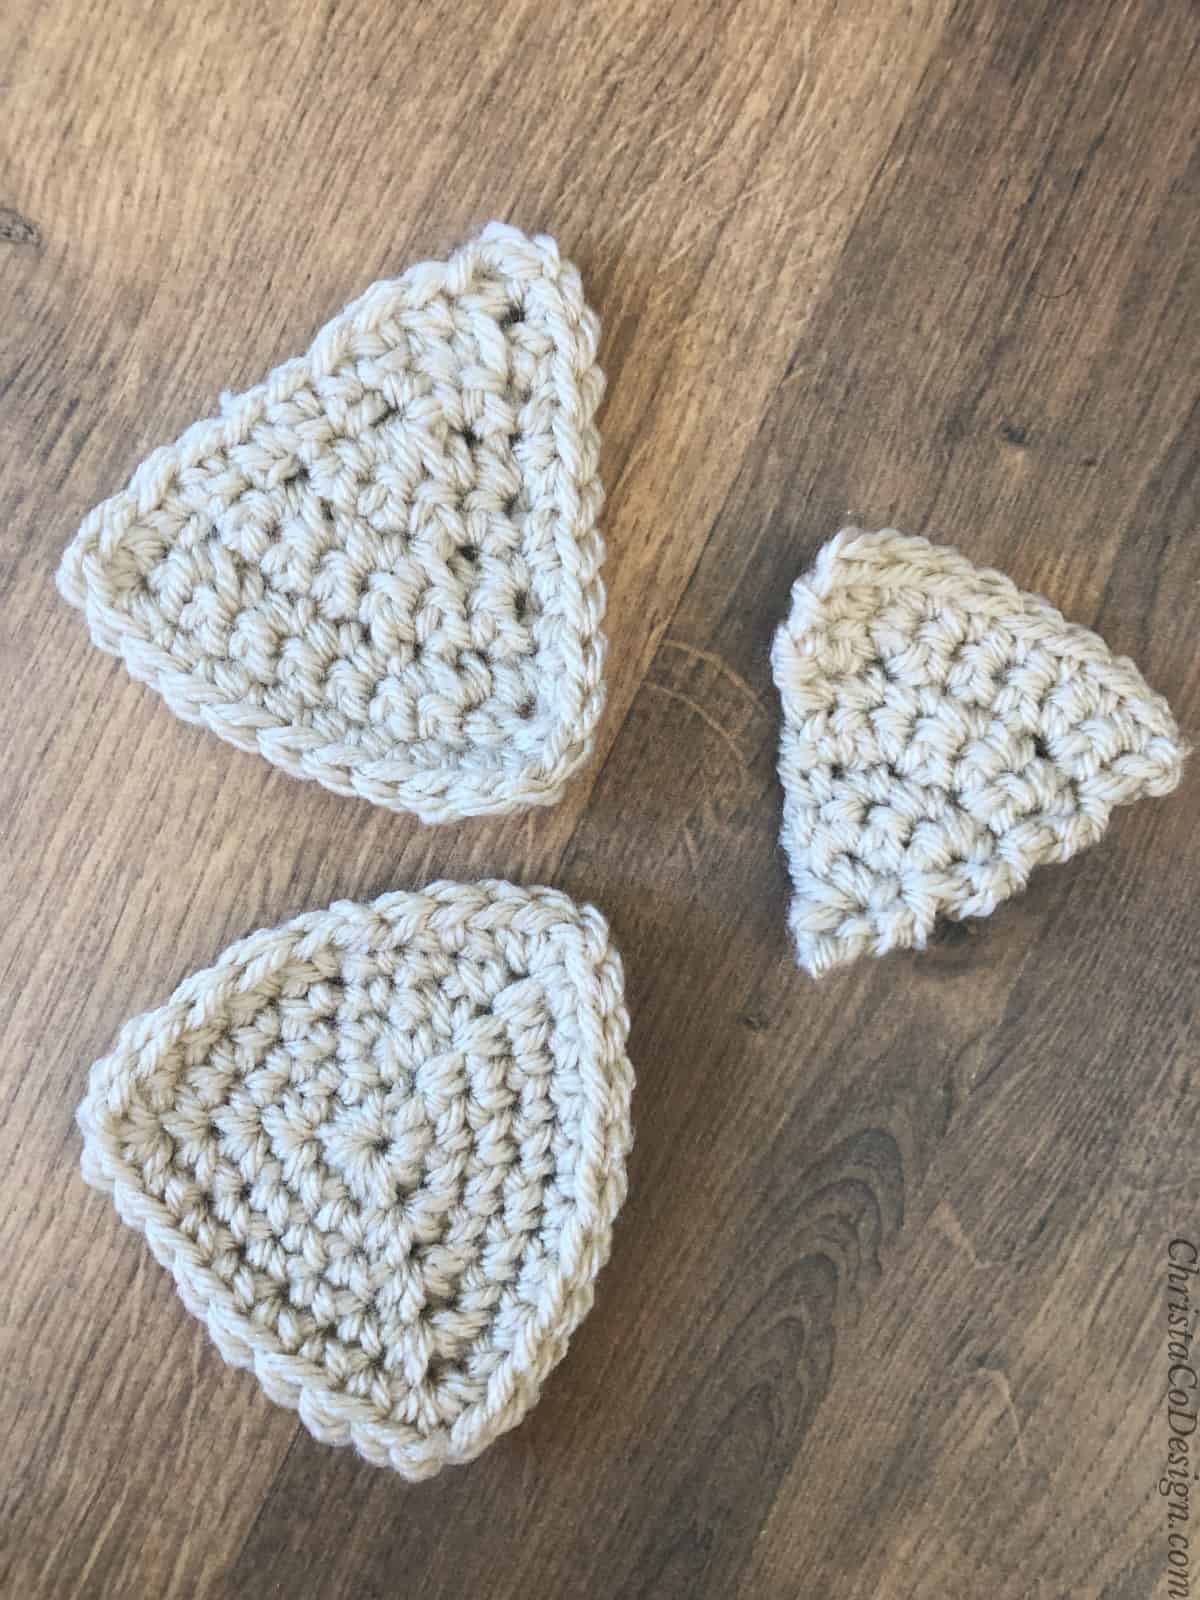
Gauge is how your hat will turn out the same size as the pattern’s (and fit!). If you need help on how to measure gauge start with this tutorial.
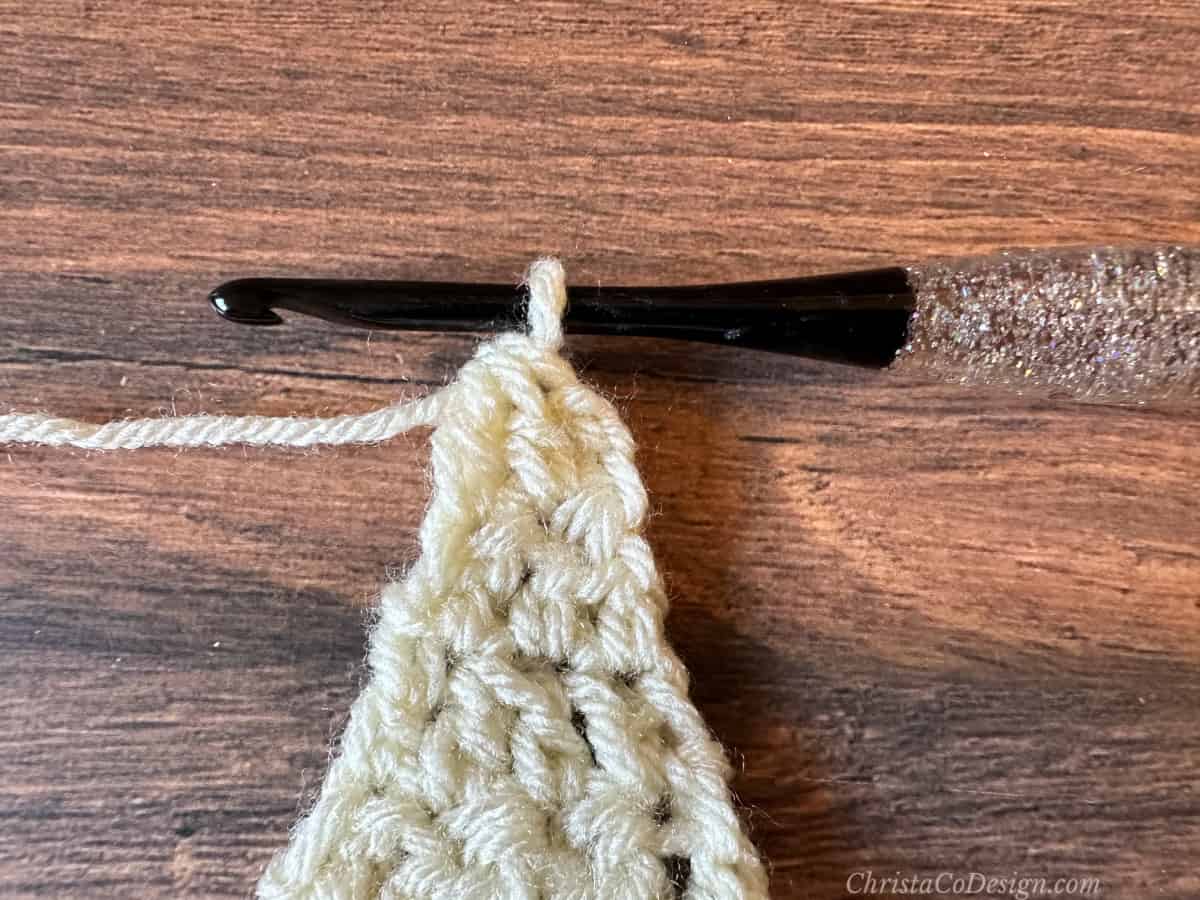
For a top down hat that’s worked in the round I like to provide the gauge in the round.
12 sts x 8 rnds (after blocking) to 4” (10 cm) measured in dc.
This indicates that the first 8 rounds of the pattern (which are in a circle) will equal 4″ (10 cm). So you can follow the pattern for your size to make a gauge swatch and compare it to this. See first picture on the left below.
To see if you’re matching gauge earlier, Rnds 1-3 = 3.5 – 3.75” (9 – 9.5 cm) across. See second picture on the right below.


Get 33 gorgeous patterns in this crochet pattern bundle!
Skill Level
Easy
Construction
This is a basic double crochet hat. You work it from the top of the hat down, in the round.
This means you will join the last stitch of each round to the first stitch. Then you continue working in a circle. Use a stitch marker in the first stitch of each round to help you keep track.
To get the correct size beanie, I include a suggested age for each size that is paired with the head circumference. So if you’re able to measure the head circumference of your family members you can use that with these numbers below.
Fit
To fit age (head circumference):
- baby 0 – 3 mos ~ 14” (35.5 cm)
- baby 3 – 6 mos (15” (38 cm)
- baby 6 – 12 mos (16” (40.5 cm)
- toddler ~ 18” (45.5 cm)
- preschool ~ 19” (48.5 cm)
- child ~ 20” (51 cm)
- teen/sm adult ~ 21” (53.5 cm)
- med/lg adult ~ 23” (58.5 cm)
Don’t forget to pin this for later!

Adjustments
To make a fitted beanie you can crochet less repeat rounds to make your hat shorter. Check out this simple double crochet beanie pattern here.
If you want your hat to have a folded brim, then you’ll want to crochet even more length. At least a 2″ brim is standard, so you can add that amount to your repeat rounds.
You can add a pom pom for a little flair. I love using my Clover pom pom maker*, but there are ways to make poms without one too.
Adding different colors in stripes is an easy and fun way to customize your hats with basic stitches.
Video Tutorial
Watch the full video tutorial for the simple slouch hat on my YouTube channel.
Purchase the ad-free, well formatted printable PDF Pattern from my shop. Scroll down for the free pattern!
Scroll down for the easy slouchy beanie crochet pattern!
Pattern Instructions
How to Crochet a Simple Slouchy Beanie for Beginners
Free basic slouchy beanie pattern in all sizes. These crochet slouch hats are easy to make and are great gifts.
Materials
- #4 medium worsted weight yarn
- Estimated yarn needed by size:
- Baby 0 – 3 mos ~ 124 yd (114 m)
- Baby 3 – 6 mos ~ 131 yd (120 m)
- Baby 6 – 12 mos ~ 138 yds (126 m)
- Toddler ~ 145 yd (133 m)
- Preschool ~ 150 yd (137 m)
- Child ~ 153 yd (140 m)
- Teen/Sm Adult ~ 160 yd (146 m)
- M/L Adult ~ 165 yd (151 m)
Tools
- 5mm US Size H-8 hook, or crochet hook needed to meet gauge.
- yarn needle, scissors, measuring tape
Instructions
Baby 0 – 3 mos Hat
Start with a magic circle, or ch 3, sl st to join into a circle.
Rnd 1. 12 dc into mc, sl st to join.
Rnd 2. Ch 3, dc in same st, 2 dc in the next stitch and in each st around, sl st to join. [24 sts]
Rnd 3. Ch 3, 2 dc in next st, *dc in next st, 2 dc in next st; rep from * around, join with sl st to first st. [36 sts] 3.75” circle
Rnd 4. Ch 3, dc in each st around, join with sl st to first st.
Rnds 5 – 17. Rep Rnd 4. ~8” tall; Go to Finishing.
Baby 3 – 6 mos Hat
Start with a magic circle, or ch 3, sl st to join into a circle.
Rnd 1. 12 dc into mc, sl st to join.
Rnd 2. Ch 3, dc in same st, 2 dc in each st around, sl st to join. [24 sts]
Rnd 3. Ch 3, 2 dc in next st, *dc in next st, 2 dc in next st; rep from * around, join with sl st to first st. [36 sts]
Rnd 4. Ch 3, dc in next st, 2 dc in next st, *1 dc in next 2 sts, 2 dc in next st; rep from * around, join with sl st to first st. rep from * around, join with sl st to first st. [48 sts] 4.75” – 5” circle
Rnd 5. Ch 3, dc in each st around, join with sl st to first st.
Rnds 6 – 18. Rep Rnd 5. ~8.5” tall; Go to Finishing.
Baby 6-12 mos
Start with a magic circle, or ch 3, sl st to join into a circle.
Rnd 1. 12 dc into mc, sl st to join.
Rnd 2. Ch 3, dc in same st, 2 dc in each st around, sl st to join. (24 sts)
Rnd 3. Ch 3, 2 dc in next st, *{dc in next st, 2 dc in next st} rep from * around, join with sl st to first st. [36 sts]
Rnd 4. Ch 3, dc in next st, 2 dc in next st, *1 dc in next 2 sts, 2 dc in next st; rep from * around, join with sl st to first st. rep from * around, join with sl st to first st. [48 sts] 4.75” – 5” circle
Rnd 5. Ch 3, dc in each st around, join with sl st to first st.
Rnds 6 – 19. Rep rnd 5. ~9.25” tall; Go to Finishing.
Toddler
Start with a magic circle, or ch 3, sl st to join into a circle.
Rnd 1. 12 dc into mc, sl st to join.
Rnd 2. Ch 3, dc in same st, 2 dc in each st around, sl st to join. [24 sts]
Rnd 3. Ch 3, 2 dc in next st, *dc in next st, 2 dc in next st; rep from * around, join with sl st to first st. [36 sts]
Rnd 4. Ch 3, dc in next st, 2 dc in next st, *1 dc in next 2 sts, 2 dc in next st; rep from * around, join with sl st to first st. rep from * around, join with sl st to first st. [48 sts] 4.75” – 5” circle
Rnd 5. Ch 3, dc in each st around, join with sl st to first st.
Rnds 6 – 20. Rep rnd 5. ~9.5” tall; Go to Finishing.
Preschool
Start with a magic circle, or ch 3, sl st to join into a circle.
Rnd 1. 12 dc into mc, sl st to join.
Rnd 2. Ch 3, dc in same st, 2 dc in each st around, sl st to join. [24 sts]
Rnd 3. Ch 3, 2 dc in next st, *dc in next st, 2 dc in next st; rep from * around, join with sl st to first st. [36 sts]
Rnd 4. Ch 3, dc in next st, 2 dc in next st, *1 dc in next 2 sts, 2 dc in next st; rep from * around, join with sl st to first st. rep from * around, join with sl st to first st. [48 sts] 4.75” – 5” circle
Rnd 5. Ch 3, dc in each st around, join with sl st to first st.
Rnds 6 – 21. Rep rnd 5. ~9.5” tall; Go to Finishing.
Child
Start with a magic circle, or ch 3, sl st to join into a circle.
Rnd 1. 12 dc into mc, sl st to join.
Rnd 2. Ch 3, dc in same st, 2 dc in each st around, sl st to join. [24 sts]
Rnd 3. Ch 3, 2 dc in next st, *dc in next st, 2 dc in next st; rep from * around, join with sl st to first st. [36 sts]
Rnd 4. Ch 3, dc in next st, 2 dc in next st, *1 dc in next 2 sts, 2 dc in next st; rep from * around, join with sl st to first st. rep from * around, join with sl st to first st. [48 sts]
Rnd 5. Ch 3, dc in next 2 sts, 2 dc in next st, *1 dc in next 3 sts, 2 dc in next st; rep from * around, join with a sl st to first st. [60 sts] 5.75” – 6” circle
Rnd 6. Ch 3, dc in each st around, join with sl st to first st.
Rnds 7 – 21. Rep rnd 6. ~10.25” tall; Go to Finishing.
Teen/Sm Adult
Start with a magic circle, or ch 3, sl st to join into a circle.
Rnd 1. 12 dc into mc, sl st to join.
Rnd 2. Ch 3, dc in same st, 2 dc in each st around, sl st to join. [24 sts]
Rnd 3. Ch 3, dc in same st, dc in next st, *2 dc in next st, dc in next st; rep from * around, join with sl st to first st. [36 sts]
Rnd 4. Ch 3, dc in same st, dc in each of next two sts, *2 dc in next st, dc in each of next two sts; rep from * around, join with sl st to first st. [48 sts]
Rnd 5. Ch 3, dc in next 2 sts, 2 dc in next st, *1 dc in next 3 sts, 2 dc in next st; rep from * around, join with a sl st to first st. [60 sts] 5.75” – 6” circle
Rnd 6. Ch 3, dc in each st around, join with sl st to first st.
Rnds 7 – 22. Rep rnd 6. ~10.5” tall; Go to Finishing.
M/L Adult
Start with a magic circle, or ch 3, sl st to join into a circle.
Rnd 1. 12 dc into mc, sl st to join.
Rnd 2. Ch 3, dc in same st, 2 dc in each st around, sl st to join. [24 sts]
Rnd 3. Ch 3, dc in same st, dc in next st, *2 dc in next st, dc in next st; rep from * around, join with sl st to first st. [36 sts]
Rnd 4. Ch 3, dc in same st, dc in each of next two sts, *2 dc in next st, dc in each of next two sts; rep from * around, join with sl st to first st. [48 sts]
Rnd 5. Ch 3, dc in next 2 sts, 2 dc in next st, *1 dc in next 3 sts, 2 dc in next st; rep from * around, join with a sl st to first st. [60 sts]
Rnd 6. Ch 3, dc in next 3 sts, 2 dc in next st, *1 dc in next 4 sts, 2 dc in next st; rep from * around, join with a sl st to first st. [72 sts] 7.25” circle med/lg adult
Rnd 7. Ch 3, dc in each st around, join with sl st to first st.
Rnds 8 – 22. Rep rnd 7. ~11” tall; Go to Finishing.
Finishing
Finish your hat with one round of single crochet.
Ch 1, sc in same st and in each st around, join with sl st to first st.
Cut yarn and weave in ends.
Recommended Products
As an Amazon Associate and member of other affiliate programs, I earn from qualifying purchases.