Free Crochet Eye Pattern (Cute!)
Learn how to crochet eyes for your hats and amigurumi. To make an eye you just need to be able to crochet a circle.

This post contains affiliate links, I may earn a fee. Read more disclosure policy.
Join the ChristaCoDesign Newsletter
Never miss a pattern!
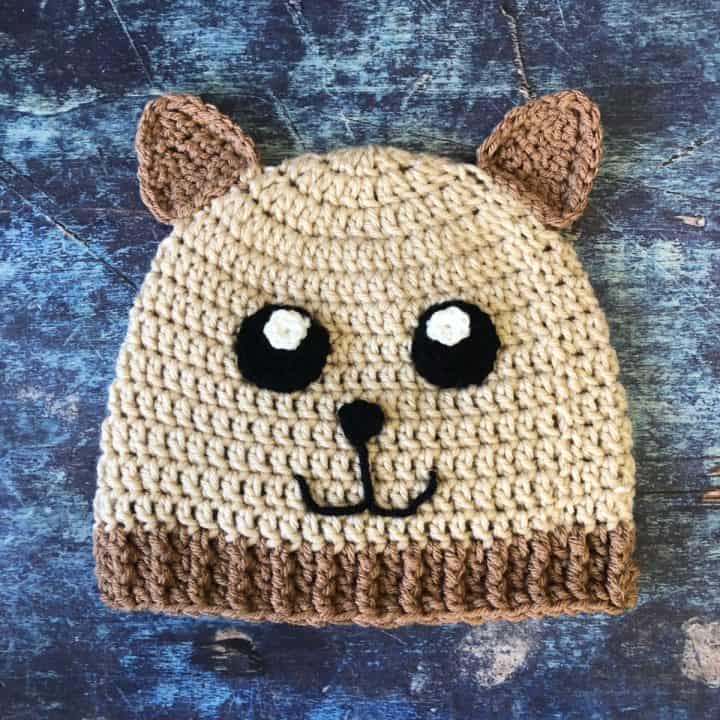
To make these crochet eyes extra cute, the way my daughter likes to draw them, I added highlights. The main part of the eye is black with smaller white circles to as the reflected light.
You can also opt to crochet a black center for the pupil and white outer. This is easy to do with color changes.
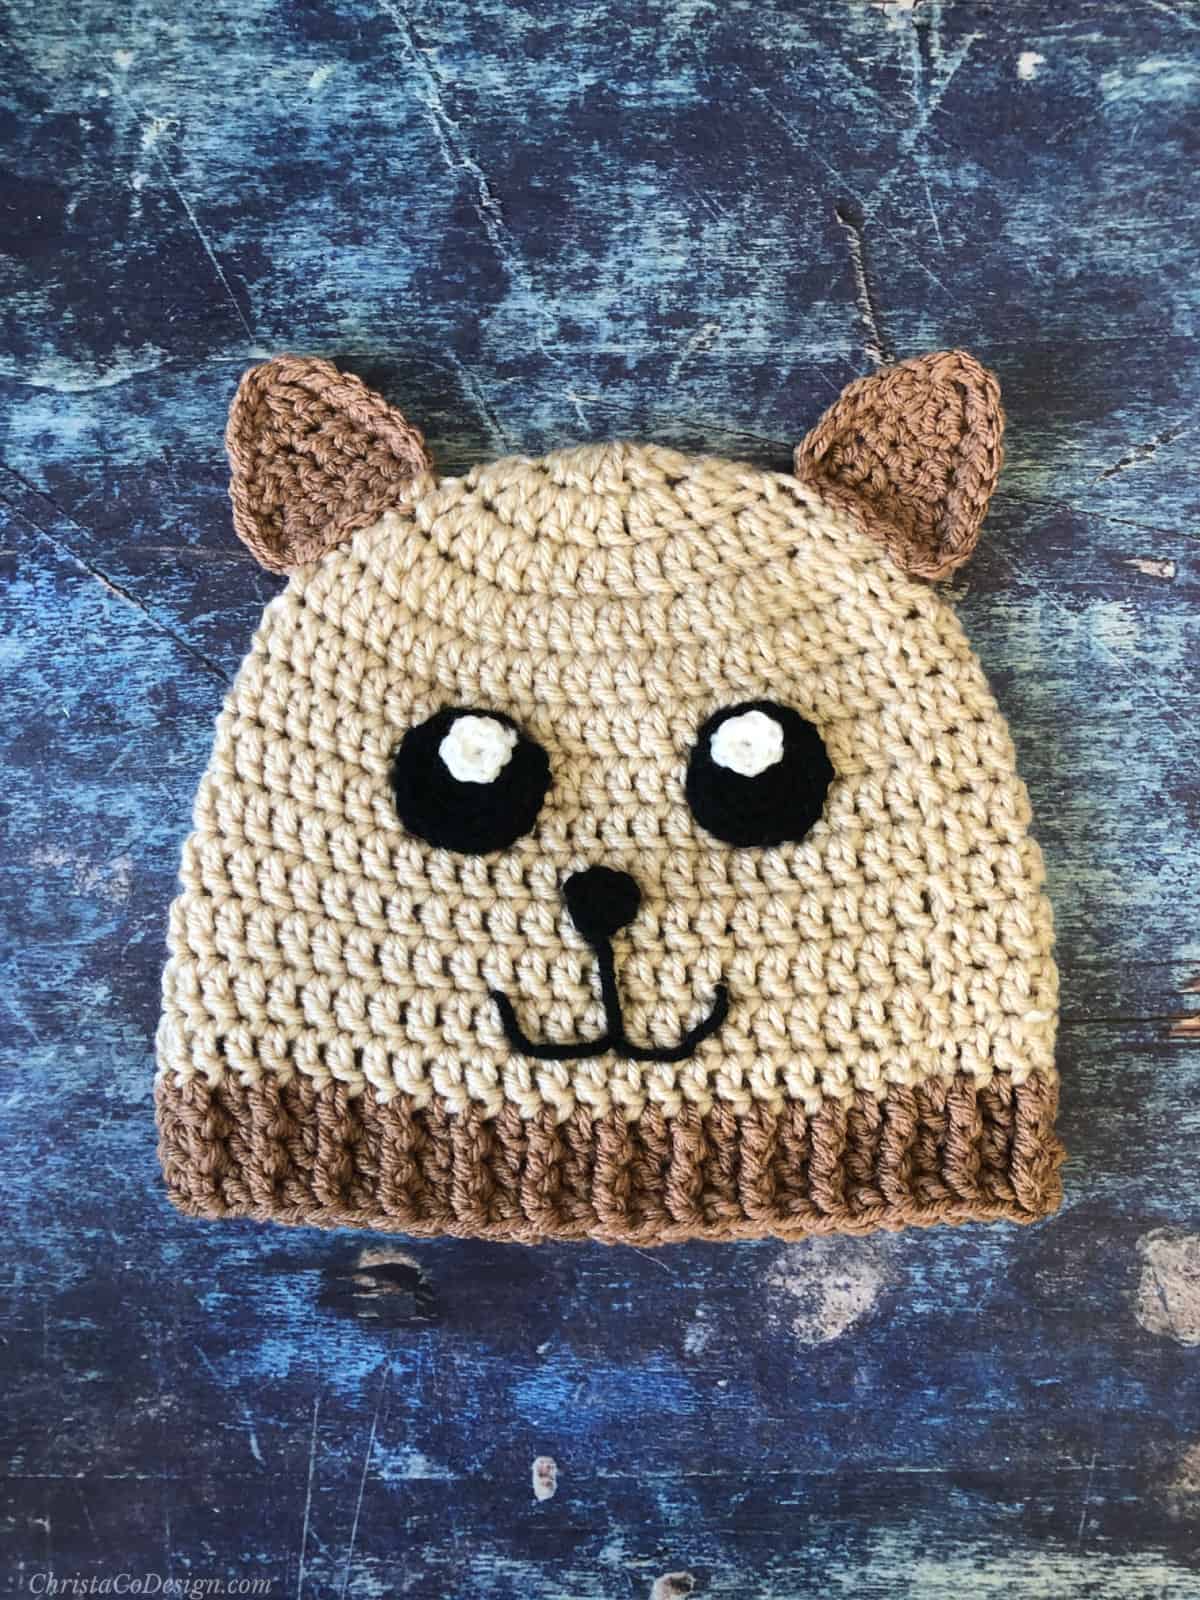
For this crochet eye pattern I’m using the Marino Hat pattern which is an easy double crochet beanie with front post finishing.
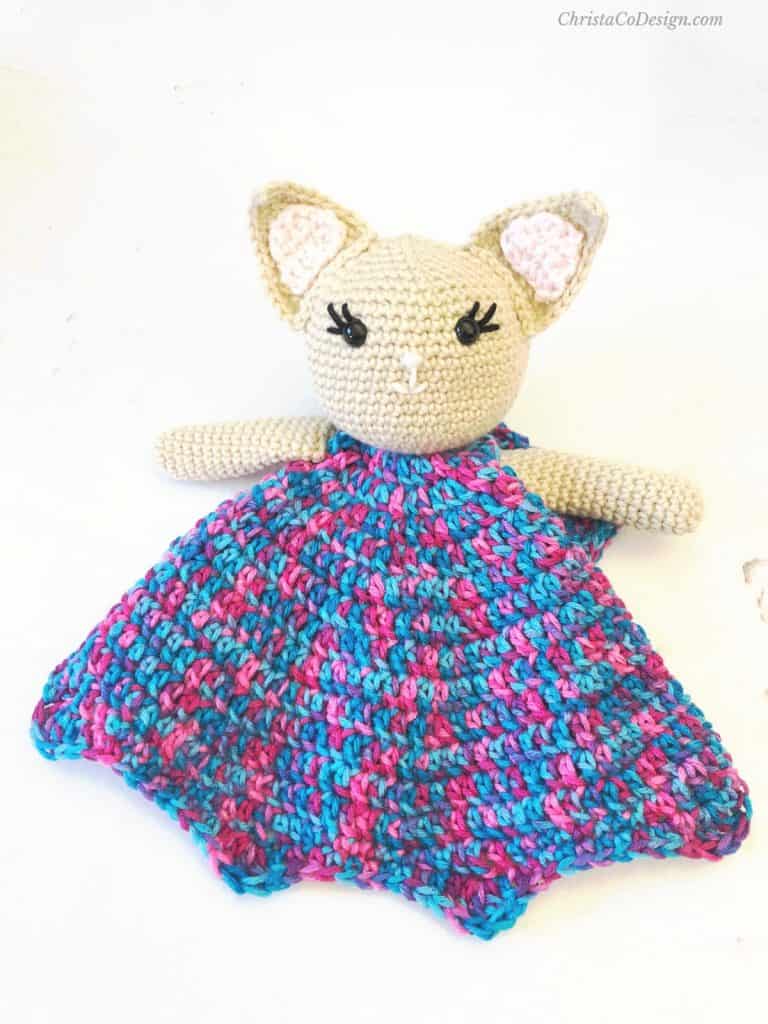
A lot of amigurumi projects use safety eyes for dolls. But sometimes you just want simple crocheted eye. You can use this pattern to crochet your own eyes instead.
Depending on how large your amigurumi doll is you may need make a smaller version.
You can crochet small black circles. Just place 6 single crochet in a magic circle and finish off. If you still want the highlight look then thread the yarn needle with a small piece of white yarn and sew down a small curve or circle.
Free Crochet Patterns
In my crochet narwhal pattern I actually cover a few different ways to crochet eyes.
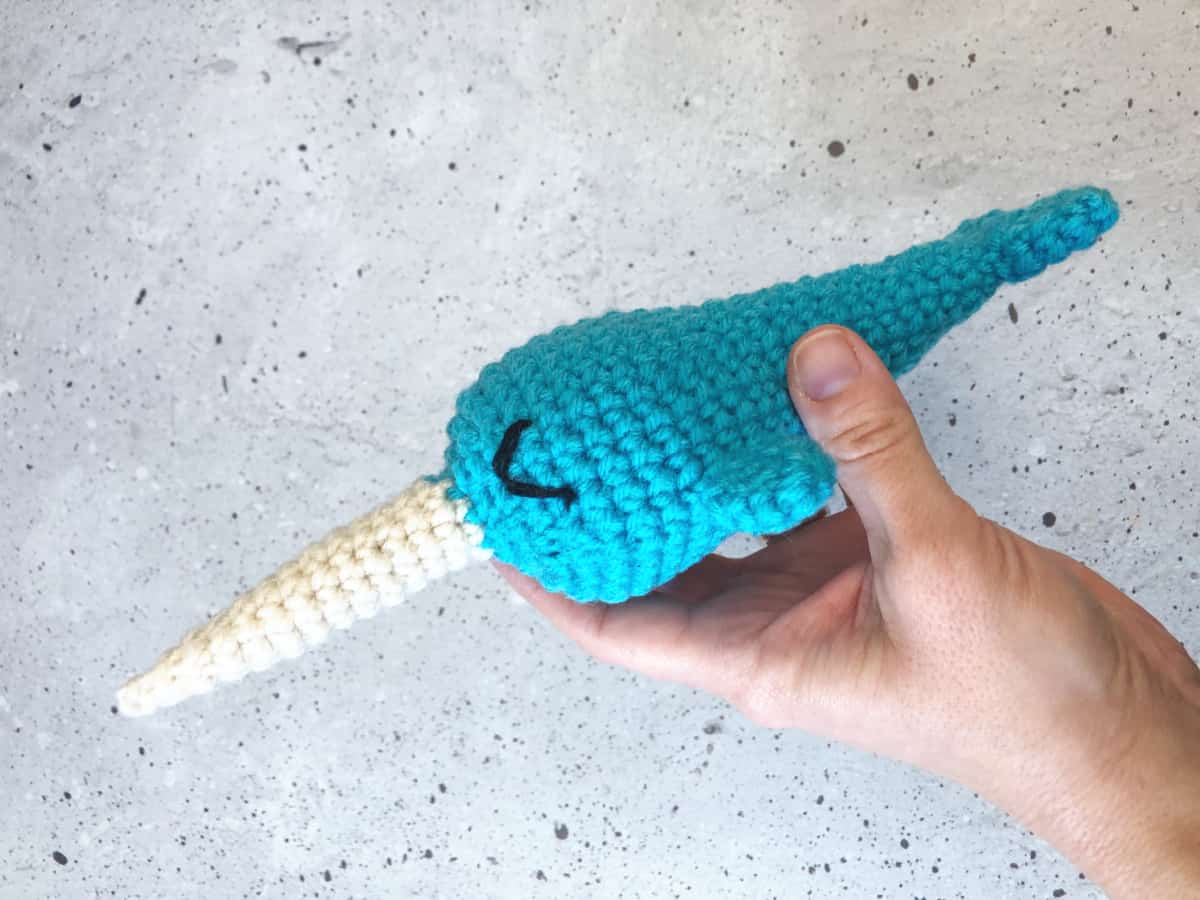
It’s easy to embroider on a face with black thread or yarn. Here I use thread to sew on little Vs to make this winky eye on the narwhal.
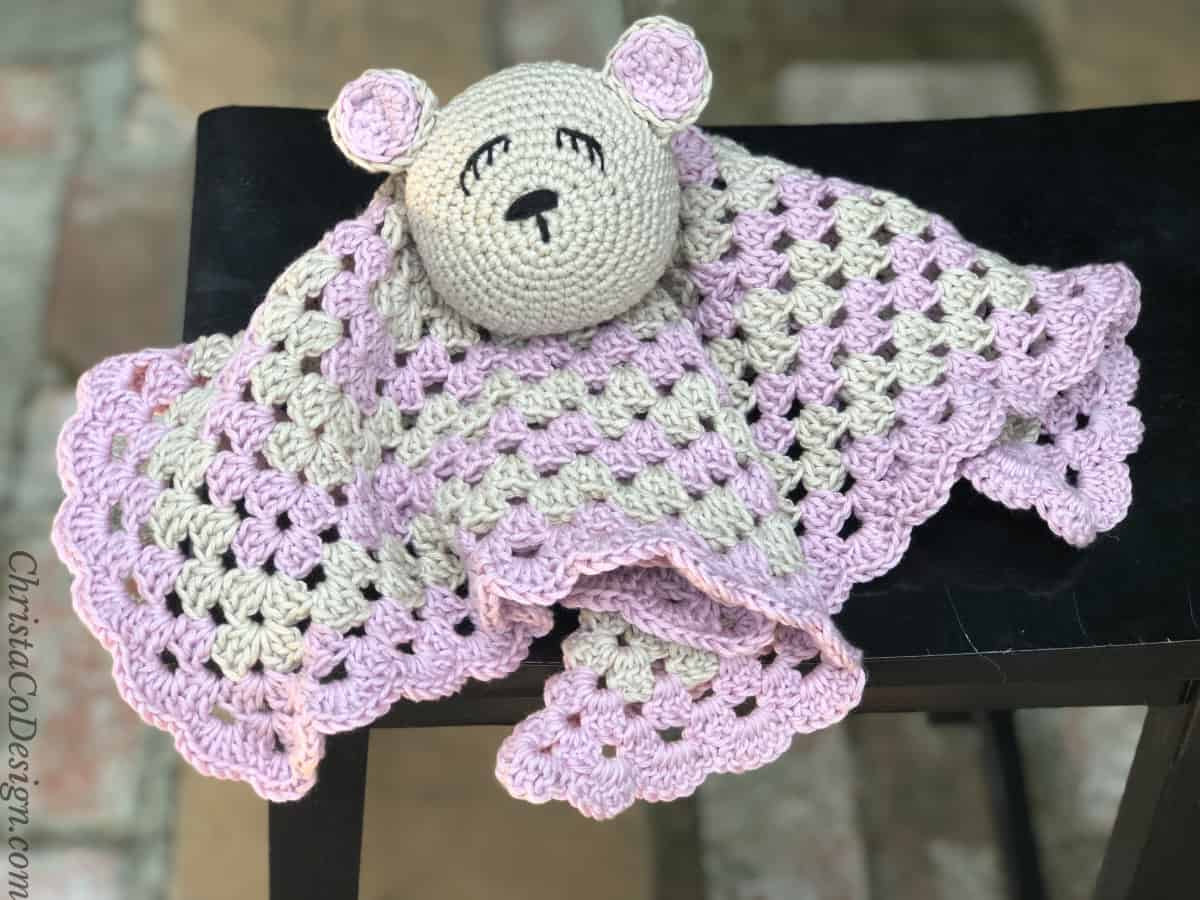
For the sleepy bear face I embroidered the closed eyes and eye lashes with black yarn. You can use crochet thread too.
Materials
For this pattern you want to use the smallest hook that you’re comfortable working with on #4 medium worsted weight yarn. I use a 3.25 mm hook.
A small amount of yarn in black (5 yd) and white yarn (1 yd).
Tapestry needle, scissors, measuring tape.
Notes
Work in a continuous round. Mark the first stitch of each round with a stitch marker.
Stitches / Abbreviations
US Terms
ch(s) – chain(s)
magic ring – magic circle
rep – repeat
rnd (s) – round(s)
sc – single crochet
st(s) – stitch (es)
Finished Dimensions
The larger circle is 1.5″ across and the smaller circle is .75″ across.
Skill Level
Easy
Gauge
Rnds 1 – 3 = 1.5″ across
Adjustment
You can make these crochet eyes different sizes by increasing or decreasing your hook size. A larger hook makers larger stitches. And a smaller hook makes smaller stitches so it will make smaller eyes.
Or you can simply add or take away a round of stitches. Keep the number of stitches the same in each round as the pattern to keep it laying in a flat circle.
Different yarn weights will also change the size of your eye. Thinner yarn will make a smaller eye and thicker yarn makes larger eyes.
Download the Hat Sizing Chart
Get this handy dandy chart so you can crochet perfectly fitting hats!
Scroll down for the free pattern!
Crochet Eye Pattern
Learn how to crochet eyes that are cute and easy!
Materials
- #4 medium worsted weight yarn
Tools
- 3.25 mm crochet hook
- yarn needle
- scissors
- measuring tape
Instructions
- Make 2
- In Black
- Start with a magic circle. Or if you prefer, ch 3, sl st to first ch to join.
- Rnd 1. Work 6 sc in the circle. (6 sts)
- Rnd 2. Place 2 sc in first st (mark first sc with a stitch marker here and throughout) 2 sc in each st around. (12 sts)
- Rnd 3. Place 1 sc in first st, 2 sc in next stitch, *{1 sc, 2 sc} rep from * around. (18 sts)
- After the last stitch, slip stitch over 2 sts.
- Cut yarn and leave a long 12 inch tail for sewing down. Set aside finished piece for now.
- In White
- Start with a magic circle. Or if you prefer, ch 3, sl st to first ch to join.
- Rnd 1. Work 6 sc in the circle. (6 sts)
- Cut yarn and leave a long tail for sewing down.
- Position white circle on black circle along one of the outer edges (not the center) and sew it down.
- Repeat for second eye.
- Sew down to hat or face.
- Weave away ends on wrong side.
Recommended Products
As an Amazon Associate and member of other affiliate programs, I earn from qualifying purchases.