Hygge Cardigan- Women’s Crochet Cardigan Pattern
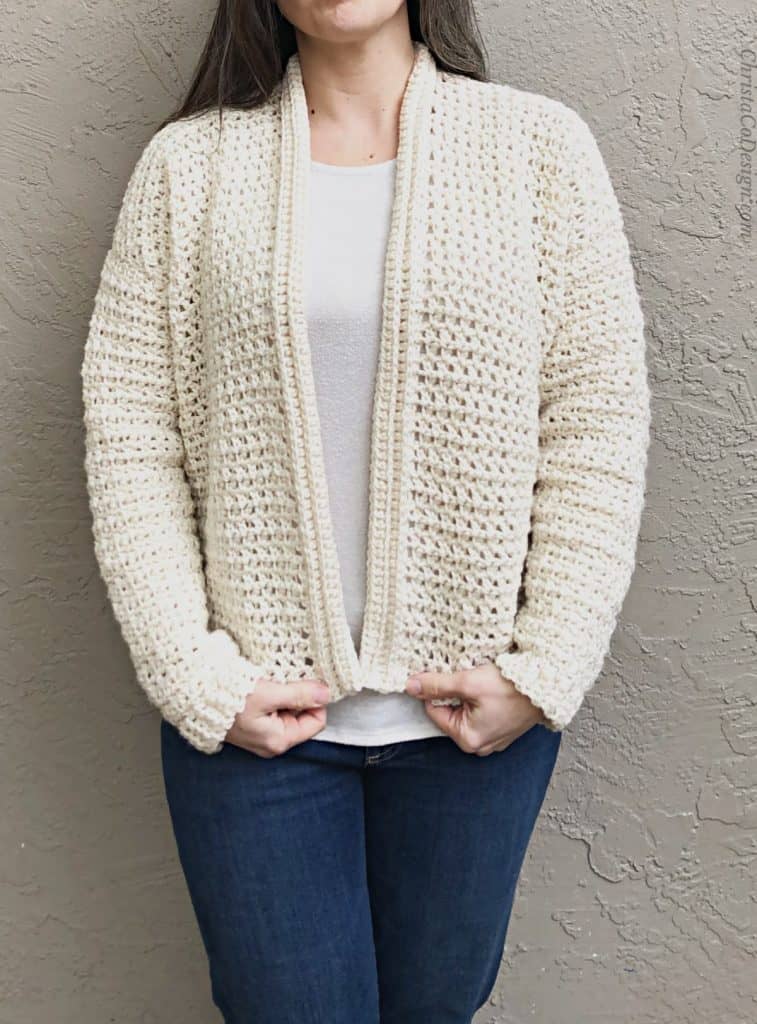
The Hygge Cardigan is a women’s cardigan pattern that’s easy to crochet and ready for every day wear. This crochet cardigan pattern features a textured, but lightweight stitch that works well for layering.
If you love a crochet cardigan that doesn’t overwhelm, then this is it. This sweater keeps you cozy without any excess bulk.
The free pattern is available in sizes S-5X below. In this shorter, hip length version the Hygge Cardigan has a lighter ribbing along the hem and neckline than the sister pattern, the Hygge Homebody Cardigan.
This version also includes changes to the sleeves. You’ll crochet them from the wrist up, this makes customizing your sizing easy.

Purchase the ad-free, well formatted printable PDF Pattern from my shop. Scroll down for the free pattern!
The PDF Pattern includes both the long and short versions!
You Can Purchase My Ad-Free PDF Patterns Here:
Yarn
For this every day cardigan I chose Red Heart Super Saver in the color aran. This is a #4 medium worsted weight yarn that’s affordable and comes in a variety of colors.
I loved my first cozy Hygge Homebody Cardigan so much and wear it all the time. Since I have a house full of kids I definitely need an easy to wash + wear yarn that doesn’t break the bank.
You can substitute another #4 yarn. I would recommend a similar yarn that has more structure like Joann’s Big Twist yarn.* If you choose a very soft yarn, be aware that this stitch pattern relaxes a lot over time.

Stitch
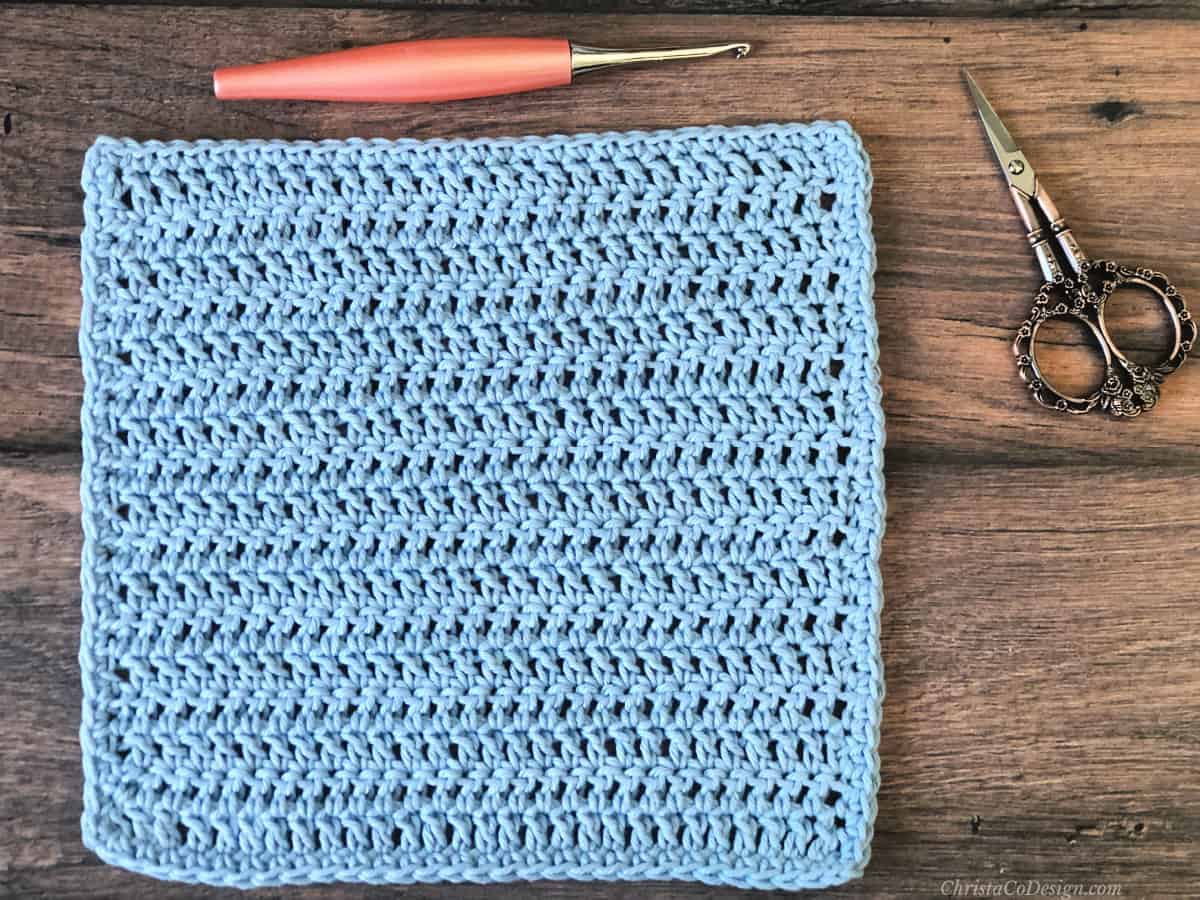
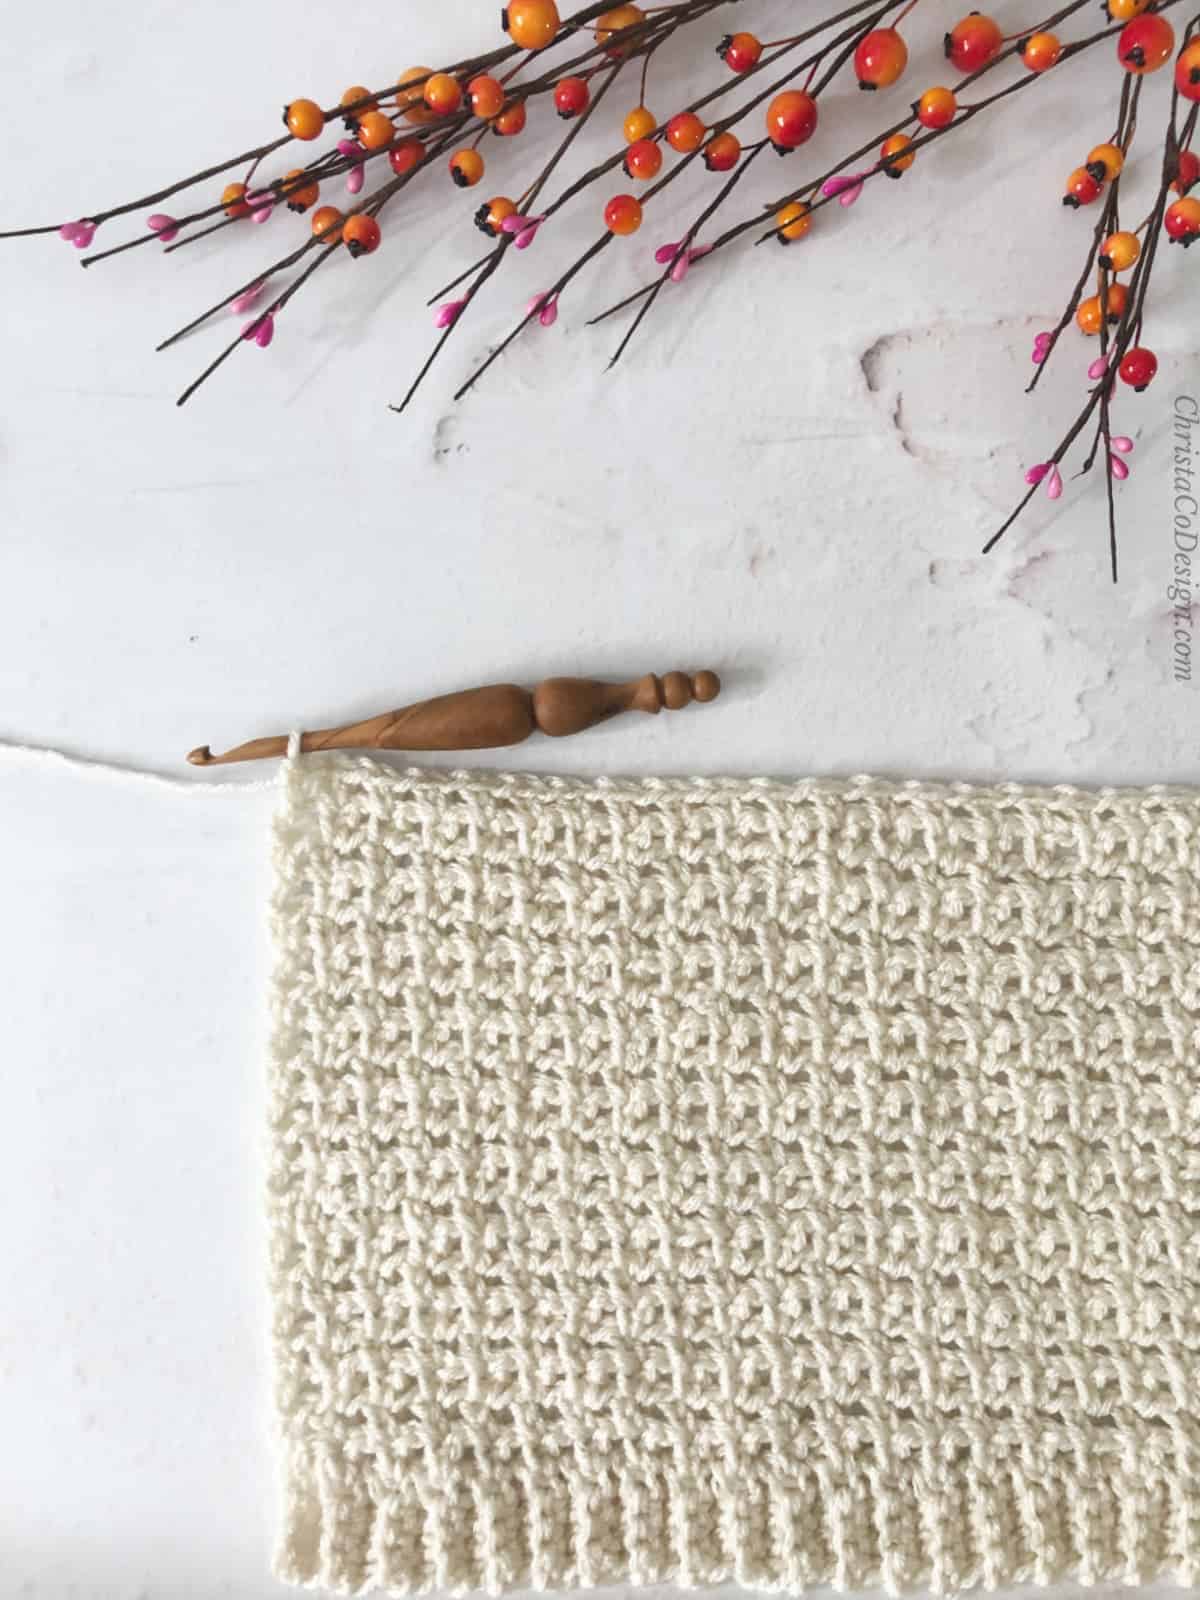
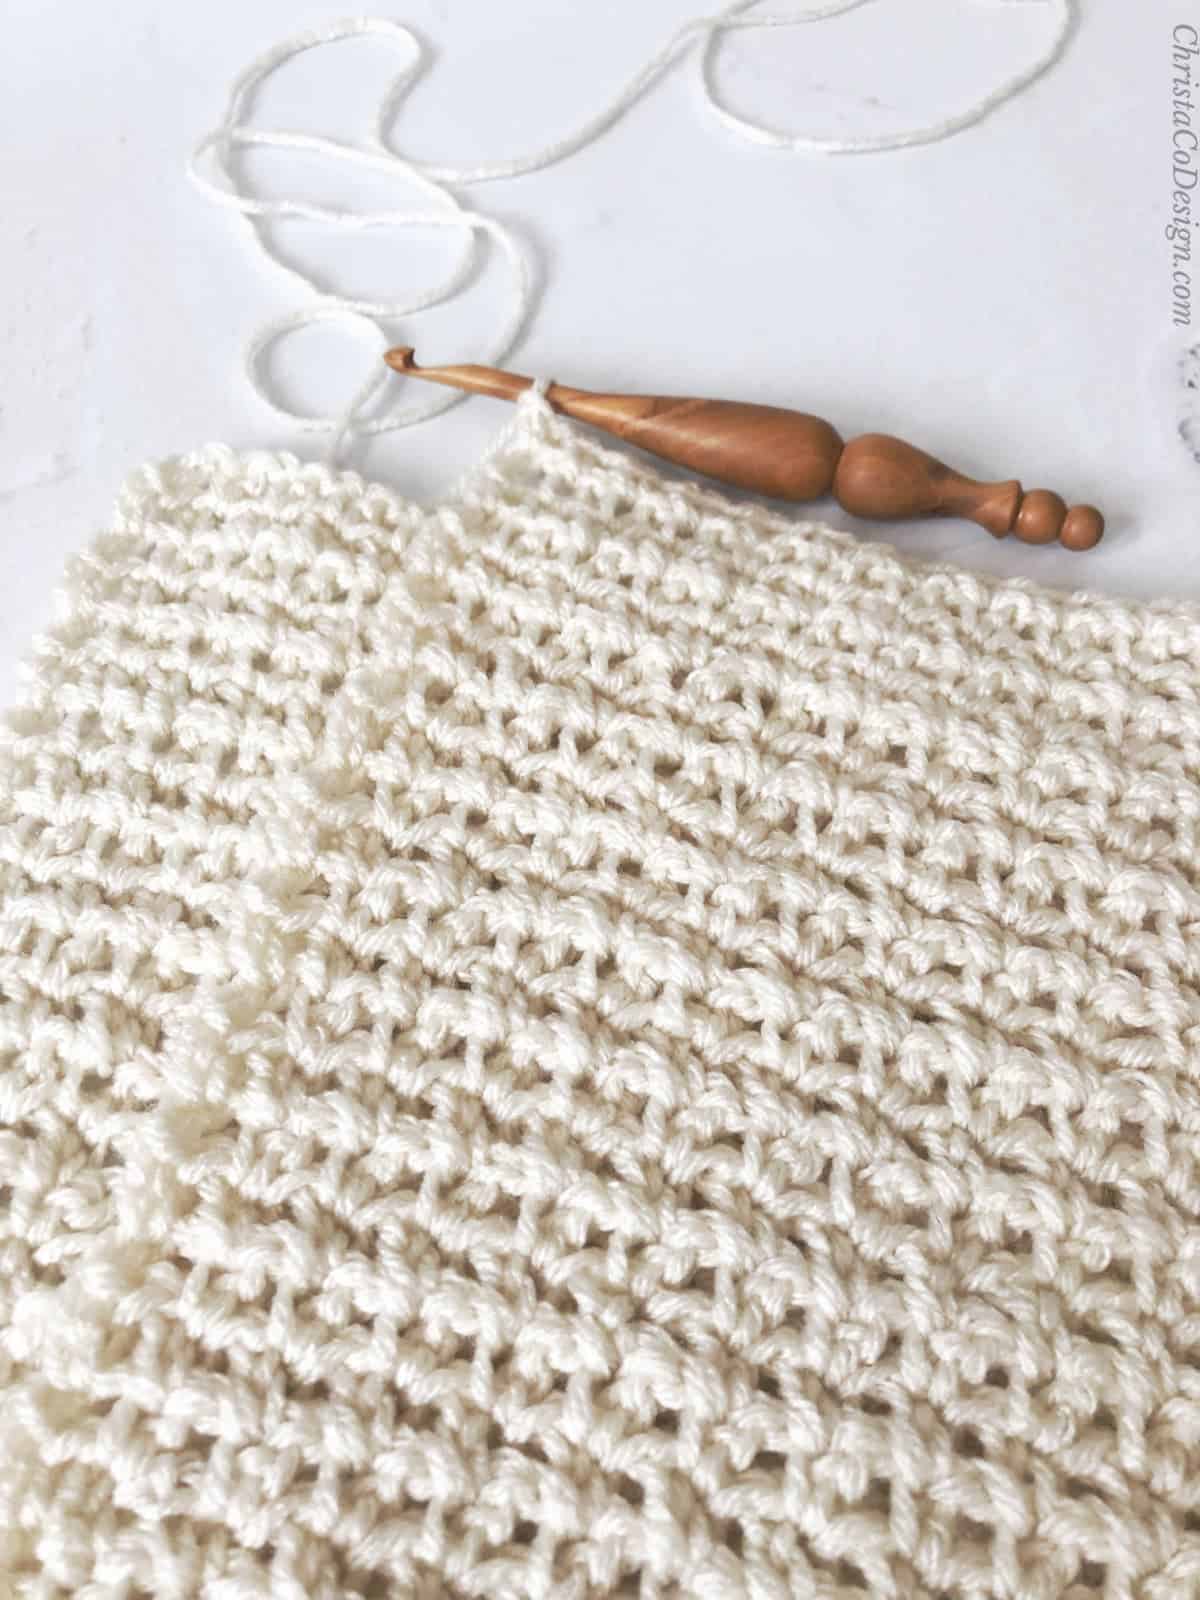
The stitch I use in this cardigan is the Pike Stitch. The tutorial includes all you need to know to crochet this one, if it’s new to you.
For this stitch there is a chain, then single crochet and then another chain. These all combine to make the pike stitch.
It’s a bit of an open stitch and with those chains, it lengthens and relaxes over time. Depending on the yarn you choose and your personal tension (some of use crochet chains more tightly or loosely) you may want to crochet your sleeves a little shorter.
Materials
- #4 medium worsted weight yarn, recommended yardage by size:
To fit bust sizes:
- (S) 34”/86.4cm approximately 811yds/742m
- (M) 38”/96.5cm approximately 952yds/871m
- (L) 42”/106.7cm approximately 1092yds/999m
- (XL) 46”/116.8cm approximately 1274yds/1165m
- (2X) 50″/127cm approximately 1456yds/1331m
- (3X) 54”/137.2cm approximately 1638yds/1498m
- (4X) 58”/147.3cm approximately 1820yds/1664m
- (5X) 62”/157.5cm approximately 2002yds/1831m
- 5.5 mm/US size I-9 hook, or hook needed to meet gauge. My favorite crochet hooks are Clover* and Furls.*
- Yarn needle
- Measuring tape
- Scissors
Notes
- Please read through entire pattern and create a gauge swatch before beginning
- Pattern is written for multiple sizes, where the first number given is the smallest size and the larger sizes follow in parenthesis. For example, “Rep row 2 for 50 (52, 54, 56, 58, 60, 62, 64) rows” means size small would repeat row 2 for 50 times and size 4X would repeat row 2 for 62 times. Where no size is indicated instruction apply to all.
- Stitch counts are given at the end of the instructions with all sizes within the parenthesis (72, 82, 90, 98, 104, 110, 116, 124 sts).
- Ch 3 counts as an exsc + ch 1.
- This stitch naturally relaxes with wash and wear.
Stitches/Abbreviations (US Terms)
blo-back loop only
ch(s)-chain(s)
exsc-extended single crochet-insert hook into the stitch to be worked, yarn over & pull up a loop, yo and pull through 1 loop, yo and pull through 2 loops
hdc in the 3rd loop– Looking at the back of your hdc stitches, there is a distinct horizontal line that runs across the stitch. This is considered the 3rd loop and where we’ll be inserting the hook for the rest of the rows.
rep-repeat
rnd(s)-round(s)
RS-right side
sk-skip the indicated stitch
st(s)-stitch(es)
WS-wrong side
yo-yarn over
Gauge
4″/10cm x 4″/10cm = 14 sts x 10 rows in pattern, before blocking.
To check gauge ch 20 and follow pattern from Back Panel Row 1.
Level
Easy
Construction
This sweater pattern is worked in fours pieces: front + back panels, and two sleeves. The panels are seamed at the sides and shoulders. The sleeves are worked separately and seamed on to the sweater.
Fit/Adjustment
To fit bust size
- (S) 34”/86.4cm
- (M) 38”/96.5cm
- (L) 42”/106.7cm
- (XL) 46”/116.8cm
- (2X) 50″/127cm
- (3X) 54”/137.2cm
- (4X) 58”/147.3cm
- (5X) 62”/157.5cm
This cardigan has an ease of 6-8” where the finished bust measurement is larger than the actual bust size.
Finished bust size
(S) 41.2″/104.6
(M) 47.4″/120.4cm
(L) 51.7″/131.3cm
(XL) 56.6″/143.8cm
(2X) 59.5″/151cm
(3X) 63.4″/161cm
(4X) 67″/170.2cm
(5X) 67″/170.2cm
You can easily adjust the length of this pattern by making more or less rows. If you change the number of rows be sure to make both the back and front panels the same length.
For a more snug fit, go down a size. Likewise, for a looser fit, go up a size.
Hip Length Hygge Cardigan Crochet Pattern
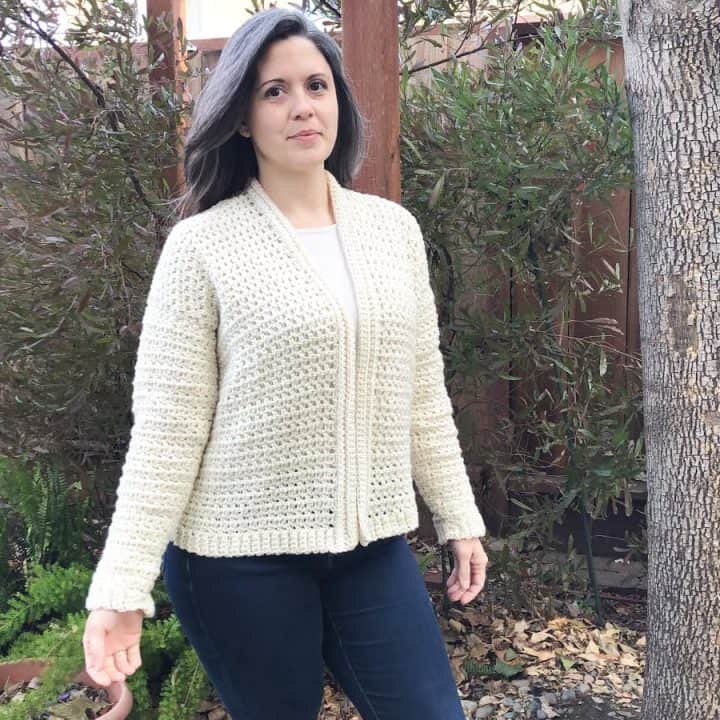
Hip Length Hygge Cardigan
This crochet cardigan pattern is easy to crochet and makes a great layering piece.
Materials
- #4 medium worsted weight yarn, see chart below for specifics by size. (S) 811yds/742m (M) 952yds/871m (L) 1092yds/999m, (XL) 1274yds/1165m, (2X) 1456yds/1331m, (3X) 1638yds/1498m, (4X) 1820yds/1664m, (5X) 2002yds/1831m
Tools
- 5.5 mm/US size I-9 hook, or hook needed to meet gauge.
- Yarn needle, Measuring tape, Scissors
Instructions
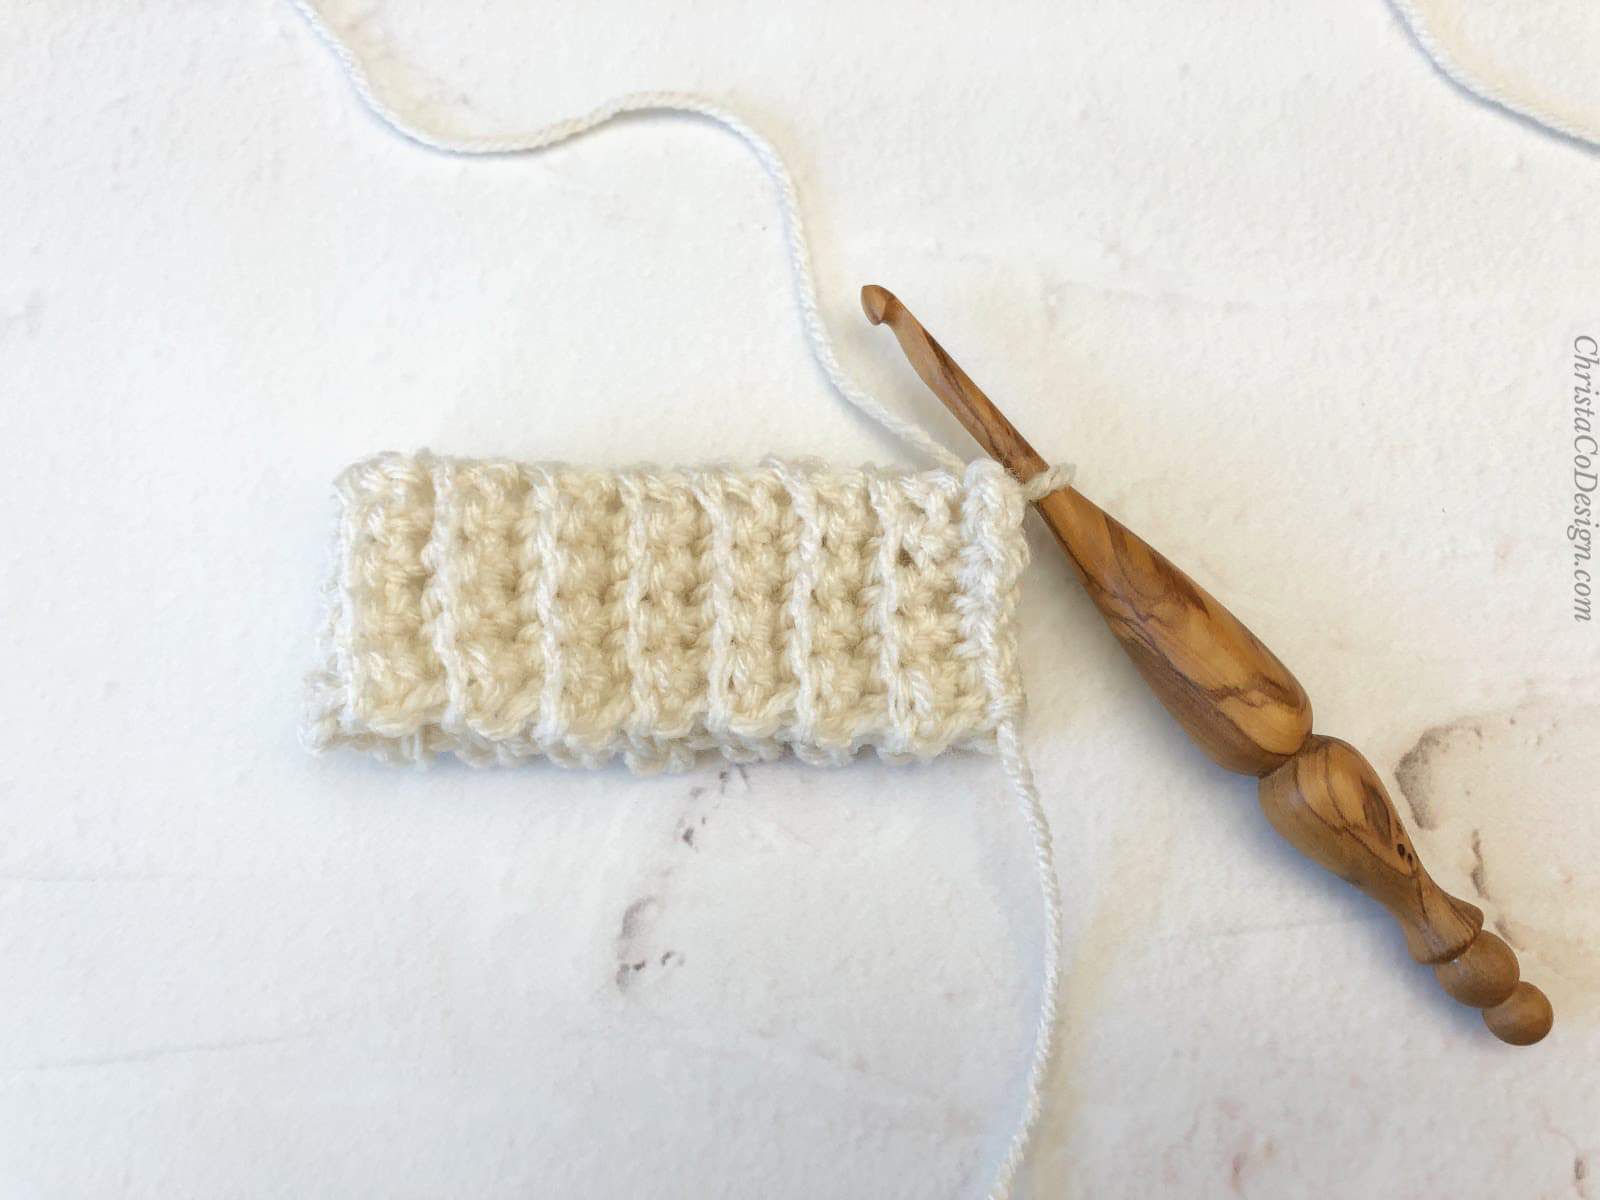
Back Panel Ribbing
Ch 5,
- Row 1. Sc in 2nd ch from your hook and in each ch across, turn. (4 sts) 1.5” wide ribbing
- Row 2. Ch 1, starting in same st place 1 blo sc in each st across, turn. (4 sts)
- Rep Row 2 until you have 72 (82, 90, 98, 104, 110, 116, 124) rows of ribbing total.
- Now turn and work into the side of the ribbing.

Back Panel
- Row 1. Ch 3, *{sk 1 row, work 1 exsc into the side of the next row, ch 1} rep from * across, 1 exsc in last row, turn. (73, 83, 91, 99, 105, 111, 117, 125 sts)

- Row 2. Ch 3, *{sk the ch 1, exsc in next exsc, ch 1} rep from * across, exsc in 2nd ch of ch 3, turn.
- Row 3. Rep 2 for 50 (52, 54, 56, 58, 60, 62, 64) rows, or until total length (including ribbing) is 21.25”, (22”, 23”, 23.7”, 24.5”, 25.3”, 26”, 27”) long. Add more rows here for a longer length.

Cut yarn and leave a long tail for seaming.
Front Panel Ribbing
Make 2.
Ch 5,
- Row 1. Sc in 2nd ch from your hook and in each ch across, turn. (4 sts) 1.5” wide ribbing
- Row 2. Ch 1, starting in same st place 1 blo sc in each st across, turn. (4 sts)
- Rep Row 2 until you have 36 (42, 46, 50, 52, 56, 60, 62) rows of ribbing total.
- Now turn and work into the side of the ribbing.
Front Panel
- Row 1. Ch 3, *{sk 1 row, work 1 exsc into the side of the next row, ch 1} rep from * across, 1 exsc in last row, turn. (37, 43, 47, 51, 53, 57, 61, 63) sts
- Row 2. Ch 3, *{sk the ch 1, exsc in next exsc, ch 1} rep from * across, exsc in 2nd ch of ch 3, turn.
- Row 3. Rep 2 for 50 (52, 54, 56, 58, 60, 62, 64) rows, or until total length (including ribbing) is 21.25”, (22”, 23”, 23.7”, 24.5”, 25.3”, 26”, 27”) long. Remember to match your back panel in length if you added rows.
- Cut yarn and leave a long tail for seaming.

Sleeves Notes
- Sleeves need an even stitch count.
- Sleeves are constructed from the wrist up, which makes trying it on to fit easy.
- After joining the ribbing, the sleeves are worked in the round, but you will join and turn each row, working on both sides just like the panels.
- Sleeves will increase gradually by adding a stitch to the first ch sp after the ch 3, as written per your size.
- Keep in mind, that the sleeves will loosen and lengthen with washing and wear. You may consider working a short sleeve length. Mine grew about 2" longer.
Sleeves Ribbing
Make 2.
Ch 5,
- Row 1. Sc in 2nd ch from your hook and in each ch across, turn. (4 sts) 1.5” wide ribbing
- Row 2. Ch 1, starting in same st place 1 blo sc in each st across, turn. (4 sts)
- Rep Row 2 until you have 32 (32, 32, 36, 40, 40, 40, 40) rows.
- Join short ends of ribbing together with sl sts. Turn and work along the edge of ribbing.

Sleeves
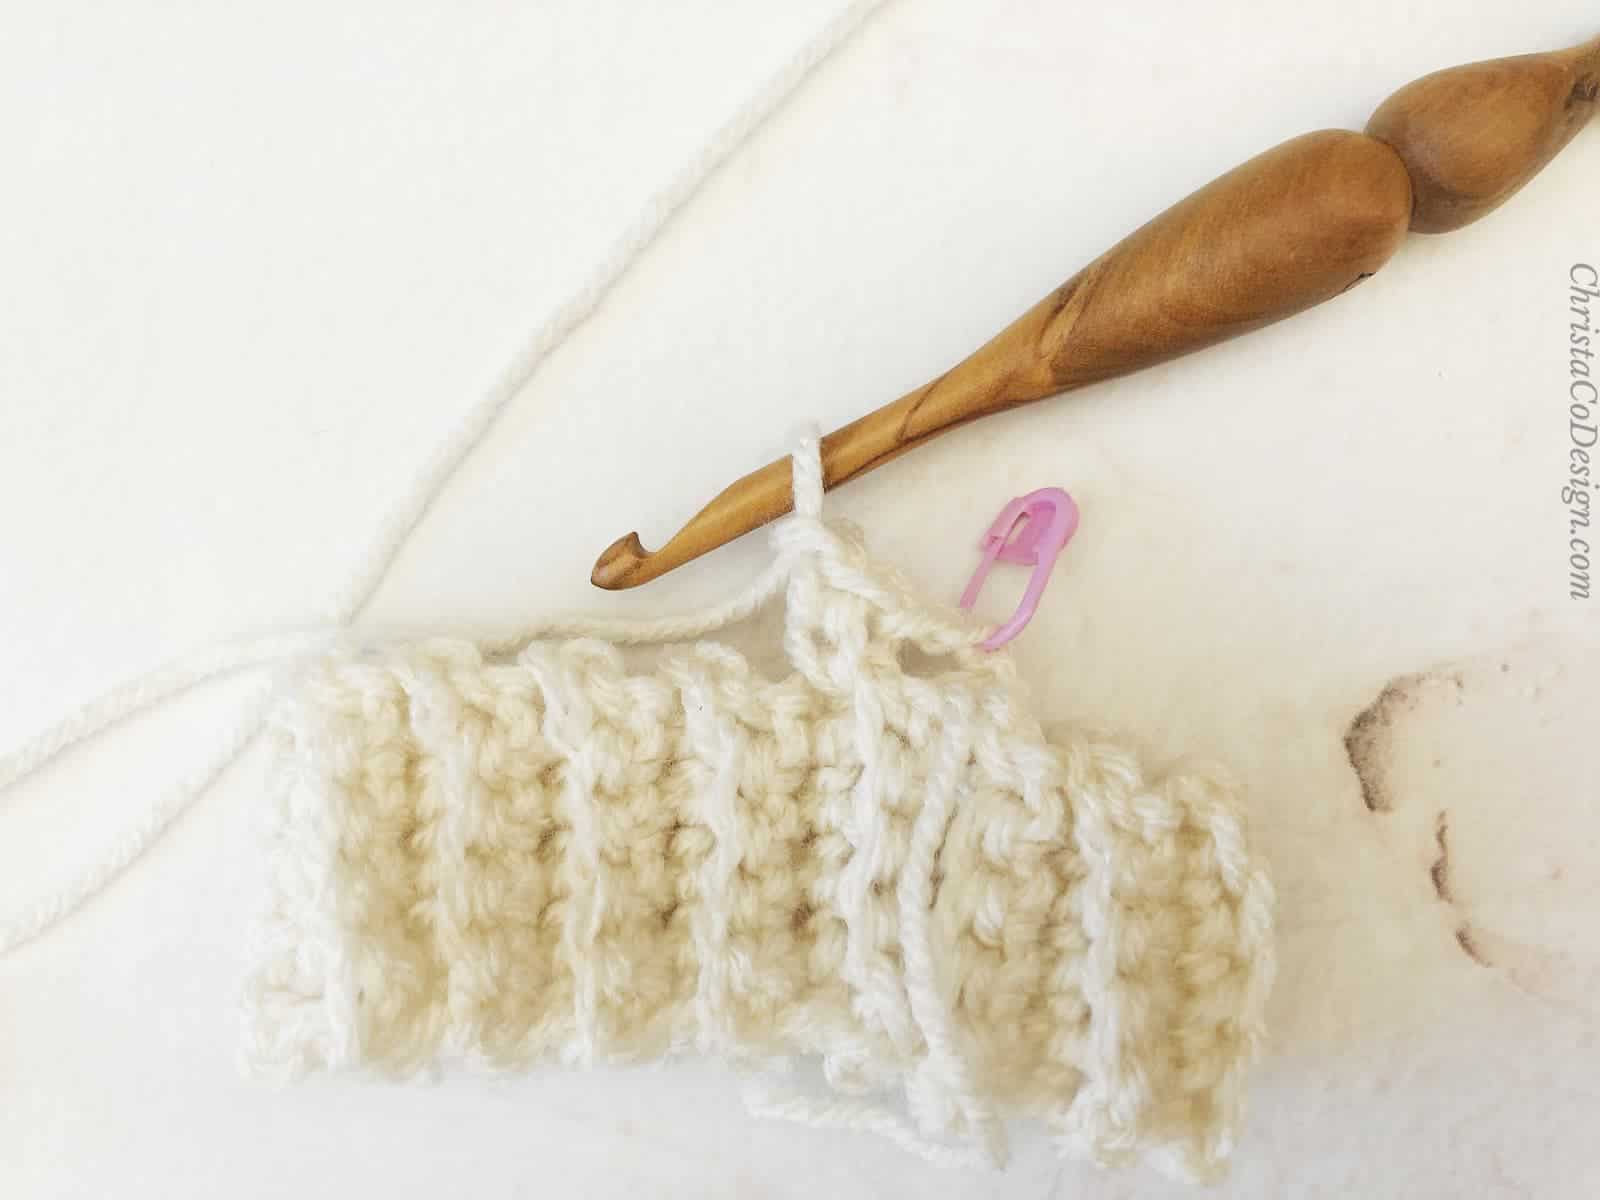
- Rnd 1. Ch 3,
 *{sk next row, exsc in next row, ch 1}
  rep from * join to 2nd ch of ch 3,
 turn. (32, 32, 32, 36, 40, 40, 40, 40 sts)
 - Rnd 2. Ch 3, place 1 exsc + ch 1 in next ch sp,
 *{in next exsc place 1 exsc, ch 1, sk next ch 1}
  rep * around, join to 2nd ch and turn. +2 (34, 34, 34, 38, 42, 42, 42, 42 sts)
 - Rnd 3. Ch 3, *{sk next ch sp, exsc in next exsc, ch 1} rep * around, join to 2nd ch and turn.
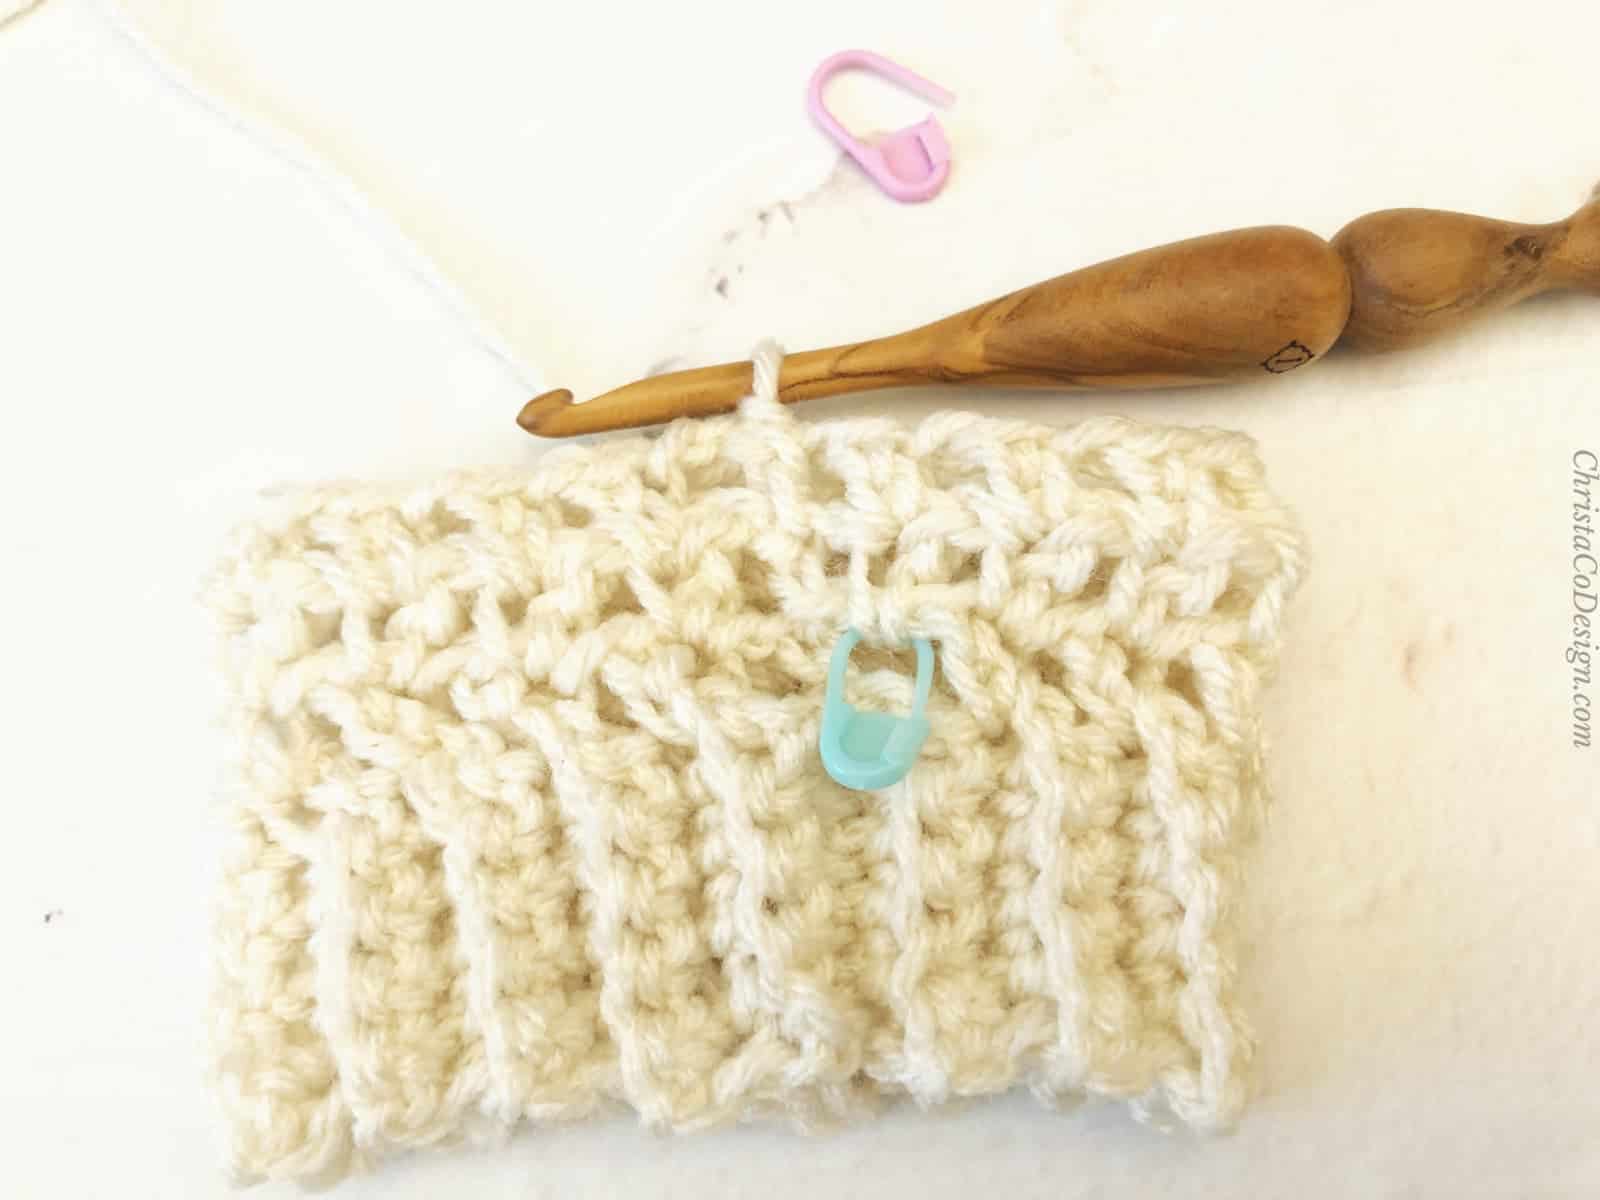
 Our increase from round 2 is marked with a blue stitch marker here.
 - Rnd 4. Ch 3, *{sk next ch sp, exsc in next exsc, ch 1} rep * until 1 ch sp left,
 place 1 exsc + ch 1 in last ch sp, join to 2nd ch (marked with stitch marker here) and turn. +2 (36, 36, 36, 40, 44, 44, 44, 44 sts)
- Rnd 5. Rep Rnd 3.
- Rnd 6. Rep Rnd 3.
- Rep Rnds 2-6. until you have 50 (52, 56, 58, 60, 64, 68, 70) sts or sleeve width measures 7” (7.4”, 8”, 8.3”, 8.6”, 9”, 9.7”, 10”) wide flat. Adjust sleeve width here for your best fit.
- Continue to rep Rnd 3 until you have 42 (44, 46, 48, 50, 52, 54, 56) rnds, or sleeve length measures 18” (19”, 19.7”, 20.5”, 21.3”, 22”, 23”, 23.7”) long total including ribbing. Adjust sleeve length here for your best fit, remember sleeves tend to loosen and lengthen over time (and with washing).
- Cut yarn, leave long tail for seaming.

Sewing your pieces together:
- Sew as indicated using a yarn needle and length of yarn. You may use either the whip stitch or mattress stitch.

- Lay panels on top of one another inside out, so front panels are on top of the back panel, and RS are touching.
- Sew shoulders together.
- Sew sides together. Start at the bottom and sew up, leave an opening of 7” (7.4”, 8”, 8.3”, 8.6”, 9”, 9.7”, 10”) at the top of the panels for the armholes. This is where you will attach the sleeves.
To attach sleeves to your sweater:
- With cardigan body still inside out (WS) and sleeve RS out, slide armhole end of sleeve into the cardigan.

- Make sure the seam is on the bottom (where your elbow will be). Line up the armhole end of sleeve with the armhole opening.
- Sew sleeve to armhole with mattress stitch. If needed, seam side of armhole close. Rep for both sleeves.
- Cut yarn. Weave in ends.
Front edge/collar:
- With cardigan laid flat, RS up facing you, position yourself at the bottom end of the cardigan and attach yarn with sl st at the bottom of the front panel on your left.

- Row 1. Ch 1, hdc evenly up the front panel, around the neck and back down the opposite front panel, turn.
- Looking at the back of your hdc stitches from row 1, there is a distinct horizontal line that runs across the stitch. This is considered the 3rd loop and where we’ll be inserting the hook for the rest of the rows. See pictures below. See 3rd Loop Tutorial for more help on this step.
- Row 2. Ch 1, hdc in 1st, hdc in 3rd loop of each hdc around, hdc in last, turn.

- Repeat row 2 for 3 more rows.
- Cut yarn and weave in ends.
Recommended Products
As an Amazon Associate and member of other affiliate programs, I earn from qualifying purchases.
Copyright © 2021 ChristaCoDesign/Crystal Marin. This pattern is for personal use only. Please feel free to sell and/or gift items you personally make from this pattern. You may not distribute this pattern and/or photos in any form, including screenshots, email, photocopying, or posting photos of this pattern online, or elsewhere. Please use this link https://christacodesign.com/2021/04/08/hygge-cardigan-womens-crochet-cardigan-pattern/ if you would like to share this pattern.


 *{sk next row, exsc in next row, ch 1}
  rep from * join to 2nd ch of ch 3,
 turn. (32, 32, 32, 36, 40, 40, 40, 40 sts)
 *{in next exsc place 1 exsc, ch 1, sk next ch 1}
  rep * around, join to 2nd ch and turn. +2 (34, 34, 34, 38, 42, 42, 42, 42 sts)
 Our increase from round 2 is marked with a blue stitch marker here.
 place 1 exsc + ch 1 in last ch sp, join to 2nd ch (marked with stitch marker here) and turn. +2 (36, 36, 36, 40, 44, 44, 44, 44 sts)


