
Free Crochet Hat Pattern for Children the Bravo Beanie
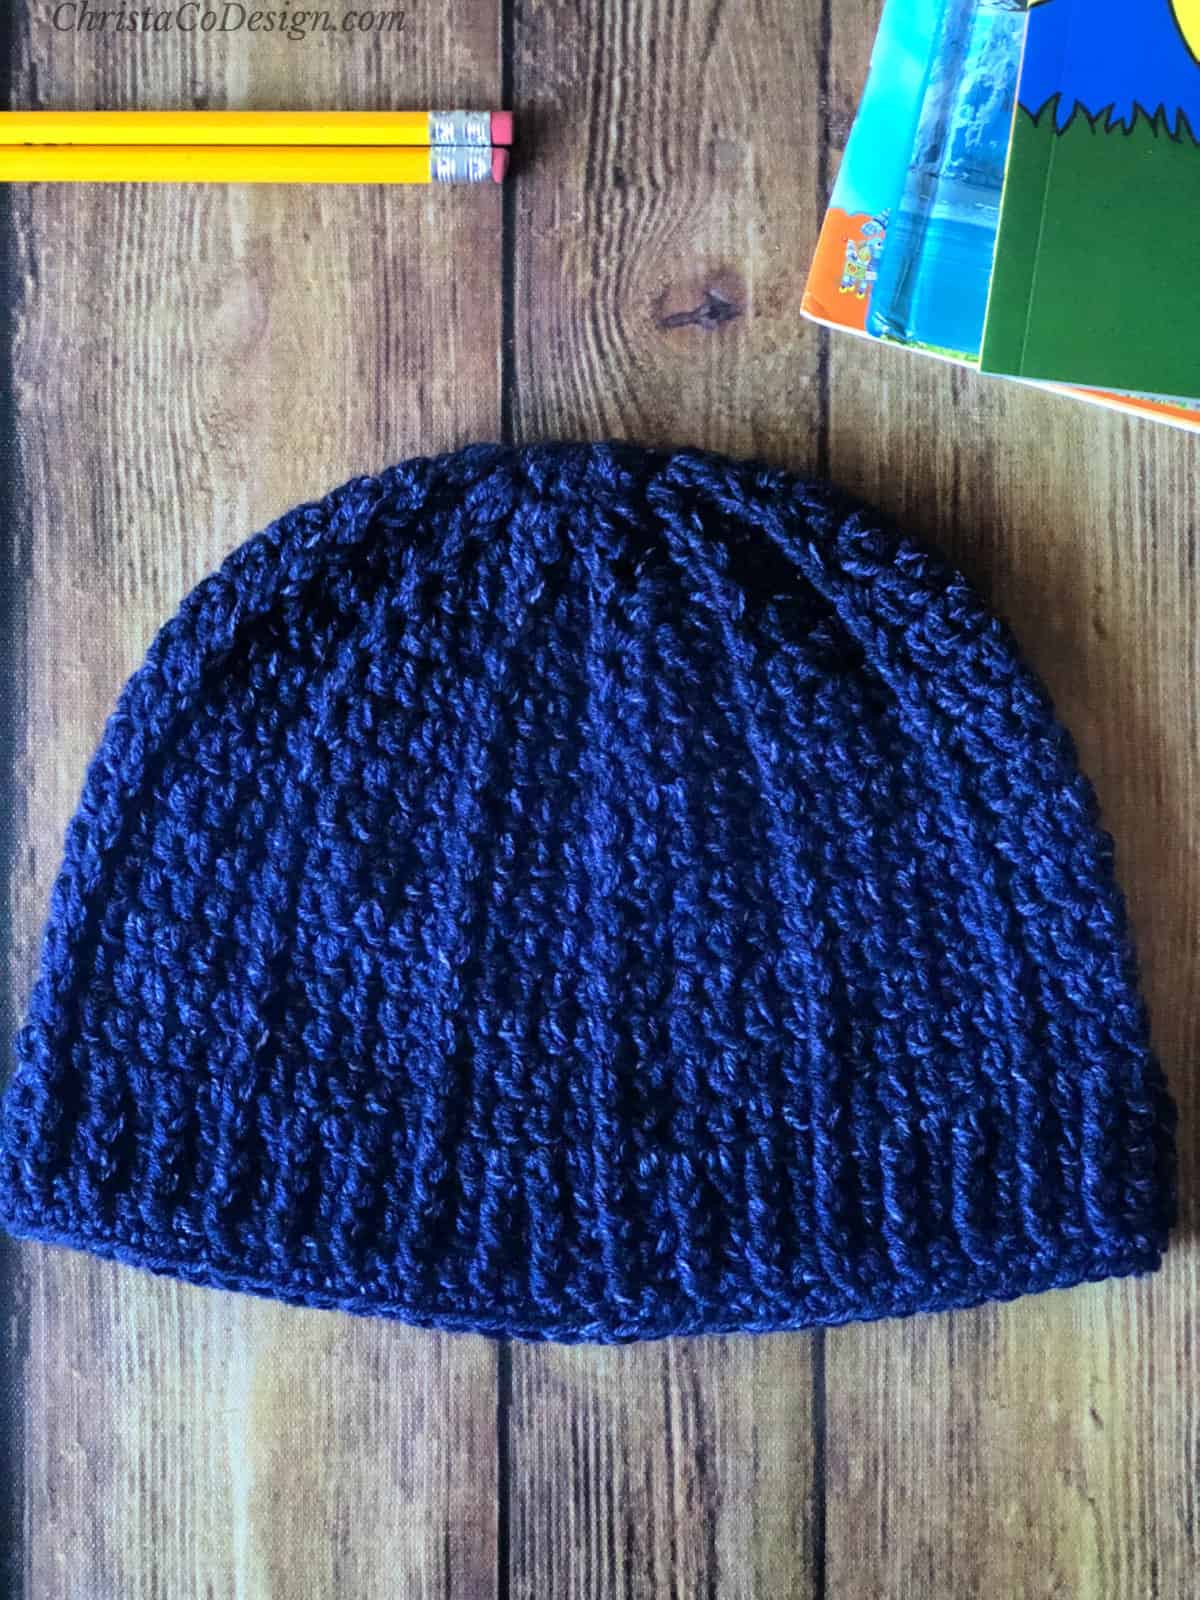
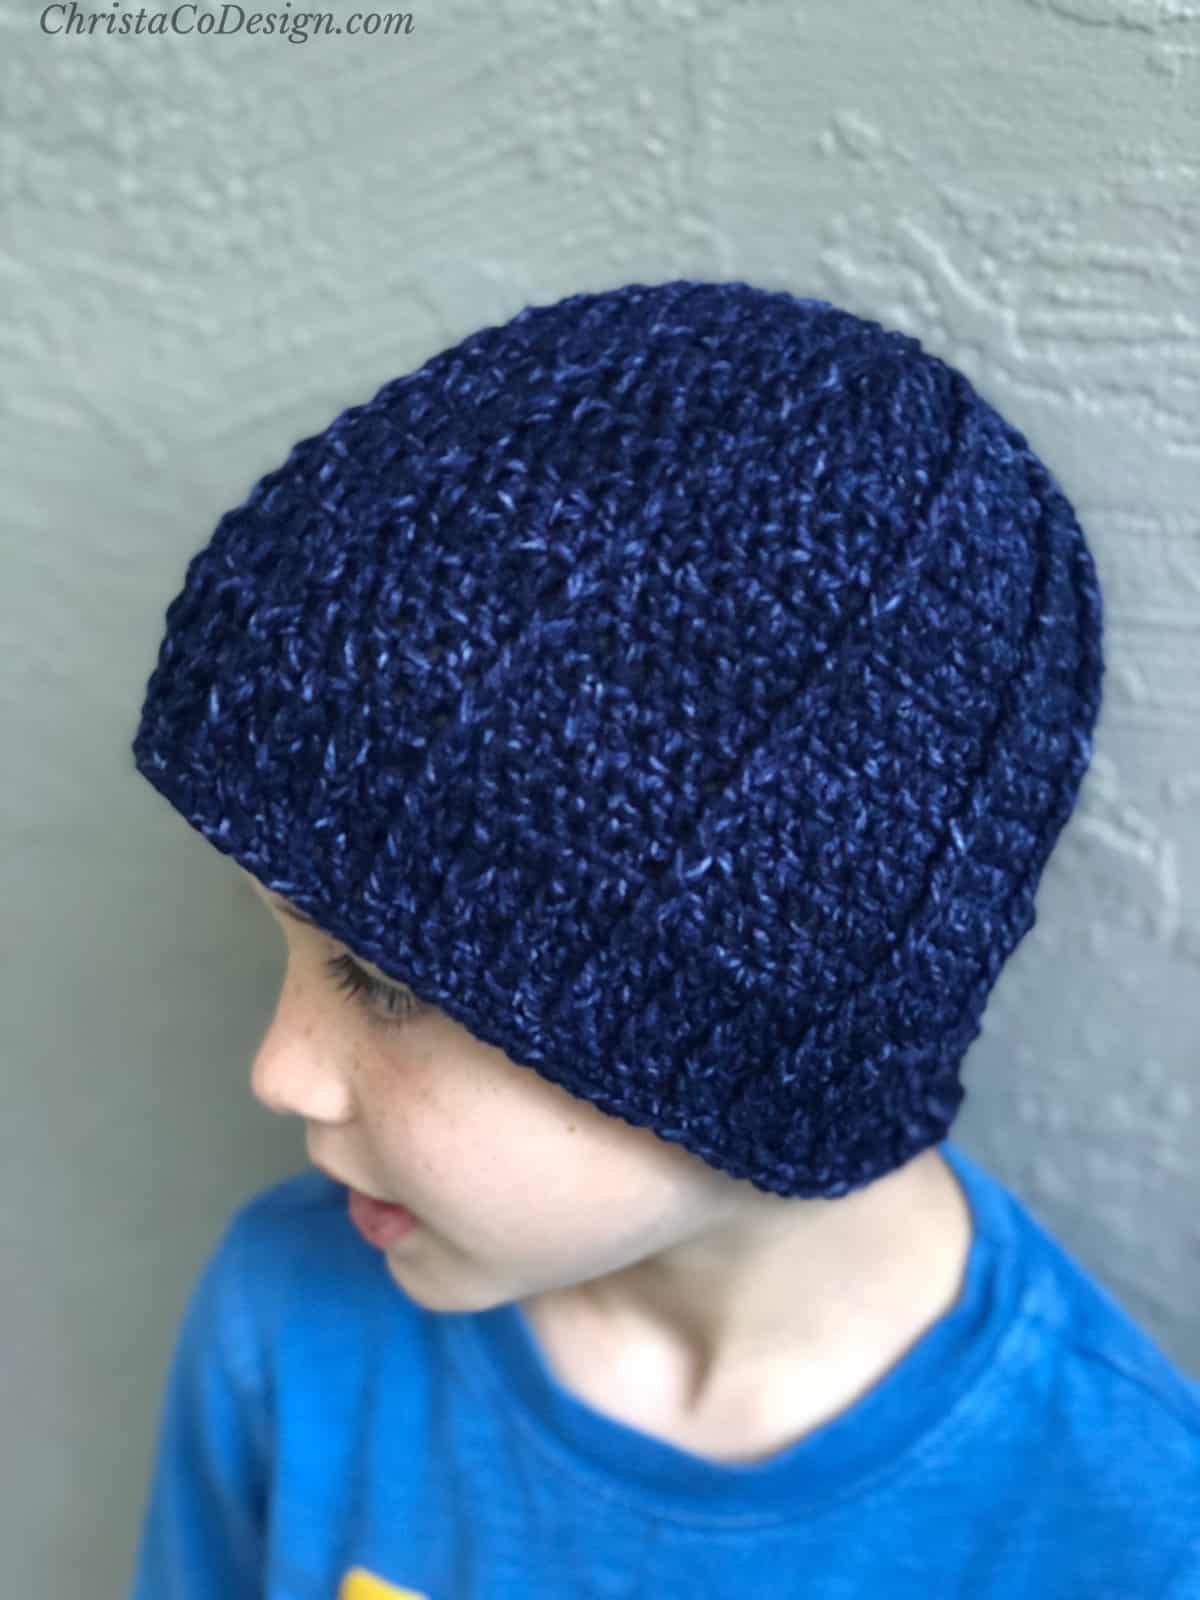
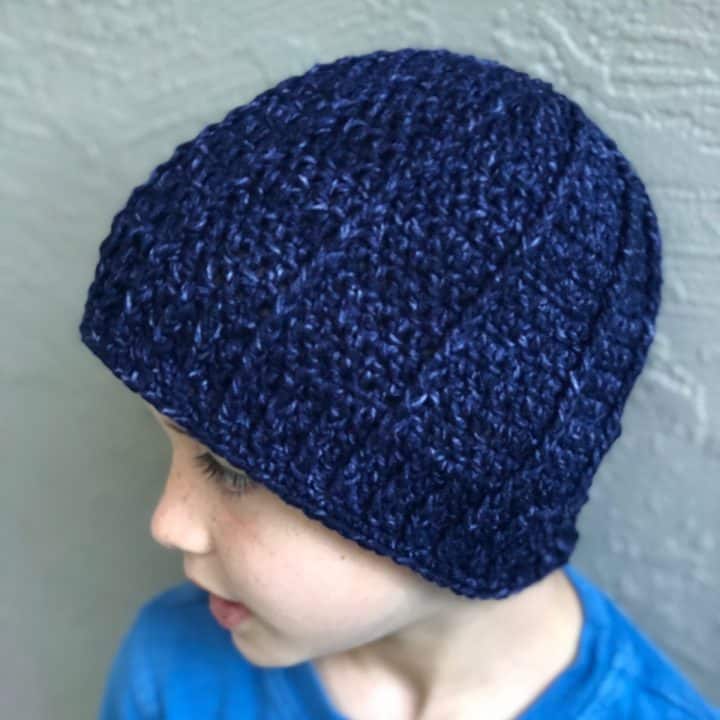
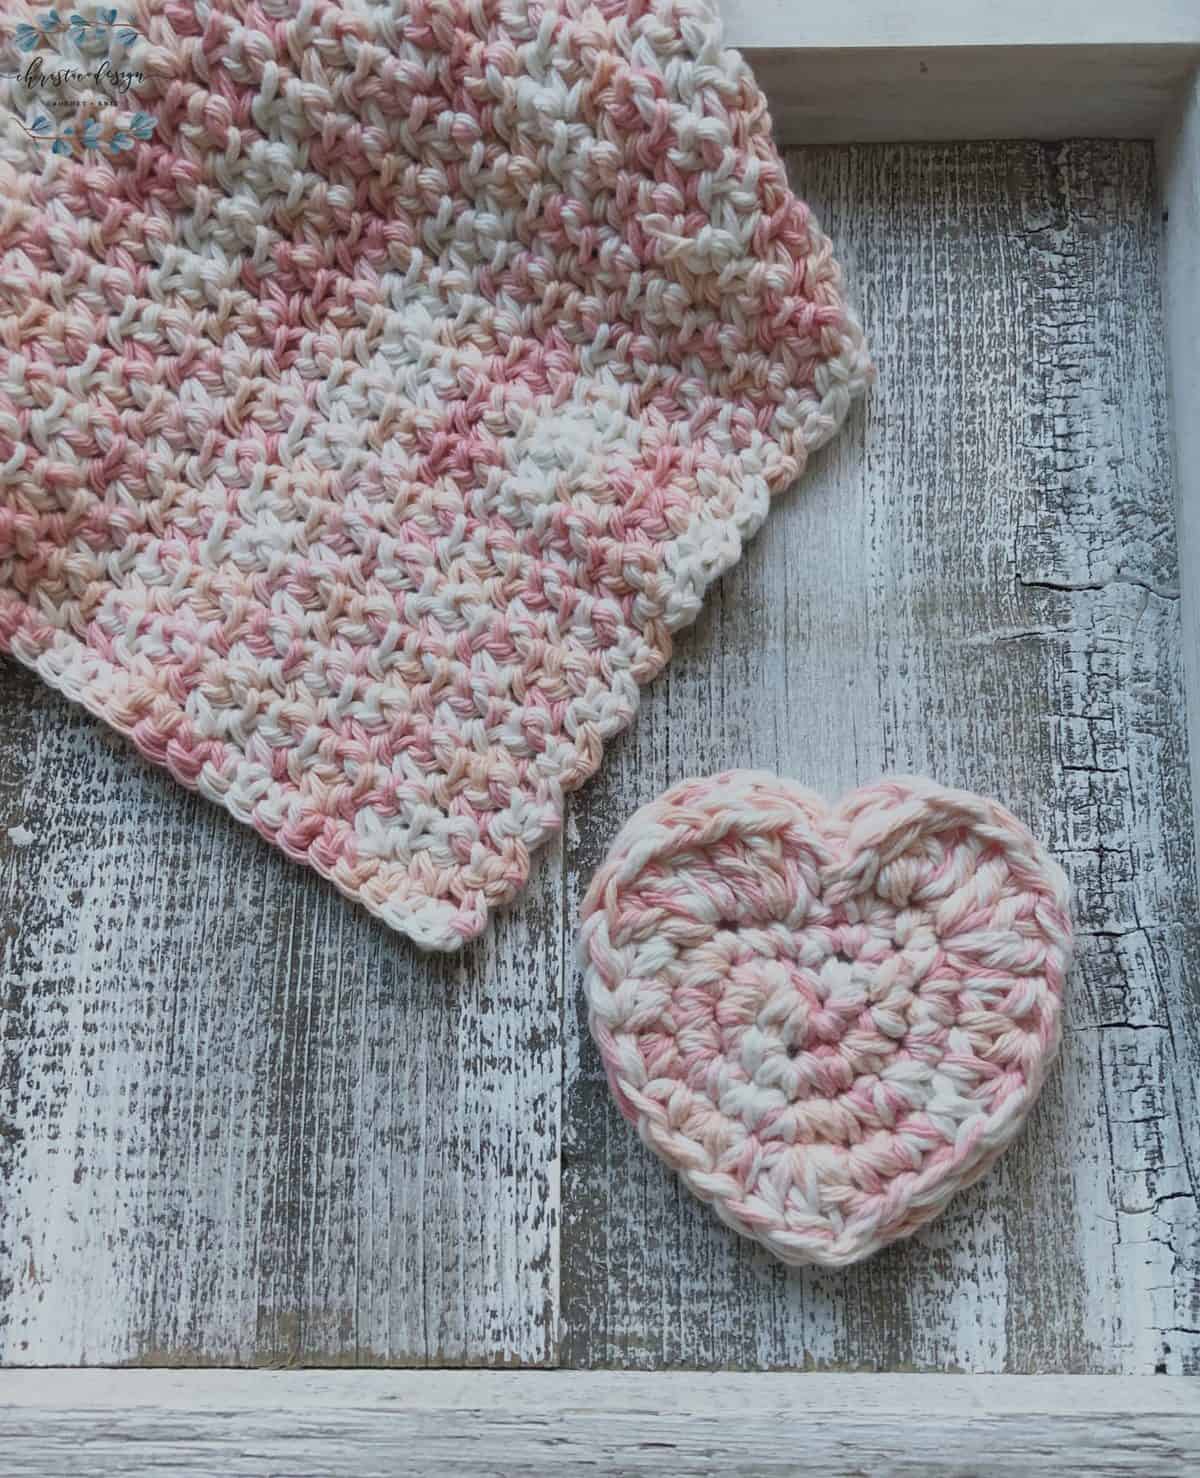
The Bravo Beanie is a free crochet hat pattern in children’s, teen size and adult sizes. This is a simple beanie pattern with textured columns that works up quickly in worsted weight yarn.

This post contains affiliate links, I may earn a fee. Read more disclosure policy.
Join the ChristaCoDesign Newsletter
Never miss a pattern!
The Bravo features double crochet stitches and evenly spaced ribbed stitches made with front post double crochets.
To really finish this one off with a flourish add a faux fur or handmade yarn pom pom to the top of this crochet hat. Or if you like, keep it simple and let the post stitches pop.
Purchase the ad-free, well formatted printable PDF Pattern from my shop. Scroll down for the free pattern!
Purchase My Ad-Free PDF Patterns In Your Favorite Shop Here:

The Bravo Beanie makes a great gift for children, teens or adults! Especially as kids head back to school and fall settles in, it’s nice to have a warm hat to wear.
Sometimes I find the the little boys wear a simple hat over a fancy one! So I like to use an easy crochet hat pattern when I’m making children’s beanies.
While this double crochet hat pattern is easy to crochet since most are simple stitches. It’s marked intermediate for the post stitches. But a beginner can totally do this hat, once you learn those. I link up the video tutorial for the front post stitch below.
Handy tip: Stitch Markers!
Tip for new crocheters working in the round. Mark the first stitch of the round with a stitch marker to help you keep track. Keep moving it up to the first stitch of each round.
Save your favs!
Add this pattern to your Ravelry queue.
Our Favorite
Free Crochet Hat Patterns
Materials
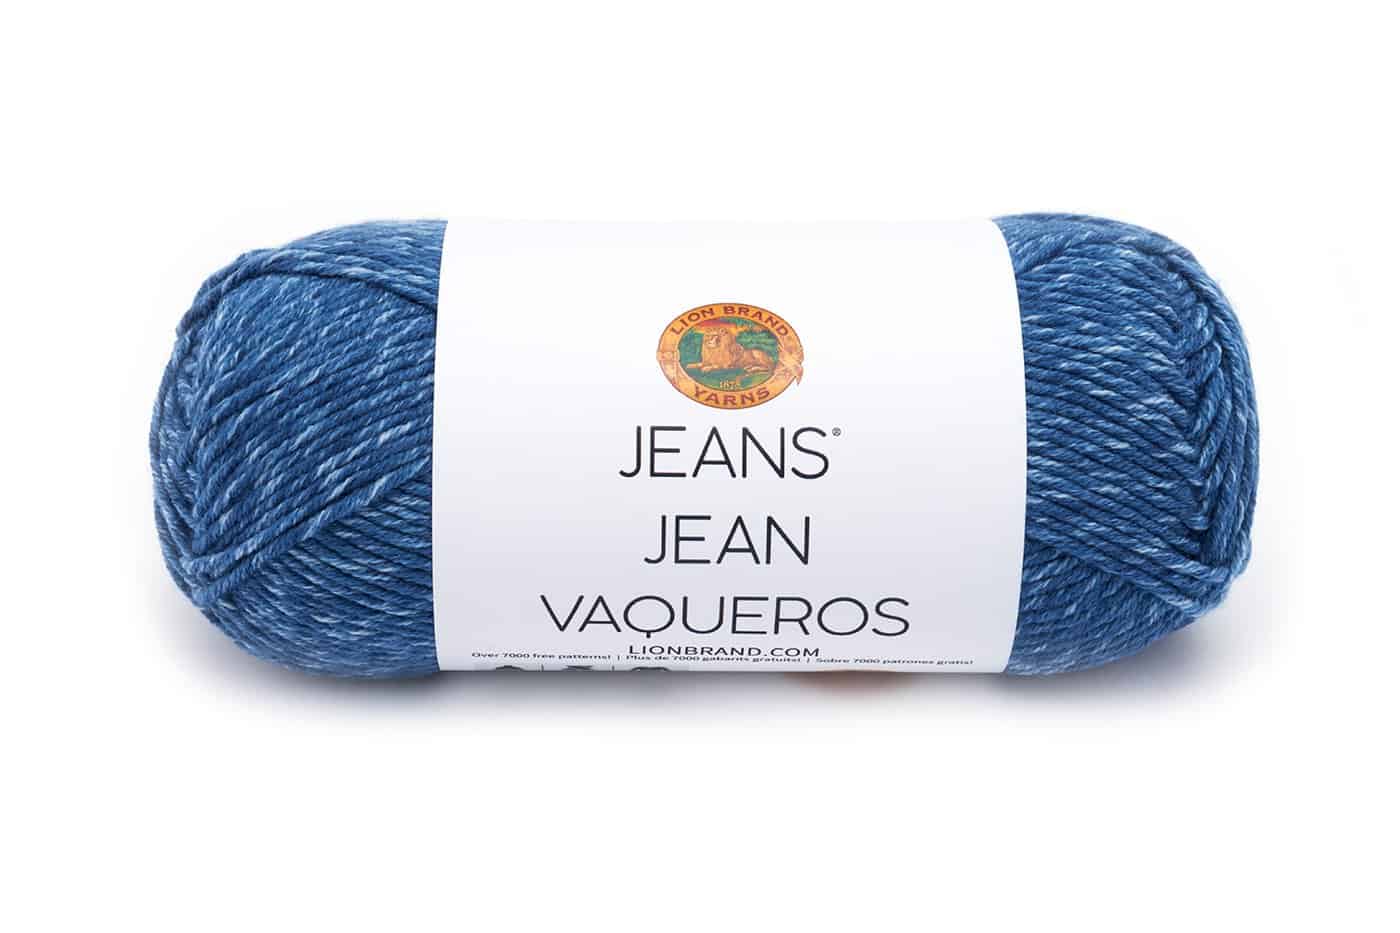
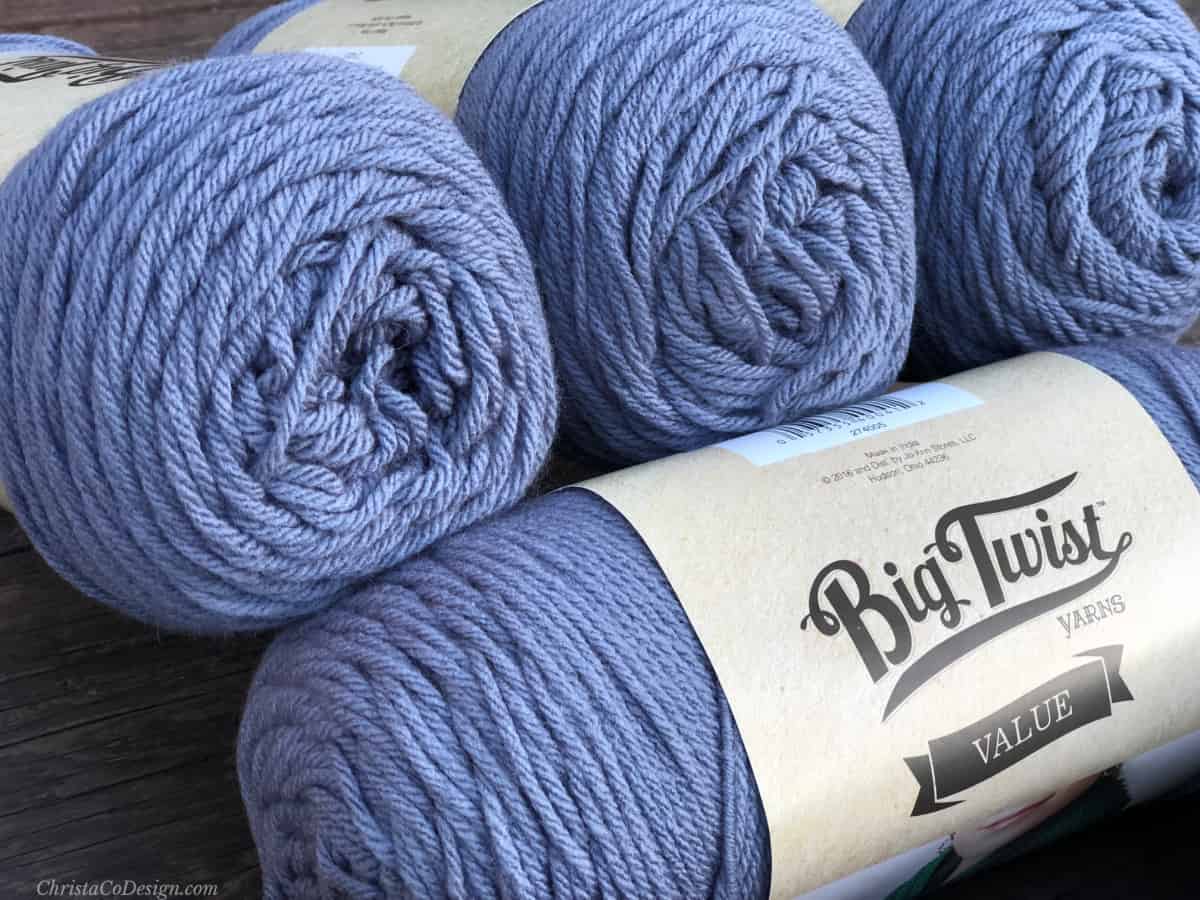
- 130 – 170 yds of #4 med worsted weight yarn. Pictured in Lion Brand Yarns, Jeans* (100% acrylic, 3.5 oz / 246 yd), color: new. See estimated yarn amounts by size below.
- 5.5 mm US I-9 crochet hook,* or hook size needed to meet gauge
- yarn needle, scissors, measuring tape
- optional pom pom
Yarn By Size
- Baby 0 – 3 mos ~ 130 yd
- Baby 3 – 6 mos ~ 136 yd
- Baby 6 – 12 mos ~ 142 yds
- Toddler ~ 150 yd
- Preschool ~ 155 yd
- Child ~ 158 yd
- Teen/Sm Adult ~ 166 yd
- M/L Adult ~ 170 yd
Stitches / Abbreviations
US Terms
ch – chain
dc – double crochet
FPdc – front post double crochet
inv join – invisible join
mc – magic circle (magic ring)
rnd – round
sc – single crochet
sl st – slip stitch
Gauge
2″/ 5 cm x 2″ / 5 cm= 7 dc x 5 rounds
Notes
- This hat is worked top down, in rounds.
- Ch 3 counts as a st, I use a ch 3 alternative to start my dc rounds.
- You will always fpdc around the previous round’s fpdc. The increase (2 dc in the same st) will always be after the fpdc.
- The last st of each round is a fpdc.
- The Brim section is a ribbing and does not line up with the fpdc at all times, although it does work out for some sizes.
Skill Level
Intermediate – Advanced Beginner can easily work up this stitch pattern. If working in the round and post stitches are new for you be sure to check the “Stitches” section for tutorials.
Download the Hat Sizing Chart
Get this handy dandy chart so you can crochet perfectly fitting hats!
Scroll down for the free crochet pattern!
Pattern Instructions
Children's Crochet Hat Pattern Bravo Beanie
The Bravo Beanie is a free children's crochet hat pattern, including all sizes from baby hats to adult hats.
Materials
- 150 – 170 yds of #4 med worsted weight yarn.
- Optionally a pom pom is a great way to finish this crochet project.
Tools
- 5.5 mm hook (US I-9) or crochet hook size needed to meet gauge
- tapestry needle
- scissors
Instructions
Baby 0 – 3mos Hat
Rnd 1. 12 dc into mc, sl st to join.
Rnd 2. Ch 3, dc in same st, 2 dc in each st around, sl st to join. [24 sts]
Rnd 3. Ch 3, dc in the same, FPdc in next, *2 dc in next dc, FPdc in next dc; rep from * around, join to first st with a sl st. [36st-24 dc & 12 FPdc] ~3.75” circle
Rnds 4 – 8. Ch 3, dc in each dc and FPdc in each FPdc around, join to top of ch 3 with a sl st.
Brim
Rnds 9 – 10. Ch 3, FPdc in next st, *dc in next st, FPdc in next st; rep from * around, join to top of ch 3 with a sl st.
Rnd 11. Ch 1, sc in the same st and in each st around, join to top first sc with a sl st. Finish off with an inv join. [36 sc]
Cut yarn and weave in ends.
Finished hat measures ~5.5” tall when laid flat.
Baby 3 – 6mos Hat
Rnd 1. 12 dc into mc, sl st to join.
Rnd 2. Ch 3, dc in same st, 2 dc in each st around, sl st to join. [24 sts]
Rnd 3. Ch 3, dc in the same, FPdc in next, *{2 dc in next dc, FPdc in next dc} rep from * around, join to top of ch 3 with a sl st. [36st-24 dc & 12 FPdc]
Rnd 4. Ch 3, dc in the same, dc in next dc, FPdc in next FPdc, *2 dc in next dc, dc in next, FPdc in next FPdc; rep from * around, join to top of ch 3 with a sl st. [48 st-36 dc & 12 FPdc] 4.75”-5” circle
Rnd 5. Ch 3, dc in each dc and FPdc in each FPdc around, join to top of ch 3 with a sl st.
Rnds 6 – 10. Rep Rnd 5.
Brim
Rnds 11 – 12. Ch 3, FPdc in next st, *dc in next st, FPdc in next st; rep from * around, join to top of ch 3 with a sl st.
Rnd 13. Ch 1, sc in the same st and in each st around, join to top first sc with a sl st. Finish off with an inv join. [48 sc]
Cut yarn and weave in ends.
Finished hat measures ~6” tall when laid flat.
Baby 6 – 12mos
Rnd 1. 12 dc into mc, sl st to join.
Rnd 2. Ch 3, dc in same st, 2 dc in each st around, sl st to join. [24 sts]
Rnd 3. Ch 3, dc in the same, FPdc in next, *2 dc in next dc, FPdc in next dc; rep from * around, join to top of ch 3 with a sl st. [36st-24 dc & 12 FPdc]
Rnd 4. Ch 3, dc in the same, dc in next dc, FPdc in next FPdc, *2 dc in next dc, dc in next, FPdc in next FPdc; rep from * around, join to top of ch 3 with a sl st. [48 st-36 dc & 12 FPdc] 4.75”-5” circle
Rnds 5 – 11. Ch 3, dc in each dc and FPdc in each FPdc around, join to top of ch 3 with a sl st.
Brim
Rnds 12 – 13. Ch 3, FPdc in next st, *dc in next st, FPdc in next st rep from * around, join to top of ch 3 with a sl st.
Rnd 14. Ch 1, sc in the same st and in each st around, join to top first sc with a sl st. Finish off with an inv join. [48 sc]
Cut yarn and weave in ends.
Finished hat measures ~ 6.75” tall when laid flat.
Toddler Size 12 mos – 24 mos
Begin with a mc.
Rnd 1. 12 dc into mc, sl st to join.
Rnd 2. Ch 3, dc in same st, 2 dc in each st around, sl st to join. [24 sts]
Rnd 3. Ch 3, dc in the same, FPdc in next, *2 dc in next dc, FPdc in next dc; rep from * around, join to top of ch 3 with a sl st. [36st-24 dc & 12 FPdc]
Rnd 4. Ch 3, dc in the same, dc in next dc, FPdc in next FPdc, *2 dc in next dc, dc in next, FPdc in next FPdc; rep from * around, join to top of ch 3 with a sl st. [48 st-36 dc & 12 FPdc] 4.75”-5” circle
Rnds 5 – 12. Ch 3, dc in each dc and FPdc in each FPdc around, join to top of ch 3 with a sl st. [48 st-36 dc & 12 FPdc]
Brim
Rnds 13 – 14. Ch 3, FPdc in next st, *dc in next st, FPdc in next st rep from * around, join to top of ch 3 with a sl st.
Rnd 15. Ch 1, sc in the same st and in each st around, join to top first sc with a sl st. Finish off with an inv join. [48 sc]
Pull up a long tail and cut yarn.
Weave in ends.
Finished hat measures ~7” tall when laid flat.
Preschool Size Hat Pattern, 2 – 3 years old
Begin with a mc.
Rnd 1. 12 dc into mc, sl st to join.
Rnd 2. Ch 3, dc in same st, 2 dc in each st around, sl st to join. [24 sts]
Rnd 3. Ch 3, dc in the same, FPdc in next, *2 dc in next dc, FPdc in next dc rep from * around, join to top of ch 3 with a sl st. [36st = 24 dc & 12 FPdc]
Rnd 4. Ch 3, dc in the same, dc in next dc, FPdc in next FPdc, *2 dc in next dc, dc in next, FPdc in next FPdc; rep from * around, join to top of ch 3 with a sl st. [48 st = 36 dc & 12 FPdc] 4.75”-5” circle
Rnds 5 – 12. Ch 3, dc in each dc and FPdc in each FPdc around, join to top of ch 3 with a sl st. [48 st = 36 dc & 12 FPdc]
Brim
Rnds 13 – 15. Ch 3, FPdc in next st, *dc in next st, FPdc in next st; rep from * around, join to top of ch 3 with a sl st.
Rnd 16. Ch 1, sc in the same st and in each st around, join to top first sc with a sl st. Finish off with an inv join. [48 sc]
Cut yarn and weave in ends.
Finished hat measures 7.5″ tall when laid flat.
Child Size Pattern, 4 – 11 years
Begin with a mc.
Rnd 1. 12 dc in Mc, join to top of first st with a sl st. [12 sts]
Rnd 2. Ch 3, dc in the same, 2 dc in next st and in each st around, join to top of first st with a sl st. [24 sts]
Rnd 3. Ch 3, dc in the same, FPdc in next, *2 dc in next dc, FPdc in next dc; rep from * around, join to top of ch 3 with a sl st. [36st-24 dc & 12 FPdc]
Rnd 4. Ch 3, dc in the same, dc in next dc, FPdc in next FPdc, *2 dc in next dc, dc in next, FPdc in next FPdc; rep from * around, join to top of ch 3 with a sl st. [48 st-36 dc & 12 FPdc]
Rnd 5. Ch 3, dc in the same, dc in each of the next two dc, FPdc in next FPdc, *2 dc in next dc, dc in each of the next two dc, FPdc in next FPdc; rep from * around, join to top of ch 3 with a sl st. [60 st-48 dc & 12 FPdc]
Rnd 6. Ch 3, dc in the same, dc in each of the next three dc, FPdc in next FPdc, *2 dc in next dc, dc in each of the next three dc, FPdc in next FPdc; rep from * around, join to top of ch 3 with a sl st. [72 st-60 dc & 12 FPdc]
Rnds 7 – 15. Ch 3, dc in each dc and FPdc in each FPdc around, join to top of ch 3 with a sl st. [72 st-60 dc & 12 FPdc]
Brim
Rnds 16 – 18. Ch 3, FPdc in next st, *dc in next st, FPdc in next st; rep from * around, join to top of ch 3 with a sl st. [72st-36 dc & 36 FPdc]
Rnd 19. Ch 1, sc in the same st and in each st around, join to top first sc with a sl st. Finish off with an inv join. [72 sc]
Cut yarn and weave in ends.
Finished hat measures 7.5" tall when laid flat.
Teen/Small Adult Size, 12+
Begin with a mc.
Rnd 1. 12 dc in Mc, join to top of first st with a sl st. [12 sts]
Rnd 2. Ch 3, dc in the same, 2 dc in next st and in each st around, join to top of first st with a sl st. [24 sts]
Rnd 3. Ch 3, dc in the same, FPdc in next, *2 dc in next dc, FPdc in next dc; rep from * around, join to top of ch 3 with a sl st. [36st-24 dc & 12 FPdc]
Rnd 4. Ch 3, dc in the same, dc in next dc, FPdc in next FPdc, *2 dc in next dc, dc in next, FPdc in next FPdc; rep from * around, join to top of ch 3 with a sl st. [48 st-36 dc & 12 FPdc]
Rnd 5. Ch 3, dc in the same, dc in each of the next two dc, FPdc in next FPdc, *2 dc in next dc, dc in each of the next two dc, FPdc in next FPdc; rep from * around, join to top of ch 3 with a sl st. [60 st-48 dc & 12 FPdc]
Rnd 6. Ch 3, dc in the same, dc in each of the next three dc, FPdc in next FPdc, *2 dc in next dc, dc in each of the next three dc, FPdc in next FPdc rep from * around, join to top of ch 3 with a sl st. [72 st-60 dc & 12 FPdc]
Rnds 7 – 17. Ch 3, dc in each dc and FPdc in each FPdc around, join to top of ch 3 with a sl st. [72 st-60 dc & 12 FPdc]
Brim
Rnds 18 – 20. Ch 3, FPdc in next st, *dc in next st, FPdc in next st; rep from * around, join to top of ch 3 with a sl st. [72 st-60 dc & 12 FPdc]
Rnd 21. Ch 1, sc in the same st and in each st around, join to top first sc with a sl st. Finish off with an inv join. [72 sc]
Cut yarn and weave in ends.
Finished hat measures 8" tall when laid flat.
Med / Large Adult Sizes
Begin with a mc.
Rnd 1. Place 12 dc in Mc, join to top of first st with a sl st. [12 sts]
Rnd 2. Ch 3, dc in the same, 2 dc in next st and in each st around, join to top of first st with a sl st. [24 sts]
Rnd 3. Ch 3, dc in the same, FPdc in next, *2 dc in next dc, FPdc in next dc; rep from * around, join to top of ch 3 with a sl st. [36st = 24 dc & 12 FPdc]
Rnd 4. Ch 3, dc in the same, dc in next dc, FPdc in next FPdc, *2 dc in next dc, dc in next, FPdc in next FPdc; rep from * around, join to top of ch 3 with a sl st. [48 st = 36 dc & 12 FPdc)]
Rnd 5. Ch 3, dc in the same, dc in each of the next two dc, FPdc in next FPdc, *2 dc in next dc, dc in each of the next two dc, FPdc in next FPdc; rep from * around, join to top of ch 3 with a sl st. [60 st = 48 dc & 12 FPdc)]
Rnd 6. Ch 3, dc in the same, dc in each of the next three dc, FPdc in next FPdc, *2 dc in next dc, dc in each of the next three dc, FPdc in next FPdc; rep from * around, join to top of ch 3 with a sl st. [72 st = 60 dc & 12 FPdc]
Rnd 7. Ch 3, dc in the same, dc in each of the next four dc, FPdc in next FPdc, *2 dc in next dc, dc in each of the next four dc, FPdc in next FPdc; rep from * around, join to top of ch 3 with a sl st. [84 st = 72 dc & 12 FPdc]
Rnds 8 – 17. Ch 3, dc in each dc and FPdc in each FPdc around, join to top of ch 3 with a sl st. [84 st = 72 dc & 12 FPdc]
Brim
Rnds 18 – 20. Ch 3, FPdc in next st, *[dc in next st, FPdc in next st; rep from * around, join to top of ch 3 with a sl st. [84 st = 72 dc & 12 FPdc]
To make a stretchier last row, you can work in the back loop.
Rnd 21. Ch 1, sc in the same st and in each st around, join to top first sc with a sl st. Finish off with an inv join. [84 sc]
Cut yarn and weave in ends. Finished hat measures 8.5″ tall when laid flat.
Recommended Products
As an Amazon Associate and member of other affiliate programs, I earn from qualifying purchases.


love this beanie! Stamp out bullies, love that!
How cute is this! (Love the color too.) What a fantastic cause.
Beautiful hat. I made 3 hats for this
Thank you for this beanie pattern. I enjoyed making it and I sent it in for # hat not hate.
I’m so glad to hear it! You’re quite welcome!
Thank you! I’m so glad to hear it! It sounds like a lot of people participated!
Thank you!
Thank you, yes a great cause!
I’ve started this hat over and over, it just keeps getting flatter and flatter like a saucer????
Hi Robin,
I’m sorry you’re having trouble. Thanks for reaching out, I’ll try to help. The way a top down hat works up is just as you describe. It’s starts off growing as a large, flat circle by increasing stitches. Then once the crown size is met, you stop increasing stitches and the flat circle will begin to curve in like a bowl. Sometimes it takes a couple of non increase rounds for the curving effect to happen.
The increases (2 dc in one stitch) happen for the first 6 rounds on this pattern, so your work should stay a flat circle through these rounds at least. Then you’ll just be working 1 stitch in each stitch. So after round 6 it should start to curve into a bowl shape. Like I said, sometimes it takes a round or two for the bowl to happen. If you are through rnd 8 and it’s still not bowling, let me know and we can trouble shoot. Sometimes with the post stitches we can accidentally increase in the same stitch.
I hope this helps, let me know if you still have questions!
Crystal
I would love to make this hat for my grandson, but his only 2. Do you by any chance have this pattern in a small size.
Sure thing Vanessa, I added a preschool size for ages 2 – 3 years old.
I am working on your beanie. Row 12 (48 stitches) Row 13 – 15 (48 stitches) Row 16 sc each stitch (72 stitches) ??? Not sure what I am doing wrong. Thanking in advance.
Hi Carol,
Thanks for asking, it sound like you’re making the Preschool Size and there was a typo in the stitch count in Row 16. It should be 48 sts, not 72. I’ve corrected it now. Sorry about that, thanks again for asking so I could fix it! I hope this helps.
Thanks,
Crystal
Where is Row 5 on the Toddler 12 mo to 24mo size?
Hi Nancy, thanks for reaching out with your question. It should be included in the repeat, as Rnds 5 – 12. Ch 3, dc in each dc and FPdc in each FPdc around, join to top of ch 3 with a sl st. (48 st-36 dc & 12 FPdc) Sorry for the typo, I’ve updated it.
On your med/adult size, on rows 18 – 20 you say to DC then FPDC , that is fine but there is an odd number of DC between the FPDC. There is no way to make it come out right unless you start with a chain 3, 1DC, 1FPDC, 2DC, 1 FPDC, 1DC.
My bad, my previous count is off, however you still cannot make it come out right without working 1DC, 1FPDC, 2DC, 1FPDC, 1DC, 1FPDCThanks for the pattern.
Hi Adrienne, yes you are right, the brim is ribbing with alternating front post and dcs so the post stitches don’t line up with the hat body for every one (some sizes do). It sounds like you figured out a way to line them up, that’s great.
Thank you SO MUCH for these patterns. I’ve been searching for ages for a child’s sized beanie and here you have all the sizes ever needed. Thank you. Going to start today 🤗