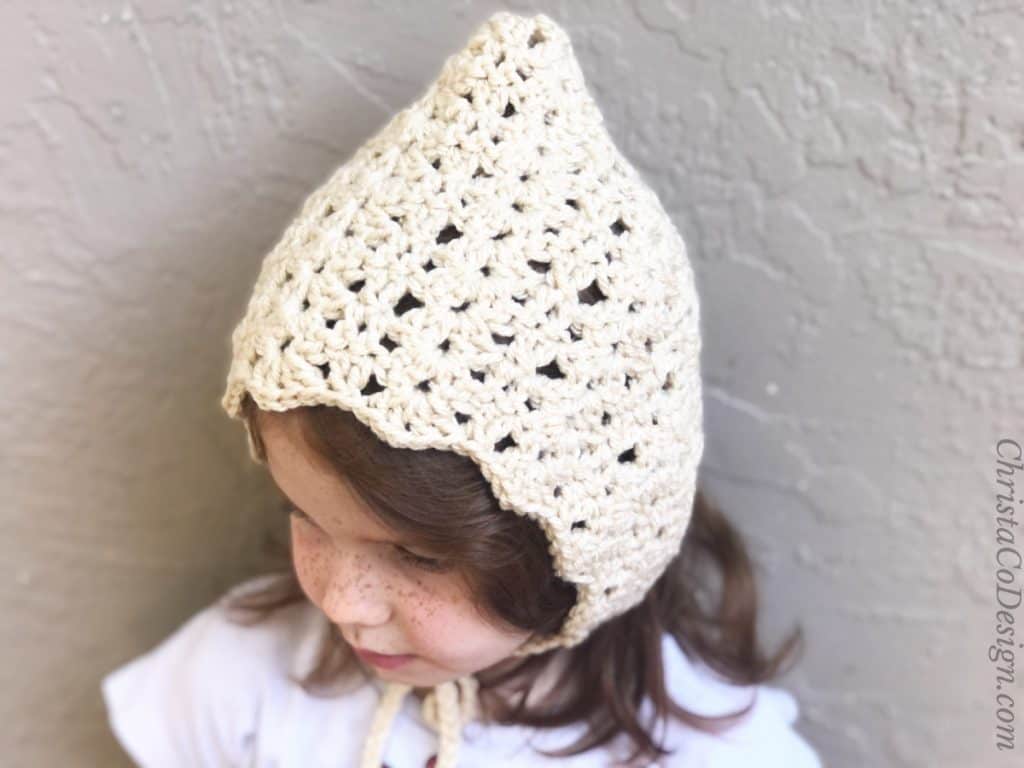
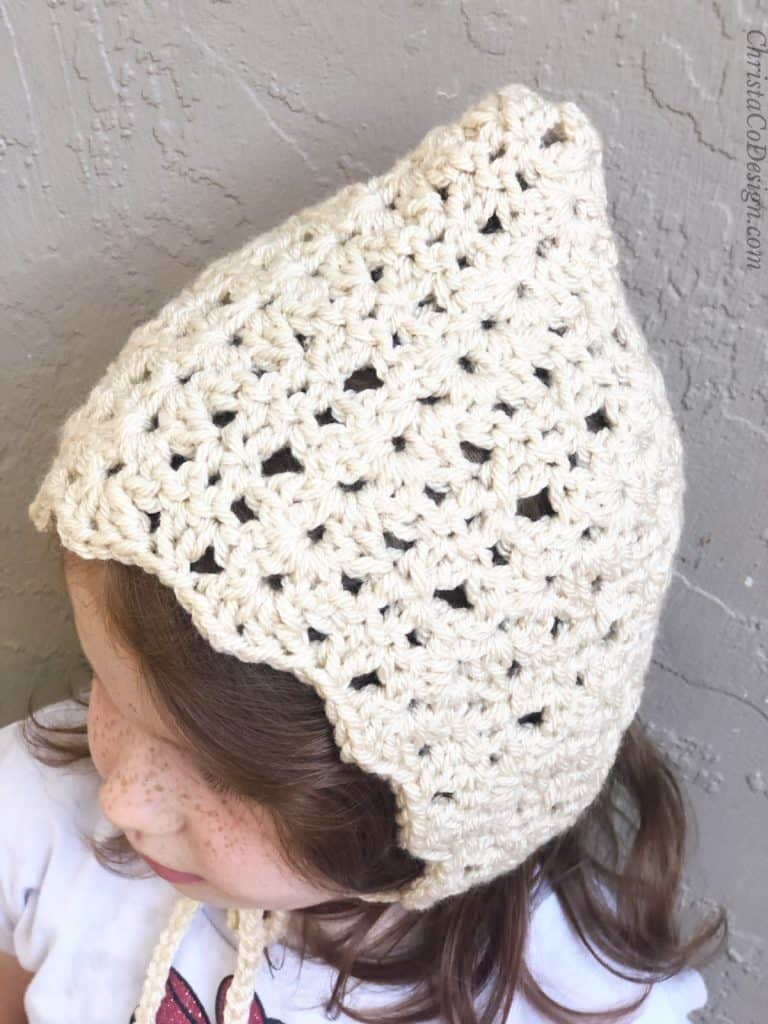
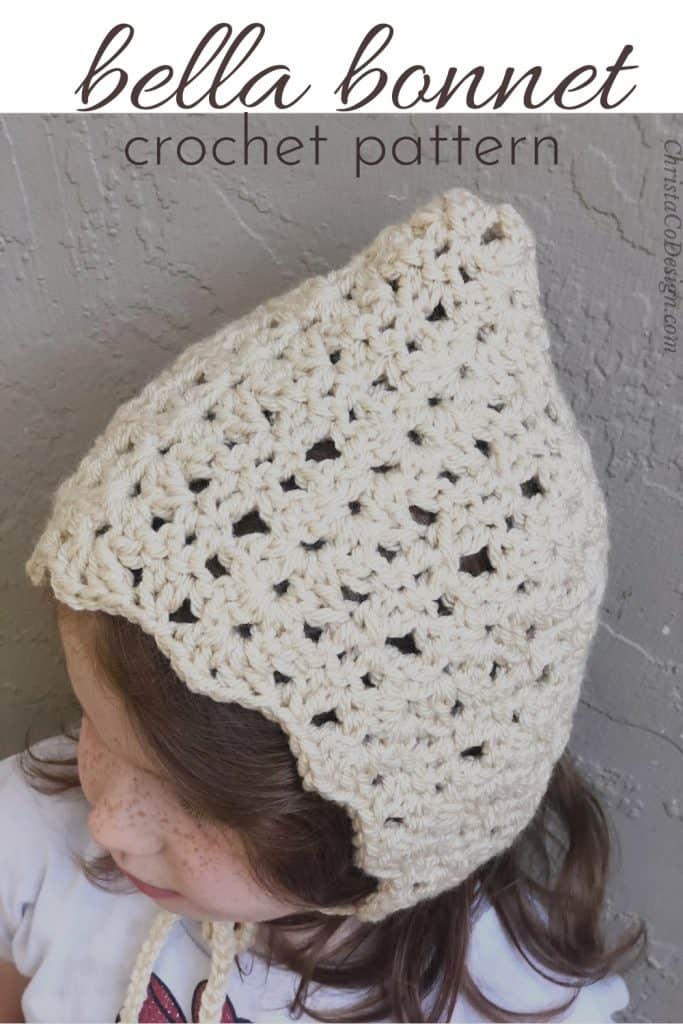
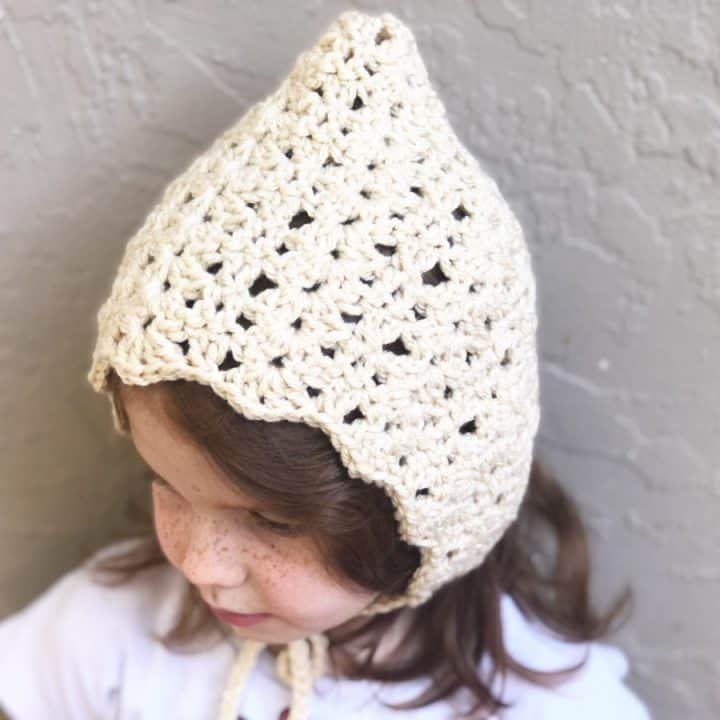
Bella Bonnet Pixie-Style Hat Free Crochet Pattern
The Bella Bonnet is a crochet hat pattern featuring a beautiful stitch pattern that’s easy to crochet. This pixie style bonnet makes a great gift for anyone in the family.

This post contains affiliate links, I may earn a fee. Read more disclosure policy.
Join the ChristaCoDesign Newsletter
Never miss a pattern!
The free crochet bonnet pattern includes sizes 0-3 months through adult. The closure options include chin strap or a button loop and closure. With it’s simple stitches this is a great beginner project.
This bonnet is a simple rectangle design that’s easy to create with a seam in the back. The pattern includes a step by step photo tutorial to support new crocheters as well.
Purchase the ad-free, well formatted printable PDF Pattern from my shop. Scroll down for the free pattern!
Purchase My Ad-Free PDF Patterns In Your Favorite Shop Here:
Yarn
The yarn for this crochet pattern is Paintbox Simply Chunky Yarn* which is a #5 bulky weight yarn. I chose the color vanilla cream.
A comparable substitute is Red Heart Soft Essentials yarn, or you may be able to meet gauge with a #4 medium worsted weight yarn, as this is a thinner #5 yarn.
If you have trouble meeting gauge with your yarn, you may be able to go up or down a size in the pattern.

Stitches in this Pattern
The basic crochet stitches for this bonnet are the double crochet and chains. There are photos for each row in the pattern below.
If you need a double crochet tutorial I have one for that here. The stitch pattern is a combination of the iris stitch and double crochets.
Add this pattern to your Ravelry queue.
You can also watch the full step by step video tutorial for this pixie bonnet on my YouTube channel. If you check it out, I’d love for you to like, share or subscribe!
You may also like the Pixie Spice Crochet Bonnet Pattern too. I reference this one in the pattern since I uses a button closure.
Materials
- 1 ball of Paintbox Simply Chunky Yarn* a #5 bulky weight yarn (100% acrylic yarn, 149 yd (136 m) per 100g skein) in shade: vanilla cream.
- 5 mm hook (US size H-8),* or crochet hook needed to meet gauge.
- yarn needle, scissors, measuring tape
My favorite hooks are Furls* and Clover*!
Notes
- Please read through all notes and pattern before you begin.
- Work up a gauge swatch using the provided gauge information. If your gauge matches great, continue on. If not, change your hook size and swatch again. If your stitches are smaller, go up a hook size, if they’re larger, go down a hook size.
- Ch 3 counts as a stitch, I highly recommend using a ch 3 alternative, here’s my favorite ch 3 alternative.
- Stitch multiple is 7.
Stitches/Abbreviations (US Terms)
Click any of these links for the tutorial.
ch(s) – chain(s)
dc – double crochet
dc2tog – double crochet two together
rep – repeat
RS – right side
sk – skip the indicated stitch
st(s) – stitch(es)
Gauge
4 x 4” (10 x 10 cm) = 23 sts x 6 rows in pattern, unblocked
Skill Level
Easy
Fit – Yarn by Size
To fit head circumference/age ~ yarn recommended by size:
13 – 14” (33 – 35.5 cm) / Baby 0-3 months ~ 45 yds (41 m)
14 – 15” (33 – 38 cm) / Baby 3-6 months ~ 55 yds (50 m)
15.5 – 16.5” (39.5 – 42 cm) / Baby 6-12 months ~ 60 yds (54 m)
16 – 18” (40.5 – 45.5 cm) / Toddler 1-2 years ~ 75 yds (69 m)
18 – 19” (45.5 – 48.5 cm) / Preschool 2 – 5yrs ~ 95 yds (87 m)
19 – 21” (48.5 – 53.5 cm) / Child 5+ ~ 115 yds (105 m)
21” (53.5 cm) / Teen/Sm Adult ~ 130 yds (119 m)
22 – 23” (56 – 58.5 cm) / Med/Lg Adult ~ 145 yds (133 m)
Construction
This bonnet is crocheted in a rectangle and then seamed in the back. This is where the pixie peak is formed.
So this means the number of stitches you start with will be the width around your face.
And as you crochet more rows, your bonnet will increase in depth. This will be how it fits from the face opening to the seam at the back of the head.
Adjustment
It’s easiest to go up or down a size in the pattern to make a larger or smaller bonnet. To customize it, you can add or subtract 7 to my starting chain.
For a longer or taller bonnet (from the crown of head to chin) you can repeat more rows in the pattern.
Download the Hat Sizing Chart
Get this handy dandy chart so you can crochet perfectly fitting hats!
Pin It
Scroll down for the crochet bonnet pattern!
Purchase the ad-free, well formatted printable PDF Pattern from my shop. Scroll down for the free pattern!
Video Tutorial
Watch the full step by step video tutorial on my YouTube channel.
Pattern Instructions
How to Crochet Bonnet Pattern
Free crochet bonnet pattern in baby, children, teen and adult sizes.
Materials
- #5 chunky weight acrylic yarn color: vanilla cream.
Tools
- 5mm US size H-8 hook, or hook needed to meet gauge.
- stitch markers, yarn needle, measuring tape, scissors
Instructions
Baby 0 – 3 mos [3 – 6mos, 6 – 12mos, 12 – 24mos, 2 – 5 yrs, Child 5+, Teen/Sm Adult, Med/Lg Adult]
Ch 35 [42, 42, 49, 56, 63, 70, 77]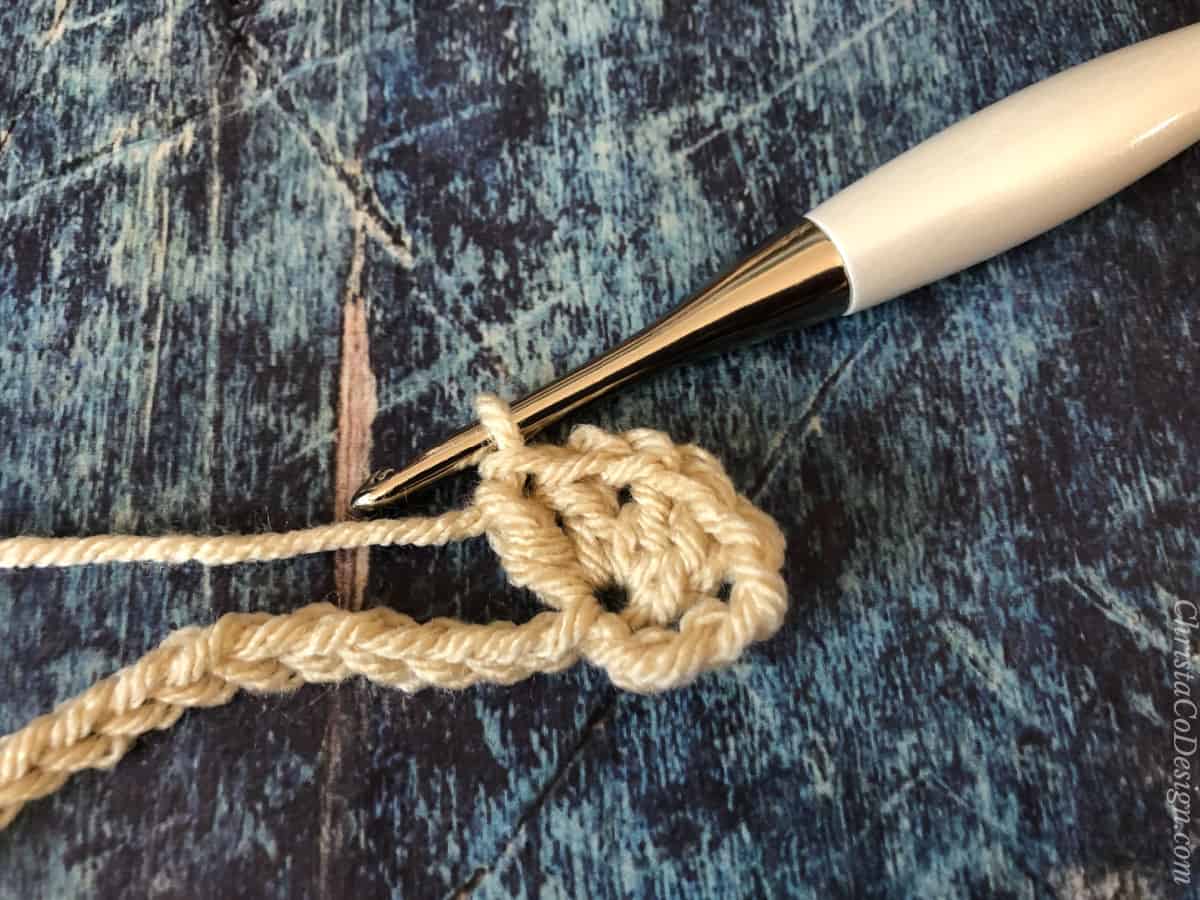
Row 1. In 5th ch place (2 dc, ch 1, 2dc) (the skipped chs count as the first dc),
(Row 1 cont.) *sk 2 chs, 1 dc in each of next 2 chs, sk 2 chs, place (2 dc, ch 1, 2 dc) in next ch; 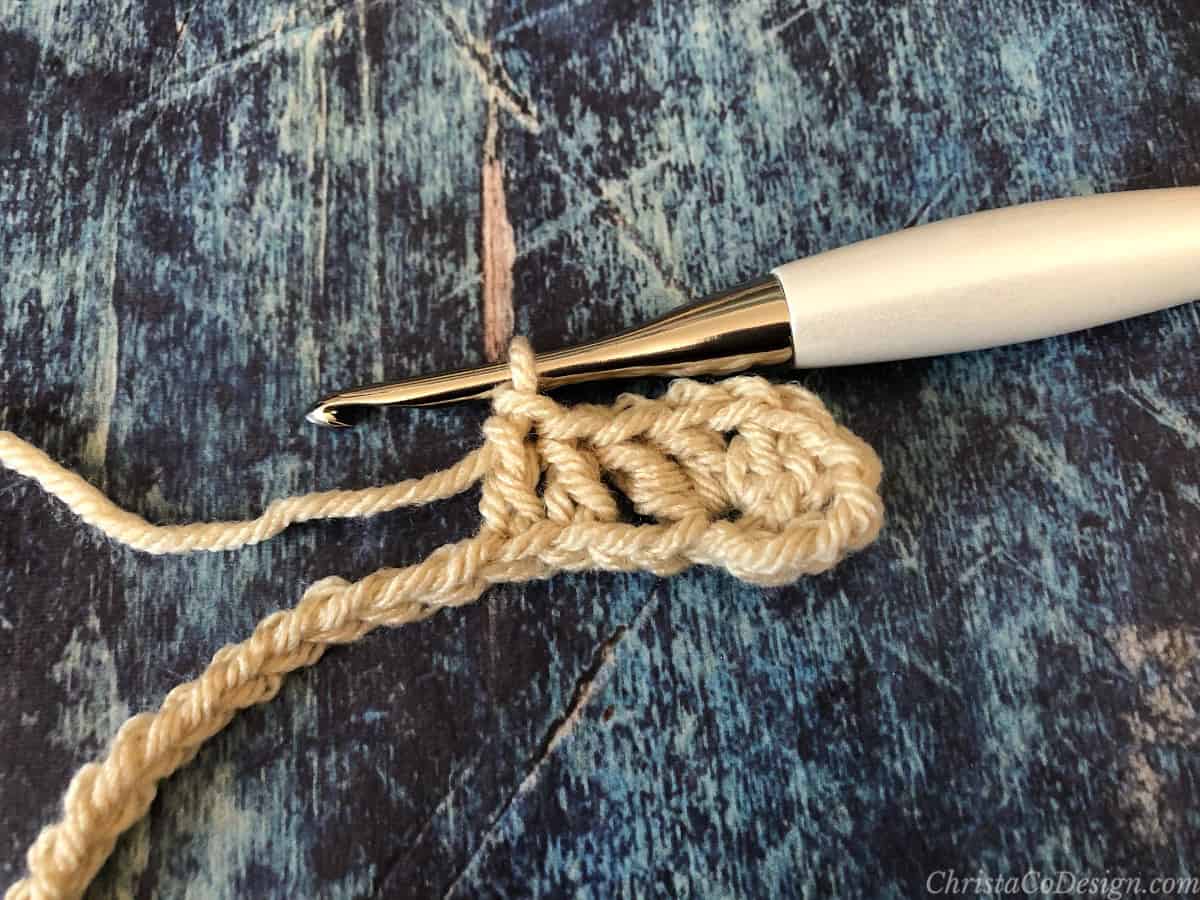
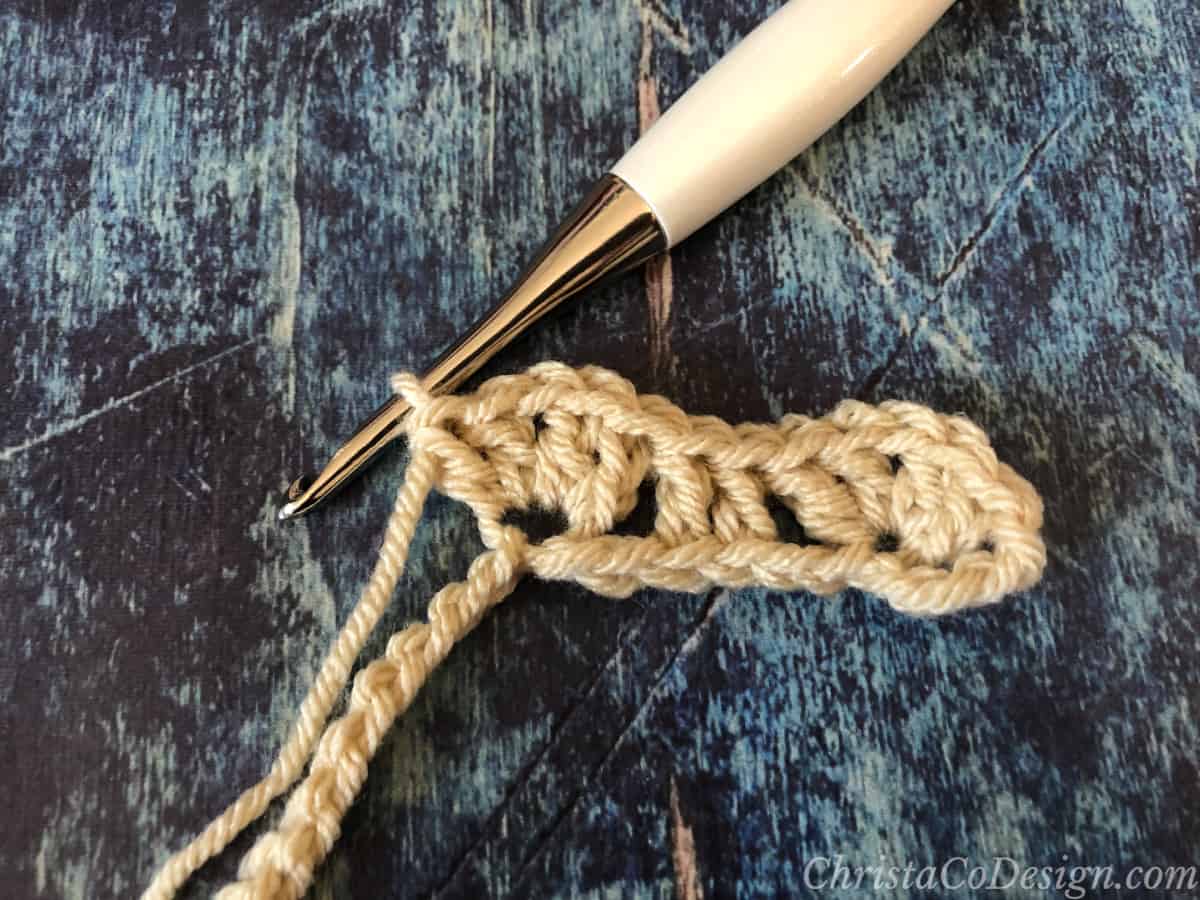
(Row 1 cont.) rep from * until last 2 chs, 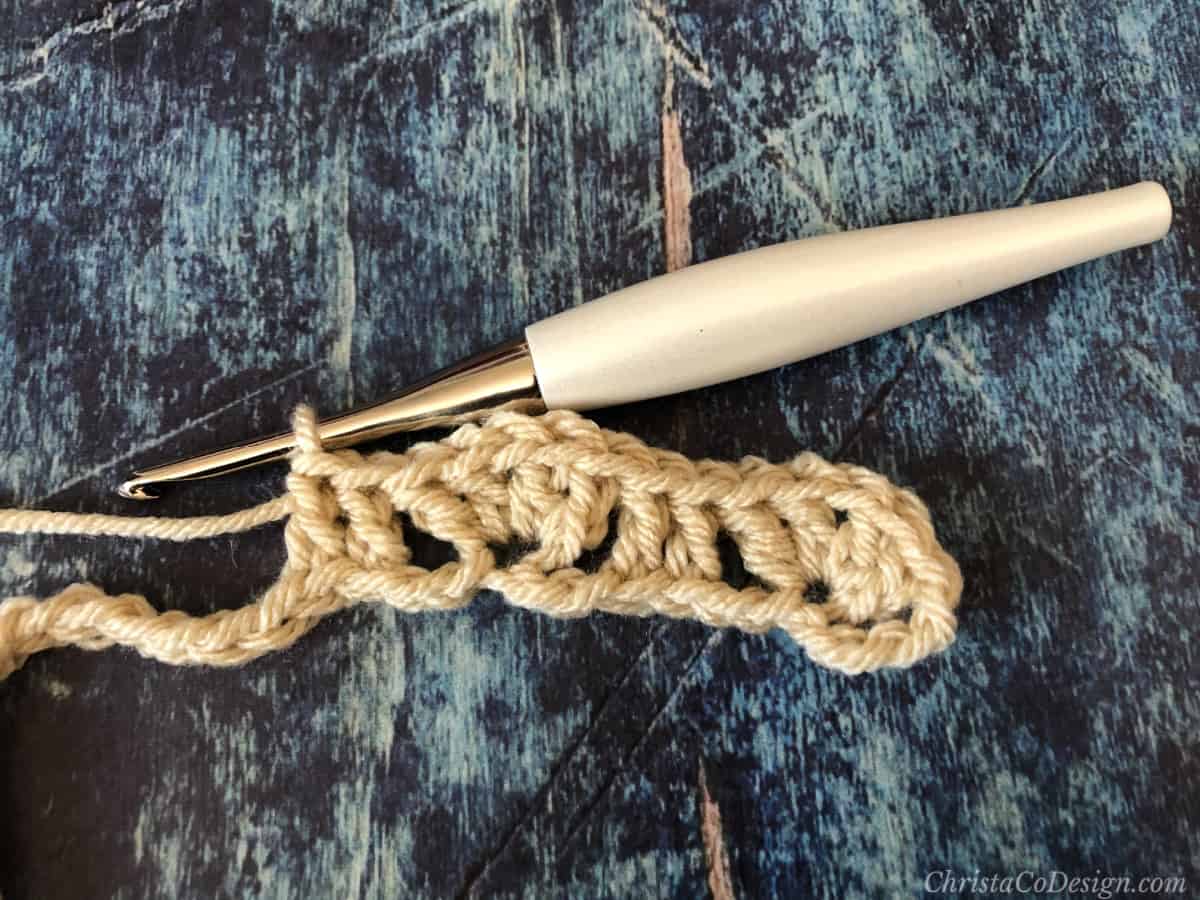

(Row 1 cont.) sk 1 ch, dc in last ch and turn. 35 [42, 42, 49, 56, 63, 70, 77 sts]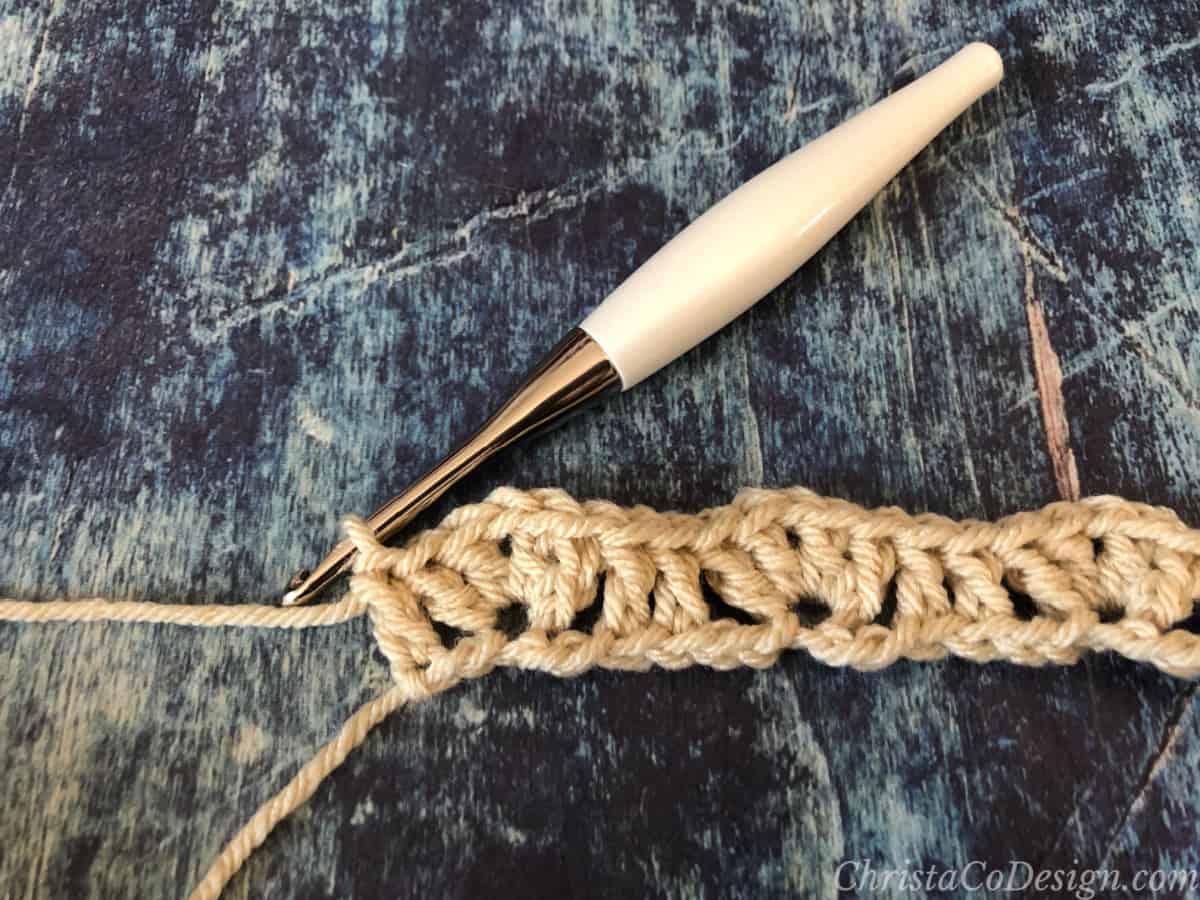
Row 2. (RS) Ch 3, *sk 2 dc, in ch 1 sp place (2 dc, ch 1, 2 dc), sk 2 dc, dc2tog, ch 1;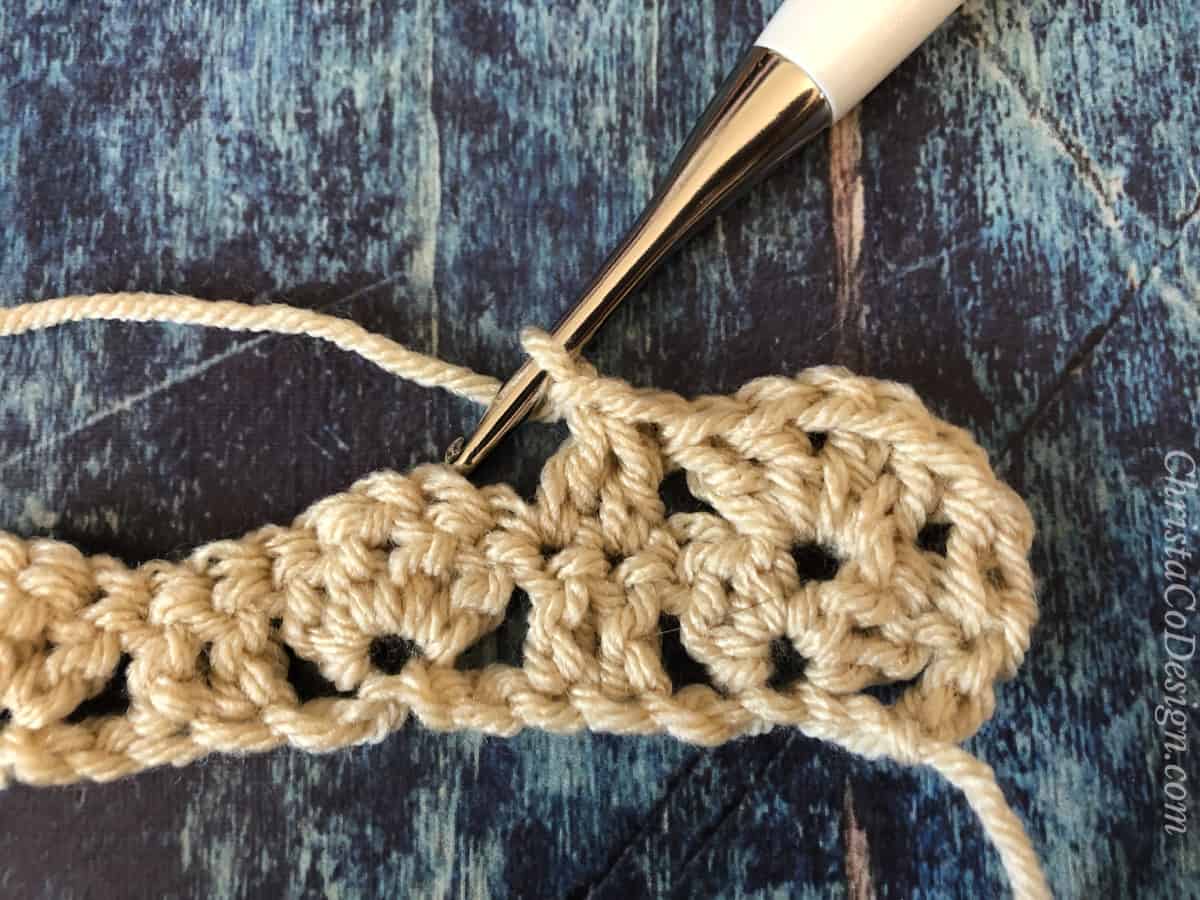
(Row 2 cont.) rep from * until last 6 sts, 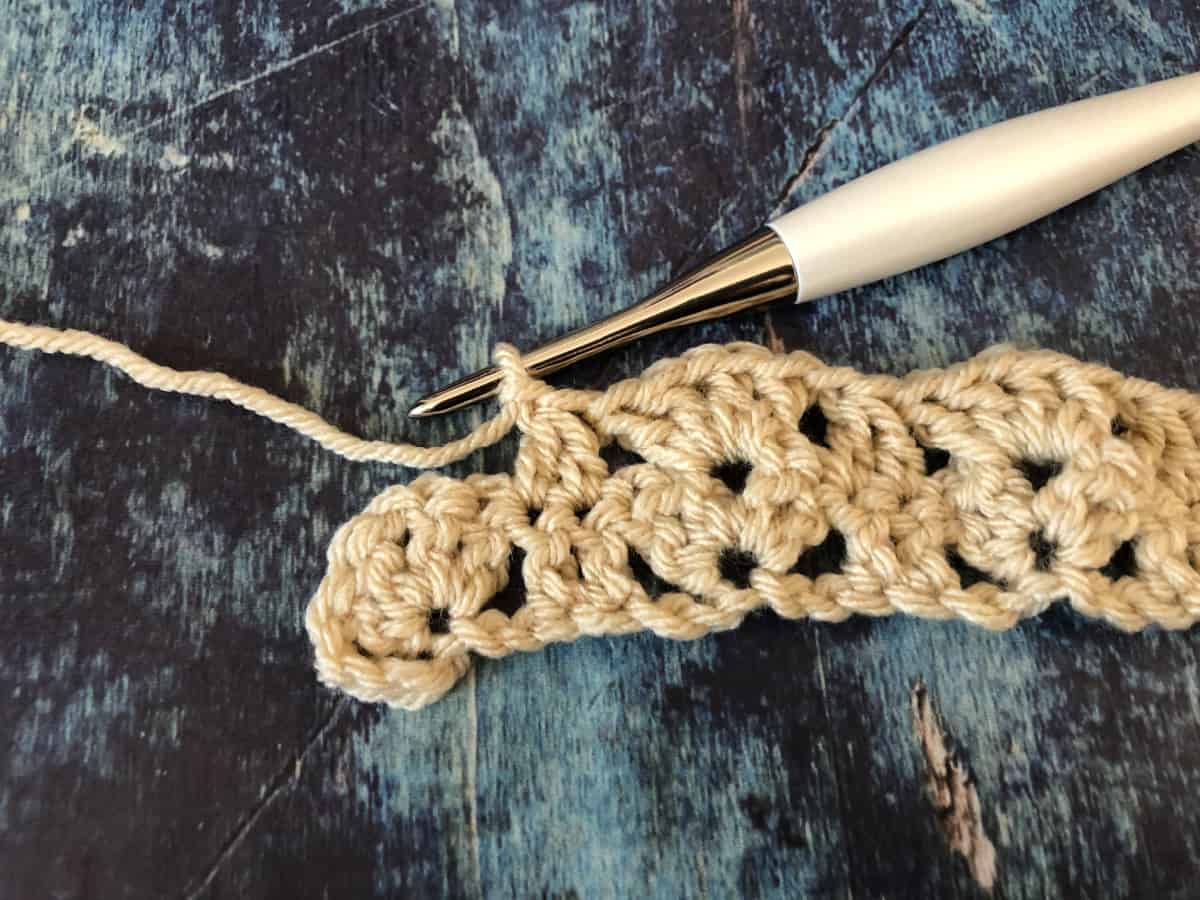
(Row 2 cont.) sk 2 dc, in ch 1 sp place (2 dc, ch 1, 2 dc), sk 2 dc, dc in last st, turn. 35 [42, 42, 49, 56, 63, 70, 77 sts]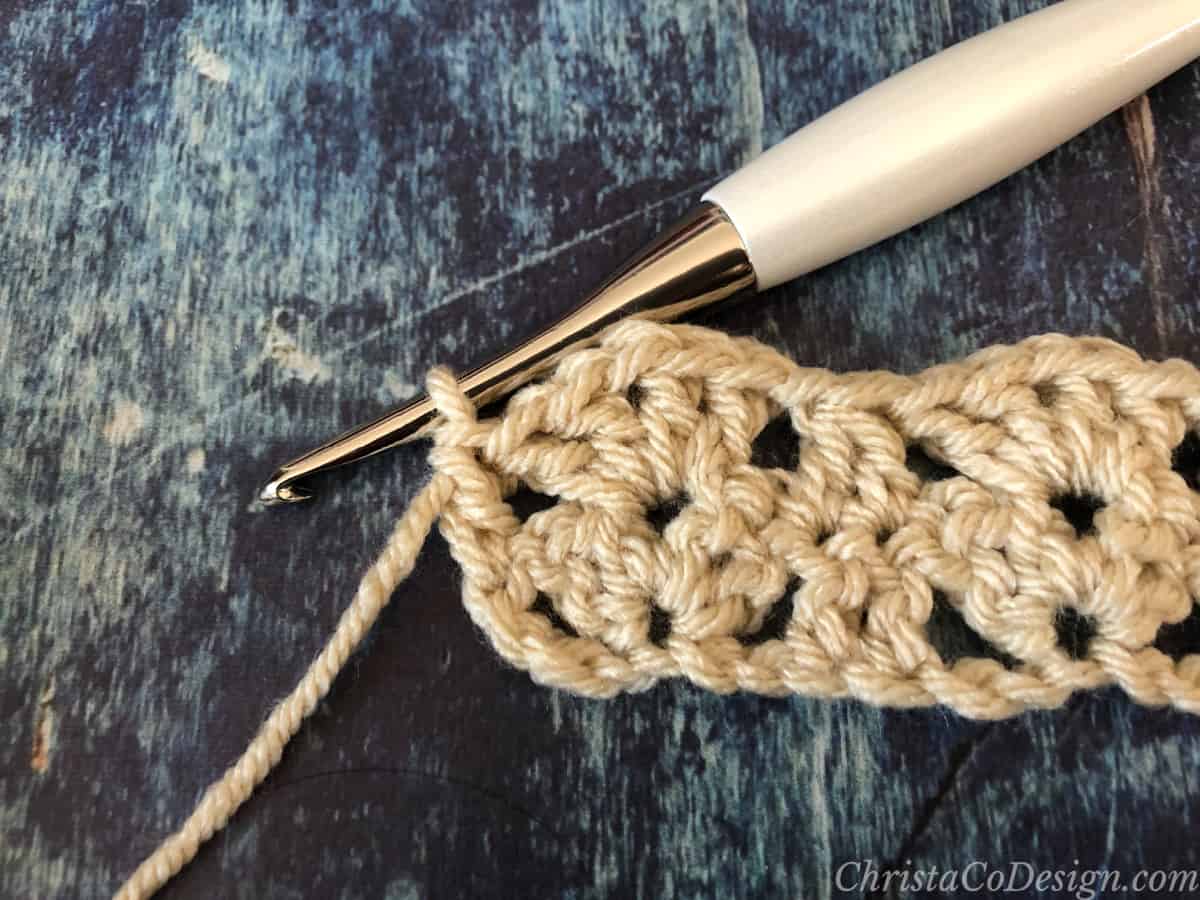
Row 3. Ch 3, sk 2 dc, (2 dc, ch 1, 2 dc) all in next ch 1 sp, *sk 2 sts, 1 dc in each of next 2 sts, sk 2 dc, (2 dc, ch 1, 2 dc) in next ch 1 sp; rep from * until last 3 sts, sk 2 sts, dc in last st, turn. 35 [42, 42, 49, 56, 63, 70, 77 sts]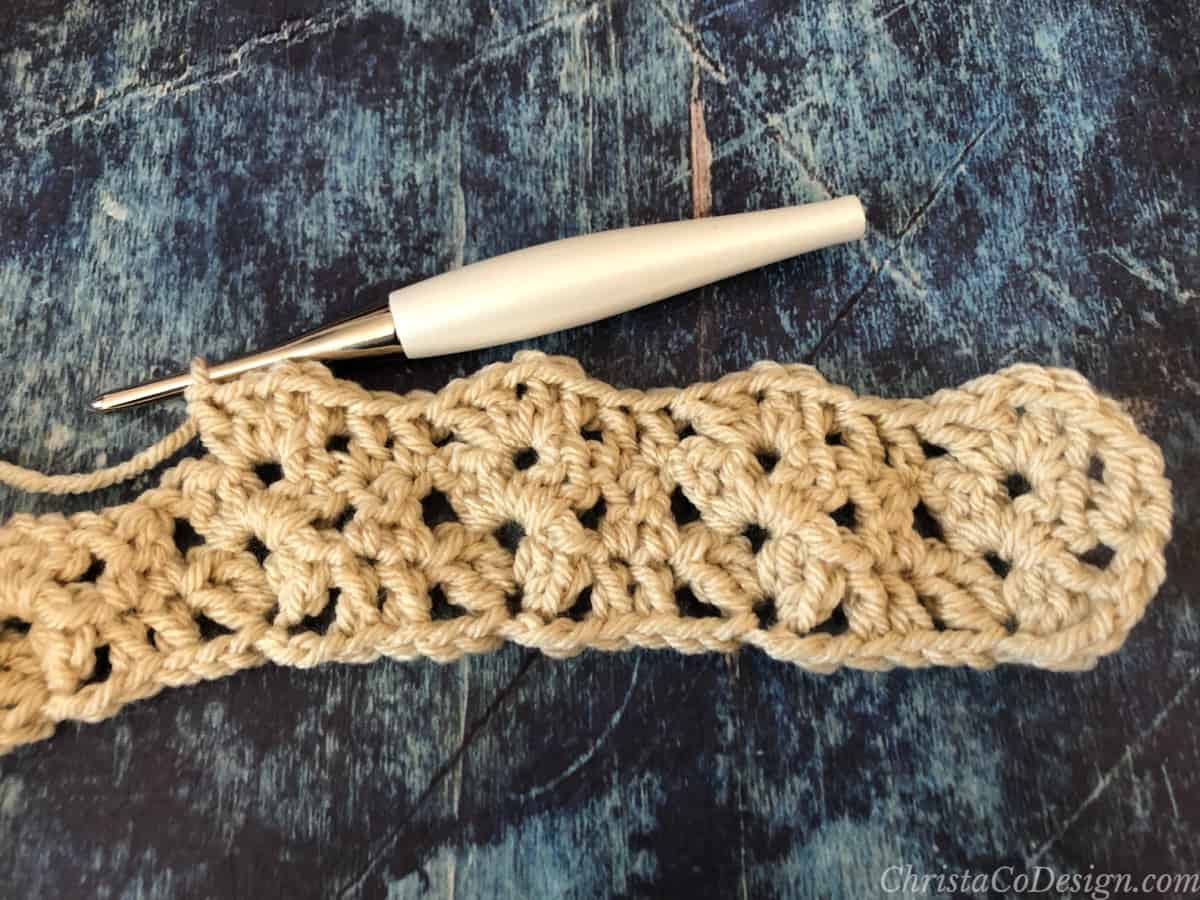
Rep Rows 2 – 3 until you have
Baby 0 – 3mos: 8 rows = 4.75” (12 cm)
Baby 3 – 6mos: 9 rows = 5.5” (14 cm)
Baby 6 – 12mos: 10 rows = 6” (15 cm)
Toddler 12 – 24mos: 11 rows = 7” (18 cm)
Preschool 2 – 5yrs: 12 rows = 7.25” (18.5 cm)
Child 5+: 13 rows = 7.75” (19.5 cm)
Teen/Sm Adult = 14 rows = 8.5” (21.5 cm)
Med/Lg Adult = 15 rows = 9” (23 cm)
Cut yarn and leave a long tail for seaming. 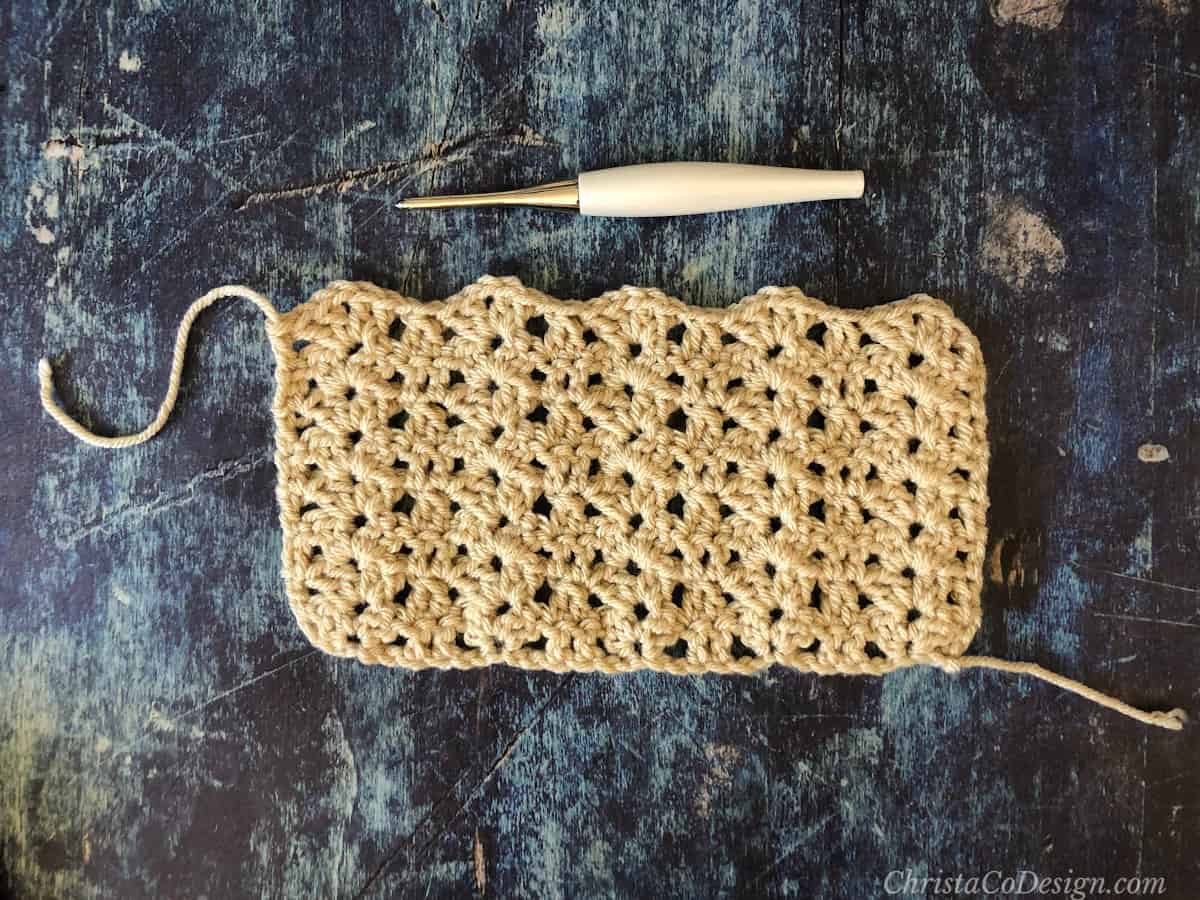
Seaming
Fold in half. Seam the bottom with mattress stitch (row 1). The last row is the front of the bonnet and will frame the face.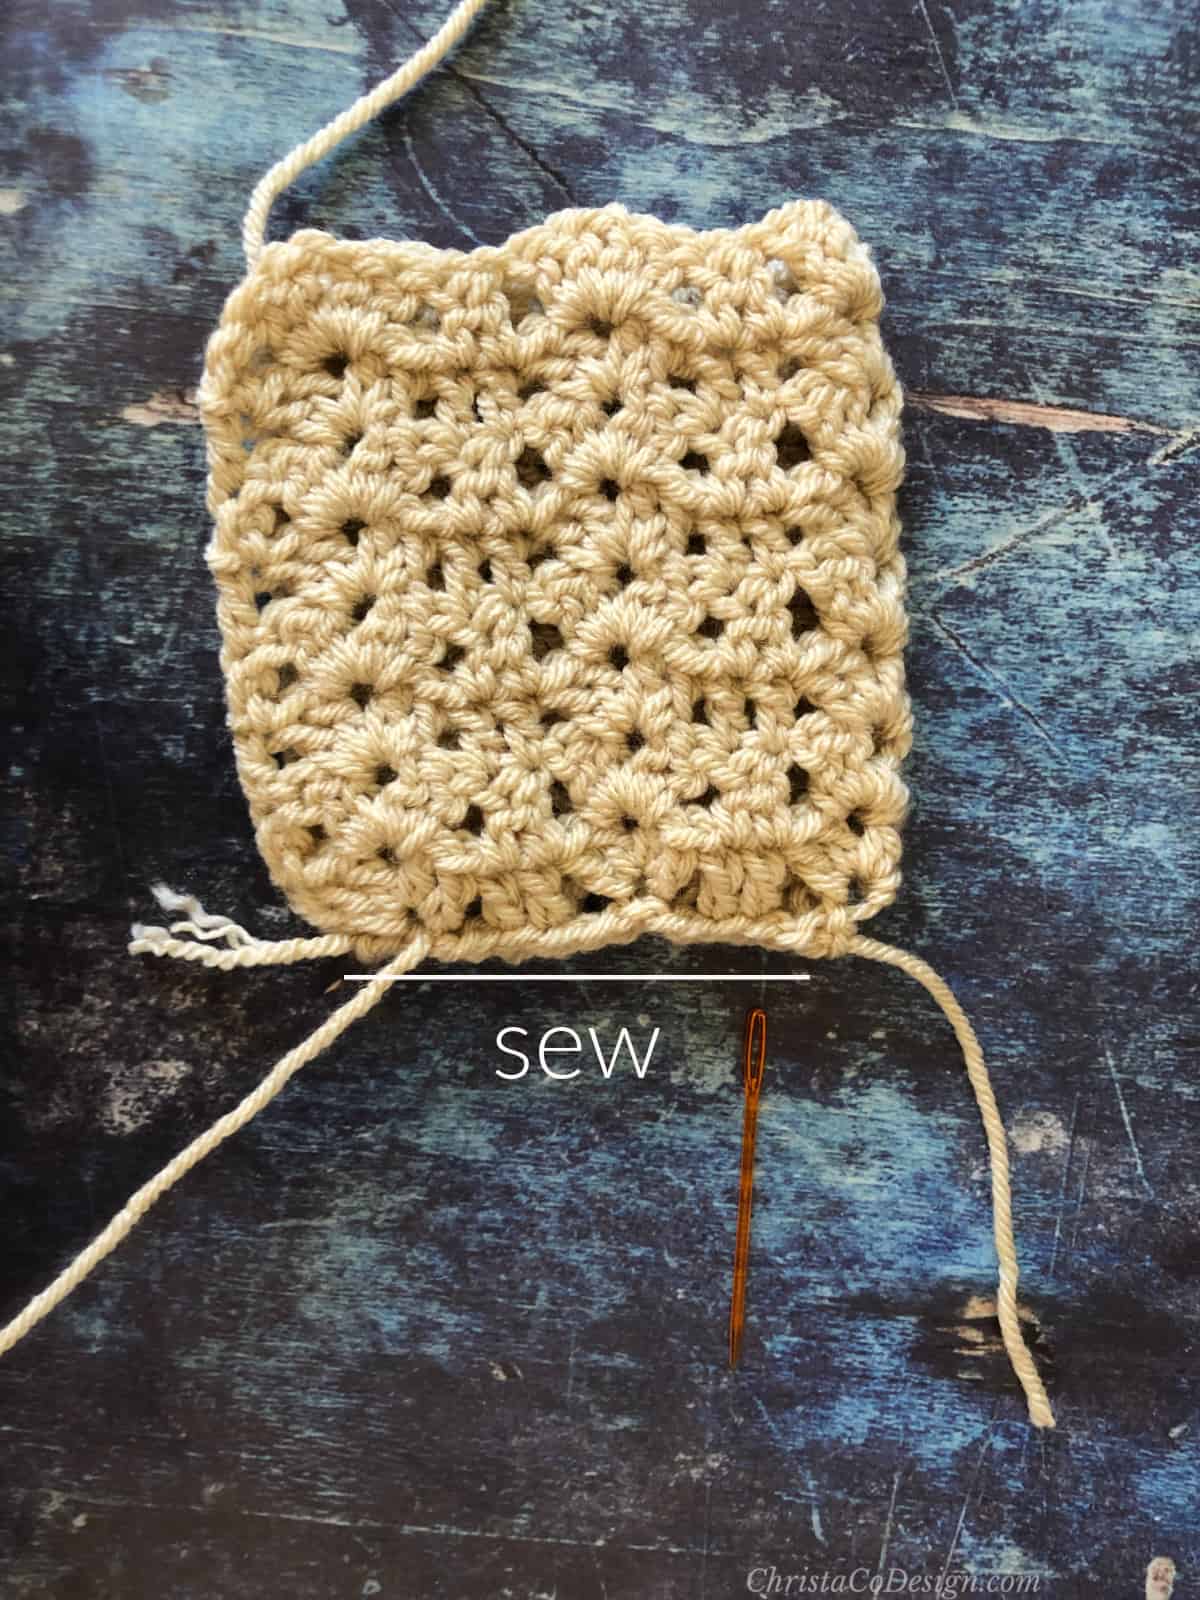 The seam will be at the back of the hat.
Finishing
Included are two finishing options 1. Buttonhole or 2. Chin straps.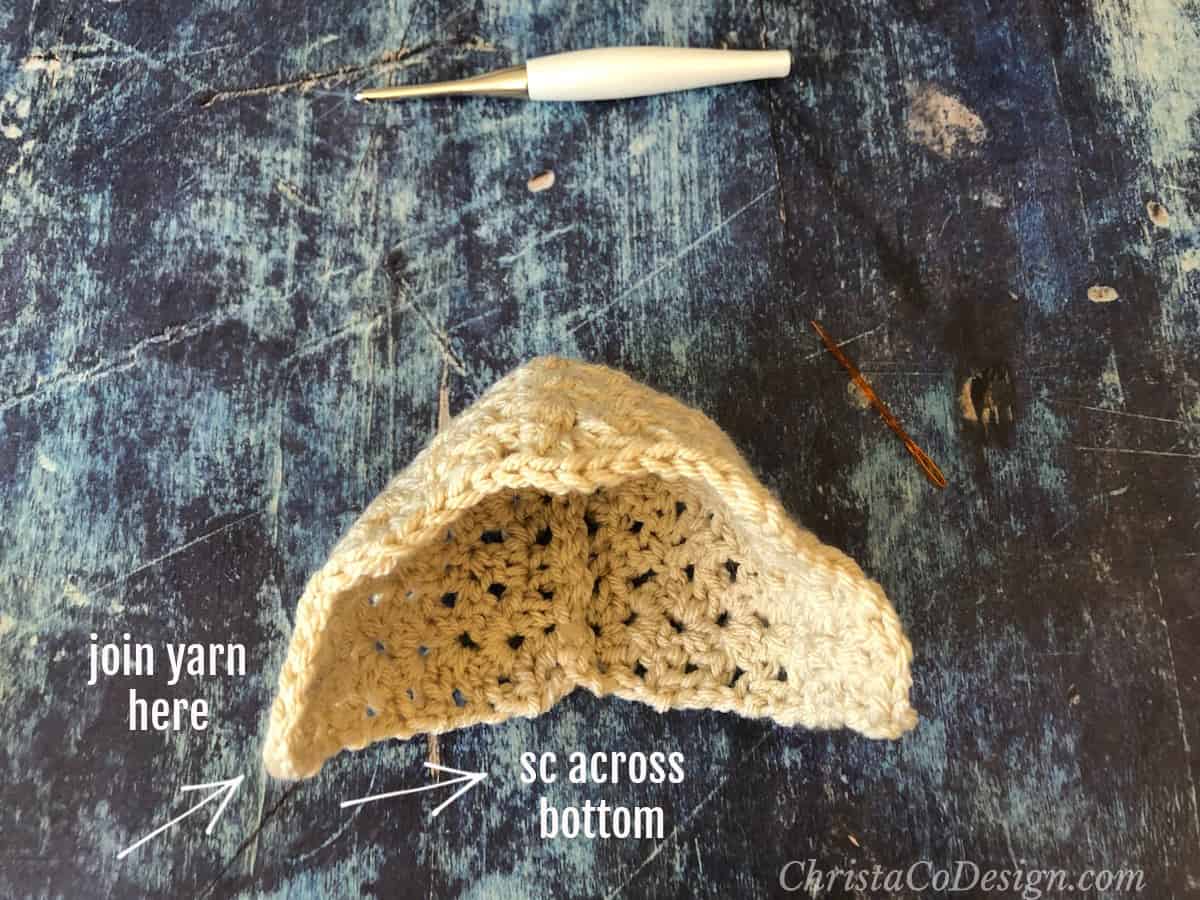
Join yarn with sl st to first st of last row, ch 1, sc evenly across bottom of the bonnet. Don’t cut yarn. 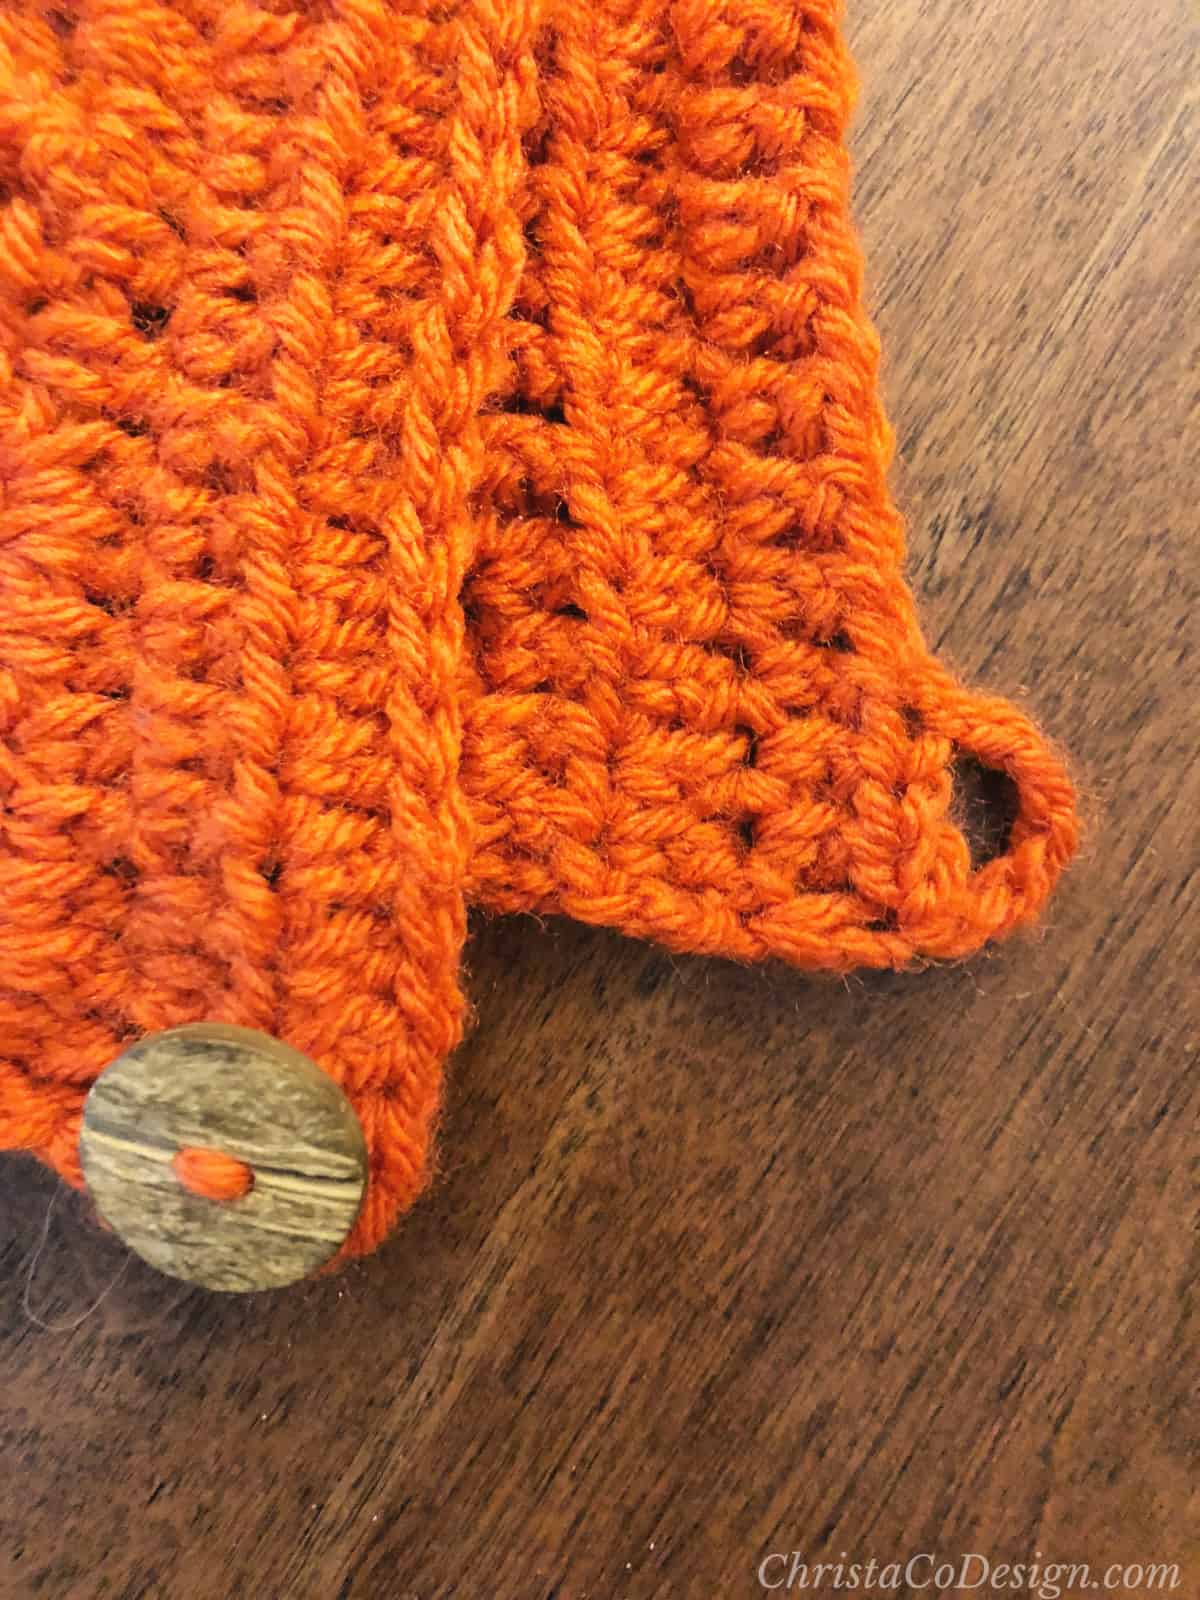
1. Continue for buttonhole: Ch 5 (or number adequate for your button size). Skip a few stitches and sl st to next st. Sew bottom on opposite corner. Picture on the right is from my Pixie Spice Hat pattern.
2. Continue for chin strap ties. Ch 36 – 44 = 10 – 12” (25.5 – 30.5 cm), cut yarn. Rejoin yarn on opposite corner and rep for second tie.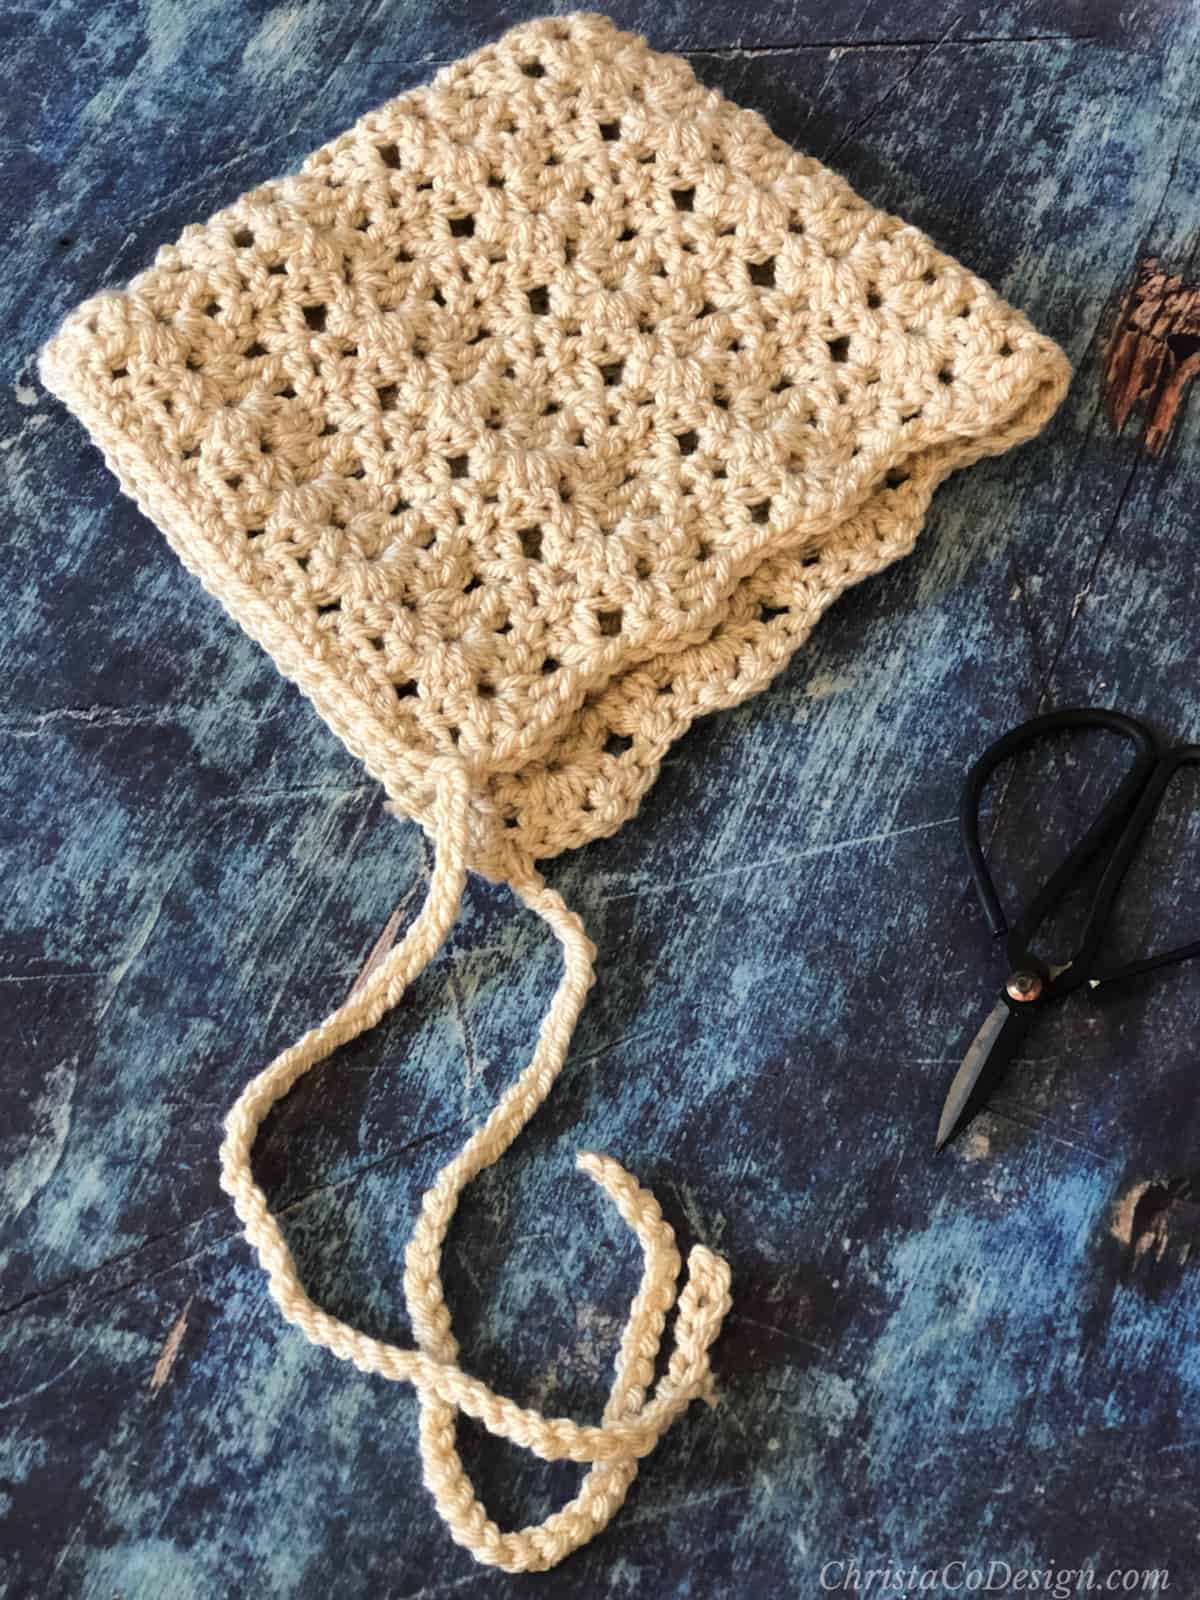
Please remember if you use chin strap tie option, not to tie them too tightly. Children and babies should never be left unattended while wearing them.
Recommended Products
As an Amazon Associate and member of other affiliate programs, I earn from qualifying purchases.