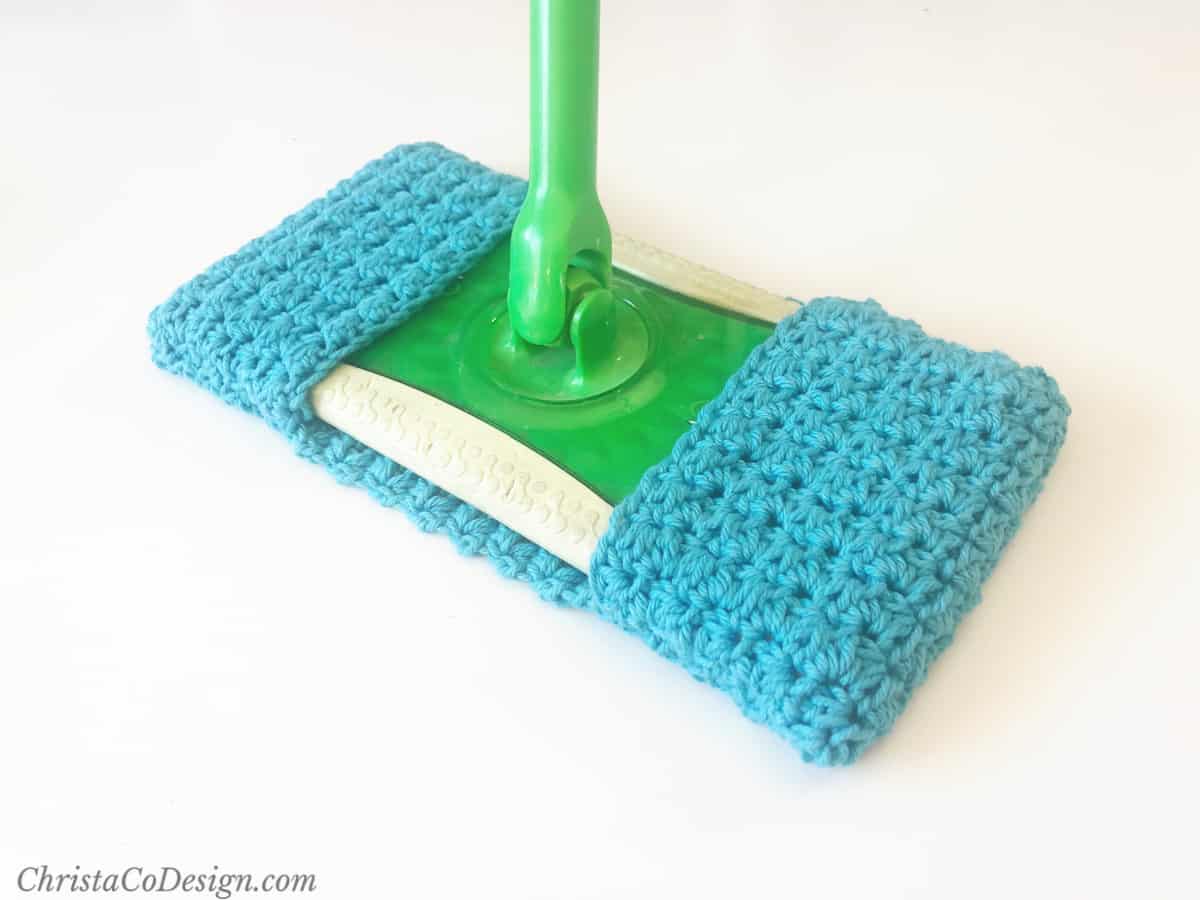
Free Reusable Crochet Mop Cover Pattern
Tired of buying disposable covers for your mop? Then it’s time to make your own sweeper cover with this free crochet pattern!

This post contains affiliate links, I may earn a fee. Read more disclosure policy.
Join the ChristaCoDesign Newsletter
Never miss a pattern!
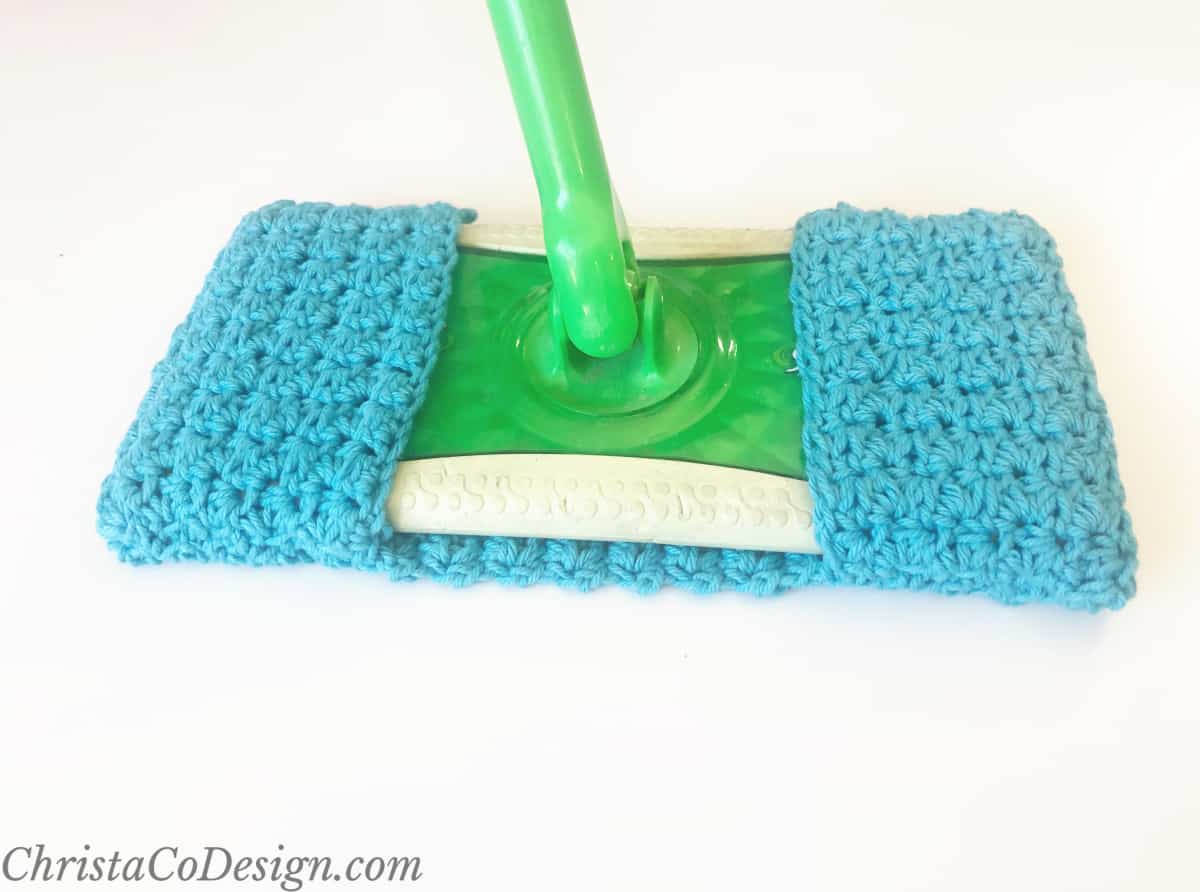
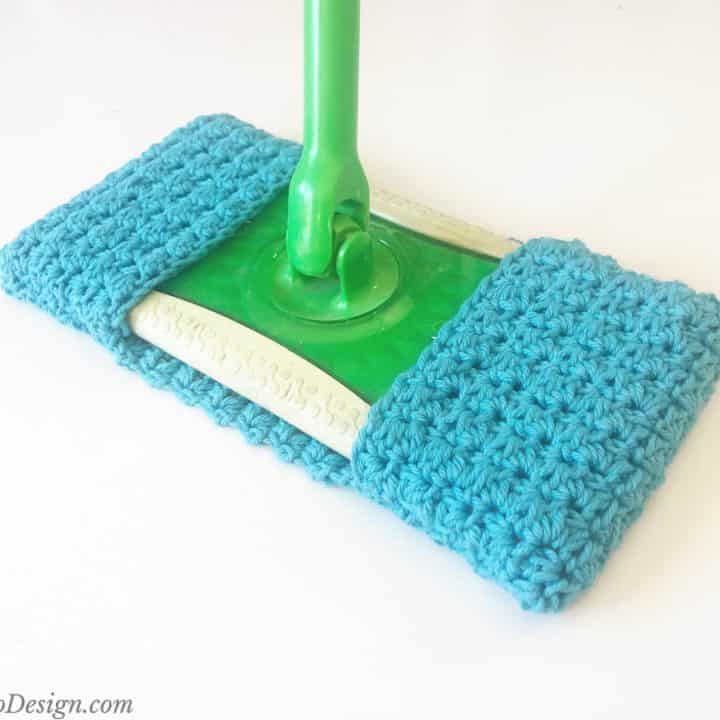
Reusable swiffer covers are easy to make. They’re made from just a simple rectangle. It’s a quick project that uses less than one skein of yarn too.
Thanks to WeCrochet for sending me the yarn to make this pattern.
How To Use These Covers
You can make as many crochet swiffer pads as you like for your mop head. Use it dry as a crochet dust cover for hardwood floors. This great for cleaning up pet fur. And for tile you can wet it like a traditional mop.
When you’re done, toss them in the washing machine, and they’re ready to use again. A crochet swiffer cover is a great option to replace the disposable ones, creating less waste.
The Yarn
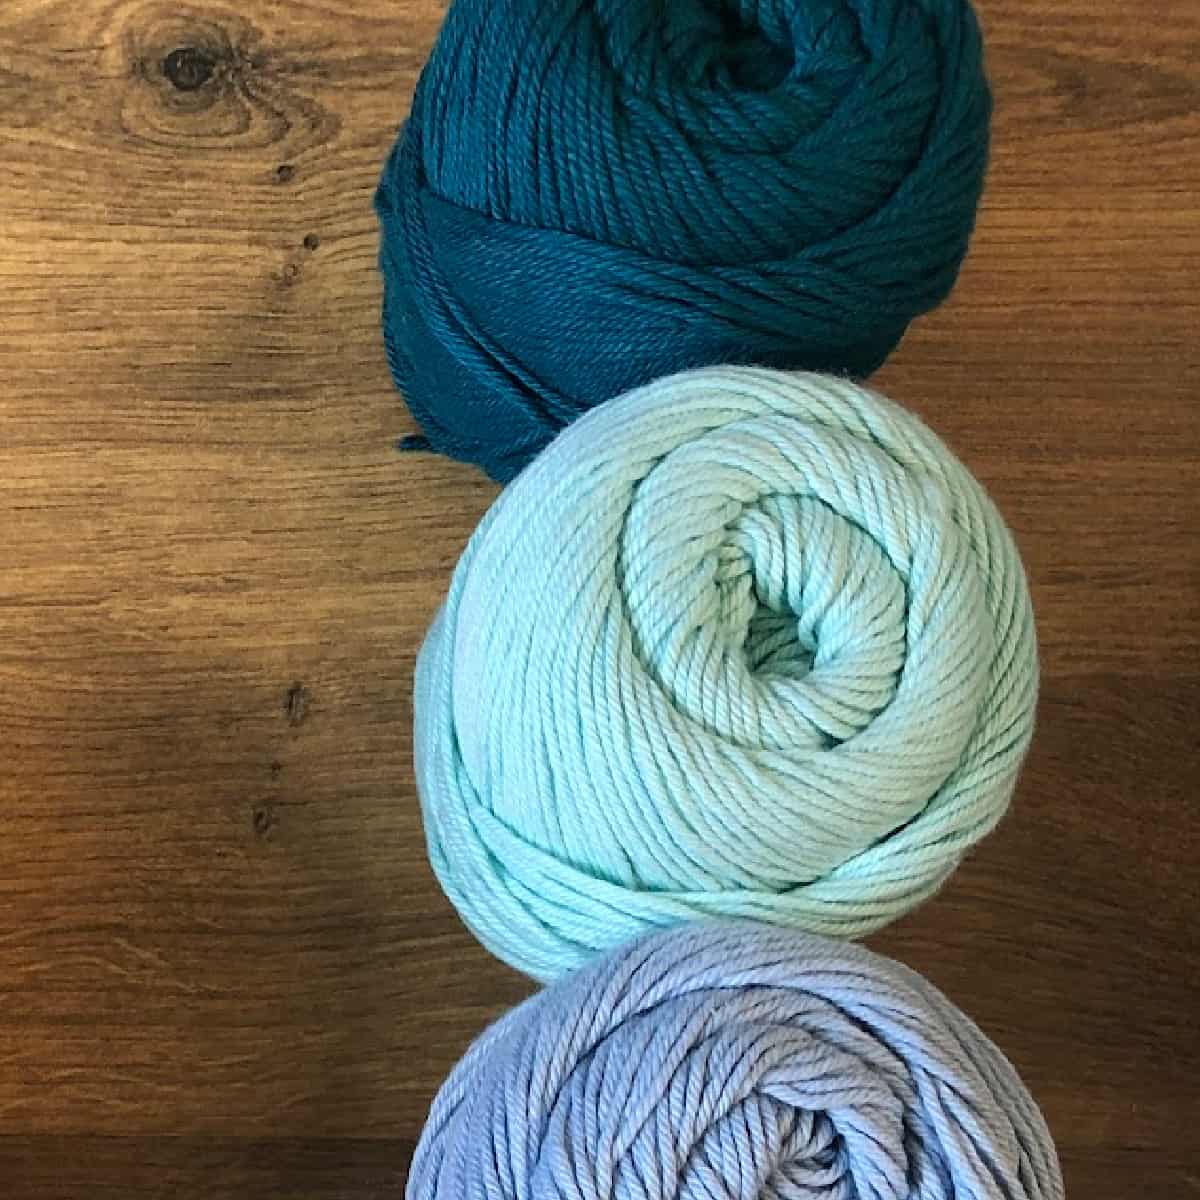
I highly recommend you use cotton yarn, preferably 100% cotton for this pattern. I use Dishie,* but you can use any #4 medium worsted weight cotton yarn. See more yarn details under Materials below.
The Hook
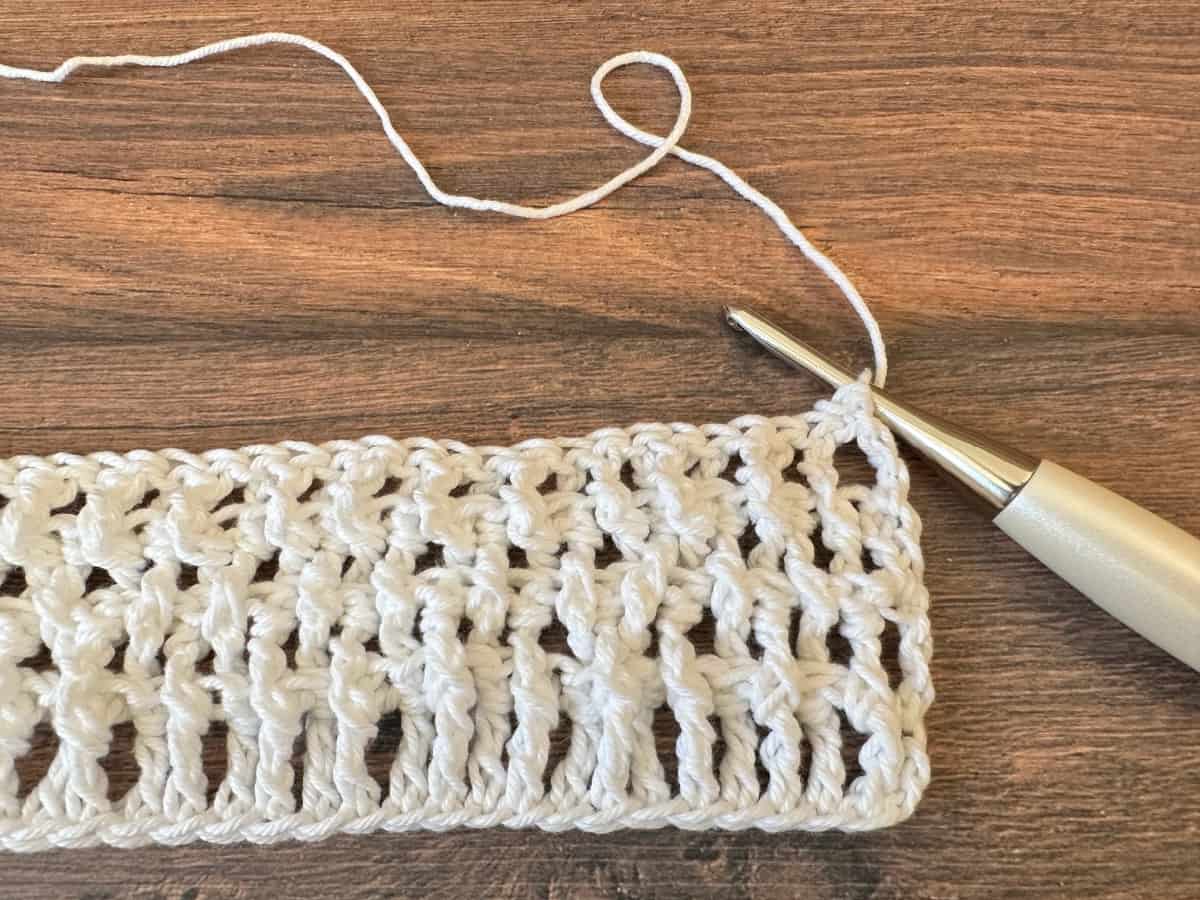
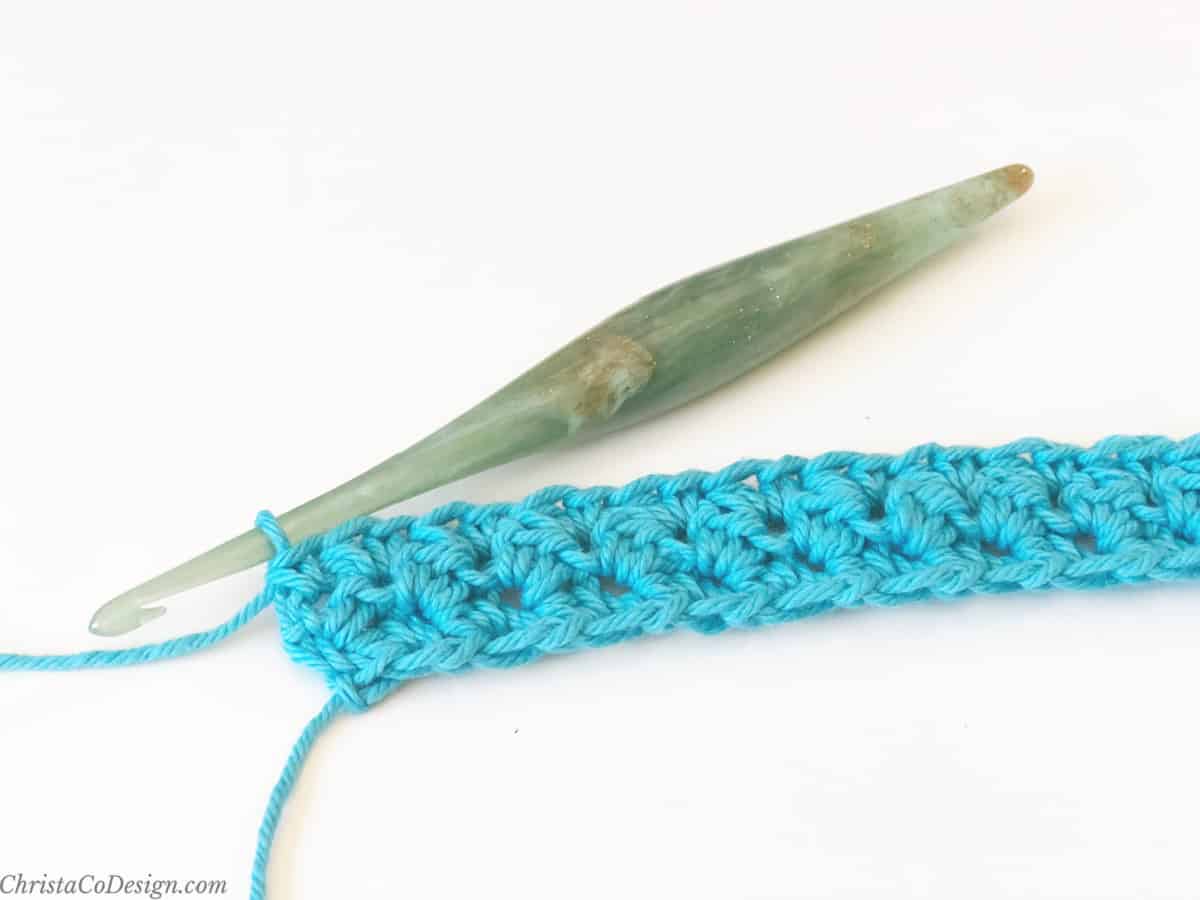
I was excited to use my newest Streamline, the Capricorn*! The gold glitter is so pretty. And most importantly the ergonomic handle is comfy!
Stitches / Abbreviations
This pattern uses simple stitches. Here are the abbreviations with tutorials linked for each stitch.
ch (s) – chain (s)
hdc – half double crochets
RS – right side
sc – single crochet
st – stitch
WS – wrong side
Skill Level
Easy
Adjustments
My mop is a 9.5″ long x 4.5″ wide x .75″ deep rectangle. If your mop is a different size you can adjust the rectangle to fit.
To make this mop cover wider or narrower chain to a different odd number. If you’re meeting gauge then you can add or subtract 4 (which is about an 1″) to my starting chain.
You can lengthen or shorten it by working less rows. Just make sure you can wrap it around the edges of your mop.
Years ago I replaced our paper towels with reusable ones I sewed. So sometimes when we run out we use one of those. But now we can use this one which is perfectly sized and works much better!
Video Tutorial
Watch the video tutorial on my YouTube.
Scroll down for the free pattern!
Crochet Mop Cover Pattern
Crochet an easy and reusable mop cover!
Materials
- 103 yd #4 medium worsted weight yarn, pictured in Dishie Yarn (100% cotton, 190 yd / 100 g)) color: Azure (1) ball.
Tools
- 5 mm crochet hook (US Size H-8) or hook needed to meet gauge.
- Yarn needle, Measuring tape, Scissors
Instructions
Gauge
- 4″/10cm x 4″/10cm = 16 sts x 13 rows in pattern
Notes
- Start with an odd number of chains.
Pattern
- Ch 21
Row 1. In 2nd ch from hook place *{(sc, hdc in the same ch), sk 1 ch} rep from * until 1 ch left and sc in last ch, turn. (21 sts) - Row 2. (RS) Ch 1, sc in same st, *{sk next st, (sc, hdc in same st)} rep from * until 2 sts left, sk 1 st, sc in last st, turn. (20 sts)
- Row 3. Ch 1, sc in same st, *{sk next st, (sc, hdc in same st)} rep from * until 1 st left, sc in last st, turn. (20 sts)
- Repeat Row 3 until your work measures 17” long.
- Work on WS.
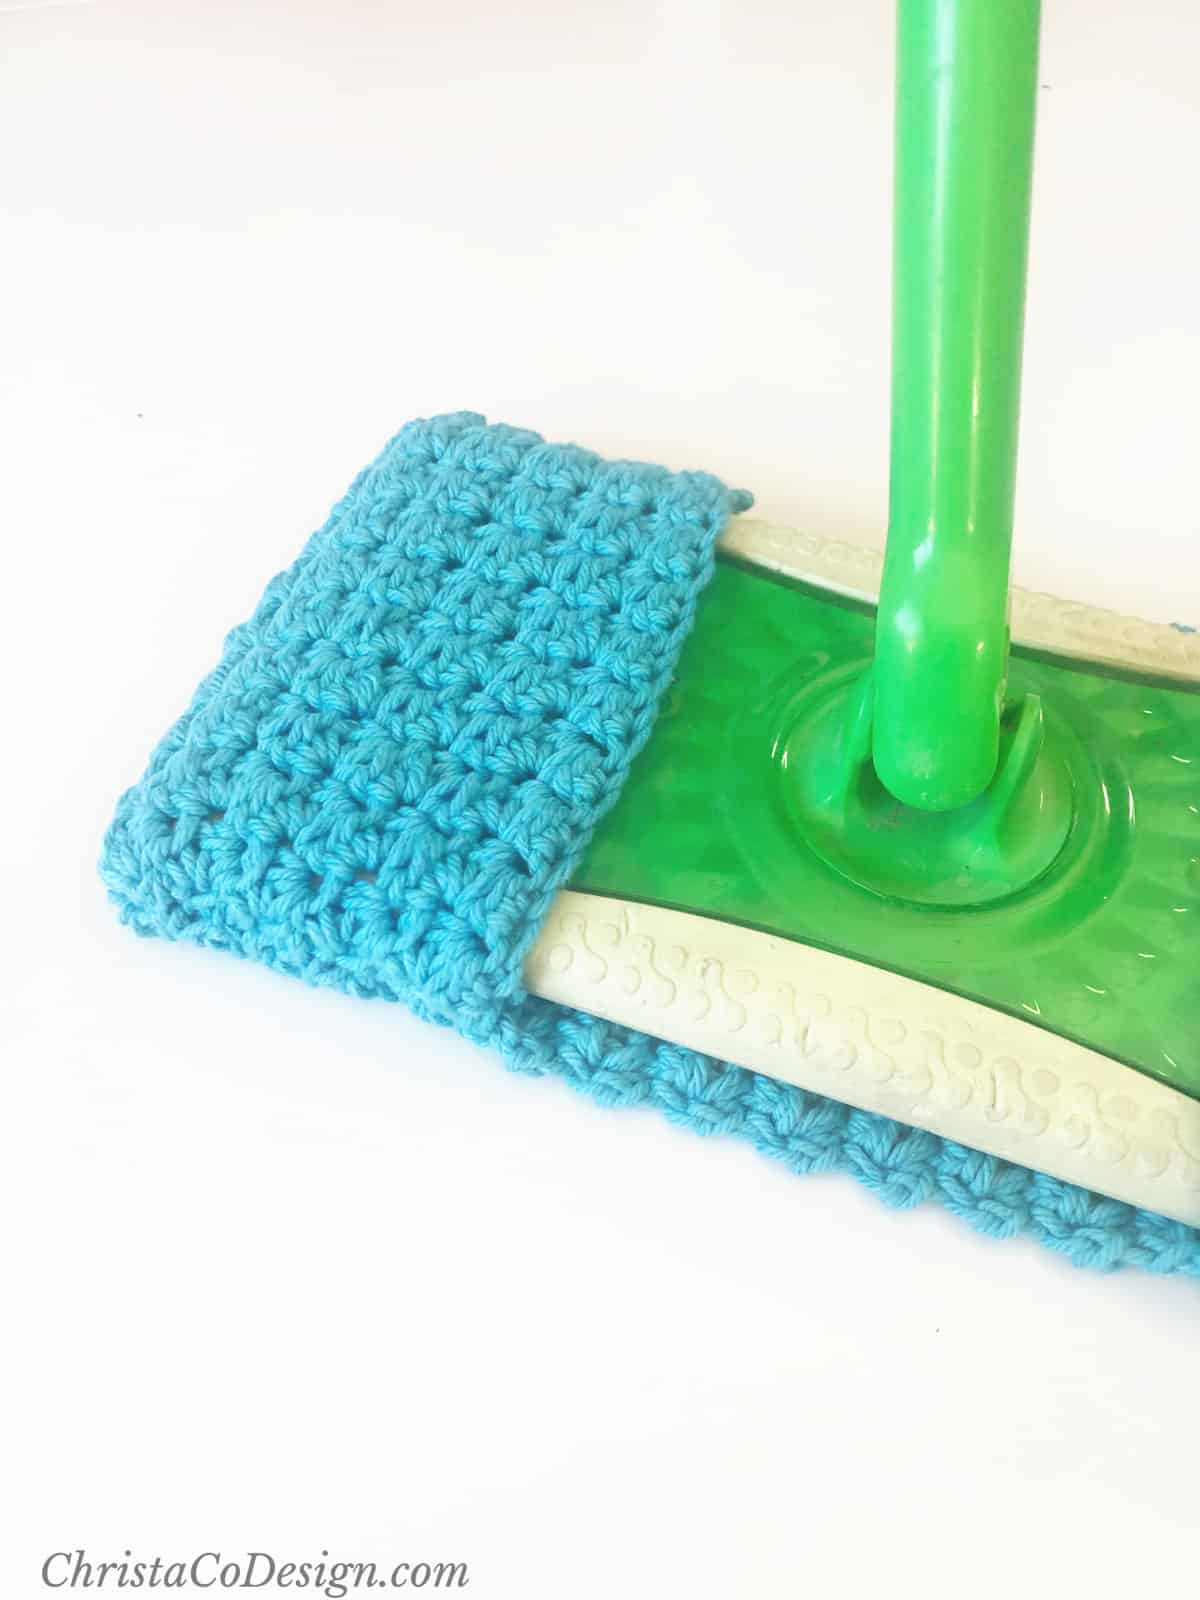
- Fold over both ends with 3" overlapping.
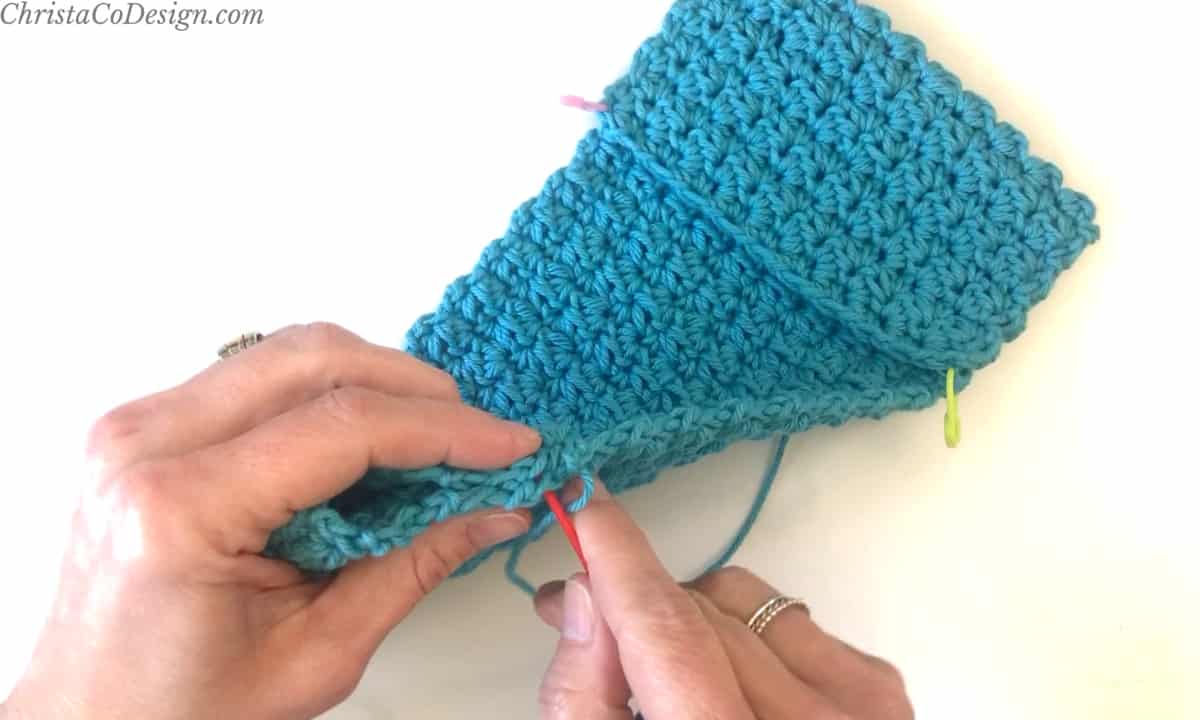
- Sew edges with yarn needle and matching length of yarn.
- Cut yarn and weave in ends.
- Turn RS out and fit on to mop head.
Recommended Products
As an Amazon Associate and member of other affiliate programs, I earn from qualifying purchases.