
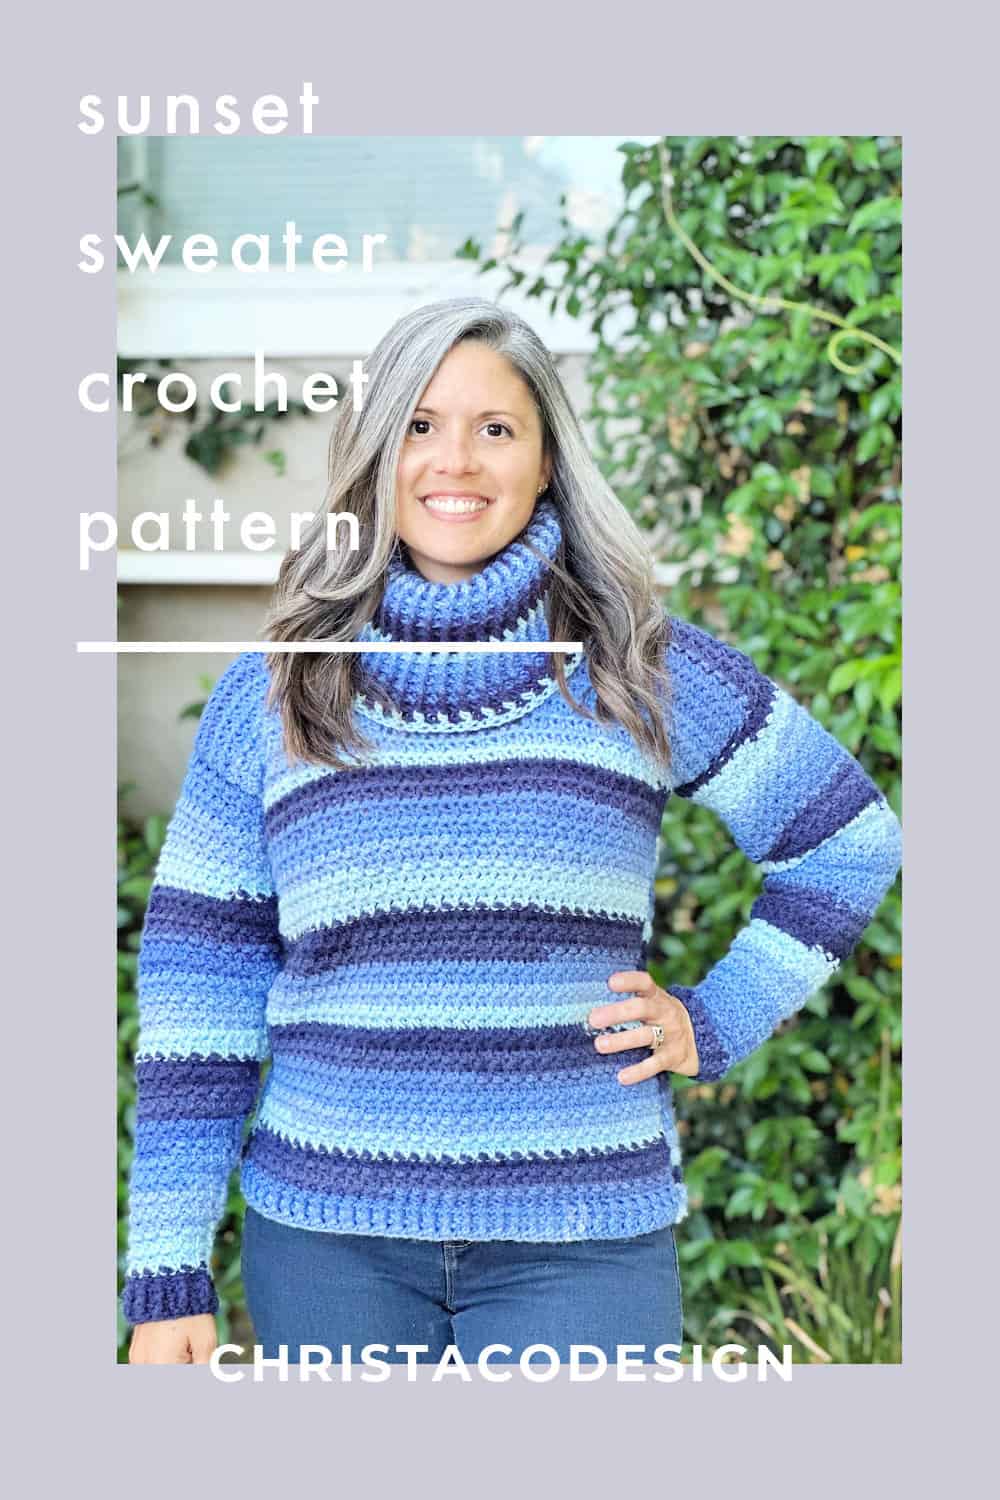
How To Crochet The Coziest Cowl Neck Sweater Pattern
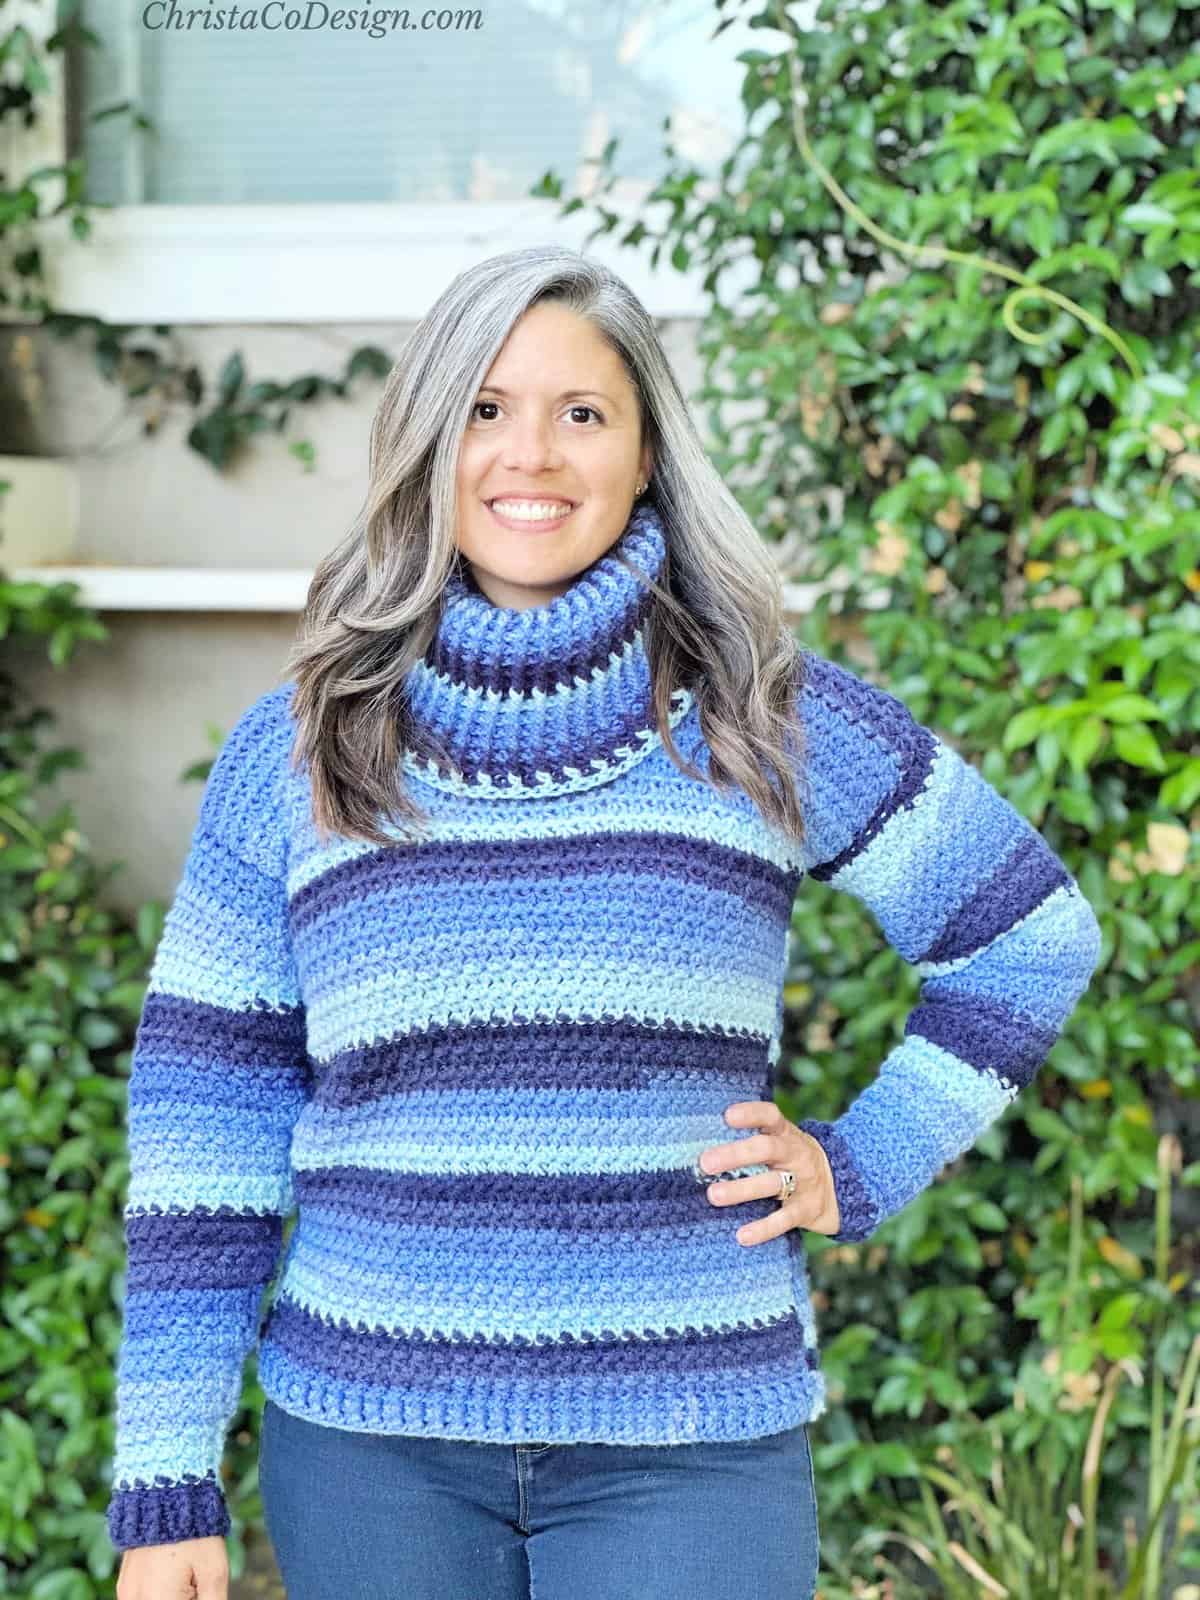
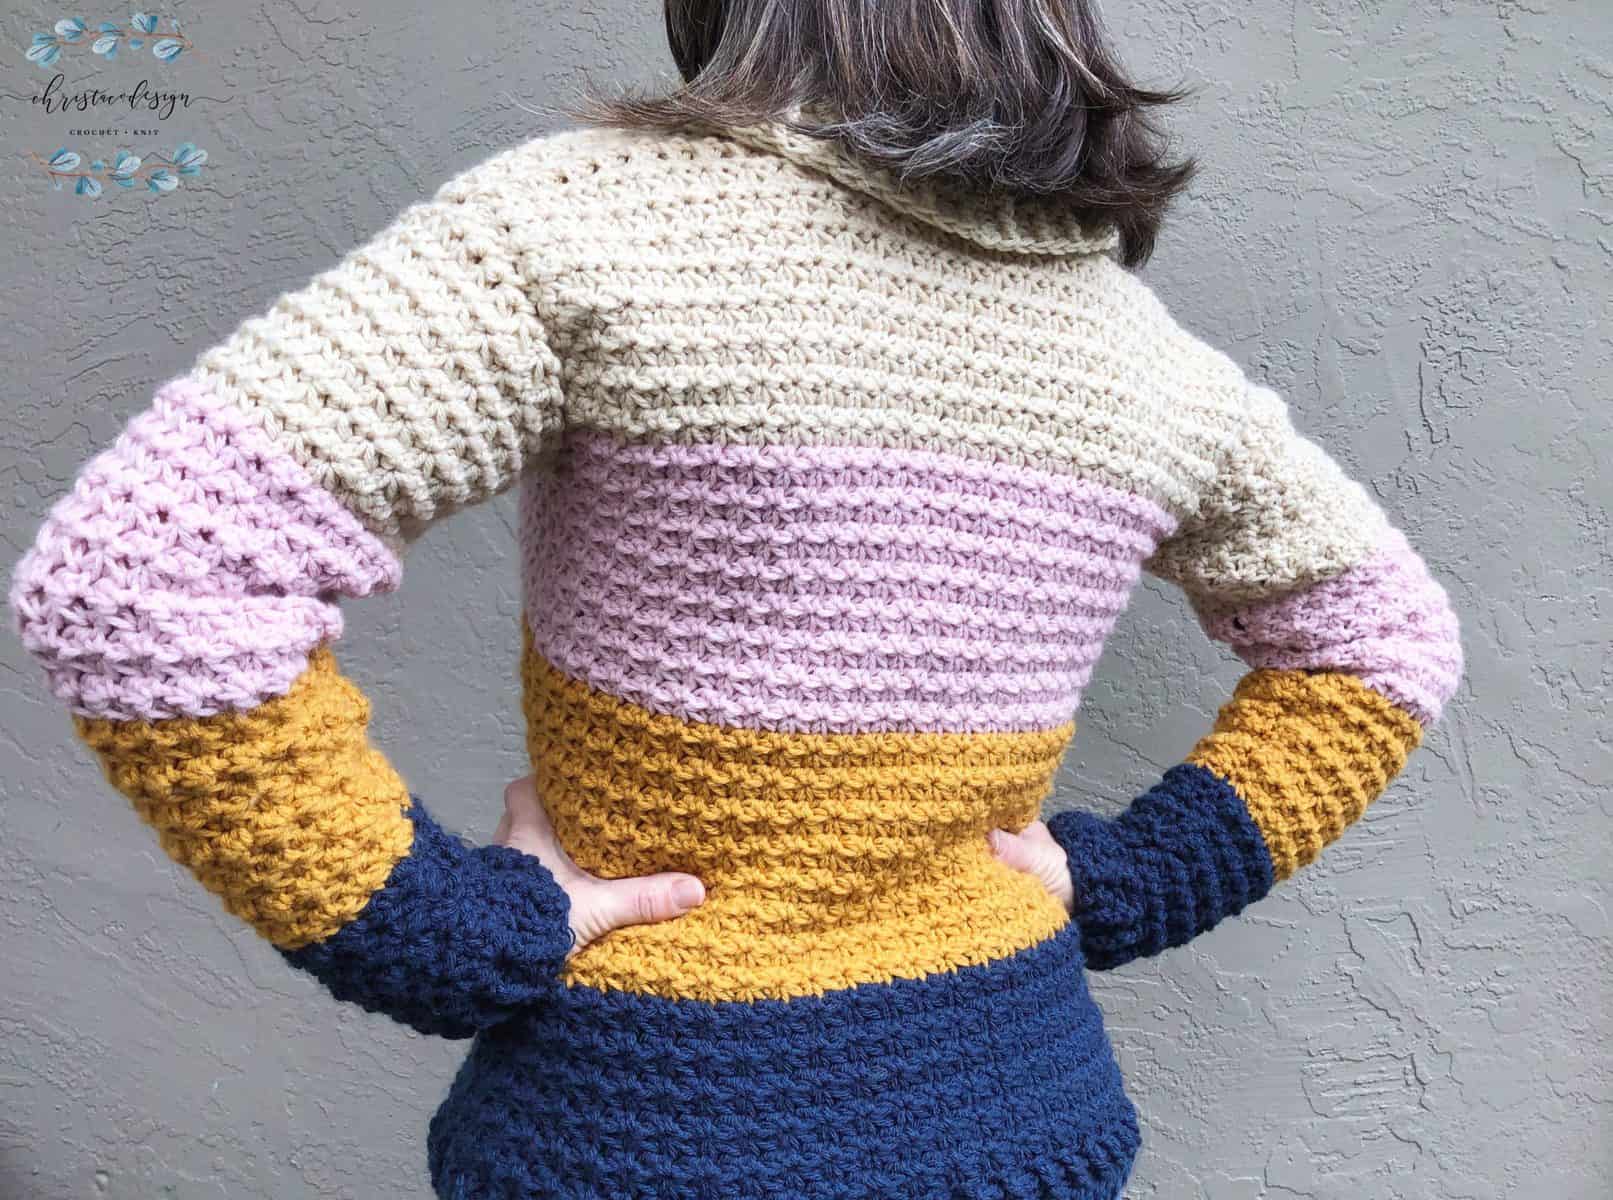
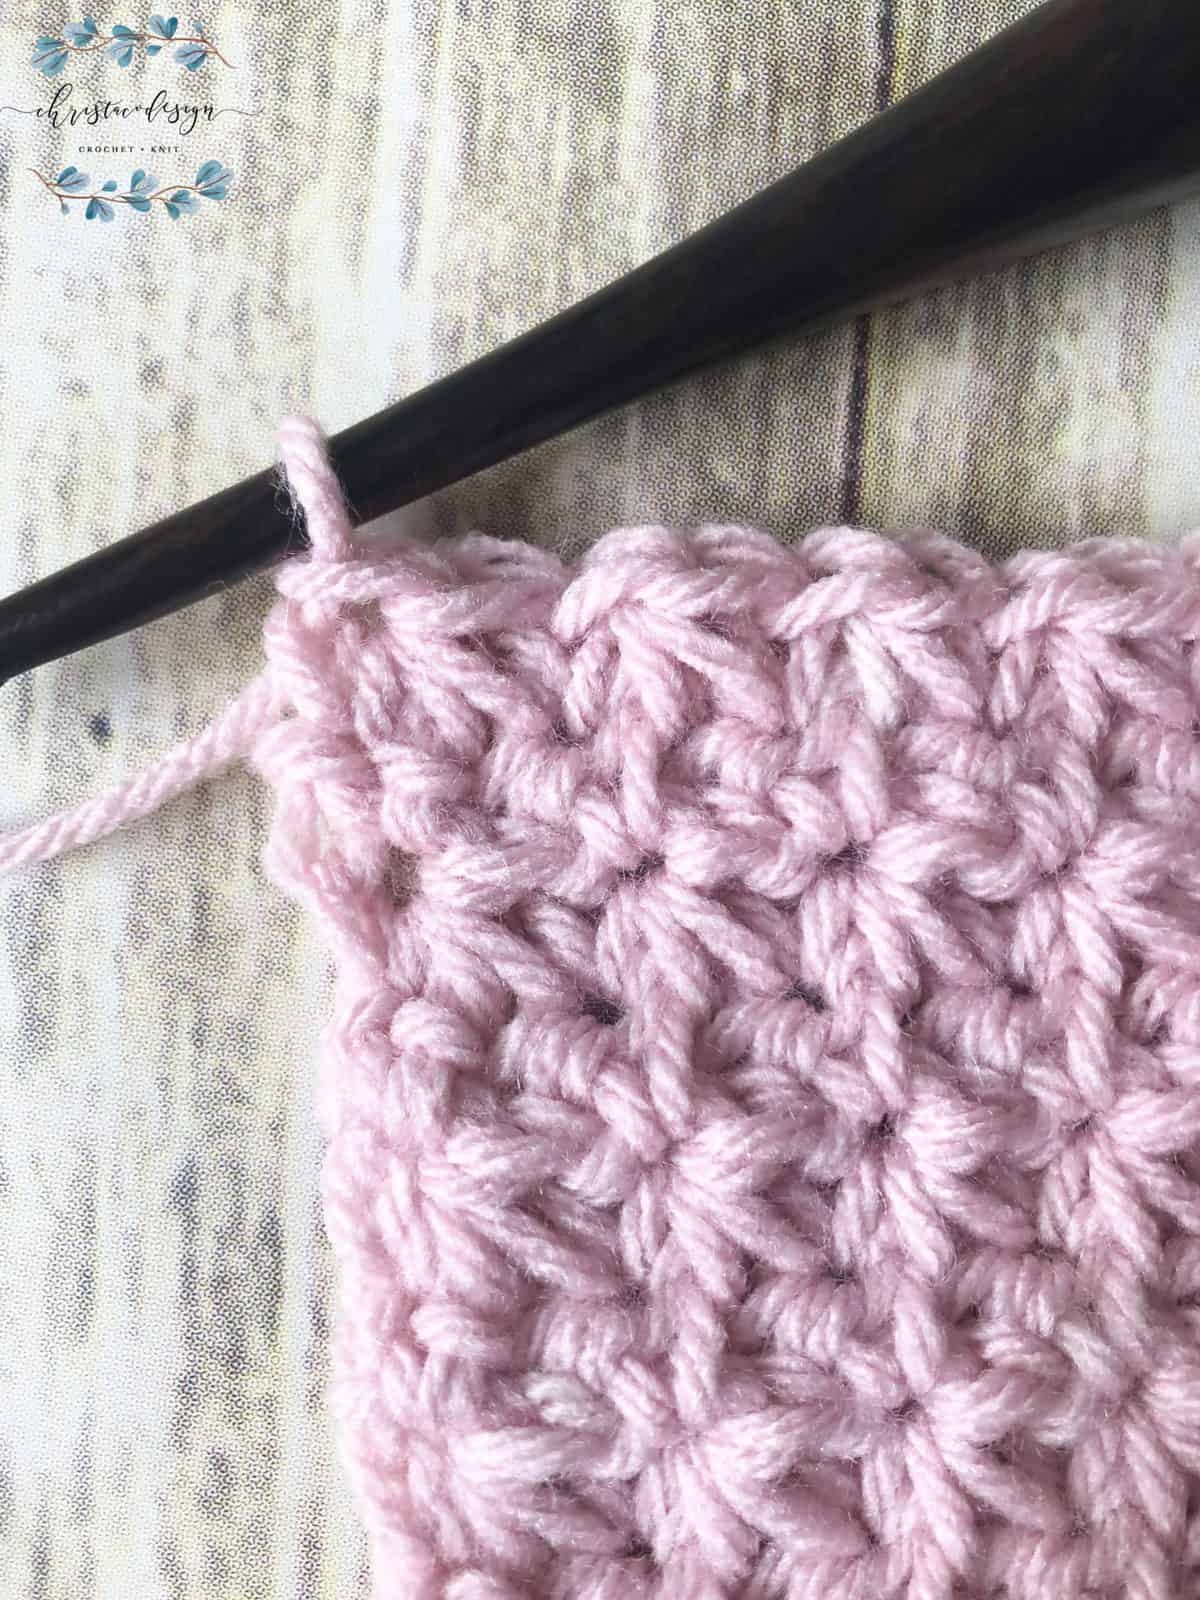
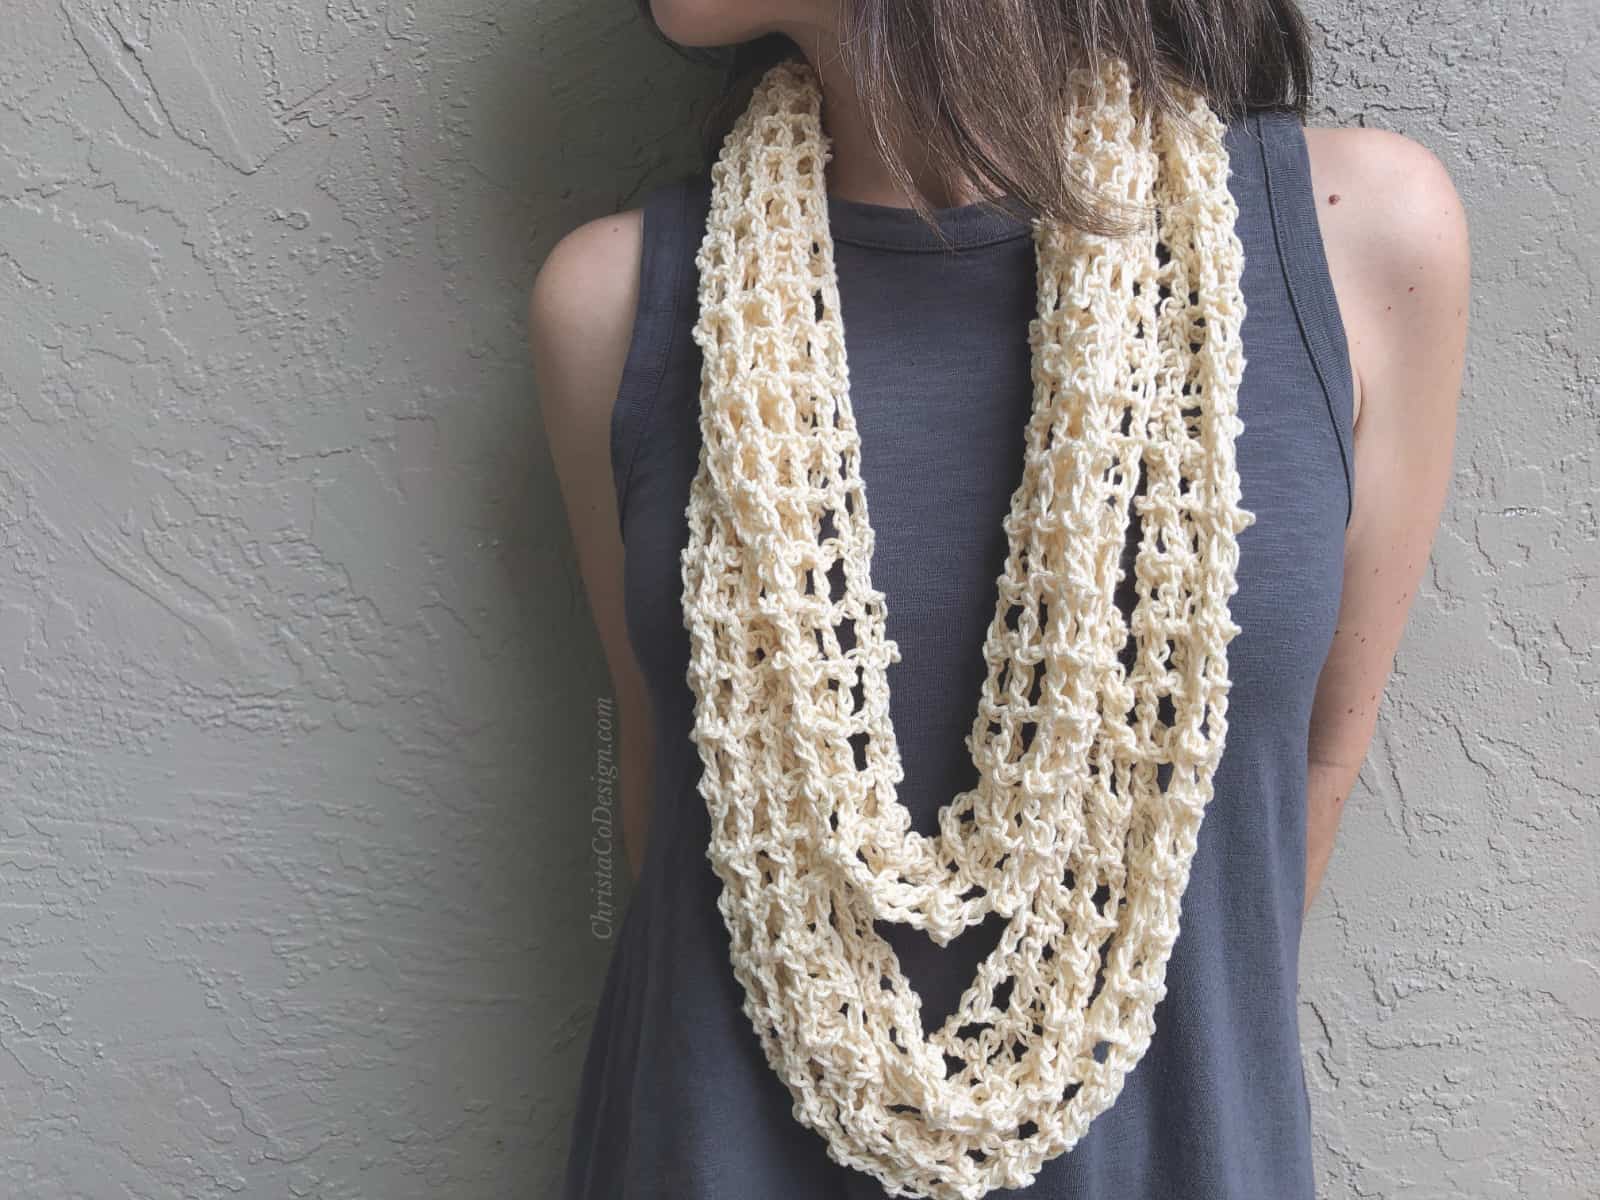
The Sunset Cowl Neck Sweater is a fitted crochet pullover with the coziest cowl neck. The Trinity Stitch lends this crochet sweater its gorgeous texture.

This post contains affiliate links, I may earn a fee. Read more disclosure policy.
Join the ChristaCoDesign Newsletter
Never miss a pattern!
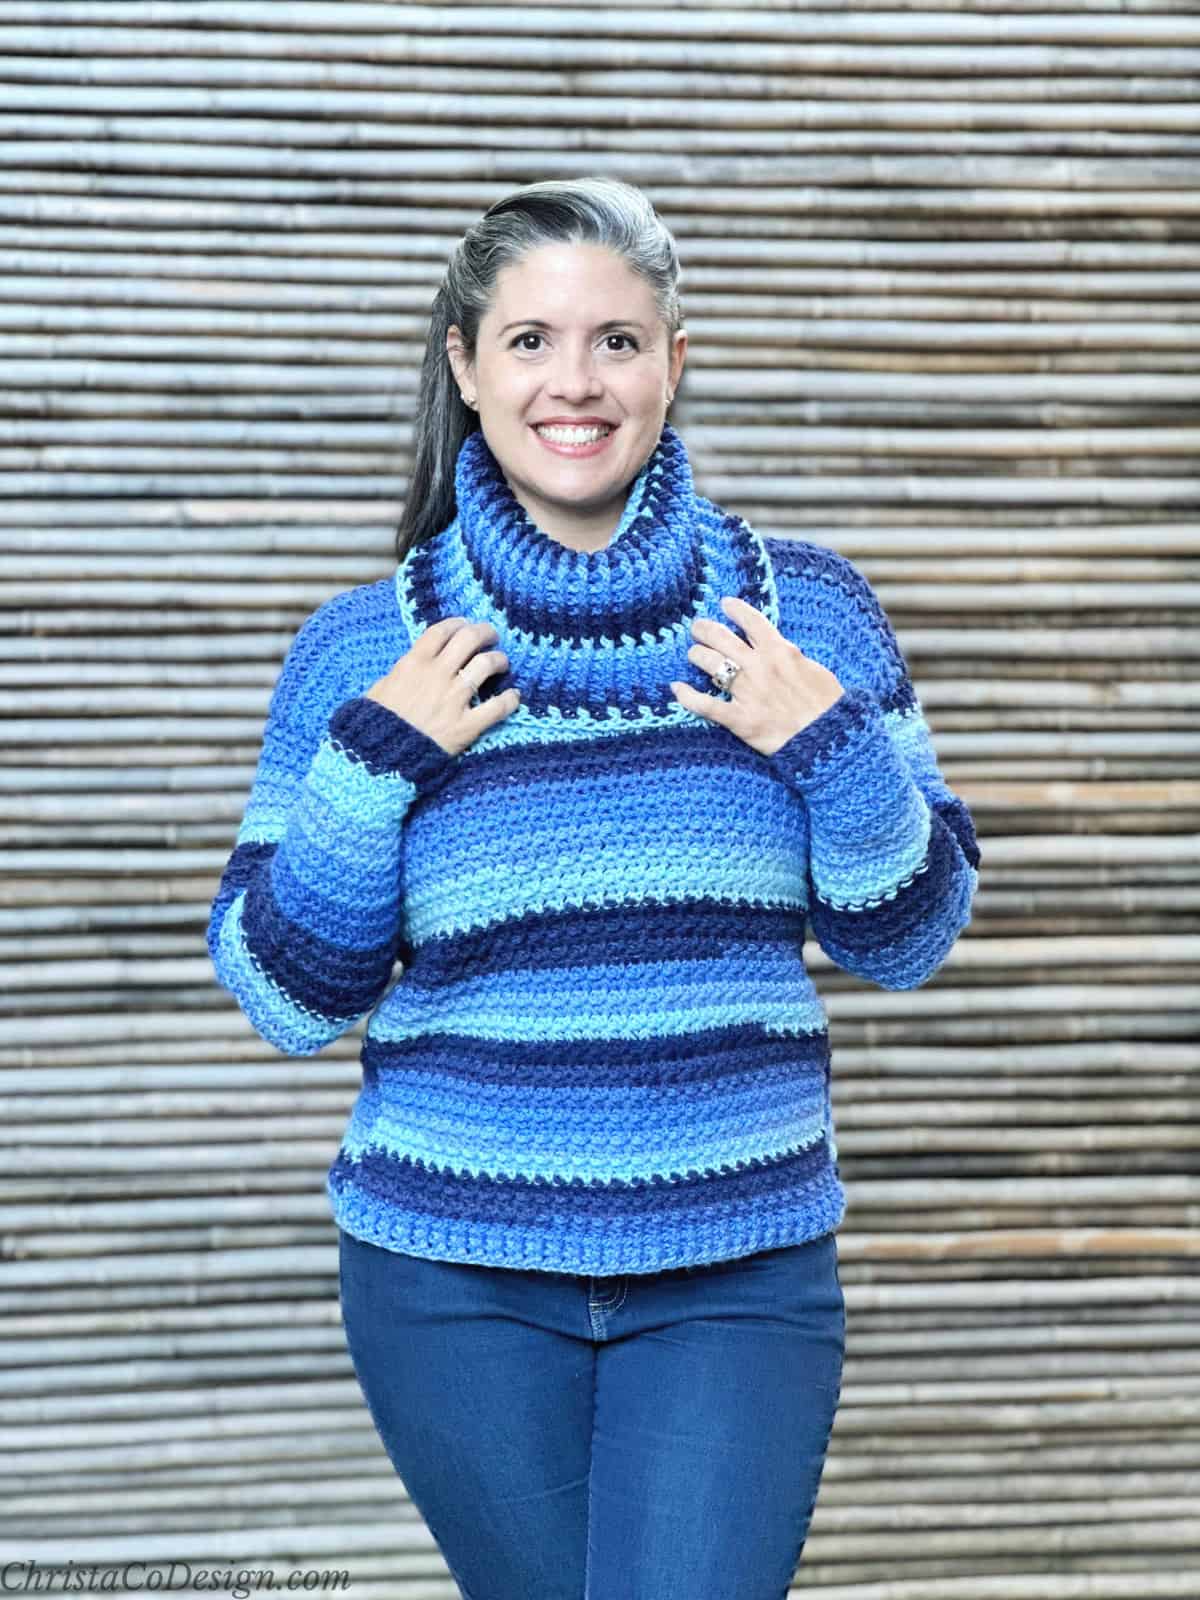
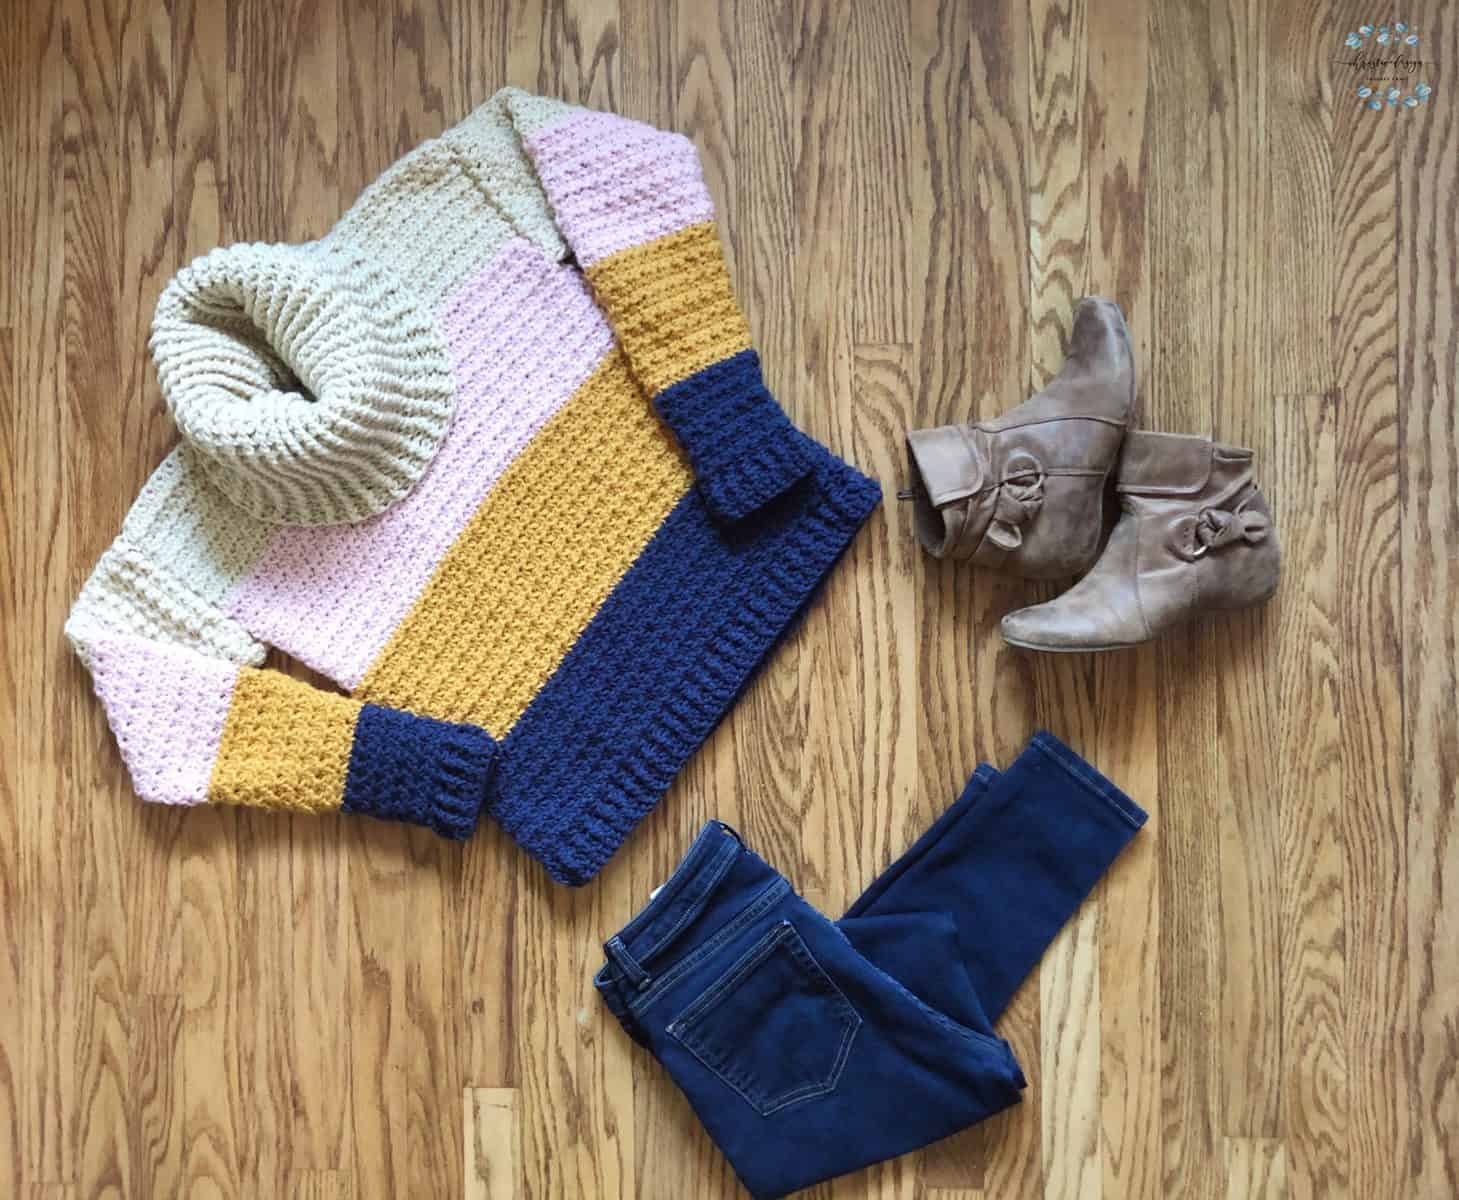
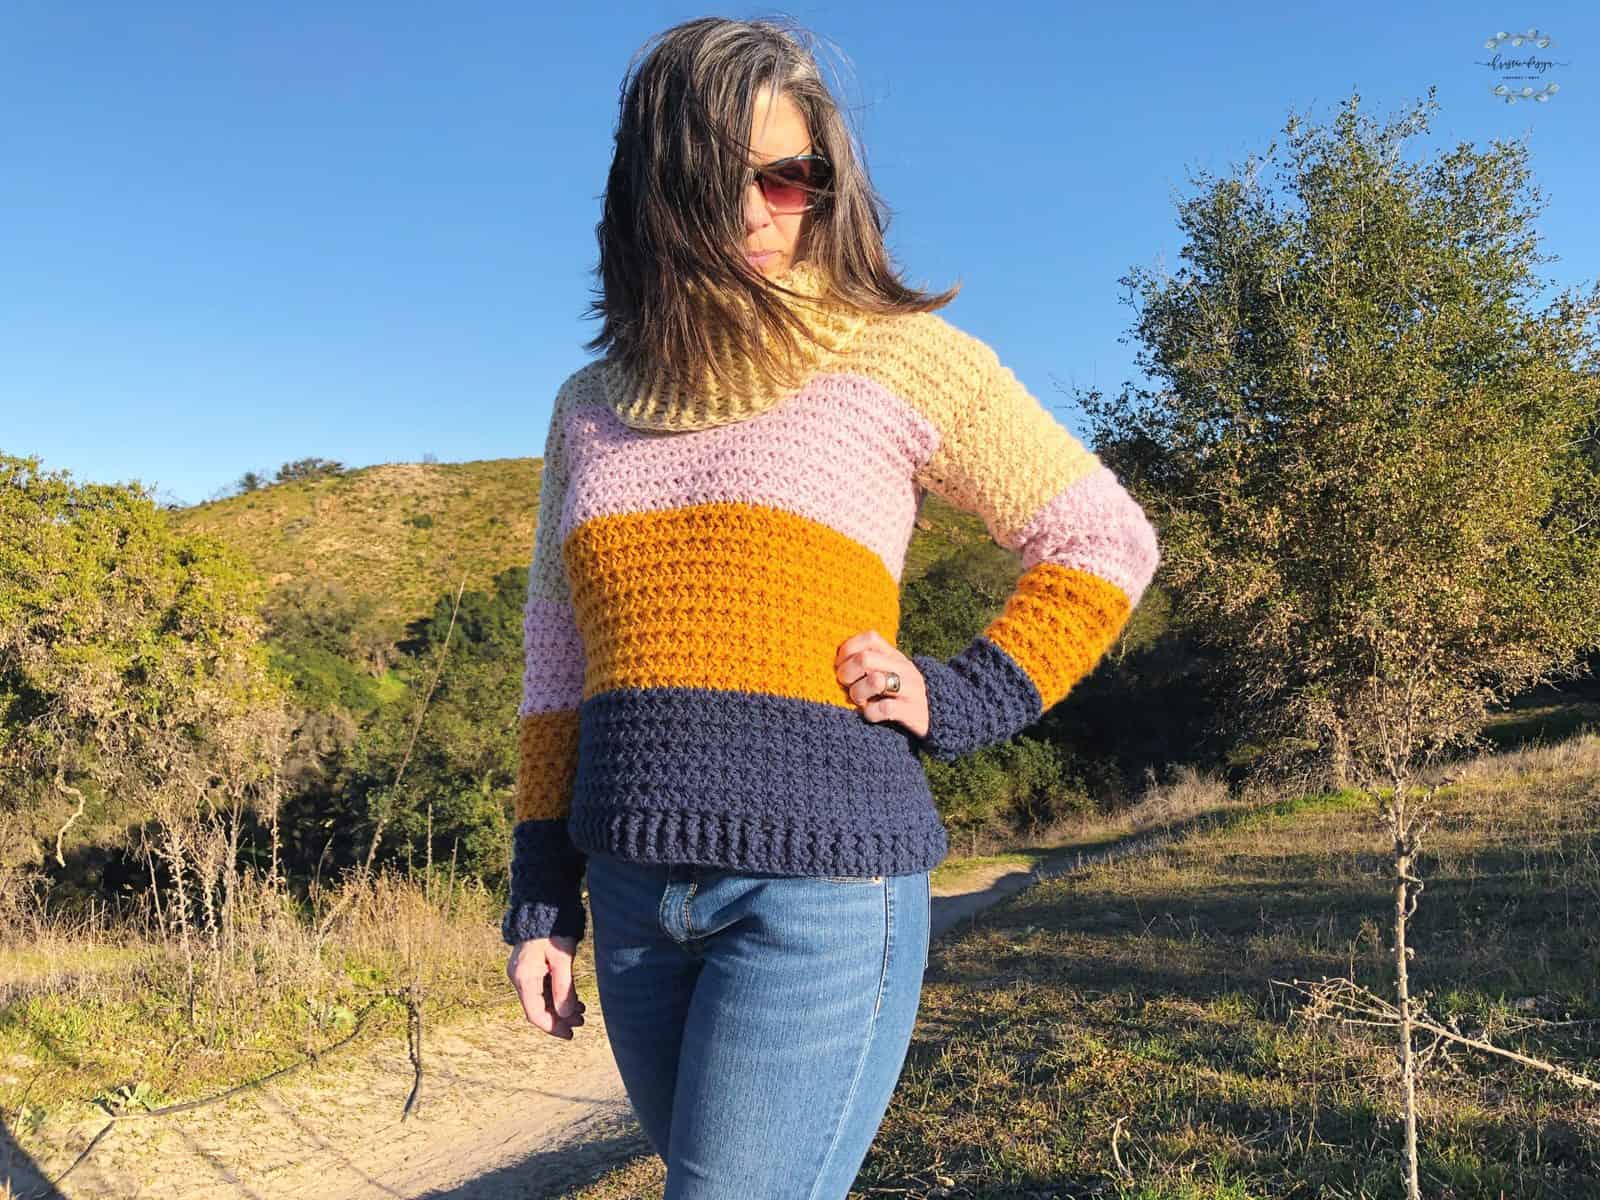
Easy to wear everyday or dress up for an evening out. This comfy sweater is so cozy. The textured stitches really pop in the light colors.
Sunset is such a lovely time of night, and a perfect time to snuggle up in a warm sweater.
Thanks to WeCrochet for sending me the yarn to make this pattern.
Purchase the ad-free, well formatted printable PDF Pattern from my shop. Scroll down for the free pattern!
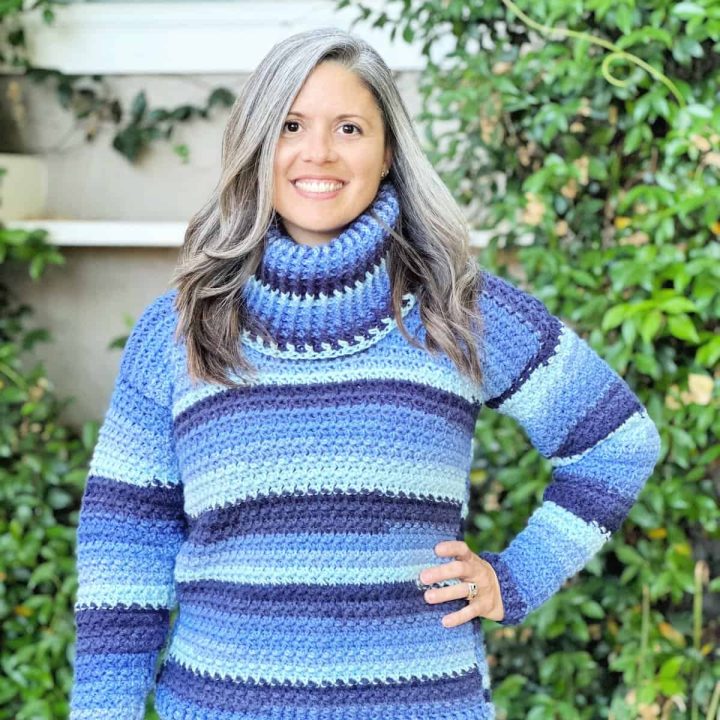
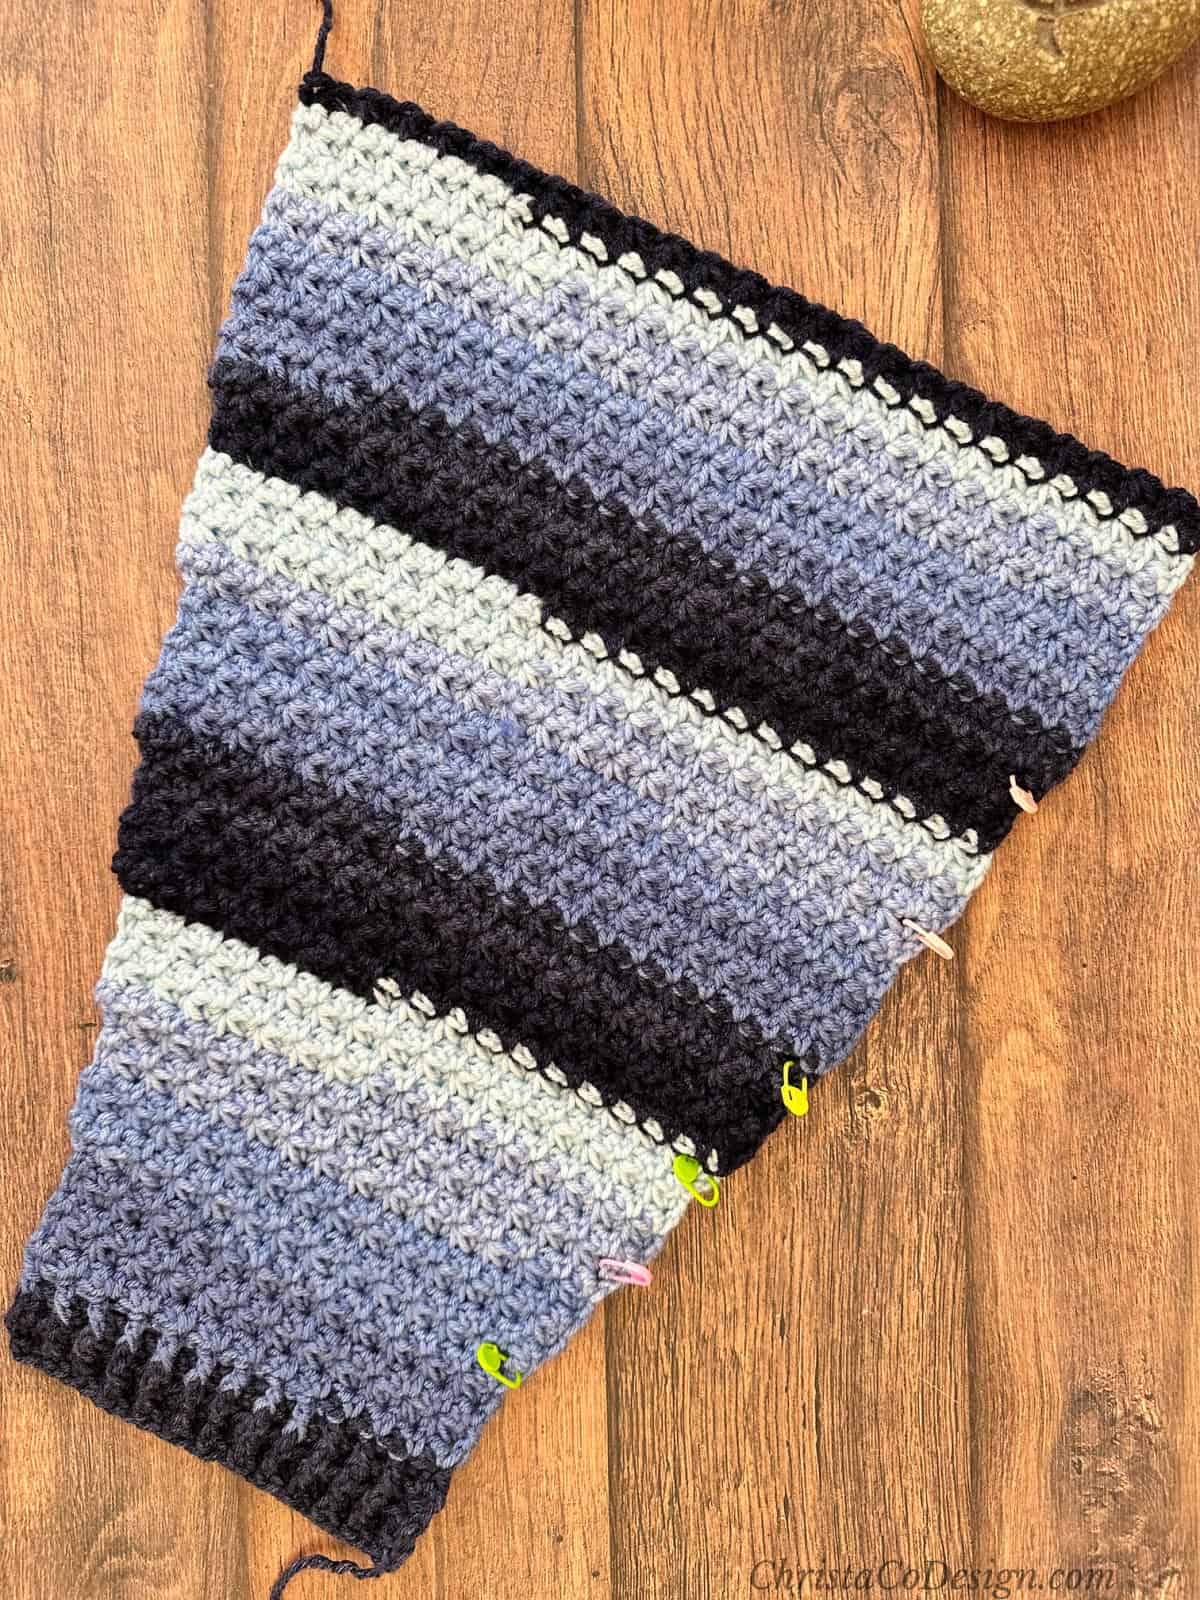
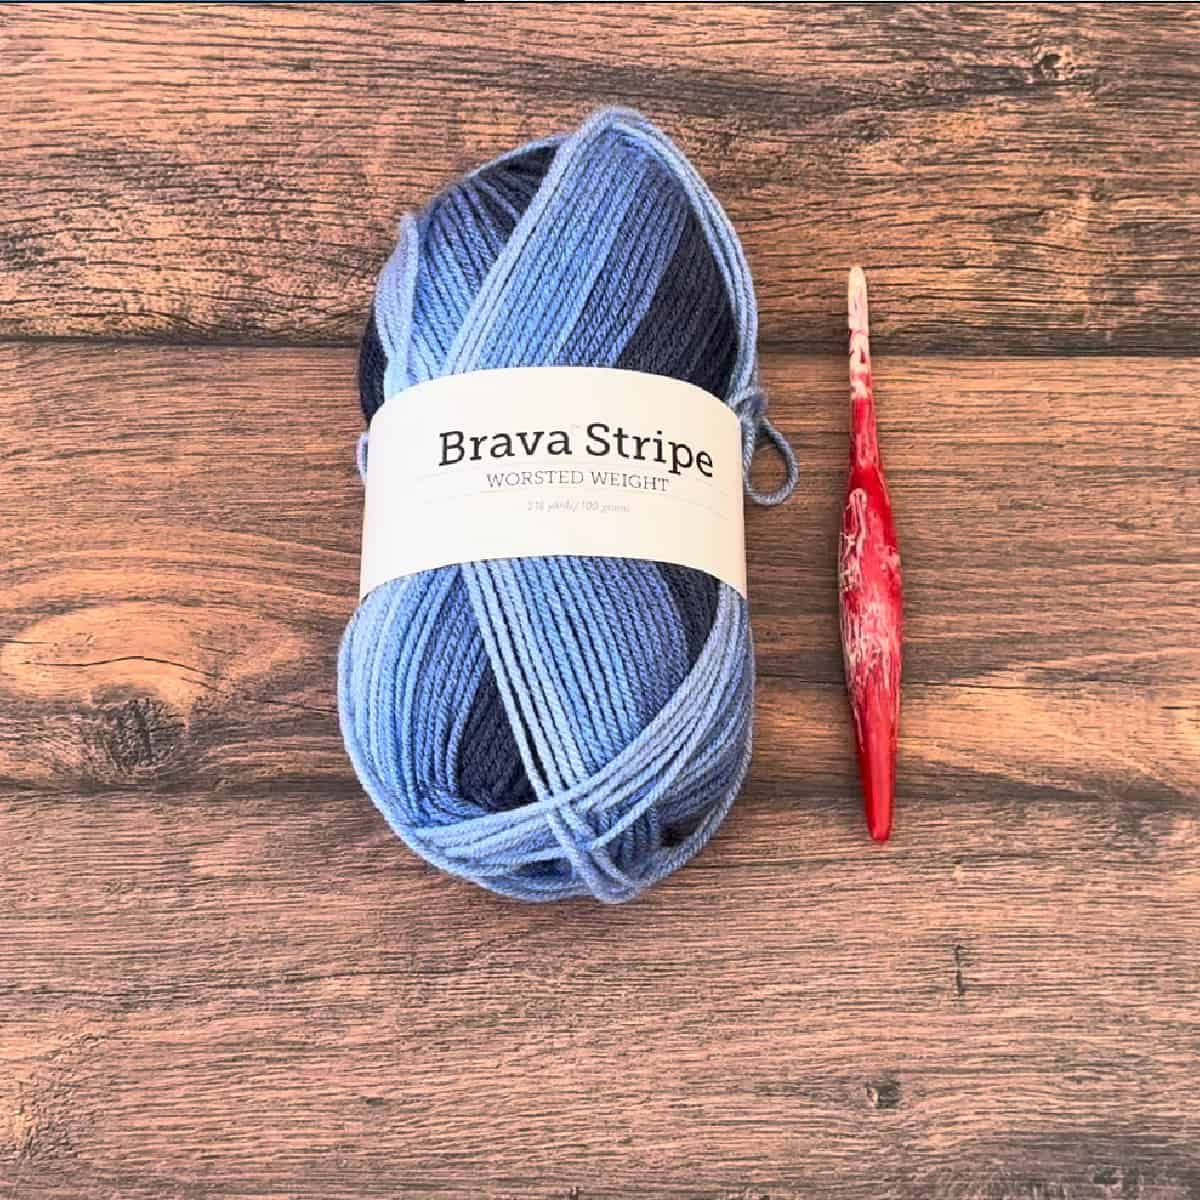
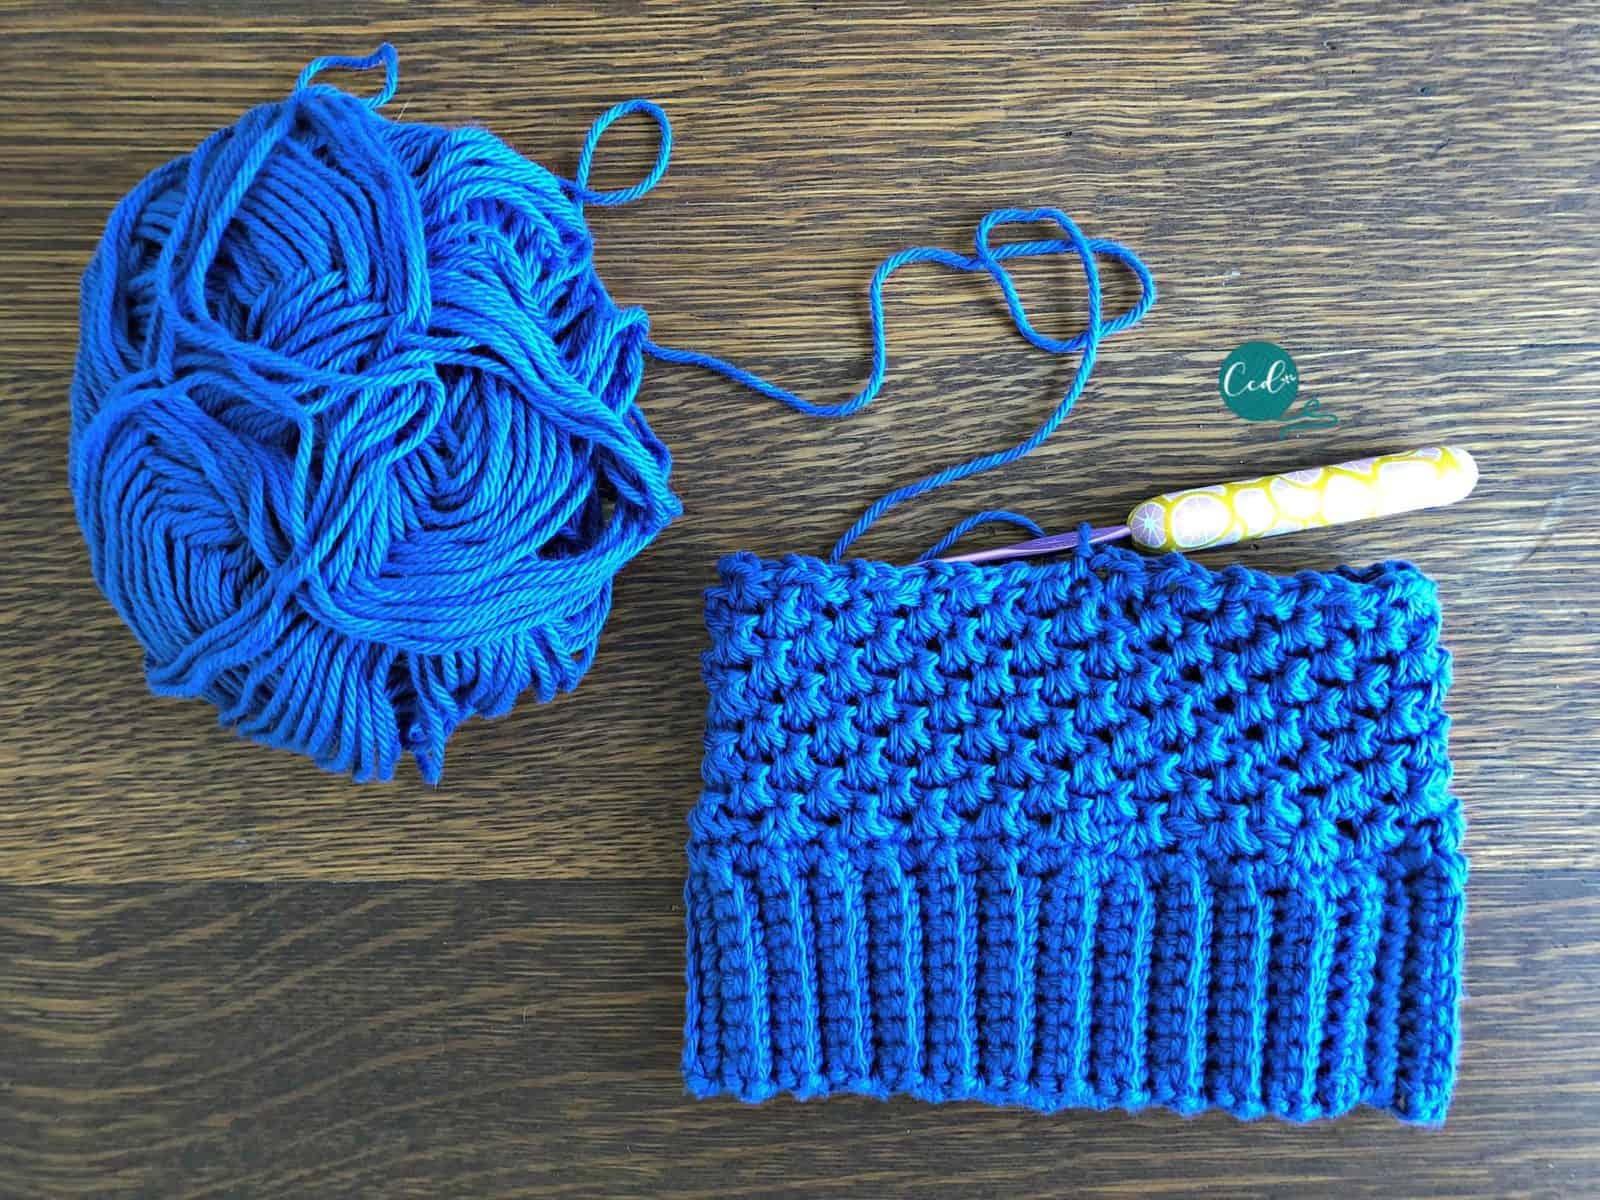
Let the yarn do the work for you! This blue striped version features Brava Stripe in the color twilight!
Thanks to the folks at WeCrochet I was able to record a full video tutorial for this cozy sweater. While I must admit I generally like control of my color changes, you can’t beat easy! And the self striping yarn does it beautifully here.
You can get the PDF Pattern and yarn for this sweater* all in one stop on the WeCrochet website!
Purchase My Ad-Free PDF Patterns In Your Favorite Shop Here:
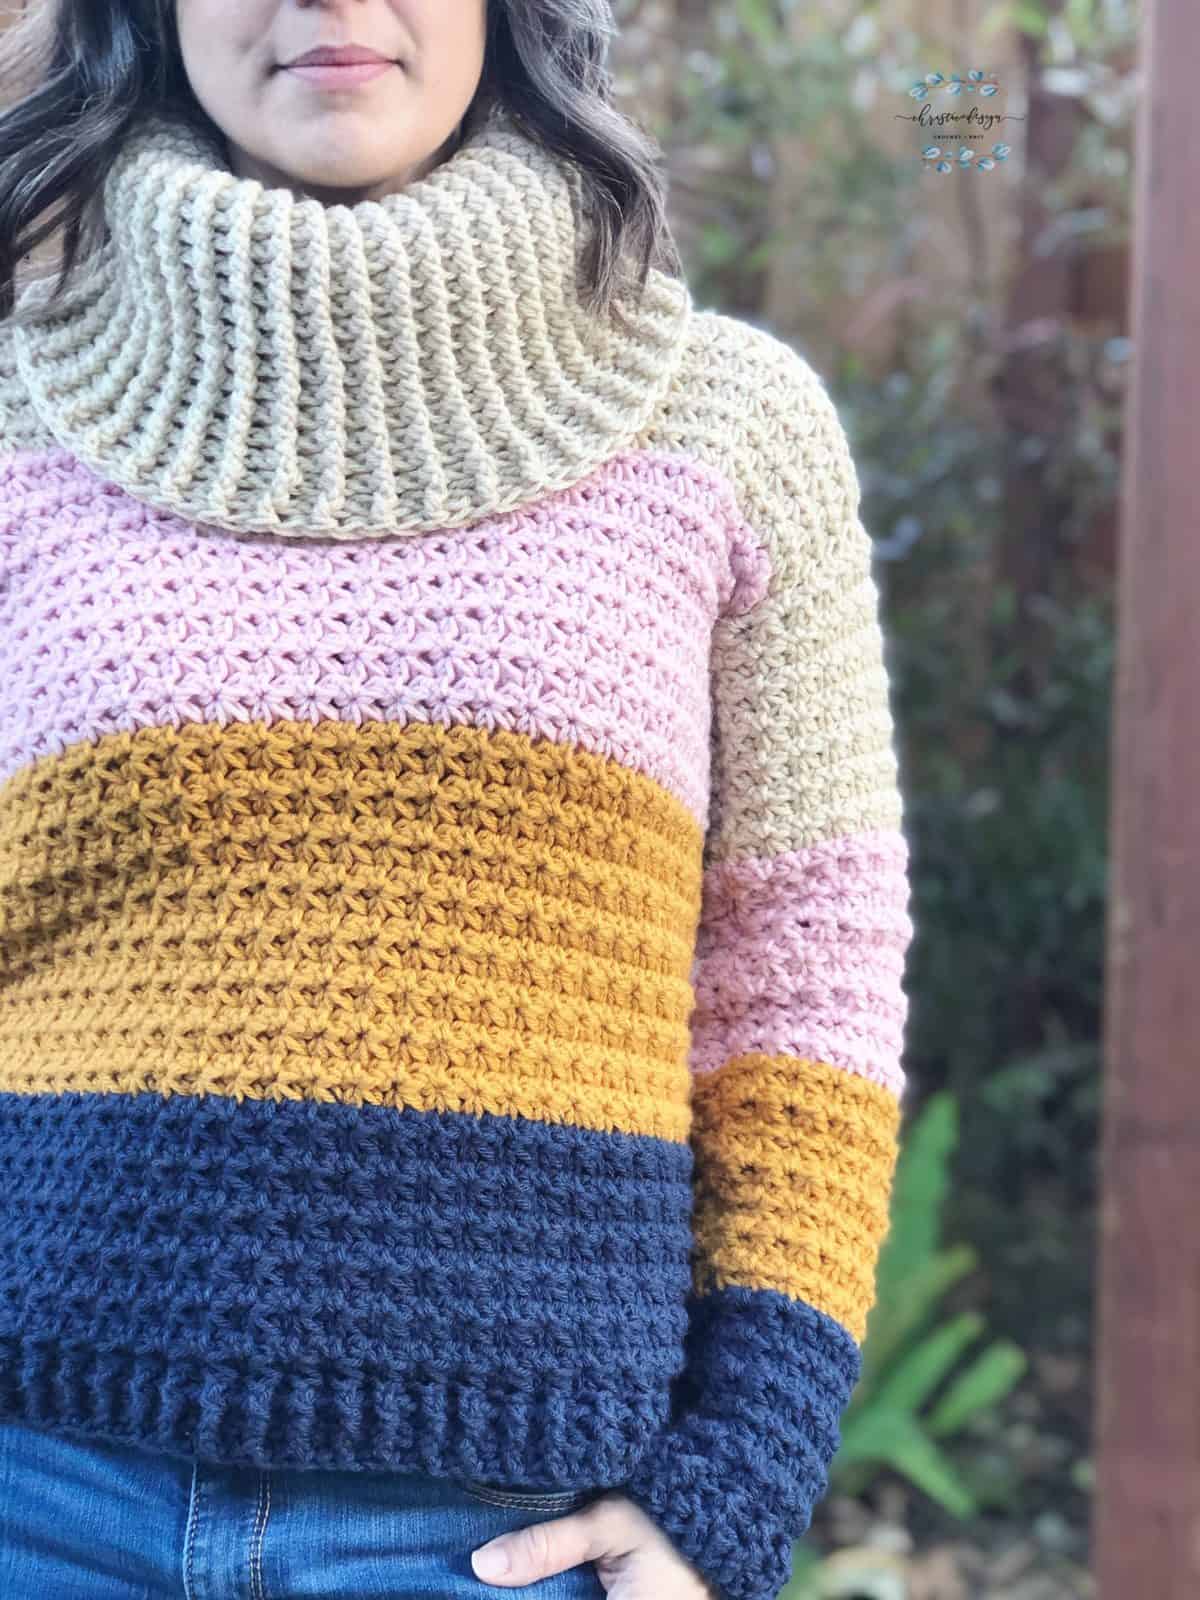
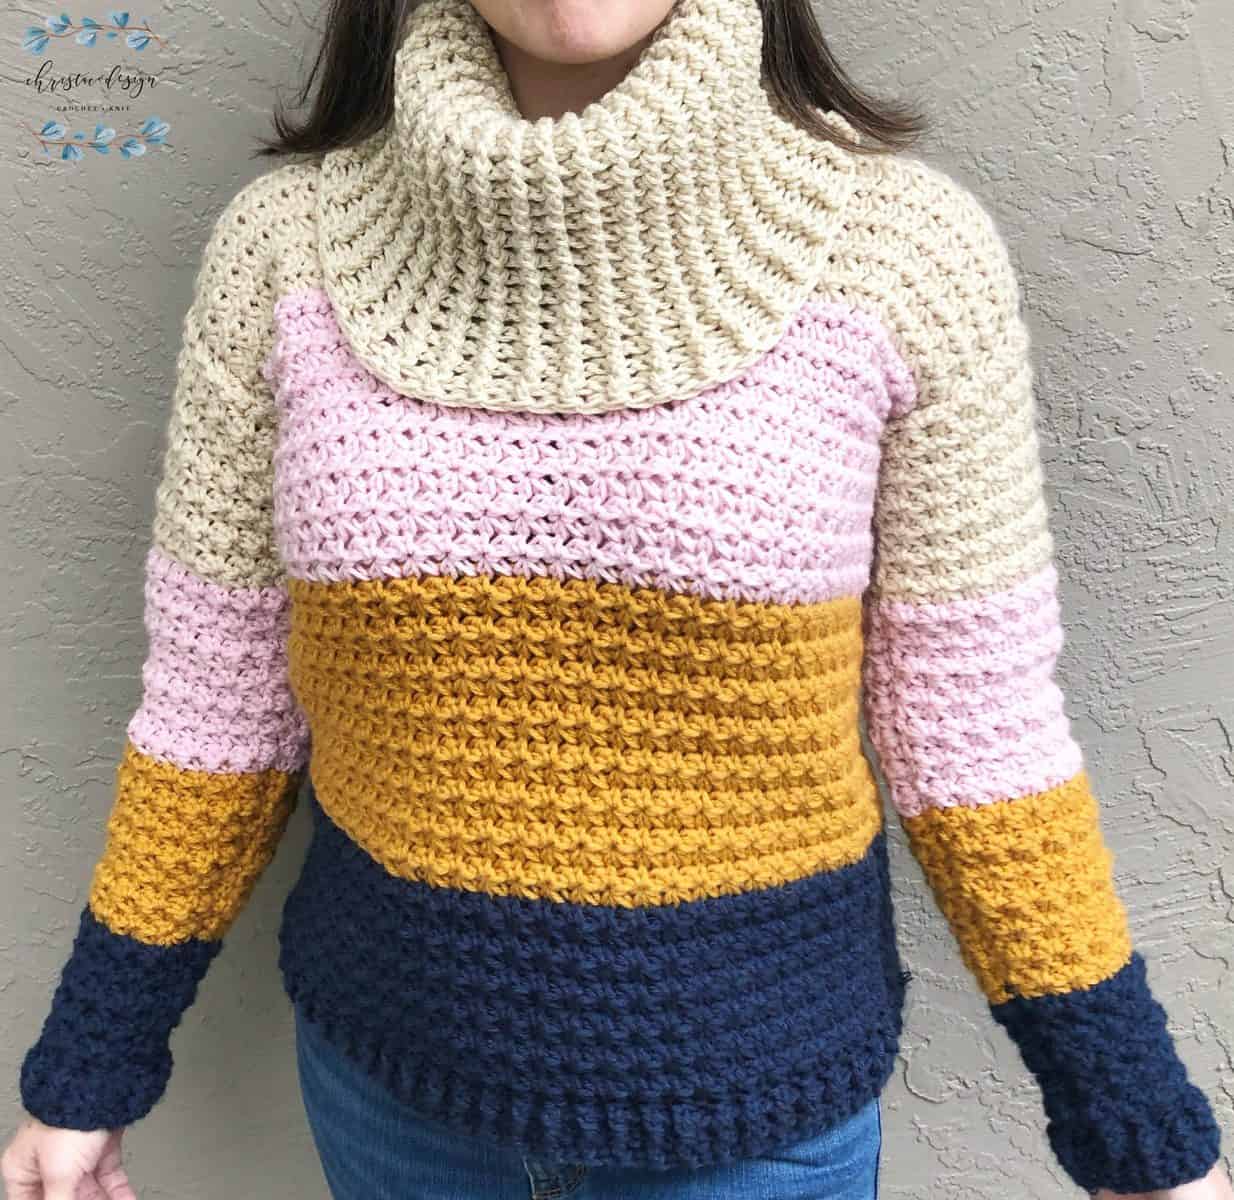
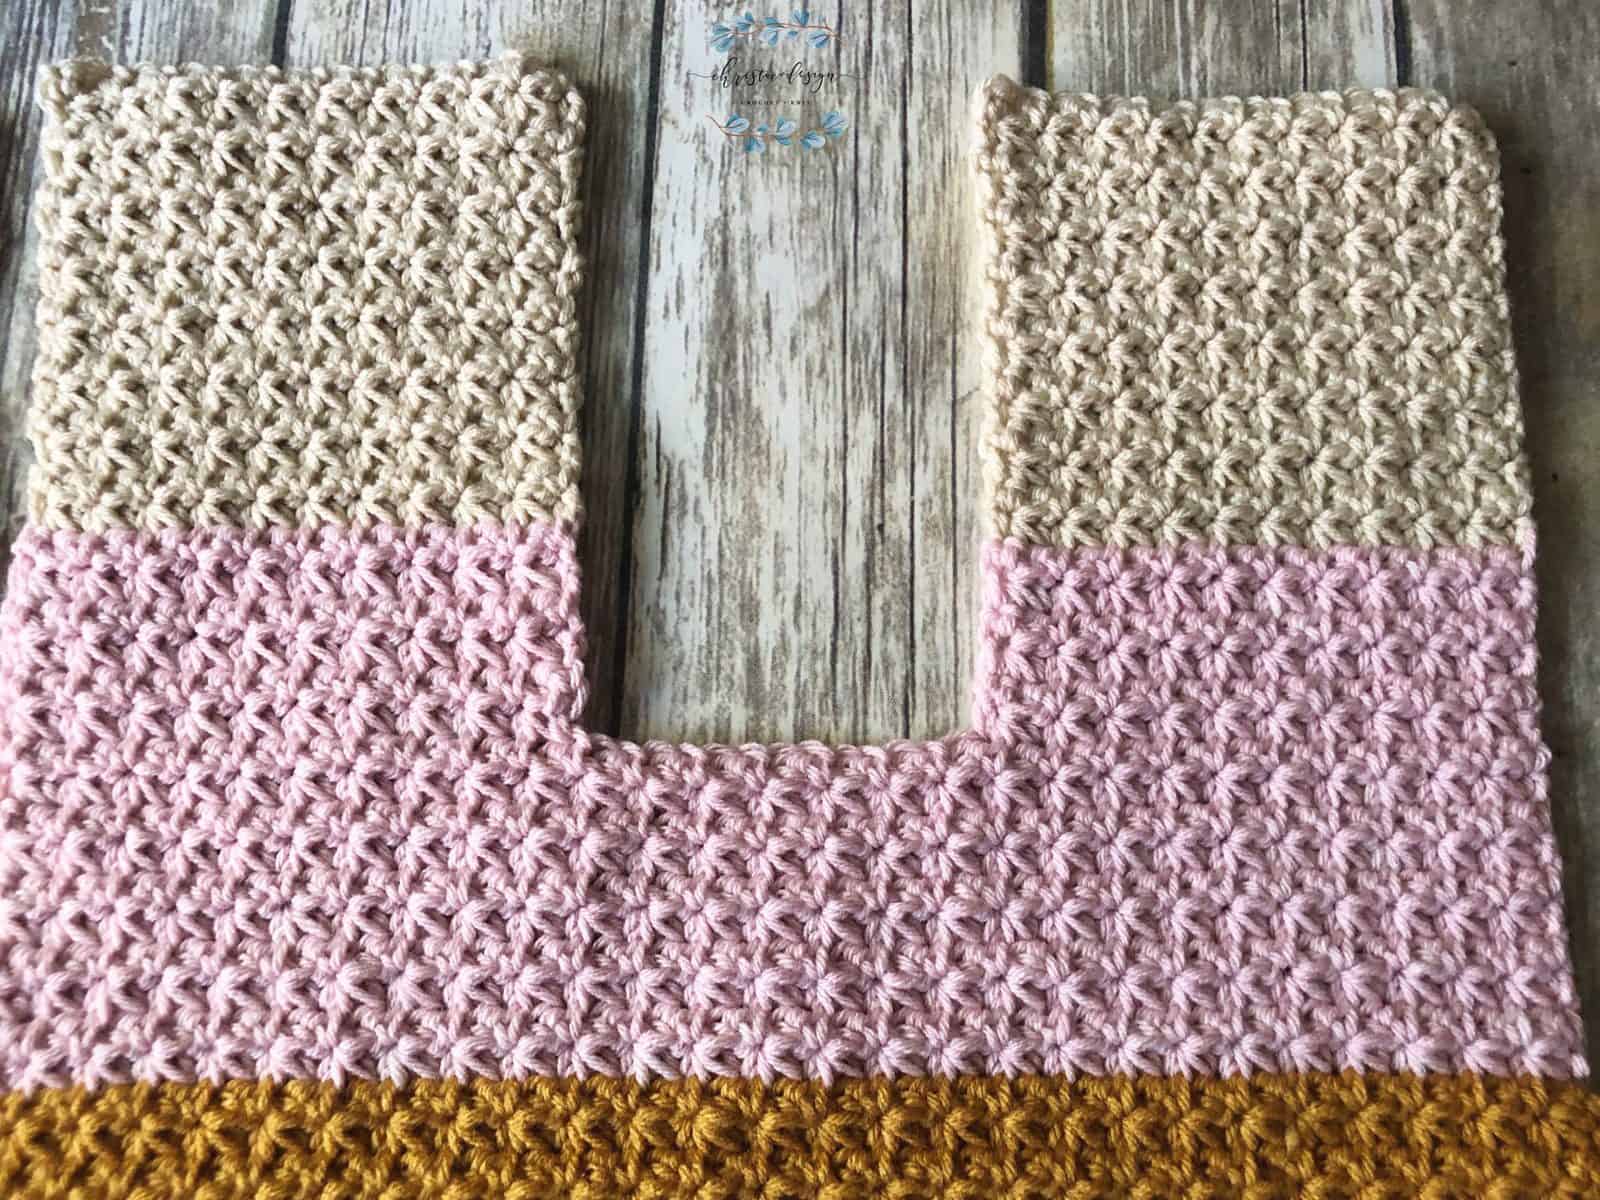
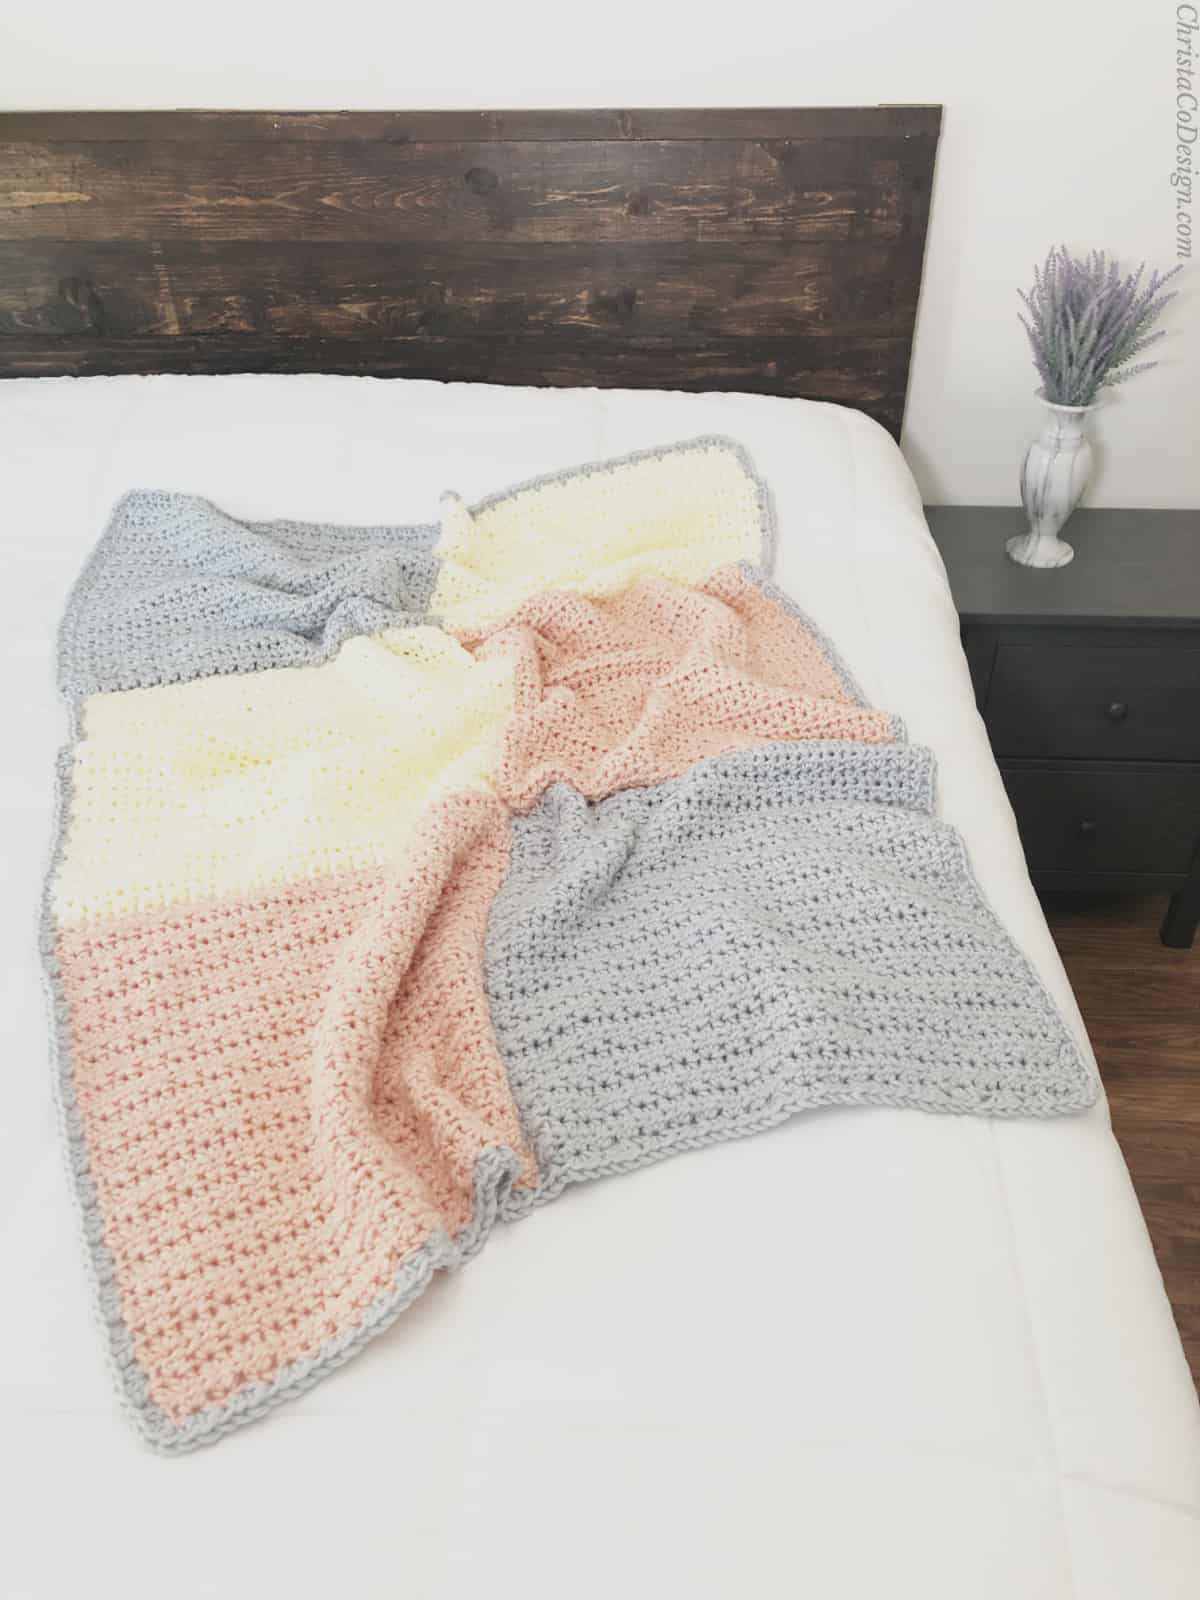
Of course if you want to do large blocks of color then the blush, navy, mustard and cream are the perfect compliments to one another and create that gentle sunset look.
The cozy cowl neck is just all kinds of snuggly. It’s a bit of a yarn eater, but oh so worth it for the squishy neck warmth. I love ribbing and it works beautifully here.
The Sunset Sweater looks amazing in solids, larger color blocks, or self striping. It’s yours to customize. This sweater can even be a fun stash buster.
Save your favs!
Add this pattern to your Ravelry queue.
Materials
- Self-striping version in WeCrochet’s Brava Stripe* (100% Premium Acrylic, 218 yd (199 m) in shade Twilight: 6 [7, 8, 9, 9, 10, 10, 11, 11] skeins.
- Color block version in Joann’s Big Twist Yarn (100% Acrylic, 380 yd / 348 m) in shade Navy (A) – 1 [1, 2, 2, 2, 2, 2, 2, 2] skeins, Mustard (B) – 1 [1, 2, 2, 2, 2, 2, 2, 2] skeins, Rose (C) – 1 [1, 2, 2, 2, 2, 2, 2, 2] skeins, and Cream (D) – 1 [1, 2, 2, 2, 2, 2, 2, 2] skeins, or (XS) 1308 (S) 1526 (M) 1744 (L) 1850 (XL) 1962 (2X) 2084 (3X) 2108 (4X) 2211 (5X) 2398 yds of #4 med worsted weight yarn divided evenly into 4 colors.
- 6 mm (US Size J-10) crochet hook,* or hook needed to meet gauge.
- Yarn needle, measuring tape, scissors, 2 stitch markers.
Notes
Please read through pattern and complete a gauge swatch before you begin.
Ch 3 counts as a stitch, I highly recommend using a ch 3 alternative, here’s my favorite.
Ch 1 at the start of the row does not count as a stitch.
Stitch multiple is 2 +1.
The panels are reversible until a color change is made, this sets which side is the RS and WS. In the pattern the color changes are made on odd rows. Keep this in mind if altering the color blocks.
Blocks in pattern are worked in four 6” panels for a length of 24.” Always change colors on the same side of your fabric and you’ll be fine.
Pattern is worked bottom up in 4 parts: back panel, front panel and two sleeve panels and then seamed together. Cowl neck is joined and worked in the round.
Pattern is written for multiple sizes, with the smallest size written first and each subsequent size written in parentheses XS (S, M, L, XL, 2X, 3X, 4X, 5X).
For example: Row 1. Fdc 49 (55, 61, 69, 75, 81, 87, 95, 101). To make an XS you would foundation double crochet 49, for a M you would foundation double crochet 55 and a 4X you would foundation double crochet 95.
Skill Level

I have marked this pattern as Intermediate because of the special stitches used. However, I’ve also linked to photo + video tutorials for those stitches, so even if the Trinity Stitch (or post stitch) is new then you can easily learn them and make this sweater too!
Tutorials linked under Stitches.
More Free Crochet Sweater Patterns
Our Favorite
Crochet Patterns
Stitches/Abbreviations
US Terms
BPdc – back post double crochet
ch(s) – chain(s)
dc – double crochet
fdc – foundation double crochet
FPdc – front post double crochet
m – stitch marker
patt – pattern
pm1(2) – place the first or second marker
rep – repeat
rnd – round
RS – right side
sc3tog – single crochet three together
sk – skip the indicated stitch
sl st – slip stitch
st(s) – stitch(es)
WS – wrong side
Special Stitches
Ts-Trinity Stitch Photo & Video Tutorial This is the stitch used, for simplicity the instructions are written out in the pattern. Click on the link above to view a step by step photo tutorial and video.
Gauge
13 sts x 10.5 rows (after blocking) to 4” (10 cm) measured over trinity stitch
Since we’re used to counting the top of the stitches and each trinity stitch includes two of those then the gauge is counted as 2 sts for each trinity st cluster. The 4″ = 13 sts so this is 6.5 clusters and if you count the tops of the stitches it’s 13.
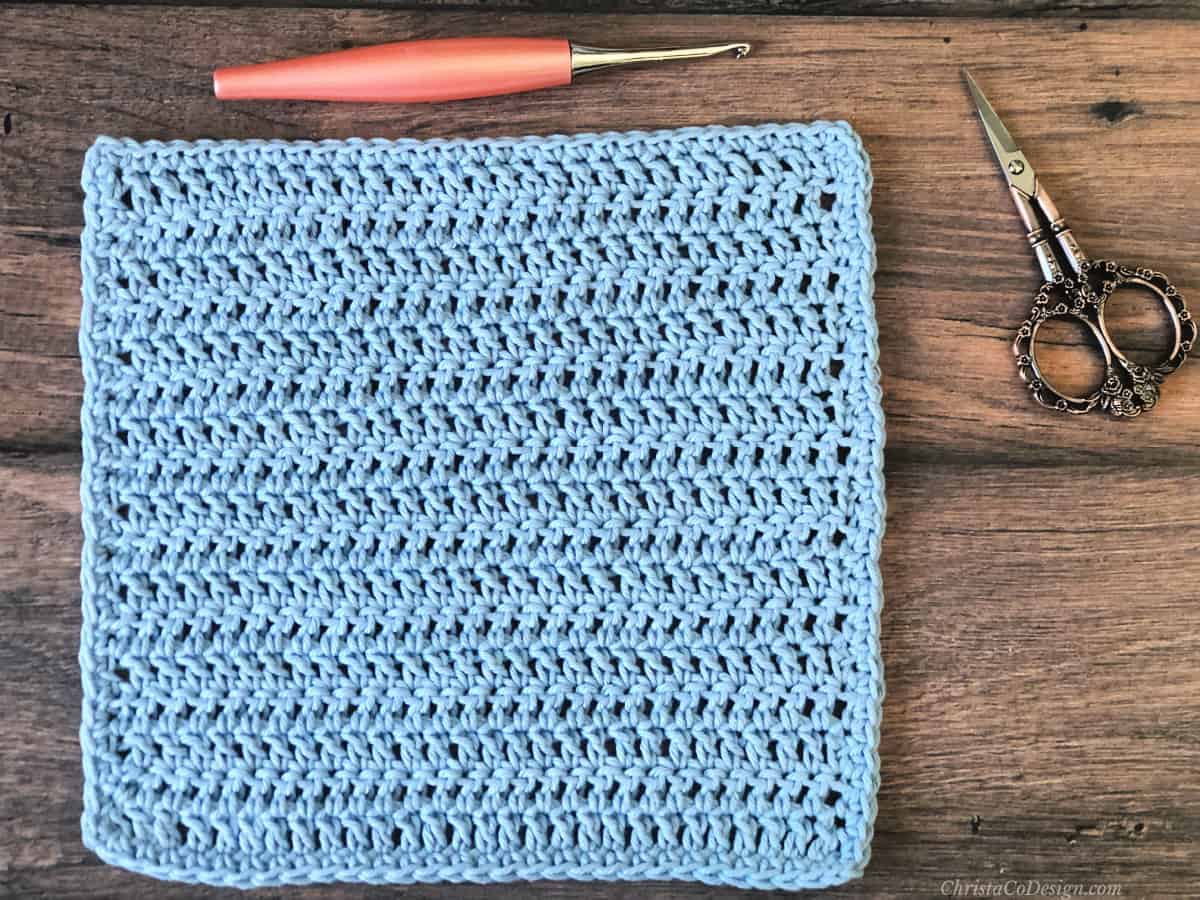
Swatch
(is intentionally larger than 4”):
Ch 18,
Row 1. Sc in 2nd ch from hook, starting in same st: sc3tog, *{ch 1, starting in same st: sc3tog} rep from * to end of row, after last sc3tog do not ch 1, insert hook back into last st, place a sc with end of last st, turn. (17 sts)
Row 2. Ch 1 (does not count), in same st sc, starting in same st as sc: sc3tog, *{ch 1, starting in same st: sc3tog} rep from * to end of row, after last sc3tog do not ch 1, insert hook back into last st, place a sc with end of last Ts, turn. (17 sts)
Rep Row 2 for 11 rows total or until swatch is at least 4” tall.
Measure 4” within the swatch. If you get more than 13 sts in 4″ then you need to rewatch with a smaller hook and if you get less than 13 sts in 4″ then you need to rewatch with a larger hook.
If you have trouble meeting gauge, you can size up in the pattern to get the needed width or add more rows to get the needed length.
Fit/Adjustments
Pattern is a snug fit, equal to body measurements. There is no ease is added, so you’ll want to take measurements periodically to check that you’re still on target. For a looser fit, go up a size in the pattern.
All sizes are written for the same length. If you increase the length of your sweater, be sure to make the front and back panels the same length; you may also need to adjust color blocking.
If you are color blocking then you will want to plan out any length adjustments before you begin. Measure from the top of your shoulder to where you would like your sweater to stop on your body. Use this measurement to divide your colors into.
As written the pattern is 24” in length made of 4 color blocks of 6” each. The last 8.5” of the front panel is when you divide for the shoulders + neck.
Don’t forget to pin this for later!
Sizing
XS [S, M, L, XL, 2X, 3X, 4X, 5X]
To fit 30 [33, 38, 42, 46, 50, 54, 58, 62]” (76 [86, 96.5, 106.5, 117, 127, 137, 147, 158] cm) circumference at bust.
Finished Measurements
30 [33.5, 39, 42.5, 46, 51, 55, 58.5, 62]” (76 [85, 99, 107.5, 117, 129.5, 139.5, 148.5, 157.5] cm) circumference at the bust (after blocking).
Intended to be worn with 0 – 1” (0 – 2.5 cm) of positive ease at the bust.
Pattern Instructions
How To Crochet the Cozy Cowl Neck Sweater
The Sunset Sweater crochet pattern features a textured stitch with the coziest cowl neck ever.
Materials
- Self-striping version in WeCrochet’s Brava Stripe* (100% Premium Acrylic, 218 yd (199 m) in shade Twilight: 6 [7, 8, 9, 9, 10, 10, 11, 11] skeins.
- Color block version in Joann’s Big Twist Yarn (100% Acrylic, 380 yd / 348 m) in shade Navy (A) - 1 [1, 2, 2, 2, 2, 2, 2, 2] skeins, Mustard (B) - 1 [1, 2, 2, 2, 2, 2, 2, 2] skeins, Rose (C) - 1 [1, 2, 2, 2, 2, 2, 2, 2] skeins, and Cream (D) - 1 [1, 2, 2, 2, 2, 2, 2, 2] skeins.
Tools
- 6 mm hook, or hook size needed to meet gauge.
- Tapestry needle, measuring tape, scissors, st marker.
Instructions
XS [S, M, L, XL, 2X, 3X, 4X, 5X]
For the color block version, the 3 ribbing rows + 12 rows of trinity stitch are worked in navy, and then 16 rows or 6” each of mustard, rose, and cream. For the self-striping version, the color changes happen randomly, if making the color block version I recommend changing on the RS.
Back Panel
Row 1. Fdc 49 [55, 63, 69, 75, 83, 87, 95, 101] or ch 51 [57, 65, 71, 77, 85, 89, 97, 103] and dc in the 4th ch and in each ch across, turn. (49, 55, 63, 69, 75, 83, 87, 95, 101 sts)
Row 2. Ch 3, *{FPdc in next st, BPdc in next st} rep from * to last 2 sts, FPdc in next stitch and dc in last, turn.
Row 3. Ch 3, *{BPdc in next st, FPdc in next st} rep from * to last 2 sts, BPdc in next st, dc in last st, turn. An easy way to add length is by adding a few more rows to your ribbing. Be sure to start the main stitch pattern on an even row.
Trinity Stitch Pattern
Row 4. (RS) Ch 1 (does not count), sc in same st, starting in same st as sc: sc3tog, *{ch 1, starting in same st: sc3tog} rep from * to end of row, after last sc3tog do not ch 1, insert hook back into last st, place a sc with end of last st, turn. (49, 55, 63, 69, 75, 83, 87, 95, 101 sts)
Rows 5 - 63. Repeat row 4 for 59 more rows or until the total length measures 24” ( 61 cm) long. Row 4 sets the pattern. To lengthen your sweater rep more rows in patt here.
After working several rows in patt, check your target panel width 15 [16.75, 19.5, 21.25, 23, 25.5, 27.5, 29.25, 31]” (38 [42.5, 49.5, 54, 58.5, 65, 70, 74.5, 78.5] cm)
Cut yarn, and leave a long tail for seaming shoulders.
Front Panel
Row 1. Fdc 49 [55, 63, 69, 75, 83, 87, 95, 101] or ch 51 [57, 65, 71, 77, 85, 89, 97, 103] and dc in the 4th ch and in each ch across, turn. (49, 55, 63, 69, 75, 83, 87, 95, 101 sts)
Row 2. Ch 3, *{FPdc in next st, BPdc in next st} rep from * to last 2 sts, FPdc in next st and dc in last, turn.
Row 3. Ch 3, *{BPdc in next st, FPdc in next st} rep from * to last 2 sts, BPdc in next st, dc in last st, turn. If you added length to your ribbing make sure it matches your back panel. Be sure to start the main stitch pattern on an even row.
Rows 4 - 41. Work in trinity stitch pattern until panel length is 15.5” (39.5 cm) long total, leaving the last 22 rows or 8.5” (21.5 cm) for shoulders. If you lengthened your back panel, add that extra length here now. Do not cut yarn, continue to Shoulders.
Shoulders
Set up: Count 17 [21, 25, 27, 31, 35, 37, 41, 43] sts in, pm1. Your first shoulder will end here. Skip the next 15 [13, 13, 15, 13, 13, 13, 13, 15] sts, pm2 in the next st. Your second shoulder will start here. 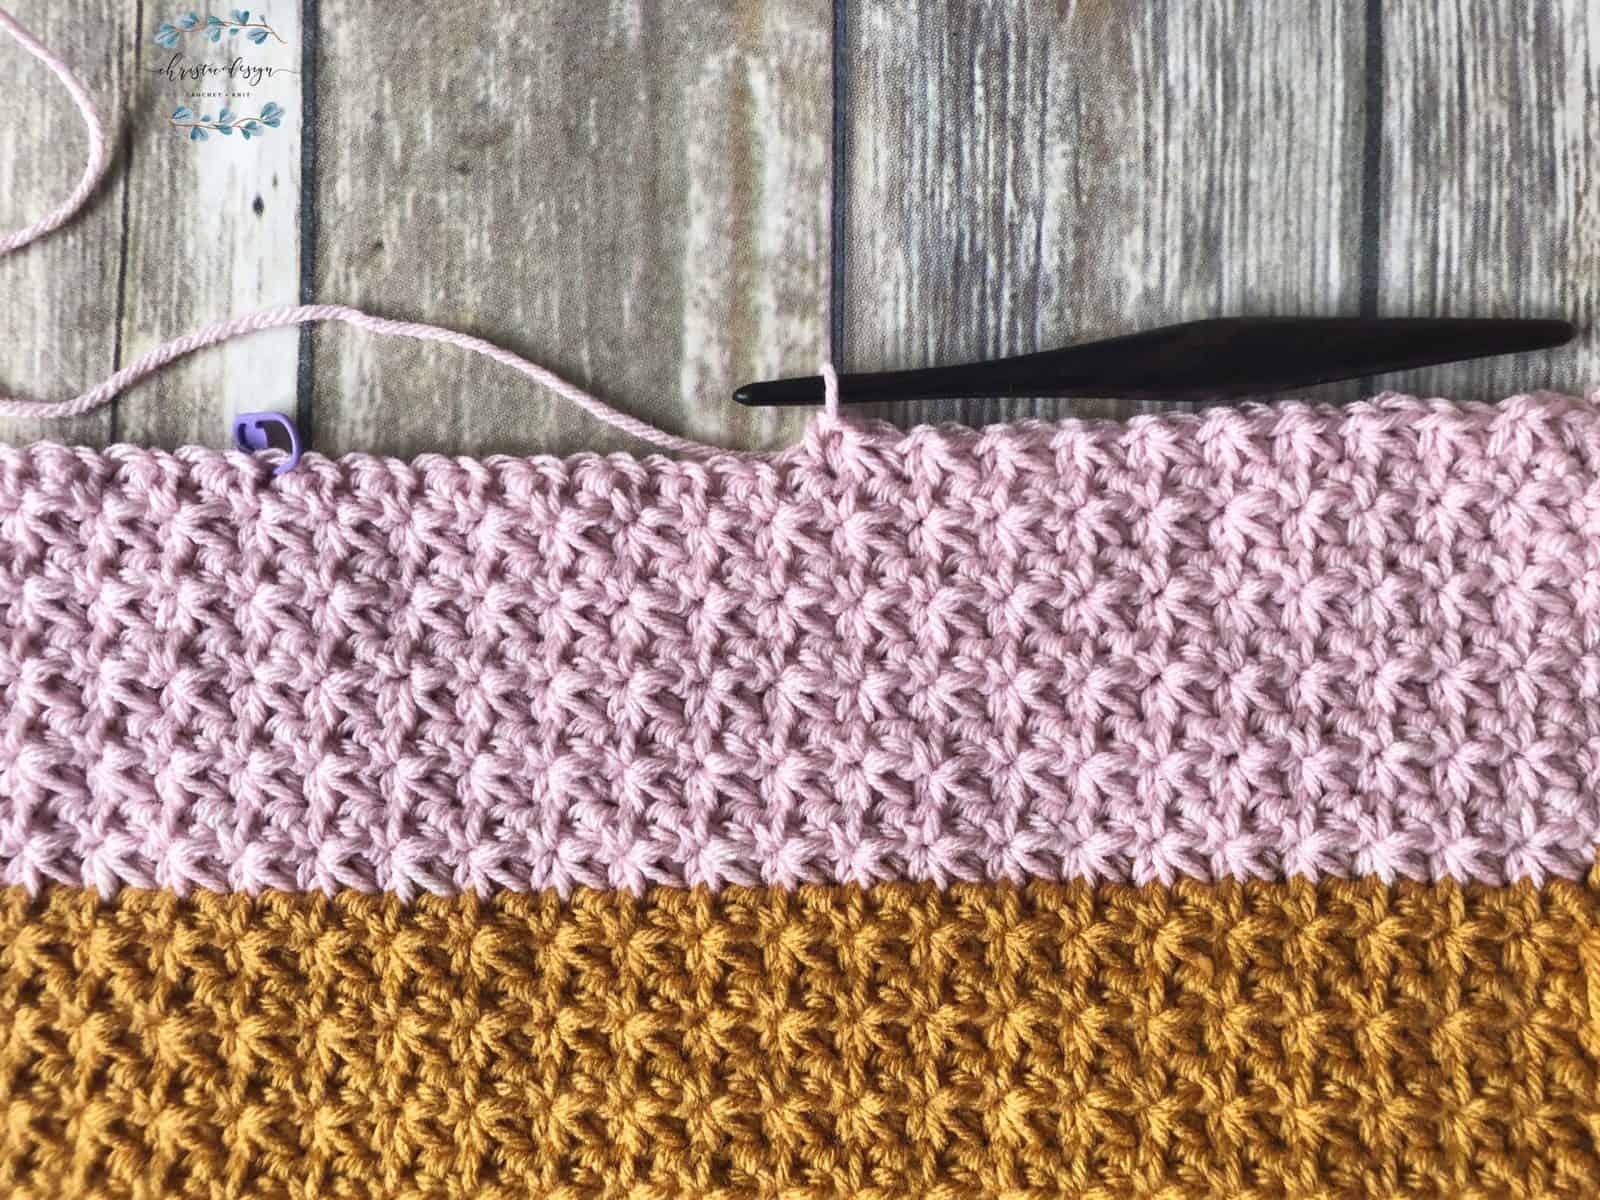
Row 1. (RS) Work in trinity stitch pattern for 17 [21, 25, 27, 31, 35, 37, 41, 43] sts.
Rows 2-22. Continue to work in patt until shoulder height measures 8.5” (21.5 cm) total. Cut yarn, and leave a long tail for seaming. *Note for color block version, color changes on Row 7 of the Shoulders.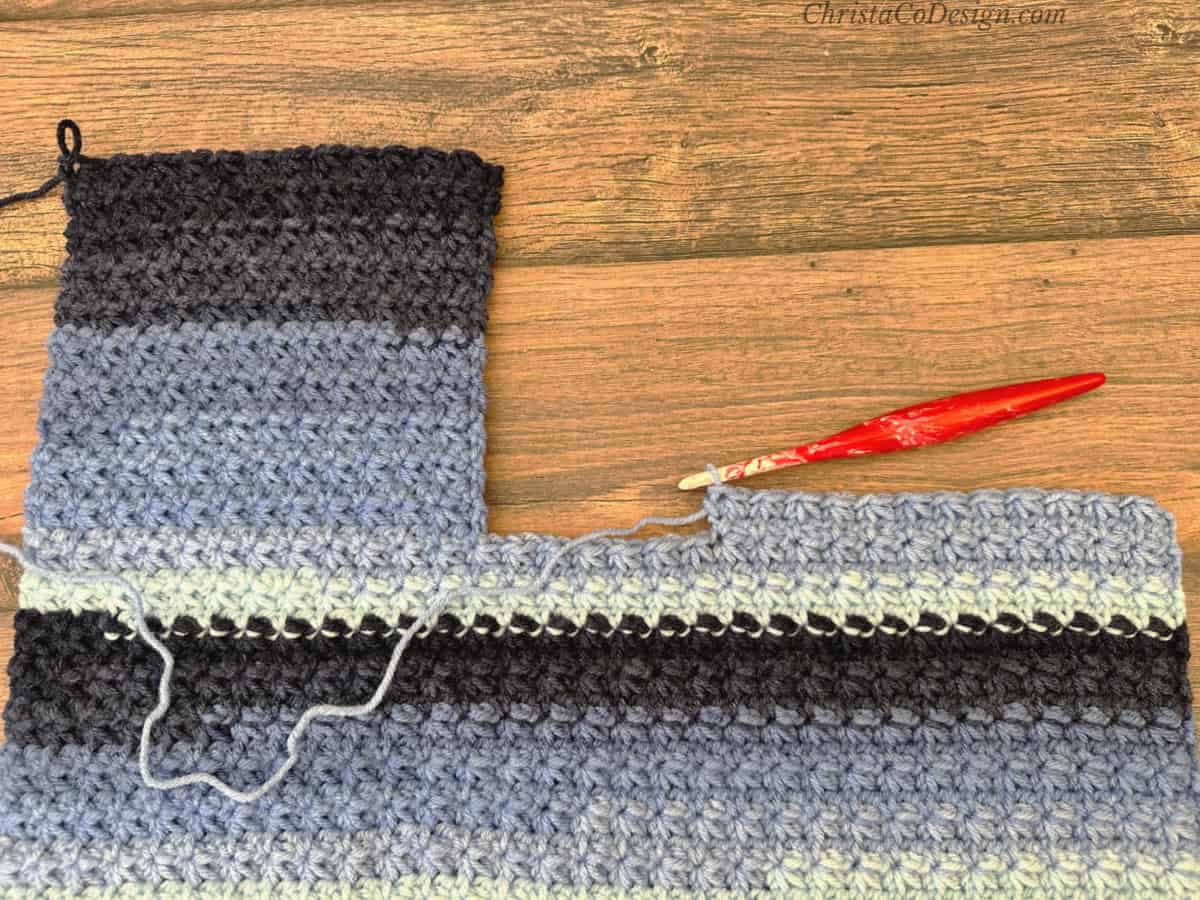
Rep for second shoulder, leaving the center 15 [13, 13, 15, 13, 13, 13, 13, 15] sts unworked for the neck. Begin at m2. Cut yarn, and leave a long tail for seaming.
Sleeves
Sleeves are worked flat from the wrist up, increasing in width over the length of the sleeve. In the pattern sleeve length is 20” (51 cm). To adjust sleeve length, first jump ahead to seaming your panels and try it on. Measure from the shoulder edge of the sweater to your hand, (or to where you want the sleeve to end, between the wrist and first thumb joint is typical). Use this length for your sleeve.
Adjust the width of your sleeve at any time by adding more increase rows, or leaving some out. Just wrap the sleeve around your arm as you go to check fit. The final width of your sleeve should equal twice the armhole measurement.
For the color block version the 3 ribbing rows and 10 trinity rows are in navy and 14 rows or 5” of each of the others. Work 14 rows per color or 5” blocks of color, changing on RS rows.
Row 1. Fdc 25 [25, 25, 29, 29, 29, 29, 29, 29], or ch 27 [27, 27, 31, 31, 31, 31, 31, 31] and dc in the 4th ch from your hook and in each ch across, turn. The cuff measures 7.5 [7.5, 7.5, 9, 9, 9, 9, 9, 9]” (19 [19, 19, 23, 23, 23, 23, 23, 23] cm) wide.
Row 2. Ch 3, *{FPdc in next st, BPdc in next st} rep from * to last 2 sts, FPdc in next st and dc in last, turn.
Row 3. Ch 3, *{BPdc in next st, FPdc in next st} rep from * to last 2 sts, BPdc in next st, dc in last st, turn. (25, 25, 25, 29, 29, 29, 29, 29, 29 sts)
Row 4. (RS) Ch 1 (does not count), sc in same st, starting in same st as sc: sc3tog, *{ch 1, starting in same st: sc3tog} rep from * to end of row, after last sc3tog do not ch 1, insert hook back into last st, place a sc with end of last st, turn. (25, 25, 25, 29, 29, 29, 29, 29, 29 sts)
Row 4 sets the trinity stitch pattern.
Work in patt for 7 [7, 5, 5, 3, 3, 3, 3, 3] more rows.
Inc Row. (RS) Ch 1 (does not count), sc in same st, ch 2, starting in same st as sc: sc3tog, *{ch 1, starting in same st: sc3tog} rep from * to end of row, after last sc3tog ch 2, insert hook back into last st, place a sc with end of last st, turn. 4 sts increased.
Work in patt repeating inc row as indicated by size below.
XS Rep Inc Row every 8 rows 4 more times. 45 sts = 13.75” wide.
S Rep Inc Row every 8 rows 4 more times. 45 sts = 13.75” wide.
M Rep Inc Row every 6 rows 3 more times, then every 8 rows 2 more times. 49 sts = 15” wide.
L Rep Inc Row every 6 rows 3 more times, then every 8 rows 2 more times. 53 sts = 16.5” wide.
XL Rep Inc Row every 6 rows 6 more times. 57 sts 17.5” wide.
2X Rep Inc Row every 4 rows 3 more times, then every 6 rows 4 more times. 61 sts = 18.75” wide.
3X Rep Inc Row every 4 rows 3 more times, then every 6 rows 4 more times. 61 sts = 18.75” wide.
4X Rep Inc Row every 4 rows 6 more times, then every 6 rows 2 more times. 65 sts = 20 wide.
5X Rep Inc Row every 4 rows 9 more times. 69 sts = 21.25” wide.
All Sizes
Rep Row 4 until sleeve length measures 20” (51 cm) or desired length.
Blocking
Block each piece with your preferred method before seaming.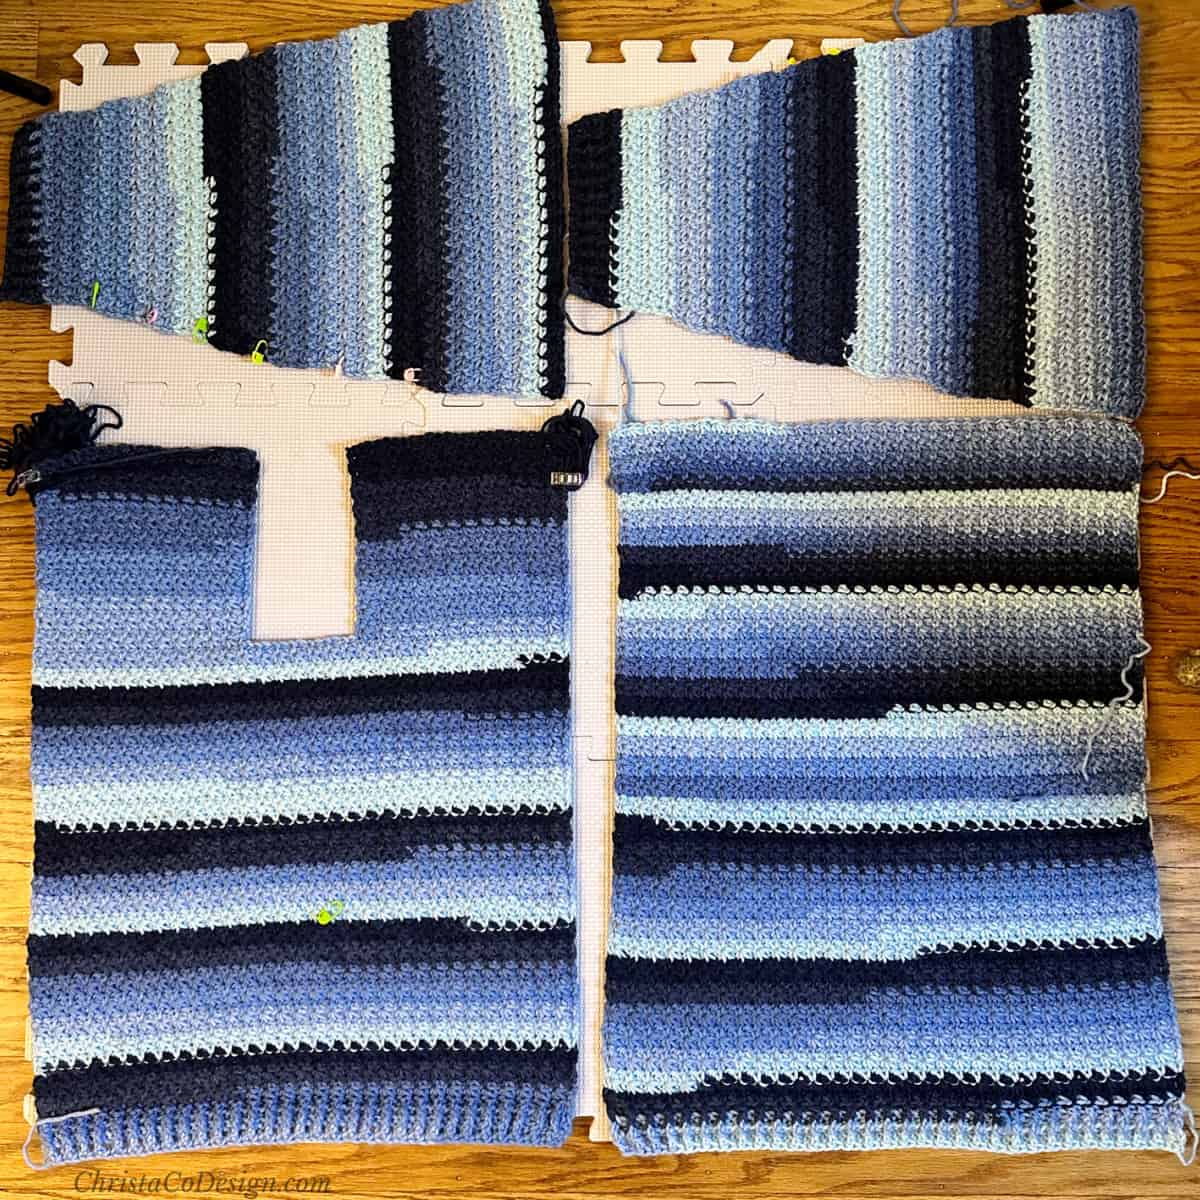
Seaming
To seam sew with a length of yarn, yarn needle, and a Mattress Stitch. See specific seaming instructions below under each section.
Panels
Shoulder Seam
Lay the front panel and back panel together with RS touching, so you are working on the WS, seam together at shoulders. 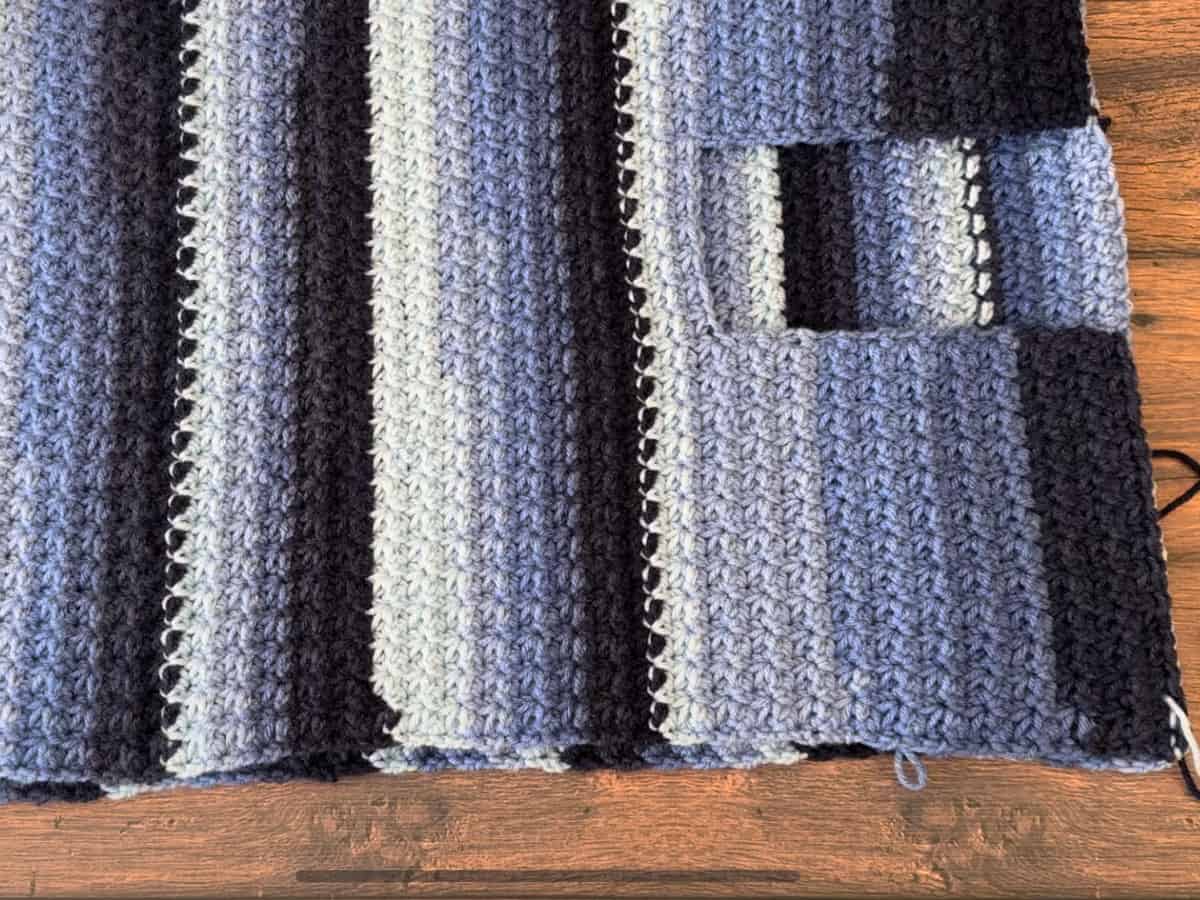
Side Seam
Seam sides of panels together, from the bottom up, leaving 6.75 [6.75, 7.5, 8.25, 8.75, 9.5, 9.5, 10, 10.5]” ( 12.5 [15, 19.5, 20.5, 24, 27.5, 28, 32, 33] cm) unseamed for armholes, on both sides.
Sleeves
Fold the sleeve in half lengthwise, with RS touching, so you are working on the WS, seam long edge together. 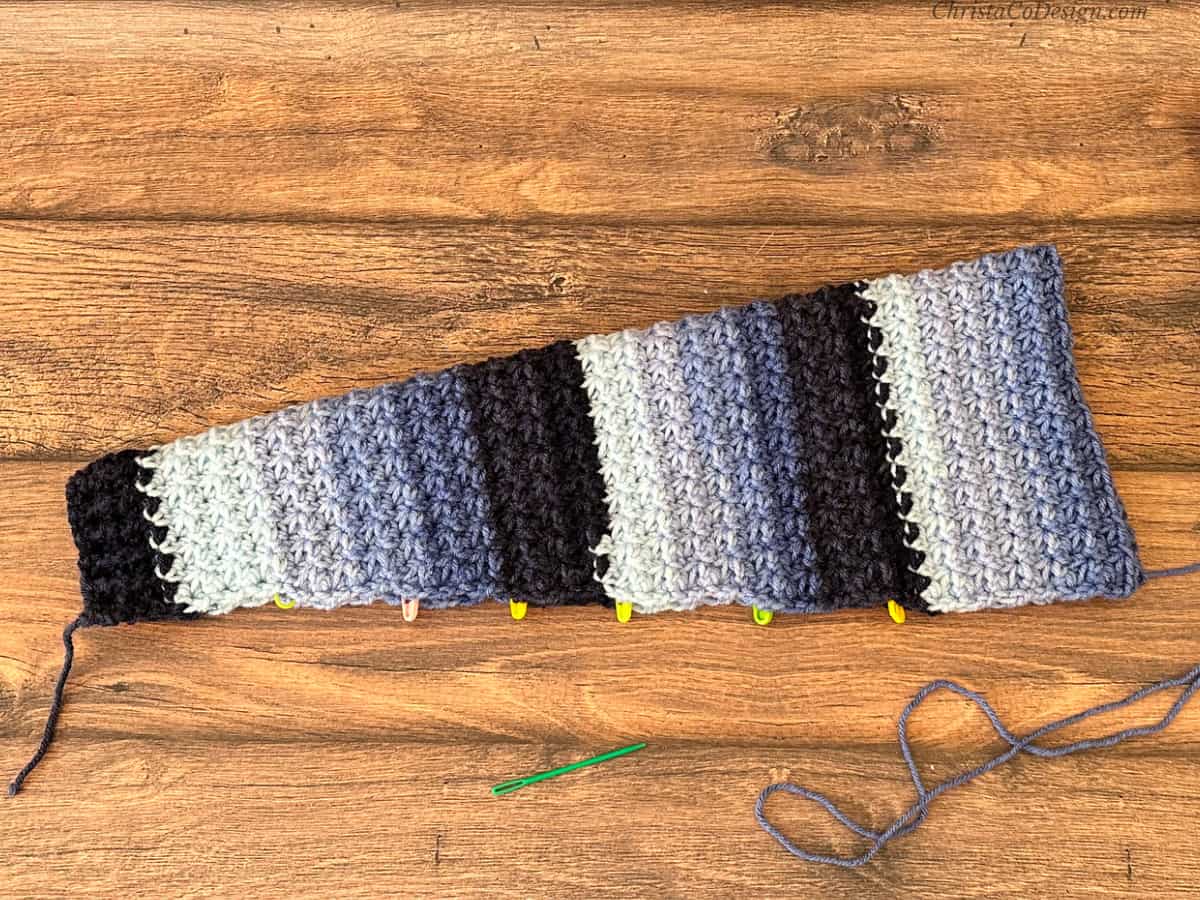
Seam Sleeve to Body
Turn sleeve RS out. With body panels still WS out, slide the sleeve (RS out) in the sweater, lining up the shoulder end of the sleeve to the armhole opening.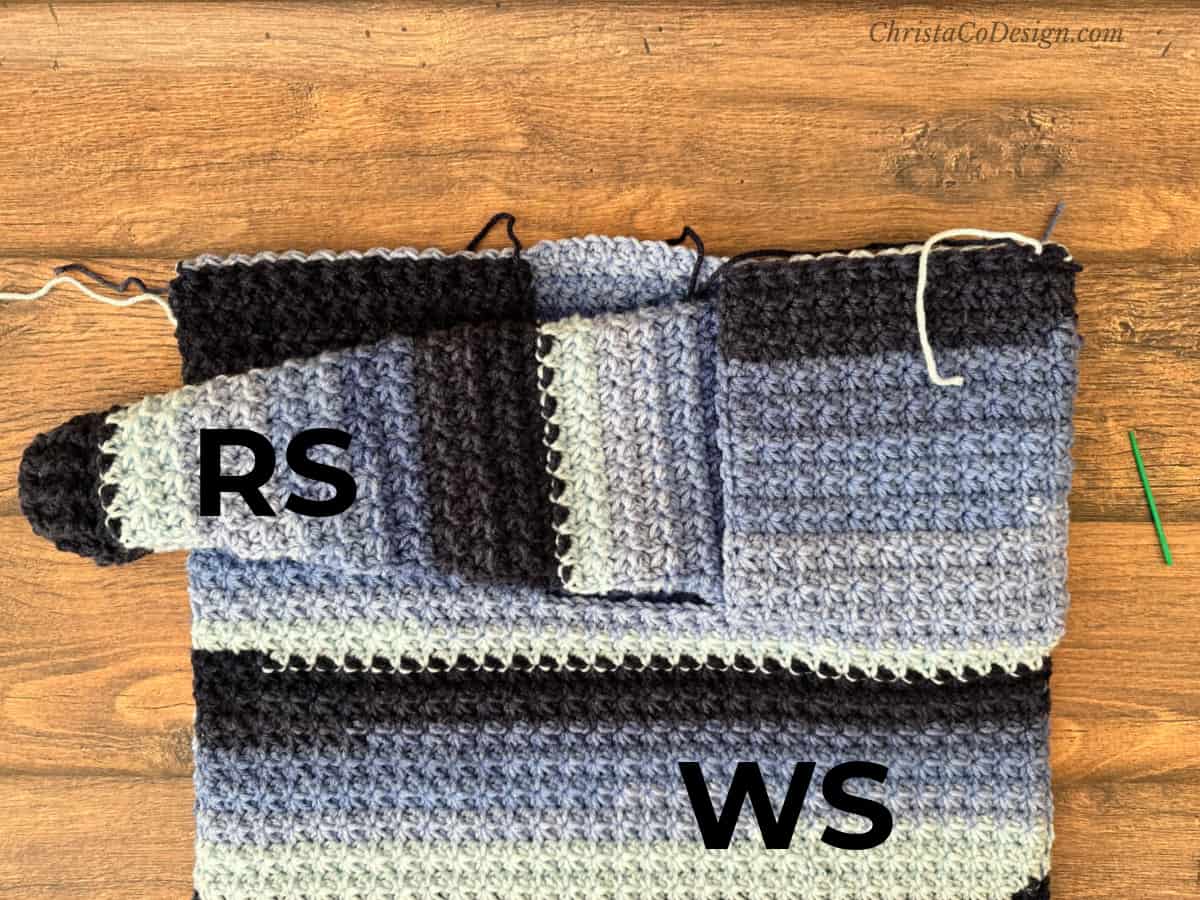
Seam sleeve to armhole with mattress stitch. Rep for the other sleeve. 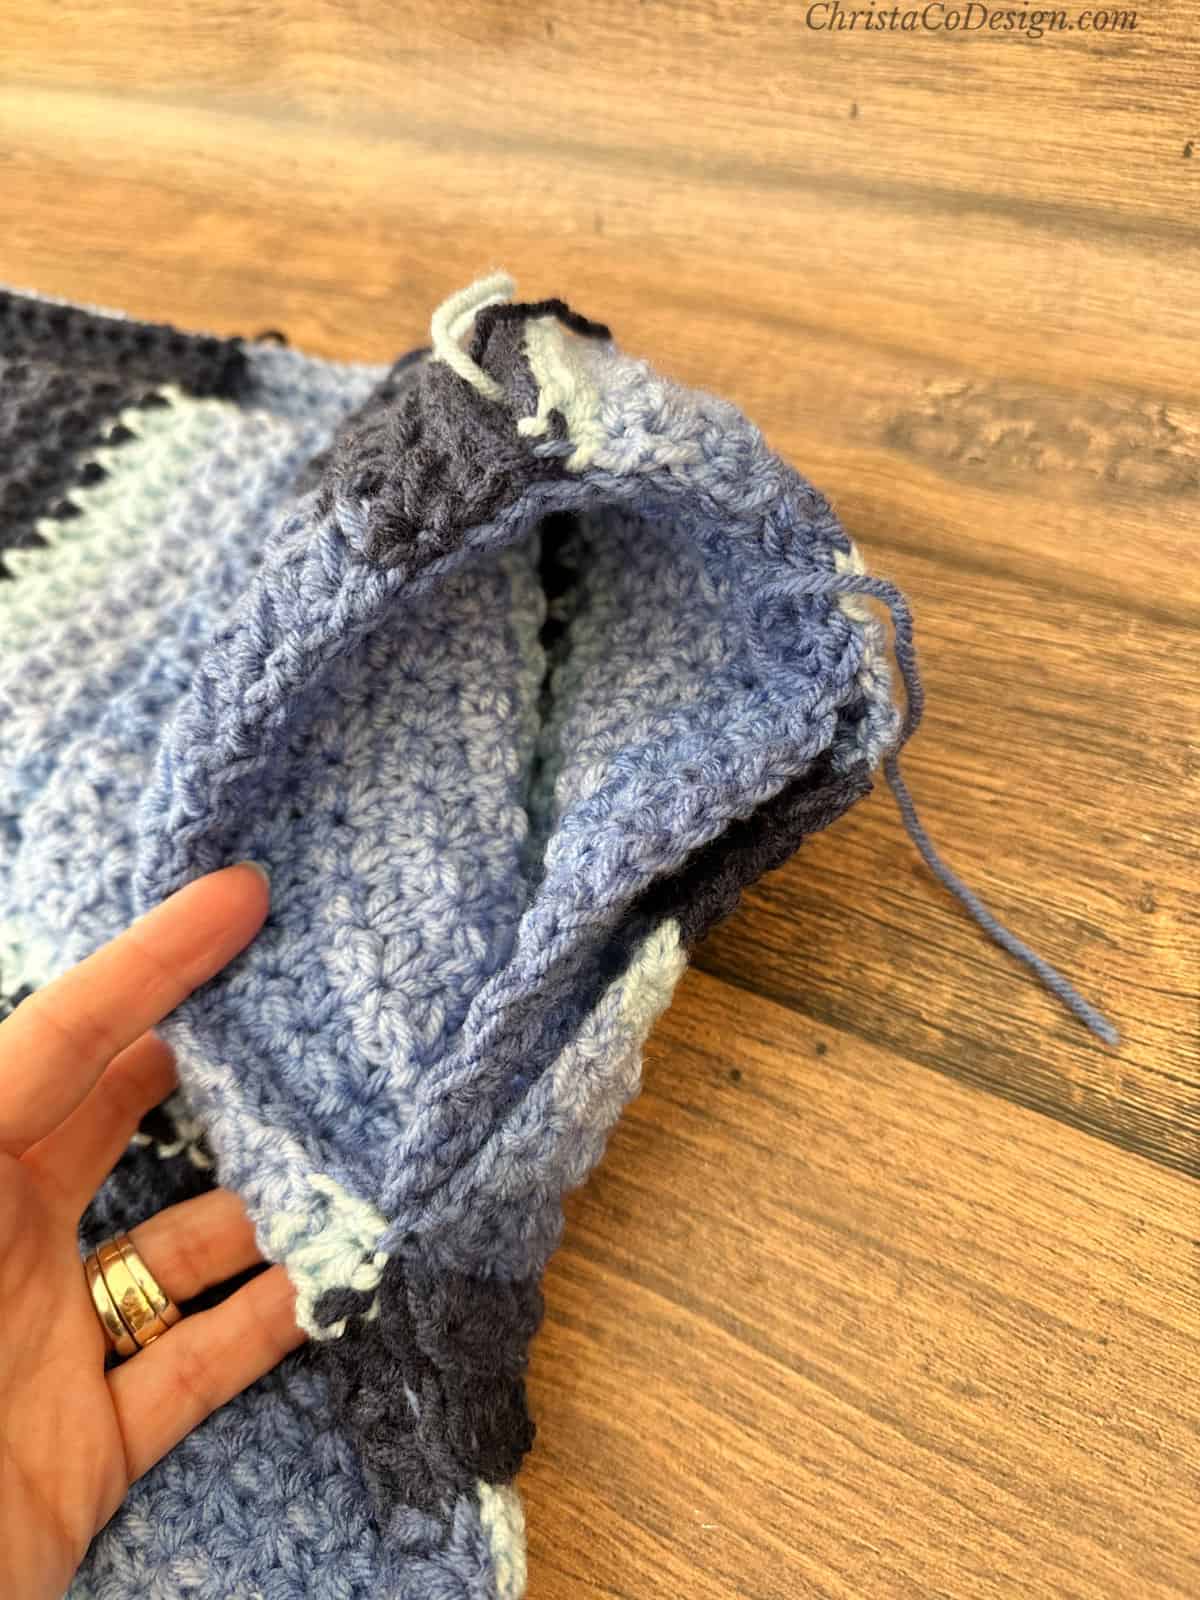
Cowl Neck
Work in the round.
St multiple is 2.
Ch 2 does not count as a st. Ch 3 counts as a dc.
As written, the cowl neck is 12” long, enough to fold down.
For a looser fit cowl, add more stitches to the neck.
For the last two rows of the cowl, I went up to a 7mm hook to allow the edge of the cowl to spread more easily and lay in place. Alternately you could loosen your tension on the 6mm.
Tucking your sleeves inside the sweater will keep them from flopping around during the cowl.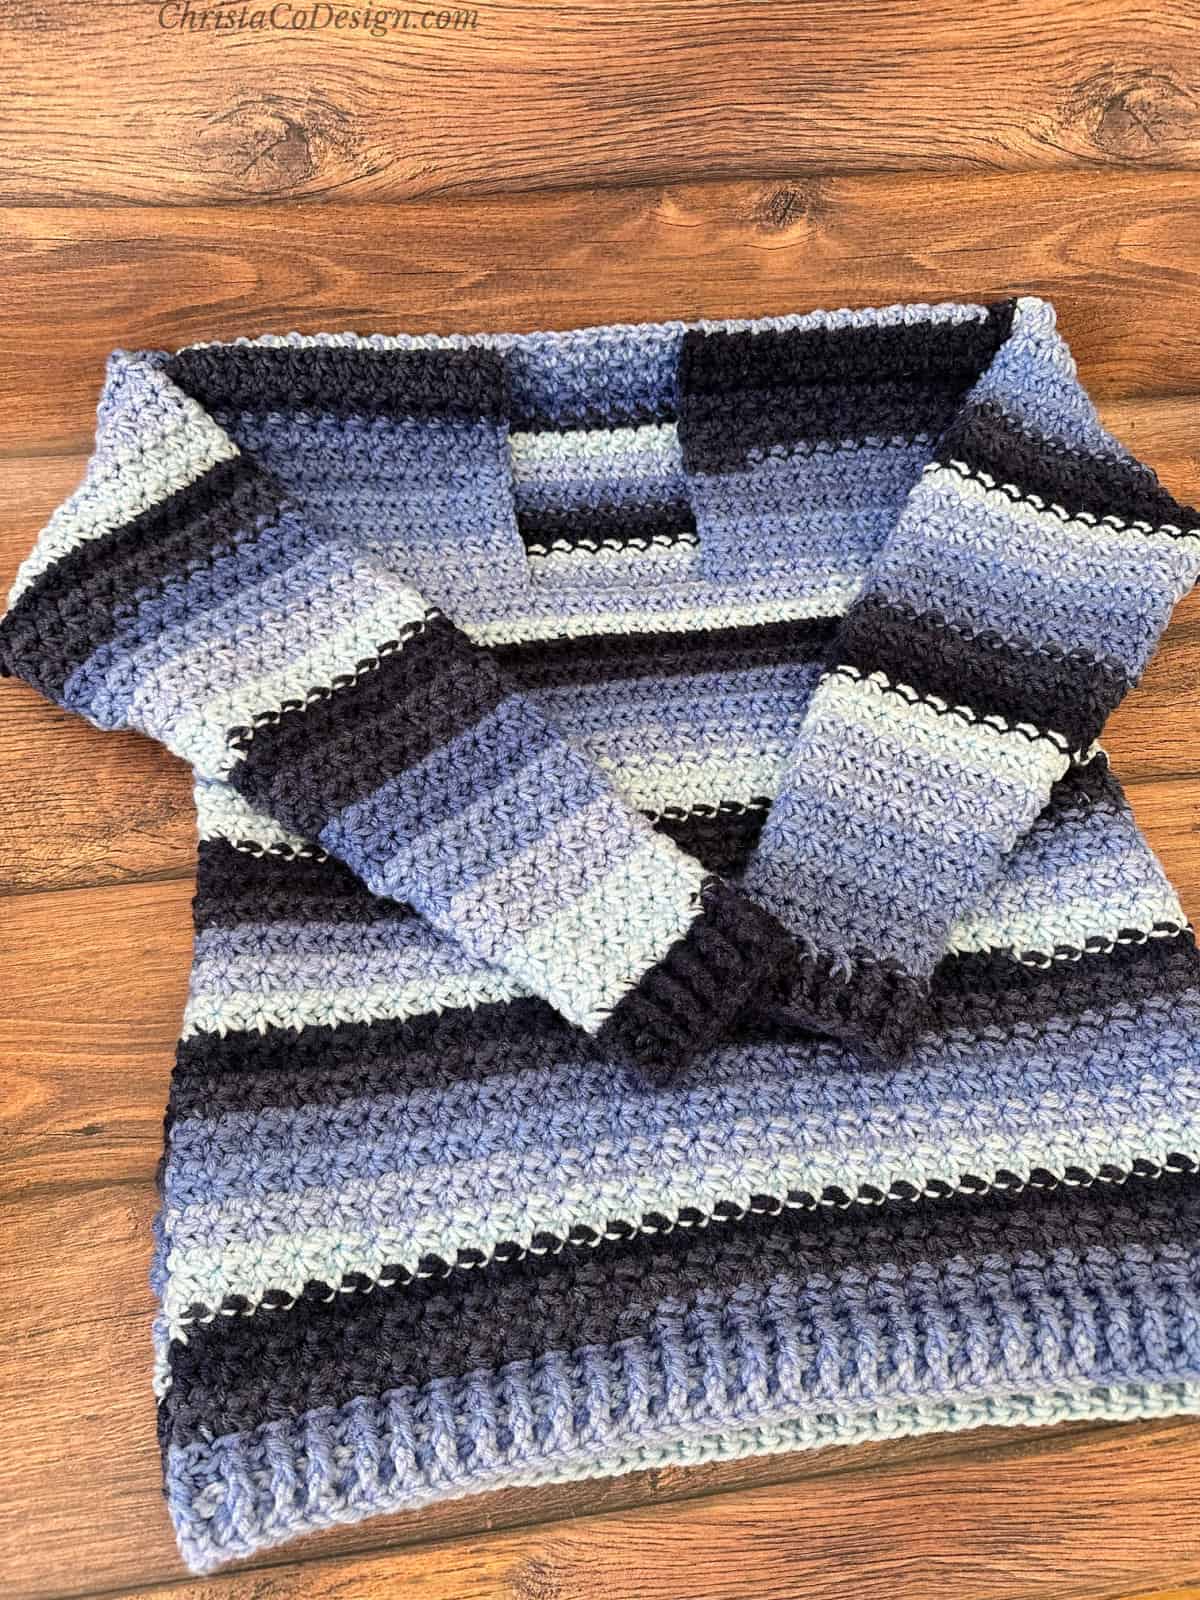
With RS of sweater facing you, join yarn with sl st along the back of the neck opening.
Rnd 1. Ch 3, dc 69 [69, 69, 79, 79, 79, 79, 79, 79] more sts evenly around neck, join with a sl st top of first st. (70, 70, 70, 80, 80, 80, 80, 80, 80 sts) The exact stitch count is unimportant, but it needs to be an even number.
Rnd 2. Ch 2 (doesn’t count), starting in same st FPdc, BPdc in next st, *{FPdc in next st, BPdc in next st} rep from * around, join with sl st to first FPdc (not ch 2).
Rnd 3. Ch 2 (doesn’t count), *{FPdc in next st, BPdc in next st} rep from * around, join with sl st to first FPdc.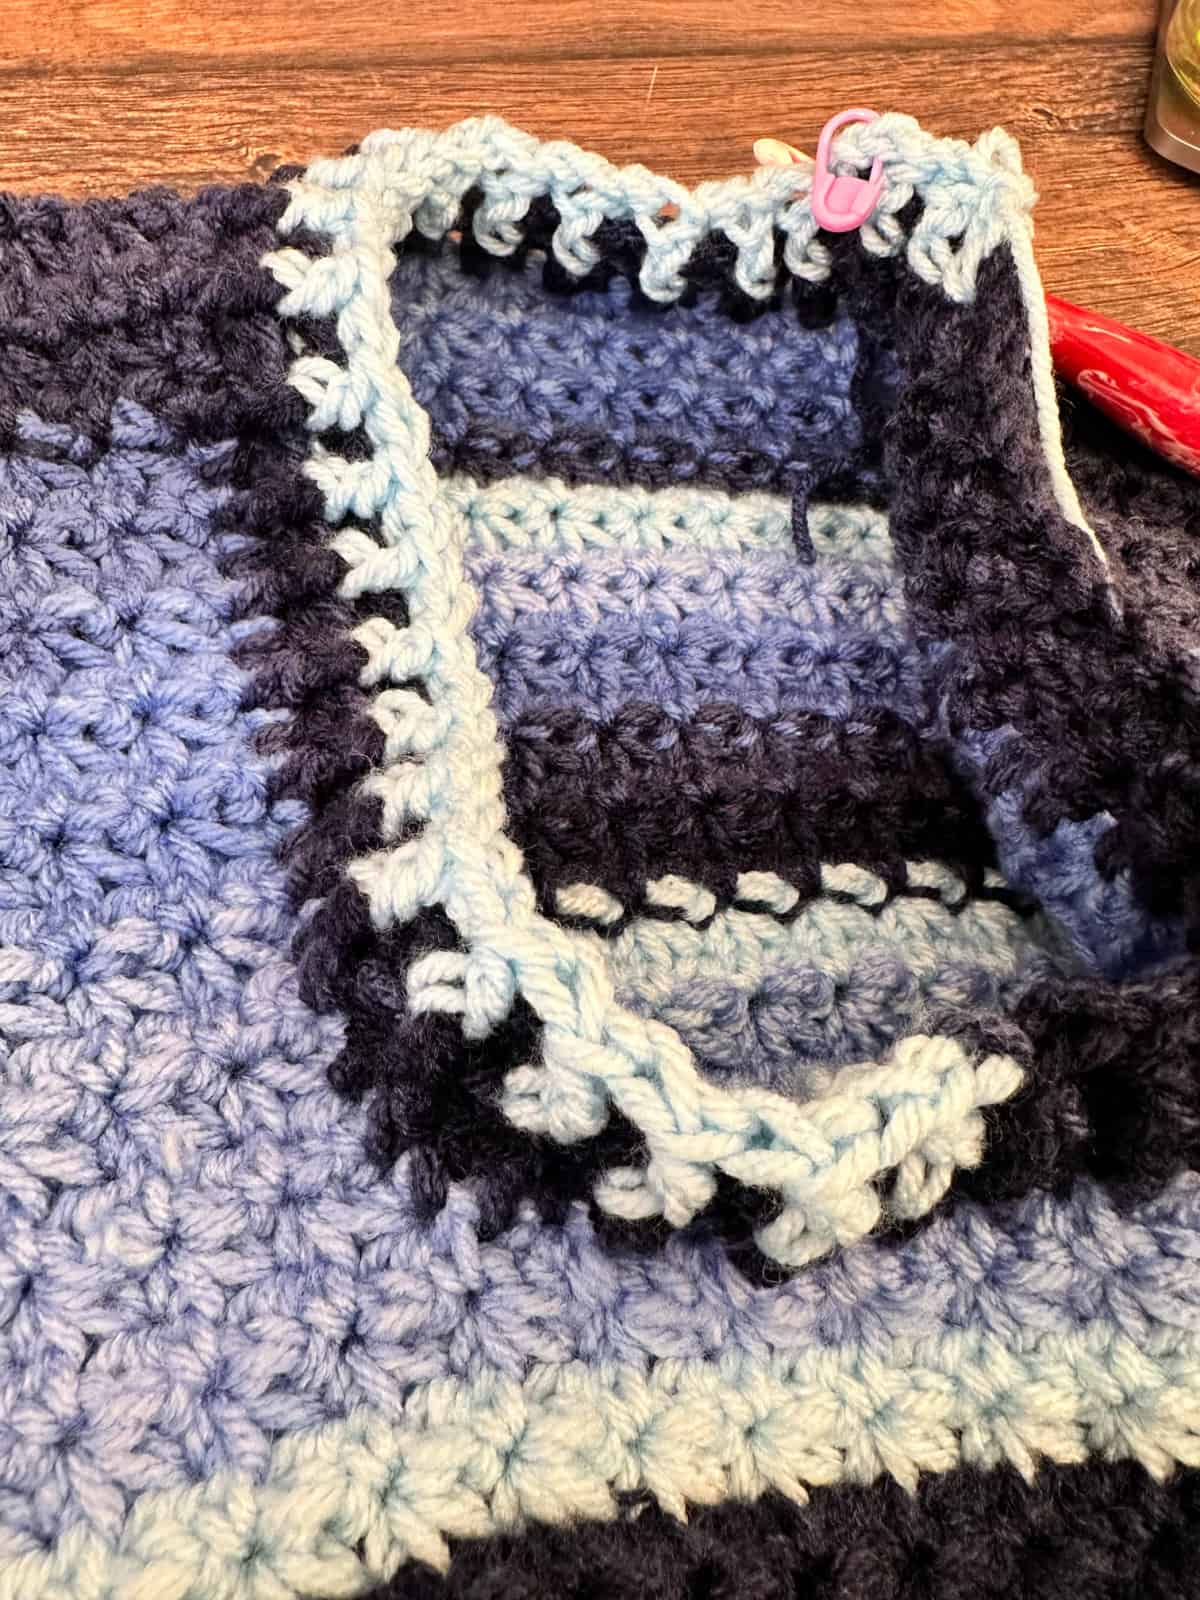
Rnds 4-30. Rep the last row for 30 rnds or until the cowl neck measures 12” long, or to the desired length.
Cut yarn and weave in all ends.
Recommended Products
As an Amazon Associate and member of other affiliate programs, I earn from qualifying purchases.


I tested this sweater and I have to say I LOVE LOVE LOVE the texture! You can feel the texture it’s so soft and bumpy! ?
Another gorgeous design Crystal!
Thank you Jo! And thanks so much for sharing your time and skills to test!