
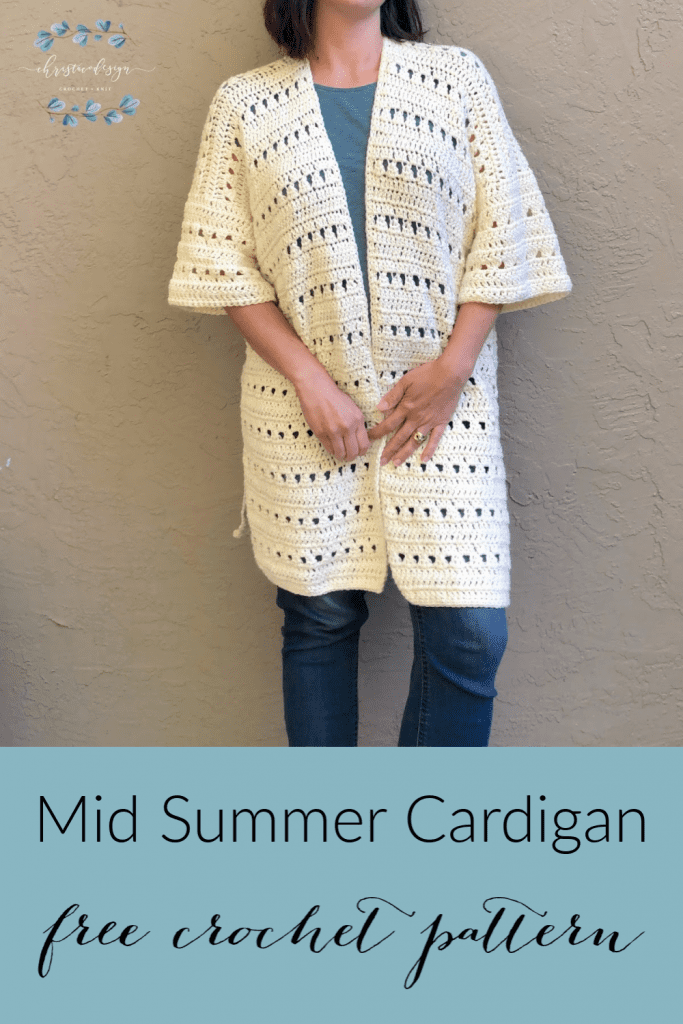
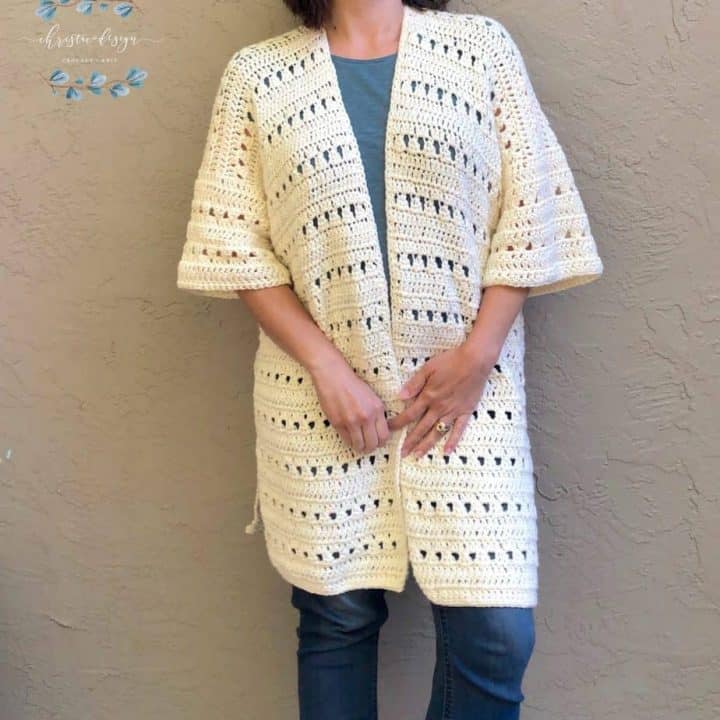
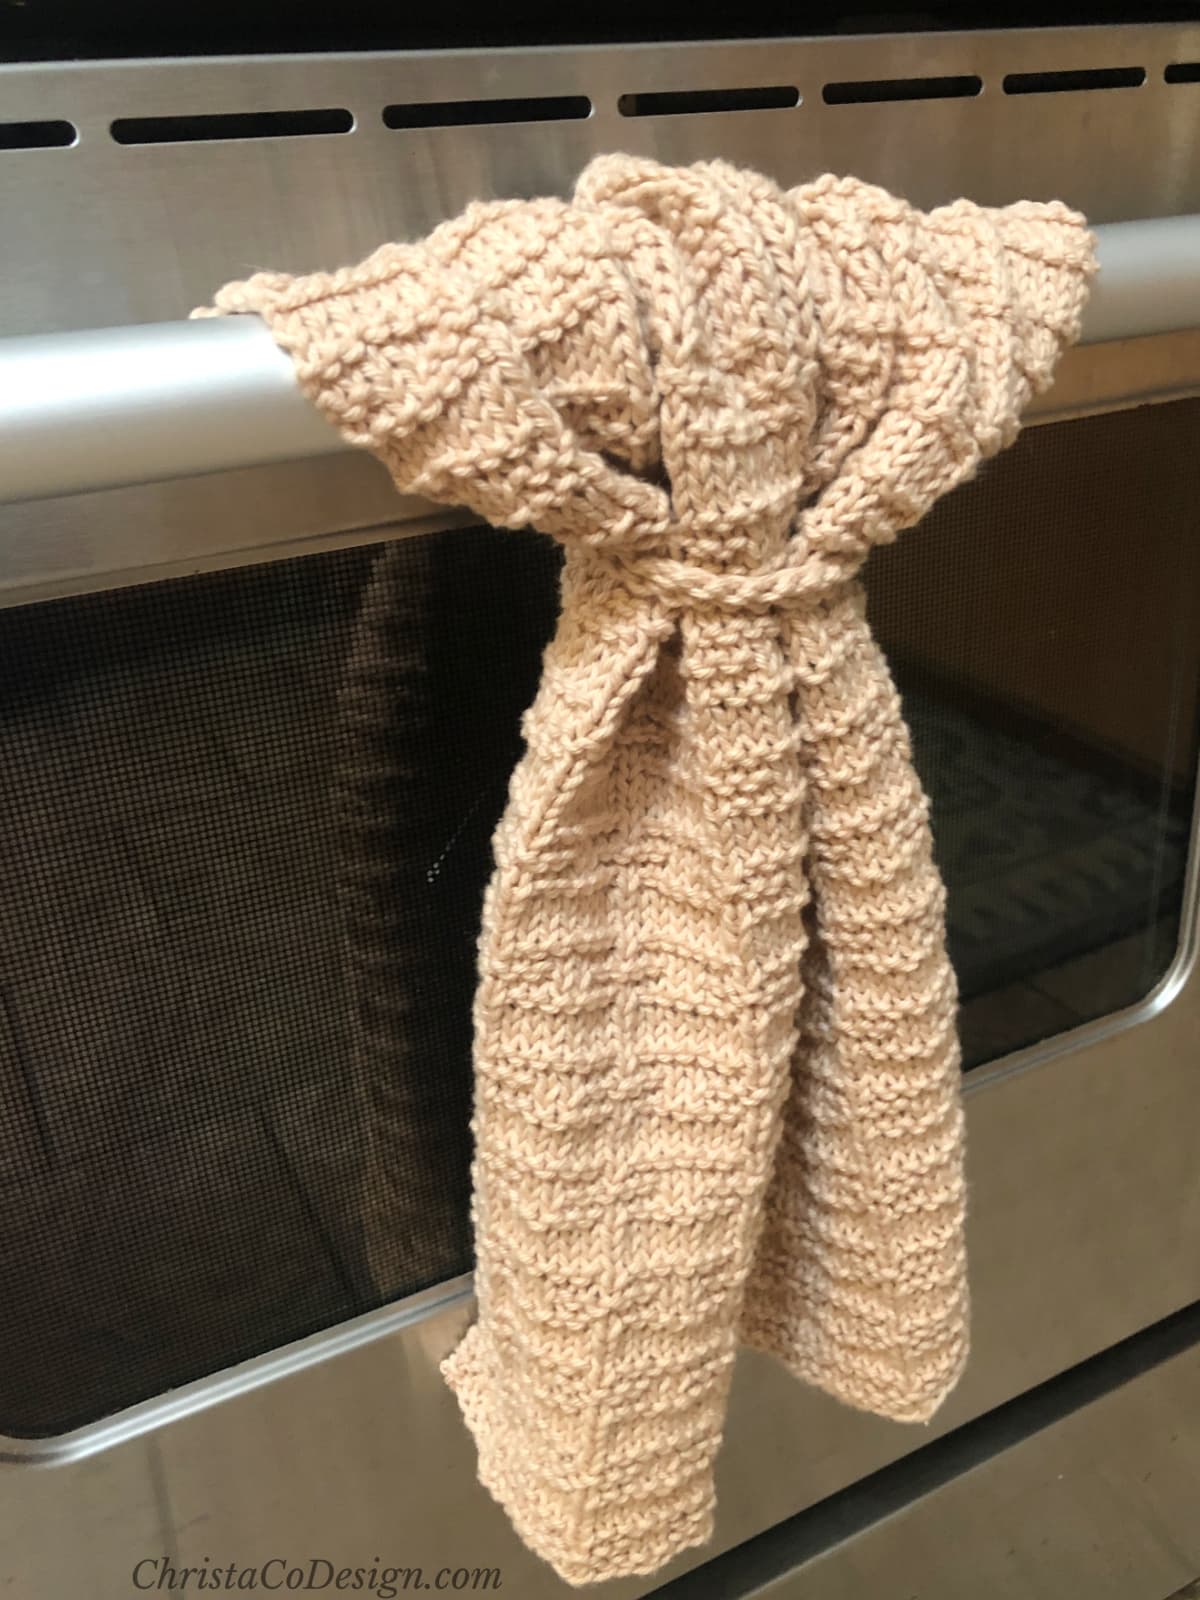
Mid Summer Cardigan Crochet Pattern
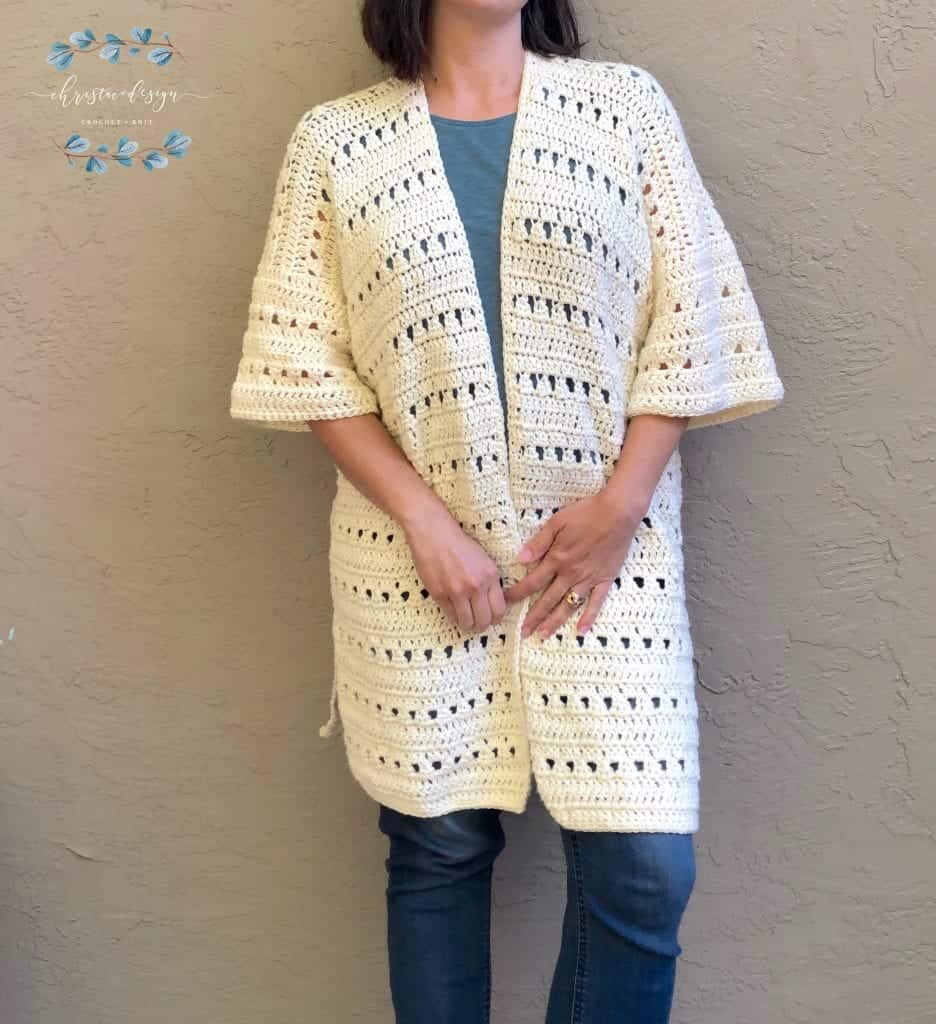
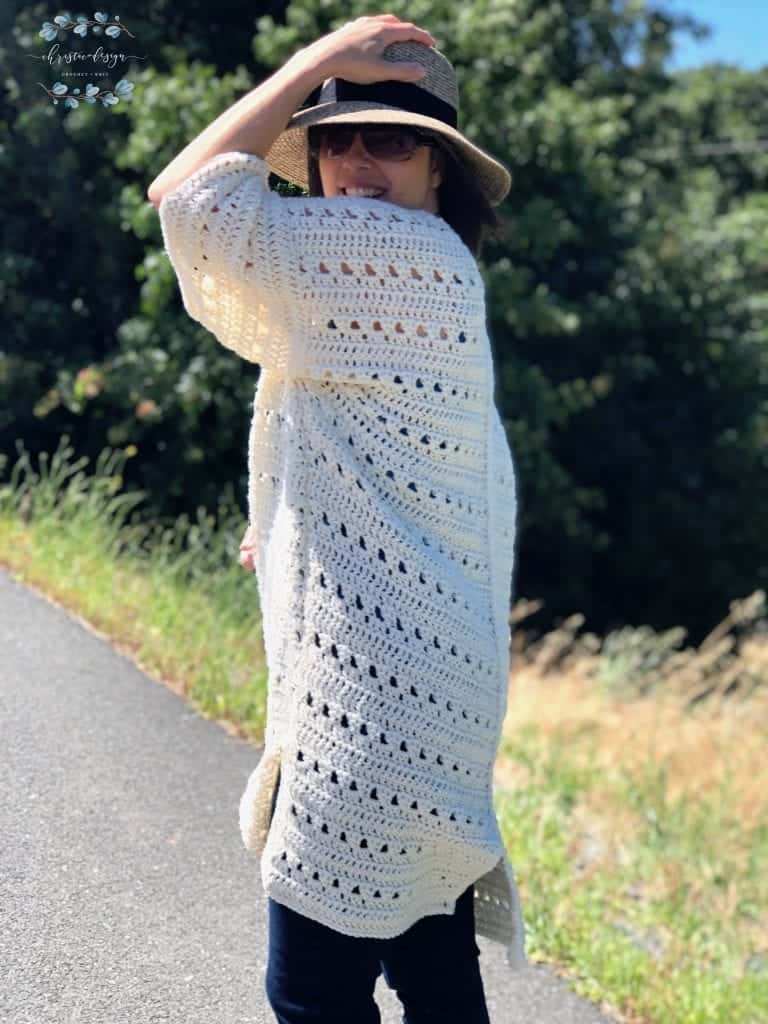
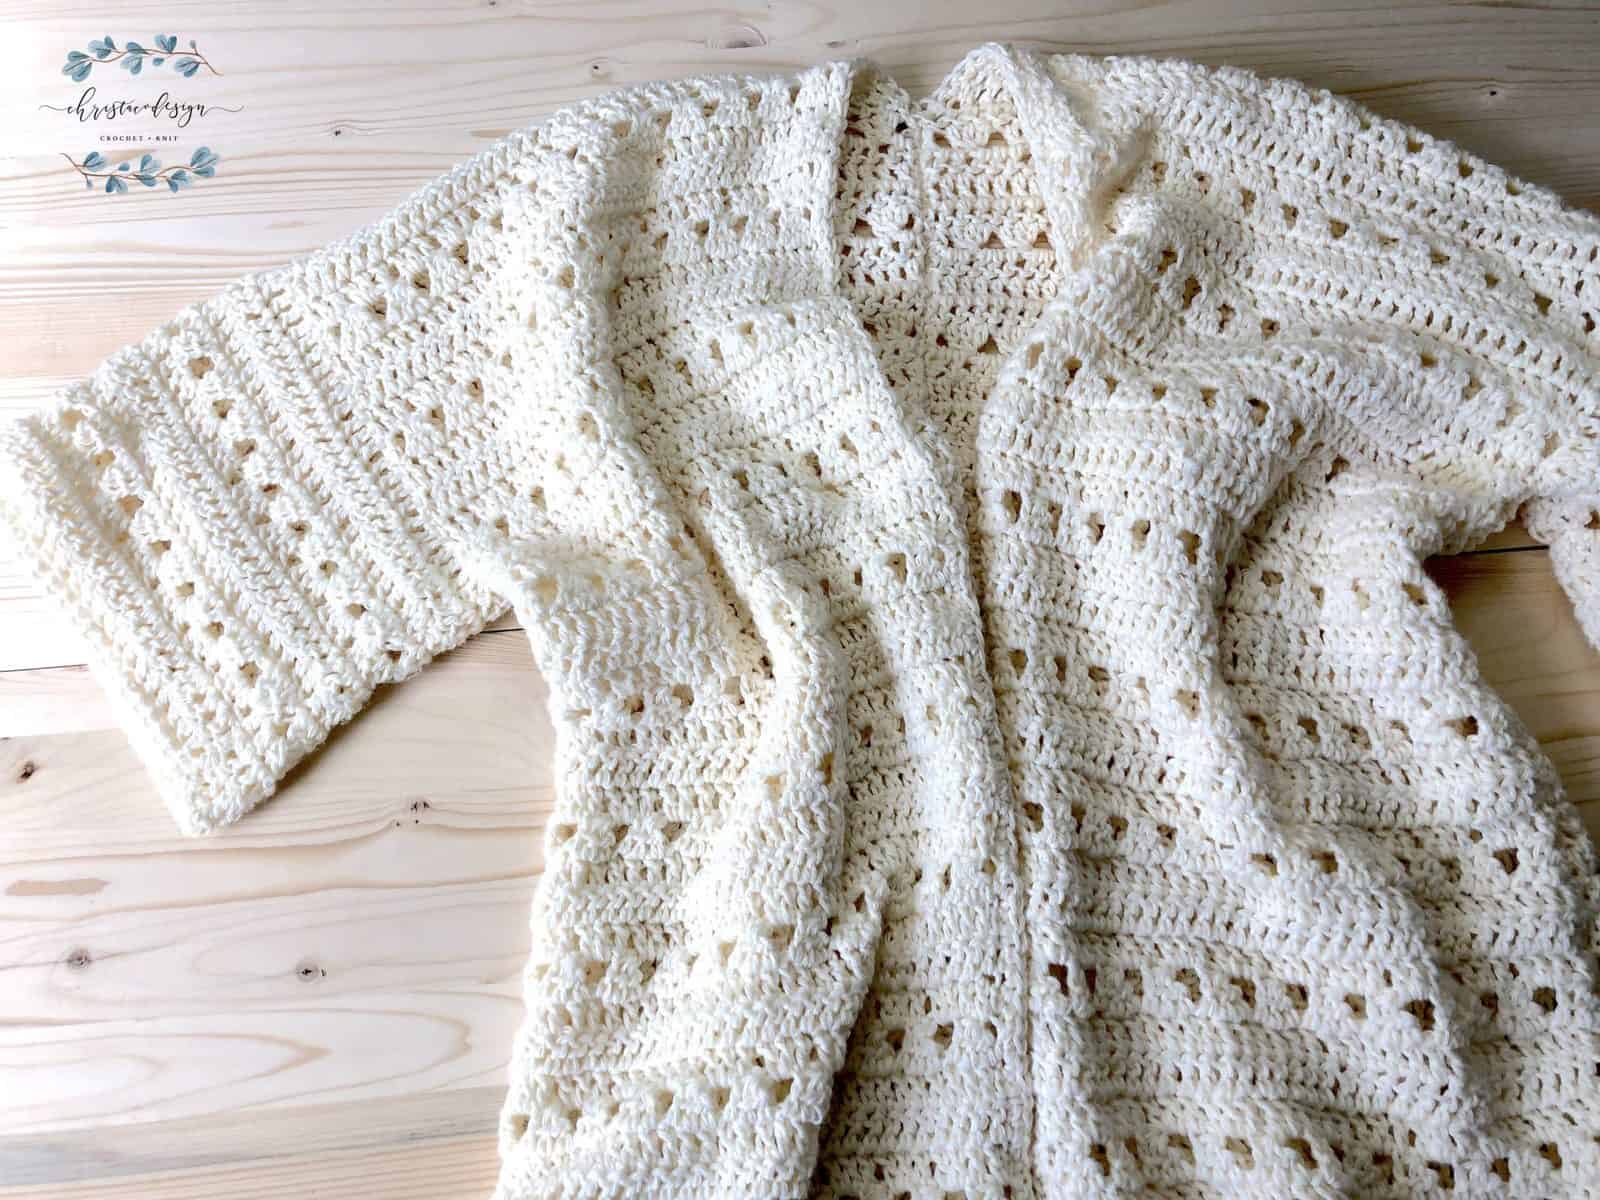
The Mid Summer Cardigan Crochet Pattern is lightweight, long and loose. Perfect for a day at the beach as a cover up, or for getting comfy on the couch.

This post contains affiliate links, I may earn a fee. Read more disclosure policy.
Join the ChristaCoDesign Newsletter
Never miss a pattern!
This easy to wear cardigan flows effortlessly with side and back slits. The 3/4 sleeves provide coverage without overwhelming.
When I chose the Summer’s End Cardigan for July’s CAL, I knew I wanted a longer option as well. And love how the Mid Summer Cardigan turned out, it’s been a fav outside and inside the house.
You can purchase the ad-free, well formatted PDF Pattern in one of my shops. Scroll down for the free pattern!
This lightweight crochet cardigan is so versatile. I can throw it on for the pool, or over leggings in the morning and feel dressed!
Join the Mid Summer Cardigan Crochet Along {CAL} here!

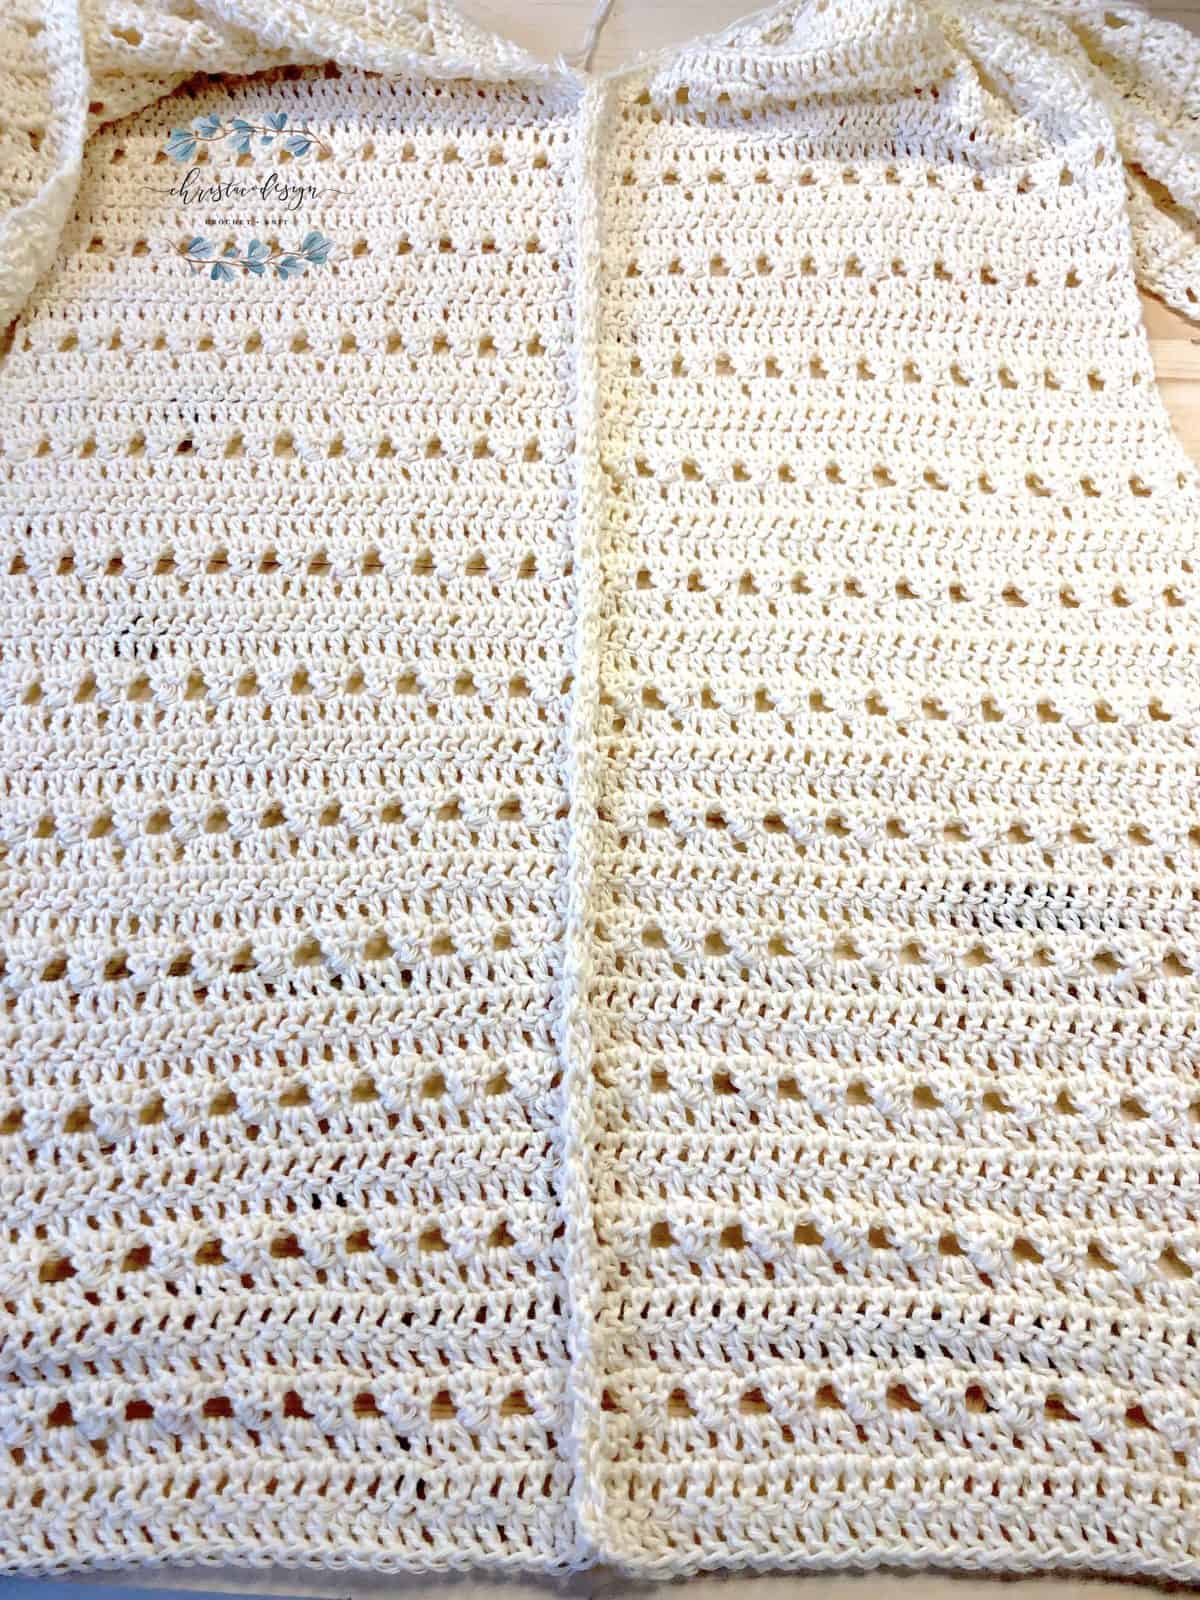
A simple three row repeat that’s easy to memorize, and creates a lovely pattern as well. The length can be customized to your preference also.
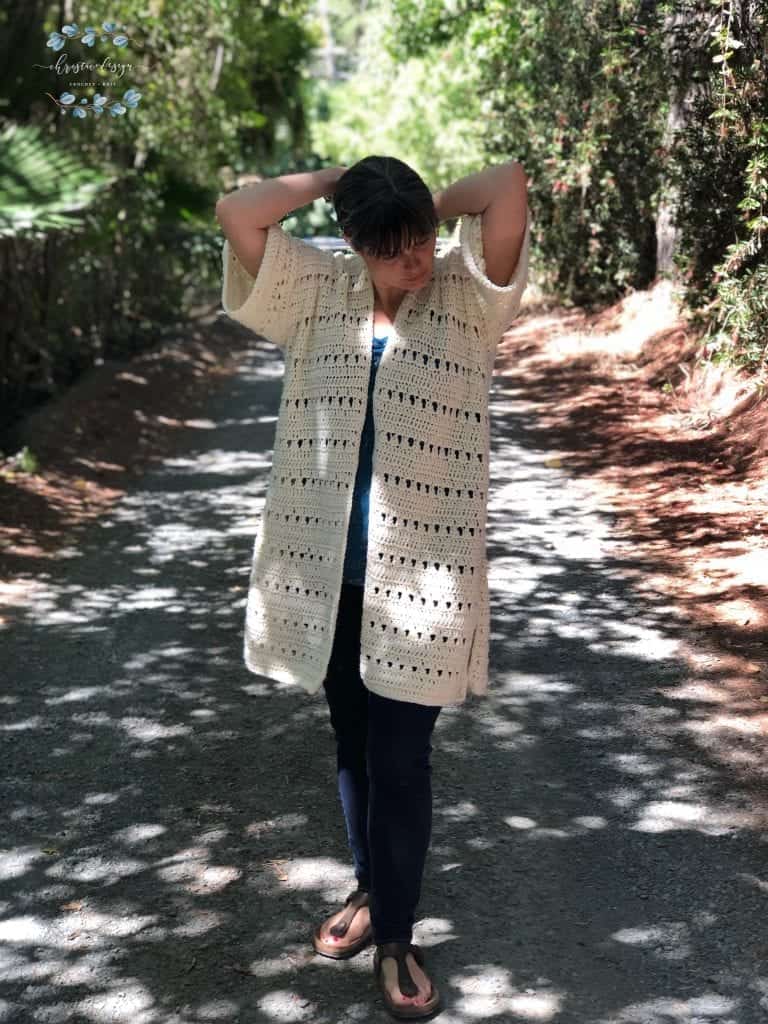
The loose, three quarter length sleeves help keep this garment cool. Plenty of air flow!
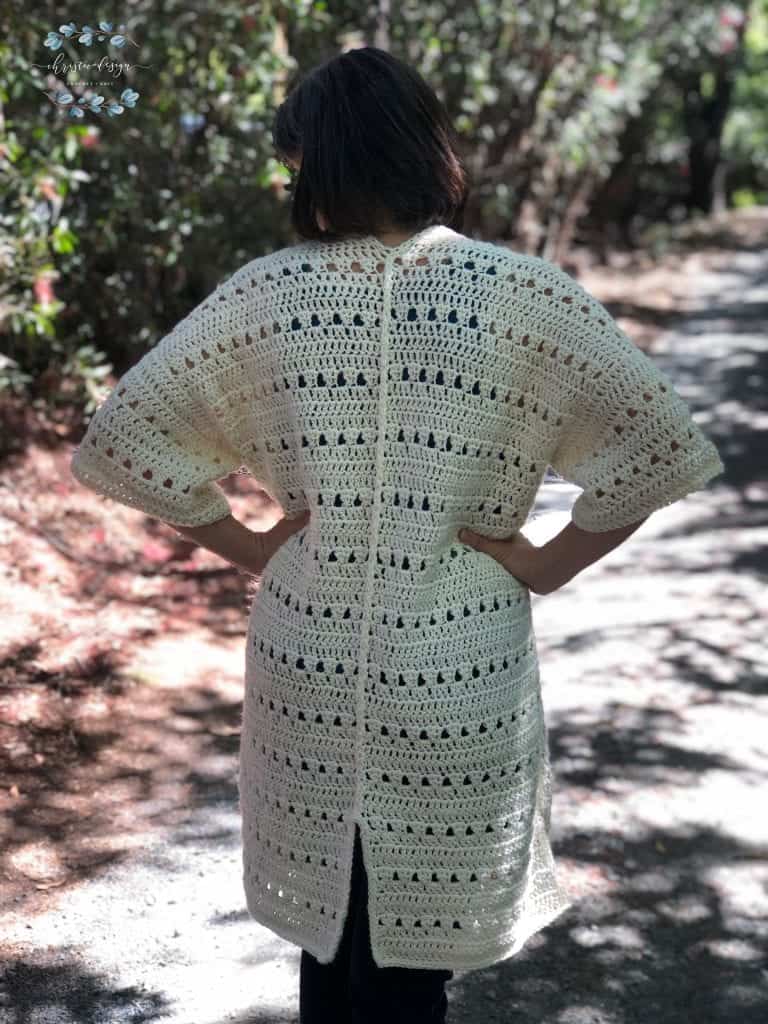
This cardigan features slits on the sides and back that you can adjust, or even leave off.
You might prefer the shorter, hip length version here Summer’s End Cardigan.
Materials
- 6mm J hook*
- #3 lightweight/DK yarn, I used Lion Brand’s Comfy Cotton Blend in Whipped Cream (discontinued); suggested substitute is Brava Recycle DK.*
- Measuring tape, Yarn needle, Stitch markers and scissors
- Estimated yardage by size:
- XS-1000, S-1170, M-1370, L-1560, XL-1760, 2X-1950, 3X-2150, 4X-2350, 5X-2540 yds
Notes
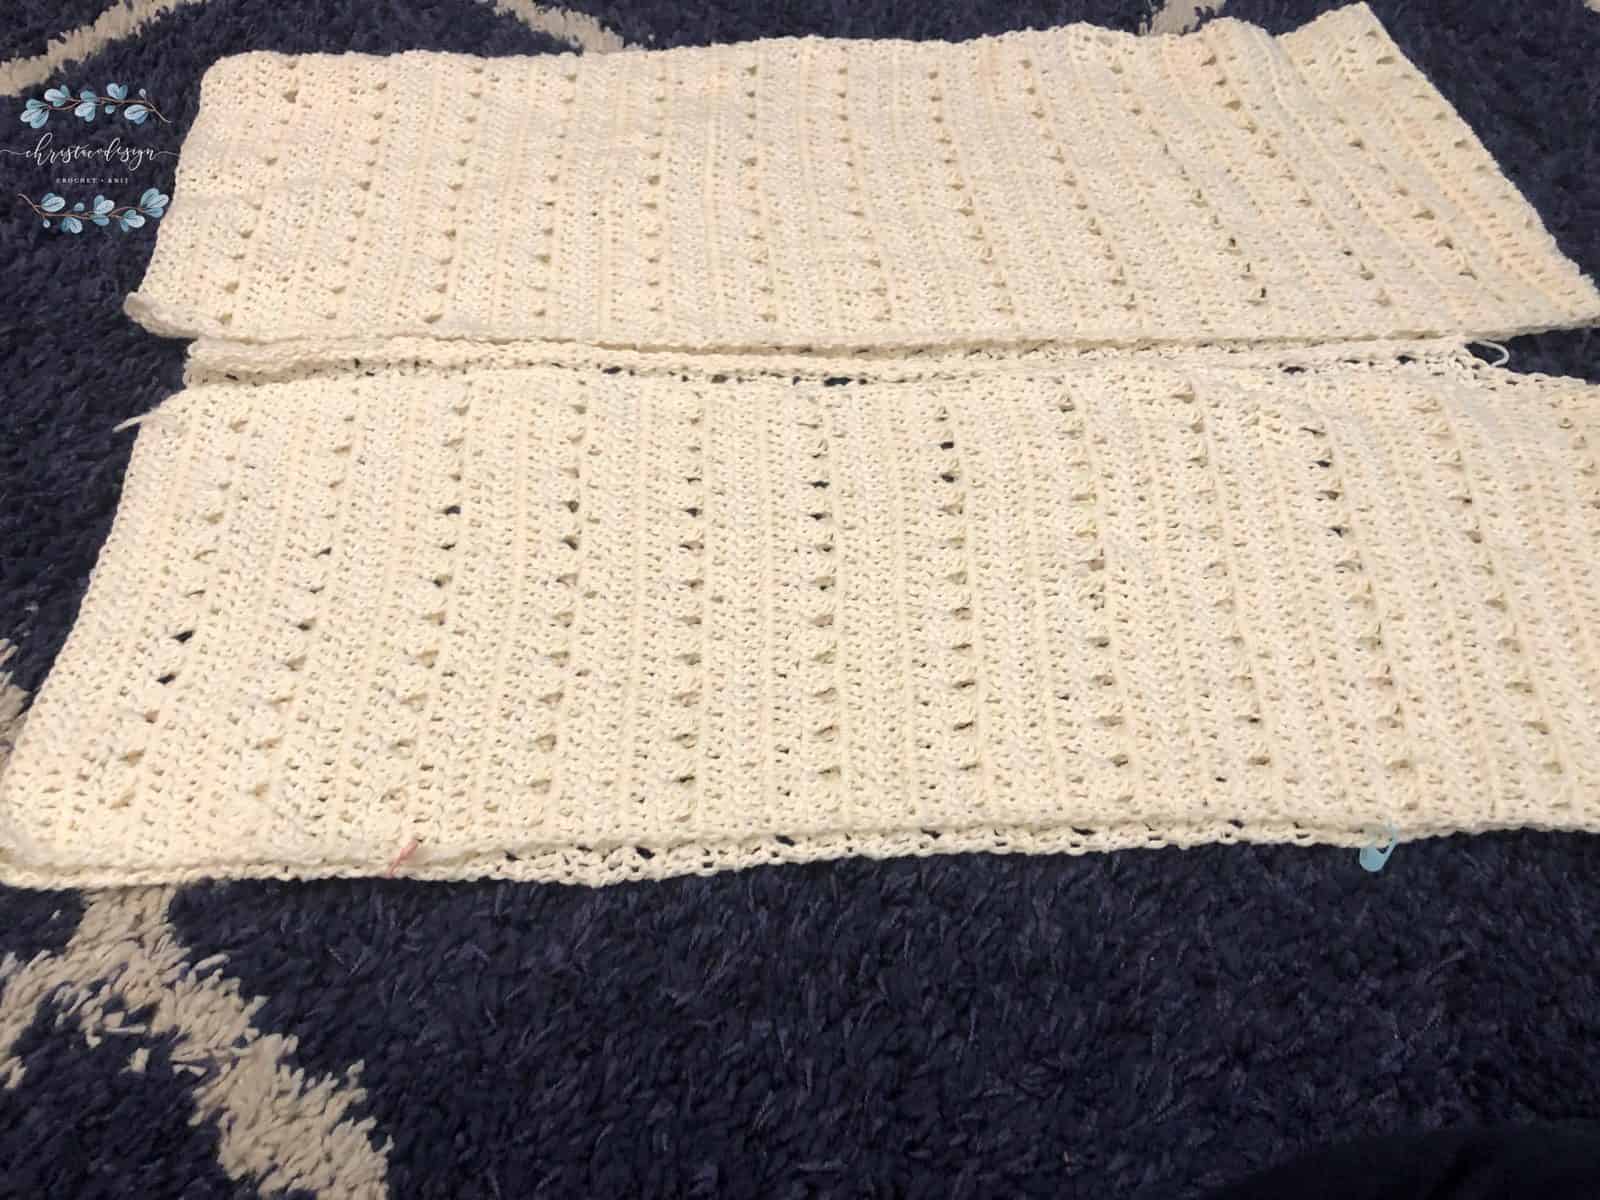
- This cardigan is worked in two panels of back and forth rows, then they are sewn together forming the back. I opted for a decorative seam to join the back. The sides are then sewn together, leaving the bottom slits open and the armhole open. The sleeves are added in rounds.
- Ch 3 counts as a stitch, I highly recommend using a ch 3 alternative, here’s my favorite.
- The stitch multiple is 3 plus 4 if chaining for the foundation row, or 3 plus 2 if using fdc.
- Pattern is written as XS (S, M, L, XL, 2X, 3X, 4X, 5X)
Stitches/Abbreviations
*All ChristaCoDesign patterns are written in standard US terms
fdc – foundation double crochet
RS – right side WS-wrong side
ch – chain
dc – double crochet
sl st – slip stitch
dc3tog – Cluster Stitch: tutorial here
rnd – round
Gauge
2.5” x 2.5” = 8 dc x 4 rows (3 dc rows + 1 dc3tog row)
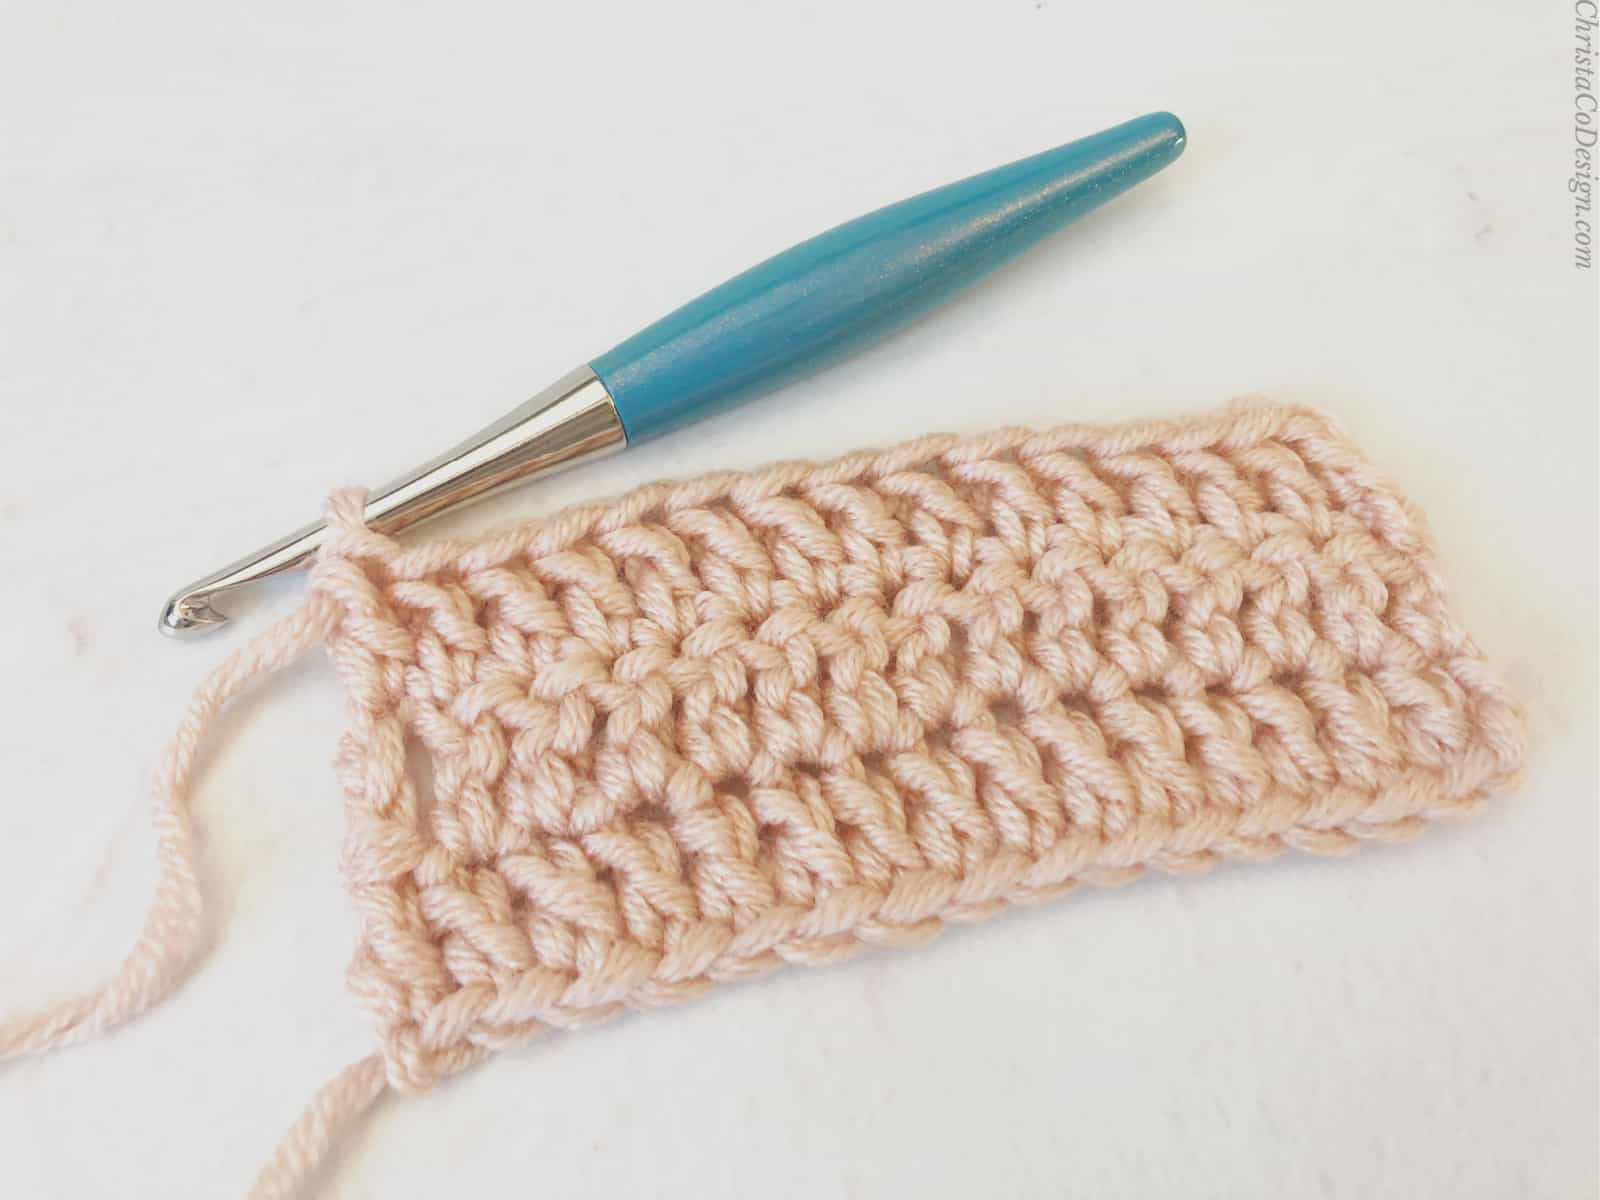
Swatch
Row 1. Fdc 14 or ch 16, dc in 4th ch from hook and in each ch across, turn.
Row 2. Ch 3, dc in each st across, turn.
Row 3. Rep last row again.
Row 4. Ch 4 (counts as a dc + ch 1), in next 3 sts dc3tog, *{ch 2, in next 3 sts dc3tog} rep from * across, ch 1, dc in last st (3rd ch).
Measure gauge and adjust hook size if needed.
Fit
The pattern is written to include 10-18” of positive ease, meaning the garment measurements are larger than the actual body measurements. The fit of this cardigan is long and loose.
The bottom hem reaches just above the knee. Finished length: 31″ (XS), 32.25″ (S), 33.5″ (M), 34.75″ (L), 36″ (XL), 39.5″ (2X), 41″ (3X), 43.5″ (4X), 44.5″ (5X). Sleeves are 3/4 length, and can be left off or made longer by following the easy repeat.
Adjustments
To customize the length of this cardigan measure from your shoulder down to where you’d like the hem to hit on you. Multiply this number by 2. This is the desired length of your panels. If you are adding rows to get extra length be sure to end after 3 dc rows.
To adjust width, increase the stitch count in multiples of 3.
To fit bust size
30″ (XS)
34″ (S)
38″ (M)
42″ (L)
46″ (XL)
50″ (2X)
54″ (3X)
58″ (4X)
62″ (5X)
Panel Width
10″ (XS)
11″ (S)
12 (M)
13″ (L)
14″ (XL)
16.5″ (2X)
18″ (3X)
19″ (4X)
20″ (5X)
Panel Length
62″ (XS)
64.5″ (S)
67″ (M)
69.5″ (L)
72″ (XL)
79″ (2X)
82″ (3X)
87″ (4X)
89″ (5X)
Pin it
Video Tutorial for Panels
Watch the video tutorial for the panels of this crochet cardigan on my YouTube Channel.
You can purchase the ad-free, well formatted PDF Pattern in one of my shops. Scroll down for the free pattern!
Scroll down for the free Crochet Cardigan Pattern!
Pattern Instructions
Mid Summer Cardigan Crochet Pattern
Mid Summer Crochet Cardigan Pattern is an easy light weight cardigan perfect for summer layering, makes a great beach cover up.
Materials
- #3 lightweight/DK yarn, I used Lion Brand’s Comfy Cotton Blend in Whipped Cream
- Estimated yardage by size:
- XS-1000, S-1170, M-1370, L-1560, XL-1760, 2X-1950, 3X-2150, 4X-2350, 5X-2540 yds
Tools
- 6mm J hook
- Measuring tape
- Yarn needle
- Stitch markers
- Scissors
Instructions
Make 2
- Row 1. (WS) Fdc 32 (35, 38, 41, 44, 53, 59, 62, 65) or Ch 34 (37, 40, 43, 46, 55, 61, 64, 67) and dc in 4th ch from hook (2 dcs formed) and in each ch across, turn. (32, 35, 38, 41, 44, 53, 59, 62, 65 sts)
- Row 2. Ch 3, dc in next dc and in each dc across, turn.
- Row 3. Rep last row.
** - Row 4. (RS) Ch 4 (counts as dc + ch 1), in next 3 sts dc3tog, *{ch 2, dc3tog} rep from * across until last st, ch 1, dc into last st (3rd ch), turn. (32, 35, 38, 41, 44, 53, 59, 62, 65 sts)
- Row 5. Ch 3, dc in each ch sp (placing 2 dc in each ch 2 sp) and st across, the last 2 dcs will go in the 4th and 3rd ch, turn.
- Row 6. Ch 3, dc in next dc and in each dc across, turn.
- Row 7. Rep last row.
**
Rep Rows 4-7: 23 (24, 25, 26, 27, 30, 31, 33, 34) more times, for a total of 99 (103, 107, 111, 115, 127, 131, 139, 143) rows, or 62 (64.5, 67, 69.5, 72, 79, 82, 87, 89).“
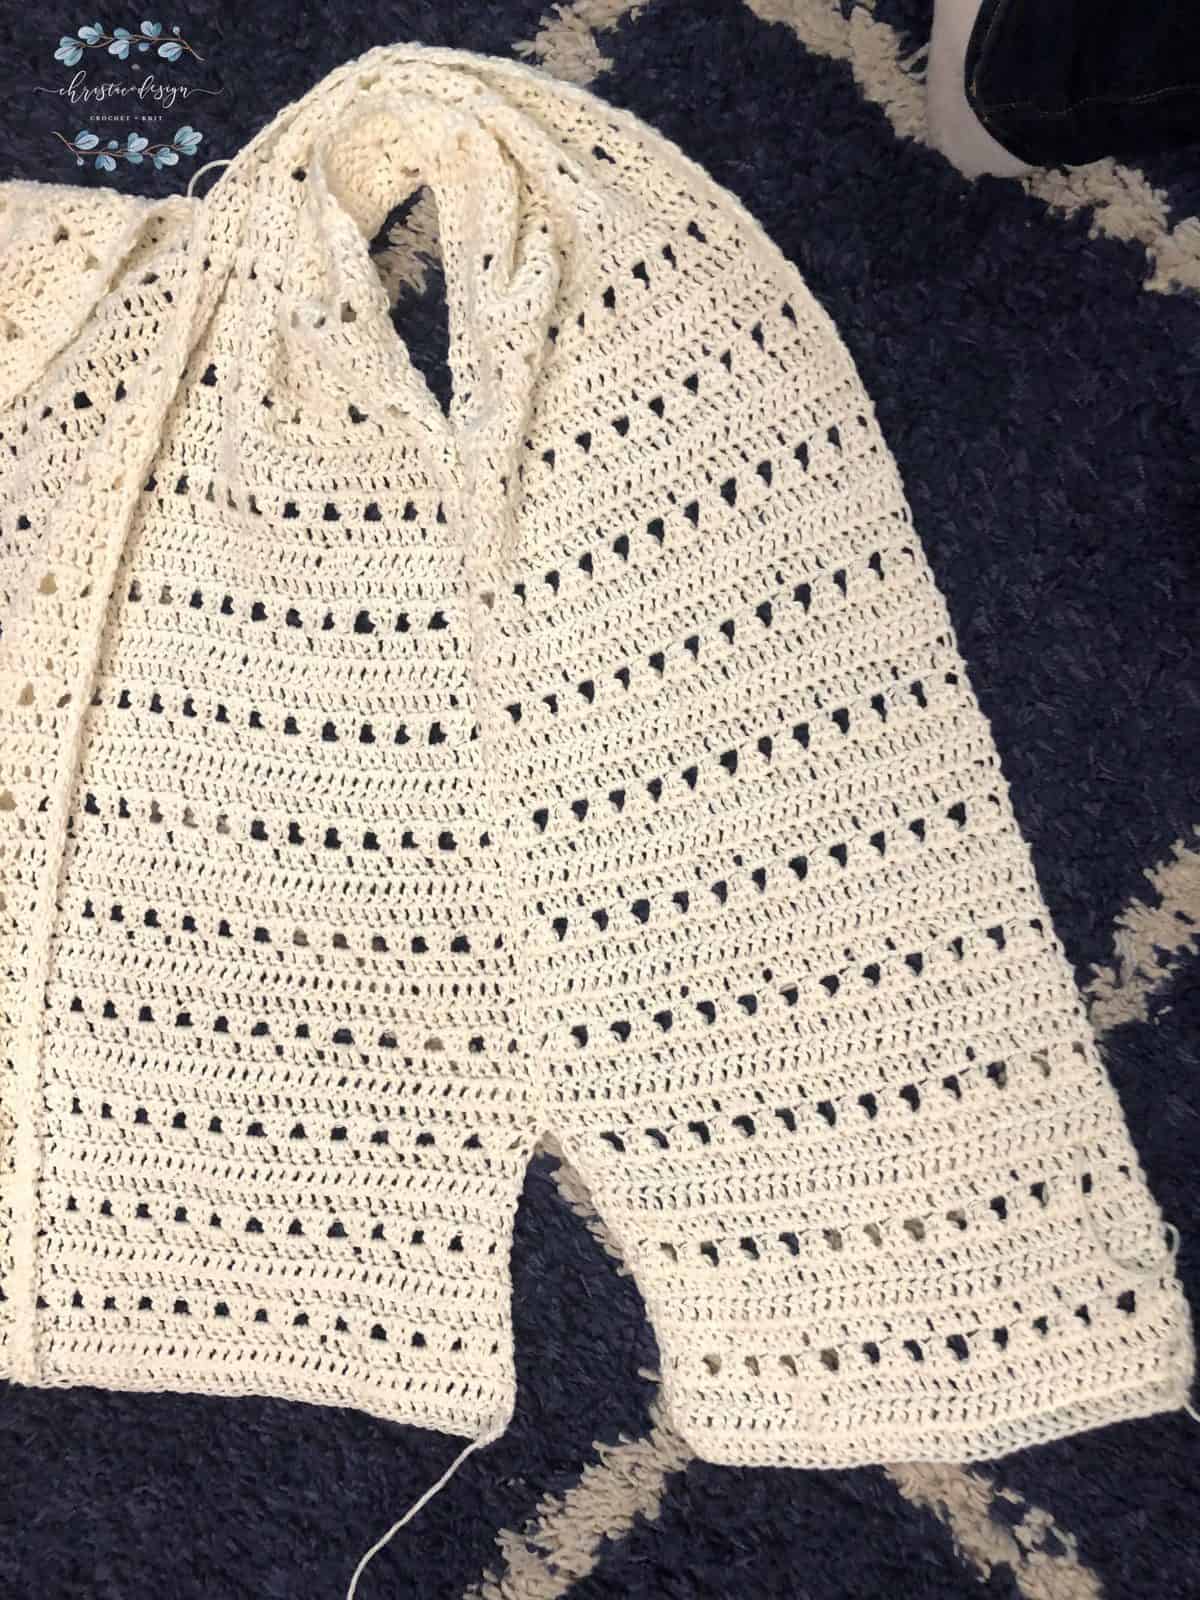
Cut yarn & weave in ends. - Lay the two panels side by side, with the WS facing down.
- Leave bottom 12 rows or 7.5” unseamed for the back slit, begin seaming here.
Assembly
Watch the Seaming Up Video
Video Tutorial for Seaming
Seam the back
Since the panels are seamed to form the back and then folded over the shoulder to form the front panels this will result in one side (your front or back) being “upside down.” If you have a preference on which you see in the front then orient them that way. Just be sure both panels are facing the same way (ie. both row 1 on the bottom) before seaming them together.
Also note that when you join the sleeves later they will hang “upside down,” which will match either your back or front depending on how you decide to fold your panels.
I chose a visible decorative seam for the back so I worked on the RS, (if you do not want your seam to stand out, work on the WS when seaming).
Join yarn with a sl st at the top of the 12th row. Sl st through both panel edges, matching row for row. Seam up the back for 39 (40, 41, 42, 43, 44, 45, 46, 47) rows or 24 (25, 25.5, 26.25, 27, 27.5, 28, 28.75, 29) inches. *If you prefer an unseen, flat seam then sew on the ws using a mattress/whip stitch.
Seam the sides
-With seamed back panel RS up, fold front panels over back panel, lining up bottom hems-notice the back is not sewn all the way up to the top of the shoulder.
-Work on the ws of the fabric.
-Use a mattress/whip stitch to sew.
Leave bottom 12 rows or 7.5” unseamed for the side slits, begin seaming here.
Sew front panel sides up until 6.5” (7, 7.5, 8, 8.5, 9, 9.5, 10, 10.5) inches are left to the fold of the shoulder, this creates the armhole opening.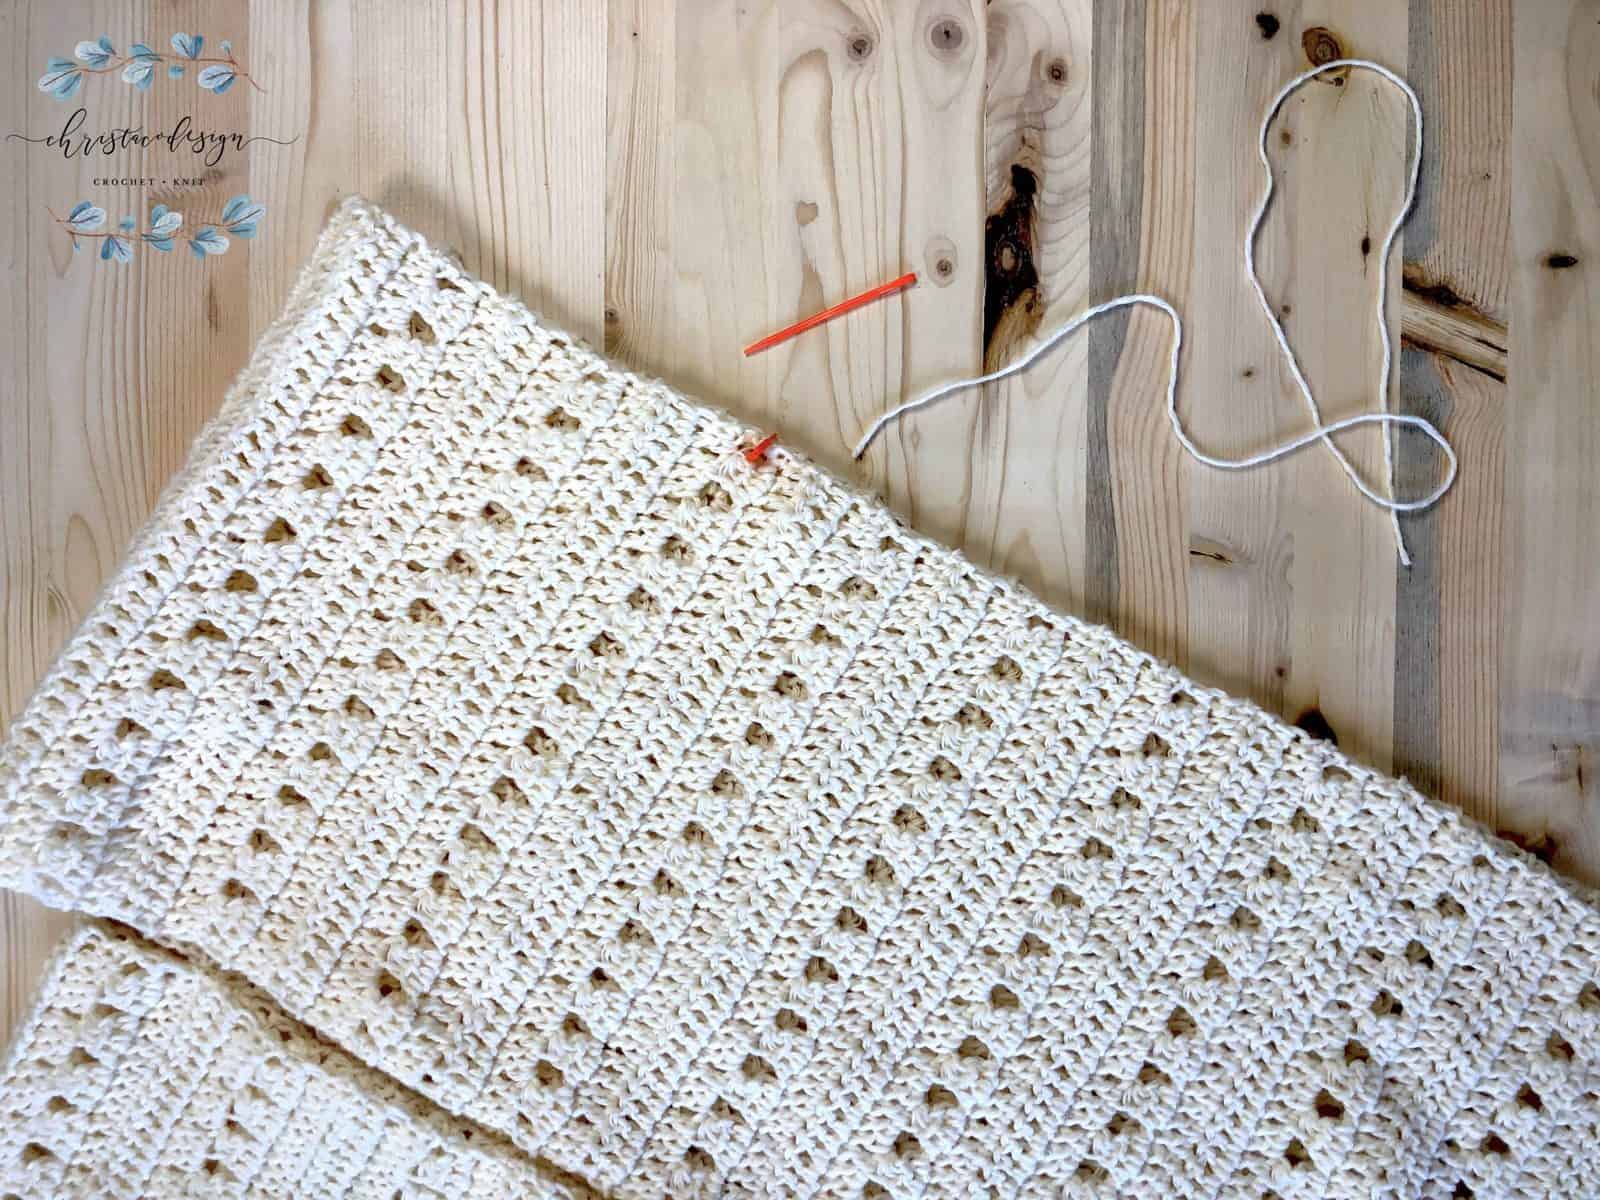
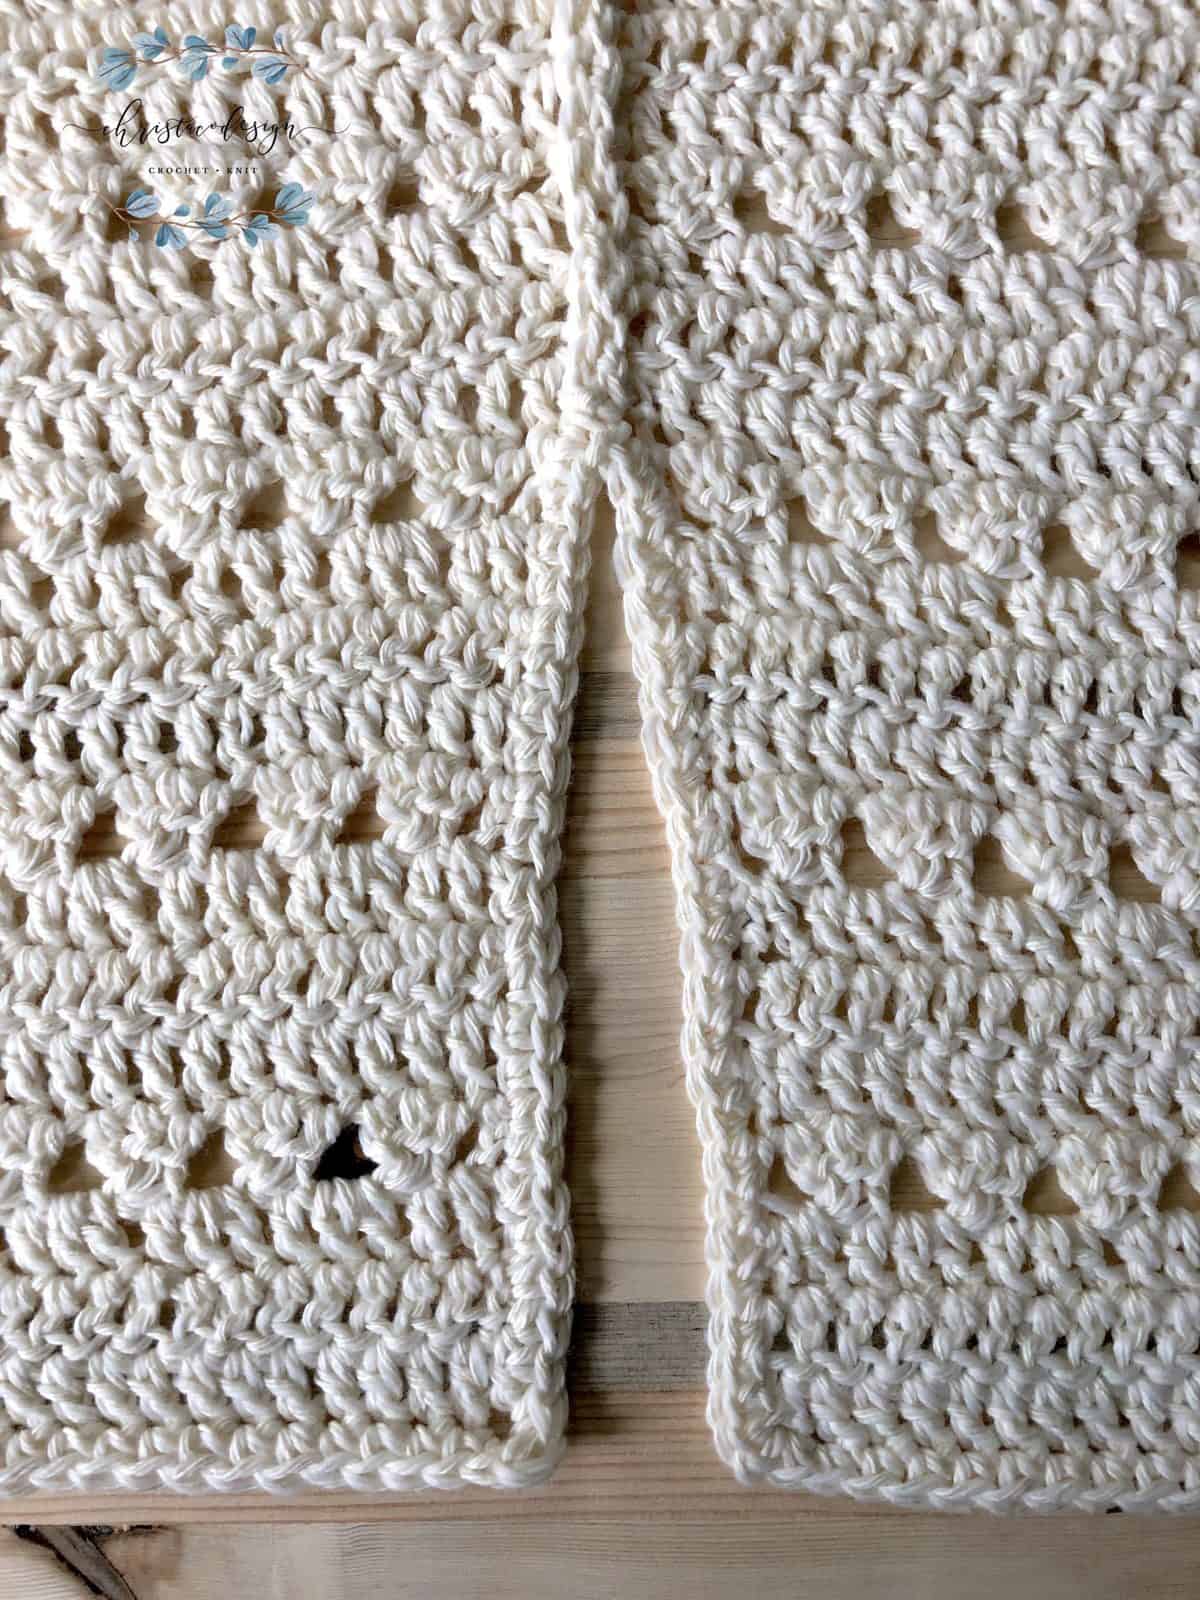
 The armhole and bottom side slit.
 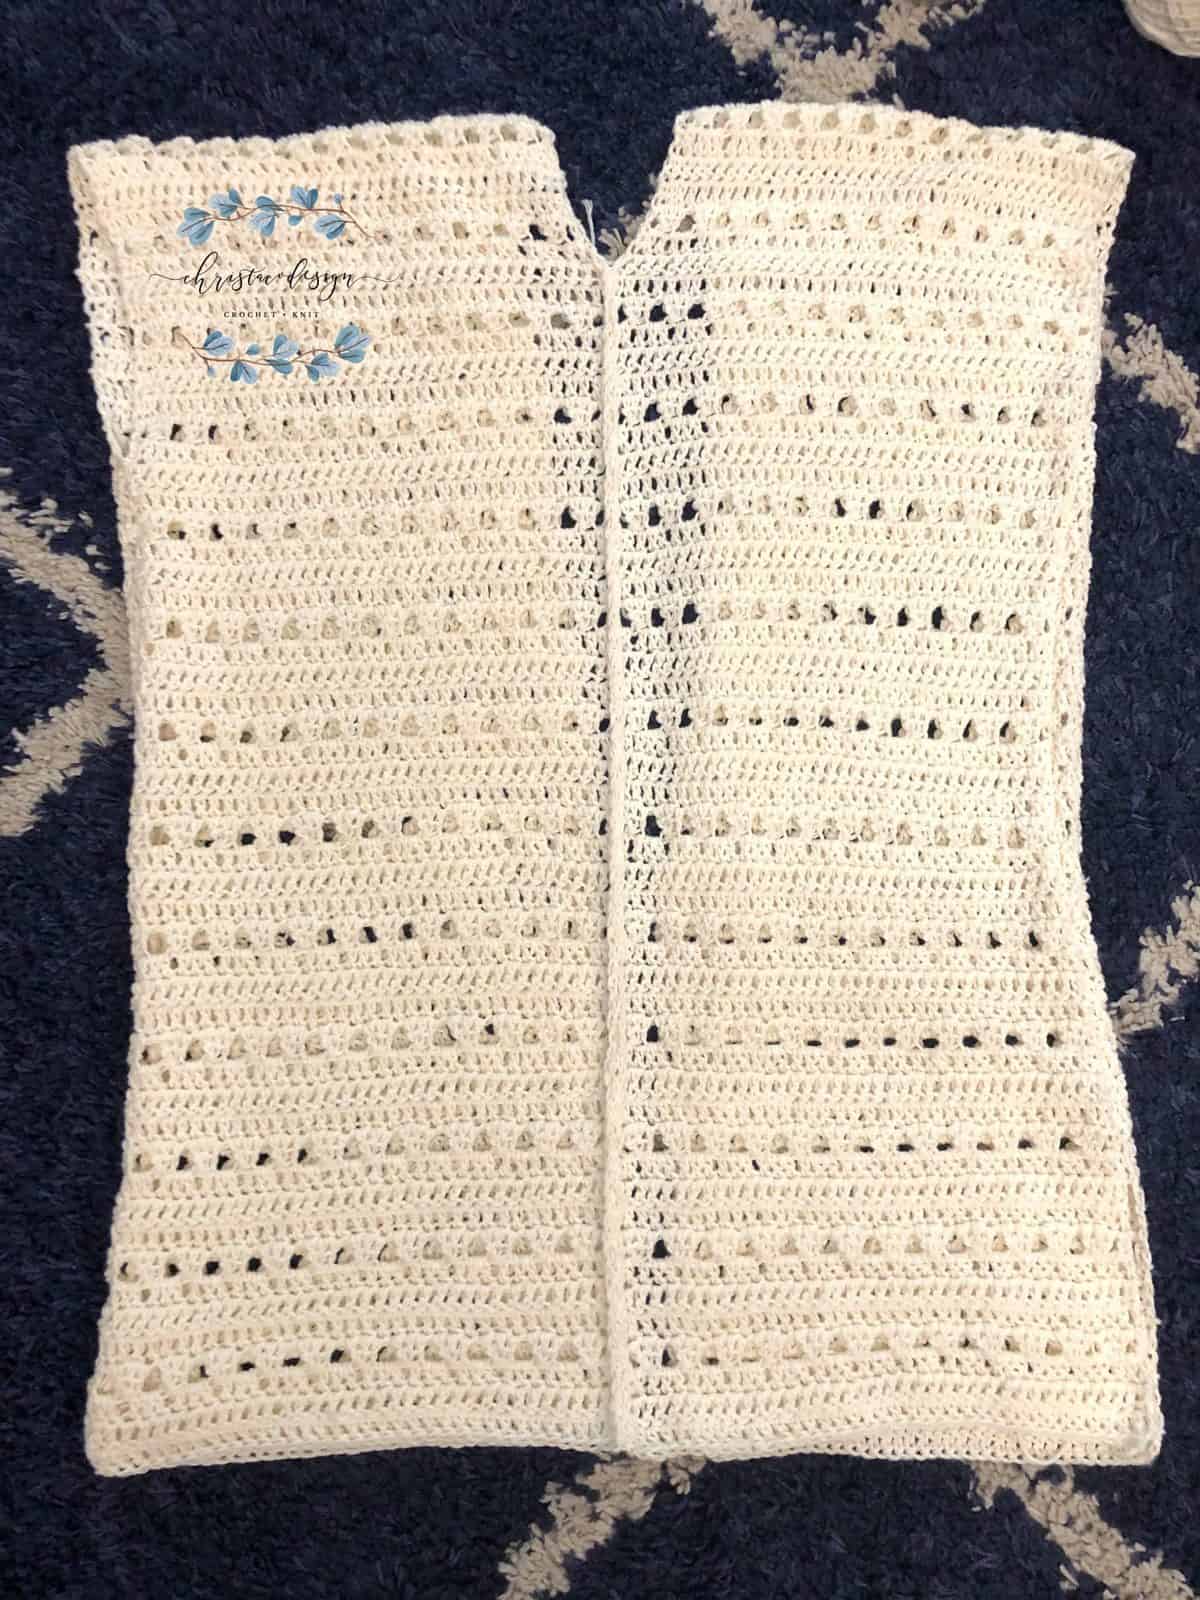 The slip stitch creates a nice visible seam.
 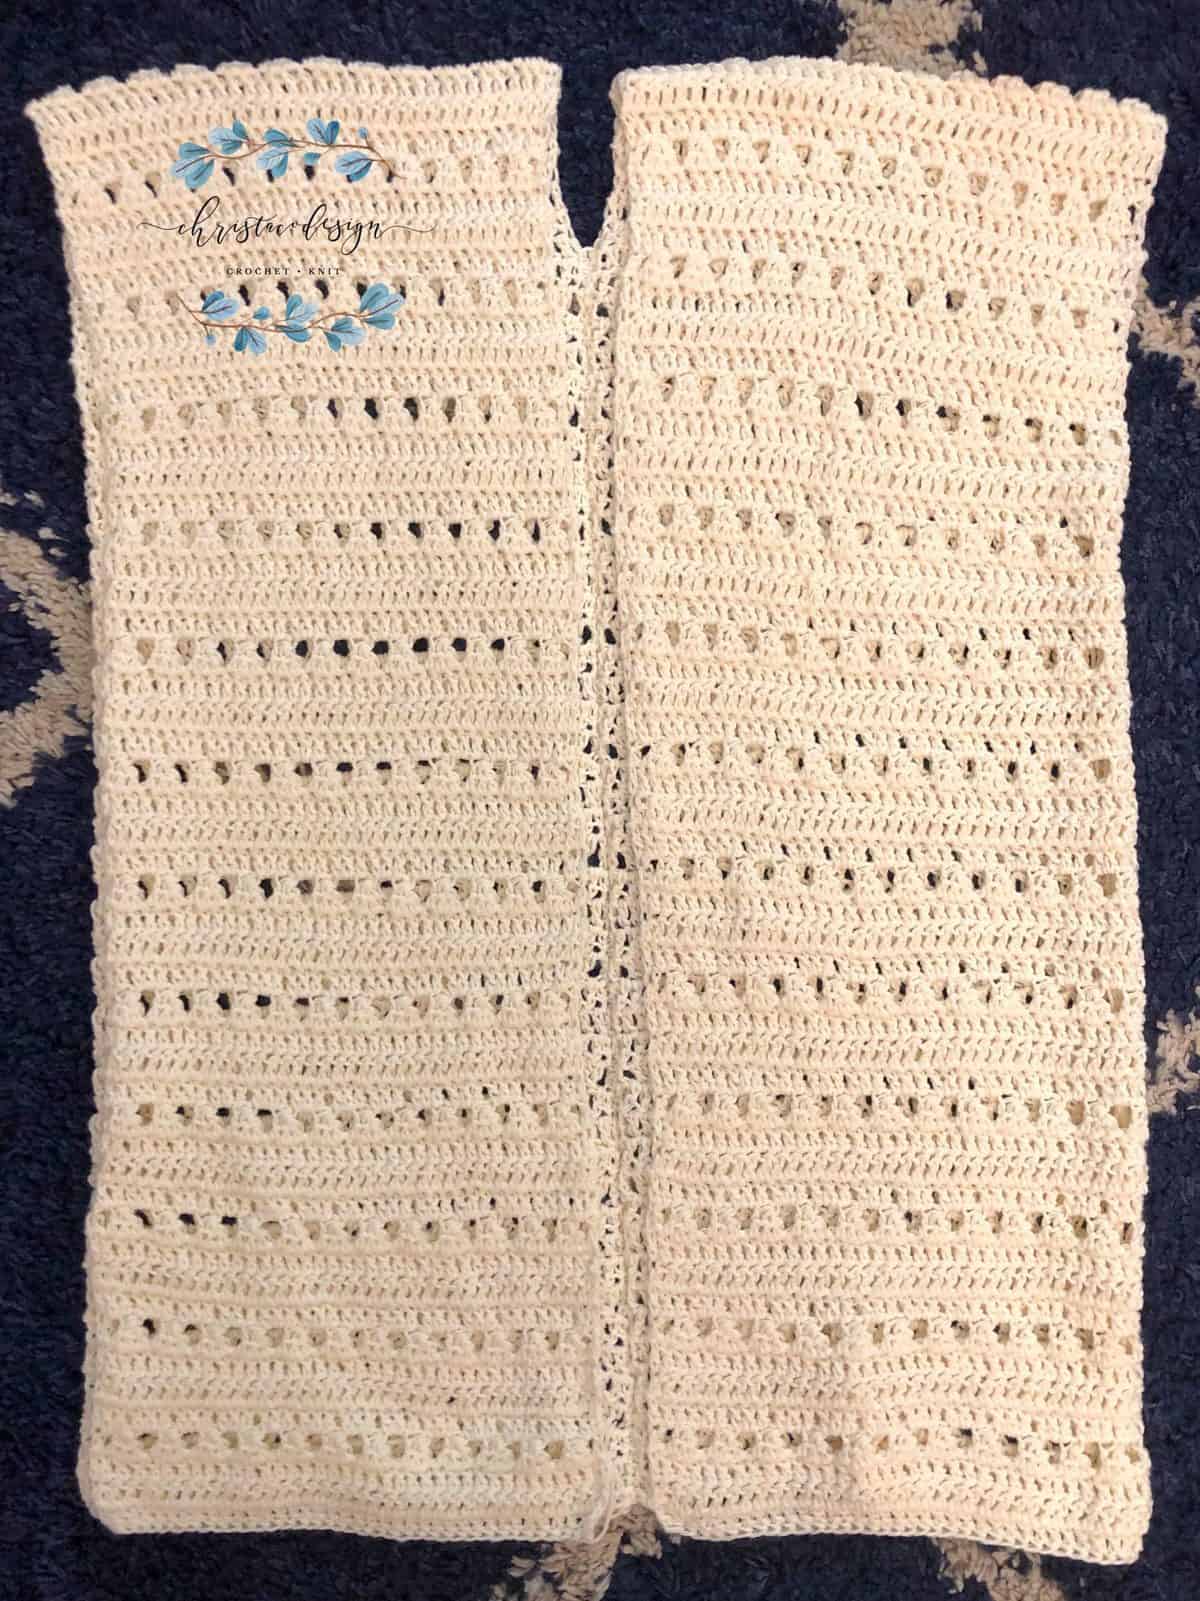 Picture shows the front of the cardigan.
Sleeves
Sleeves are worked in the round, but turned at the end of the rnd.
Stitch multiple is 3.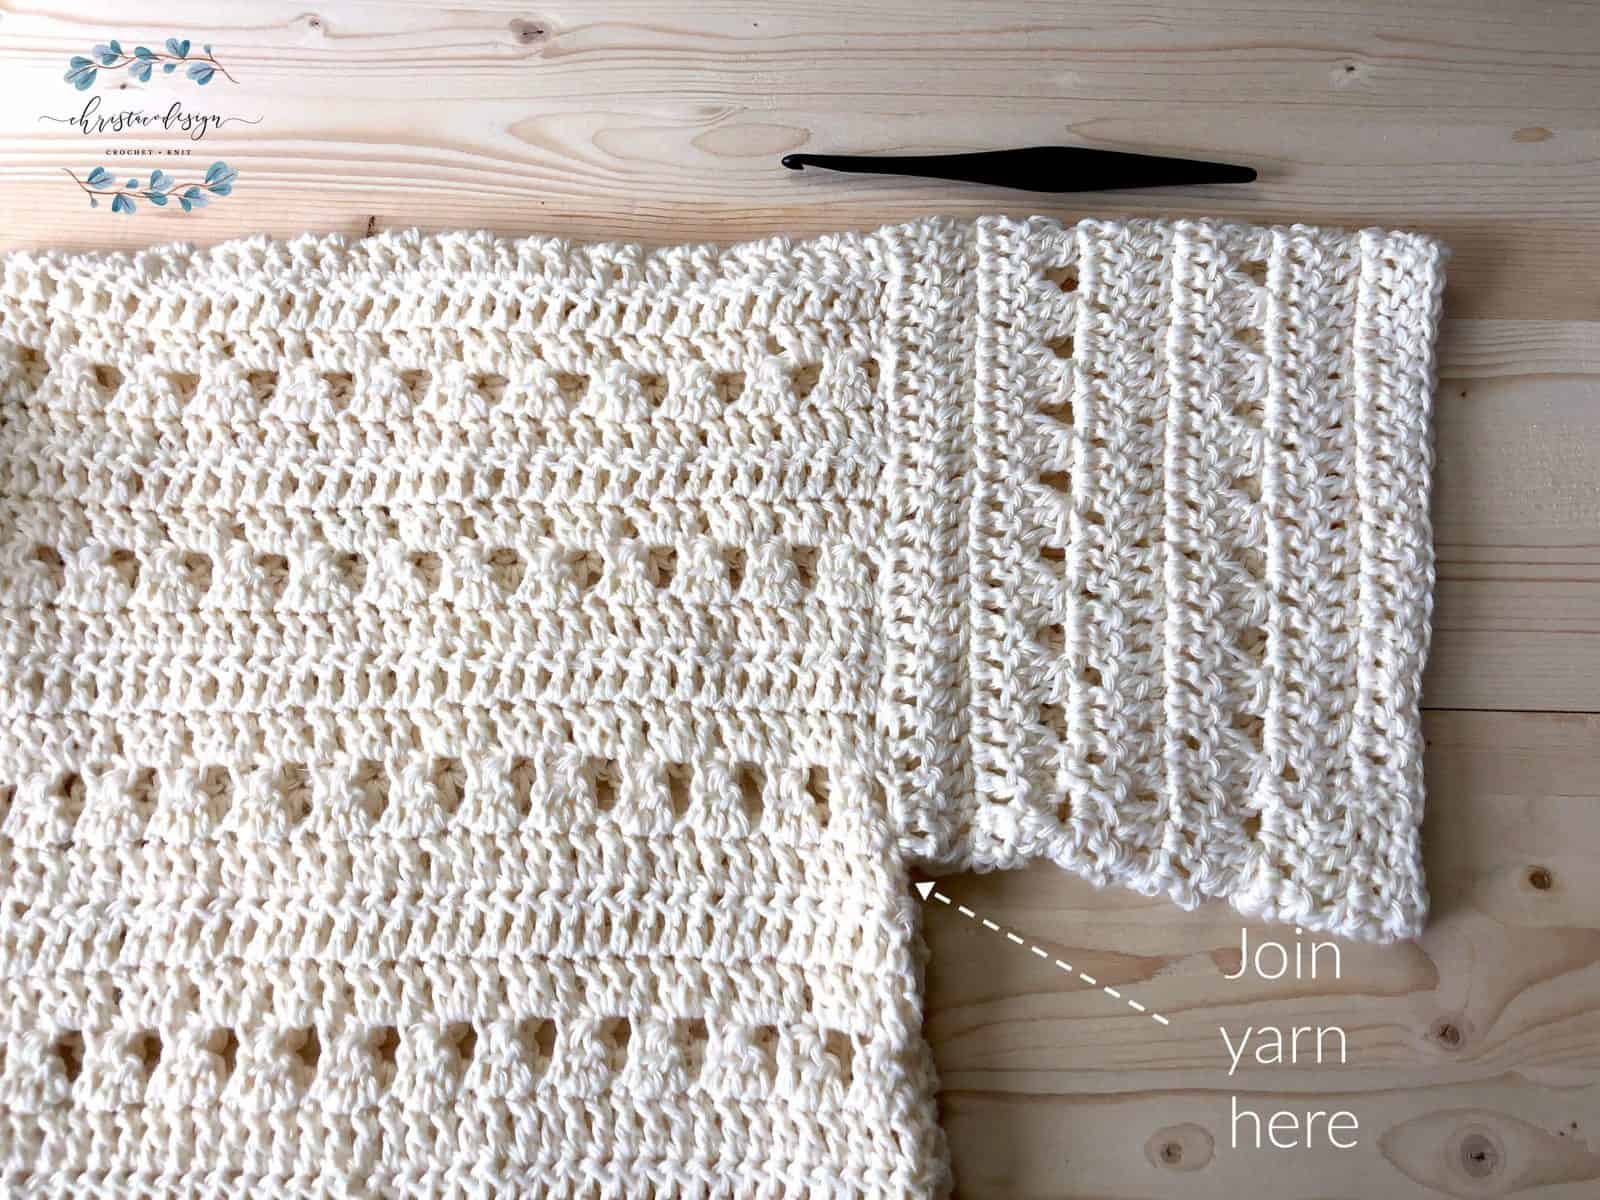 Join yarn with a sl st to the underside of armhole.
Rnd 1. Ch 3 (counts as a dc), dc 47 (50, 53, 56, 59, 62, 65, 68, 71) evenly around the armhole, join with sl st to the 3rd ch, turn. (48, 51, 54, 57, 60, 63, 66, 69, 72 sts)
Rnd 2. Ch 3 (counts), dc in each st around, join with sl st to the 3rd ch, turn.
Rnd 3. Rep last rnd.
Rnd 4. Ch 2 (does not count), beginning in the same st, dc3tog, ch 2, *{in the next 3 sts dc3tog, ch 2} rep from * around, join with sl st to first dc3tog made, turn.
Rnd 5. Ch 3 (counts), dc in each ch sp (placing 2 dc in each ch 2 sp) and st around, join with sl st to 3rd ch, turn.
Rnd 6. Ch 3 (counts), dc in each st around, join with sl st to 3rd ch, turn.
Rnd 7. Rep last rnd.
Rnds 8-11. Rep Rnds 4-7.
Rnd 12. Ch 1, sc in same st and in each st around, join with sl st to first sc. Cut yarn & weave in ends.
Repeat for second sleeve.
Edging
Video Tutorial For Hem
Worked in the round.
With cardigan laid out upside down in front of you (neck toward you and bottom hem away from you) join yarn with a sl st to the corner of front panel on your left.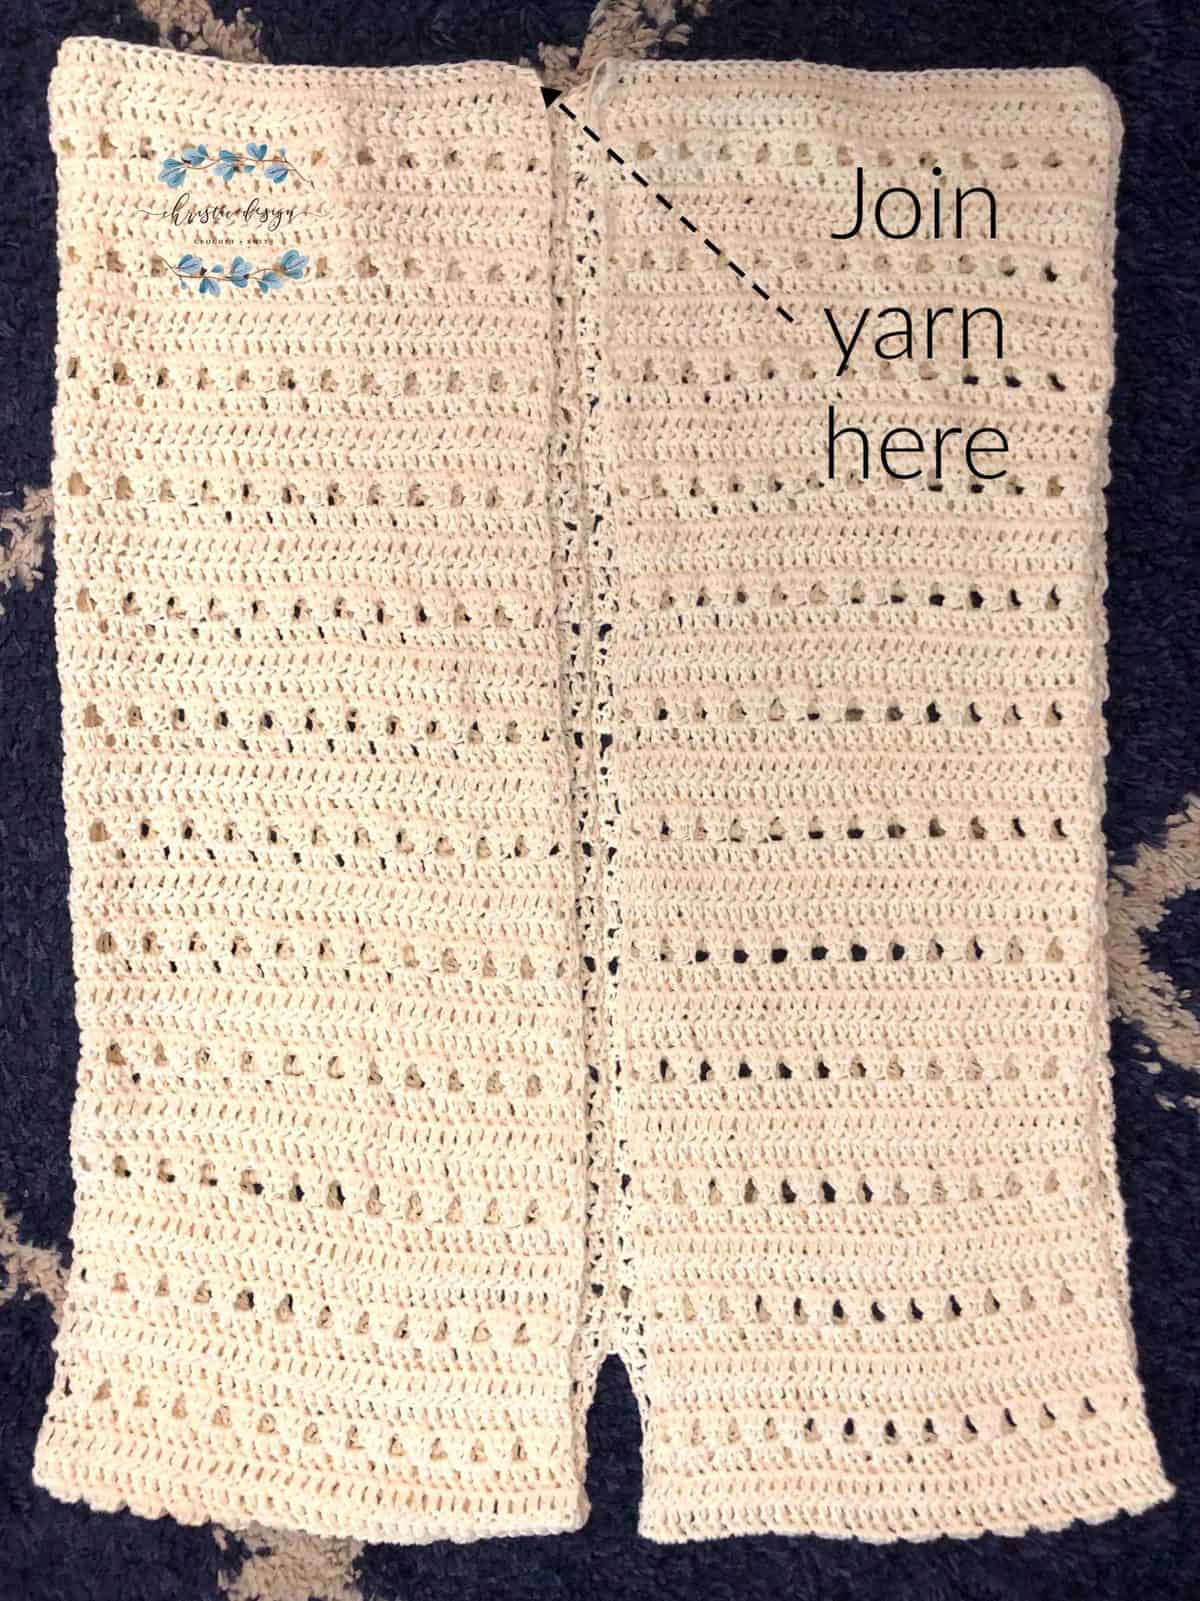
Ch 1, sc in same st and in each st around, continuing up and down the slits, at the corners place (sc, ch1, sc) all in same st and continue to sc evenly around, and up the inside lapel, back down and around, joining to the first sc with a sl st.
Cut yarn & weave in ends.
Recommended Products
As an Amazon Associate and member of other affiliate programs, I earn from qualifying purchases.


This is such a pretty pattern.
Thank you ?
I think I might make this later when I have more time
I hope you get a chance to make it!
Very beautifull! I can’t wait to try it. Thank you! Fiorella