Easy Crochet Blanket Borders That Works For Any Afghan
Learn how to add an easy crochet border to your blankets. With simple stitches you can use this crochet edging on any blanket size.

This post contains affiliate links, I may earn a fee. Read more disclosure policy.
Join the ChristaCoDesign Newsletter
Never miss a pattern!
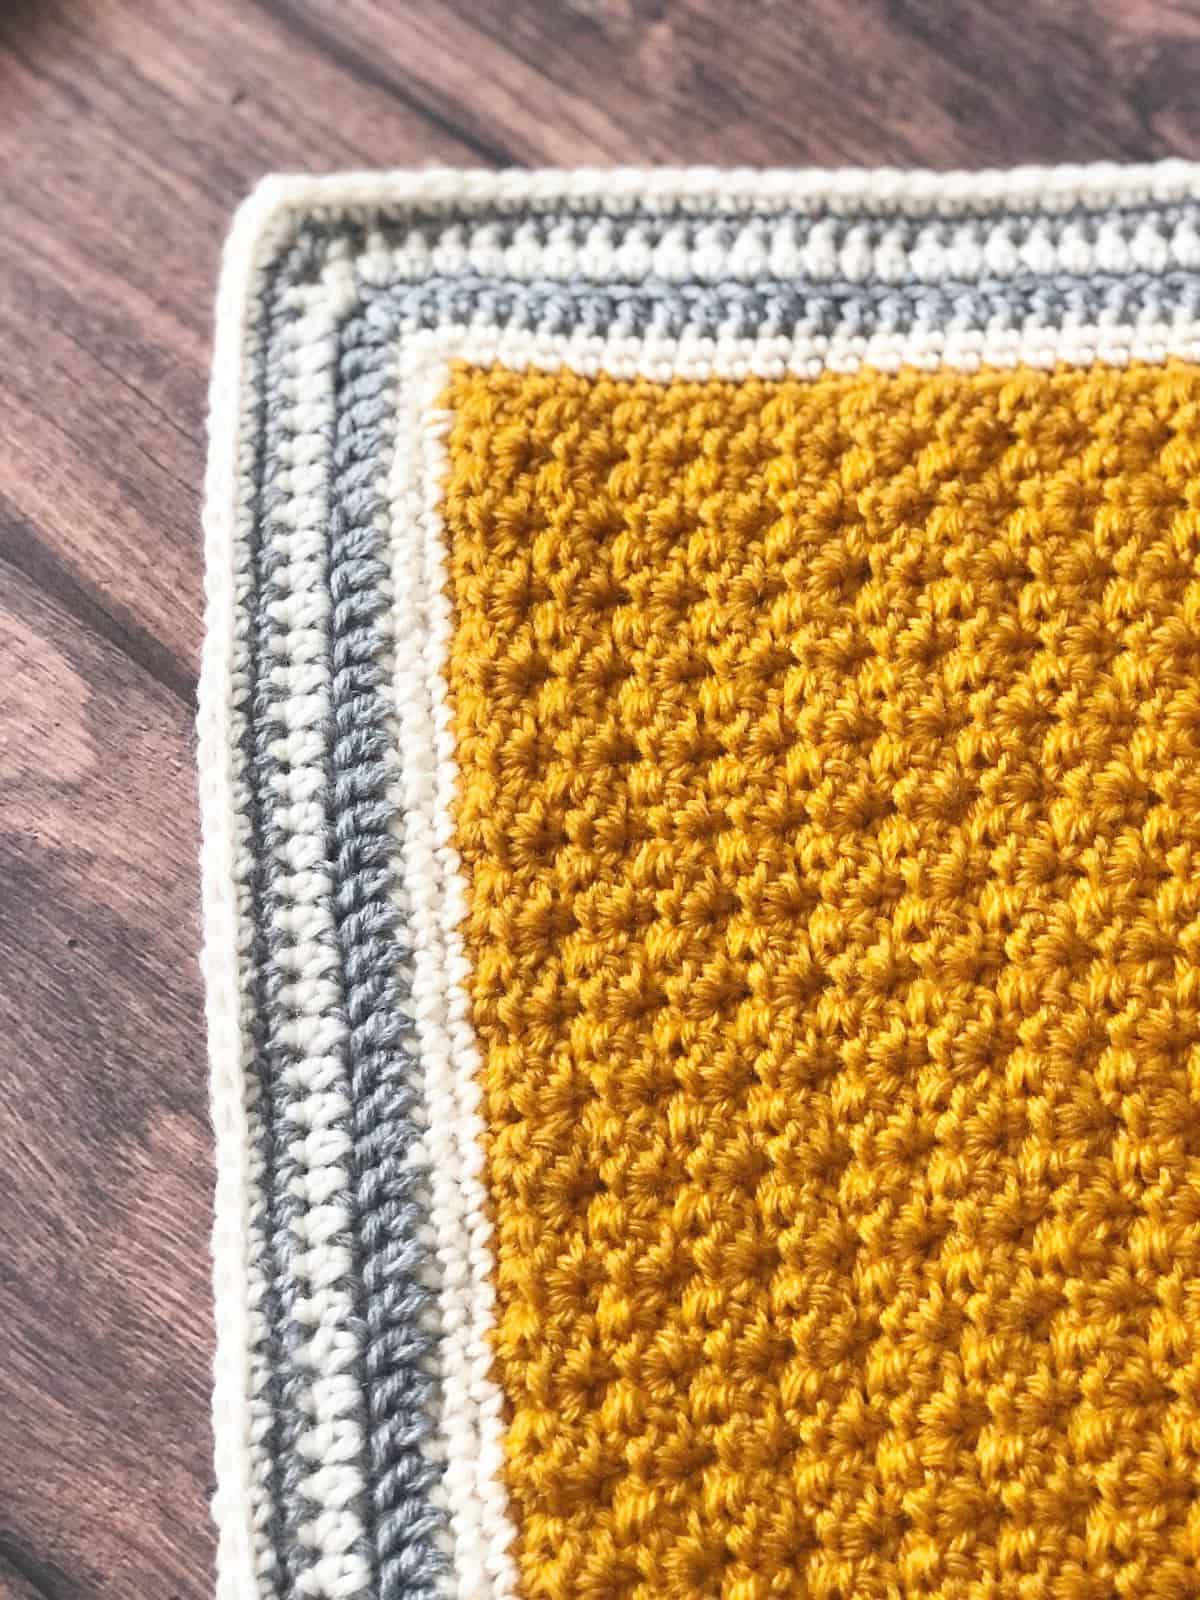
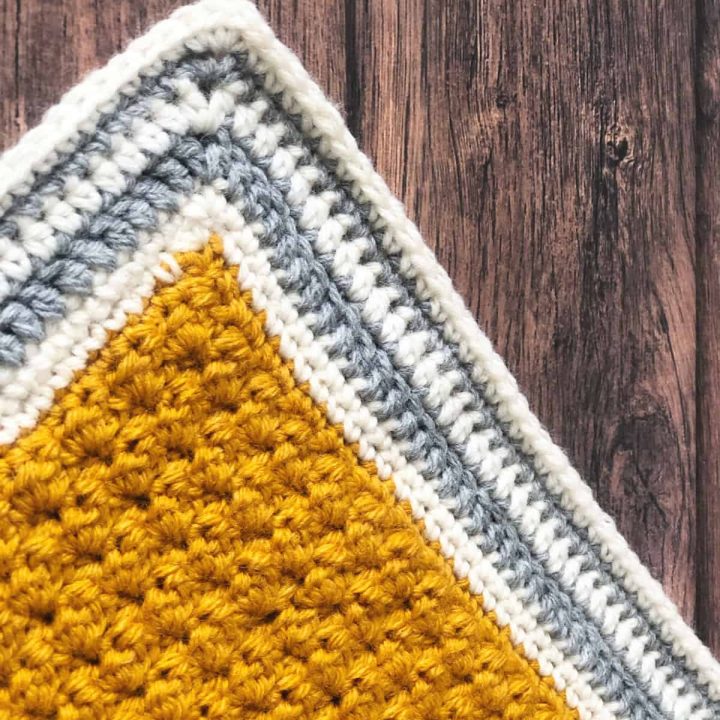
Once you finish that blanket you’ve been working on for days, weeks or months it’s time to finish it up with the perfect crochet border. This simple border design uses basic stitches and stripes to give your blanket a polished finish.
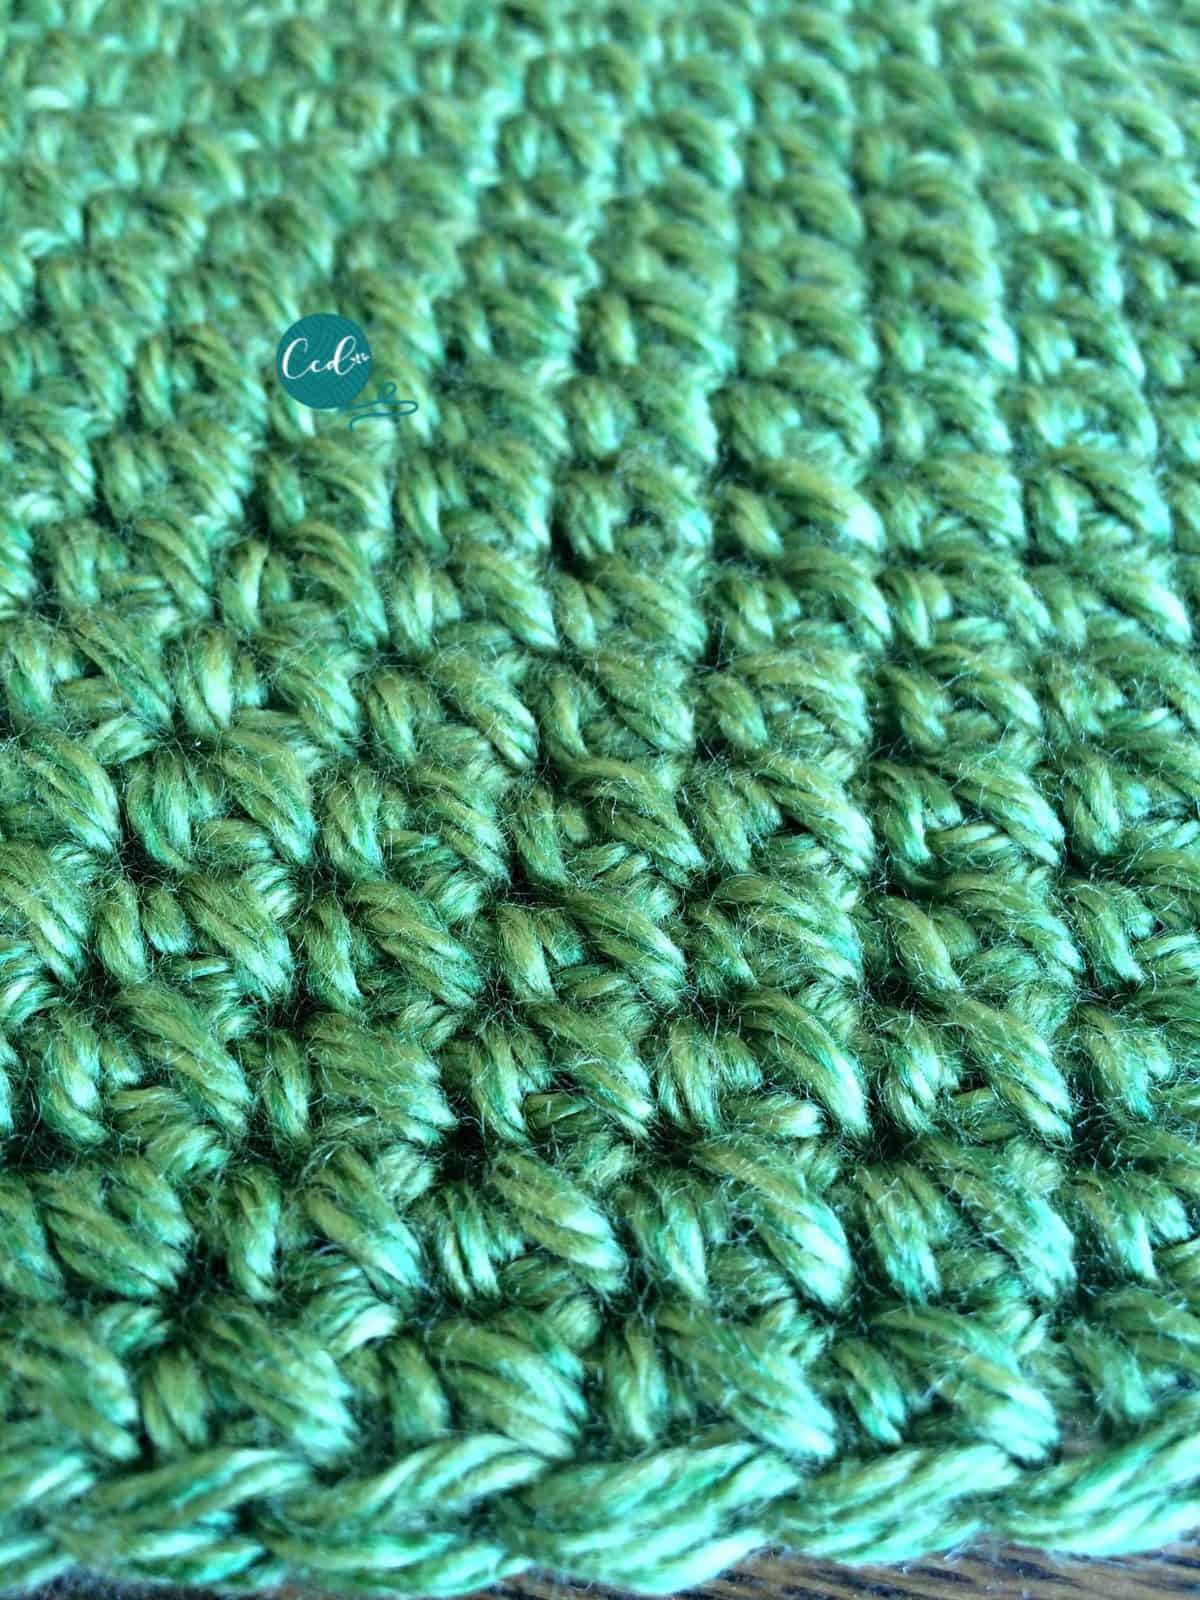
This easy border pattern includes single, double and half double crochet stitches. No need to worry about stitch count or spacing, just join you yarn and crochet away. And then you can get to the best part, gifting it!
The blanket I’m using here for this border pattern is the Modena Patchwork Blanket it’s a free crochet pattern. It’s really important to start with one round of single crochet stitches in any blanket border.
Since this blanket pattern is a combination of different squares I wanted a simple way to bring them all together that wasn’t dependent on the number of stitches.
That’s the great thing about using basic crochet stitches. Your blanket edges don’t have to accommodate any particular stitch count.
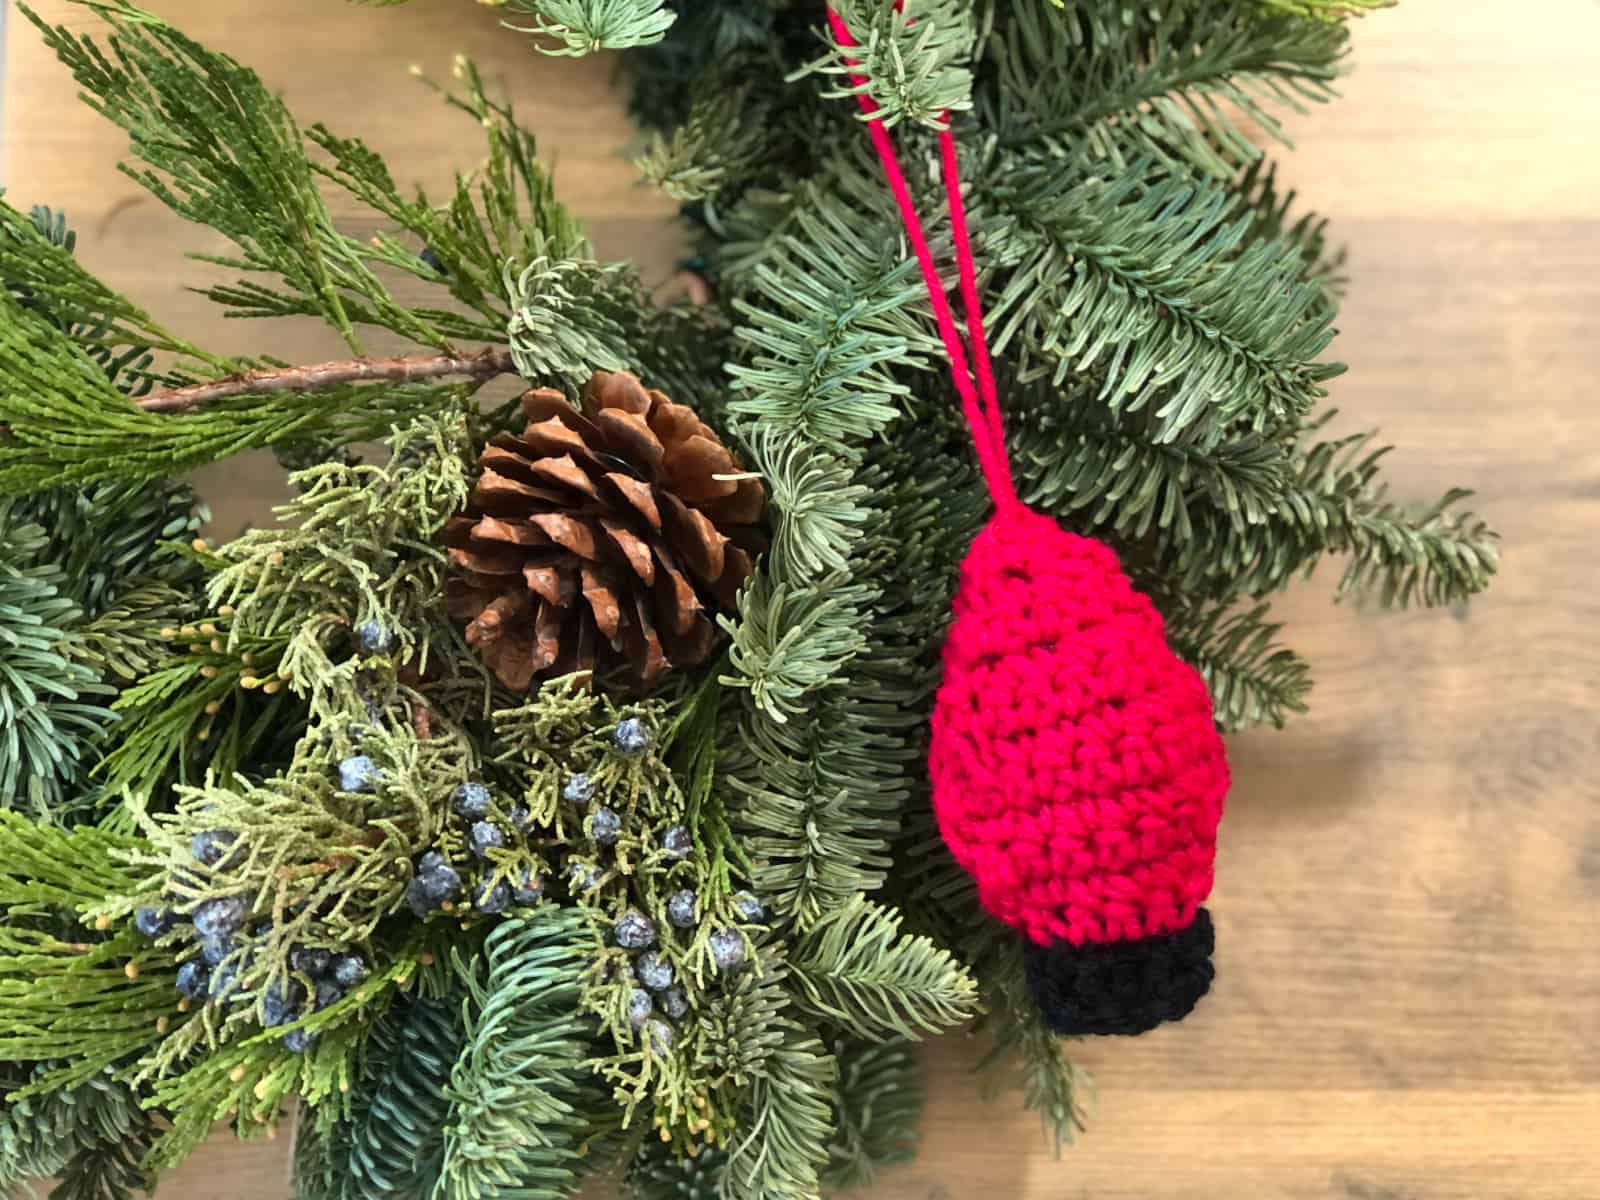
More easy crochet borders to try:
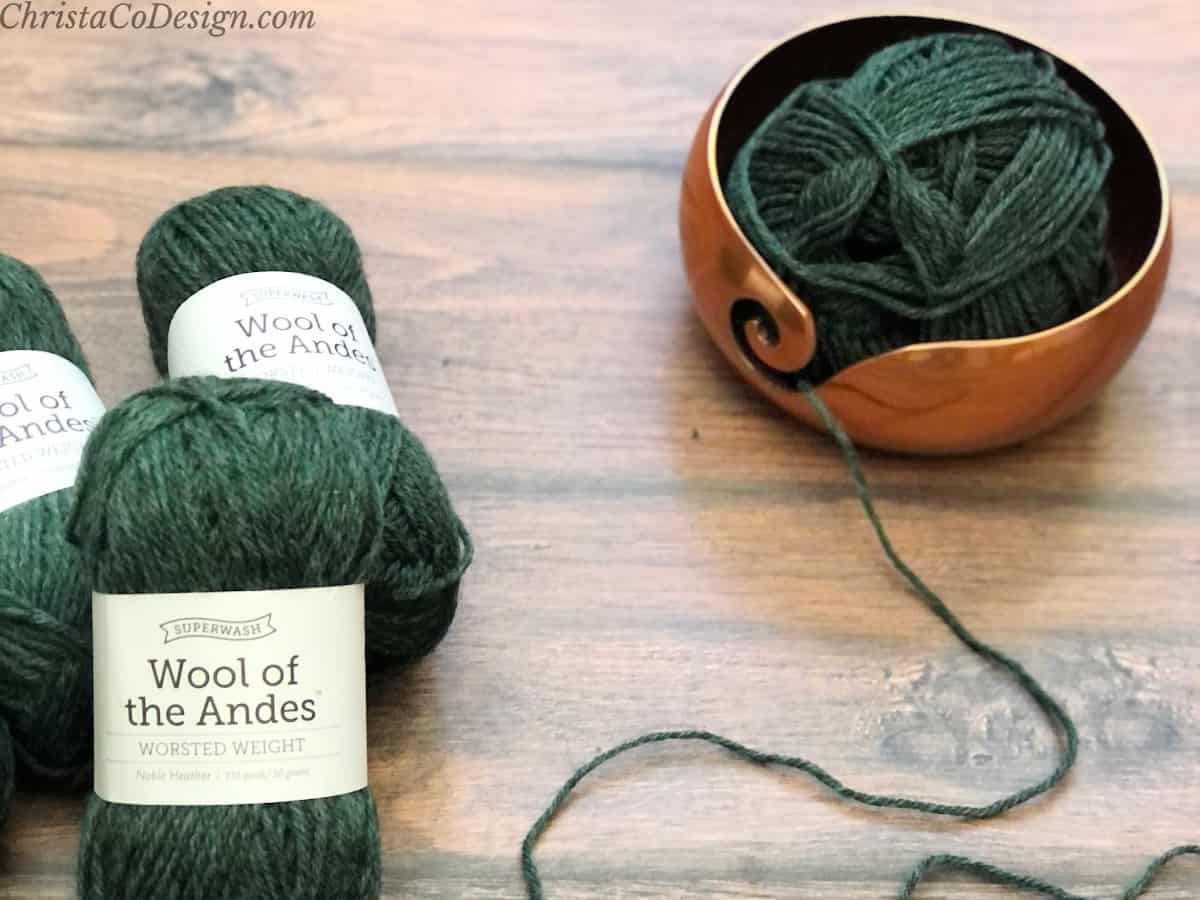
The Yarn
I use a medium worsted weight yarn for this border. You can use a different yarn brand than that suggested below but you want to use the same yarn weight.
Depending on the colors of your blanket you may choose to use only a solid color or pair it with a contrasting color as I did, here are the details.
Materials
- 2 different colors of #4 medium worsted weight yarn pictured in Lion Brand Wool Ease* (80% acrylic, 20% wool, 197 yd / 190 m, 3 oz / 85 g). For this 42″ x 58″ throw blanket I use 394 yd divided in 1 ball Fisherman, 1 ball Grey Heather. For a large blanket you’ll need more, about 1.5 balls each. And for smaller baby blankets you’ll need less yarn, about half a ball each.
- 5 mm US size H-8 crochet hook,* or crochet hook size needed to meet gauge.
- Yarn needle, Scissors, Measuring tape
Notes
- Chain 1 to start a round does not count as a stitch.
- Chain 3 to start a round does count as a double crochet. I recommend using a chain 3 alternative, this one is my favorite.
Level
Easy
Gauge
2″ x 2″ = 7 sc x 6 rows in pattern
Stitches/Abbreviations
US Terms
ch – chain
Ch 3 alternative replaces a ch 3 that counts as a dc.
dc – double crochet
inv join – invisible join
RS – right side
sc – single crochet
sl st – slip stitch
Finished Size
This border is 2″ tall so it will 4″ to your finished width and height.
Troubleshooting Tips
- If you are getting wavy or curly edges that means you may have too many stitches, or your tension is too loose. Try going down a hook size, if that doesn’t work use less stitches by skipping one (or using a decrease stitch) every few stitches.
- If your blanket border is starting to bowl up then you may not have enough stitches, or your tension is too tight. Try going up a hook size, or adding extra stitches either in the corners or every few stitches place 2 instead of 1.
- If these don’t help you might have missed a stitch somewhere in your blanket, I have a post on how to fix uneven edges on a blanket.
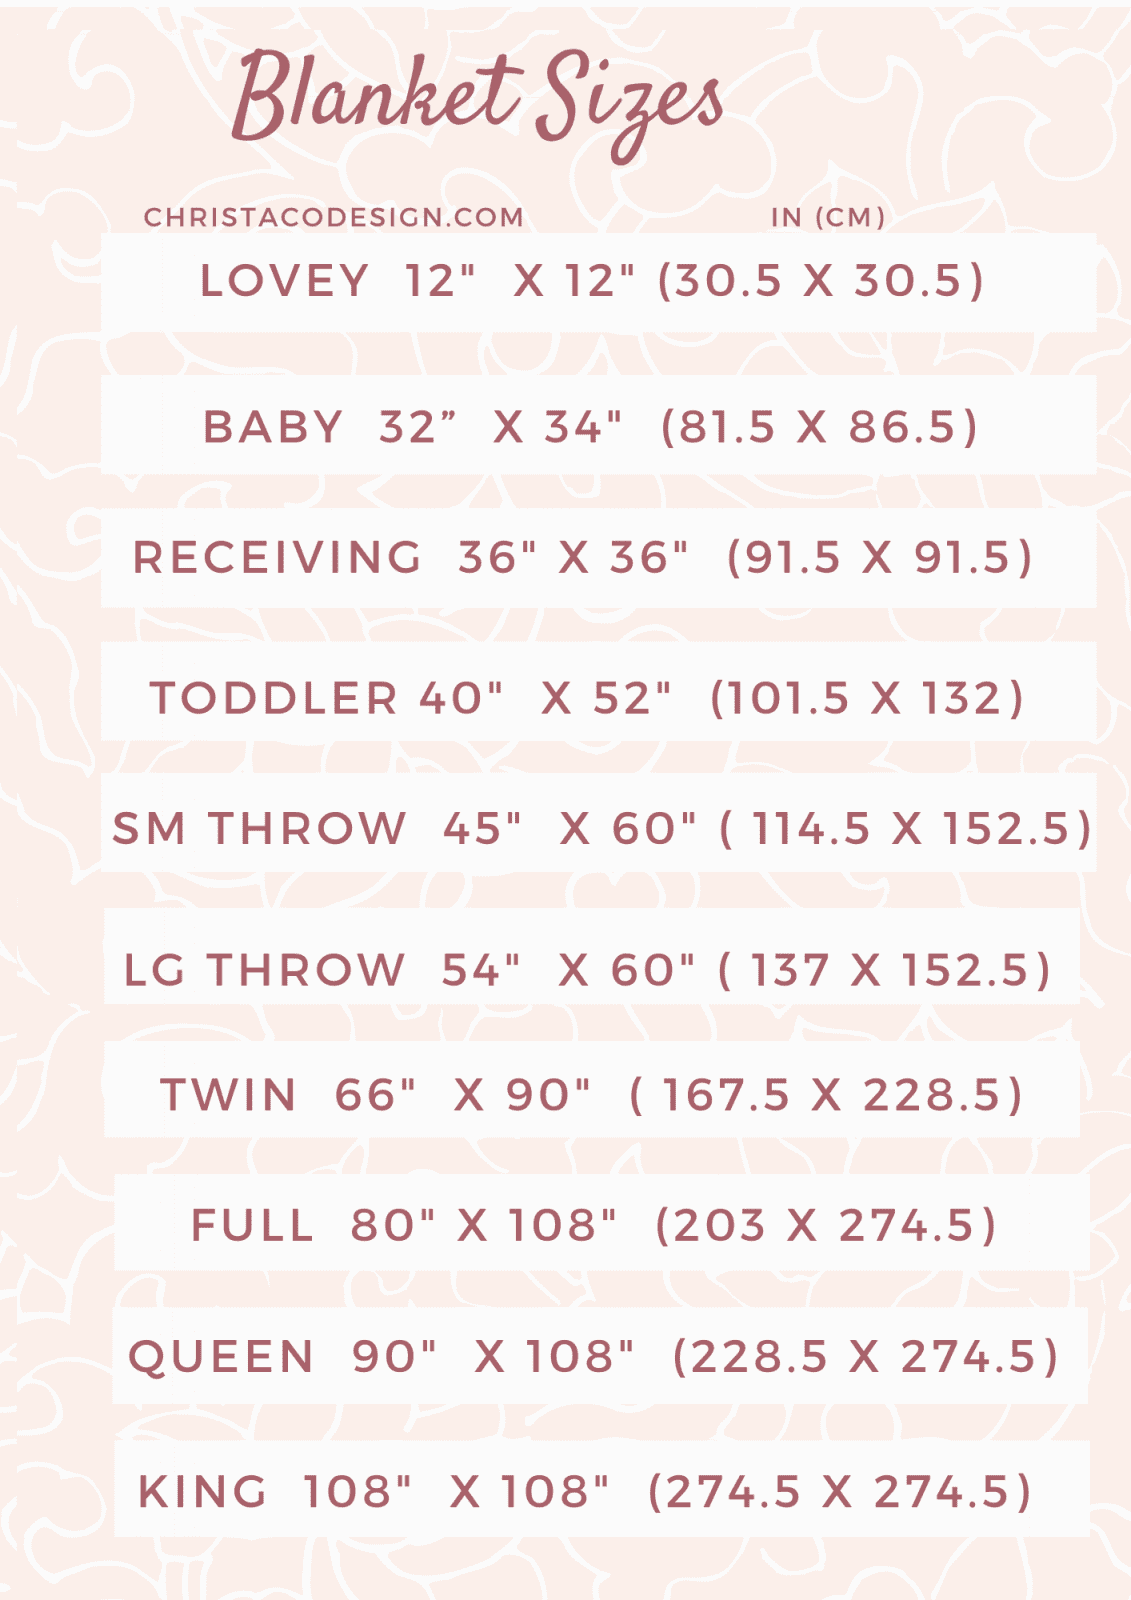
Downloadable Blanket Sizes Chart
Don’t forget to pin this for later!
Video Tutorial
Watch the video on my YouTube Channel.
Scroll down for the free pattern!
How To Crochet An Easy Blanket Border
Learn how to crochet a border on your blanket with simple stitches.
Materials
- 394 yd #4 medium worsted weight yarn pictured in Lion Brand Wool Ease (80% acrylic, 20% wool, 197 yd / 190 m, 3 oz / 85 g) 1 ball Fisherman, 1 ball Grey Heather.
- The amount of yarn you need will be determined by how large your blanket. This blanket is 42” wide x 58” long.
Tools
- 5 mm hook (US Size H-8) or crochet hook to meet gauge.
- Yarn needle
- Scissors
- Measuring tape
Instructions
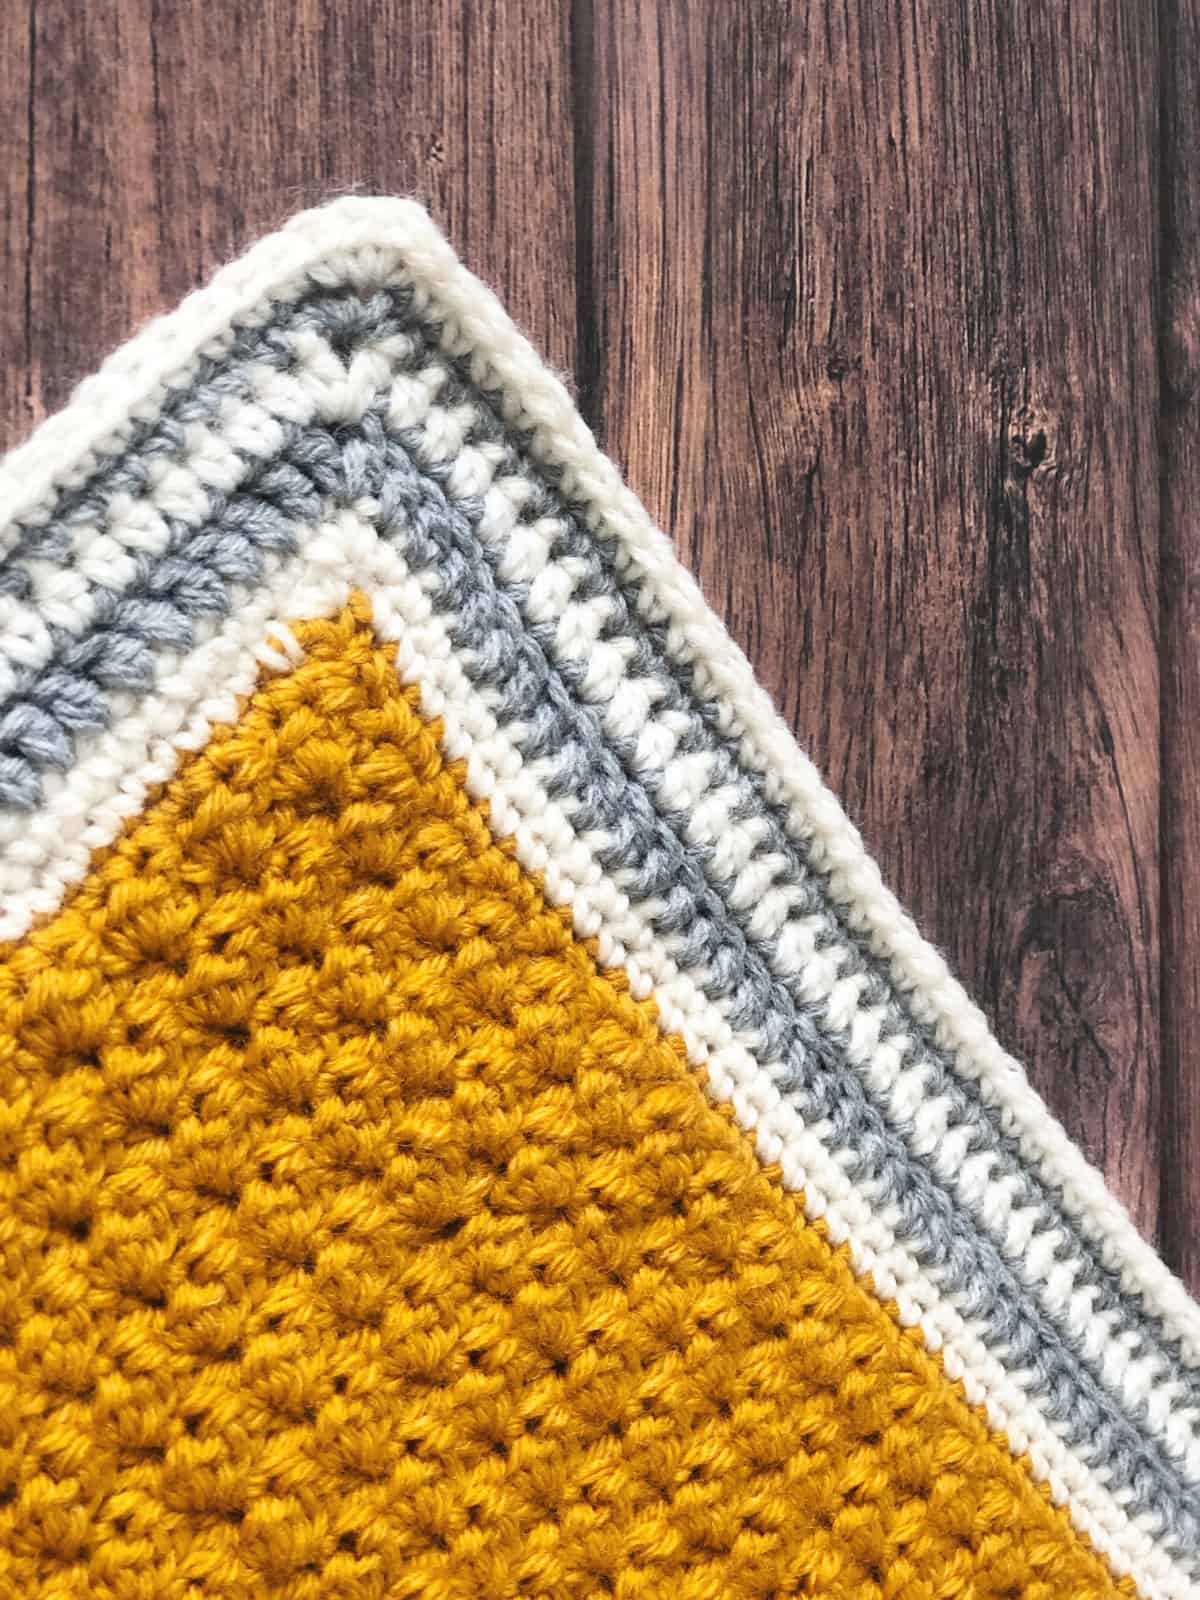
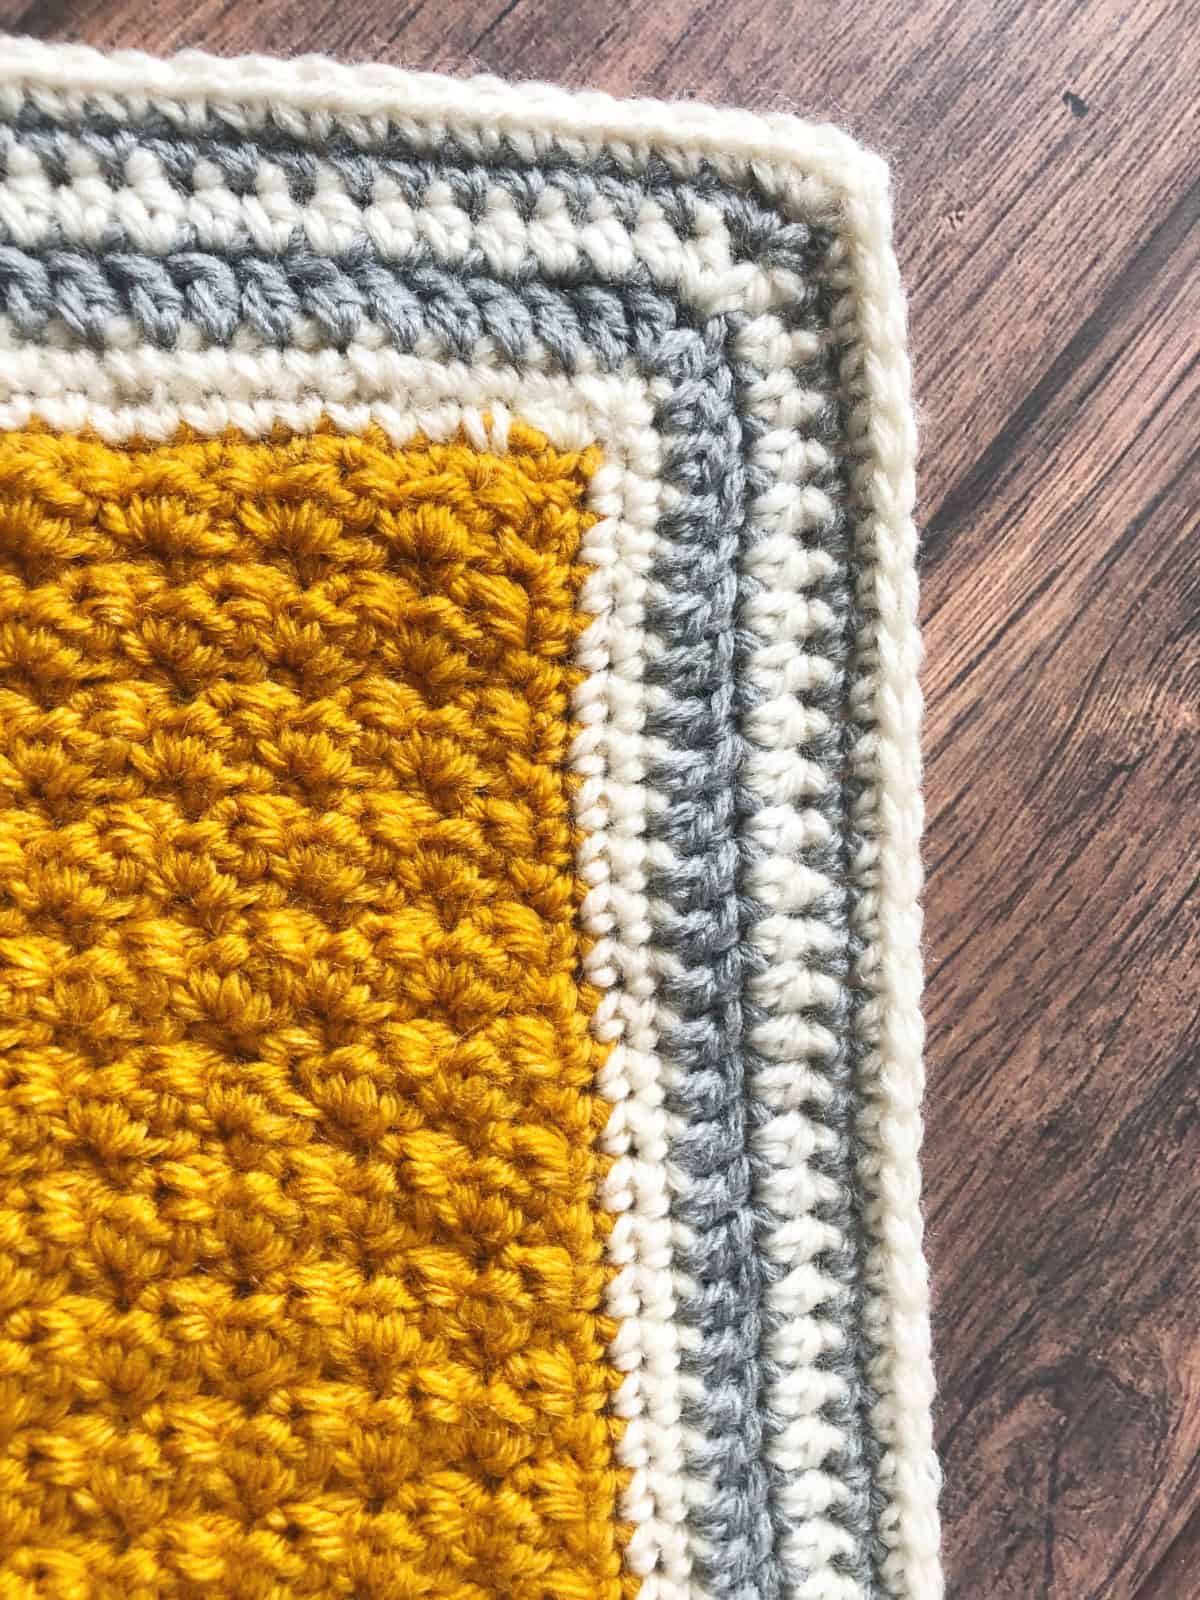
Join your first color with a sl st to any corner space. Here I use Fisherman.
Rnd 1. Ch 1 (doesn't count as a st), sc evenly around the blanket, placing a (sc, ch 1, sc) in each corner, sl st to the first sc to join.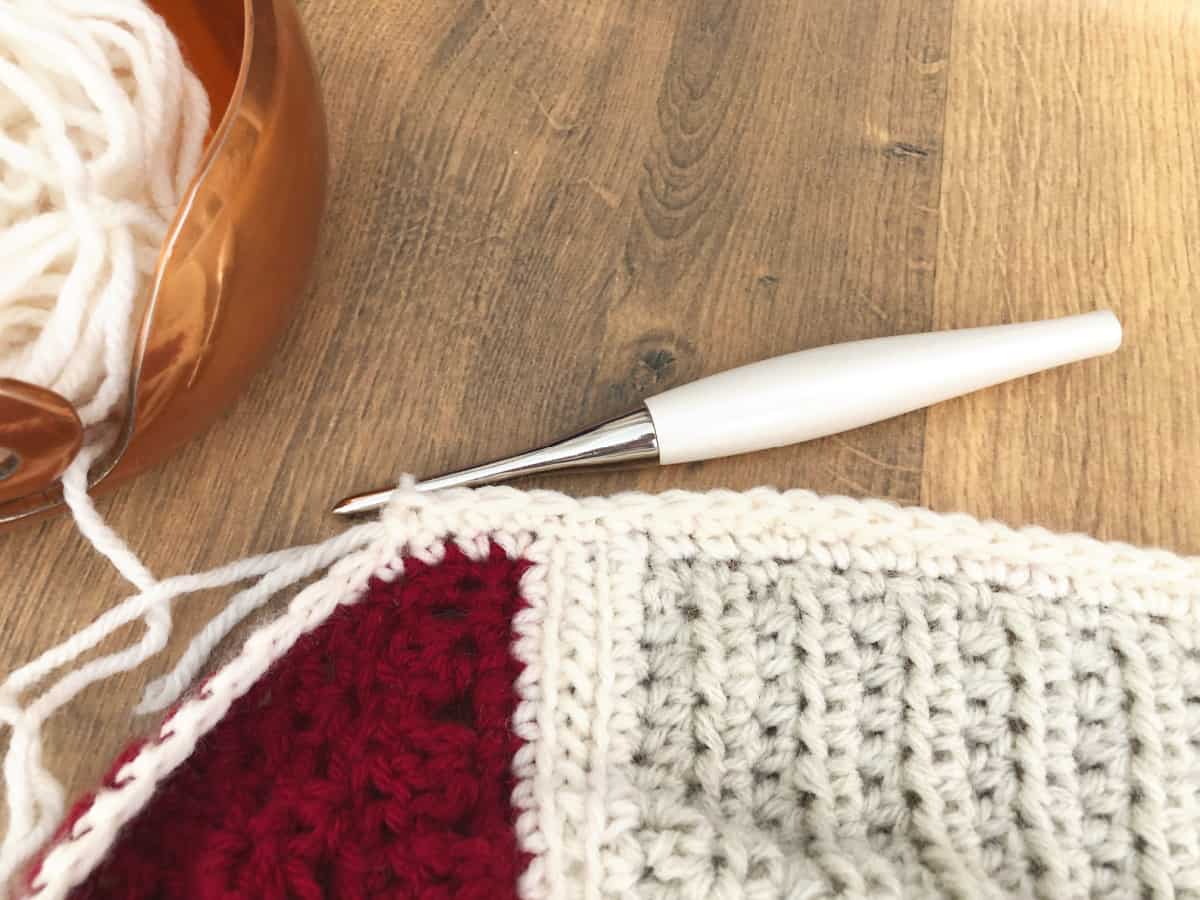 I have a tutorial specific to adding a single crochet border on your blankets first here.
Rnd 2. Ch 1 (doesn't count), sc in each st around, placing a (sc, ch 1, sc) in each corner, sl st to the first sc to join.
Change to your second color with a sl st in any corner. I'm using Grey.
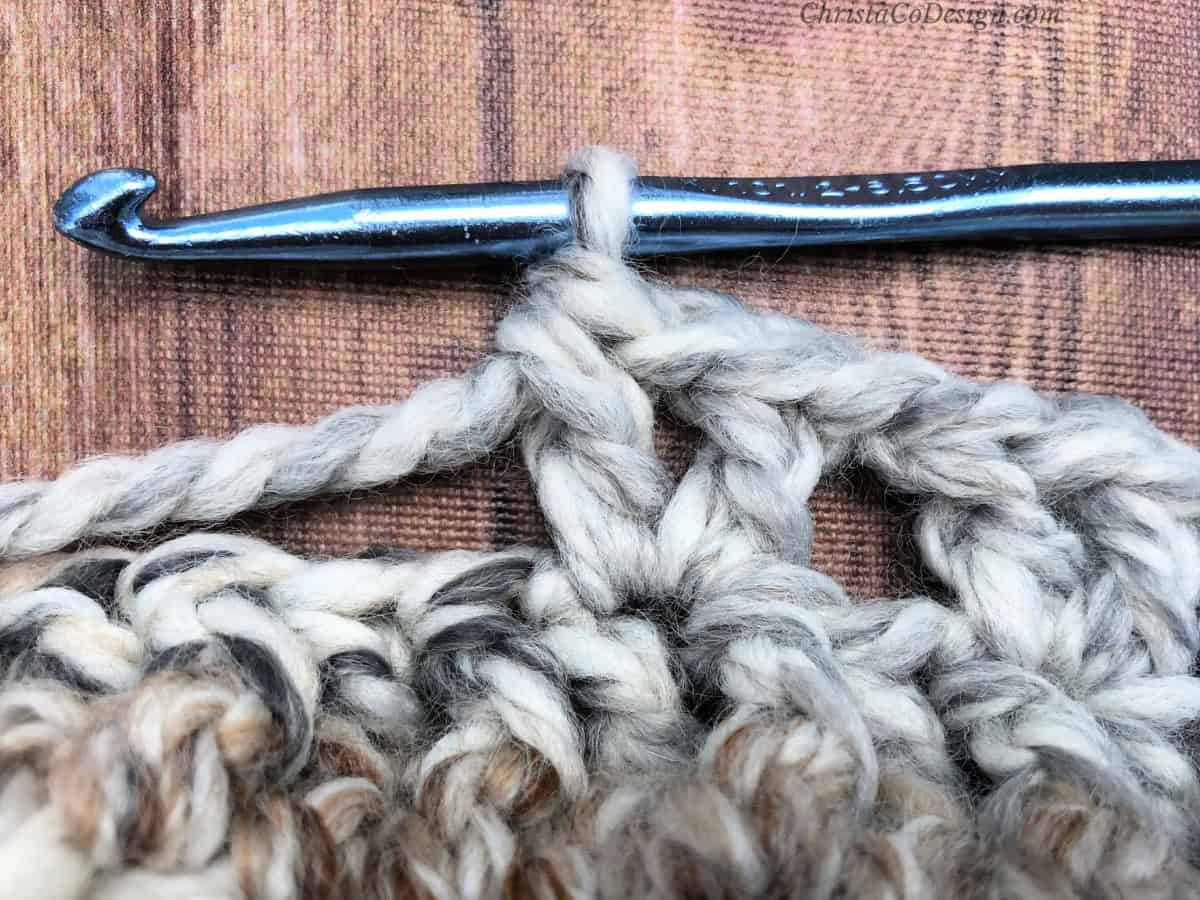
Rnd 3. Ch 3 (or use a ch 3 alternative as this counts as the first dc), dc in each st around the blanket, placing a (dc, ch 1, dc) in each corner ch sp, sl st to the first dc (or top of 3rd ch) to join.
Change to Fisherman with a sl st to any corner.![]()
Rnd 4. Ch 1 (doesn't count as a st), hdc in each st around the blanket, 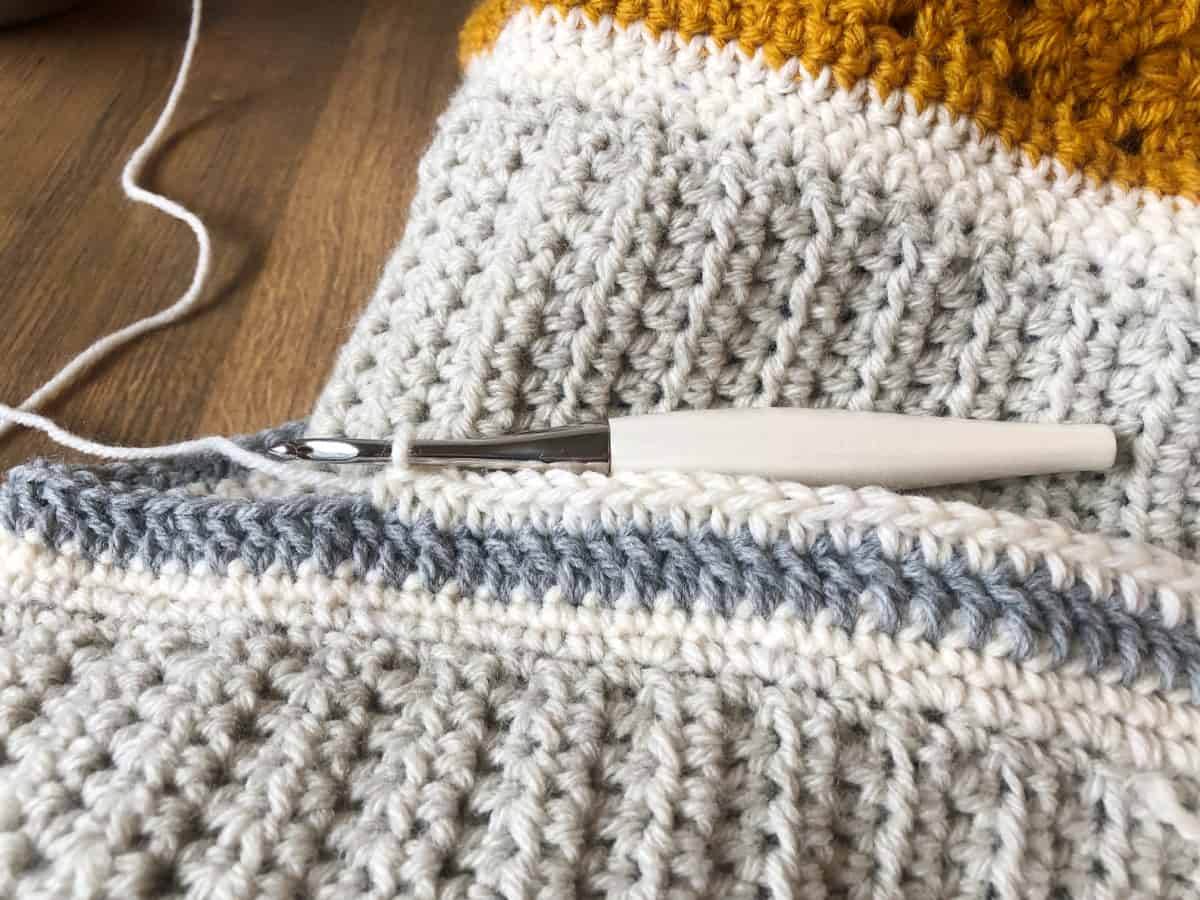 placing a (hdc, ch 1, hdc) in each corner, sl st to the first hdc to join.
![]()
Change to Grey with a sl st in any corner.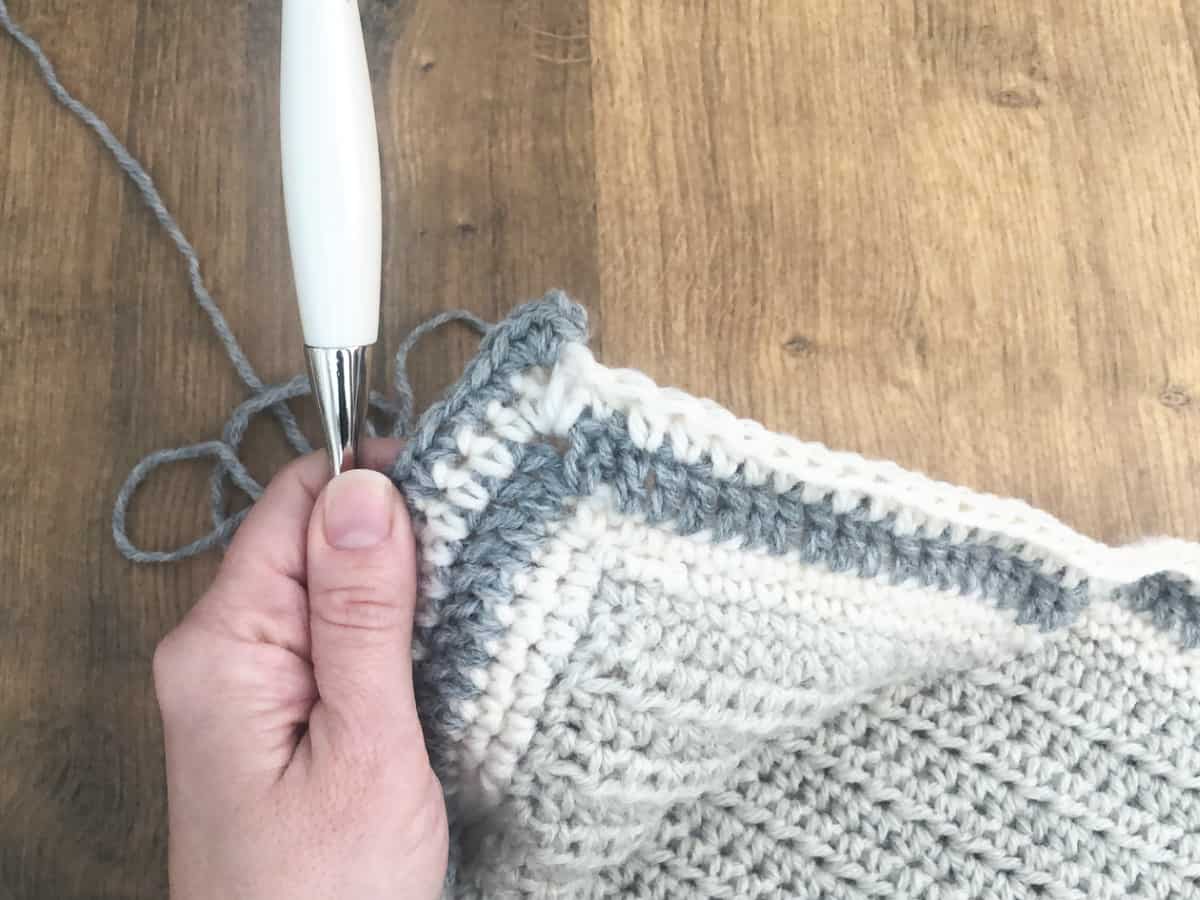
Rnd 5. Ch 1, sc in each st around the blanket, placing a (sc, ch 1, sc) in each corner, sl st to the first sc to join.
Change to Fisherman with a sl st to any corner.
Rnd 6. Ch 1, sc in each st around the blanket, placing a (sc, ch 1, sc) in each corner, sl st to the first sc to join. For a really nice clean finished look I like using an invisible join instead of the sl st here.
You can continue to repeat any and all of these rounds for a large border. Just remember to get more yarn.
Cut yarn and weave in all ends.
Block Blanket
Block the finished blanket, focusing on the
border and seams.
Notes
I hope you can give this one a try on your next crochet project!
Recommended Products
As an Amazon Associate and member of other affiliate programs, I earn from qualifying purchases.

If you love learning with video tutorials be sure to check out my YouTube Channel!
Subscribe to my youtube channel
Find more crochet border patterns here.