
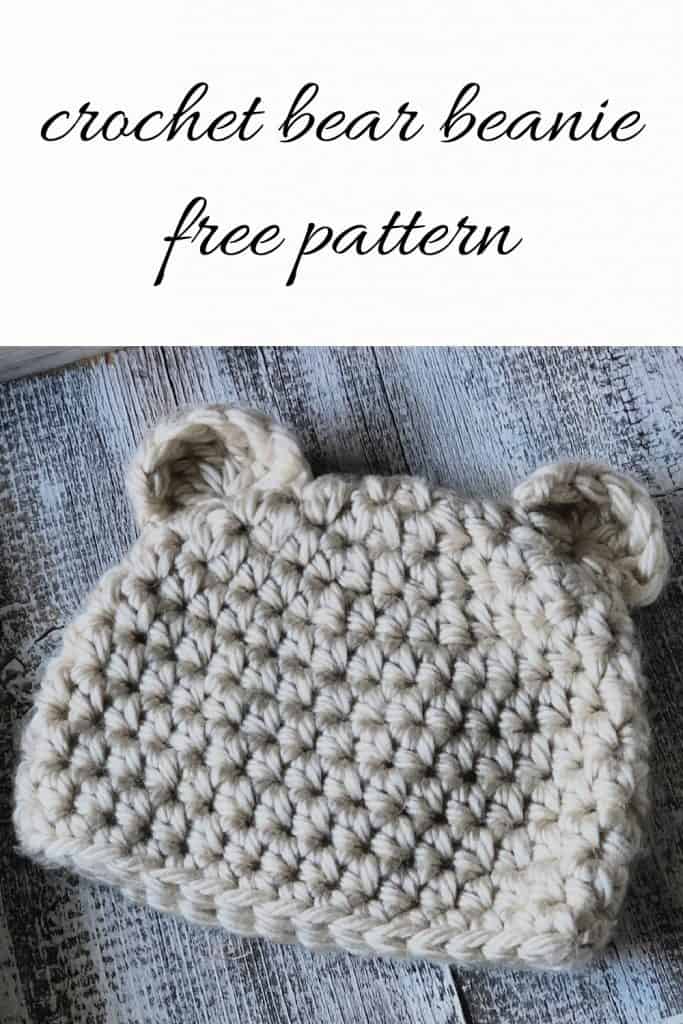
Best Crochet Baby Bear Hat a Free Crochet Pattern


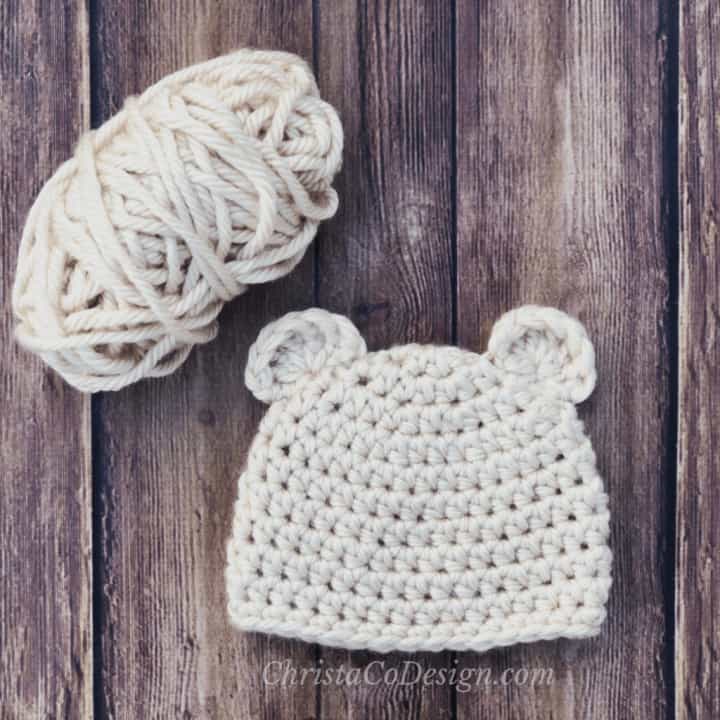
This crochet bear hat is a free crochet pattern that’s easy to make and fast in chunky yarn. Crochet bear ears are super simple and make for a sweet little baby bear beanie.

Join the ChristaCoDesign Newsletter
Never miss a pattern!
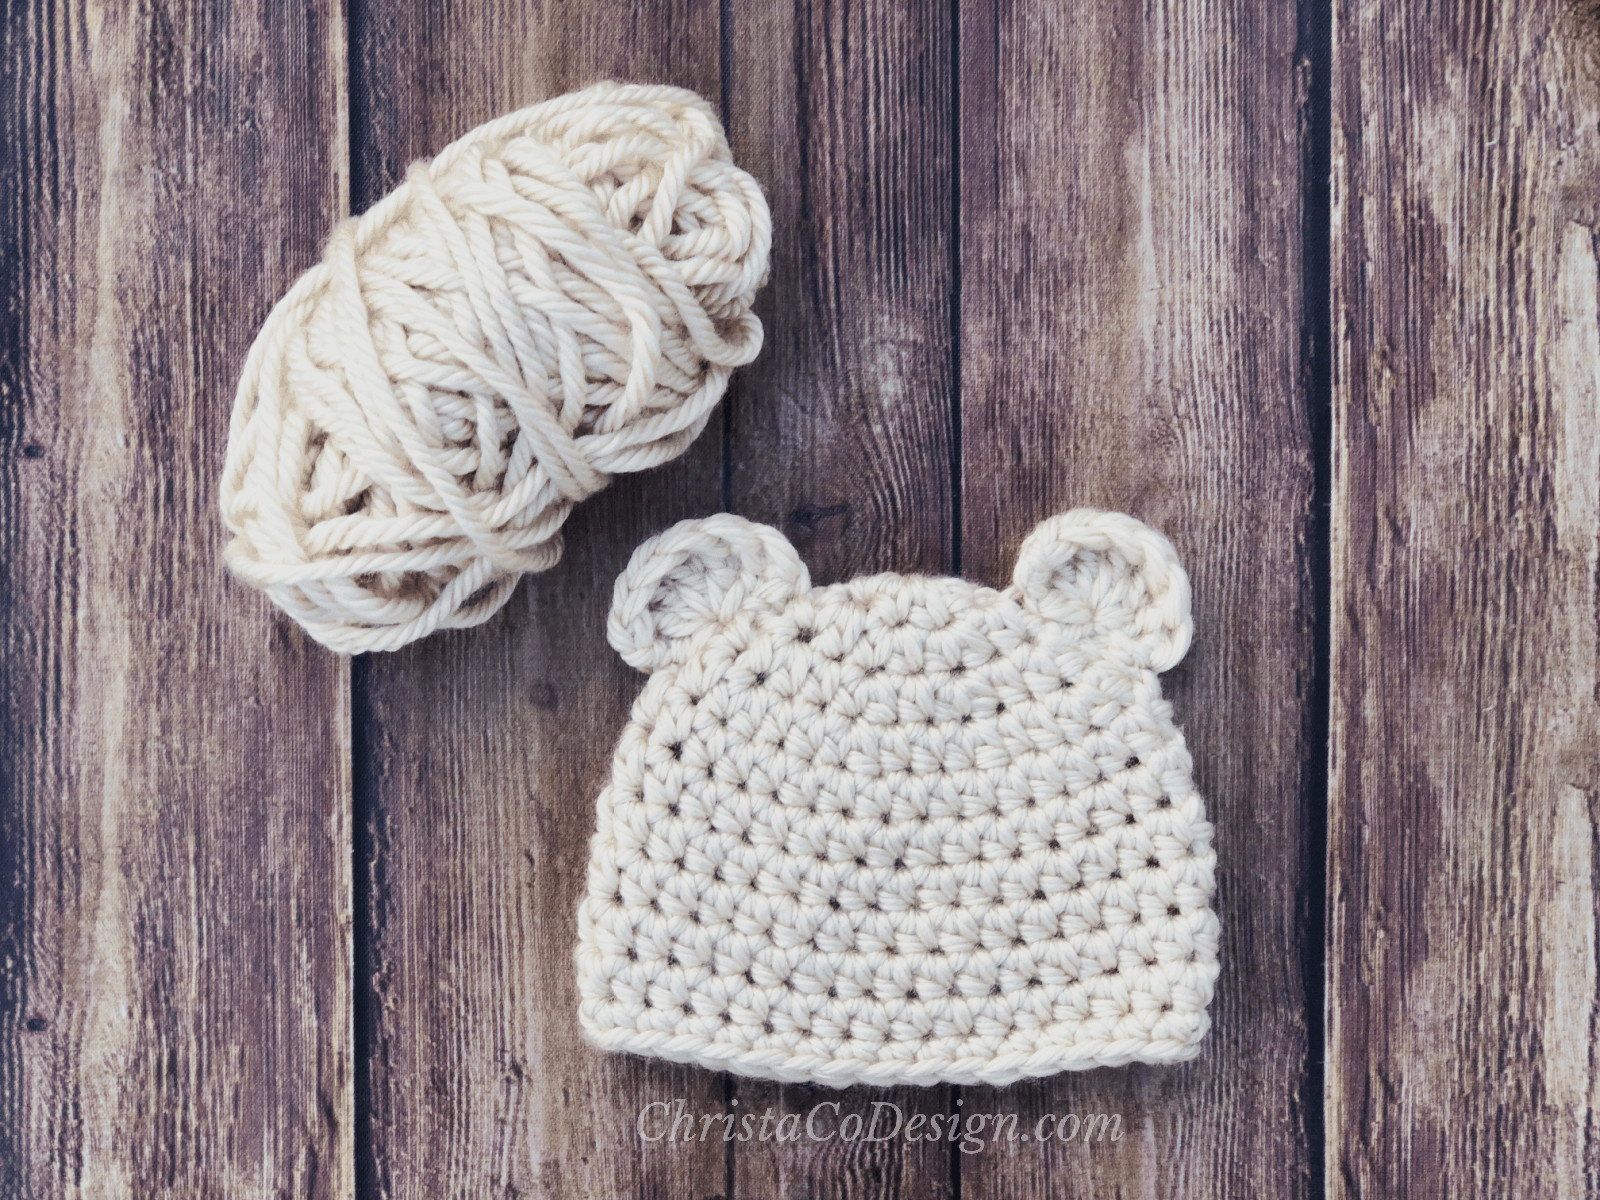
Is there anything cuter than a little baby in a bear hat? These chunky crochet bear hats work up fast in Lion Brand’s Hometown USA yarn, almost as fast as those babies grow!? Chunky yarn and chubby cheeks, yes please!
I love gifting handmade hats for babies, and it’s all the more fun when the hat is as adorable the baby sporting it! The simple addition of the bear ears takes this hat from functional to sweet.
Get 33 gorgeous patterns in this crochet pattern bundle!
Purchase the ad-free, well formatted printable PDF Pattern from my shop. Scroll down for the free pattern!
Purchase My Ad-Free PDF Patterns In Your Favorite Shop Here:
There’s a prime age for cute hat wearing, and you should take full advantage of it. Before you know it, those lil ones are toddling around and pulling everything off. And leaving a trail behind them.
Not to worry though, whatever the age you’re crocheting this hat for, it’s here. The free crochet bear hat pattern is for sizes newborn through adult! You know you want to match your little one 😉
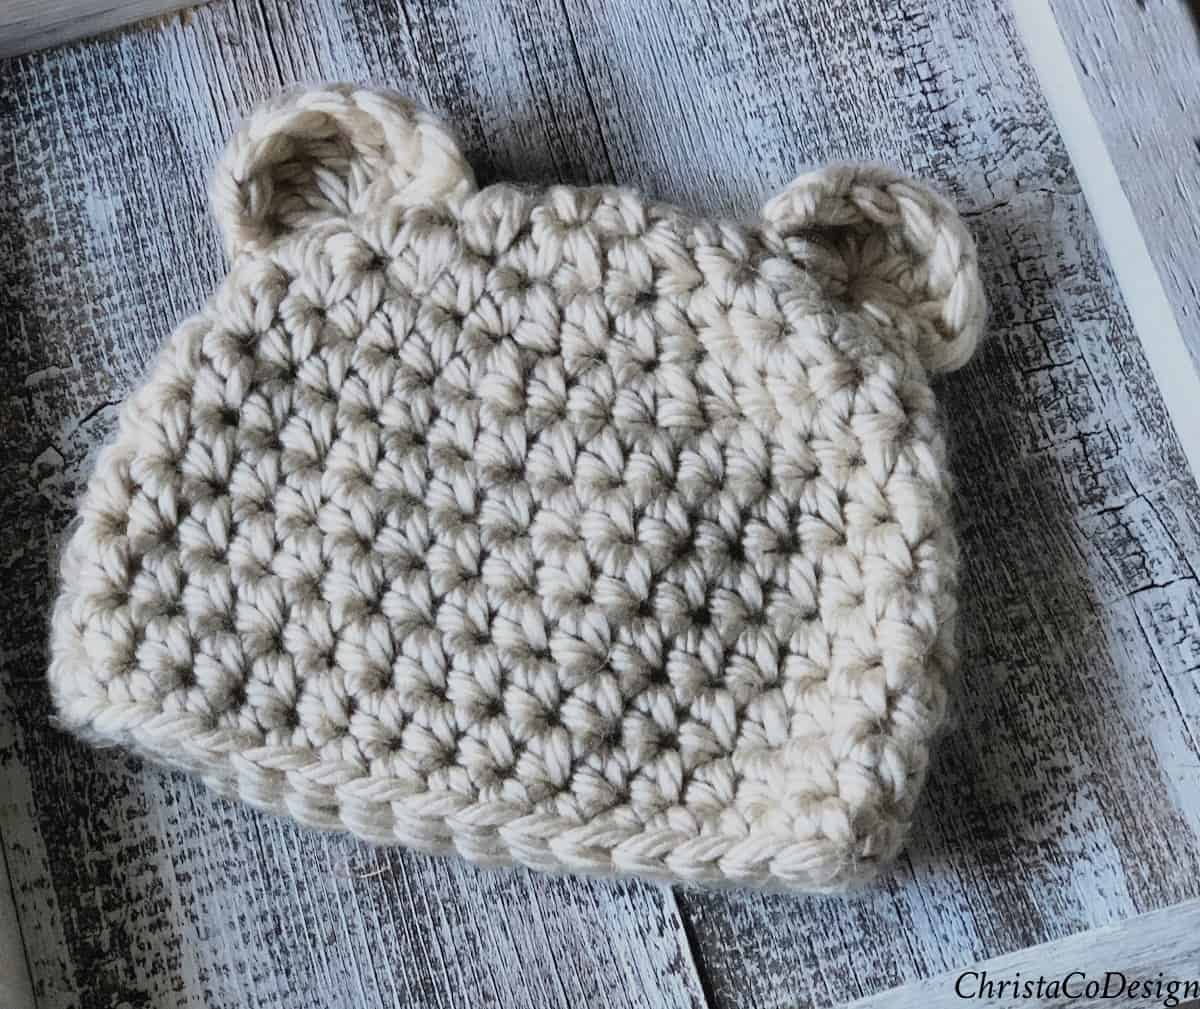
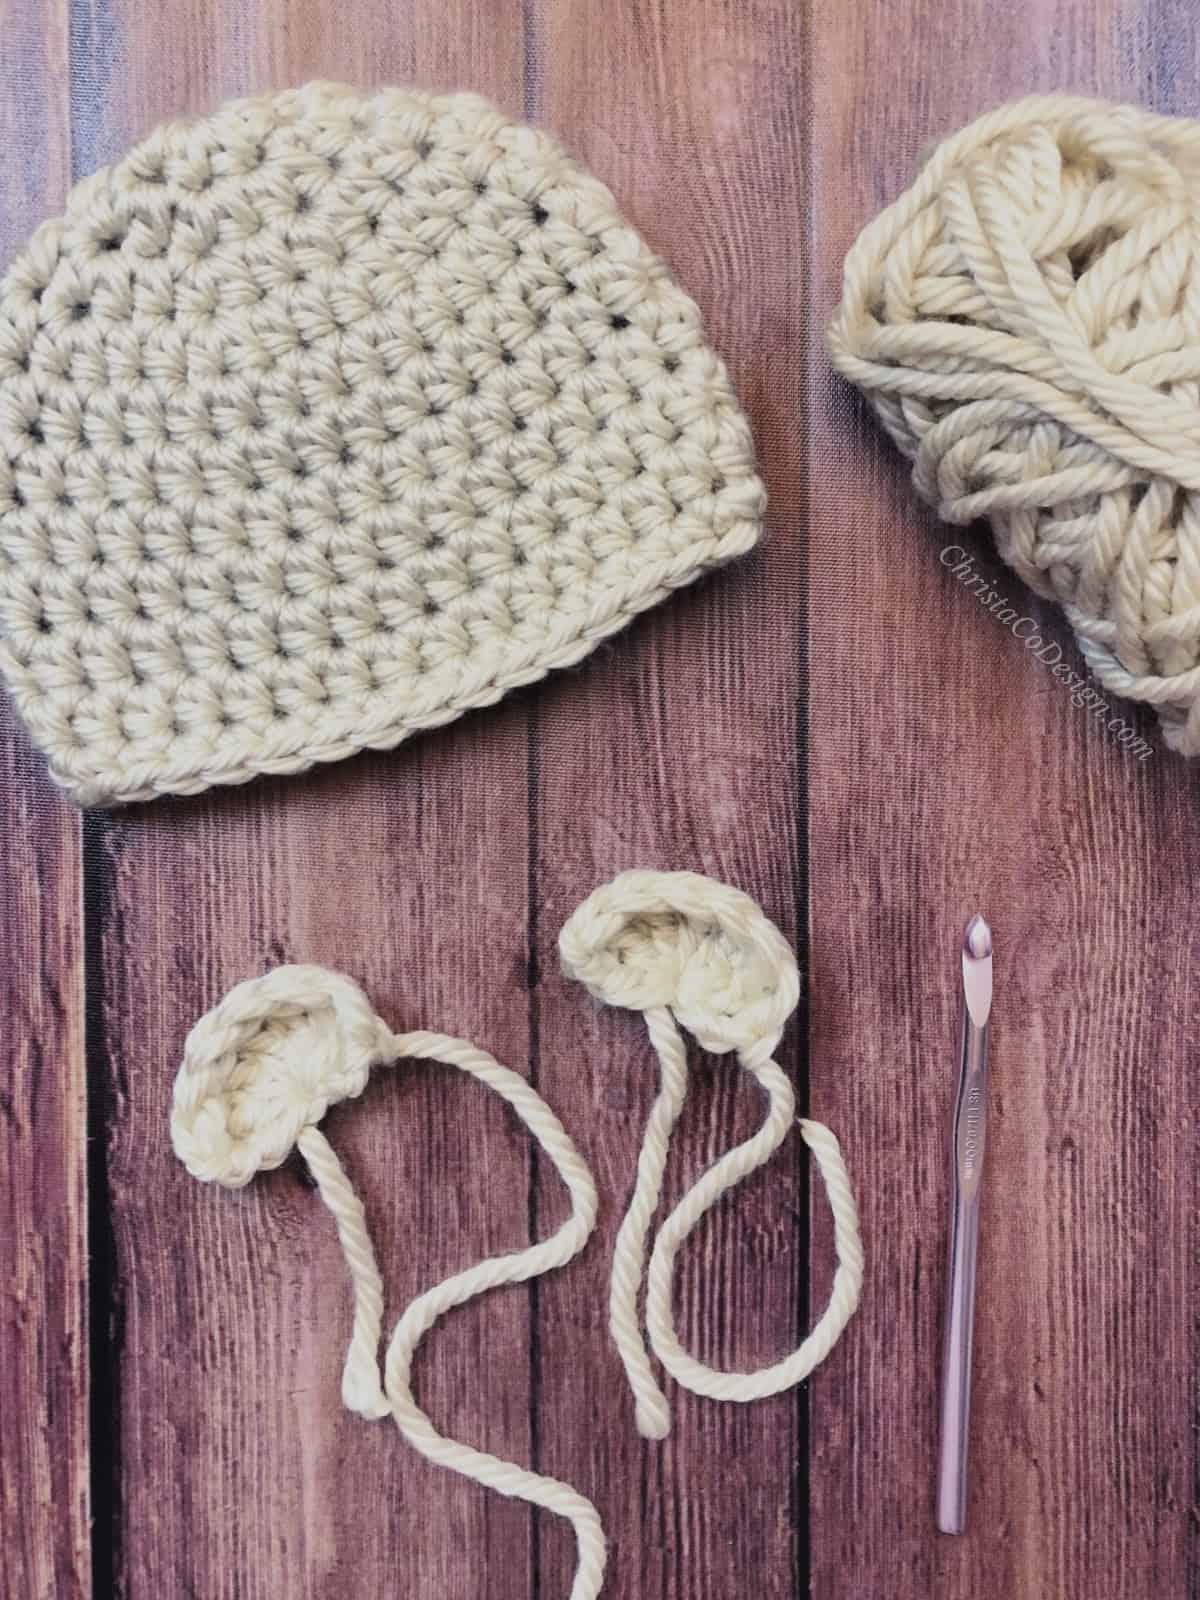
To keep everything in one place I include the hat and ears. I’ve started with the crochet bear ears pattern, which are a simple half circle. Then I detail how to sew them on.
The pattern begins with the crochet baby hats in sizes 0-3 month size, 36 mos, 6-12 mos, 12-18 mos and 18-24 mos. Scroll down past these to find the crochet bear hat pattern in all sizes from toddler size through adult.
This pattern would work well in white yarn if you prefer a polar bear hat like my son would!
These make great baby shower gifts. A matching teddy bear hat for mom and baby?
01
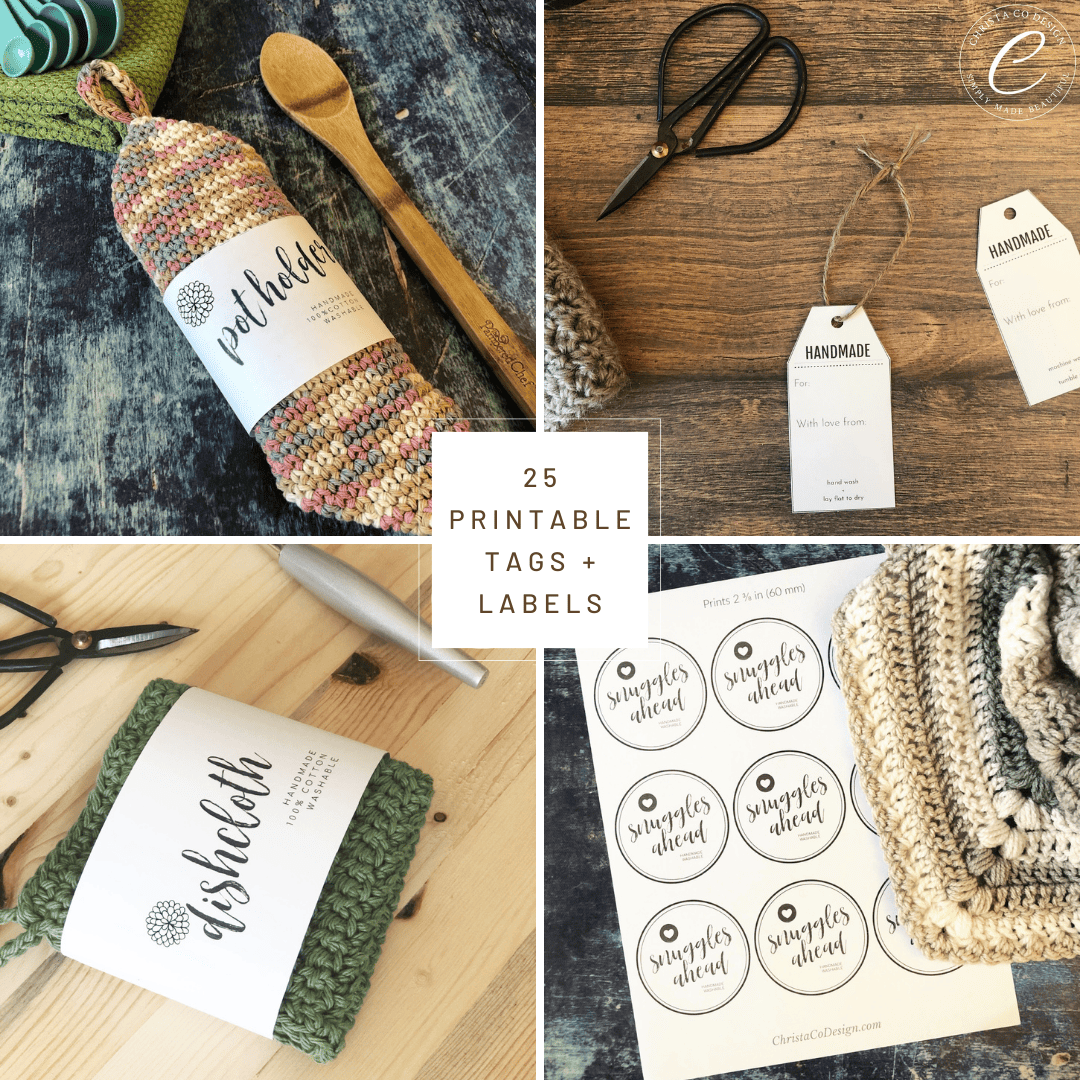
Get our free printable
With 25 of our best handmade gift tags
This ebook includes our top 25 reader favorite gift tags and labels that you are sure to enjoy as well! Enter your email below to download our beautiful handmade tags!
More Free Crochet Patterns
Check out more crochet baby hats here. Crochet hats are fun to make in all the sizes!
If you’re looking for a worsted weight crochet bear hat pattern, then you might enjoy the Tulare Bear Hat Pattern. Add child size crochet fingerless gloves to your to make list!
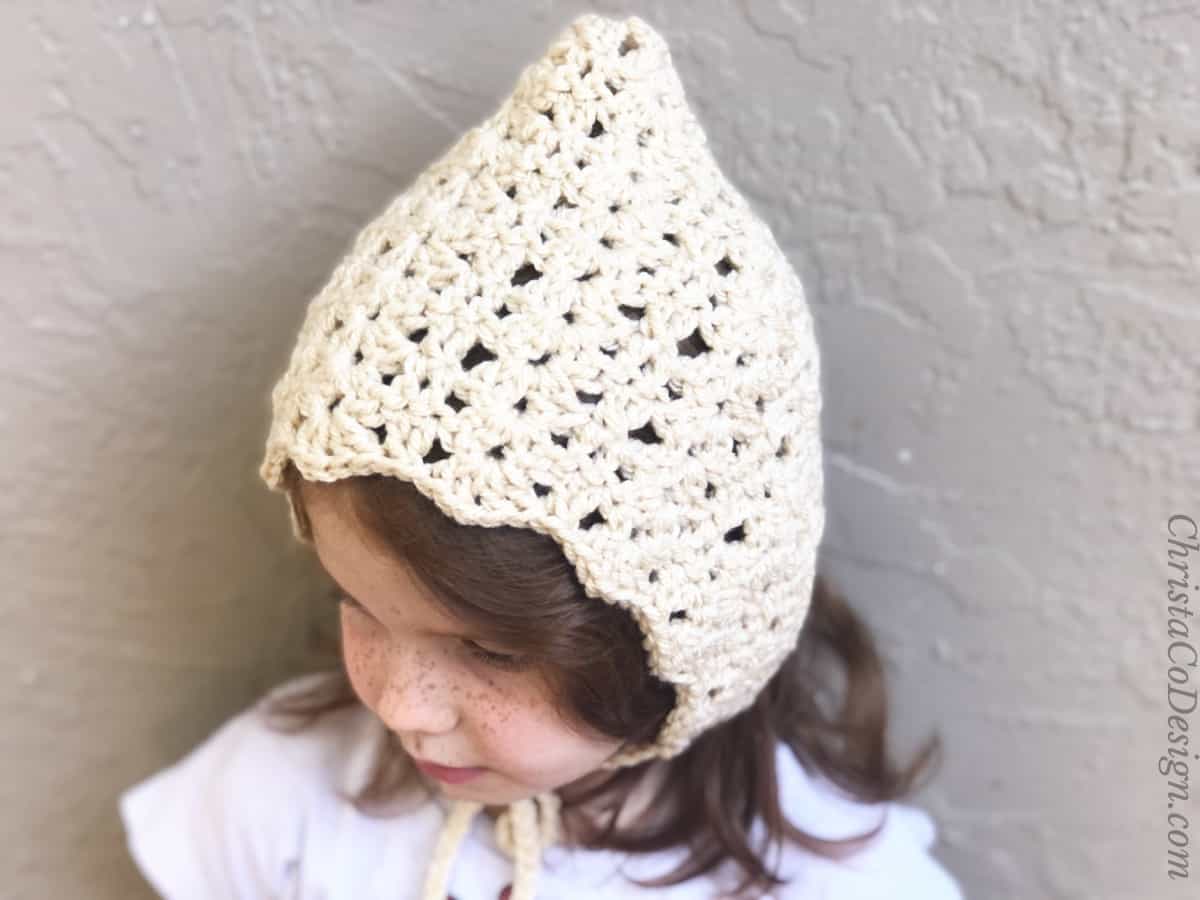
The Bella Bonnet is a vintage inspired crochet bonnet pattern in all sizes.
Your loved one will look so sweet in this easy tapestry crochet heart beanie with an ultra textured stitch. The Pebbled Heart beanie pattern includes all sizes.
Download the Hat Sizing Chart
Get this handy dandy chart so you can crochet perfectly fitting hats!
Materials
- Up to 81yds/74m of #6 super bulky weight yarn, I use Lion Brand Hometown USA yarn* (5oz/142g ea)
- 9mm (M) crochet hook size*
- Yarn needle
- Measuring tape
- Scissors
- Pins
- Optionally stitch markers to keep track of your increase rounds.
Pattern Notes
- Beanie is worked top down in the round.
- Ch 1 at the beginning of each round does not count as a stitch.
- Traditionally when working hdc a ch 2 is used, but I prefer a ch 1 in the round to keep my join tight with little to no gap.
Skill Level
Beginner
This hat uses basic stitches so it’s beginner friendly. You will need to know how to crochet in the round to work this written pattern.
Stitches
ch – chain
hdc – half double crochet
Mc – magic circle, or magic ring.
sc – single crochet
sl st – slip stitch
Gauge
2” / 5 cm x 2” / 5 cm = 4 hdc x 3 rows of hdc
Rnds 1-3 = 3.25″ / 8.5 cm diameter
Bear Ears Pattern
This pattern includes the written bears and directions for how to sew the ear on. For a full photo tutorial to crochet these bear ears check out this post.
There are step by step directions and photos included in the post dedicated to sewing the bear ears on.
How to Crochet a Chunky Newborn Beanie Video Tutorial
Watch the video tutorial on how to crochet the newborn size chunky beanie on my YouTube.
Save your favs!
Add this pattern to your Ravelry queue.
Pin It
Purchase the ad-free, well formatted printable PDF Pattern from my shop. Scroll down for the free pattern!
Scroll down for the free Crochet Bear Hat Pattern.
Pattern Instructions
Crochet Bear Hat Pattern in 10 sizes
A cozy and cute crochet bear beanie in chunky yarn for babies through adult sizes.
Materials
- 81yds/74m super bulky yarn (#6) I used Lion Brand Hometown USA yarn* (5oz/142g ea)
Tools
- 9 mm hook (US Size M)
- Tapestry needle
- Measuring tape
- Scissors
- Pins
Instructions
Bear Ears Pattern
Start with a Mc-magic circle.
Rnd 1. 6 dc into the mc, only pull closed to a semi circle, turn.
Rnd 2. Ch 1, sc into the first dc and in each dc.
Leave a tail long enough to sew on to hat.
Set aside until hat is completed. For smaller baby sizes you may want to sew on your ears after round 5 so there is plenty of room to work in the hat.
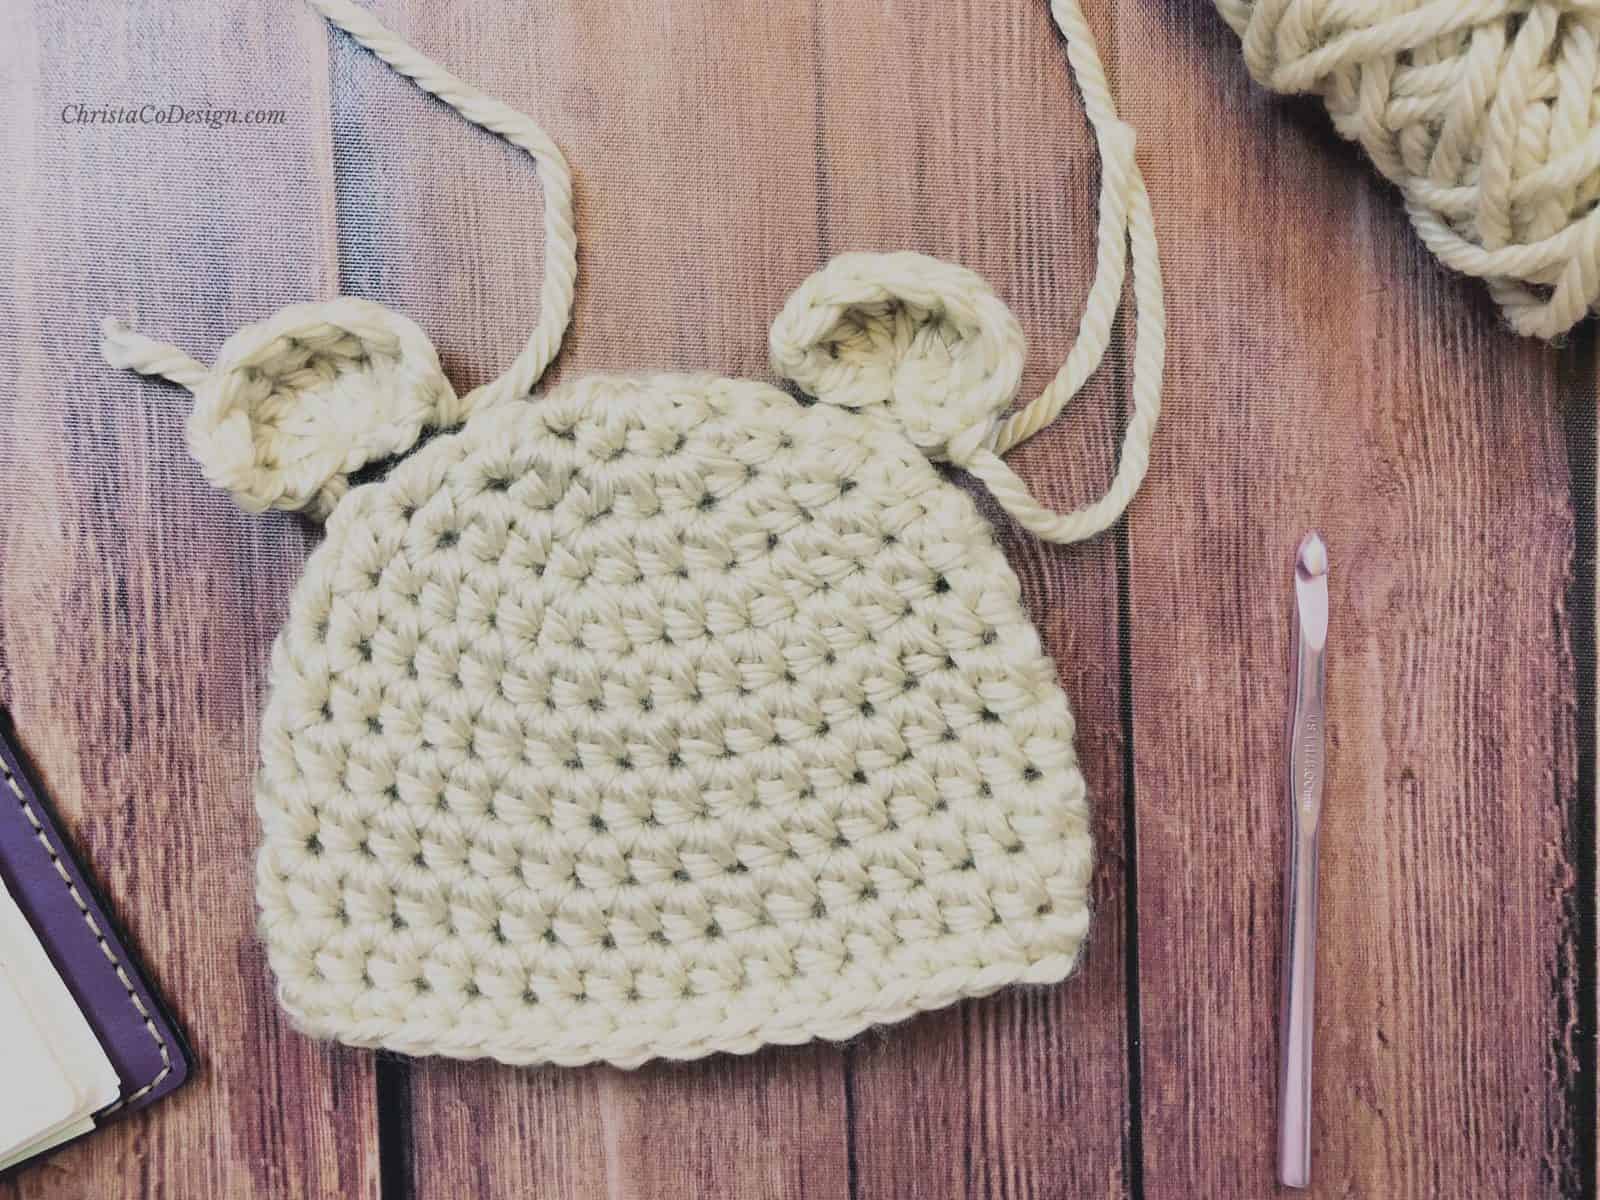
Sew on Ears (beanie pattern below)
To sew on your ears lay hat flat and pin flat edge of ears to either side along the fold. Use T-pins or sewing pins to secure the ears on rounds 3 & 4 for baby sizes and rounds 5 & 6 for child-adult sizes.
Use your yarn needle and a the long tail you left to sew ears to hat.
Cut yarn and weave in ends.
Beanie Pattern
NB-2 weeks Hat
Start with a mc.
Rnd 1. 8 hdc into the mc, join last st to first with a sl st. (8)
Rnd 2. Ch 1, 2 hdc in the same stitch and in each stitch around, join with a sl st. (16)
Rnd 3. Ch 1, hdc in the same stitch, 2 hdc in the next, *{hdc in the next stitch, 2 hdc in the next} rep from * around, join with a sl st.. (24)
Rnd 4. Ch 1, hdc in the same stitch and in each stitch around, sl st to join. (24)
Rnd 5. Repeat round 4.
Rnd 6. Repeat round 4.
Rnd 7. Ch 1, sc in the same stitch and in each stitch around, sl st to join. (24) ~ 4.75” / 12 cm tall
Cut yarn and weave in tail.
0-3 mos Hat
Start with a mc.
Rnd 1. 8 hdc into the mc, join last st to first with a sl st. (8)
Rnd 2. Ch 1, 2 hdc in the same stitch and in each stitch around, join with a sl st. (16)
Rnd 3. Ch 1, hdc in the same stitch, 2 hdc in the next, *{hdc in the next stitch, 2 hdc in the next} repeat from * around, join with a sl st. (24)
Rnd 4. Ch 1, hdc in the same stitch and in each stitch around, sl st to join. (24)
Rnds 5-8. Repeat round 4. ~ 5.5” / 14 cm tall
9. Ch 1, sc in the same stitch and in each stitch around, sl st to join. (24)
Cut yarn and weave in tail.
3-6 mos Hat
Start with a mc.
Rnd 1. 8 hdc into the mc, join last st to first with a sl st. (8)
Rnd 2. Ch 1, 2 hdc in the same stitch and in each stitch around, join with a sl st. (16)
Rnd 3. Ch 1, hdc in the same stitch, 2 hdc in the next, *{hdc in the next stitch, 2 hdc in the next} repeat from * around, join with a sl st. (24)
Rnd 4. Ch 1, hdc in the same stitch and in each stitch around, sl st to join. (24)
Rnds 5-9. Repeat round 4. ~ 6” / 15 cm tall
Rnd 10. Ch 1, sc in the same stitch and in each stitch around, sl st to join. (24)
Cut yarn and weave in tail.
6-12 mos Hat
Start with a mc.
Rnd 1. 8 hdc into the mc, join last st to first with a sl st. (8)
Rnd 2. Ch 1, 2 hdc in the same stitch and in each stitch around, join with a sl st. (16)
Rnd 3. Ch 1, hdc in the same stitch, 2 hdc in the next, *{hdc in the next stitch, 2 hdc in the next} repeat from * around, join with a sl st. (24)
Rnd 4. Ch 1, hdc in the same stitch and in the next, 2 hdc in the next stitch, *{hdc in each of the next 2 stitches, 2hdc in the next stitch} repeat from * around, join with a sl st. (32)
Rnd 5. Ch 1, hdc in the same stitch and in each stitch around, sl st to join. (32)
Rnds 6-9. Repeat round 5. ~ 6” / 15 cm tall
Rnd 10. Ch 1, sc in the same and in each stitch around. (32)
Cut yarn and weave in end.
12-18 mos Hat
Start with a mc.
Rnd 1. 8 hdc into the mc, join last st to first with a sl st. (8)
Rnd 2. Ch 1, 2 hdc in the same stitch and in each stitch around, join with a sl st. (16)
Rnd 3. Ch 1, hdc in the same stitch, 2 hdc in the next, *{hdc in the next stitch, 2 hdc in the next} repeat from * around, join with a sl st. (24)
Rnd 4. Ch 1, hdc in the same stitch and in the next, 2 hdc in the next stitch, *{hdc in each of the next 2 stitches, 2hdc in the next stitch} repeat from * around, join with a sl st. (32)
Rnd 5. Ch 1, hdc in the same stitch and in each stitch around, sl st to join. (32)
Rnds 6-10. Repeat round 5. ~ 6.75” / 17 cm tall
Rnd 11. Ch 1, sc in the same and in each stitch around. (32)
Cut yarn and weave in end.
18-24 mos Hat
Start with a mc.
Rnd 1. 8 hdc into the mc, join last st to first with a sl st. (8)
Rnd 2. Ch 1, 2 hdc in the same stitch and in each stitch around, join with a sl st.(16)
Rnd 3. Ch 1, hdc in the same stitch, 2 hdc in the next, *{hdc in the next stitch, 2 hdc in the next} repeat from * around, join with a sl st. (24)
Rnd 4. Ch 1, hdc in the same stitch and in the next, 2 hdc in the next stitch, *{hdc in each of the next 2 stitches, 2hdc in the next stitch} repeat from * around, join with a sl st. (32)
Rnd 5. Ch 1, hdc in the same stitch and in each stitch around, sl st to join. (32)
Rnds 6-11. Repeat round 5. ~ 7.5”/ 19 cm
Rnd 12. Ch 1, sc in the same and in each stitch around. (32)
Cut yarn and weave in end.
2-5 years Hat
Start with a mc.
Rnd 1. 8 hdc into the mc, join last st to first with a sl st. (8)
Rnd 2. Ch 1, 2 hdc in the same stitch and in each stitch around, join with a sl st. (16)
Rnd 3. Ch 1, hdc in the same stitch, 2 hdc in the next, *{hdc in the next stitch, 2 hdc in the next} repeat from * around, join with a sl st. (24)
Rnd 4. Ch 1, hdc in the same stitch and in the next, 2 hdc in the next stitch, *{hdc in each of the next 2 stitches, 2hdc in the next stitch} repeat from * around, join with a sl st. (32)
Rnd 5. Ch 1, hdc in the same stitch and in the next 2 stitches, 2 hdc in the next stitch, *{hdc in each of the next 3 stitches, 2 hdc in the next stitch} repeat from * around, join with a sl st. (40) 6.5”
Rnd 6. Ch 1, hdc in the same stitch and in each stitch around, sl st to join. (40)
Rnds 7-11. Repeat round 6.~ 7.5”/ 19 cm
Rnd 12. Ch 1, sc in the same and in each stitch around. (40)
Cut yarn and weave in end.
Child Size Hat
Start with a mc.
Rnd 1. 8 hdc into the mc, join last st to first with a sl st. (8)
Rnd 2. Ch 1, 2 hdc in the same stitch and in each stitch around, join with a sl st. (16)
Rnd 3. Ch 1, hdc in the same stitch, 2 hdc in the next, *{hdc in the next stitch, 2 hdc in the next} repeat from * around, join with a sl st. (24)
Rnd 4. Ch 1, hdc in the same stitch and in the next, 2 hdc in the next stitch, *{hdc in each of the next 2 stitches, 2hdc in the next stitch} repeat from * around, join with a sl st. (32)
Rnd 5. Ch 1, hdc in the same stitch and in the next 2 stitches, 2 hdc in the next stitch, *{hdc in each of the next 3 stitches, 2 hdc in the next stitch} repeat from * around, join with a sl st. (40)
Rnd 6. Ch 1, hdc in the same stitch and in each stitch around, sl st to join. (40)
Rnds 7-12. Repeat round 6.~ 8” / 20.5 cm tall
Rnd 13. Ch 1, sc in the same and in each stitch around. (40) Cut yarn and weave in end.
Teen/Sm Adult Size Hat
Start with a mc.
Rnd 1. 8 hdc into the mc, join last st to first with a sl st. (8)
Rnd 2. Ch 1, 2 hdc in the same stitch and in each stitch around, join with a sl st. (16)
Rnd 3. Ch 1, hdc in the same stitch, 2 hdc in the next, *{hdc in the next stitch, 2 hdc in the next} repeat from * around, join with a sl st. (24)
Rnd 4. Ch 1, hdc in the same stitch and in the next, 2 hdc in the next stitch, *{hdc in each of the next 2 stitches, 2hdc in the next stitch} repeat from * around, join with a sl st. (32)
Rnd 5. Ch 1, hdc in the same stitch and in the next 2 stitches, 2 hdc in the next stitch, *{hdc in each of the next 3 stitches, 2 hdc in the next stitch} repeat from * around, join with a sl st. (40)
Rnd 6. Ch 1, hdc in the same stitch and in each stitch around, sl st to join.(40)
Rnds 7-13. Repeat round 6. ~ 8.75” / 22 cm tall
Rnd 14. Ch 1, sc in the same and in each stitch around. (40)
Cut yarn and weave in end.
Md/Lg Adult Size Hat
Start with a mc.
Rnd 1. 8 hdc into the mc, join with a sl st to the 1st. (8)
Rnd 2. Ch 1, 2 hdc in the same stitch and in each stitch around, join with a sl st. (16)
Rnd 3. Ch 1, hdc in the same stitch, 2 hdc in the next, *{hdc in the next stitch, 2
hdc in the next} repeat from * around, join with a sl st. (24)
Rnd 4. Ch 1, hdc in the same stitch and in the next, 2 hdc in the next stitch, *{hdc in each of the next 2 stitches, 2hdc in the next stitch} repeat from *around, join with a sl st. (32)
Rnd 5. Ch 1, hdc in the same stitch and in the next 2 stitches, 2 hdc in the next stitch, *{hdc in each of the next 3 stitches, 2 hdc in the next stitch} repeat from * around, join with a sl st. (40)
Rnd 6. Ch 1, hdc in the same stitch and in the next 3 stitches, 2 hdc in the next stitch, *{hdc in each of the next 4 stitches, 2 hdc in the next stitch} repeat from * around, join with a sl st. (48) 7.5”
Rnd 7. Ch 1, hdc in the same stitch and in each stitch around, sl st to join. (48)
Rnds 8-14. Repeat round 7. ~ 9.5” / 24 cm
Rnd 15. Ch 1, sc in the same and in each stitch around. (48)
Cut yarn and weave in ends.
Notes
After your hat is complete refer to the directions at top on how to sew on the ears. Or check out the full bear ears tutorial, including how to crochet them and sew them on to your hat.
Recommended Products
As an Amazon Associate and member of other affiliate programs, I earn from qualifying purchases.


Hi there,
I made this for a friend at work last spring for her newborn baby. It was my first time and turned out really cute, so thanks! Now, her baby boy has grown and the hat is a bit short. She’s wondering if I can add on a few rows to make it longer. Is this possible? If so, is it possible for a beginner like me?
Thanks,
Christine
Hi Christine,
Thanks for reaching out with your question. I love to hear that mama likes the hat so much she wants to keep using it! It’s always such a compliment when people use our handmade gifts!
This is definitely possible. The easiest way to do it is by joining yarn with a slip stitch on the back, or at the seam of the hat. Then chain 1, and single crochet in the same stitch and in each stitch around, slip stitch to the first stitch to join the round. You can just repeat this round until you’ve added the length needed. Cut and weave in your ends!
I hope this helps. Let me know if you have any other questions!
Crystal
Hello! Is this pattern written in British English? Thank you so much!!!
Hello Ericka,
All my patterns are written in American English and I use US Terms. I hope this helps!
Have a great day,
Crystal
I’ve made a few of these hats! One being for my newborn nephew. My sister has had tons of compliments on it. I love this pattern, thank you!
You’re welcome! I’m so glad to hear how much you’re enjoying it!
I had a bit of the Lion Brand Hometown yarn leftover, wondering what I could make with it, and then I stumbled across your pattern. I whipped this hat up tonight in under an hour. The instructions were simple and clear, very easy to follow. Can’t wait to try it on my baby tomorrow!
Love, love, LOVE this pattern! My best friend’s twins looked so cute in them, but now I need to make them a bigger size. I was noticing the 12-18 months and the 18-24 months have the same stitch count, but different measurements. Any suggestions?
Thank you Holly! The sizes are very similar because the head sizes are similar for those ages. The larger size doesn’t have more stitches, but more rows so it’s taller. The chunky stitches makes adding another round of increases for this size too big. Many hat patterns don’t break these sizes down, and only offer 12 -24 mos as one size. So if your friend’s twins are closer to 12 mos go with the 12-18 mos size, or if they’re closer to 18 mos go with the 18-24 mos size. Or if you want to go with head circumference 12-18 mos is intended to fit 16-17″ heads and 18-24 mos to fit 17-18″ heads. I hope this helps!
Hi Christa,
The video tutorial and the written pattern seem to have different directions. I.e. for the newborn beanie, the video says to do rows 5&6 as SC but it looks like you are doing DCs. For the ears, the video says to do 2 CH and 6 DC and then tie off. But the pattern says to do multiple rows. I ended up just following the pattern because I was so confused and the ears ended up looking better than with the video tutorial. Just thought you should know!
Thank you Hope! Sorry that’s so confusing. I may have the wrong video linked up here. I’ll have a look and correct it.
Thank you so much for this pattern. It turned out so cute!!!