
Matteo Beanie a Free Crochet Pattern in All Sizes
The Matteo Crochet Beanie pattern is full of texture and includes sizes for the whole family. This top down crochet hat is an eye catcher.

This post contains affiliate links, I may earn a fee. Read more disclosure policy.
Join the ChristaCoDesign Newsletter
Never miss a pattern!
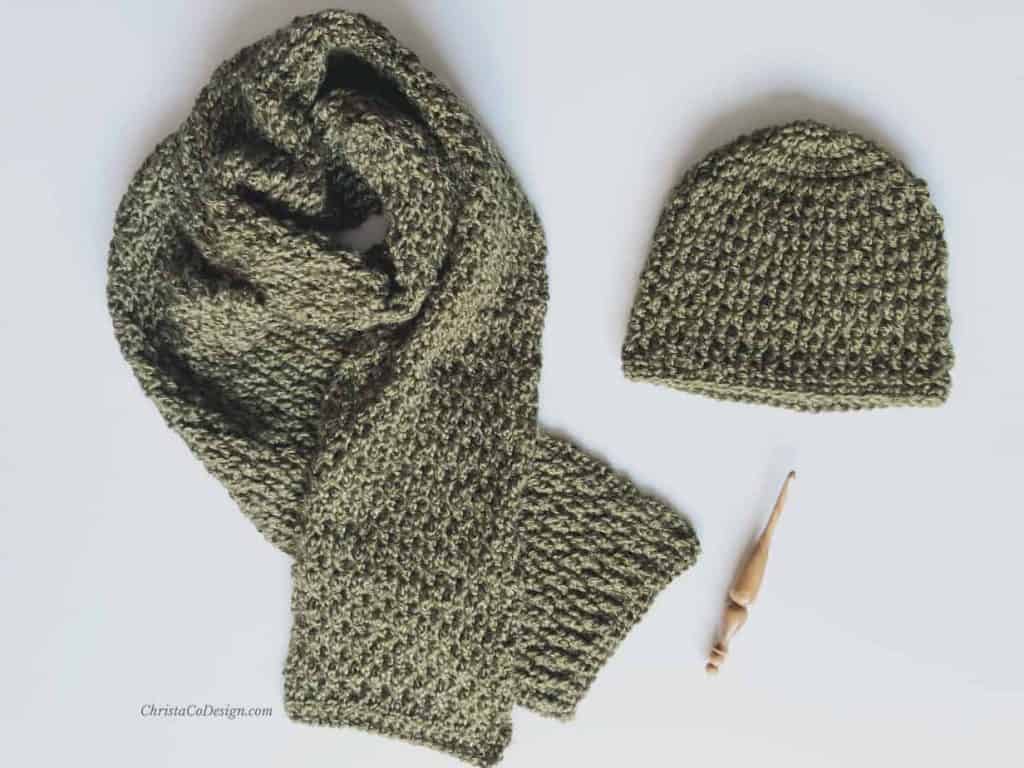
Snug fitting and warm, everyone needs a go to crochet hat like the Matteo Beanie. It makes a fabulous gift for men, women and kids too.
I’m excited to share the Matteo Beanie crochet pattern with you in all sizes from baby 0 – 3 months through large adult!
This fitted beanie has been a favorite for men to wear, so I knew everyone else would love it too.
Purchase the ad-free, well formatted printable PDF Pattern from my shop. Scroll down for the free pattern!
The texture of the Matteo Beanie is achieved with alternating front post double crochets and double crochets. You will work a dc into a fpdc and a fpdc into a dc.
I’ve marked this one as an intermediate skill level because you do need to know how to place post stitches. That’s not to say an adventurous beginner can’t do this pattern-you can!
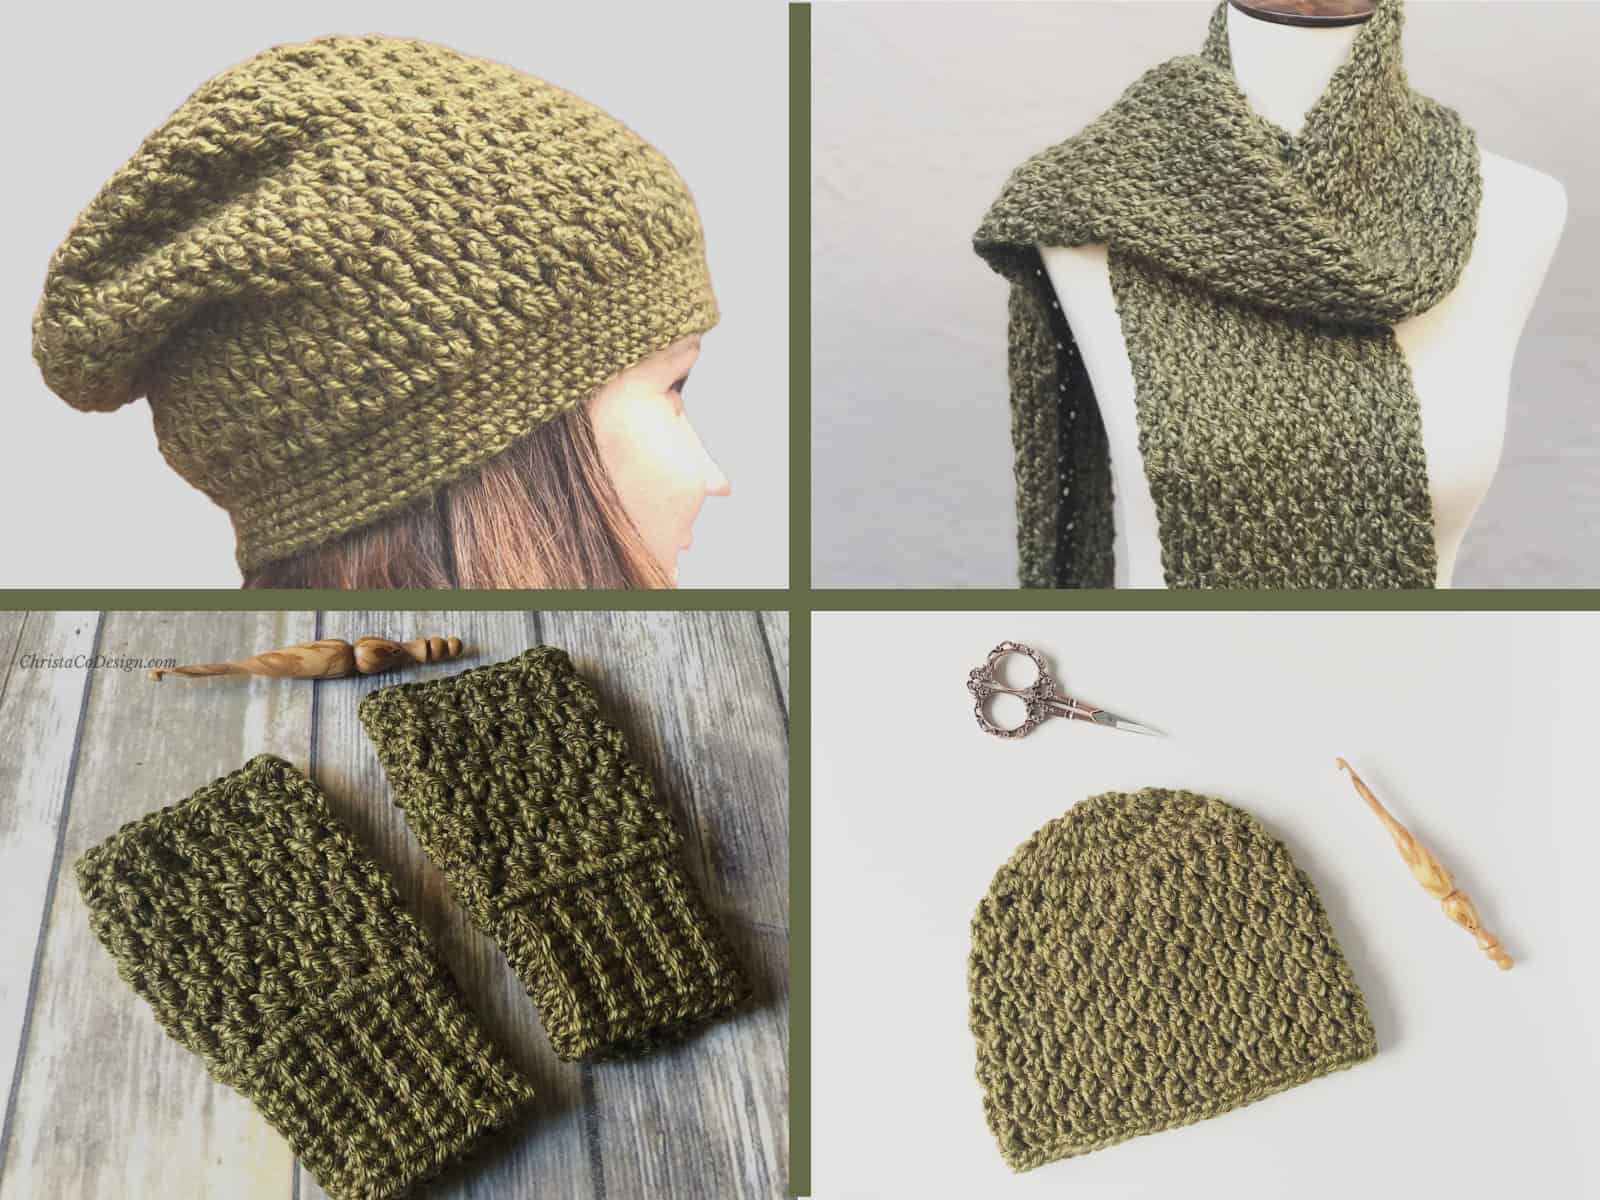
Here’s a little pic of my red head modeling the toddler size Matteo Beanie.

Get all 3 Matteo Patterns and complete the set!
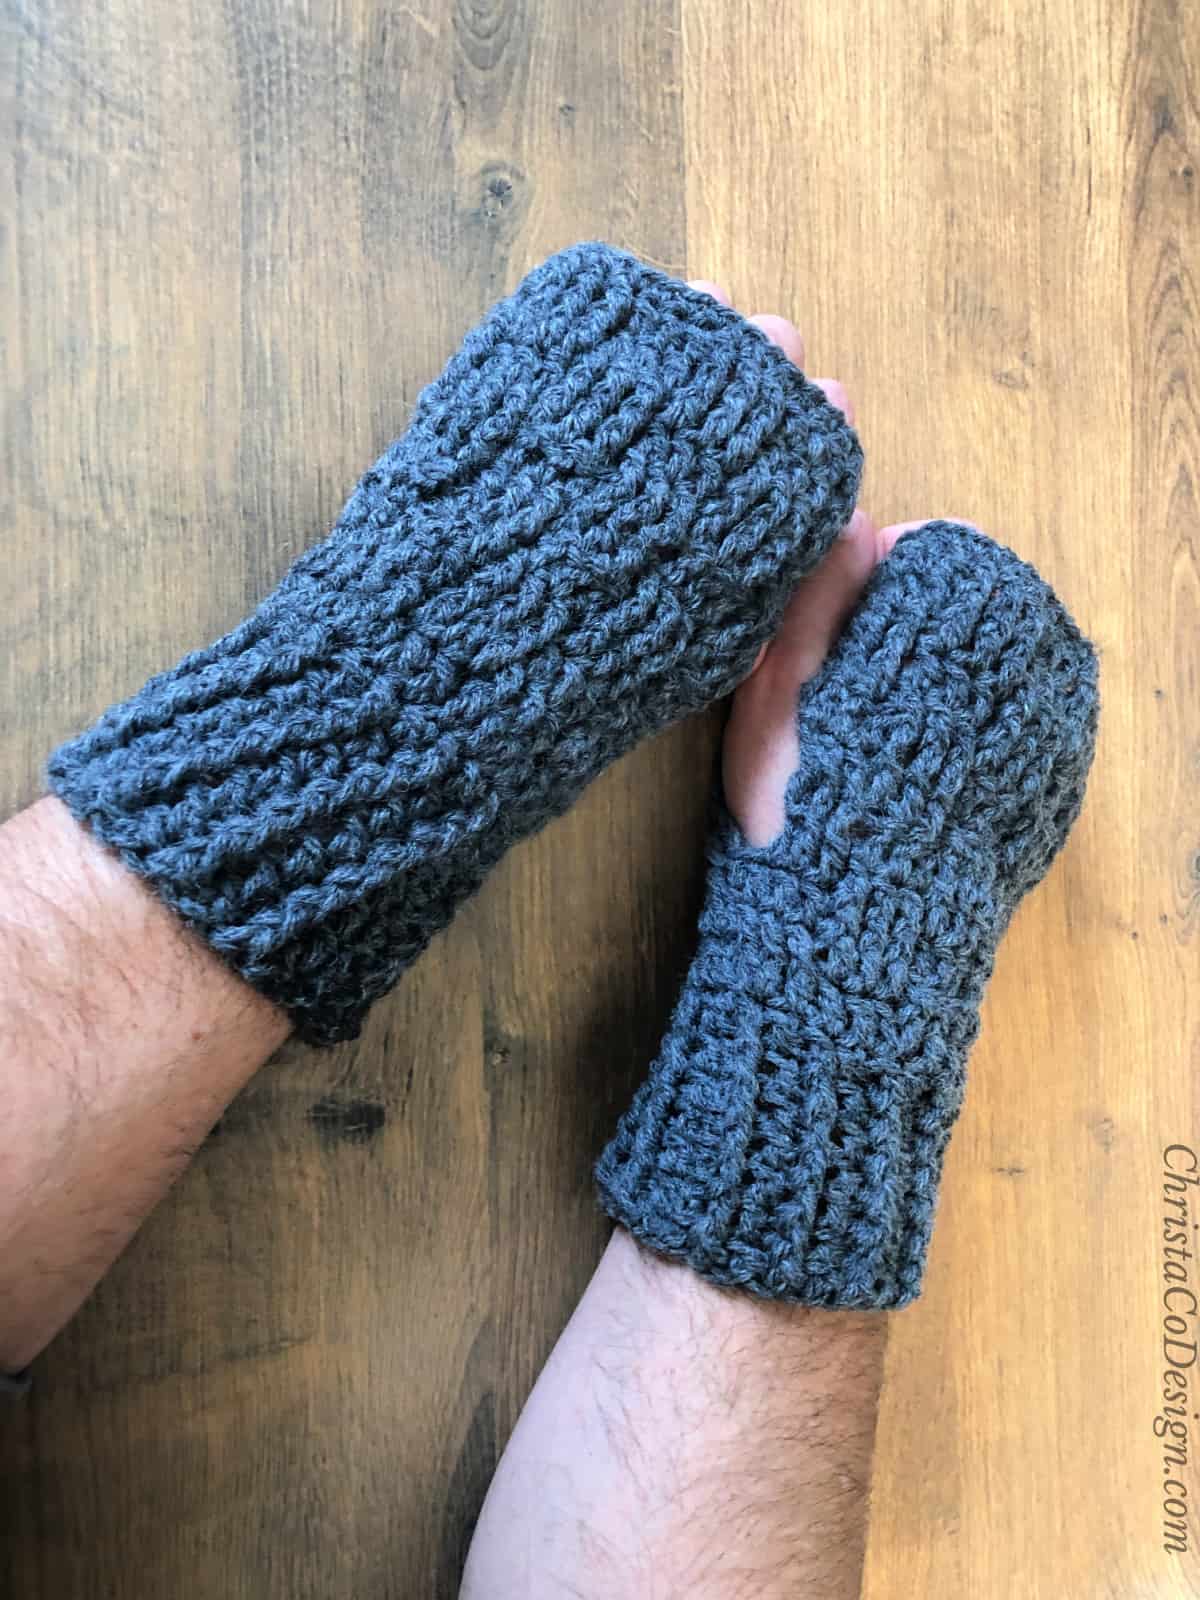
The Matteo Beanie has matching patterns. If you’re making a hat then the you’ll love these too Matteo Fingerless Gloves. Plus don’t forget the Matteo Scarf. And if you want to try the slouchy style check out the Matteo Slouch!
01
Get our most popular patterns
Matteo Set
This ebook includes our top reader favorite crochet patterns that you are sure to enjoy as well! Download our beautiful, easy to read, matching crochet pattern ebook!
Materials
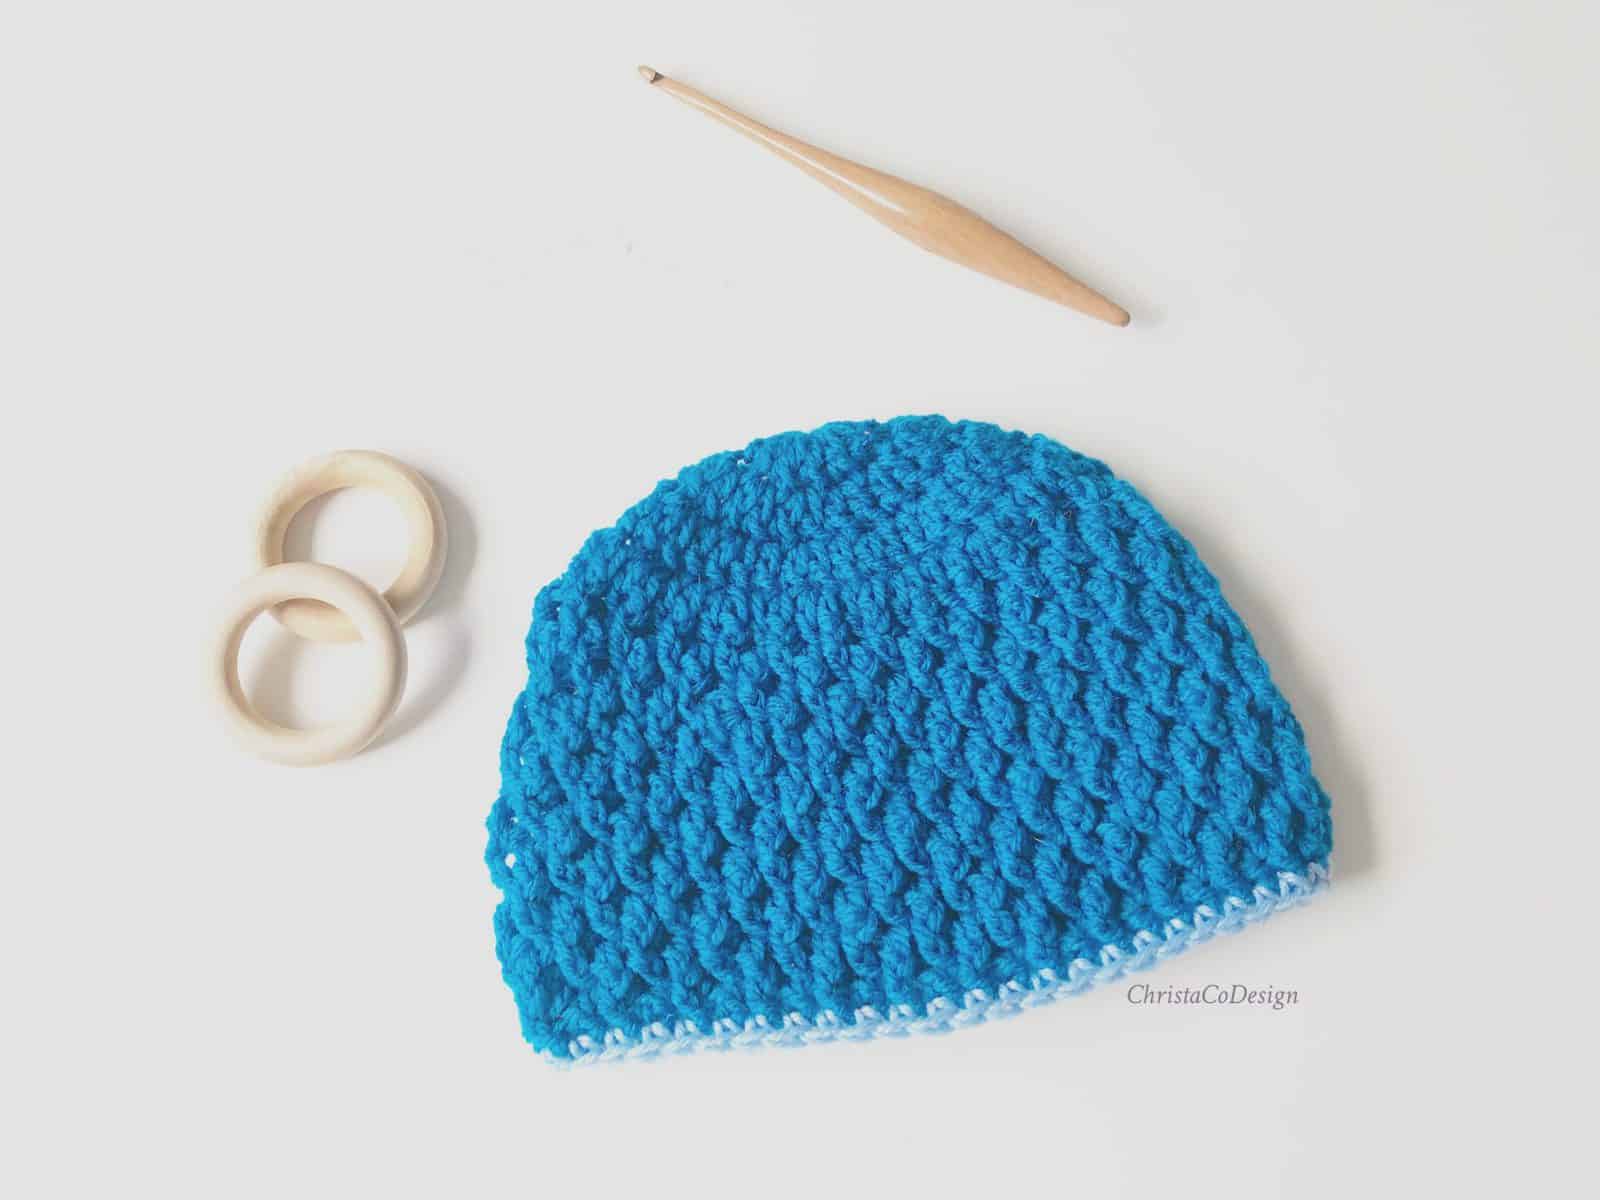
- 75-200 yds #4 med worsted weight yarn, I used Lion Brand’s Heartland* in Joshua Tree for the dark green one.
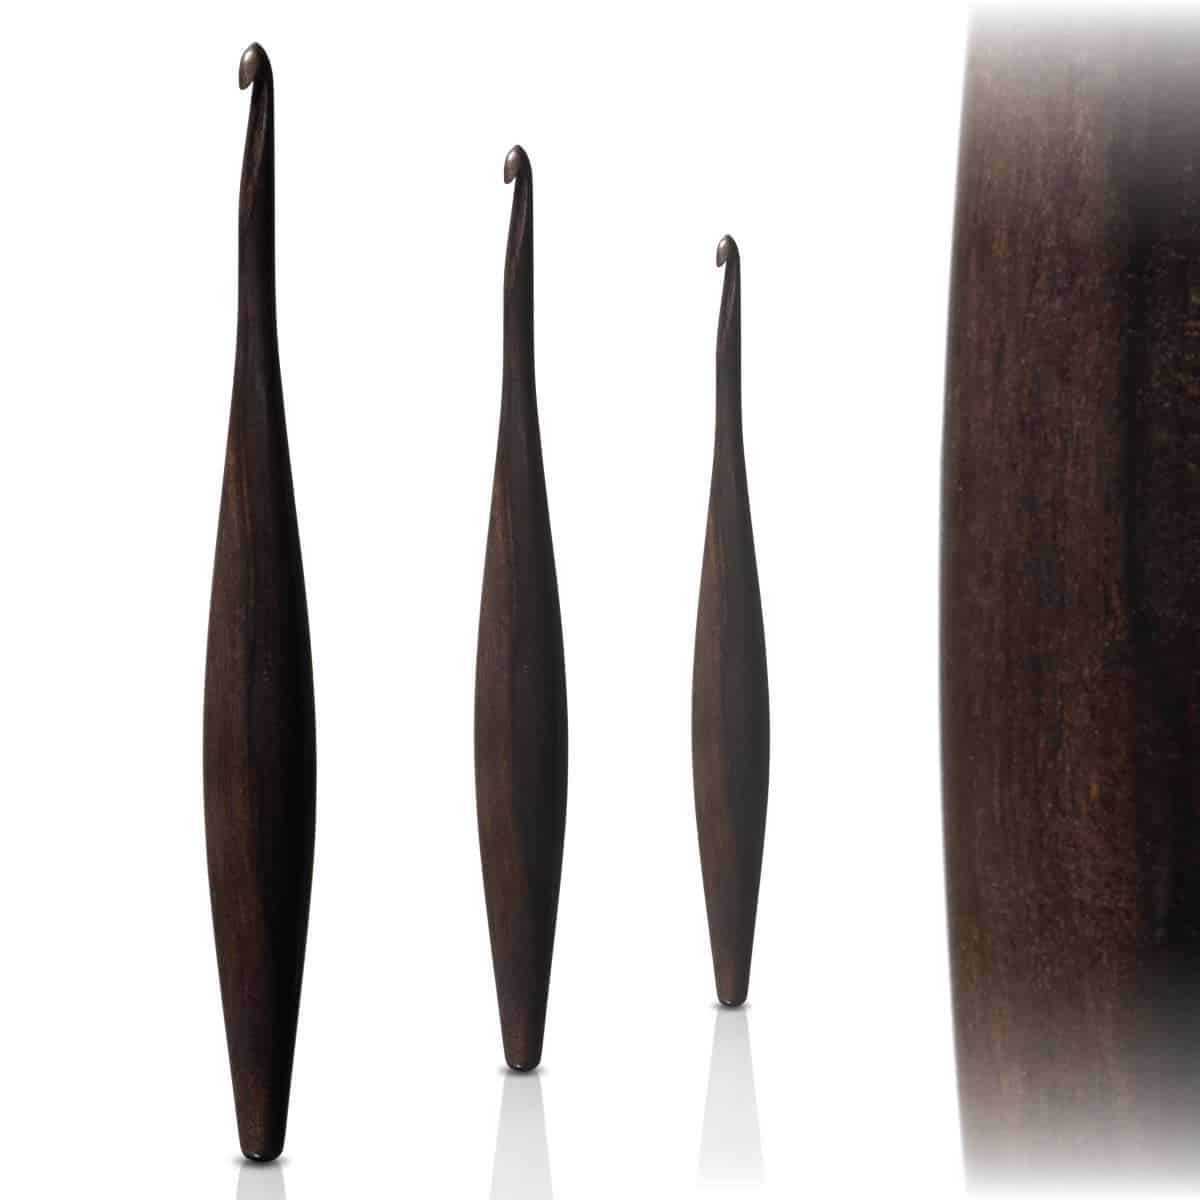
- 5.5 mm hook* US Size I-9, or hook needed to meet gauge.
- Yarn needle
- Measuring tape
- Scissors
Notes
- Ch 3 counts as a stitch, I highly recommend using a ch 3 alternative.
- Beanie is worked top down, with dc stitches only until the crown circle measurement is reached for each size.
- Then you will alternate fpdc and dc around. In the following round, you will fpdc into a dc and dc into a fpdc.
- Begin with a magic circle, or chain 3 and join with a slip stitch and work in the hole.
Level
Intermediate
Stitches/Abbreviations
ch – chain
dc- double crochet
Front Post Double Crochet (FPDC): tutorial here
sc – single crochet
sl st – slip stitch
sk-skip
st(s) – stitch(es)
Gauge
Rnds 1 – 3 = 3.5″ / 9 cm across
4” x 4” = 13 fpdc / dc x 8 rows in pattern
Download the Hat Sizing Chart
Get this handy dandy chart so you can crochet perfectly fitting hats!
Purchase the ad-free, well formatted printable PDF Pattern from my shop. Scroll down for the free pattern!
Scroll down for the free crochet hat pattern!
Textured Beanie Crochet Pattern
The Matteo beanie is perfectly textured.
Materials
- 75 yd / 69 m - 200 yd / 183 m of #4 med worsted weight yarn, I use Lion Brand’s Heartland in Joshua Tree for the dark green one.
Tools
- 5.5 mm crochet hook (US Size I-9)
- Yarn needle
- Measuring tape
- Scissors
Instructions
0-3 mos
Rnd 1. Dc 12 into a mc, sl st to first to join.
Rnd 2. Ch 3, dc in the same st, 2 dc in the next st and in each st around, sl st to first to join. (24)
Rnd 3. Ch 3, 2 dc in the next st, *{dc in the next st, 2 dc in the next st} rep from * around, sl st to first to join. (36) 4.25” circle
Rnd 4. Ch 3, *{fpdc in the next st, dc in the next st} rep from * around, sl st to first to join.(36)
Rnd 5. Ch 3, *{dc in the next, FPdc in the next st} rep from * around, sl st to first to join.
Rnds 6-11. Rep Rnds 4 & 5.
Rnd 12. Ch 1, sc in the same and in each st around, sl st to first to join.
Cut yarn & weave in. 5.5” tall
3-6 mos
Rnd 1. Dc 12 into a mc, sl st to first to join.
Rnd 2. Ch 3, dc in the same st, 2 dc in the next st and in each st around, sl st to first to join. (24)
Rnd 3. Ch 3, 2 dc in the next st, *{dc in the next st, 2 dc in the next st} rep from * around, sl st to first to join. (36) 4.5” circle
Rnd 4. Ch 3, *{fpdc in the next st, dc in the next st} rep from * around, sl st to first to join. (36)
Rnd 5. Ch 3, *{dc in the next, FPdc in the next st} rep from * around, sl st to first to join.
Rnds 6-11. Rep Rnds 4 & 5.
Rnd 12. Rep Rnd 5.
Rnd 13. Ch 1, sc in the same and in each st around, sl st to first to join.
Cut yarn & weave in. 6” tall
6-12 mos
Rnd 1. Dc 12 into a mc, sl st to first to join.
Rnd 2. Ch 3, dc in the same st, 2 dc in the next st and in each st around, sl st to first to join. (24)
Rnd 3. Ch 3, 2 dc in the next st, *{dc in the next st, 2 dc in the next st} rep from * around, sl st to first to join. (36)
Rnd 4. Ch 3, dc in the next st, 2 dc in the next st, *{dc in each of the next 2 st, 2 dc in the next st} rep from * around, sl st to first to join. (48) 5.75” circle
Rnd 5. Ch 3, *{fpdc in the next st, dc in the next st} rep from * around, sl st to first to join. (48)
Rnd 6. Ch 3, *{dc in the next, FPdc in the next st} rep from * around, sl st to first to join.
Rnds 7-12. Rep Rnds 5 & 6.
Rnd 13. Rep Rnd 5.
Rnd 14. Ch 1, sc in the same and in each st around, sl st to join.
Cut yarn & weave in. 6.5” tall
Toddler (12-24 mos)
Rnd 1. Dc 12 into a mc, sl st to first to join.
Rnd 2. Ch 3, dc in the same st, 2 dc in the next st and in each st around, sl st to first to join. (24)
Rnd 3. Ch 3, 2 dc in the next st, *{dc in the next st, 2 dc in the next st} rep from * around, sl st to first to join. (36)
Rnd 4. Ch 3, dc in the next st, 2 dc in the next st, *{dc in each of the next 2 st, 2 dc in the next st} rep from * around, sl st to first to join. (48) 5.75” circle
Rnd 5. Ch 3, *{fpdc in the next st, dc in the next st} rep from * around, sl st to first to join. (48)
Rnd 6. Ch 3, *{dc in the next, FPdc in the next st} rep from * around, sl st to first to join.
Rnds 7-14. Rep Ronds 5 & 6.
Rnd 15. Ch 1, sc in the same and in each st around, sl st to join.
Cut yarn & weave in. 7” tall
Preschool (2-4 yrs)
Rnd 1. Dc 12 into a mc, sl st to first to join.
Rnd 2. Ch 3, dc in the same st, 2 dc in the next st and in each st around, sl st to first to join. (24)
Rnd 3. Ch 3, 2 dc in the next st, *{dc in the next st, 2 dc in the next st} rep from * around, sl st to first to join. (36)
Rnd 4. Ch 3, dc in the next st, 2 dc in the next st, *{dc in each of the next 2 st, 2 dc in the next st} rep from * around, sl st to first to join. (48) 5.75” circle
Rnd 5. Ch 3, *{fpdc in the next st, dc in the next st} rep from * around, sl st to first to join. (48)
Rnd 6. Ch 3, *{dc in the next, FPdc in the next st} rep from * around, sl st to first to join.
Rnds 7-14. Rep Rnds 5 & 6.
Rnd 15. Rep Rnd 5.
Rnd 16. Ch 1, sc in the same and in each st around, sl st to join.
Cut yarn & weave in. 7.5” tall
Child 5+
Rnd 1. Dc 12 into a mc, sl st to first to join.
Rnd 2. Ch 3, dc in the same st, 2 dc in the next st and in each st around, sl st to first to join. (24)
Rnd 3. Ch 3, 2 dc in the next st, *{dc in the next st, 2 dc in the next st} rep from * around, sl st to first to join. (36)
Rnd 4. Ch 3, dc in the next st, 2 dc in the next st, *{dc in each of the next 2 st, 2 dc in the next st} rep from * around, sl st to first to join. (48)
Rnd 5. Ch 3, dc in each of the next 2 st, 2 dc in the next st, *{dc in each of the next 3 st, 2 dc in the next st} rep from * around, sl st to first to join. (60) 7” circle
Rnd 6. Ch 3, *{fpdc in the next st, dc in the next st} rep from * around, sl st to first to join. (60)
Rnd 7. Ch 3, *{dc in the next, FPdc in the next st} rep from * around, sl st to first to join.
Rnd 8-14. Rep Rnds 6 & 7.
Rnd 15. Rep Rnd 5.
Rnd 16. Ch 1, sc in the same and in each st around, sl st to join.
Cut yarn & weave in. 7.5” tall
Teen
Rnd 1. Dc 12 into a mc, sl st to first to join.
Rnd 2. Ch 3, dc in the same st, 2 dc in the next st and in each st around, sl st to first to join. (24)
Rnd 3. Ch 3, 2 dc in the next st, *{dc in the next st, 2 dc in the next st} rep from * around, sl st to first to join. (36)
Rnd 4. Ch 3, dc in the next st, 2 dc in the next st, *{dc in each of the next 2 st, 2 dc in the next st} rep from * around, sl st to first to join. (48)
Rnd 5. Ch 3, dc in each of the next 2 st, 2 dc in the next st, *{dc in each of the next 3 st, 2 dc in the next st} rep from * around, sl st to first to join. (60) 7” circle
Rnd 6. Ch 3, *{fpdc in the next st, dc in the next st} rep from * around, sl st to first to join. (60)
Rnd 7. Ch 3, *{dc in the next, FPdc in the next st} rep from * around, sl st to first to join.
Rnds 8-16. Rep Rows 6 & 7.
Rnd 17. Ch 1, sc in the same and in each st around, sl st to join.
Cut yarn & weave in. 8” tall
SM/MD Adult
Rnd 1. Dc 12 into a mc, sl st to first to join.
Rnd 2. Ch 3, dc in the same st, 2 dc in the next st and in each st around, sl st to first to join. (24)
Rnd 3. Ch 3, 2 dc in the next st, *{dc in the next st, 2 dc in the next st} rep from * around, sl st to first to join. (36)
Rnd 4. Ch 3, dc in the next, 2 dc in the next, *{dc in each of the next 2 st, 2 dc in the next st} rep from * around, sl st to first to join. (48)
Rnd 5. Ch 3, dc in each of the next 2 st, 2 dc in the next, *{dc in each of the next 3 st, 2 dc in the next st} rep from * around, sl st to first to join. (60) 7” circle
Rnd 6. Ch 3, *{fpdc in the next st, dc in the next st} rep from * around, sl st to first to join. (60)
Rnd 7. Ch 3, *{dc in the next, FPdc in the next st} rep from * around, sl st to first to join.
Rnd 8-18. Rep Rnds 6 & 7.
Rnd 19. Ch 1, sc in the same and in each st around, sl st to join.
Cut yarn & weave in. 8.5” tall
LG Adult
Rnd 1. Dc 12 into a mc, sl st to first to join.
Rnd 2. Ch 3, dc in the same st, 2 dc in the next st and in each st around, sl st to first to join. (24)
Rnd 3. Ch 3, 2 dc in the next st, *{dc in the next st, 2 dc in the next st} rep from * around, sl st to first to join. (36)
Rnd 4. Ch 3, dc in the next, 2 dc in the next, *{dc in each of the next 2 st, 2 dc in the next st} rep from * around, sl st to first to join. (48)
Rnd 5. Ch 3, dc in each of the next 2 st, 2 dc in the next, *{dc in each of the next 3 st, 2 dc in the next st} rep from * around, sl st to first to join. (60)
Rnd 6. Ch 3, dc in each of the next 3 st, 2 dc in the next, *{dc in each of the next 4 st, 2 dc in the next st} rep from * around, sl st to first to join. (72)
Rnd 7. Ch 3, *{fpdc in the next st, dc in the next st} rep from * around, sl st to first to join. (72)
Rnd 8. Ch 3, *{dc in the next, FPdc in the next st} rep from * around, sl st to first to join.
Rnds 9-18. Rep Rnds 7 & 8.
Rnd 19. Ch 1, sc in the same and in each st around, sl st to join.
Cut yarn & weave in. 9” tall
Recommended Products
As an Amazon Associate and member of other affiliate programs, I earn from qualifying purchases.


HI There ,
If i wanted to make this into a messy bun beanie are you able to modify the adult pattern for this.
Hi Michelle,
If you would like to make this beanie a messy bun hat then I would recommend starting with an open circle of 36 sts. You would Fdc 36, or ch 38 + dc in the 2nd ch and each ch across, then sl st to join into a circle. This would make the bun opening in the top of the hat. From there you would pick up the pattern from Rnd 4 and on. I hope this helps, let me know how it works out, if you try it!
Crystal
Just finished making this pattern for my hubby and he loves it. 😊
Hi Christa, this pattern looks beautiful! I’m just having trouble working out where to place my alternating dc/fpdc – at first I just worked into every post and stitch but it doubled my stitch count – oops! Do you have a tutorial please? Thanks!
Hi Brooke,
I’m sorry you’re having trouble! The post stitches can definitely be tricky. Here is the video tutorial, hopefully this helps! https://youtu.be/3hNpugOfF0k
Thanks,
Crystal
I’m hoping you can help me make this hat in the future. I have been trying to make your Matteo beanie, and cannot get past row 3 on the Teen pattern directions. Row 3 has 36 stitches – got that. Cannot get 48 stitches for a completed Row 4.
Row 4 starts with a chain, a dc & 2 dc in 1 previous stitch. Then it says to do sets of 4 (2 dc & 2 dc in 1 previous stitch). That’s adding 12 stitches, which should come out to 47 stitches.
I’m doing something wrong, because somehow I’m only getting 45.
I’ve redone Row 4 several times and still get the same result, so it’s time for me to give up.
I am so disappointed I can’t figure this out. I was counting given my hand-made beautiful, warm hats to family for holiday gifts. Now it’s not going to happen. I took a lot of time (too much) deciding on a pattern, then a lot of time (too much) deciding on the yarn. I realize it’s my fault for not starting sooner and allowing time for mess-ups and misunderstandings.
If there’s something obvious to you that could be causing my difficulty with your pattern, I would very much like to know what that is.
Thanks for reading this. Wishing you a happy holiday.
Susan
Hi Susan, I’m so sorry you’re having such trouble on this one, especially at this time of year. With the increases it’s easy to miss one. I do have a video tutorial on my YouTube channel that might be helpful https://youtu.be/3hNpugOfF0k It should be (dc, dc, 2dc) all the way around increasing by 12 stitches (48 total including the ch 3 that starts the round and counts as the first dc). I hope this helps, but if not I hope you can find a quick and easy beanie pattern to make!
Merry Christmas to you & yours,
Crystal