Easy Crochet Christmas Tree Garland Free Pattern
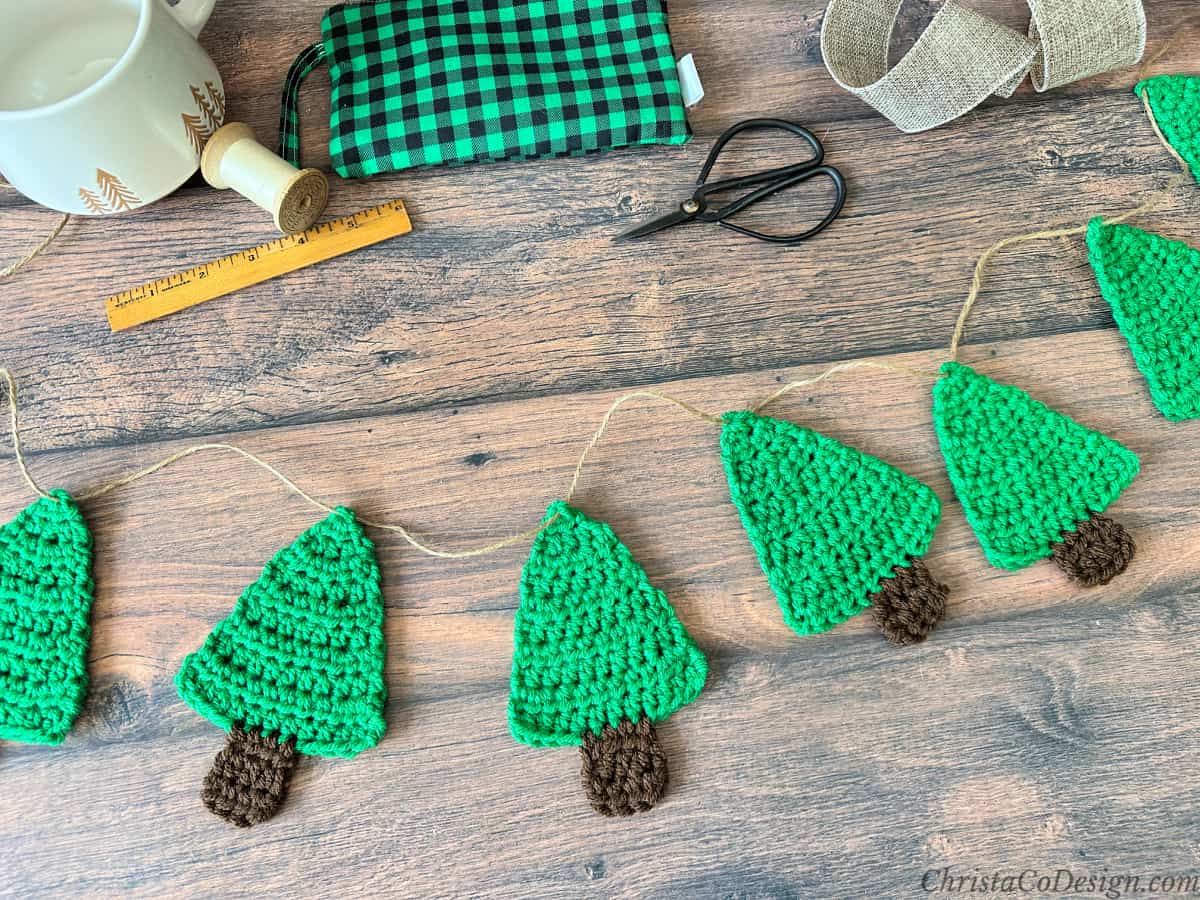
Learn how to make this easy Christmas tree garland. Adding festive Christmas decorations to your mantle is quick and easy this holiday season!
The Christmas season is always a busy one for crocheters. Either we’re making gifts, Christmas ornaments for decorations, or the myriad of other things that come in December!
I love an easy crochet pattern that can be multiple purpose. This christmas tree garland is perfect for your mantle, or a wall, or even on your own tree.
This post contains affiliate links, I may earn a fee. Read more disclosure policy.
While I chose to make standard green and brown trees it would be so much fun to make colorful, scrappy trees! These would be a fun project and great stash busters!
The free crochet pattern for these little Christmas trees is included below with the Christmas garland instructions.
CHRISTMAS
Crochet Patterns
These free Christmas crochet patterns will keep your hands busy and your home festive!
Materials
- 5 yds #4 medium worsted weight yarn Red Heart Super Saver yarn*(100% acrylic, 364 yd (334 m) per 198 g skein in shade Green: 4 yds and Brown: 1 yd.
- 5 mm hook size US H-8*, or crochet hook to meet gauge.
- Twine,* yarn or crochet thread for stringing trees together.
- Measuring tape, large eye yarn needle, stitch markers (2) and scissors.
Notes
- Ch 1 at the beginning of a row does not count as a stitch.
- We’ll start with the top of the tree and work our way down to the tree trunk.
- After making all the trees we’ll string them together with the twine and yarn needle.
Stitches / Abbreviations
US Terms
ch (s) – chain (s)
hdc – half double crochet
sl st – slip stitch
st – stitch
Gauge
2″ / 5 cm x 2″ / 5 cm = 7 hdc x 6 rows of hdc
Skill Level
Beginner – Easy
Size
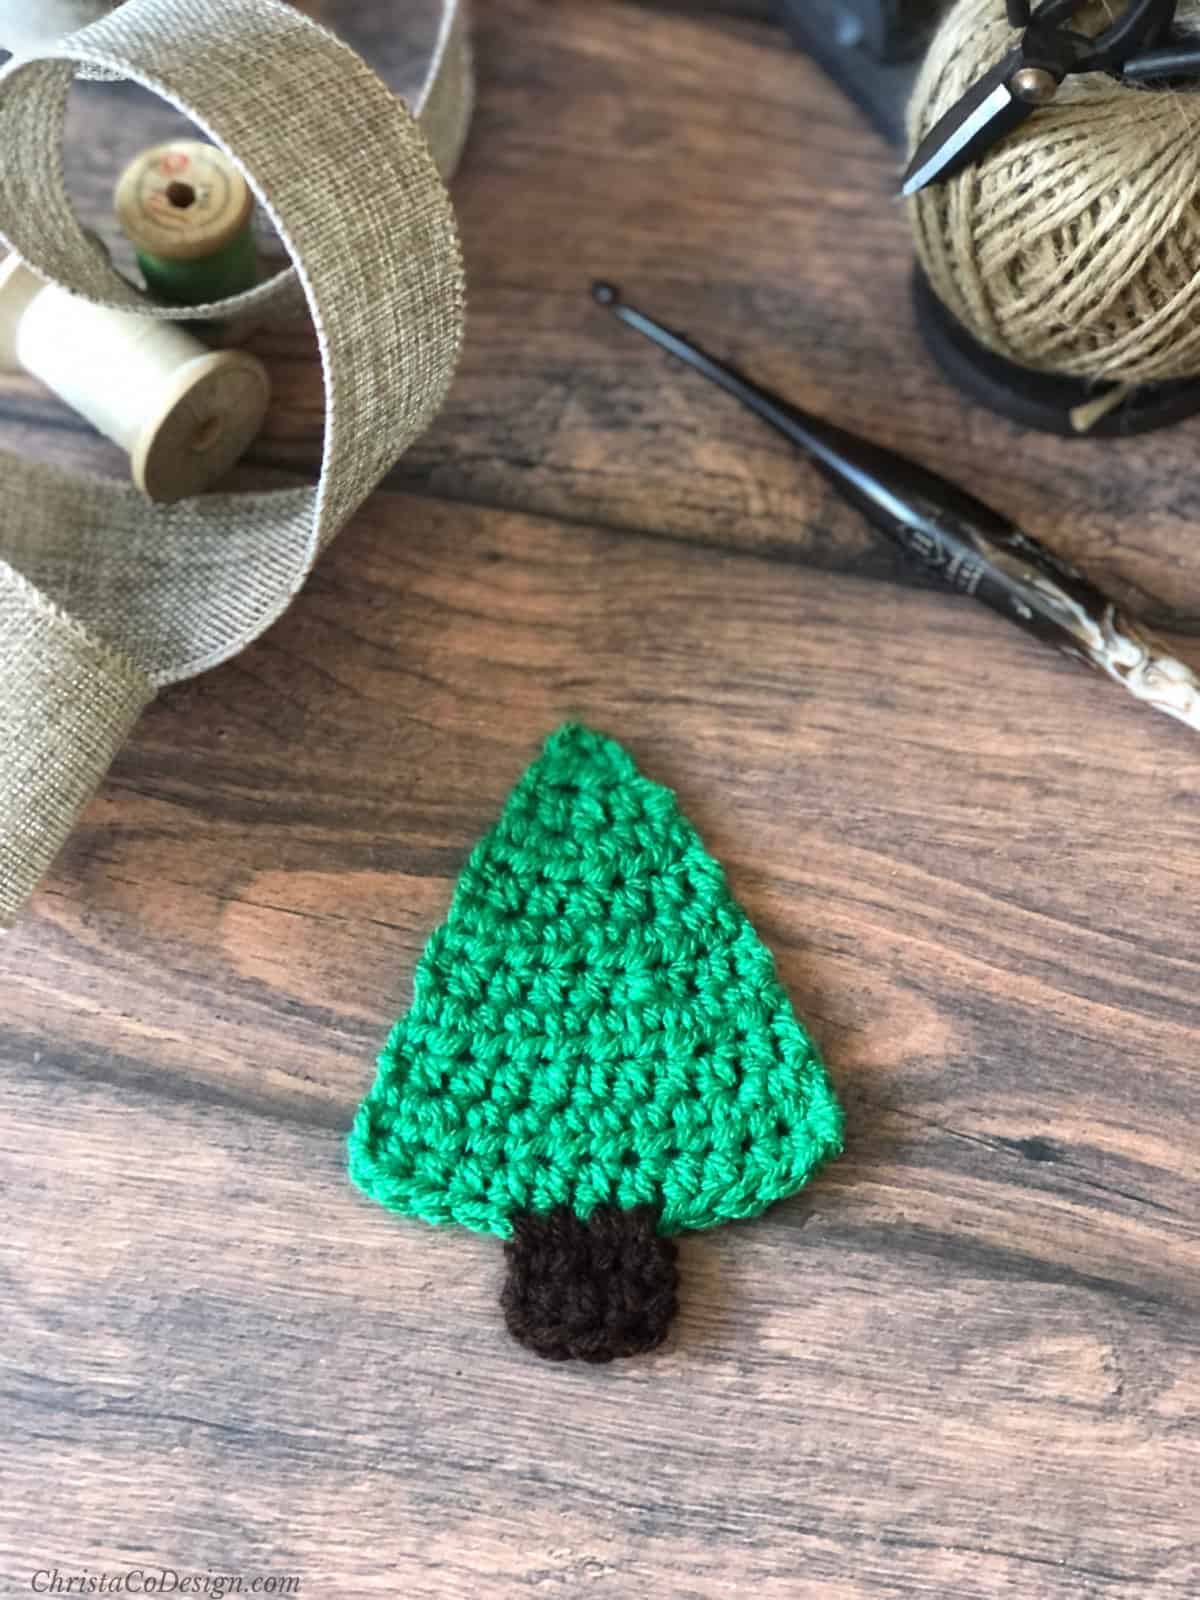
The finished dimensions of the Christmas Trees are approximately 5″ / 12.5 cm tall including the trunk and 3.5″ / 9 cm at it’s widest.
The crochet garland length is variable depending on your desired size. I spaced my trees about 5″ apart. So if you make 10 trees that’s roughly 50″ of twine, plus what you need on either end.
Again the amount of twine you need to hang your garland will depend on where and how you hang it. I recommend measuring your space before cutting. About 12″ of length to start and 12″ to end the garland was adequate for our small mantle.
Video
Watch the video tutorial on my YouTube.
Scroll down for the free crochet Christmas tree garland pattern!

Crochet Christmas Tree Garland
Learn how to make a crochet christmas tree garland to decorate your holiday home.
Materials
- #4 medium worsted weight yarn, 5 yd of green yarn and 1 yd of brown yarn in Red Heart Super Saver yarn.
- Twine, yarn or crochet thread for hanging.
Tools
- 5 mm hook size US H-8, or crochet hook to meet gauge.
- scissors
- Large eye tapestry needle
- measuring tape
Instructions
Christmas Tree Pattern
Make 12, or desired number for your garland.
In green.
Row 1. Ch 2, place 2 hdc in the 2nd ch from your hook, turn. (2 sts)
Row 2. Ch 1, 2 hdc in the first stitch, 2 hdc in the next stitch, turn. (4 sts)
Row 3. Ch 1, hdc in same st, 2 hdc in each of next 2 sts, hdc in the last st, turn. (6 sts)
Row 4. Ch 1, hdc in each st across, turn. (6 sts)
Row 5. Ch 1, hdc in same st, 2 hdc in next st, hdc in each st until there are 2 sts left, 2 hdc in the next st, hdc in the last st, turn. (8 sts)
Row 6. Ch 1, hdc in each st across, turn. (8 sts)
Row 7. Rep Row 5. (10 sts)
Row 8. Rep Row 6. (10 sts)
Row 9. Rep Row 5. (12 sts)
Row 10. Rep Row 6. (12 sts) The triangle is approximately 4” / 10 cm tall.
Cut yarn.
Trunk
Row count starts over.
Join brown yarn with sl st to 5th hdc from end.
Row 1. Ch 1, hdc in next 4 sts, turn. (4 sts)
Row 2. Rep last row.
Cut yarn and weave in ends.
Repeat for number of trees you would like.
Christmas Tree Garland
Use the measuring tape to measure how long your garland needs to be. Remember to account for the center hanging down, and extra length to tie it depending on how you will hang it. Add extra 24" just in case, or better yet leave the length attached to the spool if you can.
Stack all trees so the they are facing the same way.
Thread end of twine through eye of yarn needle. 
Insert the yarn needle into the top stitch of the tree. I went from the back to the front. You can go the other way, but make sure to do it the same on all the trees.
Once you've slipped them all on, space them 5" apart. You can adjust this to your liking.
Leave 12" or more, before the first tree, and 12" or more after the last tree.
If you're able to check it in place before cutting off the twine from the spool I recommend you do that.
Cut it, and hang your garland!
Notes
You can shorten or lengthen the pattern for different sizes.
Recommended Products
As an Amazon Associate and member of other affiliate programs, I earn from qualifying purchases.


