Easy Crochet Top With 3/4 Bell Sleeve Free Pattern
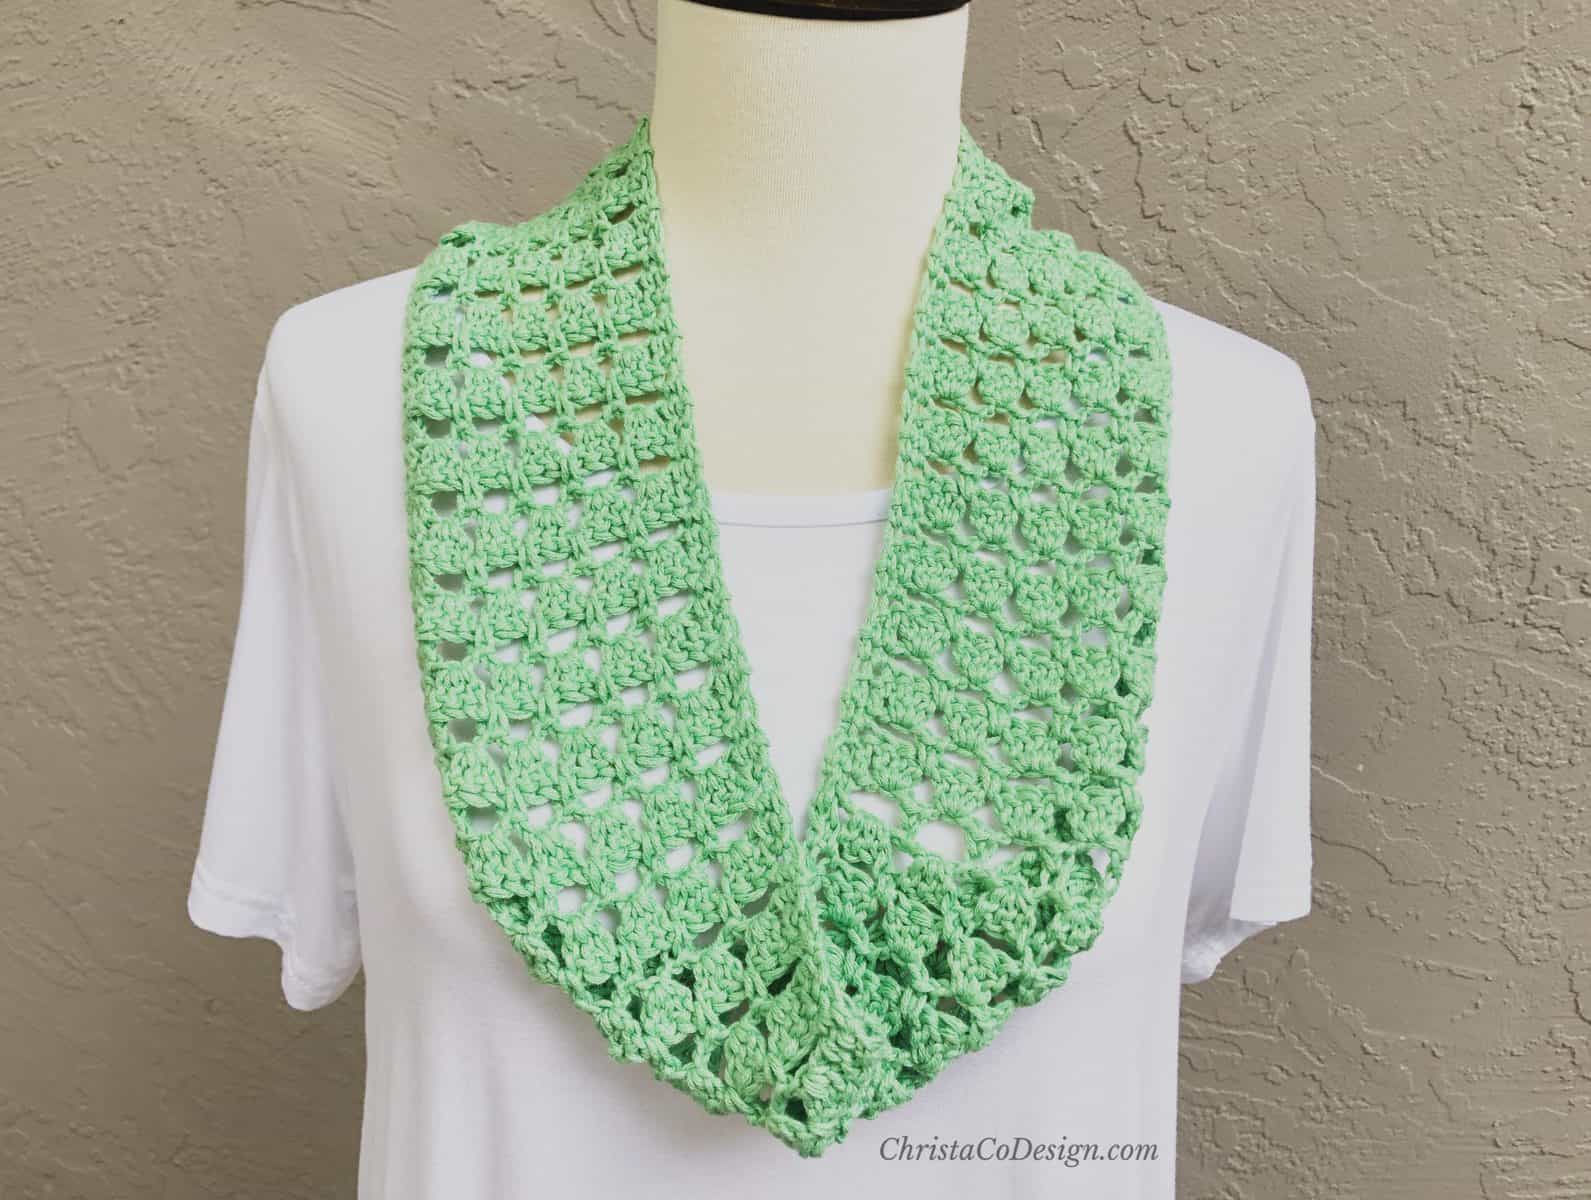
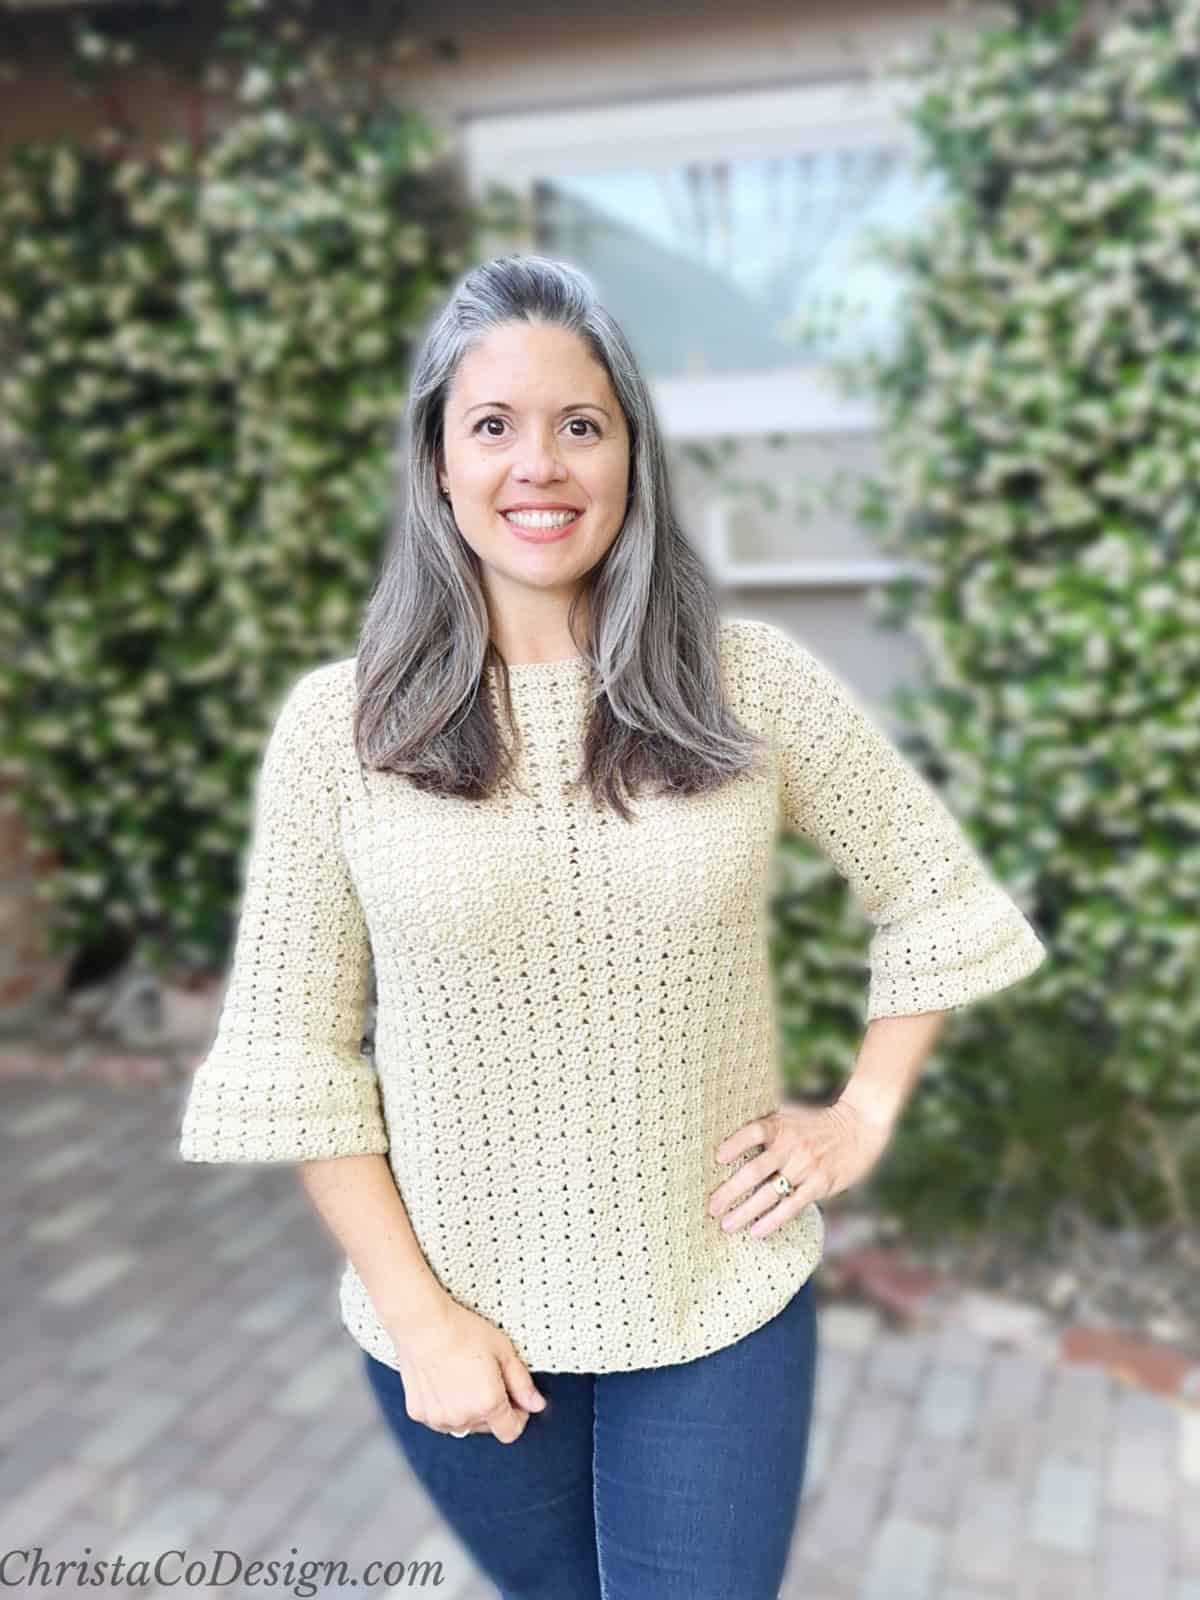
The Belinda is a lightweight top featuring 3/4 length crochet bell sleeves. This free crochet pattern is made with basic crochet stitches that come together in an almost lace like design. There is a step by step photo tutorial for stitch pattern too.

This post contains affiliate links, I may earn a fee. Read more disclosure policy.
Join the ChristaCoDesign Newsletter
Never miss a pattern!
This crochet top pattern includes 9 women’s sizes. It’s written for women’s sizes XS – 5X, and it’s easy to customize by adding or taking away four stitches at a time. Depending on where you fall in the size range the ease is 1″ – 4″.
This lightweight top uses a #3 DK weight yarn. I do think a #4 medium worsted weight yarn will work, especially if it’s on the thinner size. Always be sure to work a gauge swatch, no matter your yarn choice.
Purchase the ad-free, well formatted printable PDF Pattern from my shop. Scroll down for the free pattern!
For reference Size M is shown on 36″ bust model.

The Belinda also has a sister pattern, the sleeveless crochet summer top version is perfect for summer.
Purchase My Ad-Free PDF Patterns In Your Favorite Shop Here:
Materials
- 3.5 mm US Hook Size E*, or hook needed to meet gauge.
- Measuring tape, yarn needle, stitch marker (2) optional, and scissors
- #3 lightweight/DK yarn pictured in Berroco Comfort DK* (50% Super Fine Nylon, 50% Super Fine Acrylic, 1.75 oz / 50 g, 178 yd / 165 m) color: barley.
Yarn by Size
- XS – 7 balls (1246 yd / 1139 m)
- S – 8 balls (1340 yd / 1225 m)
- M – 8 balls (1424 yd / 1320 m)
- L – 9 balls (1602 yd / 1465 m)
- XL – 10 balls (1780 yd / 1628 m)
- 2X – 11 balls (1958 yd / 1790 m)
- 3X – 12 balls (2136 yd / 1953 m)
- 4X – 13 balls (2314 yd / 2116 m)
- 5X – 14 balls (2492 yd / 2279 m)
Notes
- Starting ch 3 counts as a dc, standing stitches are a great alternative, you can see my tutorial for my favorites.
- The stitch multiple is 4 plus 4 for the foundation row.
- Pattern is written as a multi size pattern where the first number is the smaller size, and each number following is inside the parenthesis and the next size up: XS (S, M, L, XL, 2X, 3X, 4X, 5X).
- Stitch counts are given after the row instructions, with all numbers inside the parentheses ( ).
Stitches/Abbreviations (US Terms)
ch – chain
dc – double crochet
rnd – round
rep – repeat
RS – right side
sc – single crochet
sl st – slip stitch
st (s) – stitches
pm – place stitch marker
WS – wrong side
Video Tutorial
Watch the full video tutorial for the twin v stitch used in this top pattern here.
Gauge
*A note about gauge. Checking your gauge is important to achieve the correct sizing. Crochet a gauge swatch with the yarn and hook you plan to use. If you have more or less stitches than the listed gauge you need to use a hook smaller or larger to get the correct gauge. Read more on gauge in this blog post.
4″ / 10 cm x 4″ / 10 cm = 20 sts x 11 rows in pattern
Gauge Swatch Pattern
- Ch 32
- Follow the pattern Rows 1-3 until your swatch measures 6″.
- Measure and count how many stitches per 4 inches. If you have more than 20 sts, then try going up a hook size, if you have less, then try going down a hook size.
- Measure in length (rows), if you have more than 11 rows then try going down a hook size and if you have less than 11 rows then try going up a size—unless your stitch gauge is right on, then you can use the hook that works for stitch gauge and just work more or less rows to accommodate your row gauge.
- If you cannot meet gauge by going up or down one hook size you may need to go up or down by a size in the pattern to get the correct width for your panels. See the Fit for detailed measurements.
Fit
To fit bust size:
XS (30”), S (34”), M (38”), L (42”), XL (46”), 2X (50), 3X (54”), 4X (58”), 5X (62”)
XS (76 cm), S (86 cm), M (96.5 cm), L (106.5 cm), XL (117 cm), 2X (127 cm), 3X (137 cm), 4X (147 cm), 5X (158 cm).
This top has a recommended 1 – 4 in / 2.5 – 10 cm of positive ease, where the finished top is larger than the actual bust/hip measurement.
Finished Hip/Bust:
XS (31”), S (36”), M (39”), L (44”), XL (47”), 2X (52), 3X (55”), 4X (60”), 5X (63”)
XS (78.5 cm), S (91.5 cm), M (99 cm), L (112 cm), XL (119.5 cm), 2X (132 cm), 3X (139.5 cm), 4X (152.5 cm), 5X (160 cm).
As this pattern is worked without shaping, I recommend choosing size/ease that comfortably fits your widest measurement. For some that will be the hip, for some the stomach and some the bust.
Panel Width:
XS (15.5”), S (18”), M (19.5”), L (22”), XL (23.5”), 2X (26), 3X (27.5”), 4X (30”), 5X (31.5”)
XS (39.5 cm), S (45.5 cm), M (49.5 cm), L (56 cm), XL (59.5 cm), 2X (66 cm), 3X (70 cm), 4X (76 cm), 5X (80 cm).
Adjustments
There is no shaping in the pattern. If you would like to add shaping, choose the fit for your largest measurement and use decreases at both ends of a row to narrow the rectangle to fit your waist or bust. *Unless your narrowest measure is the hip, then you should choose the size corresponding to that measurement and add increases on either end of rows to increase as you work.
Depending on where you fall in the size range, you may want to size up or down. This boatneck shirt is designed to have a classic fit and hip length.
Length:
XS (21.5”), S (21.5”), M (22”), L (22”), XL (23”), 2X (23), 3X (23.5”), 4X (23.5”), 5X (24.5”)
XS (54.5 cm), S (54.5), M (56 cm), L (56 cm), XL (58.5 cm), 2X (58.5 cm), 3X (59.5 cm), 4X (59.5cm), 5X (62 cm).
If you would like a longer shirt, just add more rows. Measure from the top of your shoulder down to your where you want the hem to stop.
If you would like long sleeves, you can continue the sleeve length repeat for full length instead of 3/4. Be sure to add extra yarn.
Save your favs!
Add this pattern to your Ravelry queue.
Video Tutorial
Start with Belinda Top video tutorial to make the body of this sweater. Then watch the full video tutorial for the bell sleeve for this crochet top on my YouTube channel.
Scroll down for the written pattern instructions on how to make this free bell sleeve crochet top!
Don’t forget to pin this for later!

Purchase the ad-free, well formatted printable PDF Pattern from my shop. Scroll down for the free pattern!
Pattern Instructions

How to Crochet Easy 3/4 Bell Sleeve Top
Learn how to crochet this easy top with 3/4 length bell sleeves. This simple pattern includes 9 women's sizes and tutorial.
Materials
- #3 lightweight/DK yarn pictured in Berroco Comfort DK (50% Super Fine Nylon, 50% Super Fine Acrylic, 1.75 oz / 50 g, 178 yd / 165 m) color: barley.
- Yarn By Size:
- XS - 7 balls (1246 yd / 1139 m)
- S - 8 balls (1340 yd / 1225 m)
- M - 8 balls (1424 yd / 1320 m)
- L - 9 balls (1602 yd / 1465 m)
- XL - 10 balls (1780 yd / 1628 m)
- 2X - 11 balls (1958 yd / 1790 m)
- 3X - 12 balls (2136 yd / 1953 m)
- 4X - 13 balls (2314 yd / 2116 m)
- 5X - 14 balls (2492 yd / 2279 m)
Tools
- 3.5 mm US Hook Size E, or hook needed to meet gauge.
- Measuring tape, tapestry needle, stitch marker (2) optional, and scissors
Instructions
Front Panel & Back Panel
- Make 2
XS (S, M, L, XL, 2X, 3X, 4X, 5X)
Ch 80 (92, 100, 112, 120, 132, 140, 152, 160)
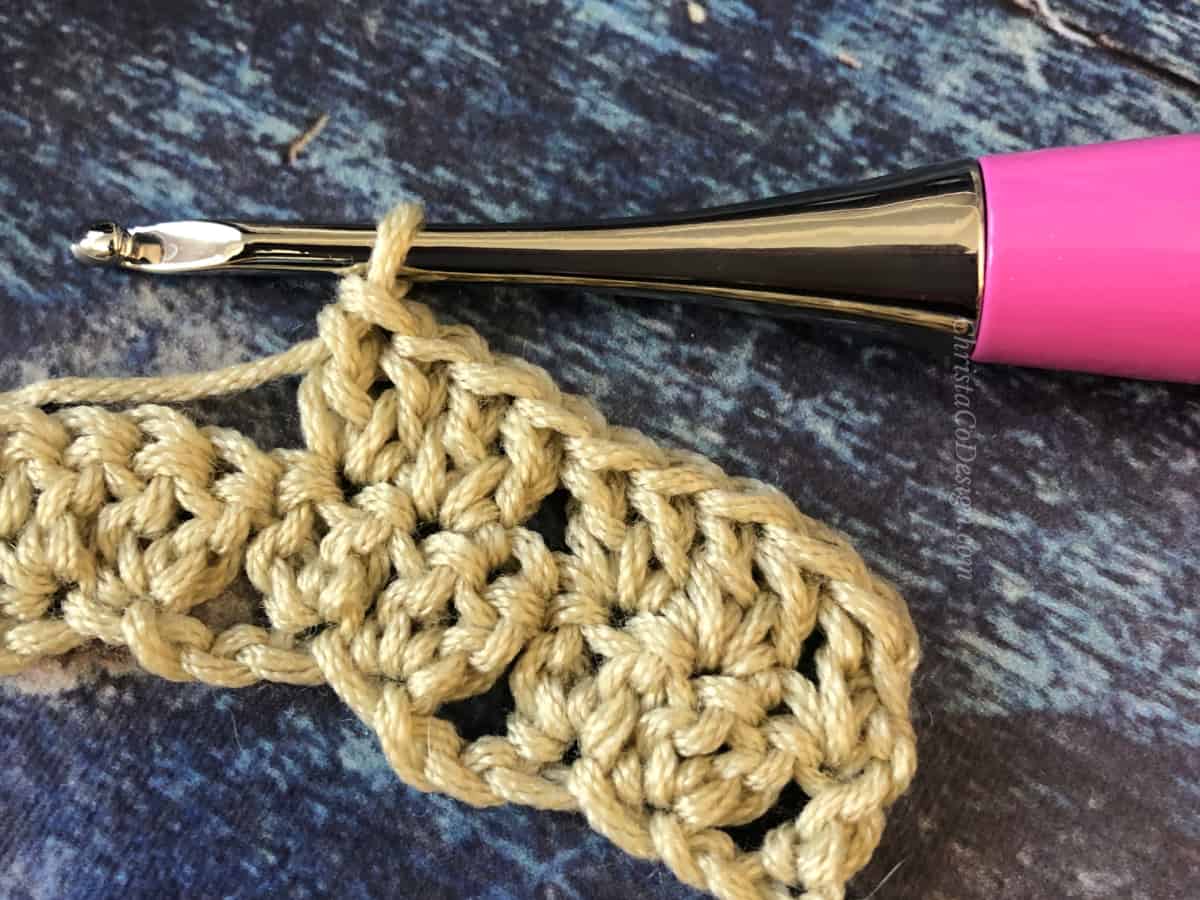
Row 1. (RS) Place 2 dc in the 5th ch from your hook(skipped chs count as the first dc),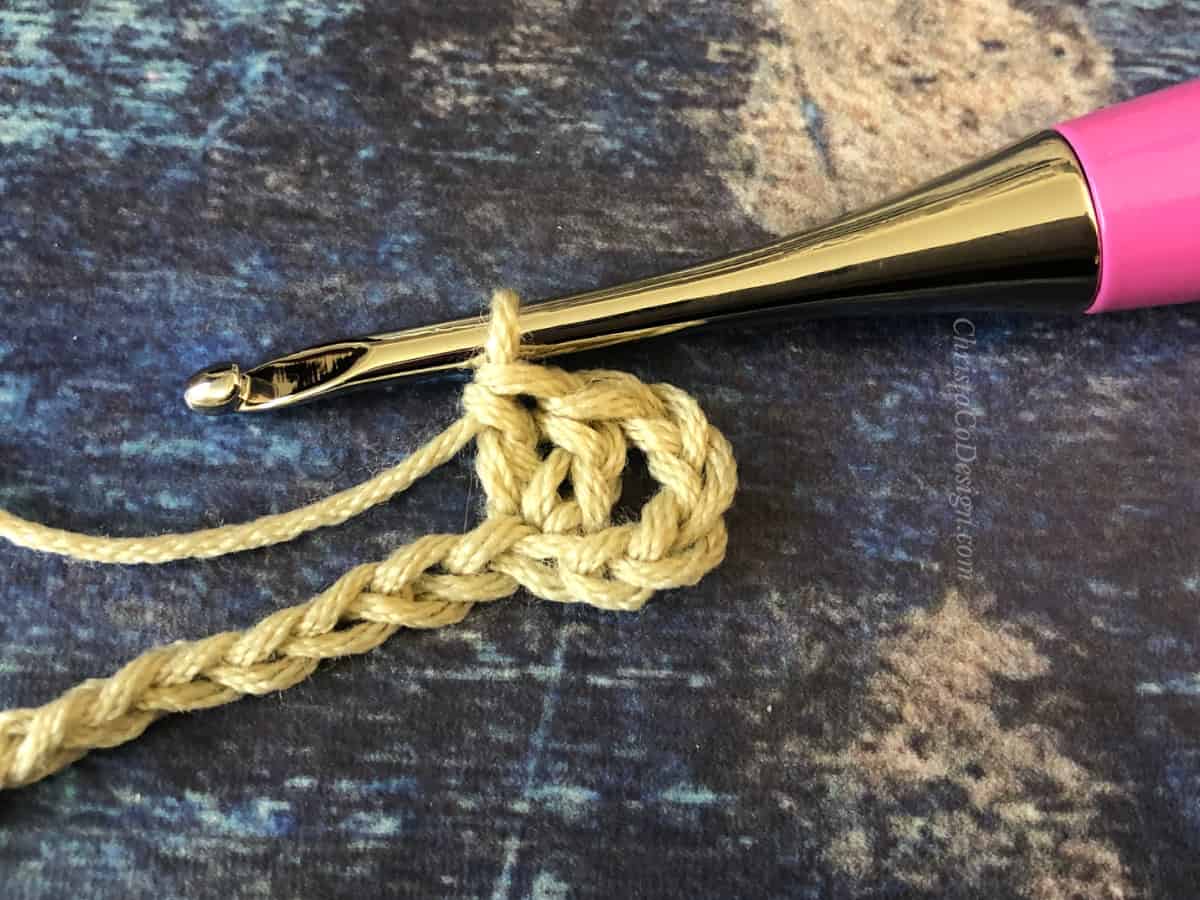
- Row 1 (cont.) 2 dc in the next ch,
- Row 1 (cont.) *{sk 2 chs, 2 dc in the next ch, 2 dc in the next ch} rep from * until the last two chs
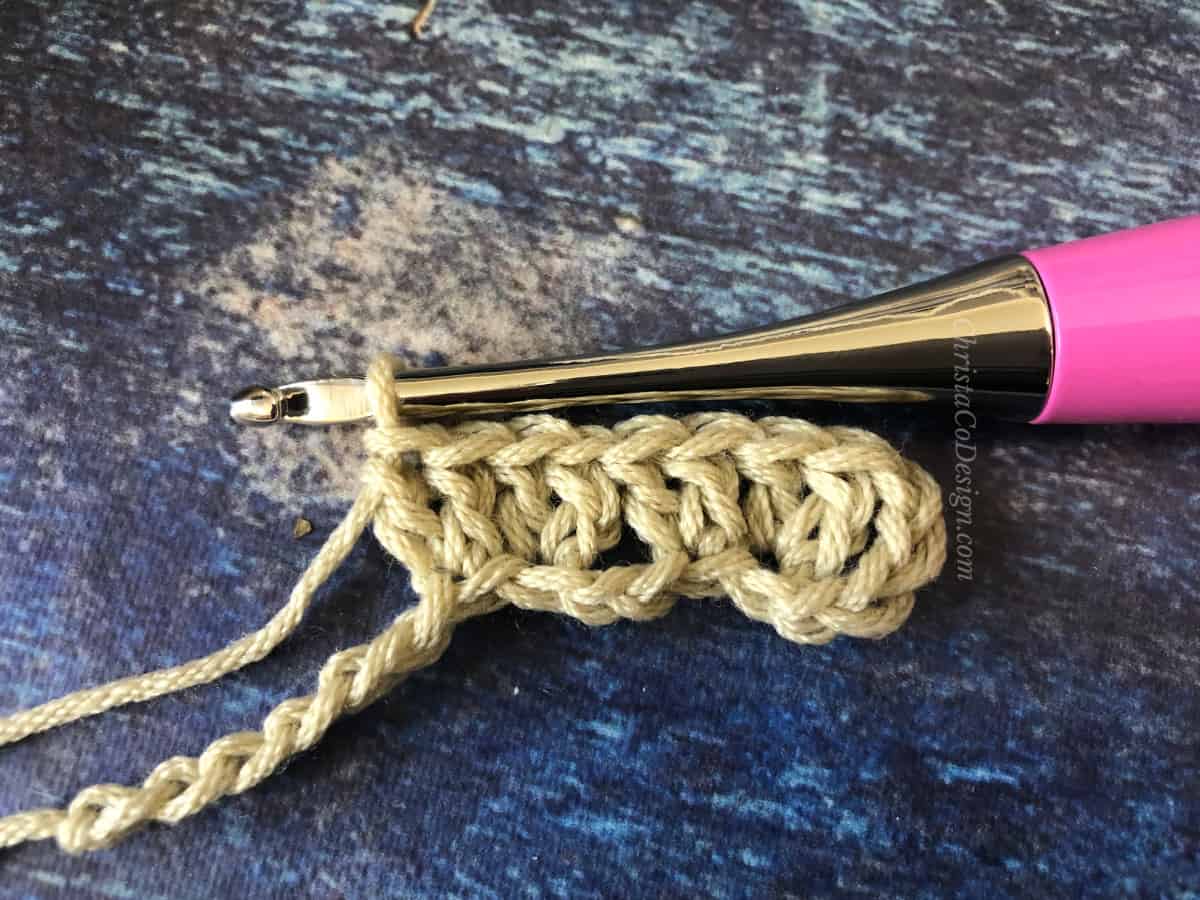
- Row 1 (cont.) then sk 1 ch and dc in the last, turn. (78, 90, 98, 110, 118, 130, 138, 150, 158 sts)
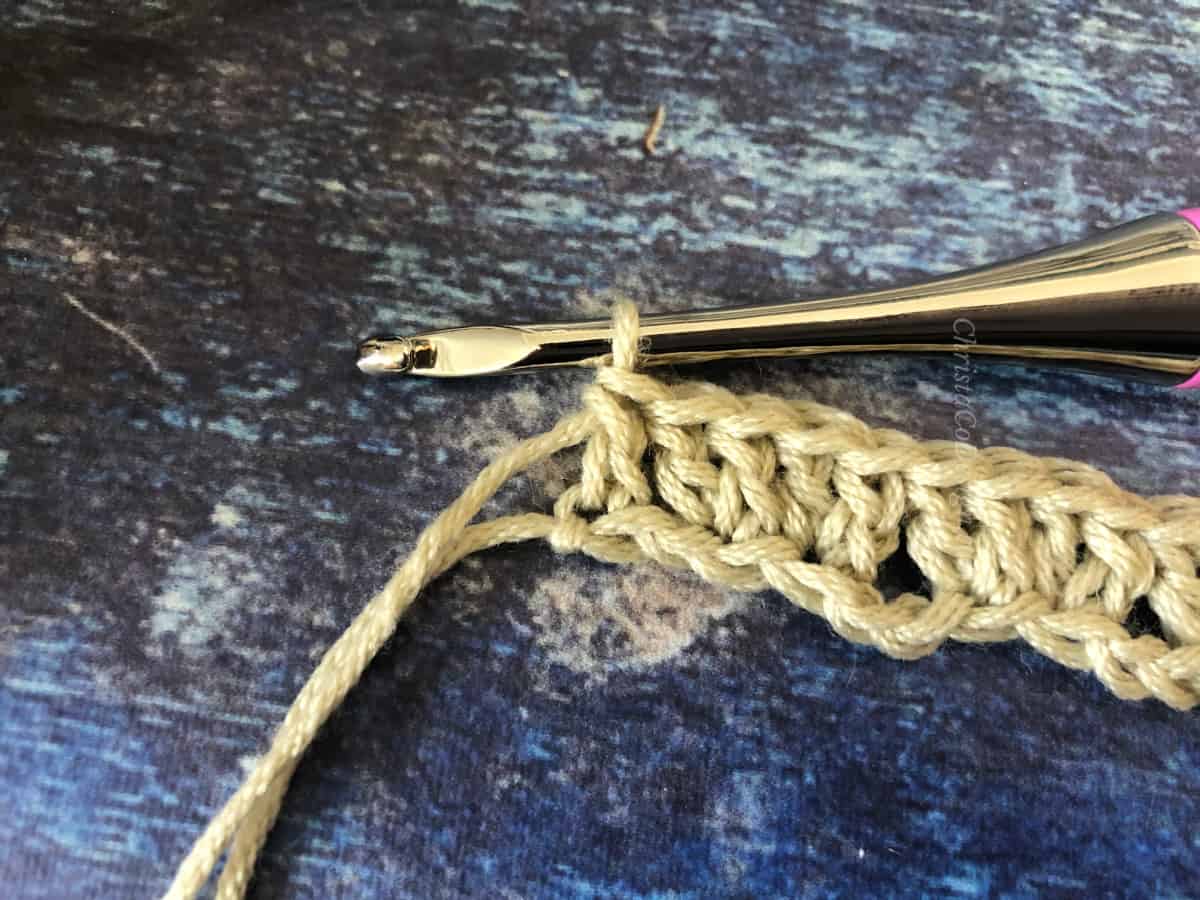
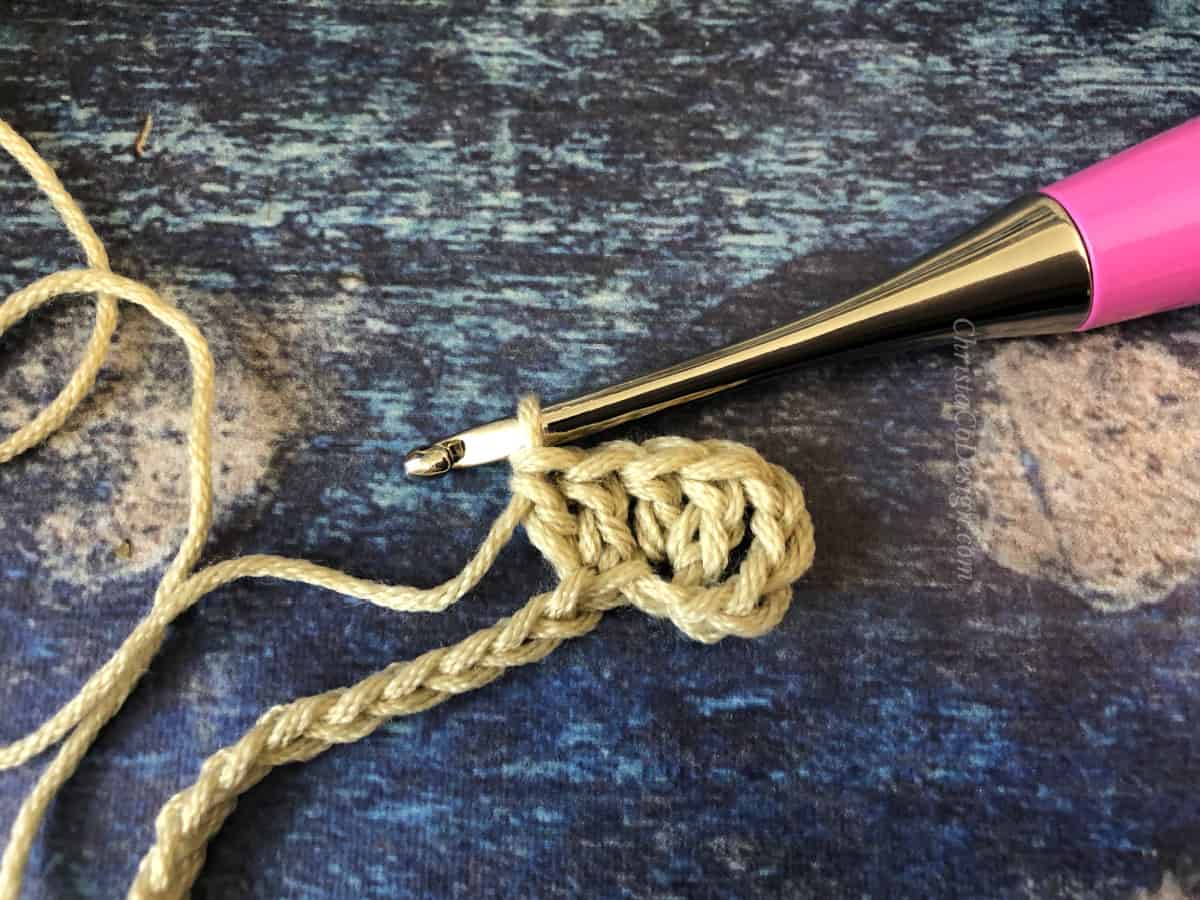
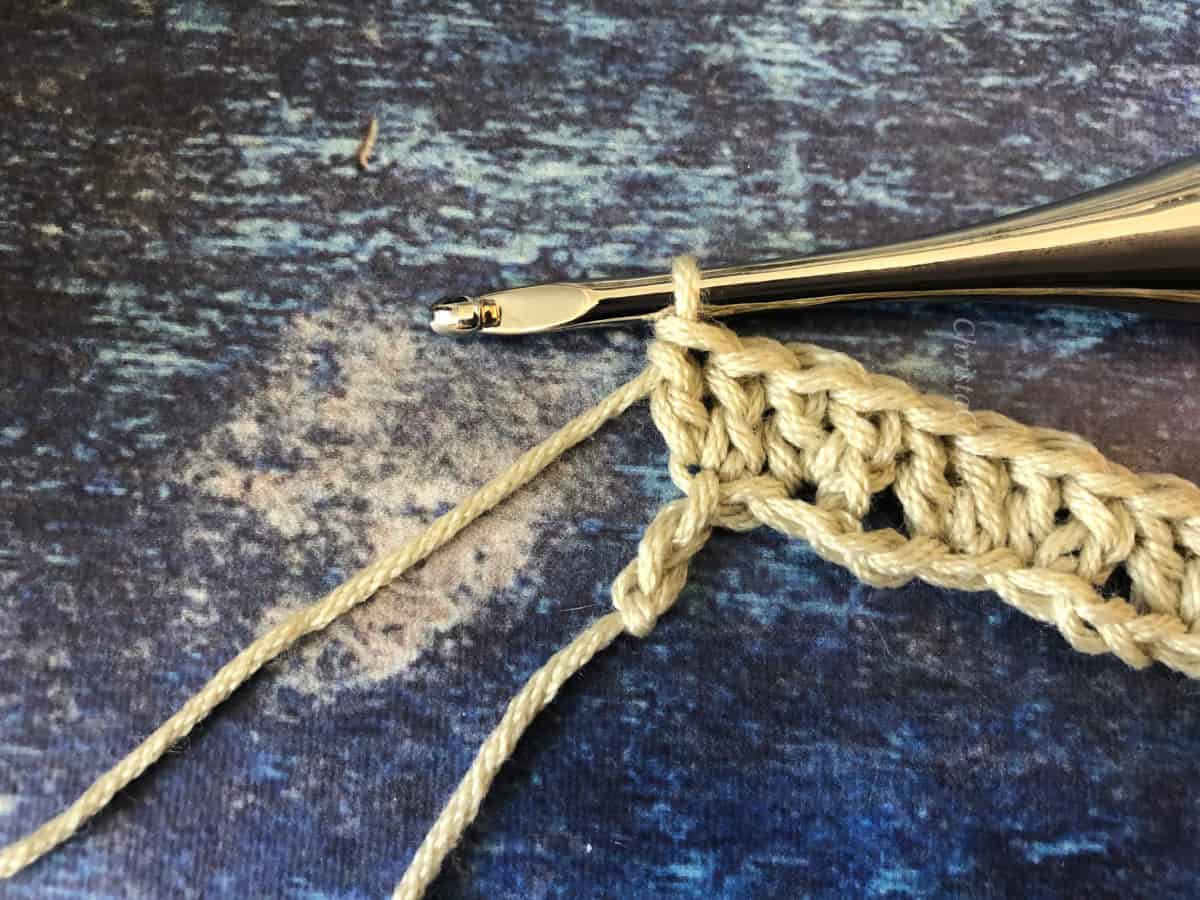
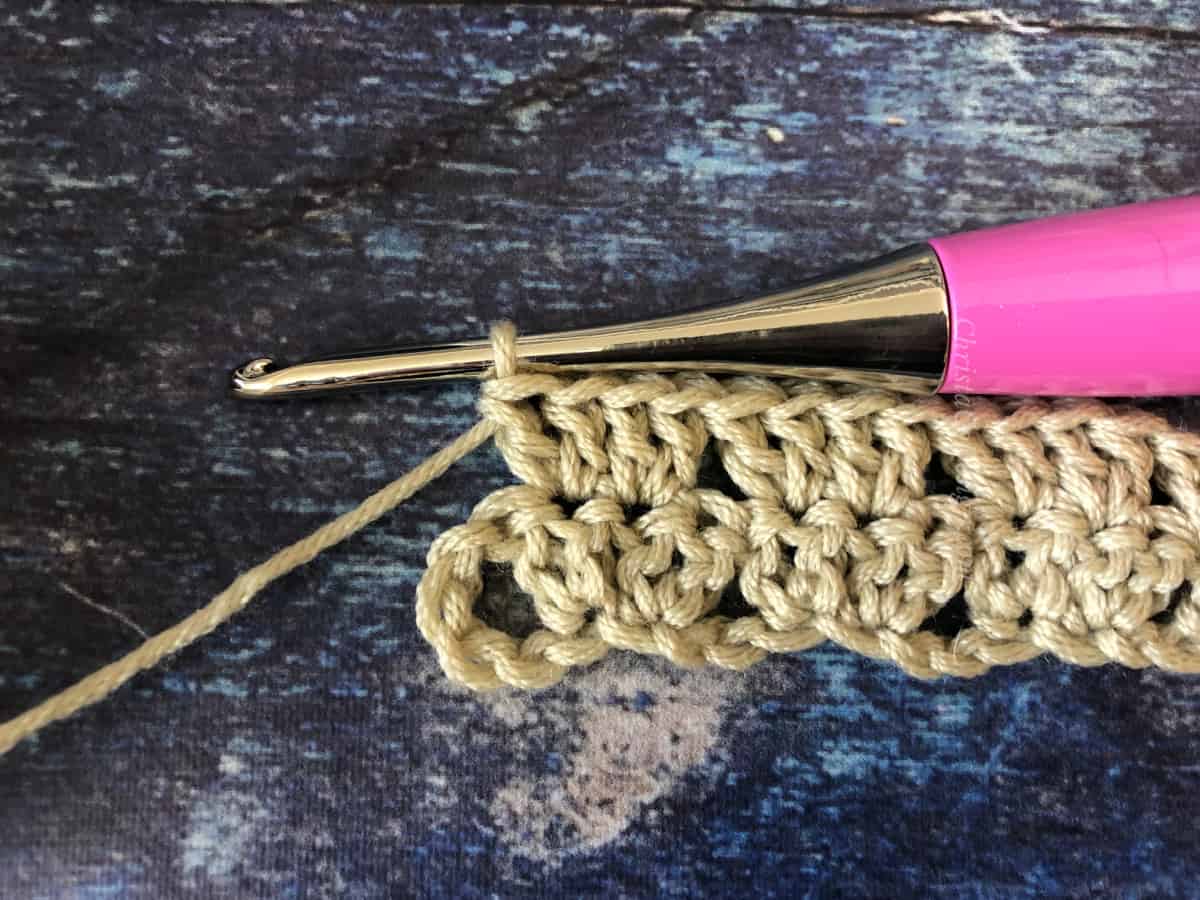
Row 2. Ch 3, sk the next dc,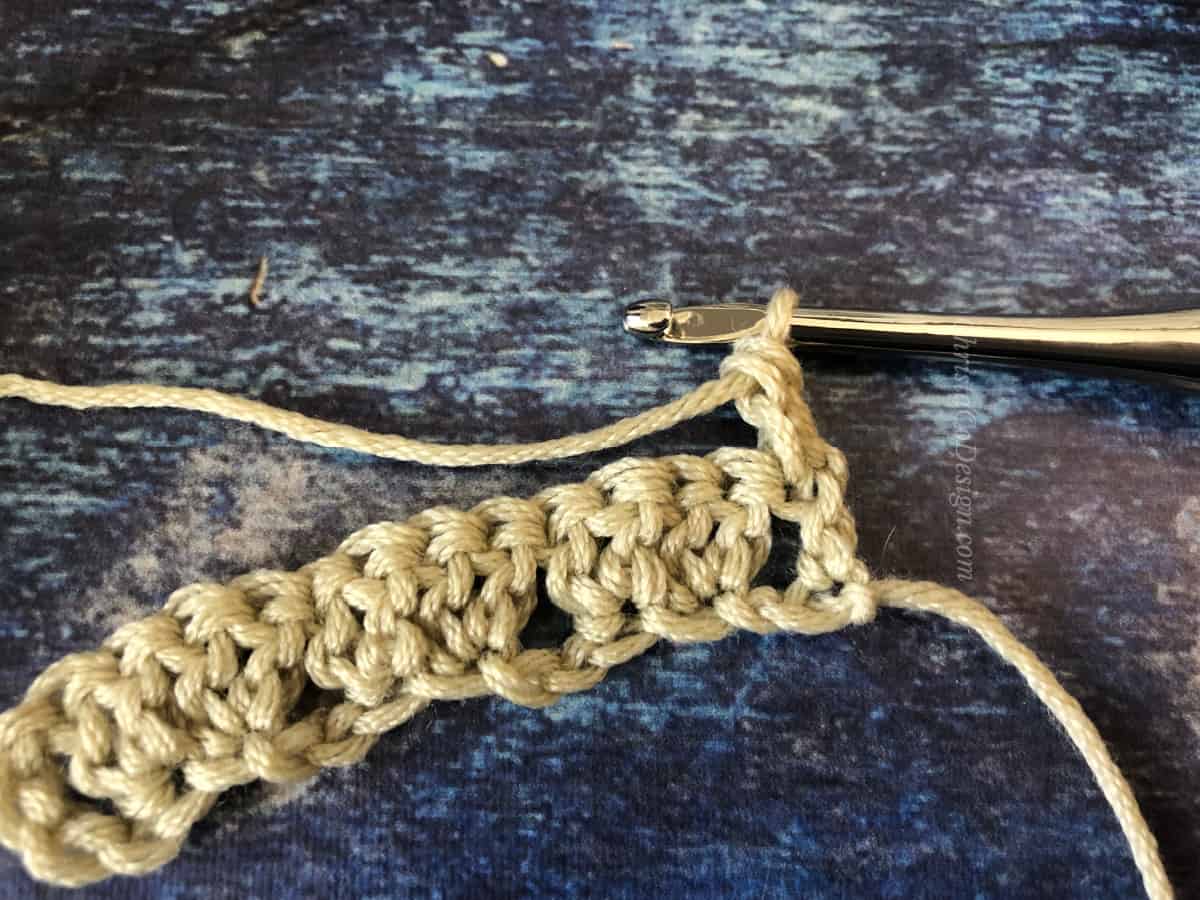
- Row 2 (cont.) 2 dc in the next dc, 2 dc in the next dc,

- Row 2 (cont.) *{sk the next two dc, 2 dc in the next dc, 2 dc in the next dc} rep from * until the last two dcs
- Row 2 (cont.) then sk the next dc and dc in the last, turn. (78, 90, 98, 110, 118, 130, 138, 150, 158 sts)

Rows 3 - 57 (57, 59, 59, 61, 61, 63, 63, 65) Ch 3, sk the next dc, 2 dc in the next dc, 2 dc in the next dc, *{sk the next two dc, 2 dc in the next dc, 2 dc in the next dc} rep from * until the last two dcs then sk the next dc and dc in the last, turn. - Repeat Row 3 until work = 20.5” (20.5”. 21.5”, 21.5”, 22”, 22”, 23”, 23”, 23.5”) in / 52 (52, 54.5, 54.5, 56, 56, 58.5) cm, or for the desired length.
- Cut yarn and leave a long tail for seaming.
- Repeat for second panel.
Sleeves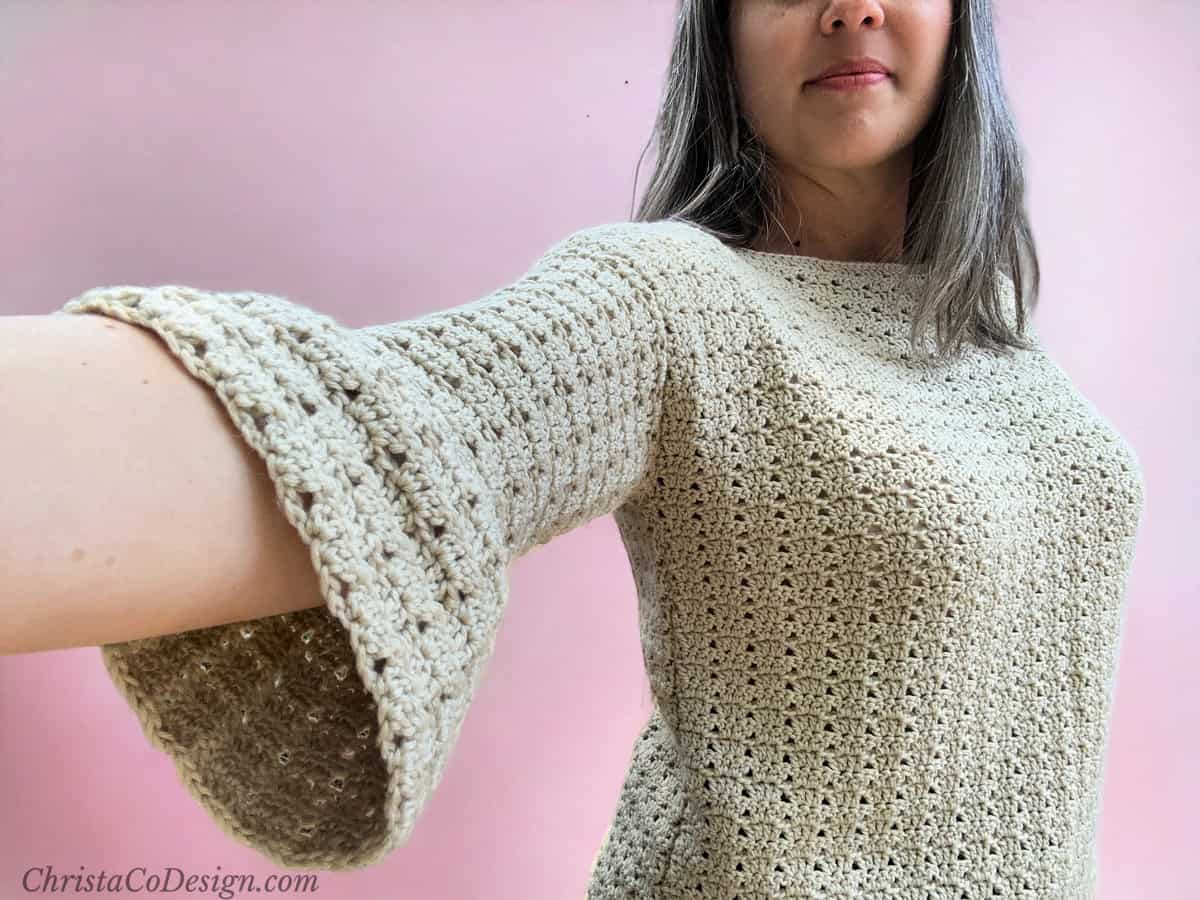
- Make 2.
Work in the round, but turn after each rnd, so you’ll work on both sides.
Stitch multiple for sleeves is 8 for the starting chain.
XS (S, M, L, XL, 2X, 3X, 4X, 5X)
Ch 80 (88, 96, 104, 104, 112, 120, 128, 136) join to first ch with sl st to work in the round.
Rnd 1. Ch 3, dc in same ch, 2 dc in next ch, *{sk next 2 chs, 2 dc in next ch, 2 dc in next ch} rep from * until last 2 chs, sk last 2 chs, join with sl st to top of 3rd ch, turn. (80, 88, 96, 104, 104, 112, 120, 128, 136 sts) - Rnd 2. Sl st over to 2nd dc, ch 3, dc in same st, 2 dc in next st, *{sk next 2 sts, 2 dc in next st, 2 dc in next st} rep from * until last 2 sts, sk last 2 sts, sl st to top of 3rd ch, turn. (80, 88, 96, 104, 104, 112, 120, 128, 136 sts)
- Rnds 3 - 8. Rep Rnd 2 for 8 rnds total, or work measures 3” tall.

- Rnd 9. Ch 1, sc in same st, sc in next 5 sts, sc2tog, *{sc in next 6 sts, sc2tog} rep from * around, join with sl st to first sc, turn. (70, 77, 84, 91, 91, 98, 105, 112, 119 sts)
Rnd 10. Ch 1, sc in same st, sc in next 4 sts, sc2tog, *{sc in next 5 sts, sc2tog} rep from * around, join with sl st to first sc, turn. (60, 66, 72, 78, 78, 84, 90, 96, 102 sts)
Rnd 11. Ch 3, dc in same st, 2 dc in next dc, *{sk next 2 sts, 2 dc in next st, 2 dc in next st} rep from * until last 2 sts, sk last 2 sts, sl st to top of 3rd ch, turn. (60, 66, 72, 78, 78, 84, 90, 96, 102 sts)
Rnd 12. Sl st over to 2nd dc, Ch 3, dc in same st, 2 dc in next st, *{sk next 2 sts, 2 dc in next st, 2 dc in next st} rep from * until last 2 sts, sk last 2 sts, sl st to top of 3rd ch, turn. (60, 66, 72, 78, 78, 84, 90, 96, 102 sts)
Rep Rnd 12 for 19 more rnds, or until sleeve length measures 12”, or to desired length.
Fasten off. Rep for second sleeve.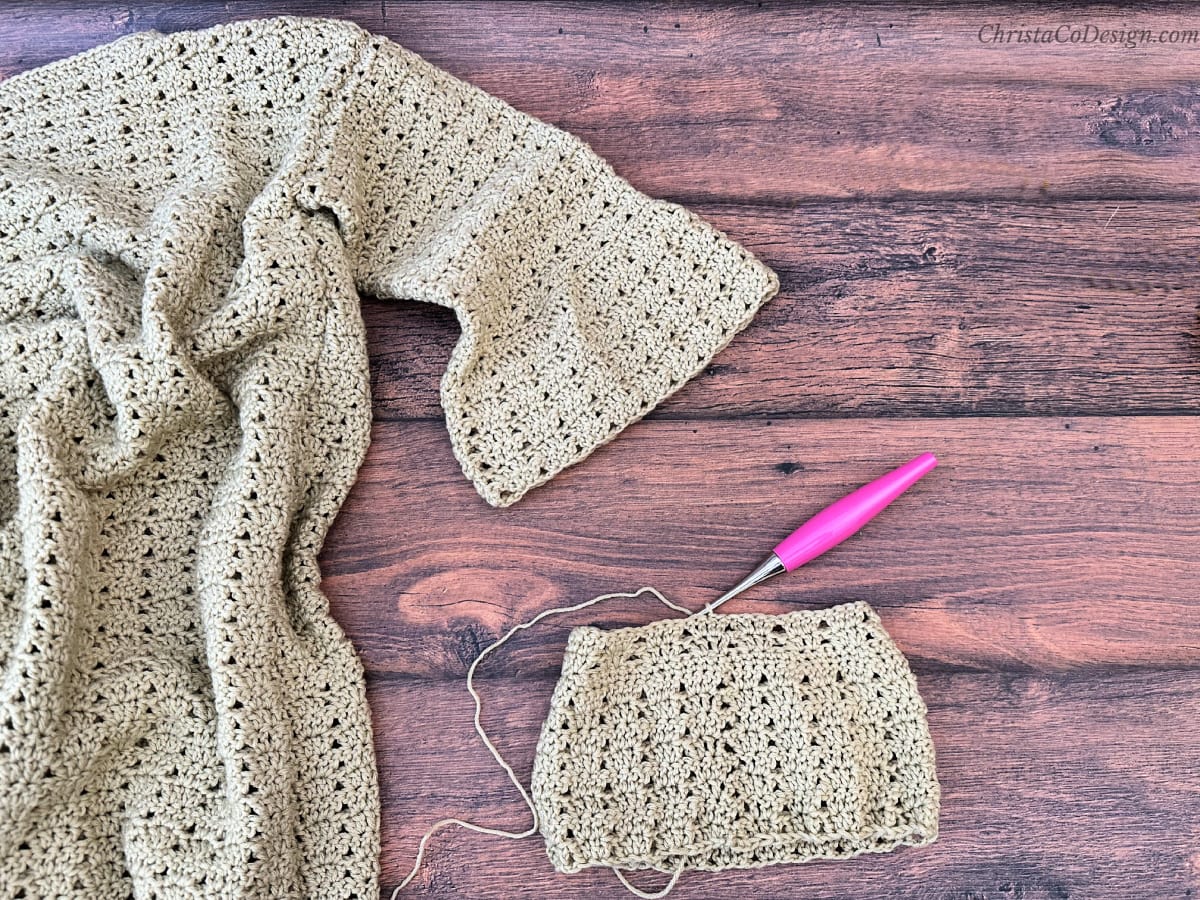
Assembly
Seaming Tips
- When sewing: Thread a yarn needle with a length of yarn that is double the number of inches you need to sew. This is usually plenty.
- You may use a whip stitch or mattress stitch to sew.
- Work on the WS of the fabric.
- When sewing two different pieces together be sure the stitches are facing the same way (make sure one is not upside down and that both RS are together). Use your start chain slip knot to help you identify Row 1 if needed.
- Start from the bottom corner or outer edge when possible to be sure you’re lined up evenly. If you start in the middle of an edge or row it’s easy to get “off.”
- It’s most important to match row to row and stitch to stitch to keep it even.

Seam the shoulders
- Lay the two panels on top of one another, with the RS together.
- Use a yarn needle and the long tails you left to sew the shoulder seams together on both sides.
- From outer edge, sew shoulders together for 14 (18, 22, 26, 30, 38, 42, 46, 50 sts) = 3” (3.5”, 4.5”, 5”, 6”, 7.5”, 8.5”, 9”, 10") in / 7.5 (9, 11.5, 12.5, 15, 19, 21.5, 23, 25.5) cm wide.
- Rep on other side. Boatneck style opening should be 10" (11", 11", 12", 12", 11", 11", 12", 12") in / 25.5 (28, 28, 30.5, 30.5, 28, 28, 30.5, 30.5) cm wide after seaming shoulders.
- Try it on now to see how the boatneck fits. Make any adjustments to the boatneck before continuing to seam the sides.
Finish off.
Seam the sides
- Use your measuring tape and stitch marker to mark where to stop sewing on the sides and leave the armhole opening. Measure 6” (6.75”, 7.75”, 8”, 8”, 8.5”, 9”, 9.75”, 10.25”) in / 15 (17, 19, 20.5, 20.5, 21.5, 23, 25, 26) cm down from the top of the shoulder and pm. Mark the same row on the opposite side of the panel to be sure they’re even.
- Sew the sides together. You may use a whip stitch or mattress stitch to sew. Start from the bottom corner and stop where you marked for the armhole. It’s important to match row to row to keep it even. Rep for other side.
Seam the Sleeves
- To sew sleeve to arm holes turn shirt inside out so you’re working on the WS.
- Keep sleeve RS out.
- Slide sleeve inside the shirt, and line up the end of the sleeve to the armhole opening of the shirt.
- Sew sleeve to armhole.
- Rep on other side.
Finishing
Neckline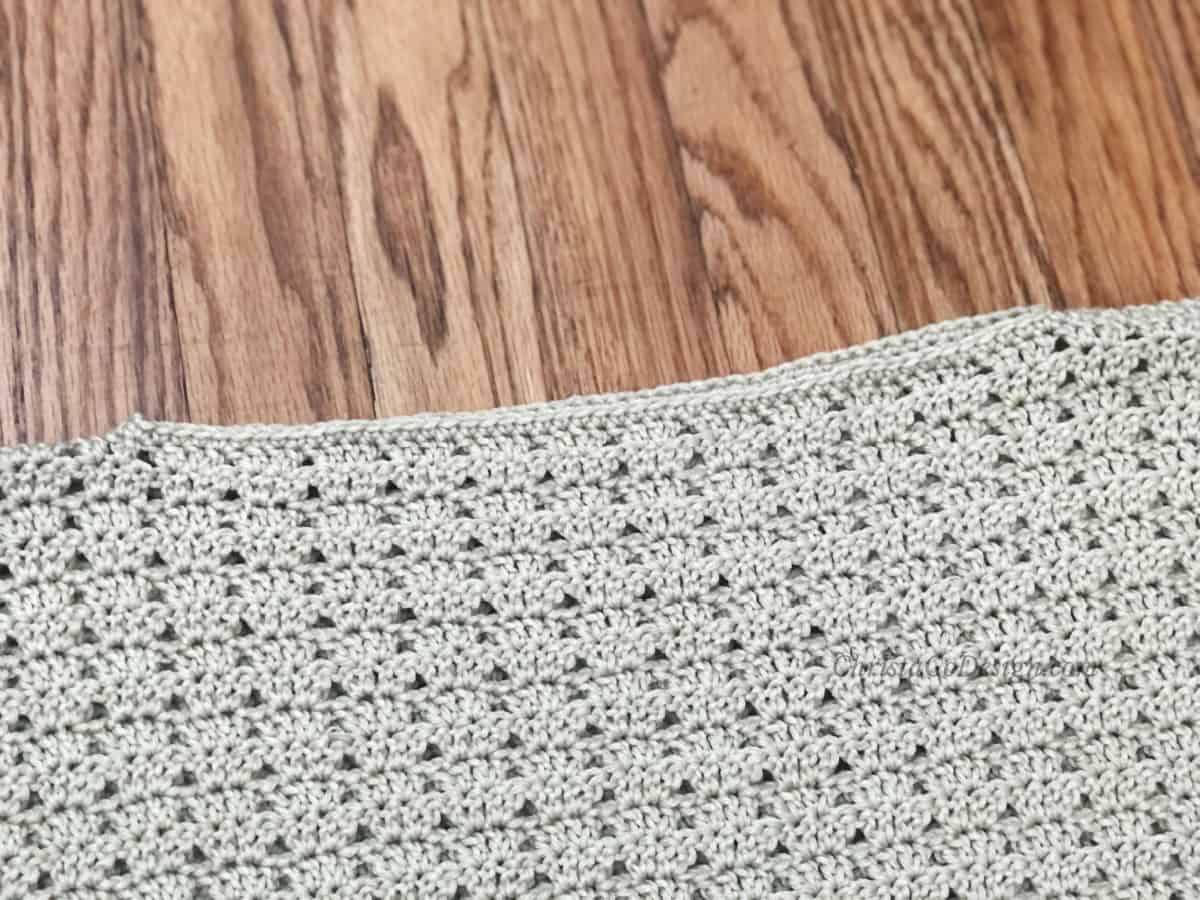
- To finish join yarn with a sl st to any stitch along the neckline, ch 1, sc in the same and in each st around, join with a sl st to first st and finish off.
Recommended Products
As an Amazon Associate and member of other affiliate programs, I earn from qualifying purchases.