
Best Fitting Crochet Cardigan with V-Neck: Sera Cardigan
Learn how to crochet the Sera Cardigan. This free crochet cardigan pattern includes 9 women’s sizes. This cardigan is easy to crochet and even easier to wear.

This post contains affiliate links, I may earn a fee. Read more disclosure policy.
Join the ChristaCoDesign Newsletter
Never miss a pattern!
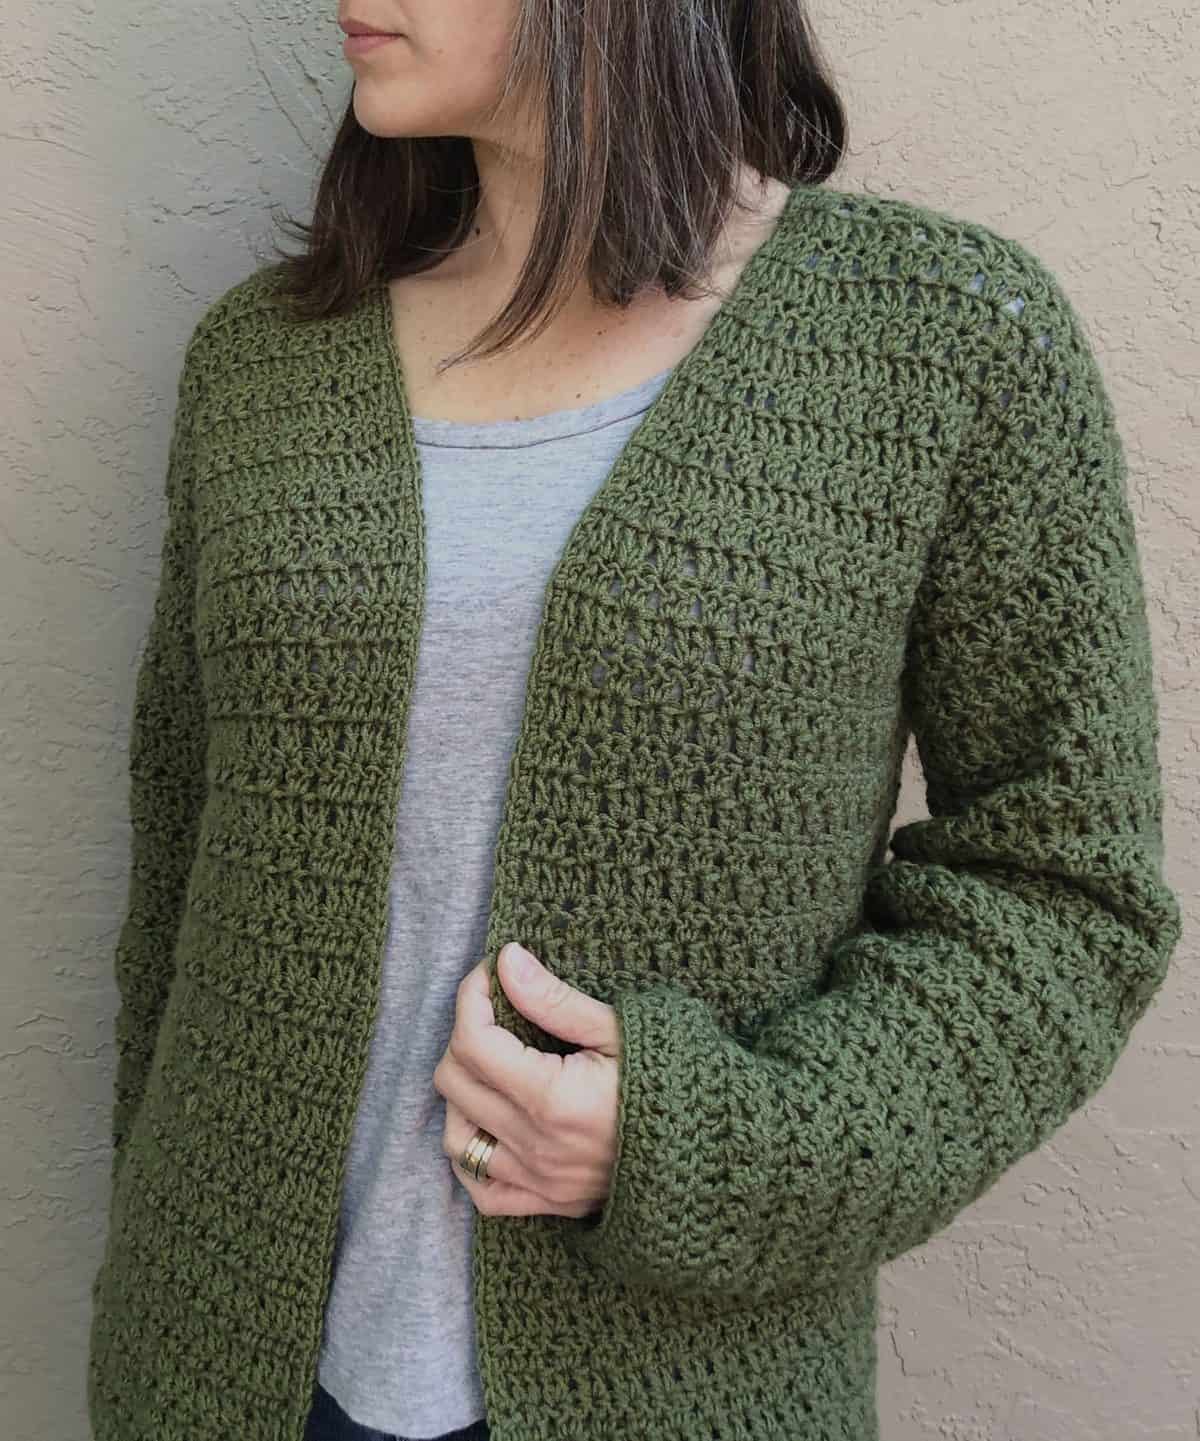
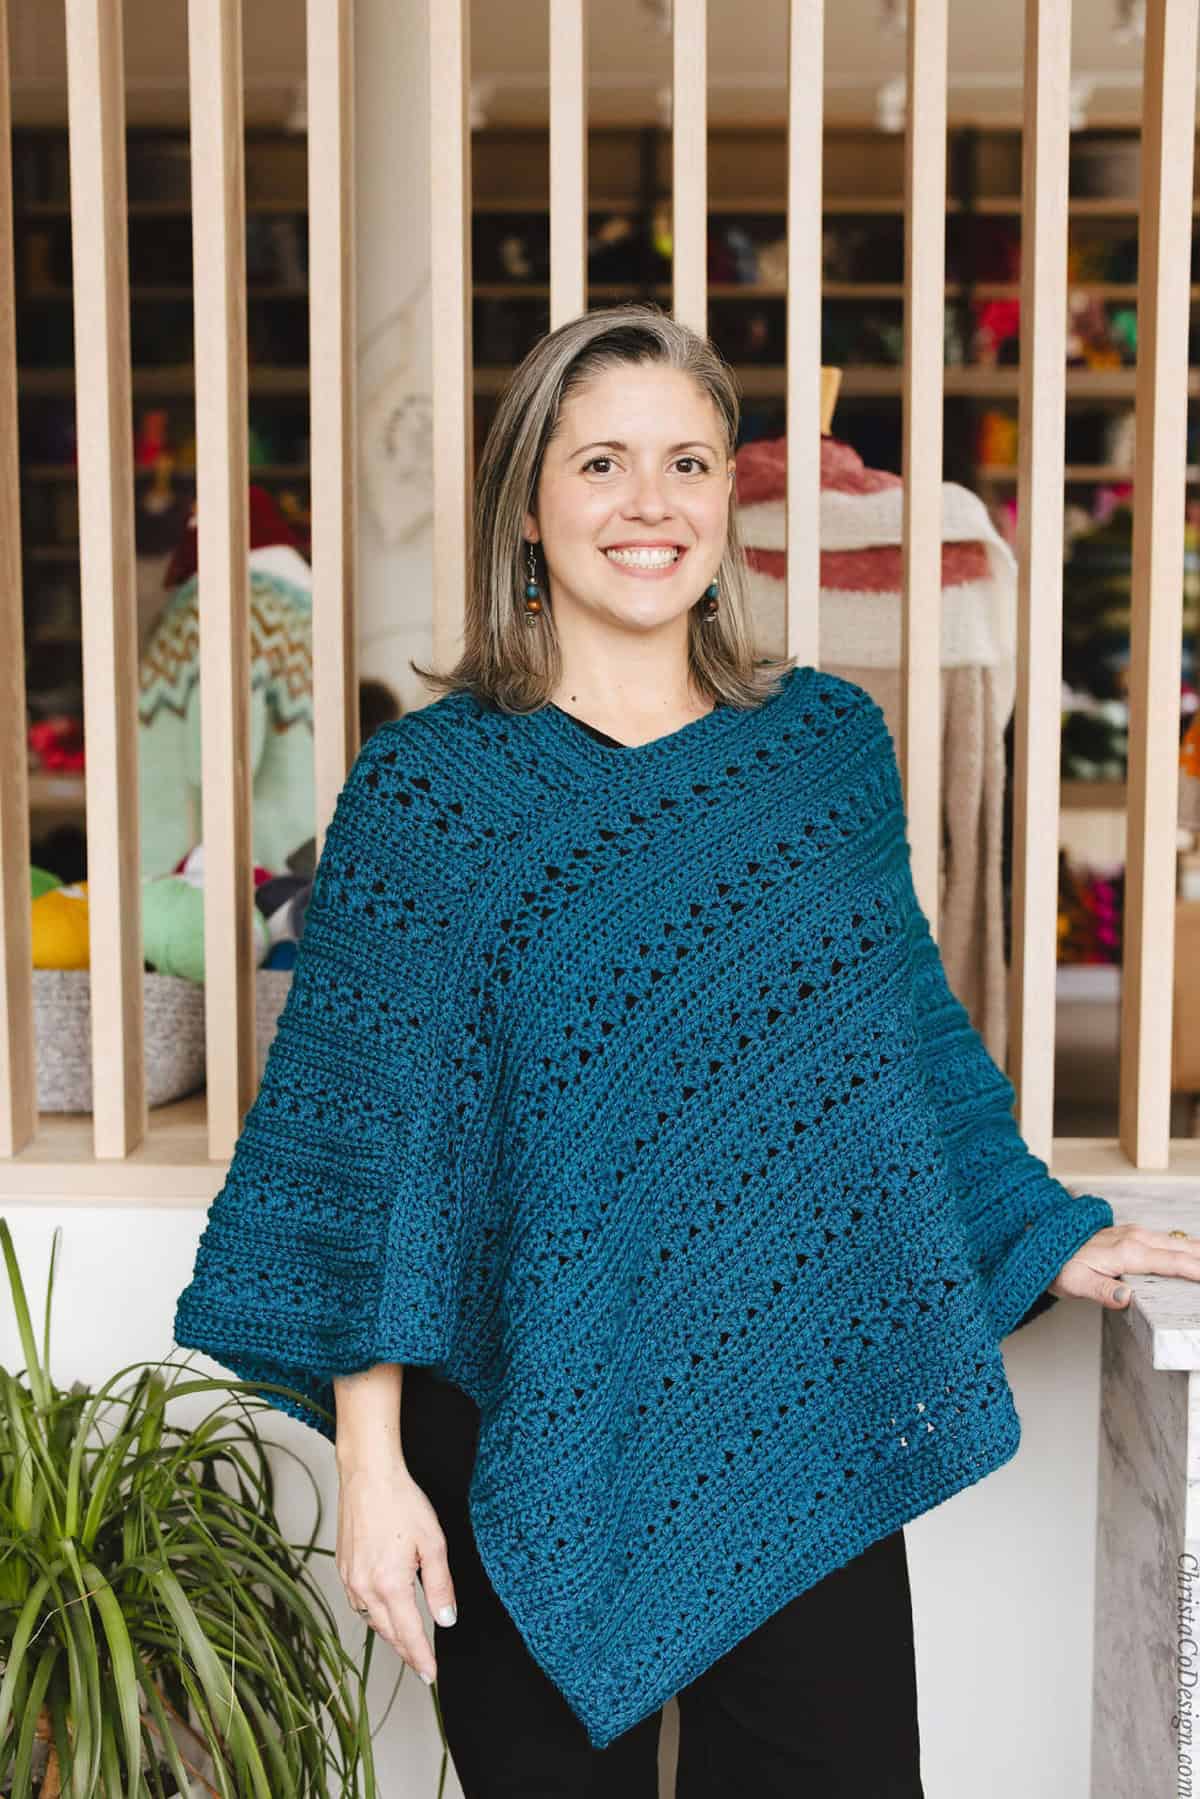
The Sera Cardigan is a lightweight and easy to layer cardigan sweater. Featuring a classic fit this crochet cardigan is comfortable for around the house or a day out. It’s perfect for an evening walk, or passeggiata serale.
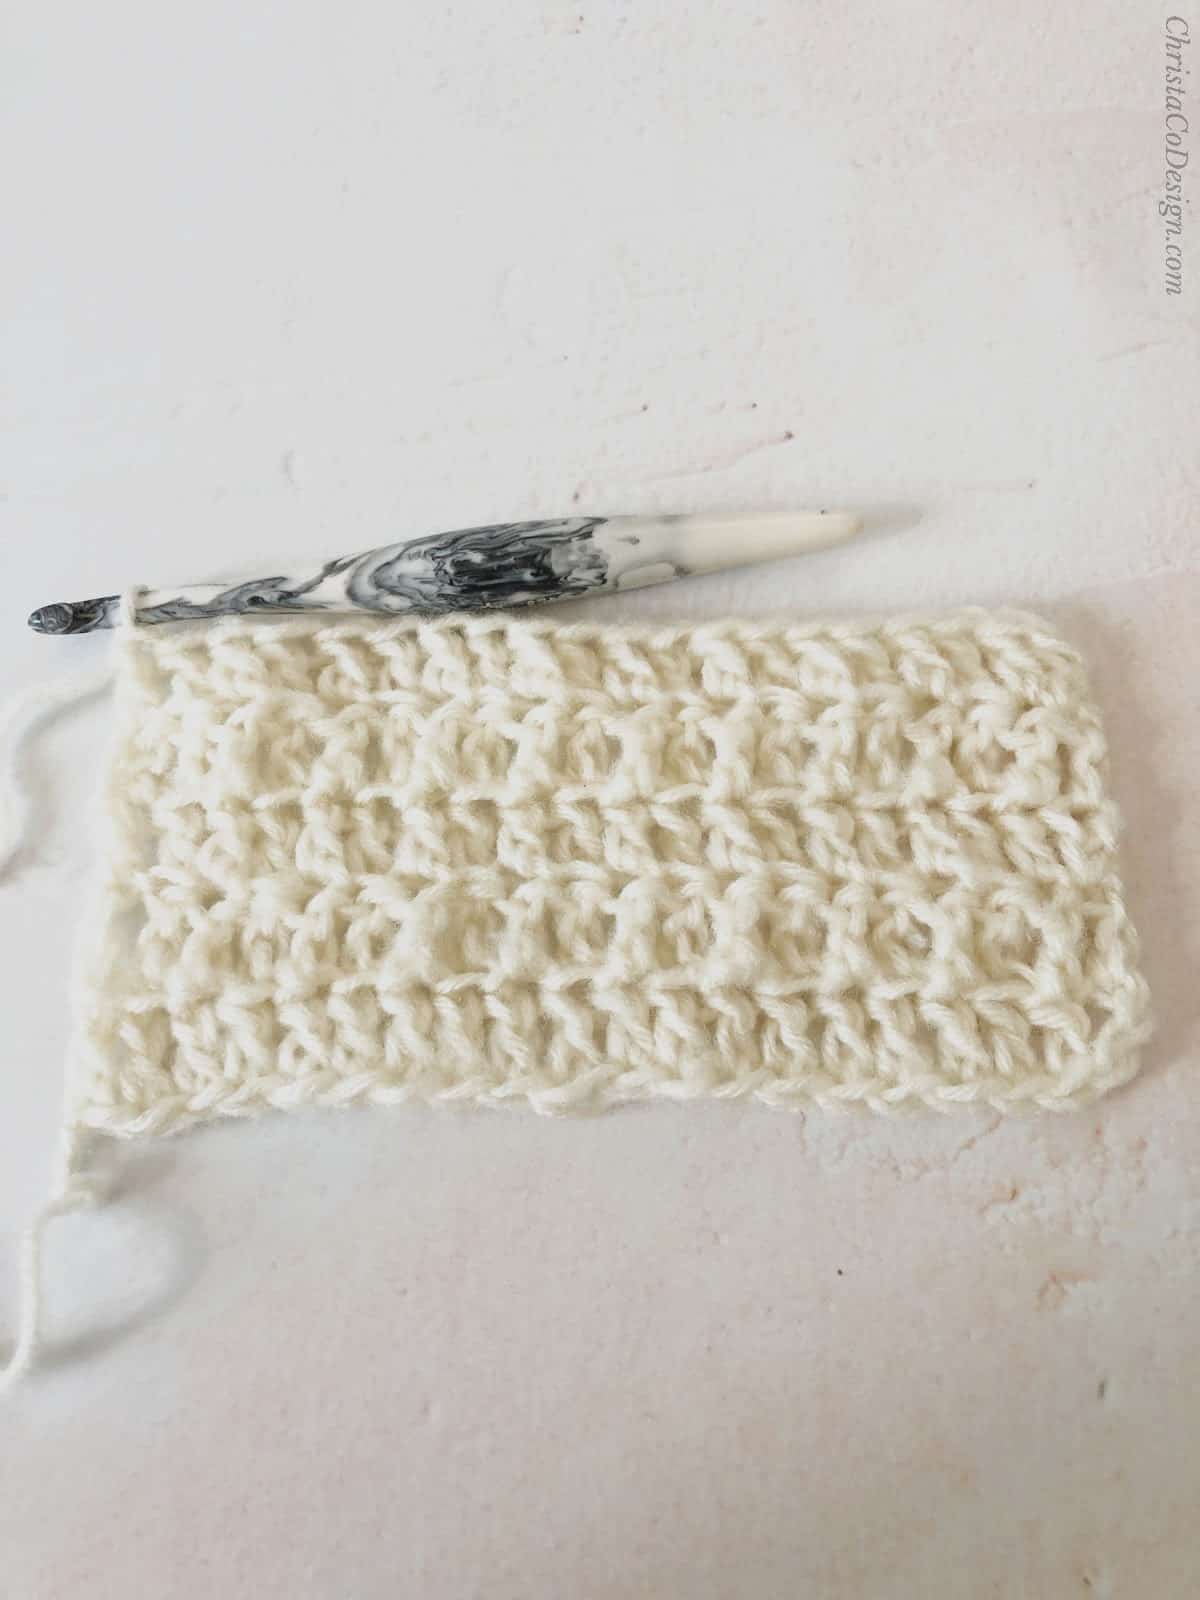
Made with double crochets, the stitch pattern is simple and easy to remember. I wanted minimal seaming on this design, but all the customizing ability.
Thanks to WeCrochet for sending me the yarn to make this pattern.
Purchase the ad-free, well formatted printable PDF Pattern from my shop. Scroll down for the free pattern!
Purchase My Ad-Free PDF Patterns In Your Favorite Shop Here:
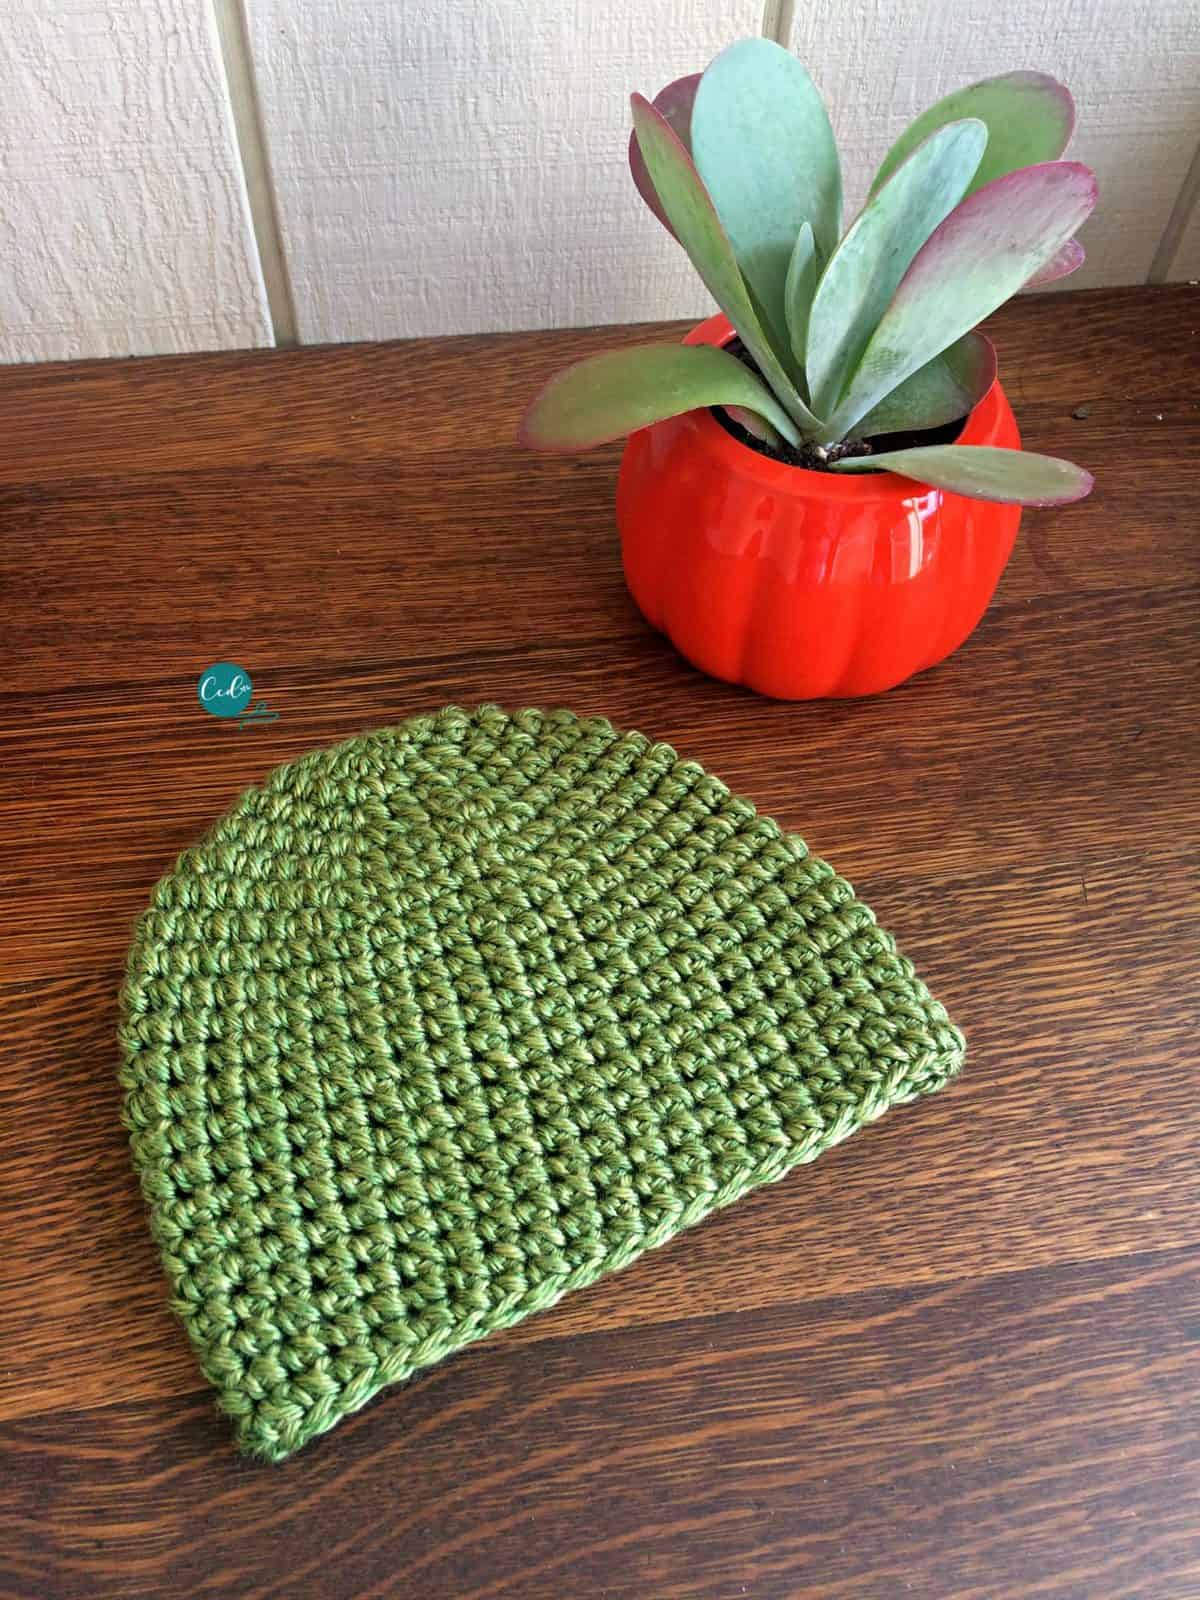
This great fitting cardigan pattern just got a yarn update since the original yarn has been discontinued. The Gloss DK yarn also comes in a variety of gorgeous colors.
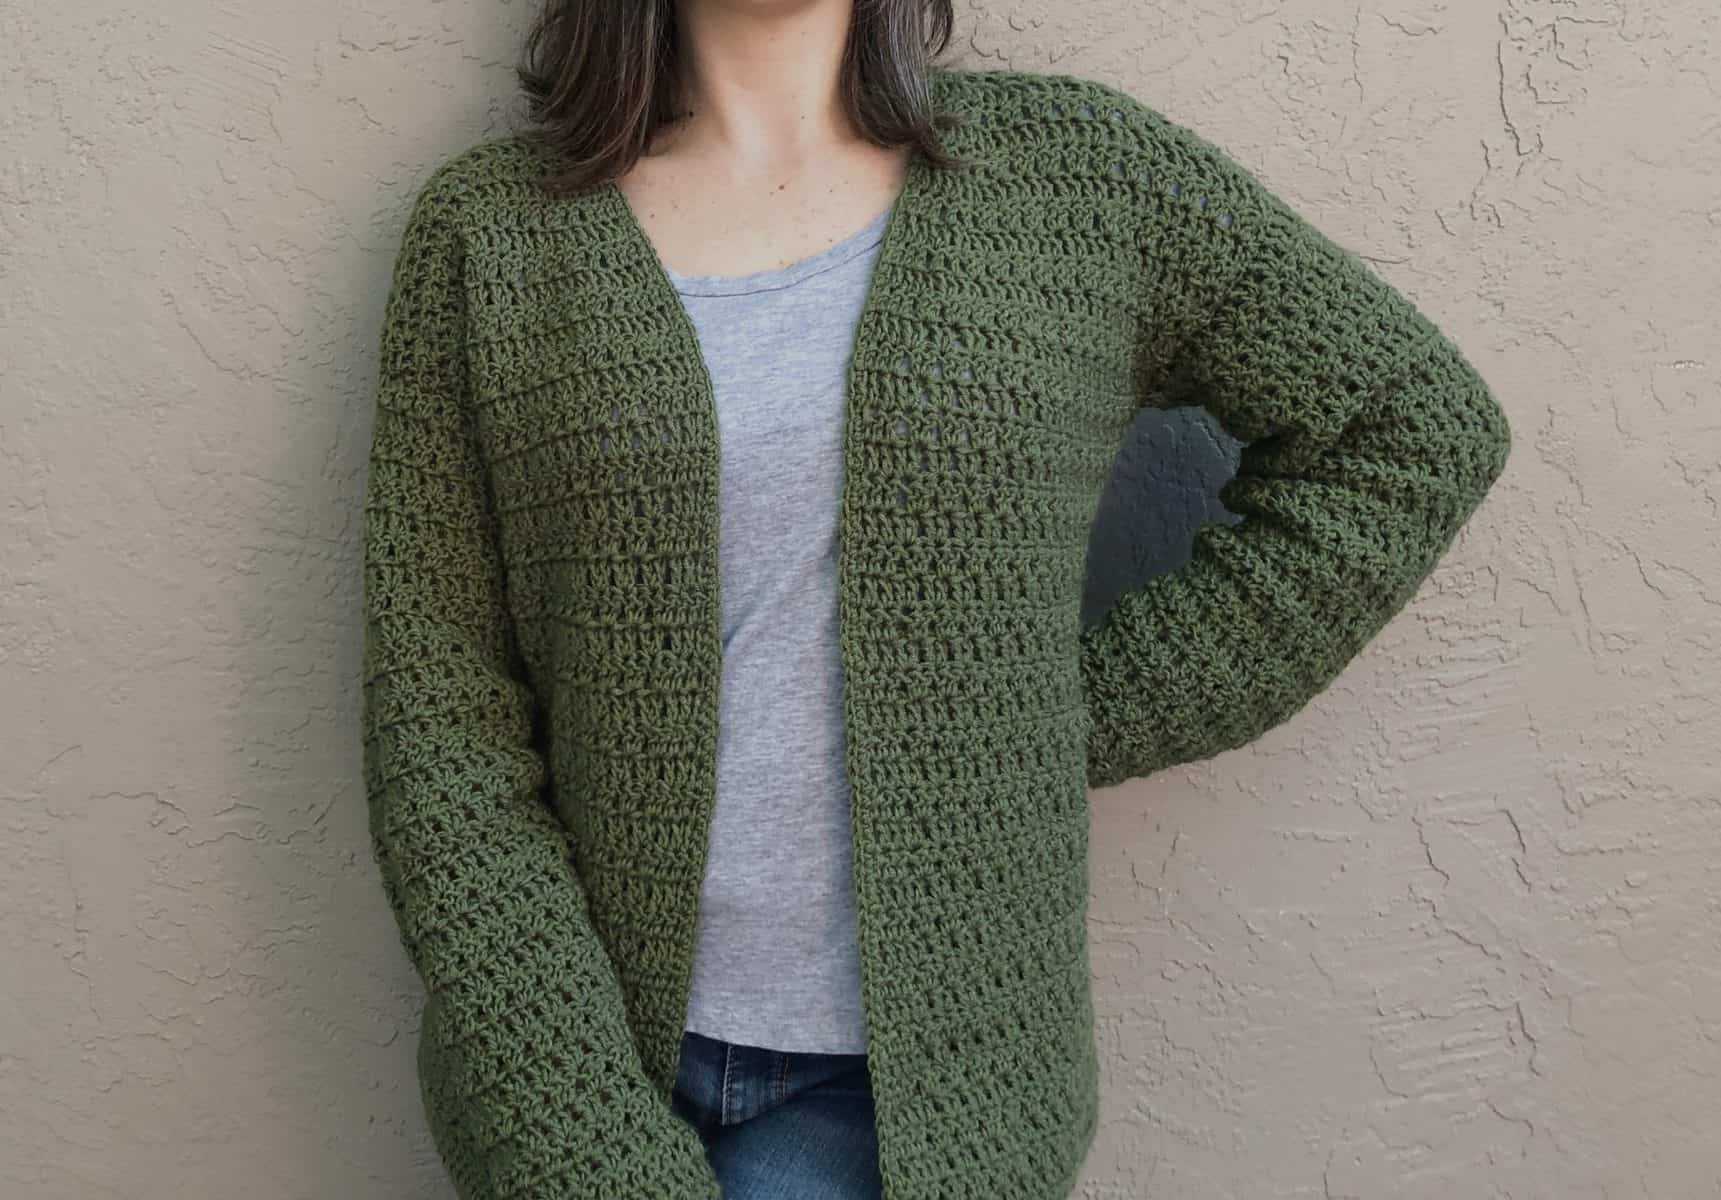
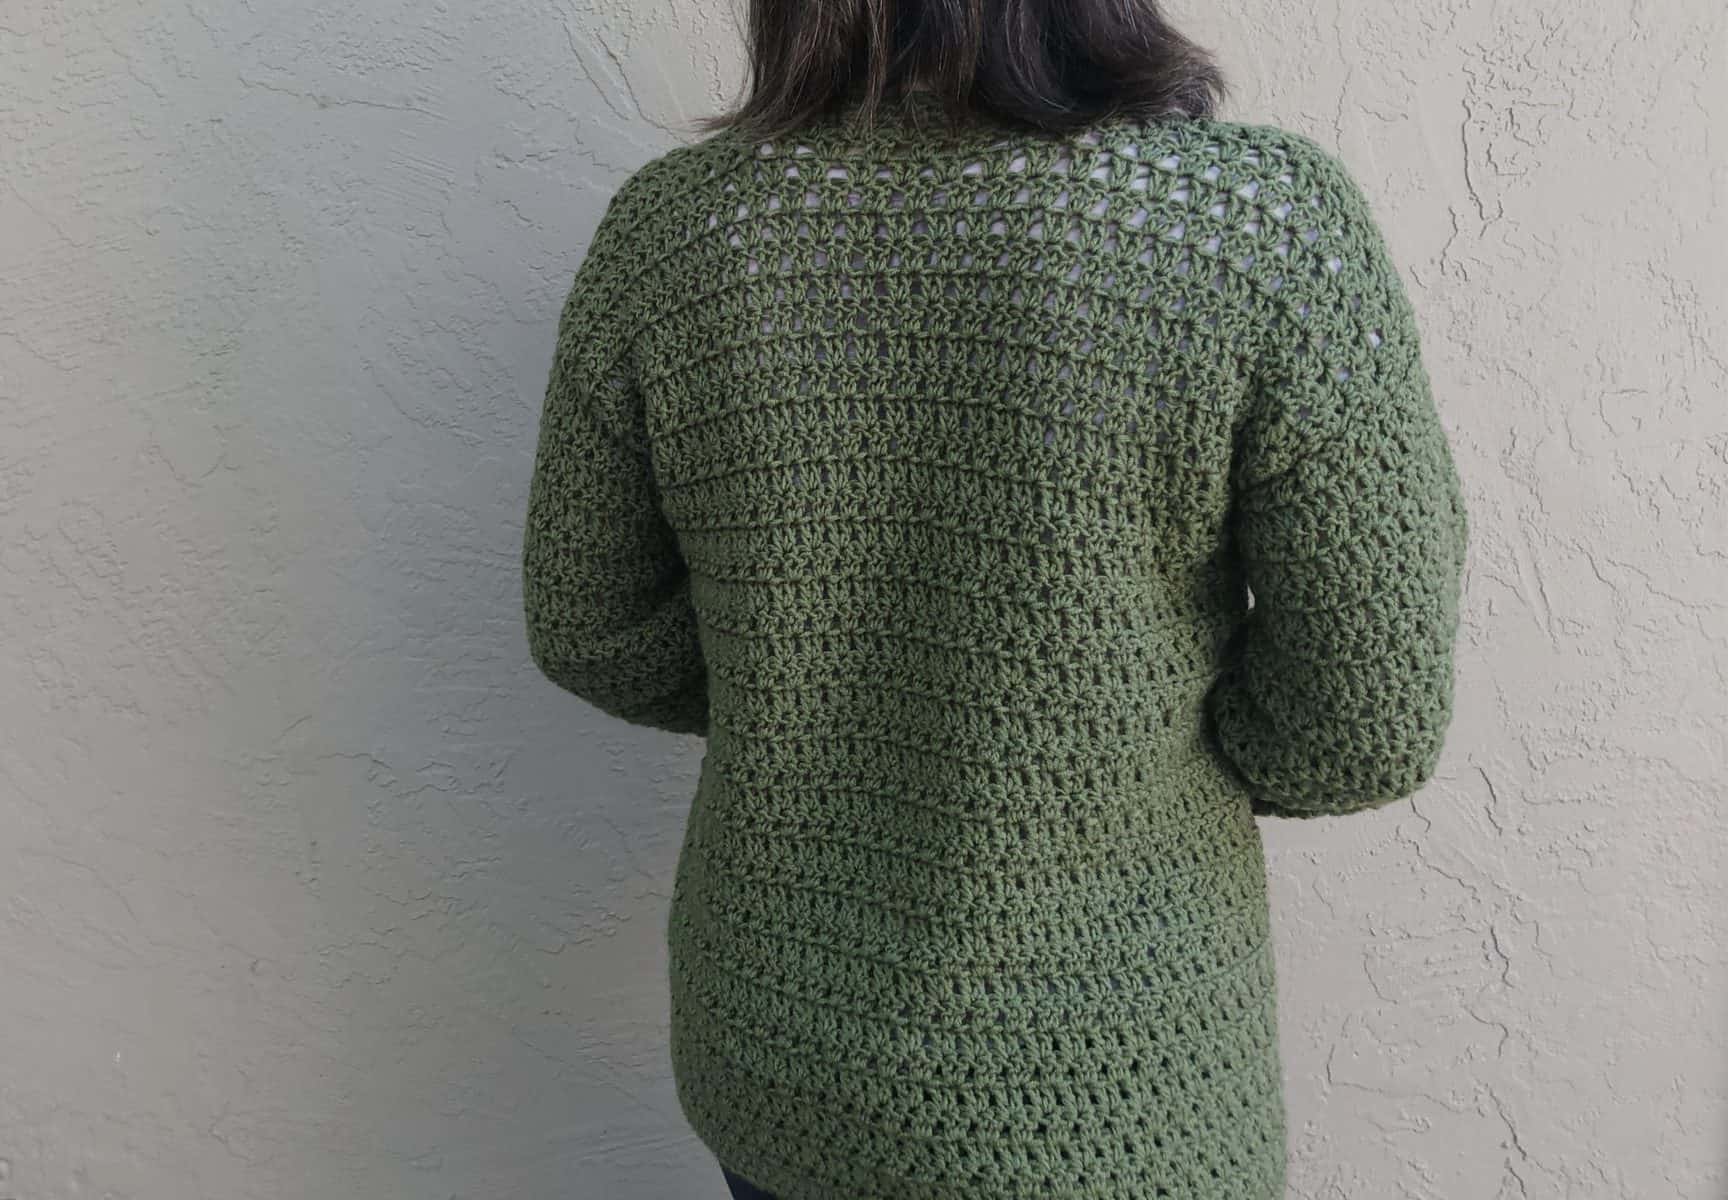
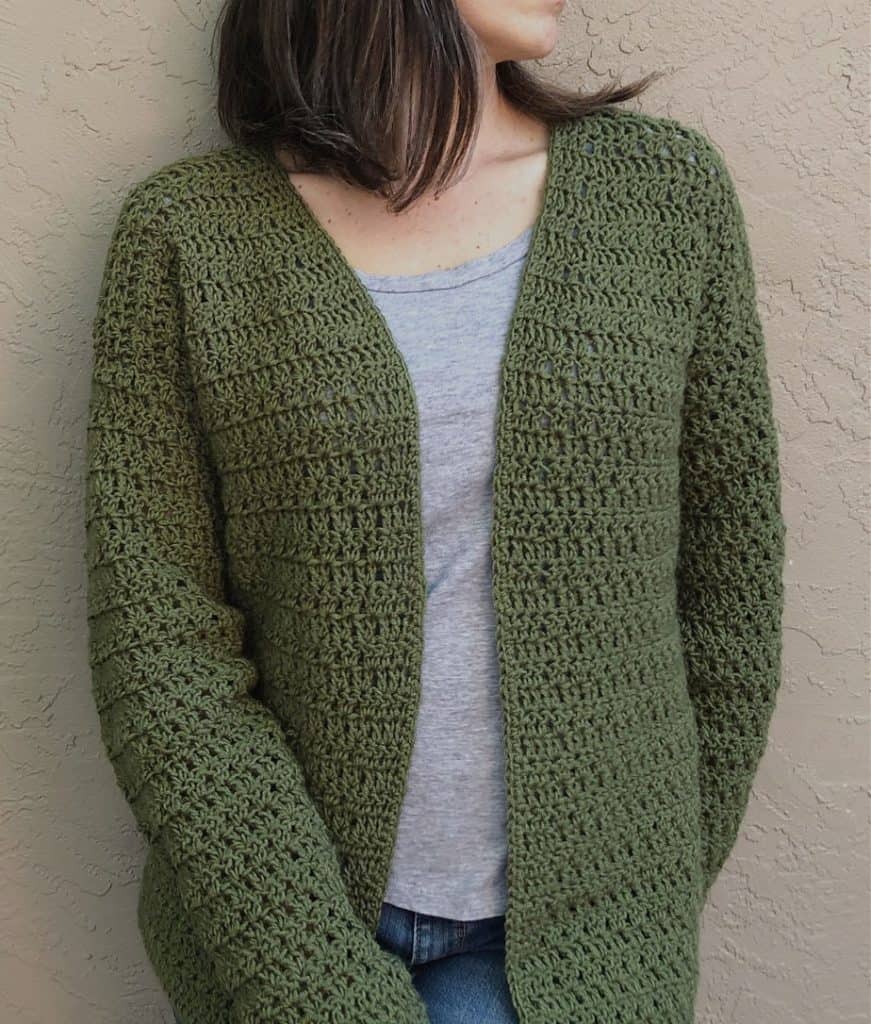
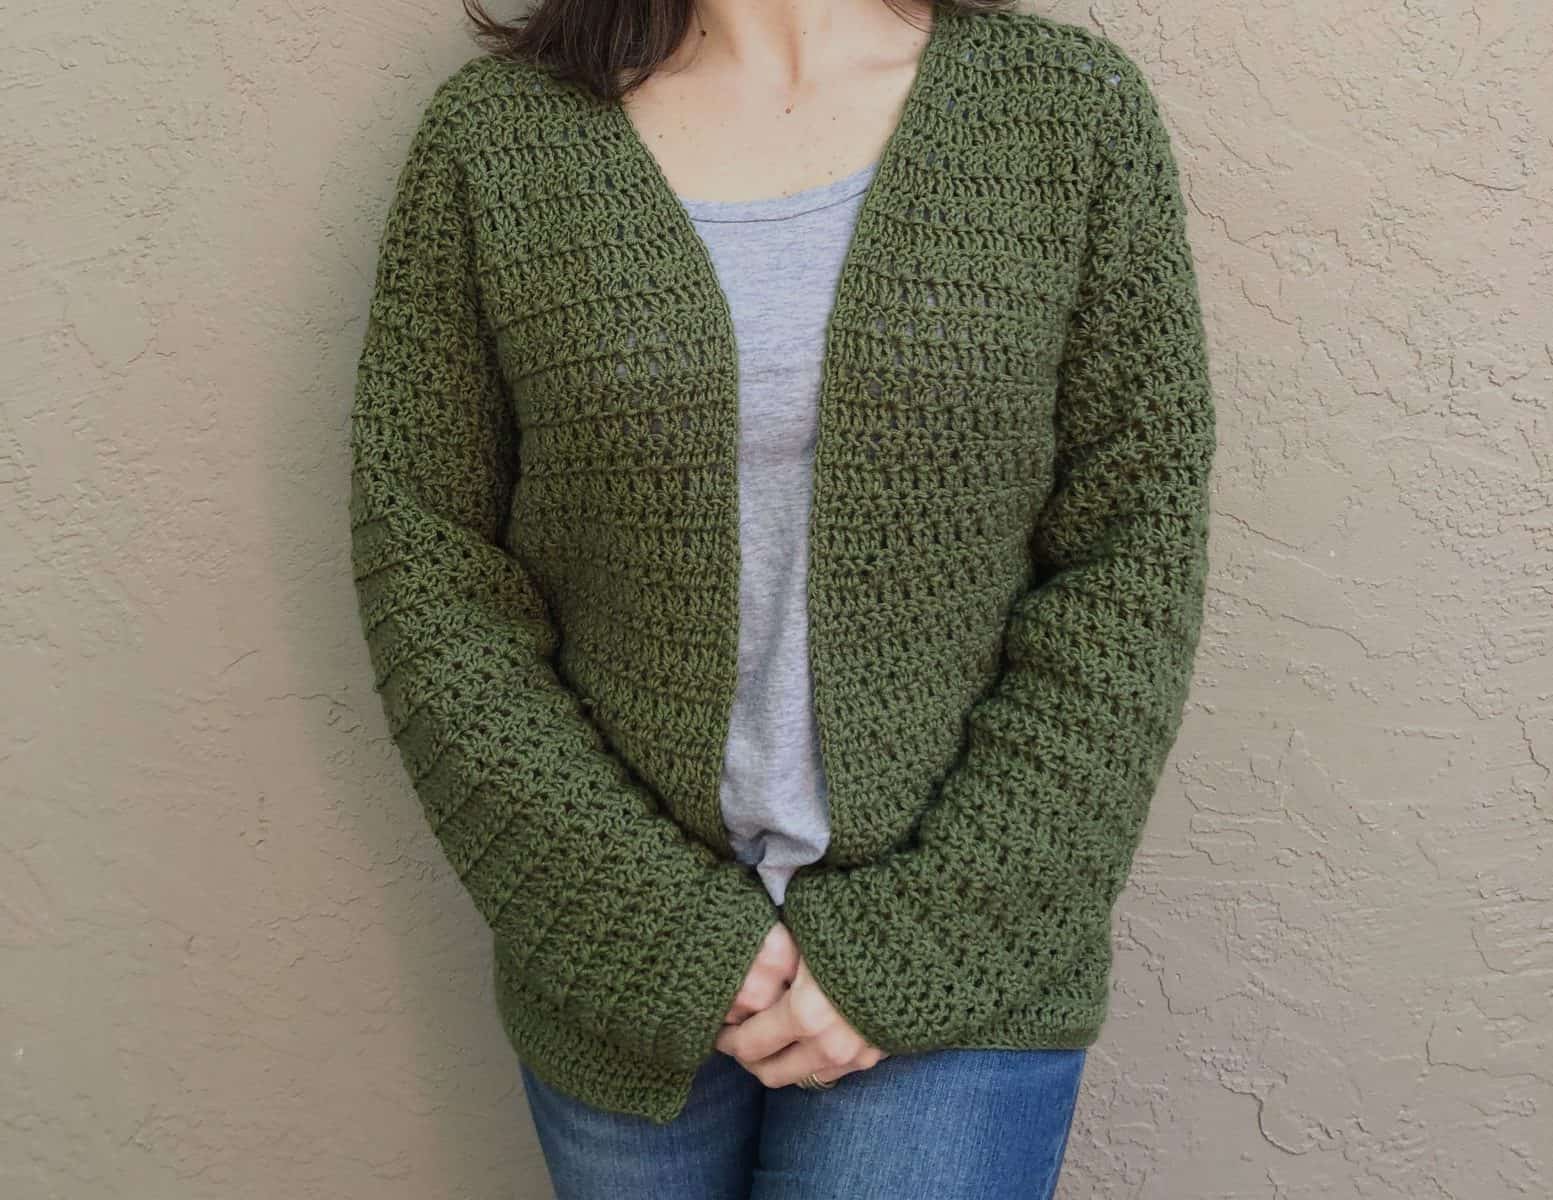
I opted to crochet a small, for a more fitted look. But I’m leaving the pictures of the cozy green cardigan, a size medium up too.
You can easily adjust length of the sweater or the sleeves. And there are only seams on the shoulders and armholes!
The subtle v-neck shaping give this easy cardigan a great fit. This is one crochet cardigan women will want to wear.
I love how simple it is to decrease in some crochet stitches. Here it’s just a matter of making one less double crochet.
Get 33 gorgeous patterns in this crochet pattern bundle!
I find this length the most versatile for my wardrobe. But, of course adjusting the length of your cardigan is easy, with a little planning. Look for more details in the free crochet pattern below.
Save your favs!
Add this pattern to your Ravelry queue.
Fall Pattern Bundle
The Sera Cardigan is part of the Fall into Autumn Pattern Bundle! All these patterns together in one bundle, and for 90% off!
Be sure to click through and check out all the patterns included in this amazing crochet pattern bundle!
01
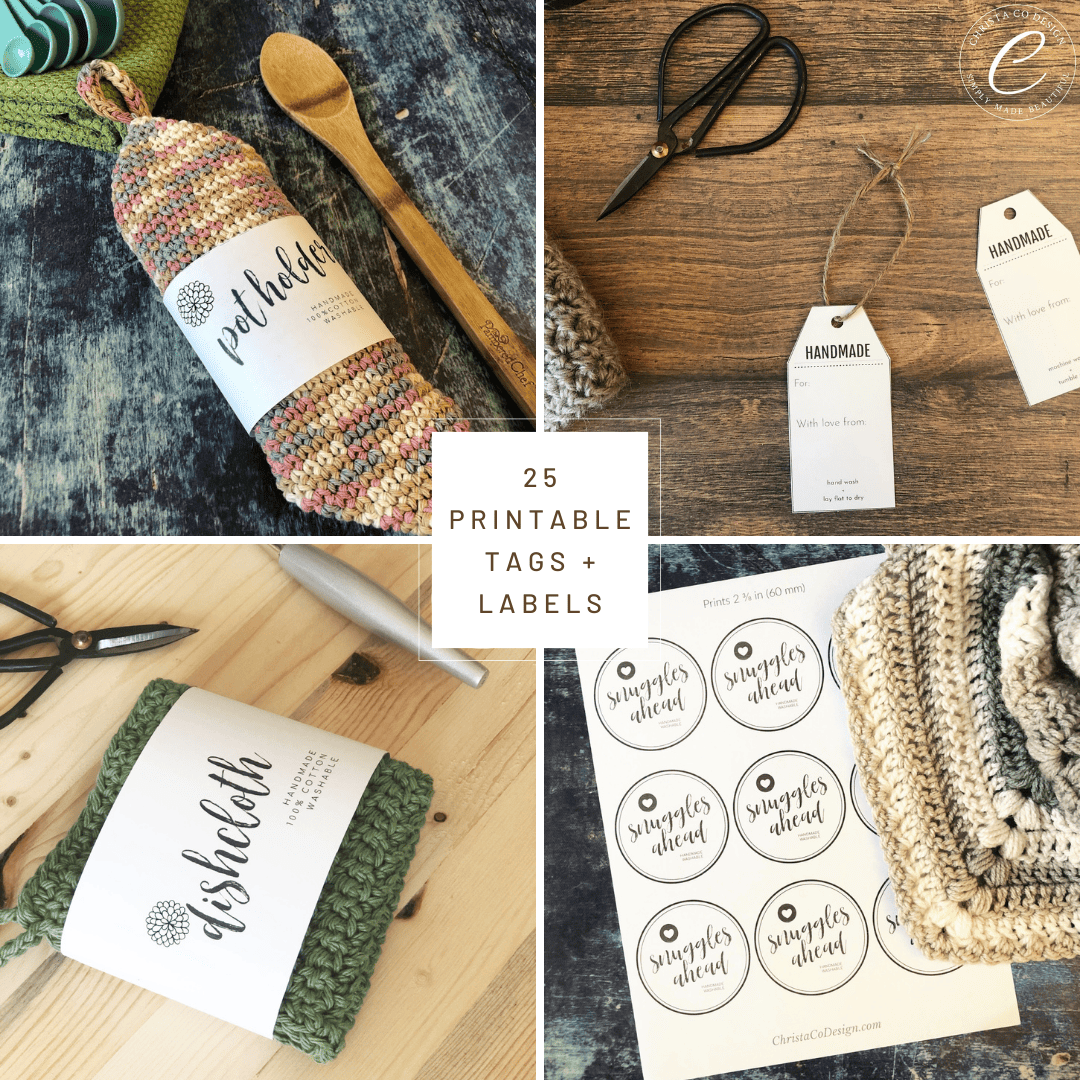
Get our free printable
With 25 of our best handmade gift tags
This ebook includes our top 25 reader favorite gift tags and labels that you are sure to enjoy as well! Enter your email below to download our beautiful handmade tags!
More Crochet Cardigans
Find these free crochet patterns on my blog!
If you’re looking for an uber cozy crochet cardigan that looks great with leggings, you might enjoy this Cozy Crochet Cardigan Pattern.
Or maybe it’s a little warm for long sleeves where you are? The Spring Cardi has 3 sleeve options, plus it’s a Top Down Crochet Cardigan Pattern.
This stitch pattern works up so nicely, you may also like the crochet sweater version, the Sera Sweater. This crochet top features a v-neck.
More Free Crochet Cardigan Patterns
- Summer’s End Cardigan short and long versions available
- Spring Cardi top down crochet cardigan
- Sorella Cardigan open lacy summer cardigan
The green cardigan is size medium, pictured on size 37″ bust, in the original (discontinued) yarn.
The Yarn
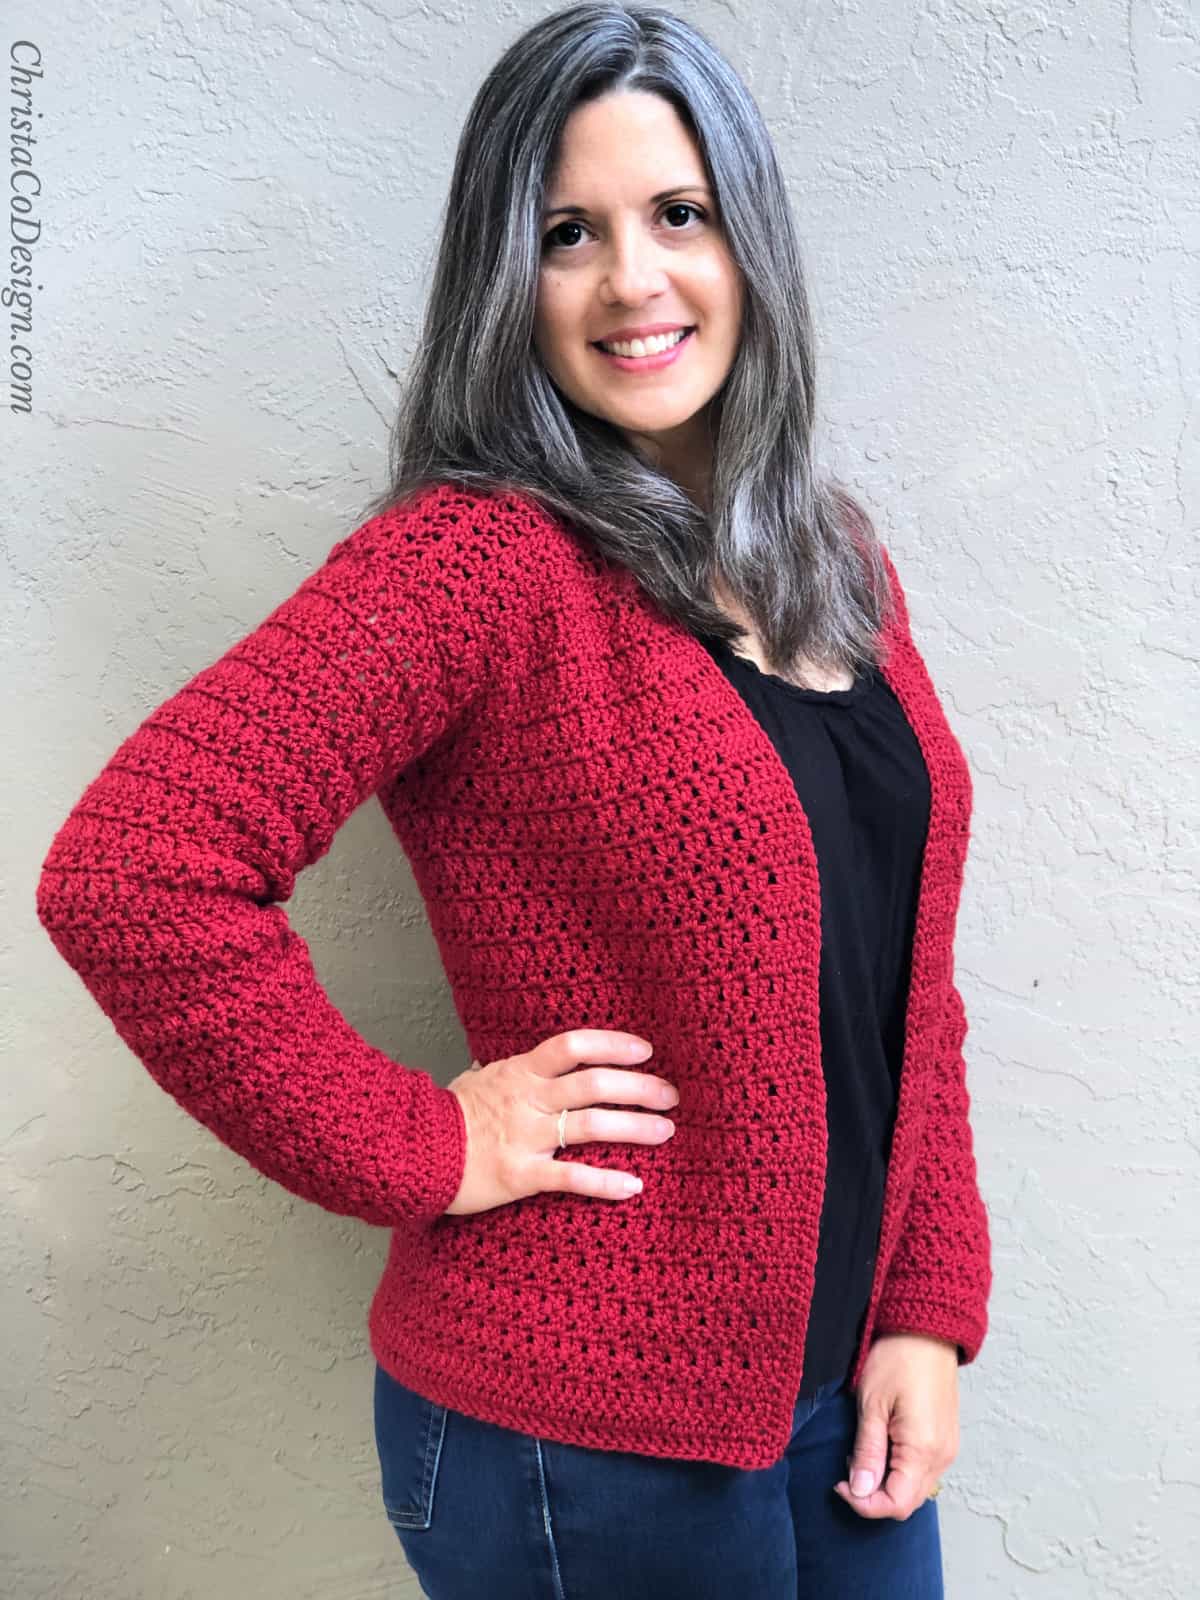
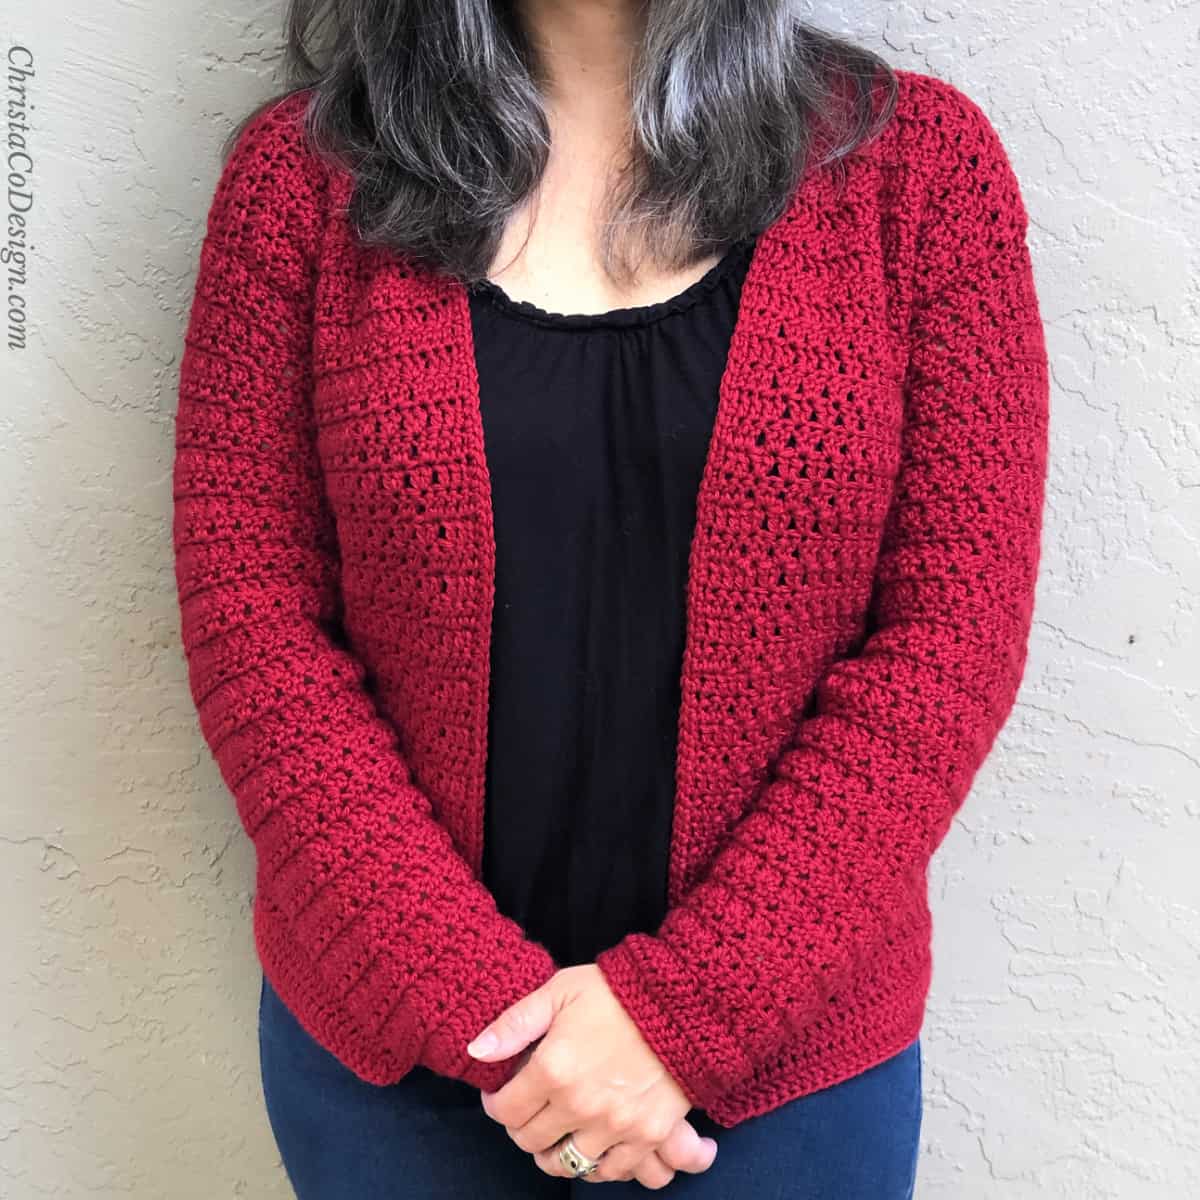
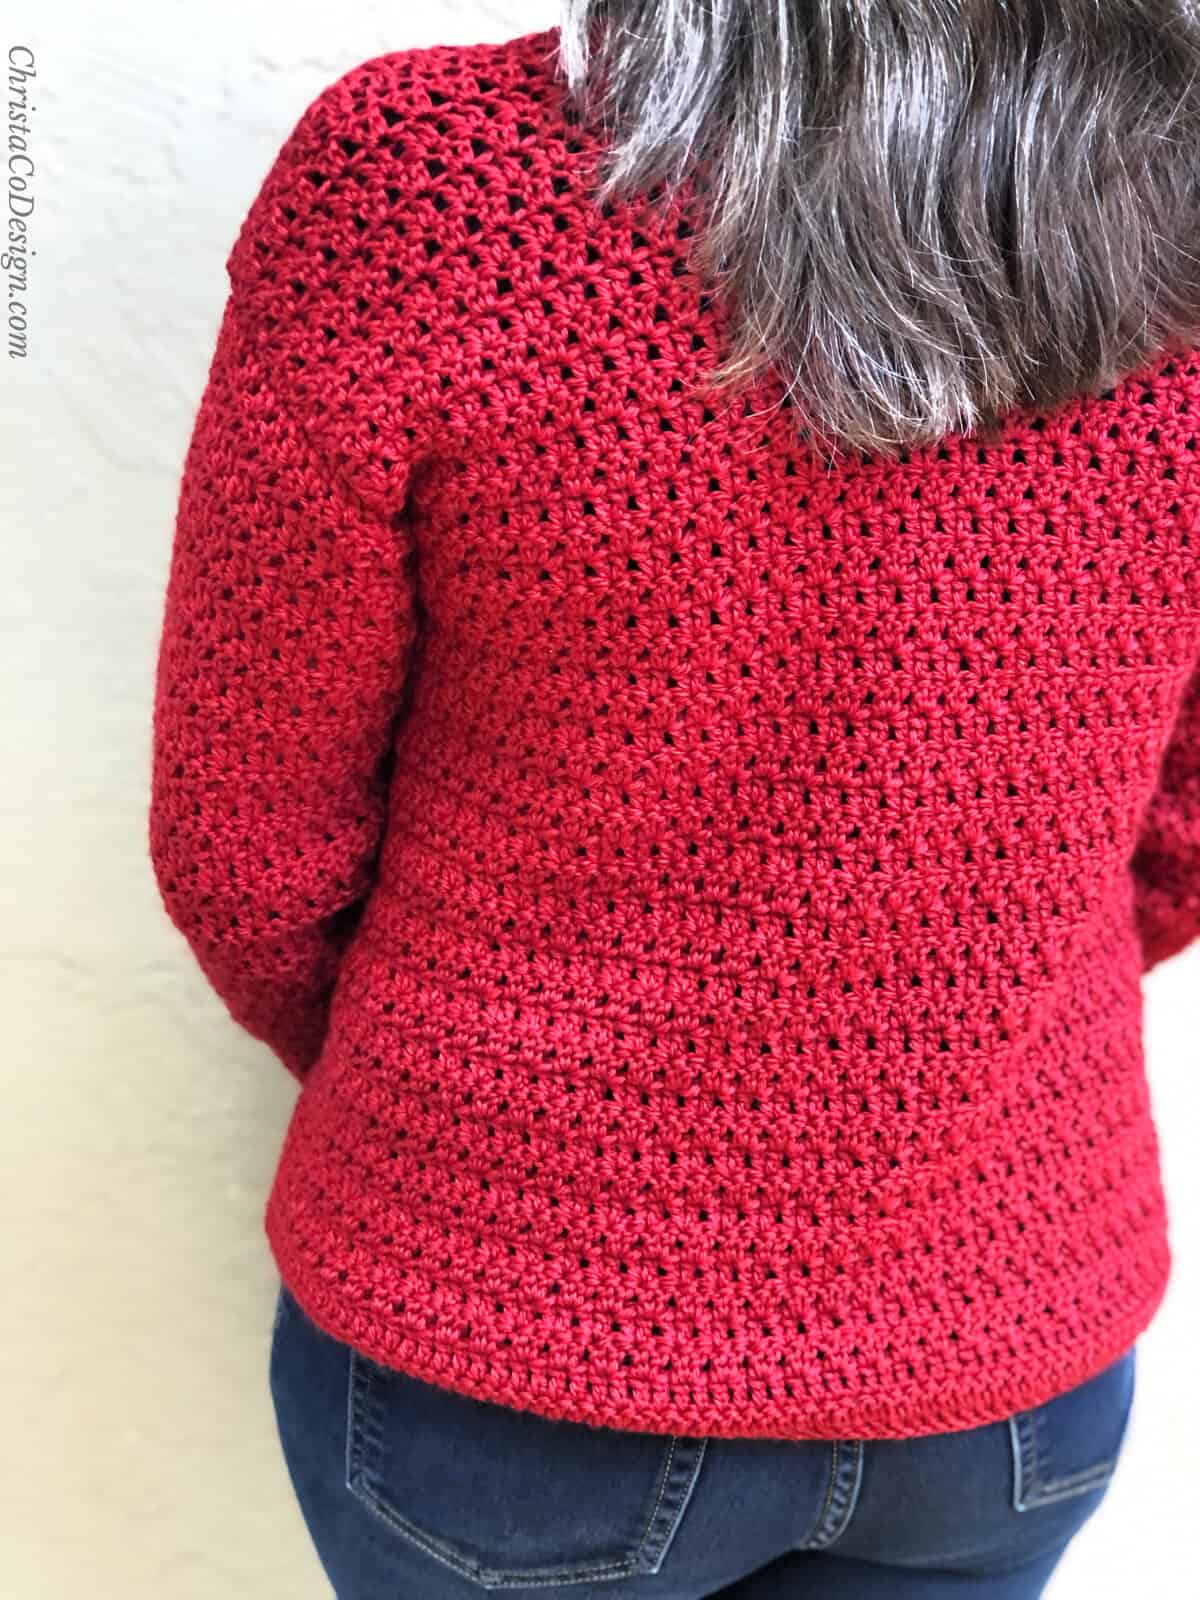
Unfortunately the Vanna’s Style yarn pictured in the green cardigan is discontinued. The new yarn, Gloss DK* pictured in the red cardigan is fabulous, and has a similar green color, Rosemary.
This cardigan is made with #3 DK/lightweight yarn. #3 yarn makes for great drape which is perfect for garments. You can substitute another yarn in the same weight category.
If you only have #4 medium worsted weight yarn, I think that could easily work for this pattern. However, you’ll need to meet gauge with your chosen yarn/hook. Otherwise, your cardigan might not fit!
The New Yarn
WeCrochet graciously sent me this Gloss DK Yarn* to crochet a new sample for this pattern. I love how it turned out!
The merino silk blend makes this a fabulous date night cardigan. And the colors are gorgeous too.
In the picture above is a size small cardigan on 37″ bust woman.
Materials
- #3 lightweight yarn, shown in Gloss DK Yarn* (70 % merino wool, 30% silk, 123 yd / 50 g); color: Cranberry. The green cardigan pictured was made in Vanna’s Style Yarn* a #3 light weight yarn (100% acrylic, 3.5 oz/100g, 254 yd/232m) which has been discontinued. More yarn details below by size.
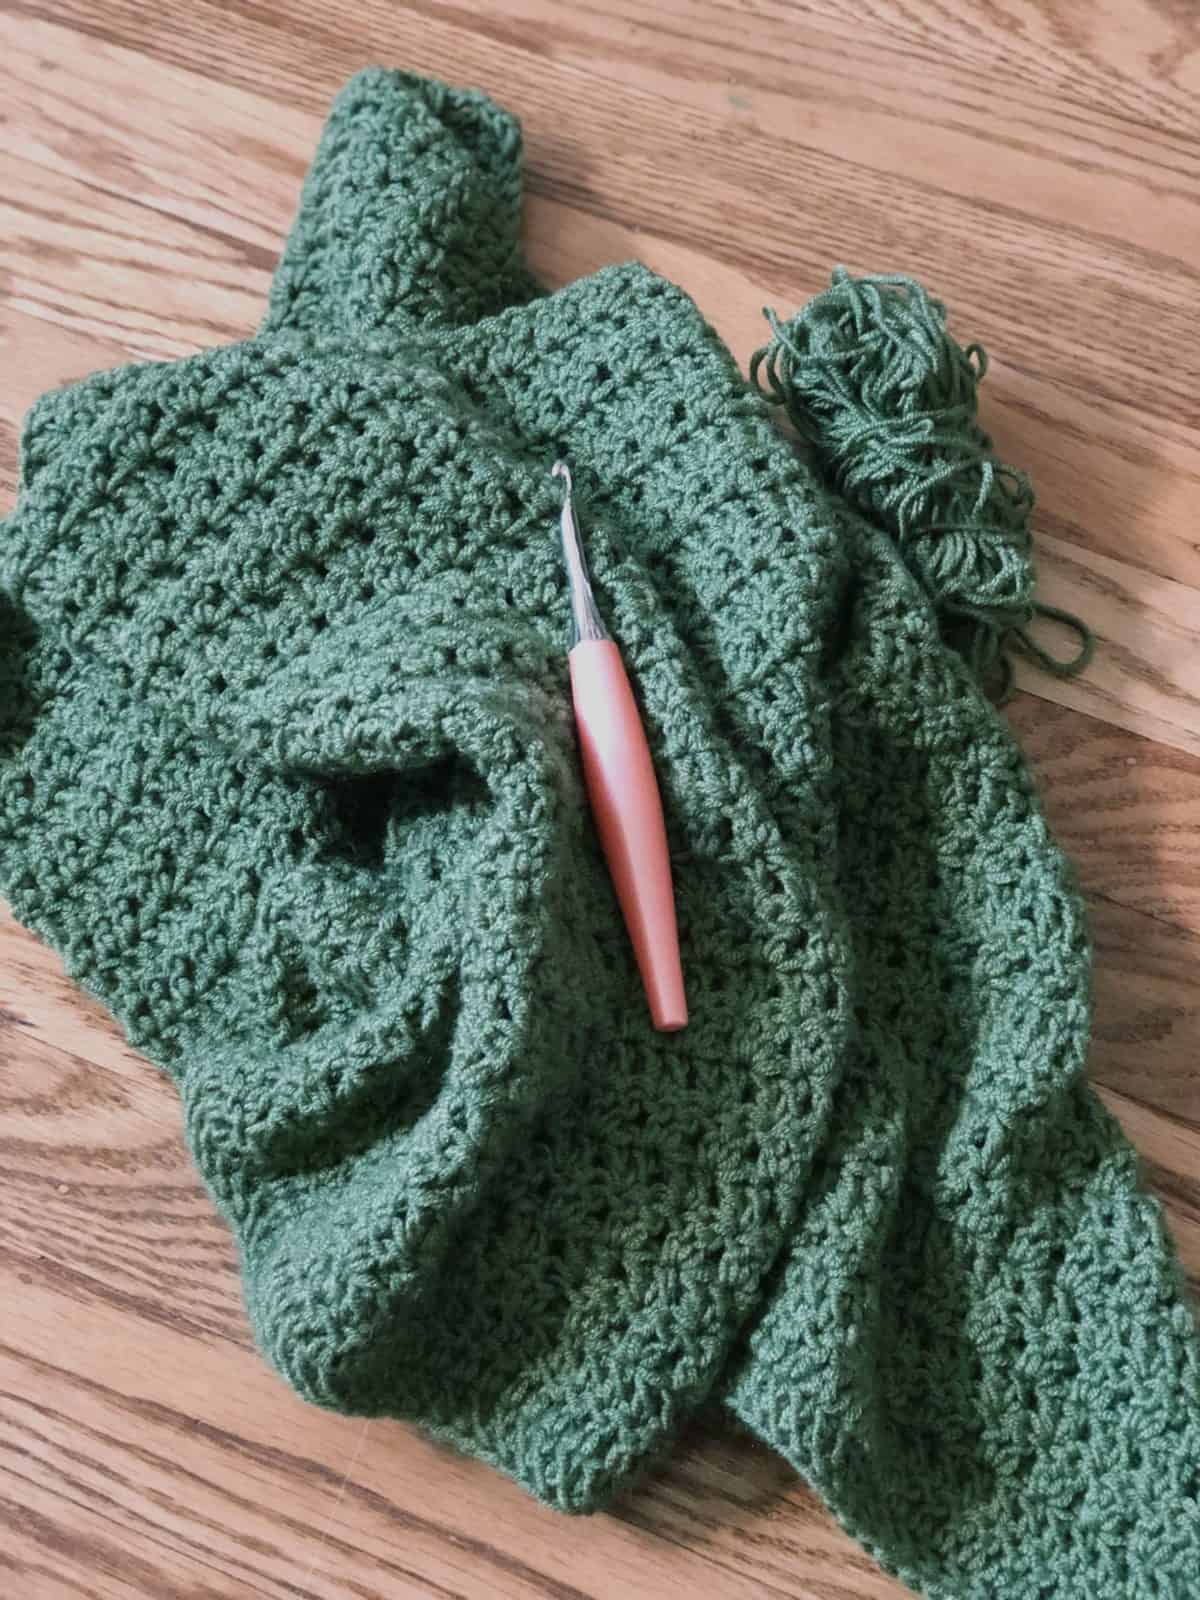
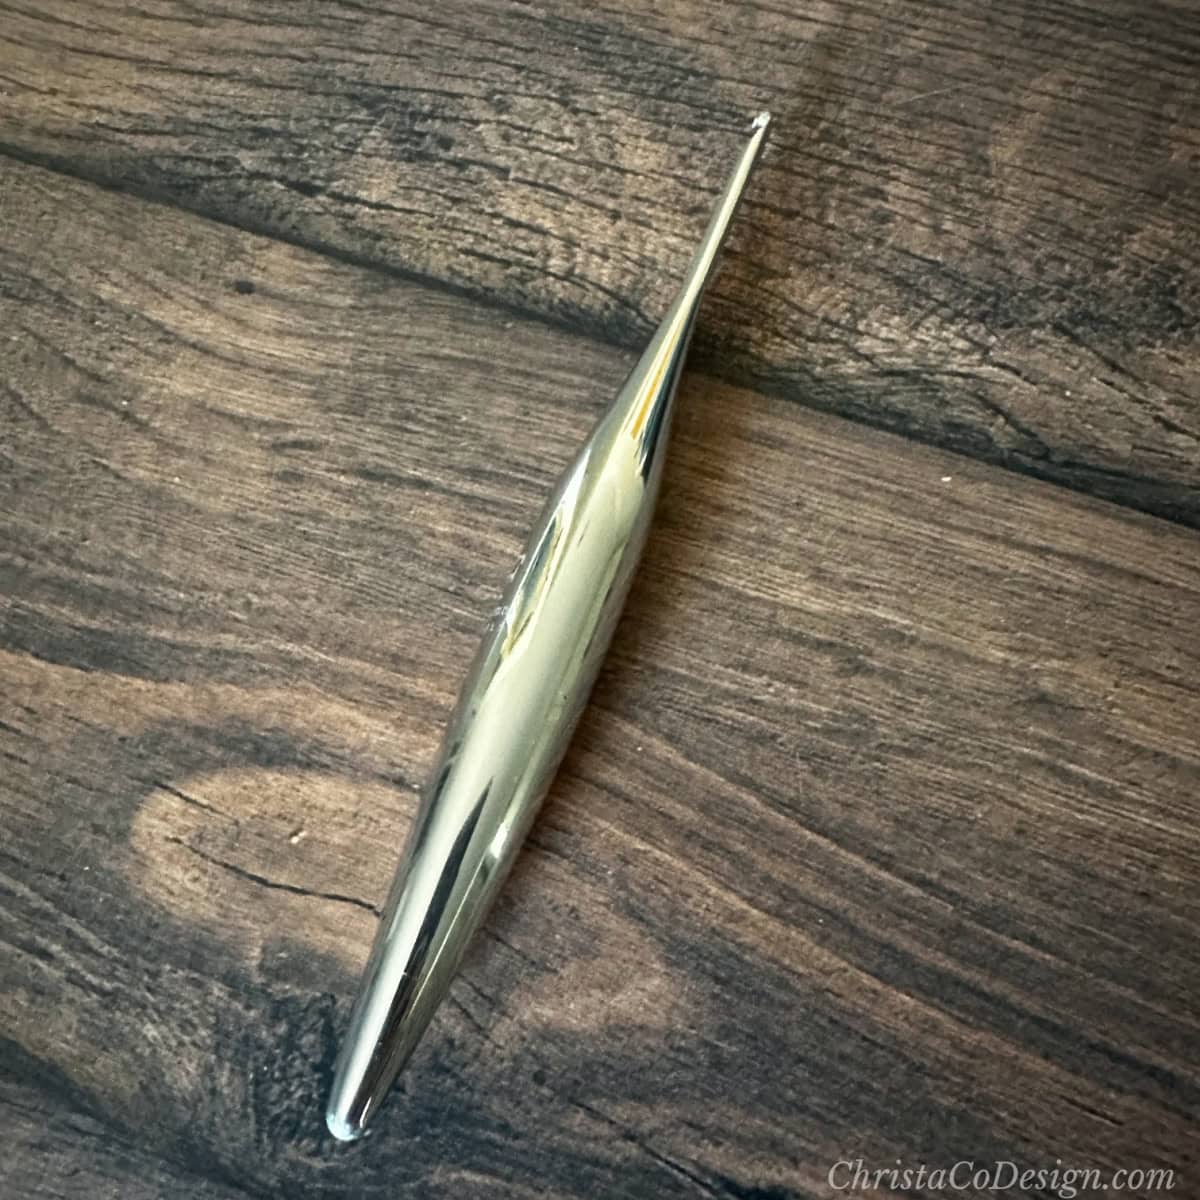
- 5mm US size (H) hook, pictured below is my Furls Odyssey in Peach*
- stitch markers, yarn needle, measuring tape
Yarn By Size
(XS) 9 balls or 1000 yd / 914 m
(S) 10 balls or 1225 yd / 1120 m
(M) 11 balls or 1300 yd / 1189 m
(L) 12 balls or 1450 yd / 1326 m
(XL) 13 balls or 1600 yd / 1463 m
(2X) 14 balls or 1700 yd / 1555 m
(3X) 15 balls or 1800 yd / 1646 m
(4X) 16 balls or 1950 yd / 1783 m
(5X) 17 balls or 2091 yd / 1912 m
- Please read through all notes and pattern before you begin.
- Work up a gauge swatch using the provided gauge information. Measure your swatch and if your gauge matches, great continue on; if not, change your hook size and swatch again. Are your stitches are smaller? Then go up a hook size, and if they’re larger, go down a hook size.
- Ch 3 counts as a stitch, I highly recommend using a ch 3 alternative, like one of these.
- St multiple is 2 + 6.
- Check stitch count before starting a new section.
- Pattern is written for multiple sizes, with the smallest size written first and each subsequent size written in parentheses XS (S, M, L, XL, 2X, 3X, 4X, 5X). For example: Row 1. FDC 104 (120, 136, 144, 160, 176, 184, 200, 208). To make an XS you would foundation double crochet 104, for a M you would foundation double crochet 136 and a 4X you would foundation double crochet 200.
Stitches/Abbreviations
ch(s) – chain(s)
dc – double crochet
FDC – foundation double crochet
rep – repeat
rnd(s) – round(s)
sc – single crochet
sk – skip the indicated stitch
sl st – slip stitch
st(s) – stitch(es)
Gauge
4”/10cm x 4”/10cm = 13 dc x 8 rows of dc
Gauge is after blocking. You can read more on how to check gauge here.
Construction
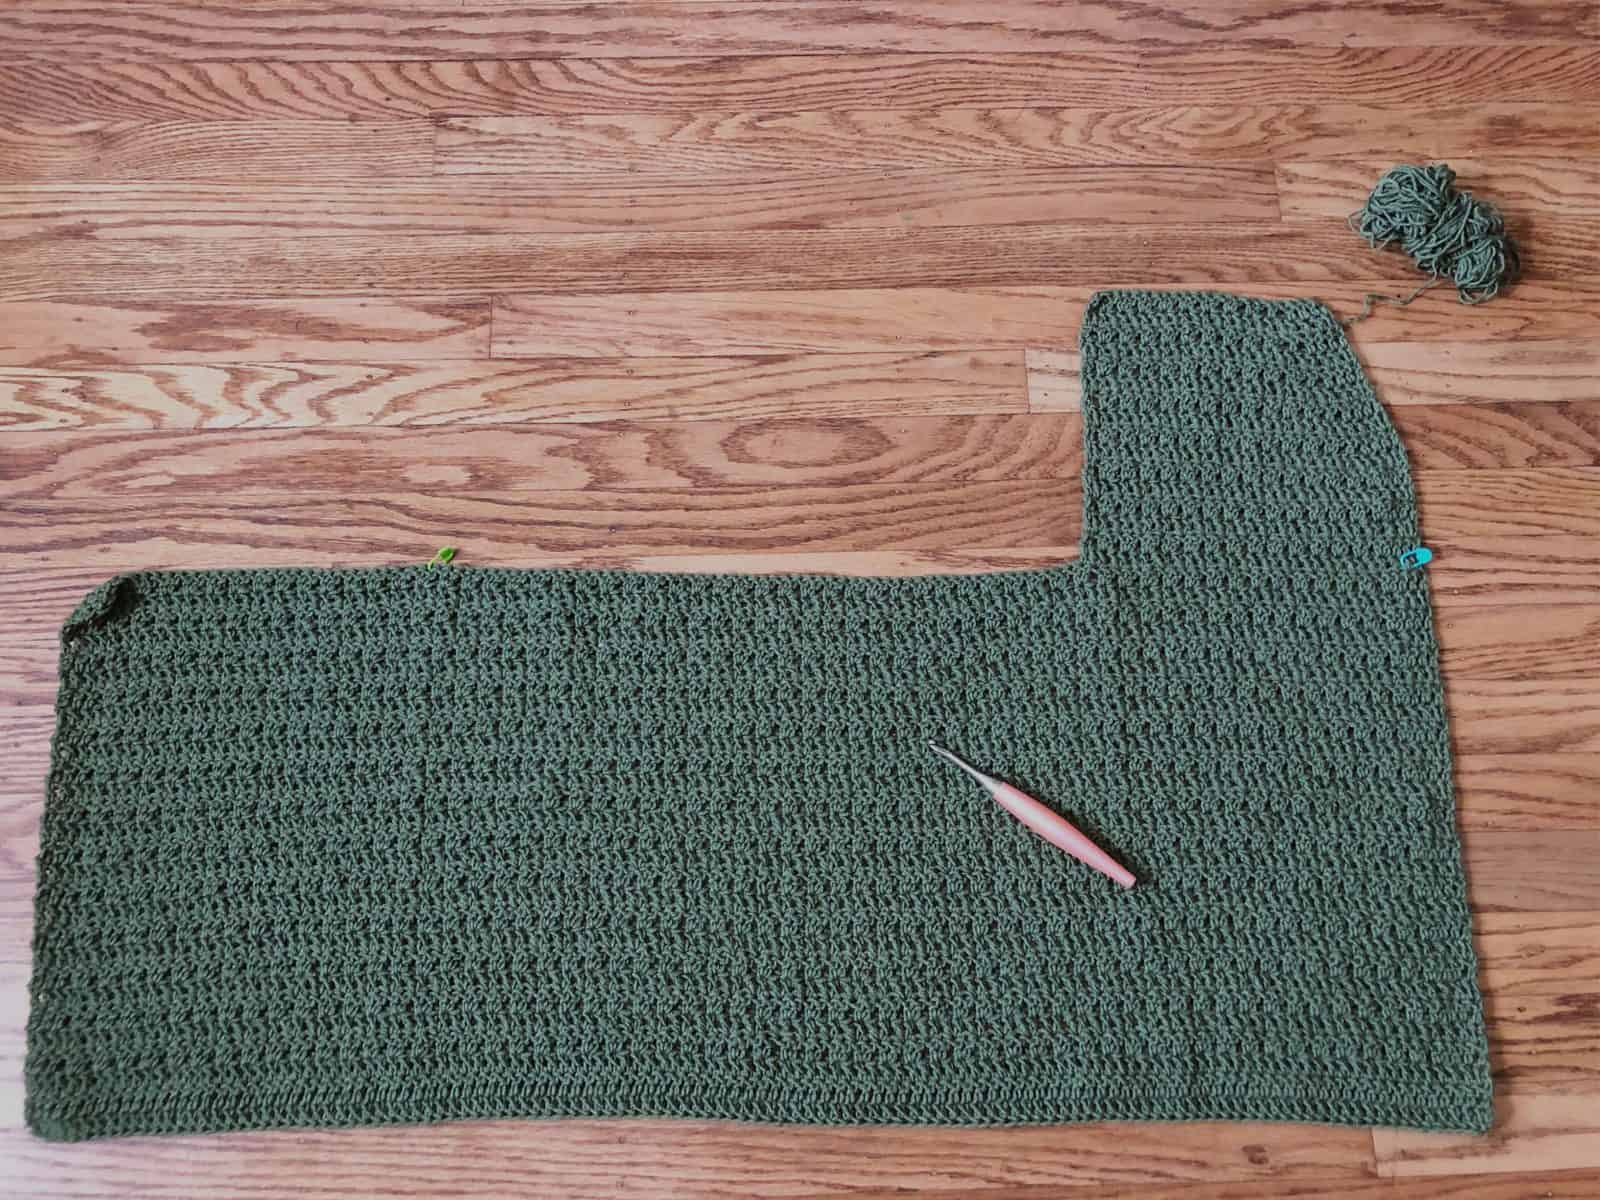
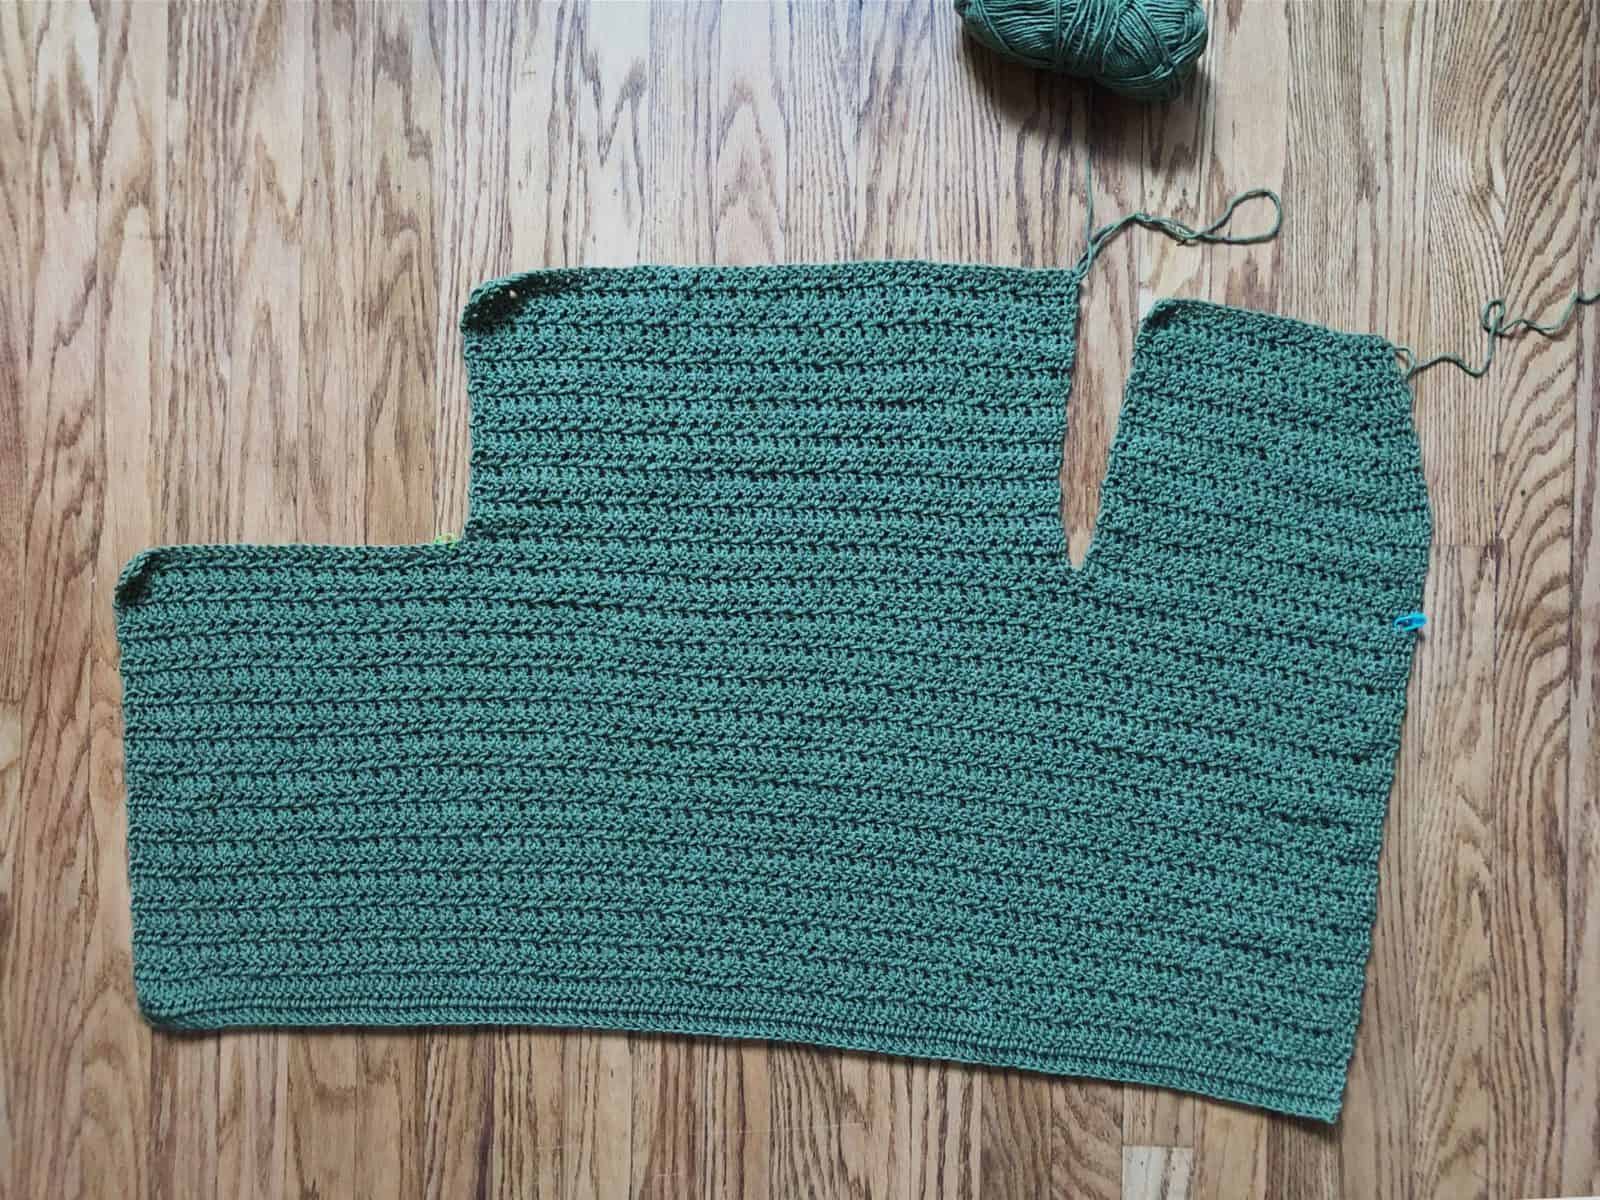
The main body this easy crochet cardigan is crocheted as one piece, bottom up. We will then separate the cardigan into three pieces, creating armholes for the sleeves, while also creating the front and back panels.
These are seamed together at the shoulder. The sleeves are worked separately, from the wrist up and in the round, but turned to keep the stitch pattern the same. The sleeves are seamed on at the armholes.
Fit/Adjustment
Pattern adds 2″ / 5 cm-4” / 10 cm of ease to bust measurement, for a classic fit. For a looser fit, go up a size, for a snugger fit, go down a size.
To adjust length of cardigan add or subtract rows before dividing. Measure from your underarm to where you want the cardigan to stop. This is your desired length before dividing.
To Fit Bust Size
(XS) 30″ / 76 cm
(S) 34″ / 86.5 cm
(M) 38″ / 96.5 cm
(L)42″ / 106 cm
(XL) 46″ / 117 cm
(2X) 50″ / 127 cm
(3X) 54″ / 137 cm
(4X) 58″ / 147.5 cm
(5X) 62″ / 157.5 cm
Finished Bust
(XS) 32” / 81.25 cm
(S) 37” / 94 cm
(M) 41.75” / 106 cm
(L) 44.5” / 113 cm
(XL) 49.25” / 125 cm
(2X) 54” / 137 cm
(3X) 56.75” / 144 cm
(4X) 61.5” / 156 cm
(5X) 64” / 162.5 cm
Finished Length (in / cm)
(XS) 21.5″ / 54.5 cm
(S) 22.5″ / 57 cm
(M) 23″ / 58.5 cm
(L/XL) 23.5″ / 59.5 cm
(2/3X) 24.5″ / 62 cm
(4/5X) 25.5″ / 65 cm
ChristaCoDesign patterns use Craft Yarn Council sizing standards.
Video Tutorial
Check out the full video tutorial for this crochet cardigan on my YouTube channel. If you’re looking for help on a specific part, scroll to the bottom of the description for the list of chapters.
Purchase the ad-free, well formatted printable PDF Pattern from my shop. Scroll down for the free pattern!
Scroll down for the Free Crochet Cardigan Pattern!
Pattern Instructions

V-Neck Crochet Cardigan Pattern
Learn how to crochet the Sera Cardigan in 9 women’s sizes.
Materials
- #3 lightweight yarn, red cardigan is Gloss DK Yarn* (70 % merino wool, 30% silk, 123 yd / 50 g); color: Cranberry. Green cardigan is made with Vanna's Style, a discontinued yarn.
- Yarn By Size
- (XS) 9 balls or 1000 yd / 914 m
- (S) 10 balls or 1225 yd / 1120 m
- (M) 11 balls or 1300 yd / 1189 m
- (L) 12 balls or 1450 yd / 1326 m
- (XL) 13 balls or 1600 yd / 1463 m
- (2X) 14 balls or 1700 yd / 1555 m
- (3X) 15 balls or 1800 yd / 1646 m
- (4X) 16 balls or 1950 yd / 1783 m
- (5X) 17 balls or 2091 yd / 1912 m
- Remember if you adjust or lengthen your cardigan, order an extra ball of yarn.
Tools
- 5 mm hook, pictured is my Furls Odyssey in Peach, and my Camwood Streamline.
- stitch markers
- yarn needle
- measuring tape
- scissors
Instructions
XS (S, M, L, XL, 2X, 3X, 4X, 5X)
Row 1. FDC 104 (120, 136, 144, 160, 176, 184, 200, 208) or if you’re unfamiliar with FDC you can CH 106 (122, 138, 146, 162, 178, 186, 202, 210), dc in the 4th ch and in each ch across, turn.
Row 2. Ch 3, dc in next st and in each st across, turn.
Row 3. Rep Row 2. Now is a good time to check your “finished bust”: 32 (36.9, 41.9, 44.2, 49.2, 54.2, 56.7, 61.6, 64)”
Row 4. Ch 3, dc in next 2 sts, *{sk next st, 2 dc in next st} rep from * til 3 sts left, dc in last 3 sts, turn. (104,120, 136, 144, 160, 176, 184, 200, 208) sts
Rows 5-31. Rep Row 4 until sweater body measures 15.5” long, or if you would like a longer cardigan add more rows here, end on an odd row. *We will add 6 (7, 7.5, 8, 8, 9, 9, 10, 10)” to the length once panels are divided.
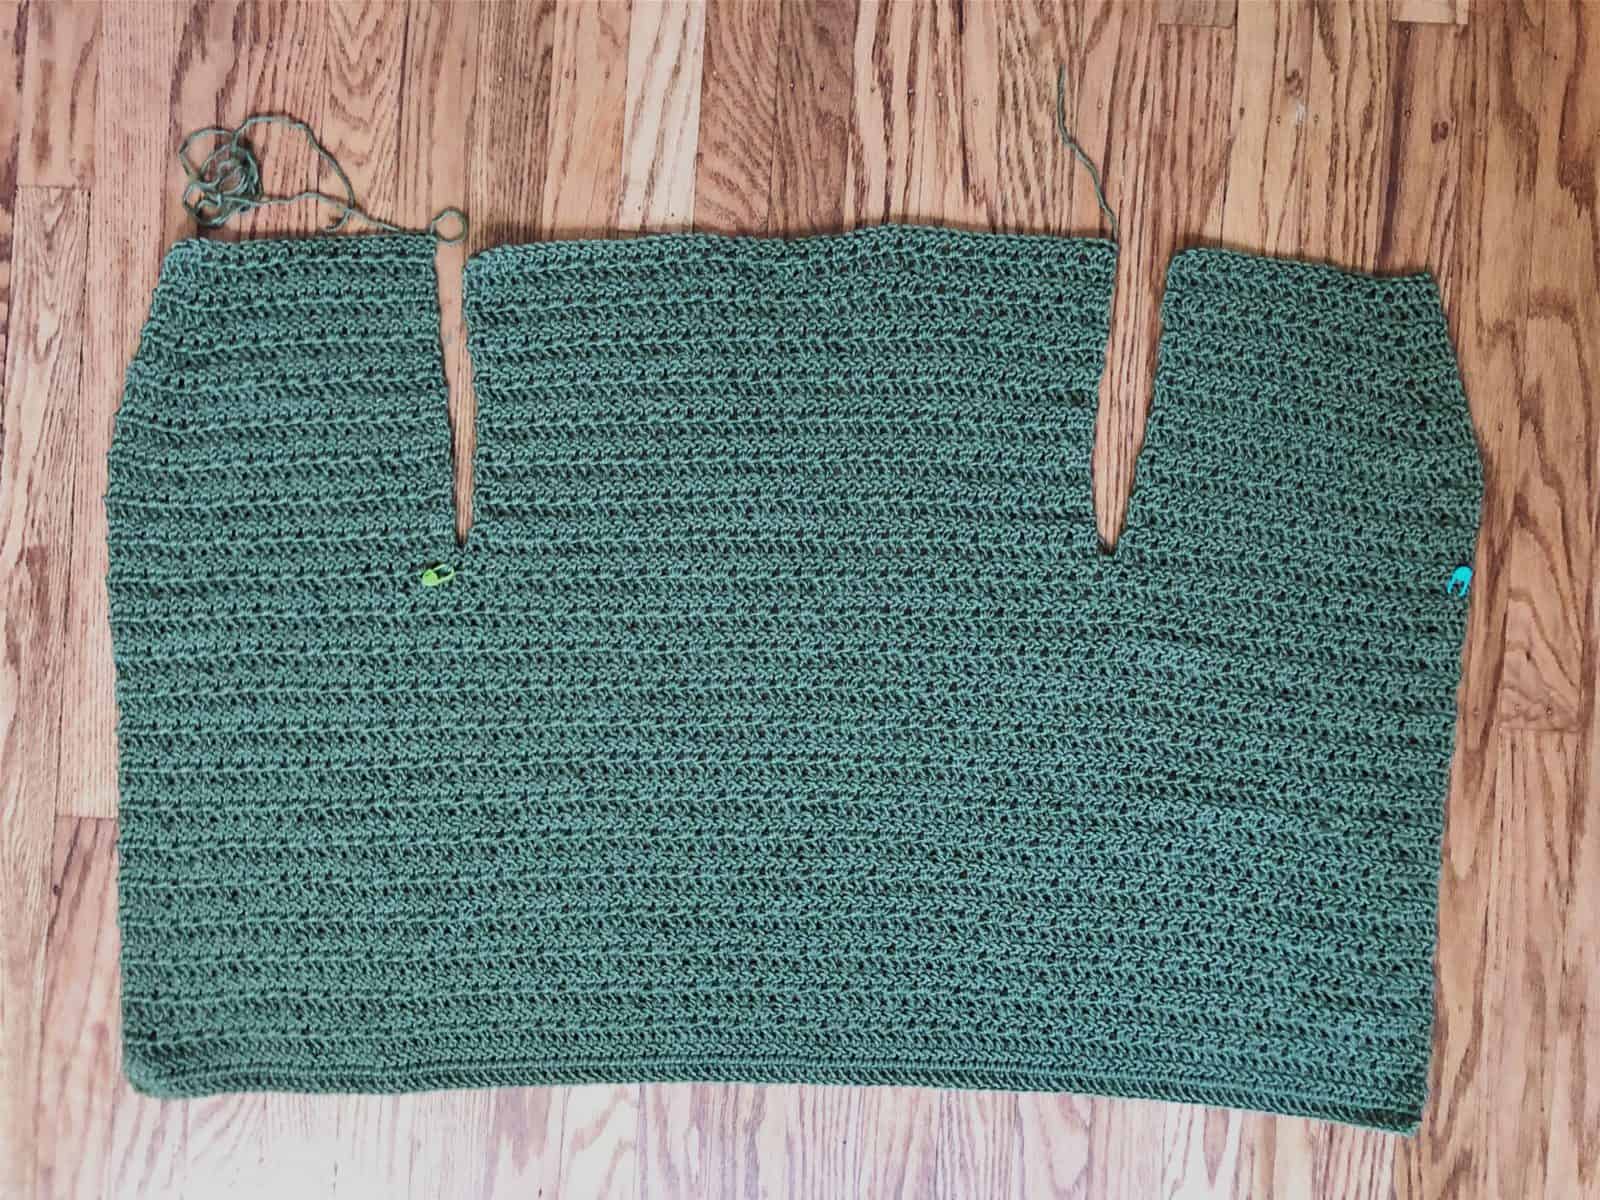
Divide
Check stitch count before dividing.
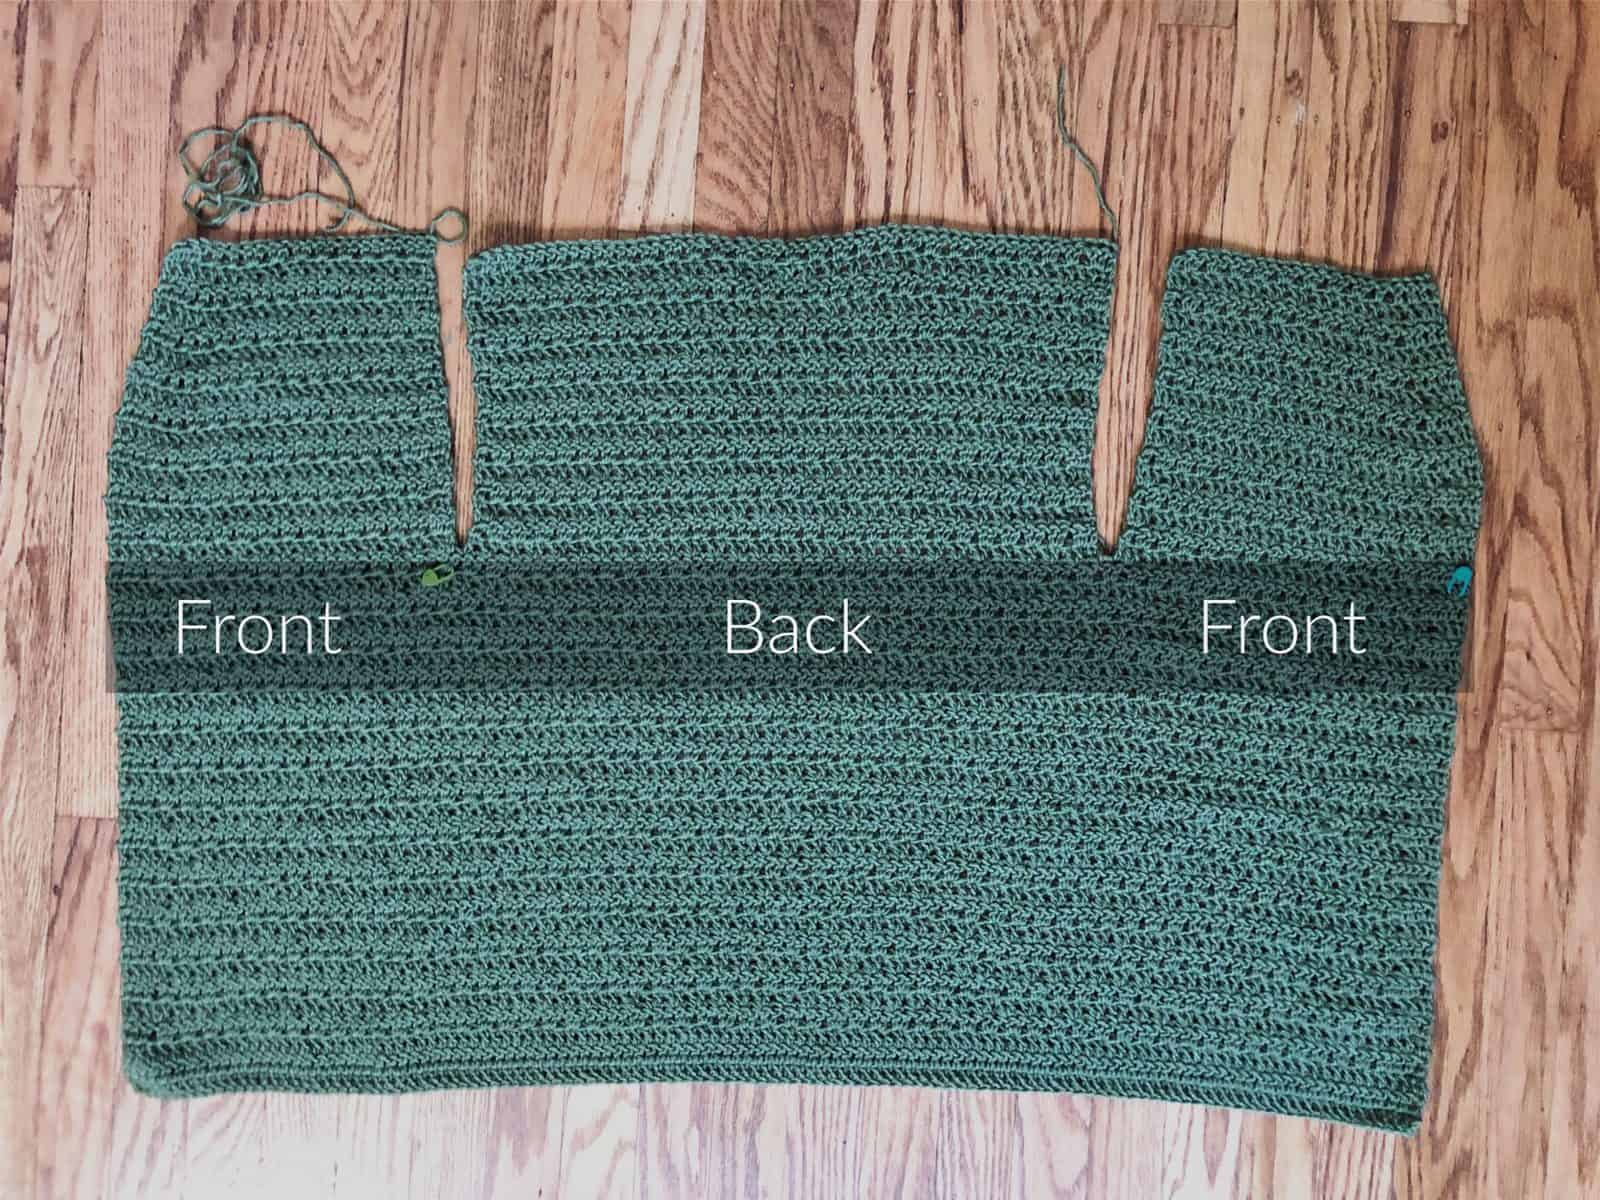
Now we’ll divide the front right (when wearing), back, and left front (when wearing) panels. Place st marker in 27 (31, 35, 37, 39, 45, 47, 51, 53) st. Marker will be in the 2nd dc of a set. The first 26 (30, 34, 36, 40, 44, 46, 50, 52) sts are the Front Right Panel.
The first st marker begins the back panel. Begin with the marked st and count (52, 60, 68, 72, 80, 88, 92, 100, 104) sts place 2nd st marker in the last st counted. Marker will be in the 1st dc of a set. This marks the end of the Back Panel.
The remaining 26 (30, 34, 36, 40, 44, 46, 50, 52) sts are the Front Left Panel (when wearing). Note the marked sts are a part of the Back Panel st count.
Finished panels will look like the picture:
Front Right Panel {when wearing}
-If you are a left-handed crocheter the Right Panel is your Left Panel and vice versa.
-Row count starts over.
Row 1. (RS) Ch 3, dc in next 2 sts, *{sk next st, 2 dc in next st} rep from * til one st before marker, dc in next st, turn. (26, 30, 34, 36, 40, 44, 46, 50, 52 sts)
Row 2. Ch 3, *{sk next st, 2 dc in next st} rep from * til 3 sts left, dc in last 3 sts, turn. (26, 30, 34, 36, 40, 44, 46, 50, 52 sts)
Row 3. Ch 3, dc in next 2 sts, *{sk next st, 2 dc in next st} rep from * til one st left, dc in last st, turn.
Row 4. Ch 3, *{sk next st, 2 dc in next st} rep from * til 7 sts left, **{sk next st, 1 DC in next st} rep from ** 1 more time, dc in last 3 sts, turn. (24, 28, 32, 34, 38, 42, 44, 48, 50 sts)
Row 5. Ch 3, dc in next 2 sts, *{sk next st, 2 dc in next st} rep from * til one st left, dc in last st, turn. (24, 28, 32, 34, 38, 42, 44, 48, 50 sts)
Rows 6-11. Rep Rows 4-5. (18, 22, 26, 28, 32, 36, 38, 42, 44 sts) shoulder width = (5.5, 6.8, 8, 8.6, 9.9, 11, 11.7, 12.9, 13.5)”
XS
Row 12. Rep Row 2. Leaving a long tail for seaming, cut yarn. Measures 6” from divide row.
S
Row 12-13. Rep Rows 2-3.
Row 14. Rep Row 2. Leaving a long tail for seaming, cut yarn. Measures 7” from divide row.
M
Row 12-15. Rep Rows 2-3. Leaving a long tail for seaming, cut yarn. Measures 7.5” from divide row.
L
Rows 12-15. Rep Rows 2-3.
Row 16. Rep Row 2. Leaving a long tail for seaming, cut yarn. Measures 8” from divide row.
XL
Rows 12-15. Rep Rows 2-3.
Row 16. Rep Row 2. Leaving a long tail for seaming, cut yarn. Measures 8” from divide row.
2X
Rows 12-17. Rep Rows 2-3.
Row 18. Rep Row 2. Leaving a long tail for seaming, cut yarn. Measures 9” from divide row.
3X
Rows 12-17. Rep Rows 2-3.
Row 18. Rep Row 2. Leaving a long tail for seaming, cut yarn. Measures 9” from divide row.
4X
Rows 12-19. Rep Rows 2-3.
Row 20. Rep Row 2. Leaving a long tail for seaming, cut yarn. Measures 10” from divide row.
5X
Rows 12-19. Rep Rows 2-3.
Row 20. Rep Row 2. Leaving a long tail for seaming, cut yarn. Measures 10” from divide row.
Back Panel
With RS up, join yarn with sl st to 1st marked back panel st = st # (27, 31, 35, 37, 41, 45, 47, 51, 53) Remove st markers as you come to them.
Row 1. Ch 3, *{sk next st, 2 dc in next st} rep from * until you reach the st marker, dc in same st as marker, turn. (52, 60, 68, 72, 80, 88, 92, 100, 104 sts)
Row 2. Ch 3, *{sk next st, 2 dc in next st} rep from * until one st left, dc in last st, turn. (52, 60, 68, 72, 80, 88, 92, 100, 104 sts)
Row 3. – Row 12, 14, 15, 16, 16, 18, 18, 20, 20. Rep Row 2, cut yarn.
Front Left Panel {when wearing}
If you are a left handed crocheter the Left Panel is your Right Panel and vice versa.
The remaining 26 (30, 34, 36, 40, 44, 46, 50, 52) sts are the Left Panel.
With RS up, join yarn with sl st to first st left of back panel.
Row 1. Ch 3, *{sk next st, 2 dc in next st,} rep from * to last 3 sts, dc in last 3 sts, turn. (26, 30, 34, 36, 40, 44, 46, 50, 52 sts)
Row 2. Ch 3, dc in next 2 sts, *{sk next st, 2 dc in next st} rep from * to one st left, dc in last st, turn. (26, 30, 34, 36, 40, 44, 46, 50, 52 sts)
Row 3. Ch 3, *{sk next st, 2 dc in next st} rep from * to last 3 sts, dc in last 3 sts, turn.
Row 4. Ch 3, dc in next 2 sts, *{sk next st, 1 DC in next st} rep from * one more time, **{sk next st, 2 dc in next st} rep from ** to one st left, dc in last st, turn. (24, 28, 32, 34, 38, 42, 44, 48, 50 sts)
Row 5. Ch 3, *{sk next st, 2 dc in next st} rep from * to last 3 sts, dc in last 3 sts, turn. (24, 28, 32, 34, 38, 42, 44, 48, 50 sts)
Rows 6-11. Rep Rows 4-5, ending with (18, 22, 26, 28, 32, 36, 38, 42, 44 sts) and a shoulder width = (5.5, 6.8, 8, 8.6, 9.9, 11, 11.7, 12.9, 13.5)”
XS
Row 12. Rep Row 2. Leaving a long tail for seaming, cut yarn. Measures 6” from divide row.
S
Row 12-13. Rep Rows 2-3.
Row 14. Rep Row 2. Leaving a long tail for seaming, cut yarn. Measures 7” from divide row.
M
Row 12-15. Rep Rows 2-3. Leaving a long tail for seaming, cut yarn. Measures 7.5” from divide row.
L
Rows 12-15. Rep Rows 2-3.
Row 16. Rep Row 2. Leaving a long tail for seaming, cut yarn. Measures 8” from divide row.
XL
Rows 12-15. Rep Rows 2-3.
Row 16. Rep Row 2. Leaving a long tail for seaming, cut yarn. Measures 8” from divide row.
2X
Rows 12-17. Rep Rows 2-3.
Row 18. Rep Row 2. Leaving a long tail for seaming, cut yarn. Measures 9” from divide row.
3X
Rows 12-17. Rep Rows 2-3.
Row 18. Rep Row 2. Leaving a long tail for seaming, cut yarn. Measures 9” from divide row.
4X
Rows 12-19. Rep Rows 2-3.
Row 20. Rep Row 2. Leaving a long tail for seaming, cut yarn. Measures 10” from divide row.
5X
Rows 12-19. Rep Rows 2-3.
Row 20. Rep Row 2. Leaving a long tail for seaming, cut yarn. Measures 10” from divide row.
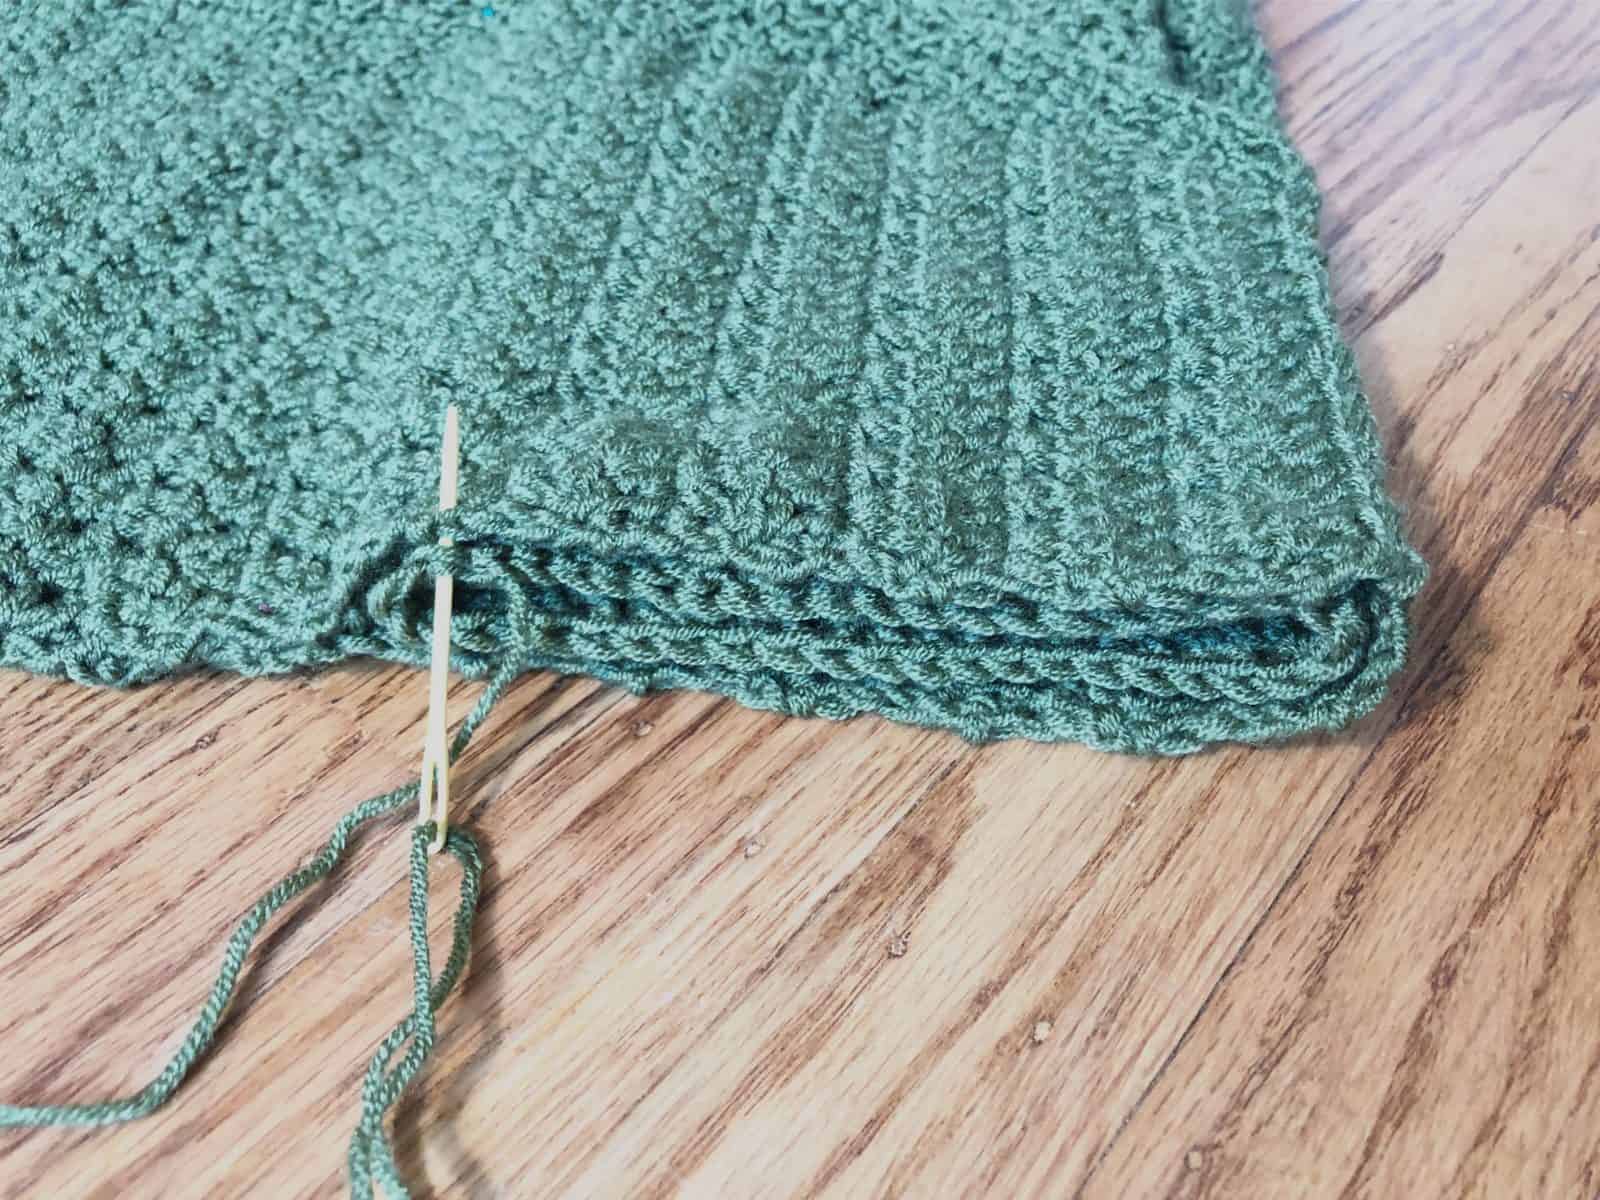
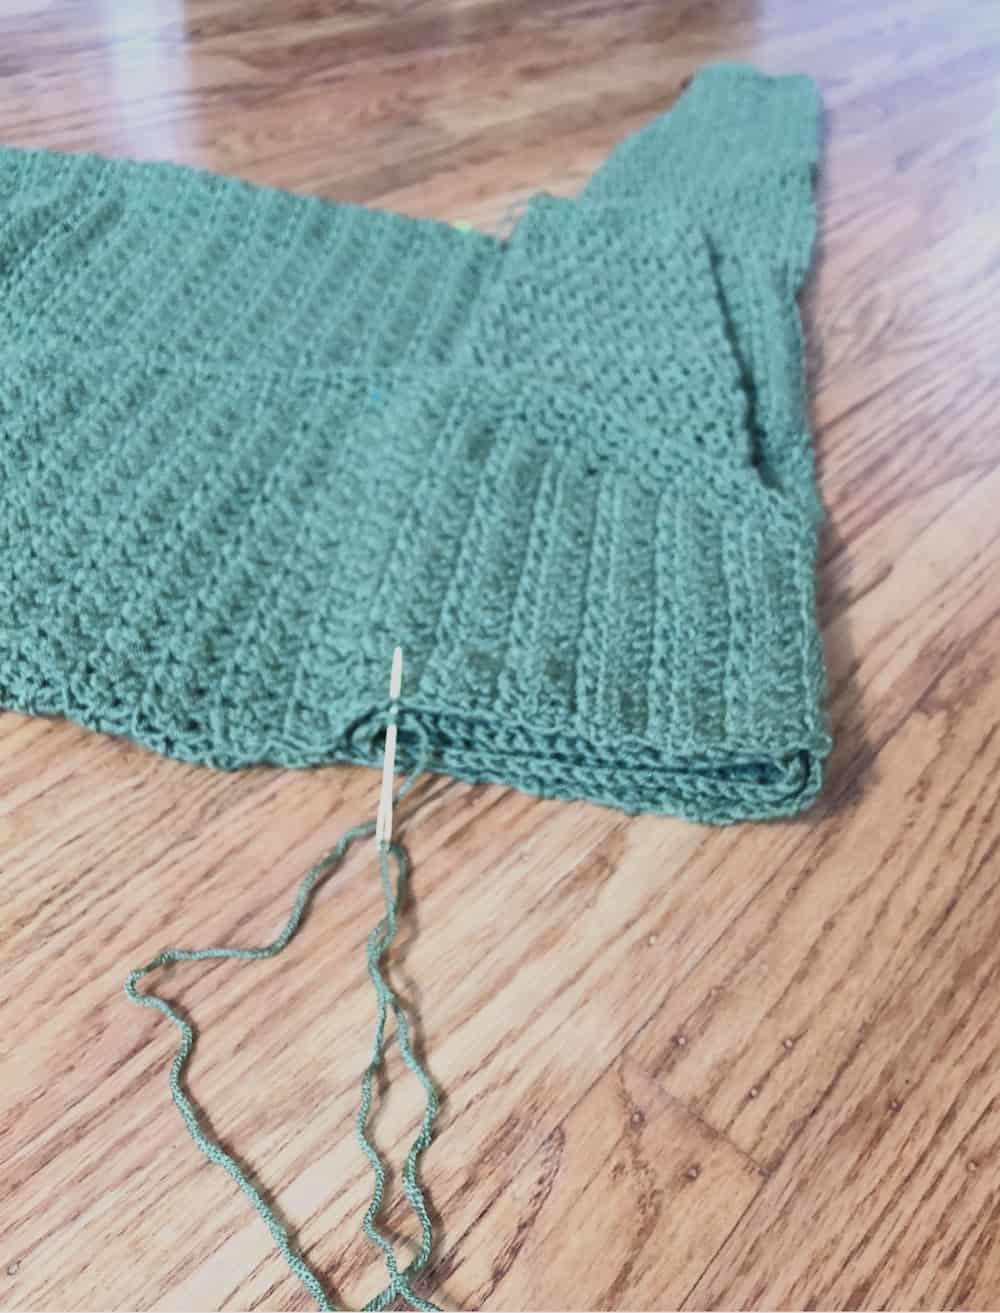
Seam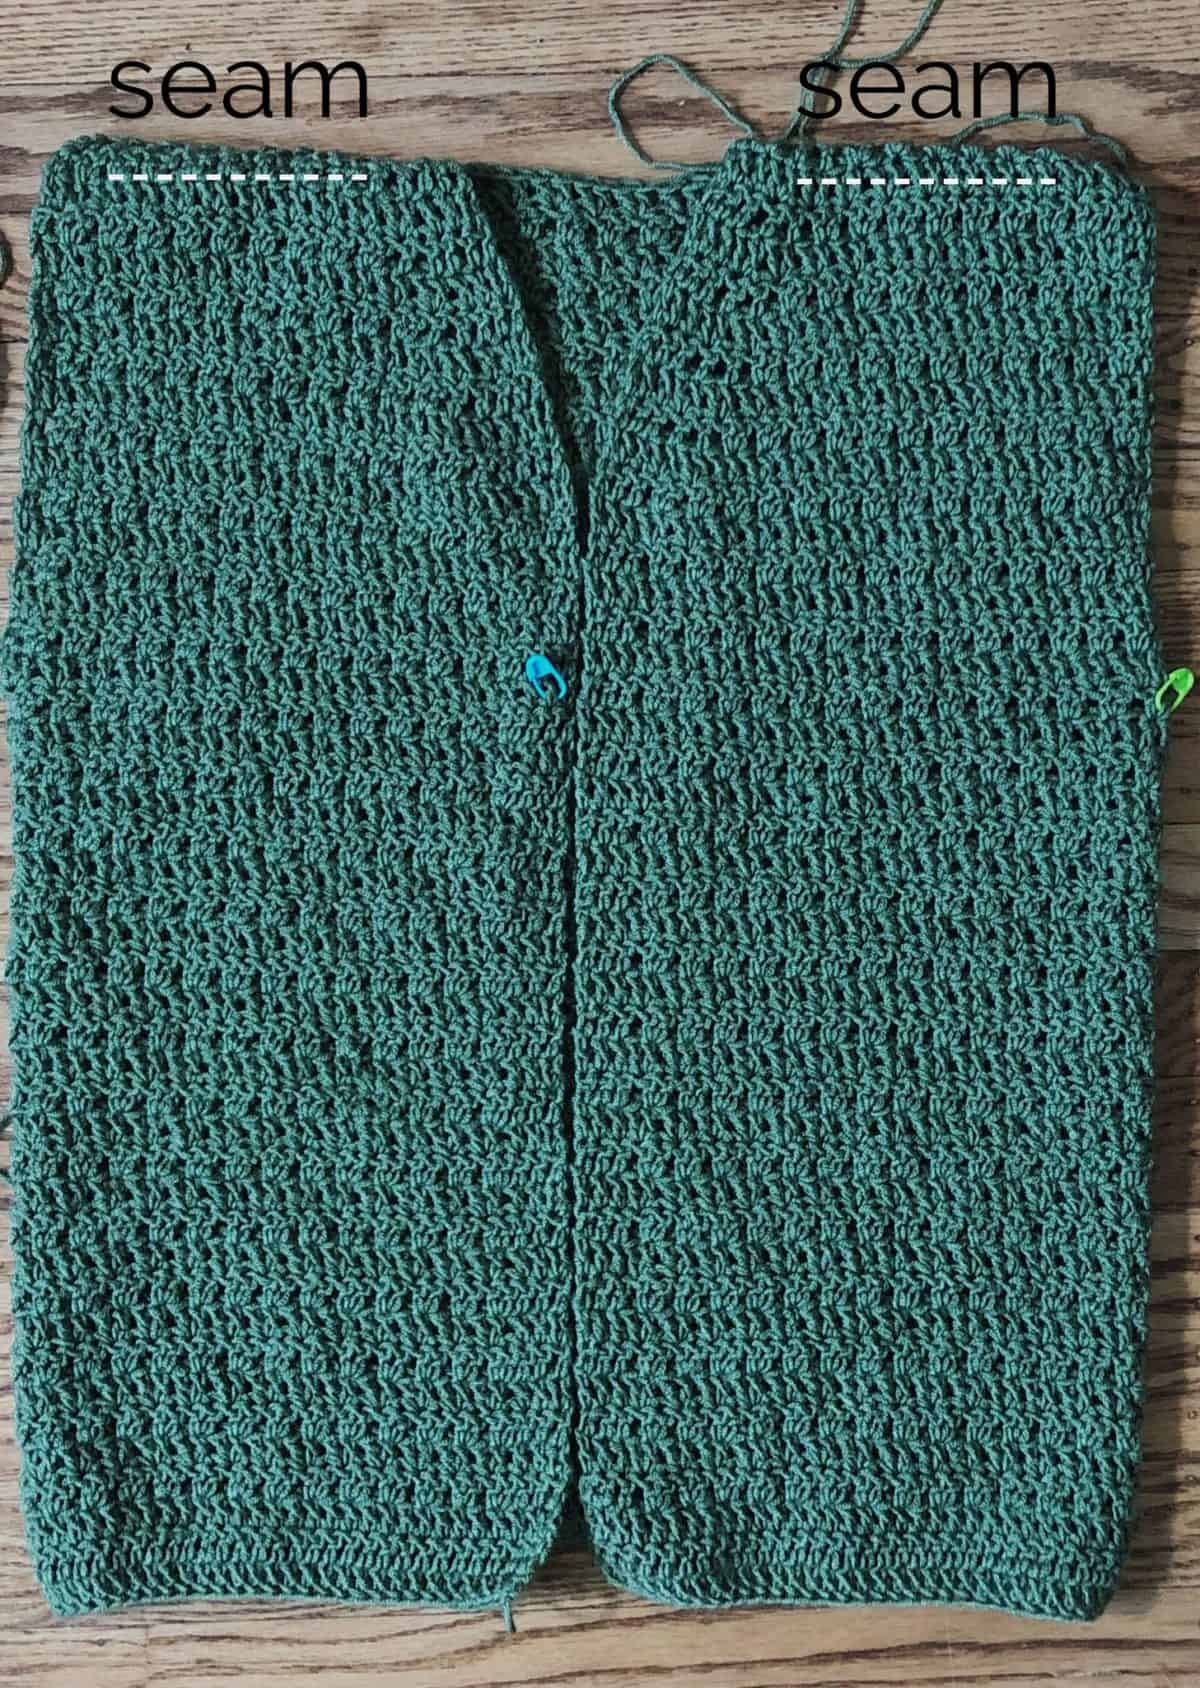
Turn cardigan WS out so RS are touching. Line up shoulders to back panel. Use the mattress stitch to sew shoulders to back panel. Cut yarn. Now is a good time to try it on and make any adjustments.
Sleeves
Make 2
-Join and turn each round.
-Sleeves are worked from the wrist up, so you can try them on at anytime and add or subtract increases as needed.
-We will increase on either side of the join, at this point the stitch pattern will look a little different, but this will be our faux seam so it will be on the underside.
-Sleeves XS-3X are written for 18.5” and 4X-5X for 19” in length.
-To adjust your sleeve length: try on your sleeveless cardigan, measure from the shoulder edge down to your hand-or where you want your sleeves to end. This is your desired sleeve length. You can add or subtract rounds according to your need.
Rnd 1. FDC 32, or ch 34 and dc in the 4th ch from your hook and in each ch across, join with sl st to first st and turn. (32 sts)
Rnds 2-3. Ch 3, dc in each st around, sl st to first st to join, turn.
Rnd 4. Ch 3, dc in same st, *{sk next st, 2 dc in next st} rep from * to one st left, sk last st, sl st to first st to join, turn. (32 sts)
Rnds 5-7. Ch 3, dc in same st, *{sk next st, 2 dc in next st} rep from * to one st left, sk last st, sl st to first st to join, turn.
Rnd 8. Ch 3, dc in same st, 2 DC in next 2 STS, *{sk next st, 2 dc in next st} rep from * to one st left, 2 dc in last st, sl st to first st to join, turn. (36 sts) 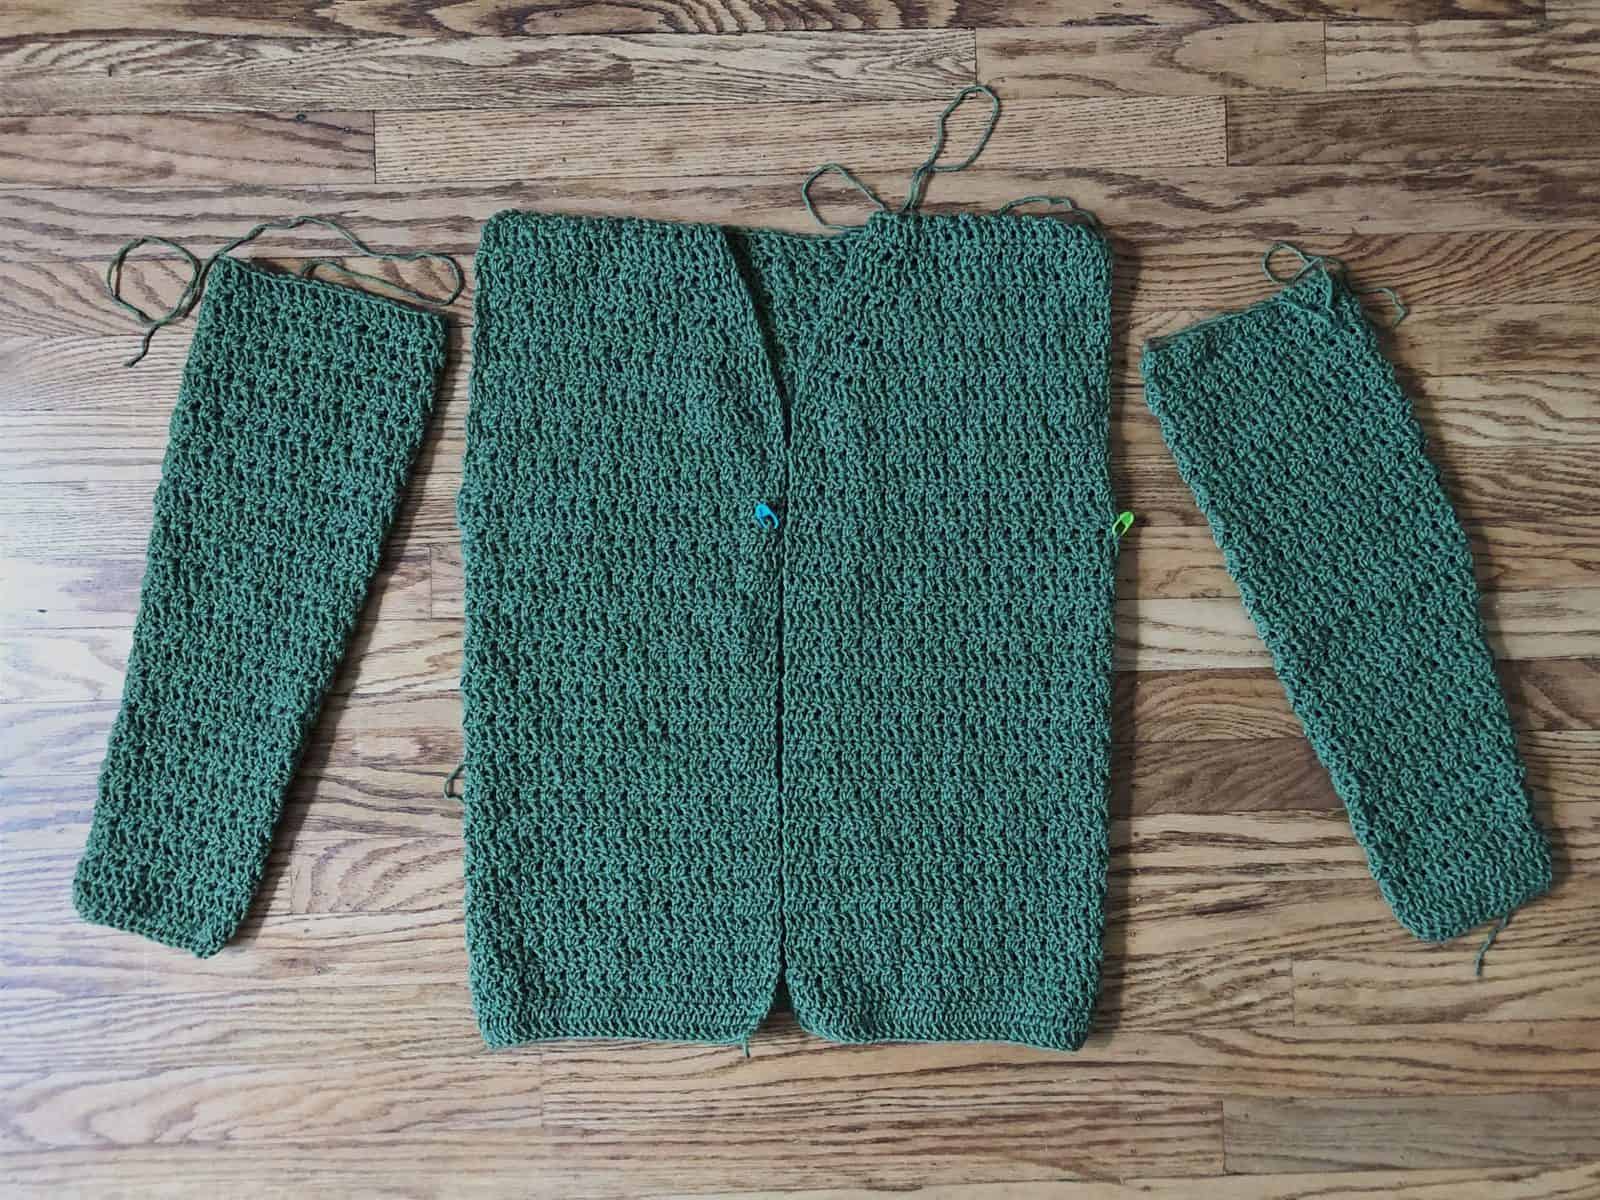
XS
Rnds 9-12. Rep Rnds 5-8 til you have 40 sts and sleeve is 6” wide flat.
Rnds. 13-35. Rep Rnd 4 or til you have reached your desired sleeve length. Leaving a long tail for seaming, cut yarn.
S
Rnds 9-16. Rep Rnds 5-8 til you have 44 sts and sleeve is 6.8” wide flat.
Rnds. 17-35. Rep Rnd 4 or til you have reached your desired sleeve length. Leaving a long tail for seaming, cut yarn.
M
Rnds 9-20. Rep Rnds 5-8 til you have 48 sts and sleeve is 7.4” wide flat.
Rnds. 21-35. Rep Rnd 4 or til you have reached your desired sleeve length. Leaving a long tail for seaming, cut yarn.
L
Rnds 9-24. Rep Rnds 5-8 til you have 52 sts and sleeve is 8” wide flat.
Rnds. 25-35. Rep Rnd 4 or til you have reached your desired sleeve length. Leaving a long tail for seaming, cut yarn.
XL
Rnds 9-24. Rep Rnds 5-8 til you have 52 sts and sleeve is 8” wide flat.
Rnds. 25-35. Rep Rnd 4 or til you have reached your desired sleeve length. Leaving a long tail for seaming, cut yarn.
2X
Rnds 9-28. Rep Rnds 5-8 til you have 56 sts and sleeve is 8.6” wide flat.
Rnds. 29-35. Rep Rnd 4 or til you have reached your desired sleeve length. Leaving a long tail for seaming, cut yarn.
3X
Rnds 9-32. Rep Rnds 5-8 til you have 60 sts and sleeve is 9” wide flat.
If you need more sleeve length Rep Rnd 4 til you have reached your desired length. Leaving a long tail for seaming, cut yarn.
4X
Rnds 9-36. Rep Rnds 5- 8 til you have 64 sts and sleeve is 9.8” wide flat.
For more sleeve length Rep Rnd 4 til you have reached your desired length. Leaving a long tail for seaming, cut yarn.
5X
Rnds 9-36. Rep Rnds 5- 8 til you have 64 sts and sleeve is 9.8” wide flat.
For more sleeve length Rep Rnd 4 til you have reached your desired length. Leaving a long tail for seaming, cut yarn.
Seam
 With cardigan body WS out and sleeve RS out, slide armhole end of sleeve into the cardigan.
 Make sure the faux seam is on the bottom (where your elbow will be). Line up the armhole end of sleeve with the armhole opening.
 Sew sleeve to armhole with mattress stitch. If needed, seam side of armhole to close.
Rep for both sleeves. Cut yarn. Weave in ends.
Finishing
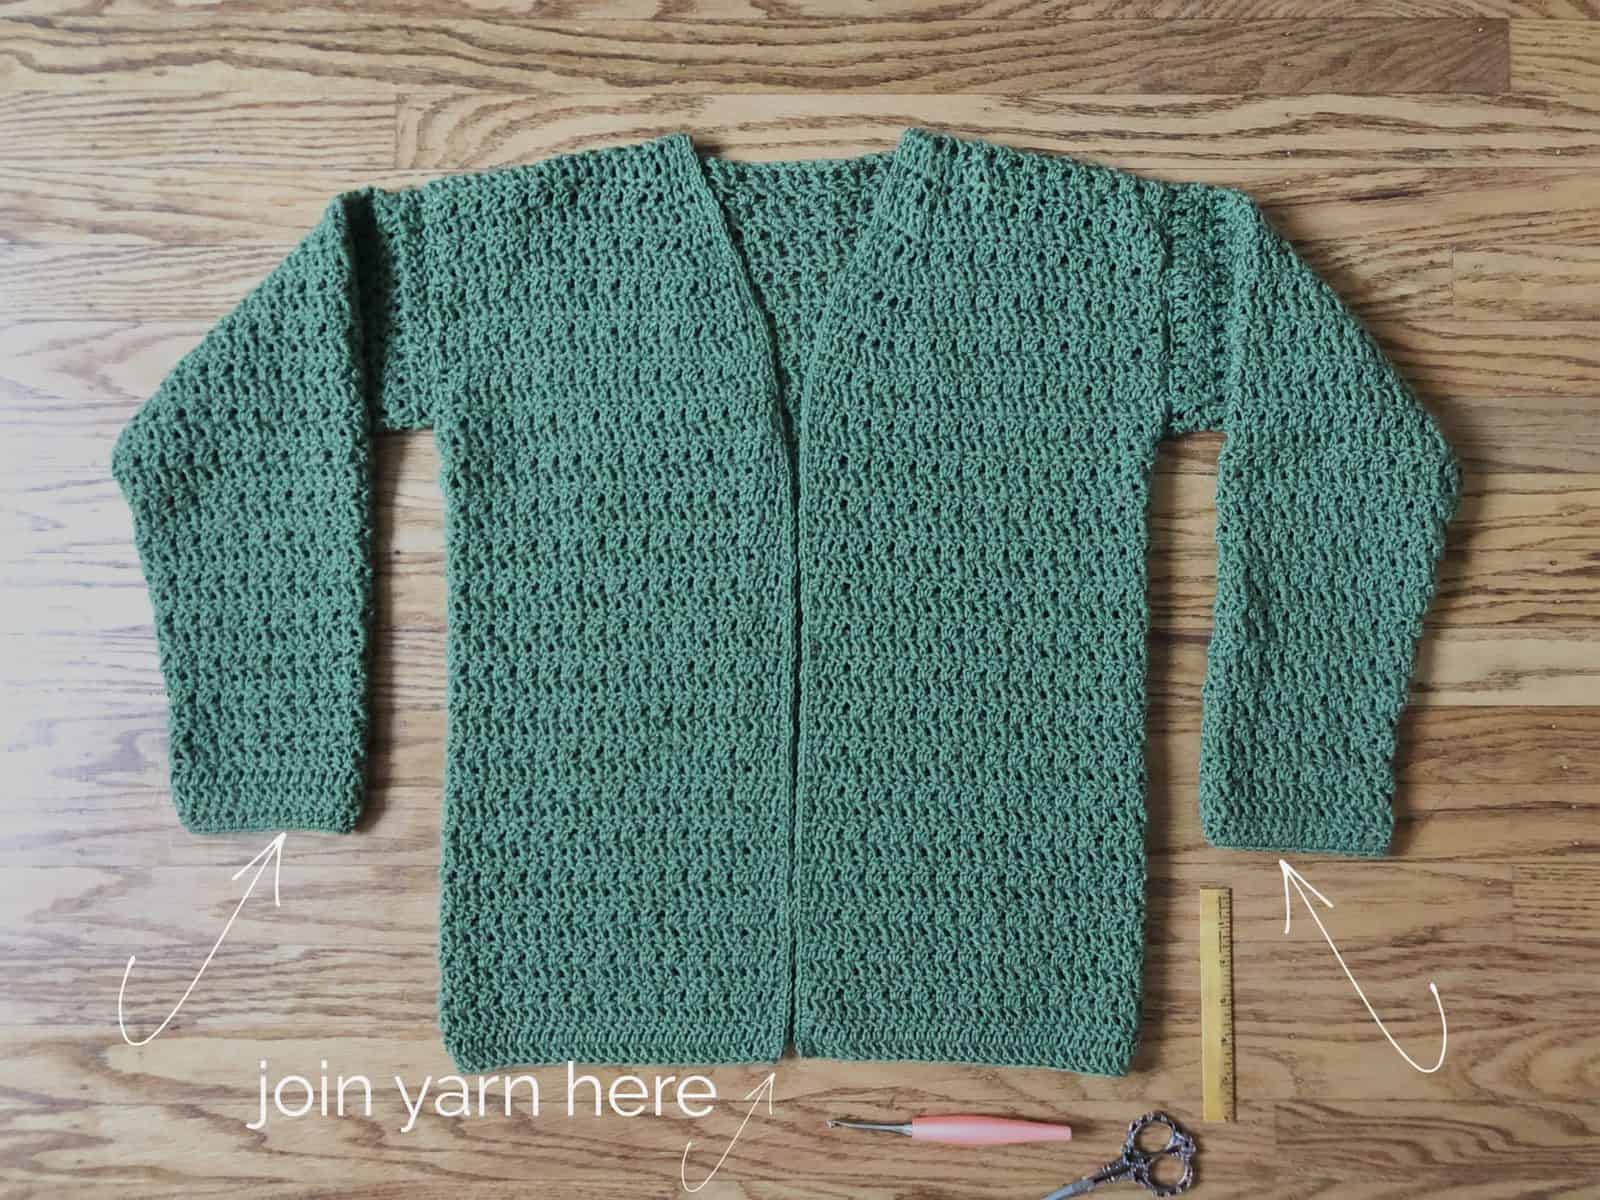 Turn cardigan RS out. Join yarn with sl st to bottom corner of the Front Right Panel (when wearing)(Left for left handed crocheters)
Ch 1, sc evenly up front panel, continue along back panel and down left front panel. Cut yarn. Weave in ends.
Join yarn with sl st to sleeve cuff on the backside. Ch 1, sc in same st and in each st around, sl st to join. Cut yarn. Weave in ends. Rep on second sleeve.
Recommended Products
As an Amazon Associate and member of other affiliate programs, I earn from qualifying purchases.


I love the sweater but it would be very helpful to have the finished measurement of the length or a picture that shows how long it is while being worn. I had to take out multiple rows because it was too long. Thank you for the great pattern!
Hi Beth,
So sorry that essential measurement was missing! I’ve added the lengths back now. I recently had to update it, and must have accidentally deleted those. Thank you for reaching out so I could fix it. Sorry you had to frog back! I’m glad you enjoyed the pattern otherwise.
Have a great weekend,
Crystal
@Christa,
Thank you! No worries, it’s my first sweater so I was prepared to redo parts. 🙂
I’m looking forward to making more now that it doesn’t seem so daunting.
I’m a bit puzzled. I’m making the cardigan for a size XL. My foundation row was 160 stitches but after rows 2 and 3 I was down to 159 stitches. Then once I finished row 4 I was down to 158 stitches. I’m not sure what I’m doing wrong.
Hi Hayley,
I’m sorry you’re having trouble, thanks for reaching out. I’ll try to help.
Are you counting the ch 3 as the first dc? You should be working into it at the end of each row.
Let me know if that helps, or if you’re still having trouble.
Thanks,
Crystal
Hi 😊 I seen to be stuck! Im about to start the back panel on the Sera Cardigan and it don’t understand your instructions for row 3. Could you possibly elaborate? Im confused with the directions on it. Thanks bunches Linda😊
Hi Linda,
Thanks for reaching out with your question. Just to clarify, I’m going to copy and paste the instructions for Row 3 here and explain below: Row 3. Rep Row 2. Now is a good time to check your “actual bust”: 32 (36.9, 41.9, 44.2, 49.2, 54.2, 56.7, 61.6, 64)”
Rep Row 2 means to repeat row 2 again — simply another row of double crochets. To check your “actual bust” means that at this point your yarn/tension/fabric should be working out to the actual width it’s going to be. So now is a good time to check how wide your fabric is compared to how wide it should be (which is listed under “finished bust” for your size {I see that I have used two different terms here: actual and finished. They are the same, so I will edit that.
I hope this clarifies. Please let me know if you have any further questions and thanks for asking!
Crystal
Could I possibly get some help with row 3 on the back panel?
Hi Linda,
Are you on the back panel after the divide? How can I help? Row 3 is the same stitch pattern skip 1, 2 dc in the next.
From the pattern it reads: Row 3. – Row 12, 14, 15, 16, 16, 18, 18, 20, 20. Rep Row 2, cut yarn.
So you will repeat this row Ch 3, *{sk next st, 2 dc in next st} rep from * til one st left, dc in last st, turn. for the number of rows by size. For instance if you’re making the XS then it’s Rows 3-12, or 10 rows total. If you’re making the 5X repeat Row 2 for Rows 3-20, or 18 rows total.
Please feel free to ask your specific question, if this doesn’t help. You can also email me directly at [email protected]
Thanks,
Crystal
Hello,
Is there anyway I could pay for this cardigan pattern so I don’t have to follow my phone . If it can be emailed without advertising I can then print it out.
Hi Rose, Yes you can purchase the PDF Pattern and download it from one of my shops.
Here are the links:
https://www.etsy.com/listing/779817560/sera-cardigan-crochet-pattern-pdf
https://www.lovecrafts.com/en-us/p/catalog/product/view/id/301805/
https://www.ravelry.com/patterns/library/sera-cardigan
Thank you,
Crystal
I don’t know why – but in the first part none of my end stitches come out, i. e., if I start with the 2DC in the next two stitches, I end up with only 135 across instead of 136 – so I just throw in another DC at the end (4dcs)
Am I supposed to skip the FIRST stitch in and then 2DC? I don’t know, but as long as the count comes up . . . .
Hi! Thanks for your question. I’ll try to help.
Looking at Row 4, it begins with 3 double crochets in the first 3 stitches (ch 3 counts as the first dc, the 1 dc in the next and 1 dc in the next).
After those first three stitches you begin the sk 1 and 2 dc pattern across. And then you end with 1 dc in each of the last 3 stitches.
Here is “Row 4. Ch 3, dc in next 2 sts, *{sk next st, 2 dc in next st} rep from * til 3 sts left, dc in last 3 sts, turn. (104,120, 136, 144, 160, 176, 184, 200, 208) sts” I’m referring to.
I hope this helps!
Crystal
@Christa,
Thank you! I had this BEAUTIFUL thread/yarn that I purchased at a thrift store years ago and am using your pattern to make the softest slouchy sweater ever! Now my sister wants me to make one for her.
I think I figured out how I will make notes starting with R 4
Turn, ch 2(3), *1 DC in first three stitches, sk 1 st, 2 DC in next st, 1 DC in each last 3 st, turn, ch 2, Repeat from *
That is how I got to 136, even on both sides with the 3 DC in the beg and end of each row.
@Hayley Bradford,
I found was having the same problem.
I think I figured out starting with R 4
Turn, ch 2(3), *1 DC in first three stitches, sk 1 st, 2 DC in next st across, then 1 DC in each last 3 st, turn, ch 2, Repeat from *
That is how I got to 136, even on both sides with the 3 DC in the beg and end of each row.
I finally finished mine (which I made 2 sizes bigger for extra comfy) and it came out beautifully!
Can’t wait to start another. THANK YOU for sharing
This is so great to hear! I’m glad you love it!
Good morning Christa, I am trying to download the free pattern on revelry for the blog hop today and it is not coming up free. I hope you can help with this.
Hi Ramona,
Thanks for reaching out. First head to the blog hop for the code you need to enter on Ravelry, here is the link https://nedandmimi.com/fall-crochet-pattern-ideas
Then scroll down to DAY 22, where you will see the code, copy it down. Then come back to this page and click over to the Ravelry link, here it is again https://www.ravelry.com/patterns/library/sera-cardigan
Next add the pattern to your cart, click apply coupon, and enter the code from the blog hop. This brings the cost to $0 and you can check out.
I hope this helps!
Crystal
Can I choose an intermediate size counting like this:
If L144 and XL 160, may I count 152 and so on for other stitches?
I’m 117cm bust and I’d like a lightly snug fit.
I’m going to use Titan Wool Sfinge (100g=200m, for hook 4). I’ve 7 balls, would they be enough – i don’t need a very long cardigan, just some cm under the waist.
Thank you.
Hi thanks for reaching out with your questions. It’s best to follow the pattern as written unless you are well versed in “crochet math” and able to adjust stitch multiples for changes. If you’re comfortable redoing the stitch counts to start and after dividing the panels then you can work that out. The stitch multiple is 2 + 6. If you are not comfortable making these changes then I recommend going down a size (especially if you want it fitted) to making the L (144). As to your yarn it sounds like that may be enough, but it’s most important that you check gauge as that affects sizing and yarn usage. Here’s an article on gauge if you need it https://christacodesign.com/crochet-gauge-what-is-gauge-how-do-you-measure-it/ I hope this helps.
Thanks,
Crystal