
Crochet Granny Triangle Scarf Pattern | Canyon Scarf
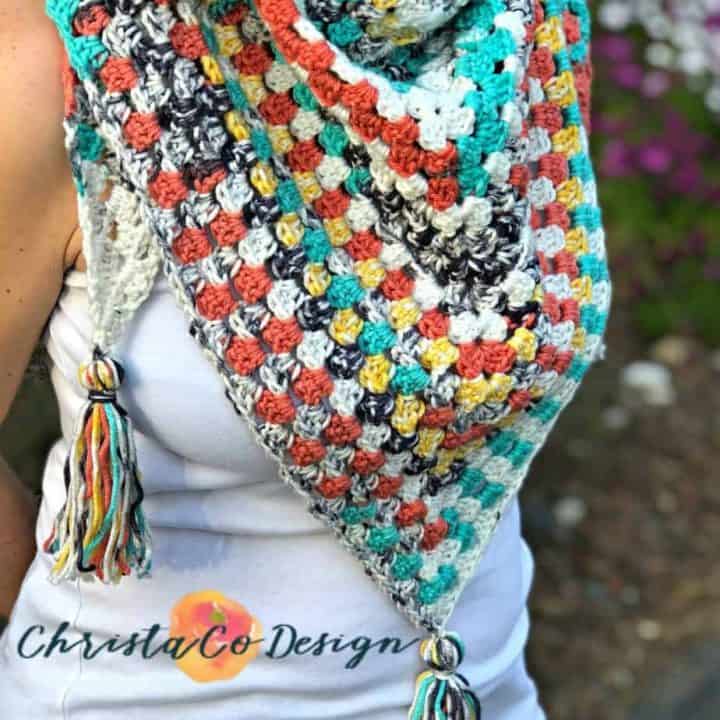
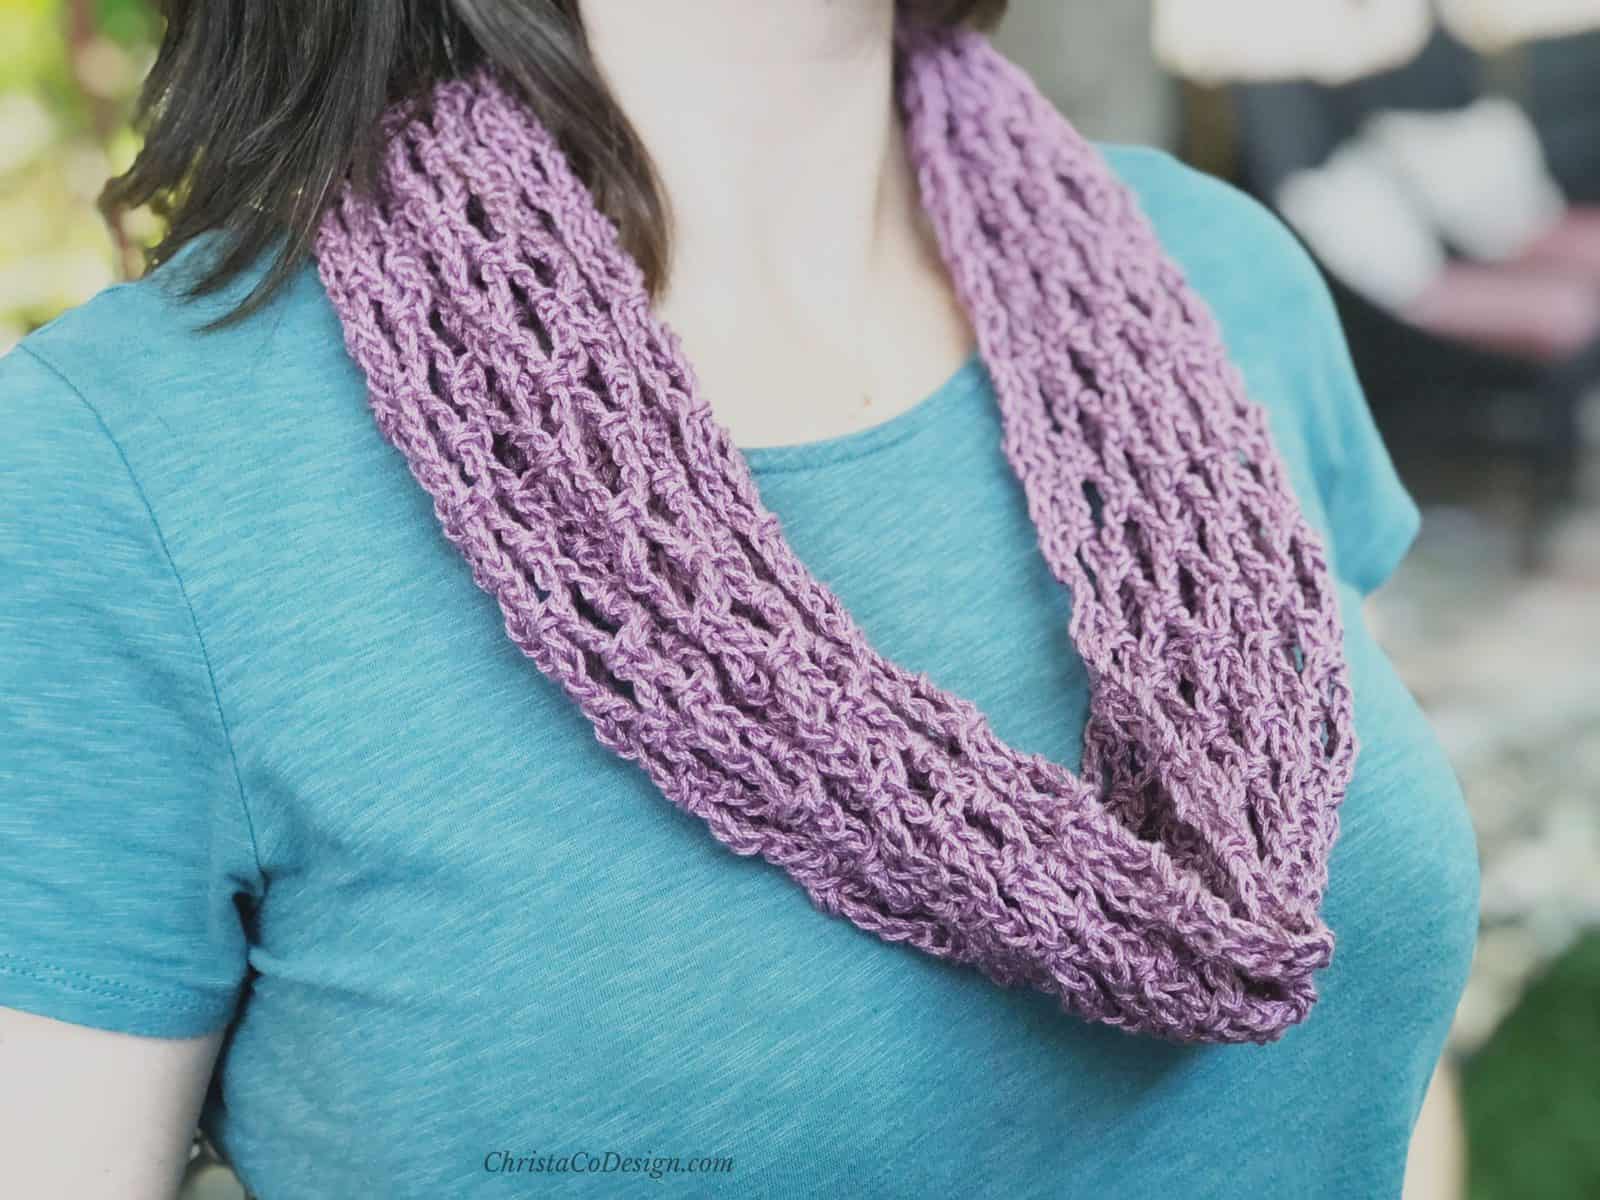
The Canyon Scarf is a classic granny triangle pattern. This top down scarf pattern is an easy and relaxing crochet project.

This post contains affiliate links, I may earn a fee. Read more disclosure policy.
Join the ChristaCoDesign Newsletter
Never miss a pattern!
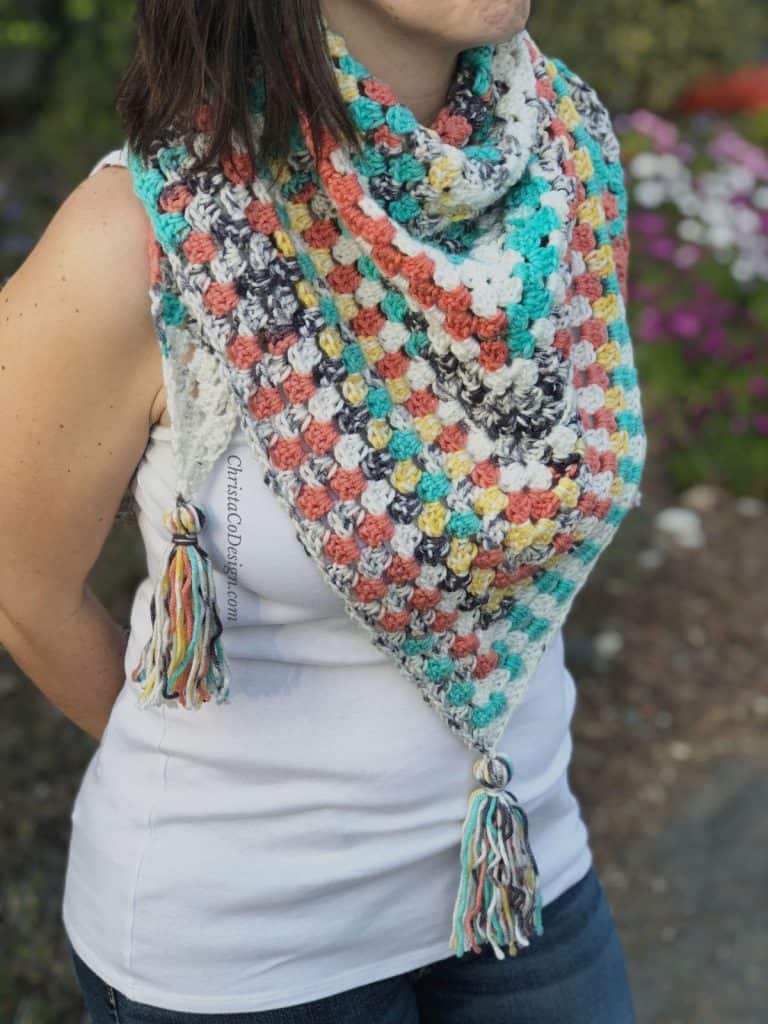
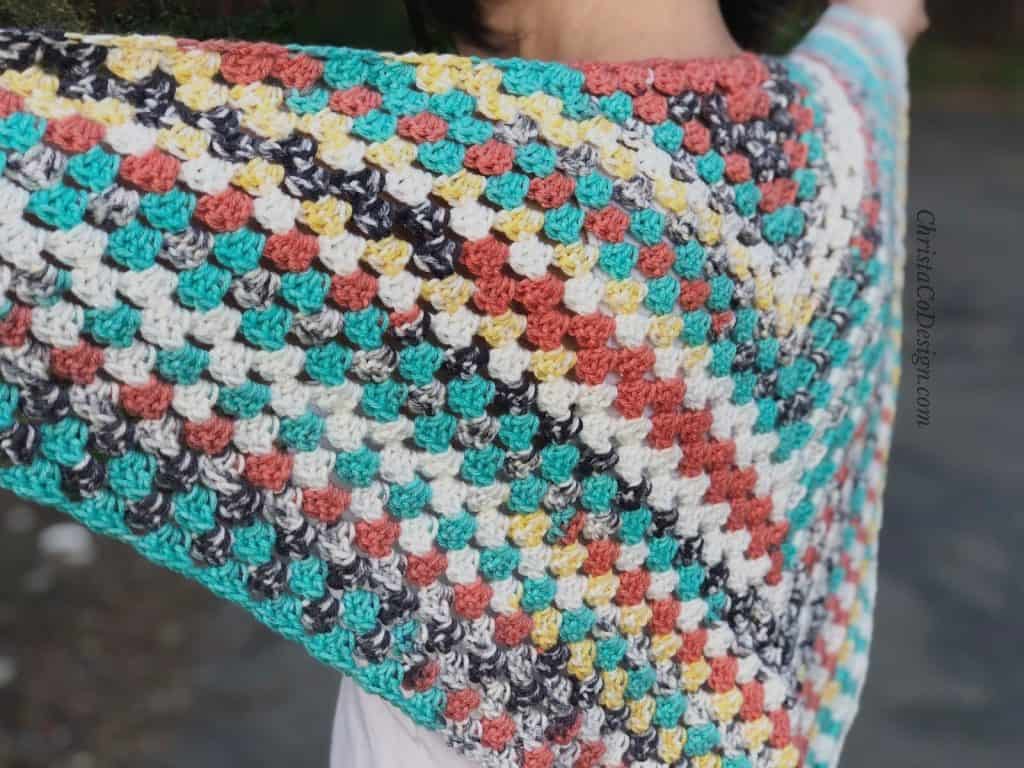
The simple stitches allows a bright and colorful yarn to shine. Add the tassels for a finished and polished look.
This granny triangle scarf is an easy, beginner friendly crochet pattern. I love how simple stitches pair with colorful yarns for a beautiful result.
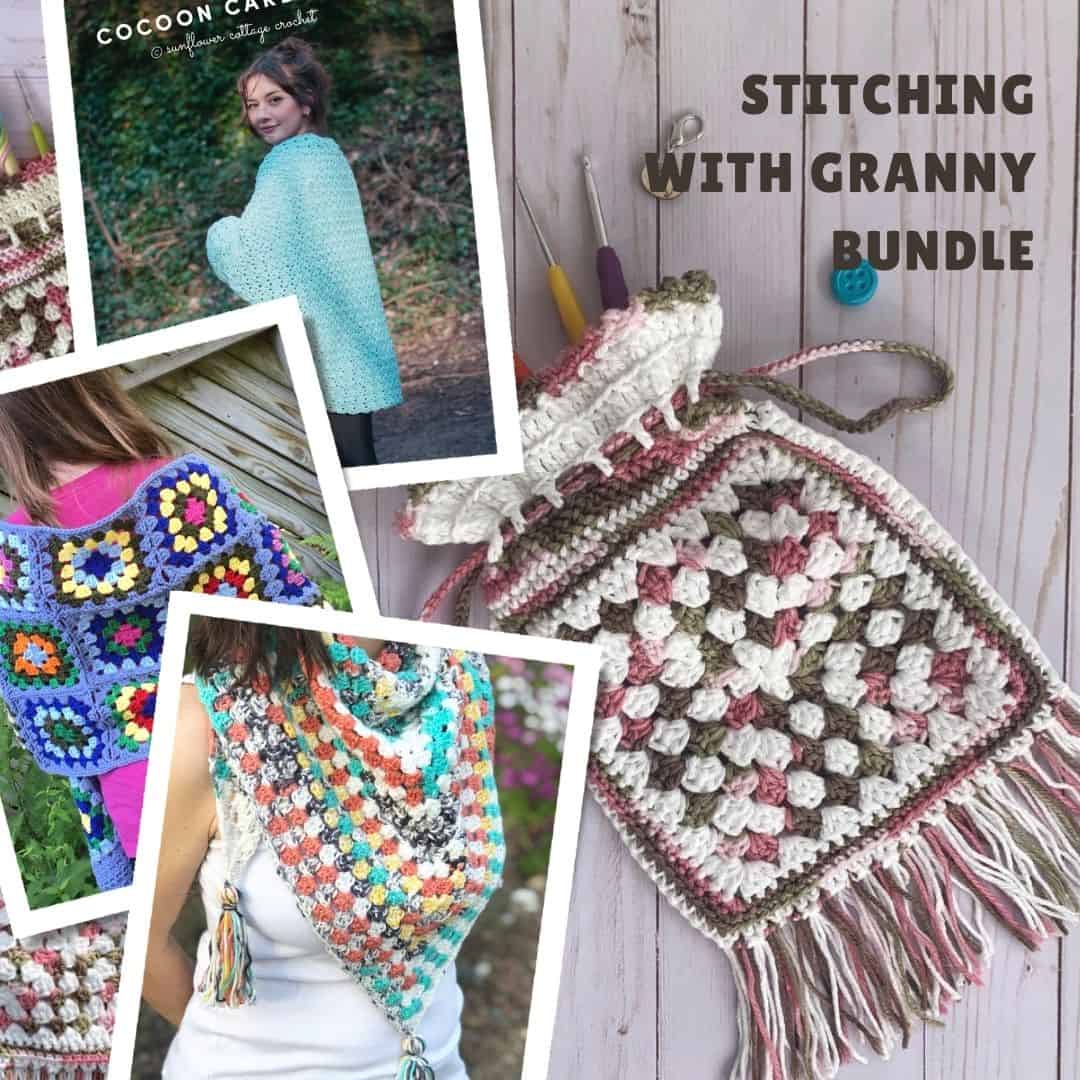
You can scroll down for the free pattern, purchase the individual pdf or get this pattern along with 22 other crochet patterns in the Stitching With Granny Bundle!
Purchase the ad-free, well formatted printable PDF Pattern from my shop. Scroll down for the free pattern!
I was itching to use Hobby Lobby’s Painted Canyon colorway and I think it worked up lovely in this pattern. The self striping yarns are such a breeze to work with-no color planning, less ends to weave = win, win!
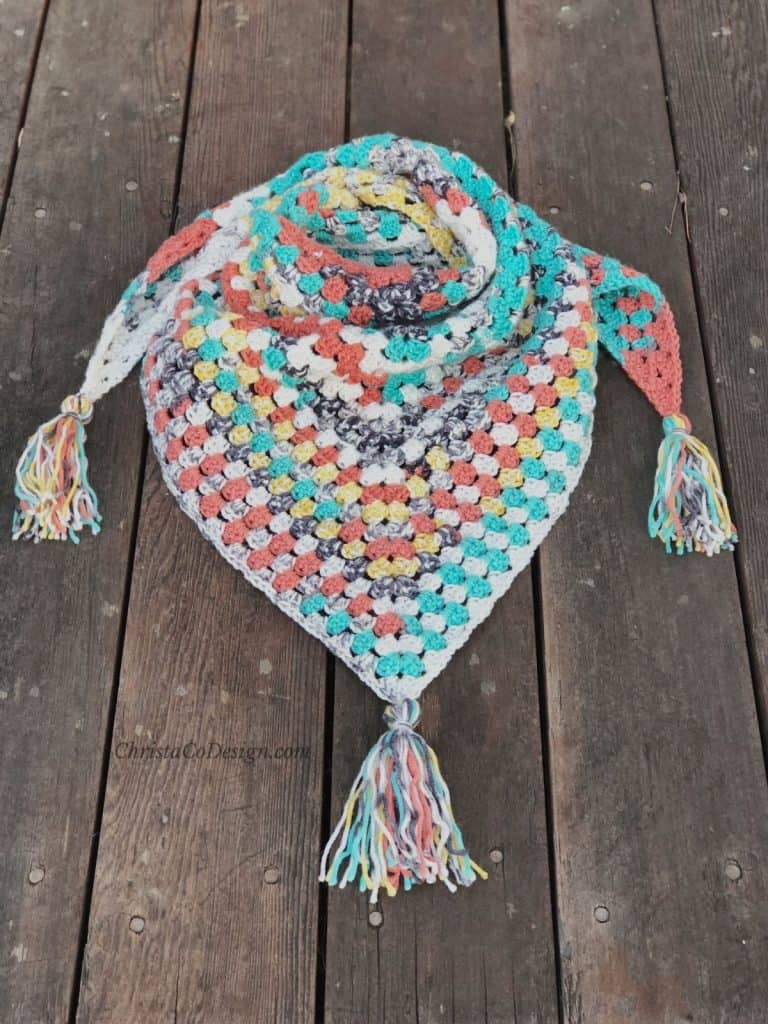
This pattern will give you the triangle scarf size pictured: 23.5″ deep by 50″ long. You can continue the pattern to increase your triangle to a full shawl size.
Purchase My Ad-Free PDF Patterns In Your Favorite Shop Here:
For this scarf I use 3 skeins of Hobby Lobby’s I Love This Yarn in Painted Canyon. I think adding another two skeins (with this gauge and hook) would create a comfortable sized shawl. These granny triangle scarves are so easy to add on to!
I chose to add tassels on my corners, but you could add fringe along the edges or leave it off entirely. Isn’t that the beauty of crochet-customizing it to your liking.
I love how this colorful triangle scarf pairs with the simplicity of a white top. It’s great when the weather is cool in the morning, but you know it’ll be warm by afternoon.
It’s so much fun crocheting with these self striping yarns. I love working through the skeins to see how those colors play out. I don’t know if I could combine colors so well myself.
Save your favs!
Add this pattern to your Ravelry queue.
Materials
#4 medium worsted weight yarn,* pictured in 3 skeins of I Love This Yarn in Painted Canyon (100% acrylic, 252 yds/230m, 5oz/142g)
5mm (H) hook*, love my Clover Amours.
Yarn needle for weaving in ends, scissors.
If you’d like to add fringe, I did a little photo tutorial on my Veneto Fringed Scarf pattern.
Gauge
14 dc x 8 rows = 4″/10cm x 4″/10cm
Notes
- Ch 3 counts as a double crochet, you can also use a ch 3 alternative.
- Ch 4 counts as a double crochet + chain 1.
- The step by step photo tutorial is below. Once you get the triangle started it’s a one row repeat (step 19).
Stitches/Abbreviations (US Terms)
ch – chain
dc – double crochet
sl st – slip stitch
granny – a cluster of 3 double crochets
Scroll down for the crochet Granny Triangle Scarf Photo Tutorial
How to Crochet a Granny Triangle Scarf
Learn how to crochet a granny triangle scarf.
Materials
- #4 medium worsted weight yarn, pictured in 3 skeins of I Love This Yarn in Painted Canyon (100% acrylic, 252 yds/230m, 5oz/142g)
Tools
- 5mm (H) hook
- Yarn needle
- Scissors
Instructions
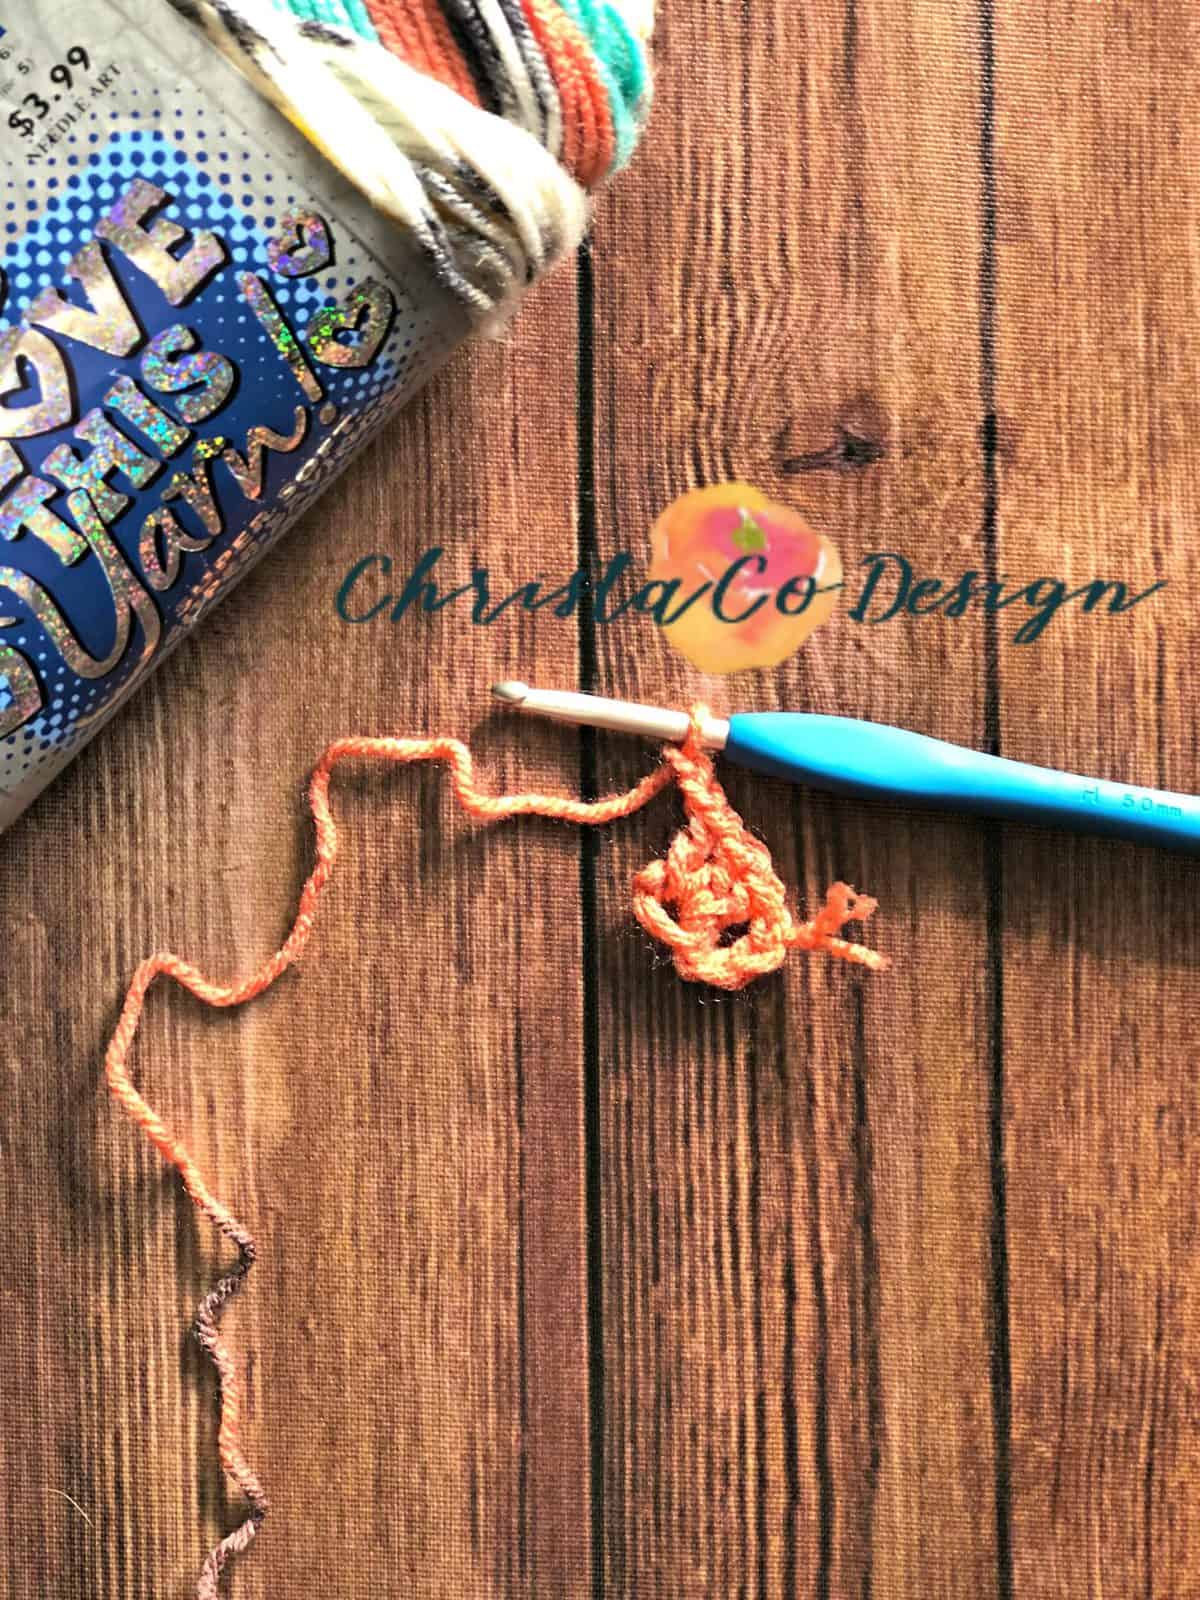
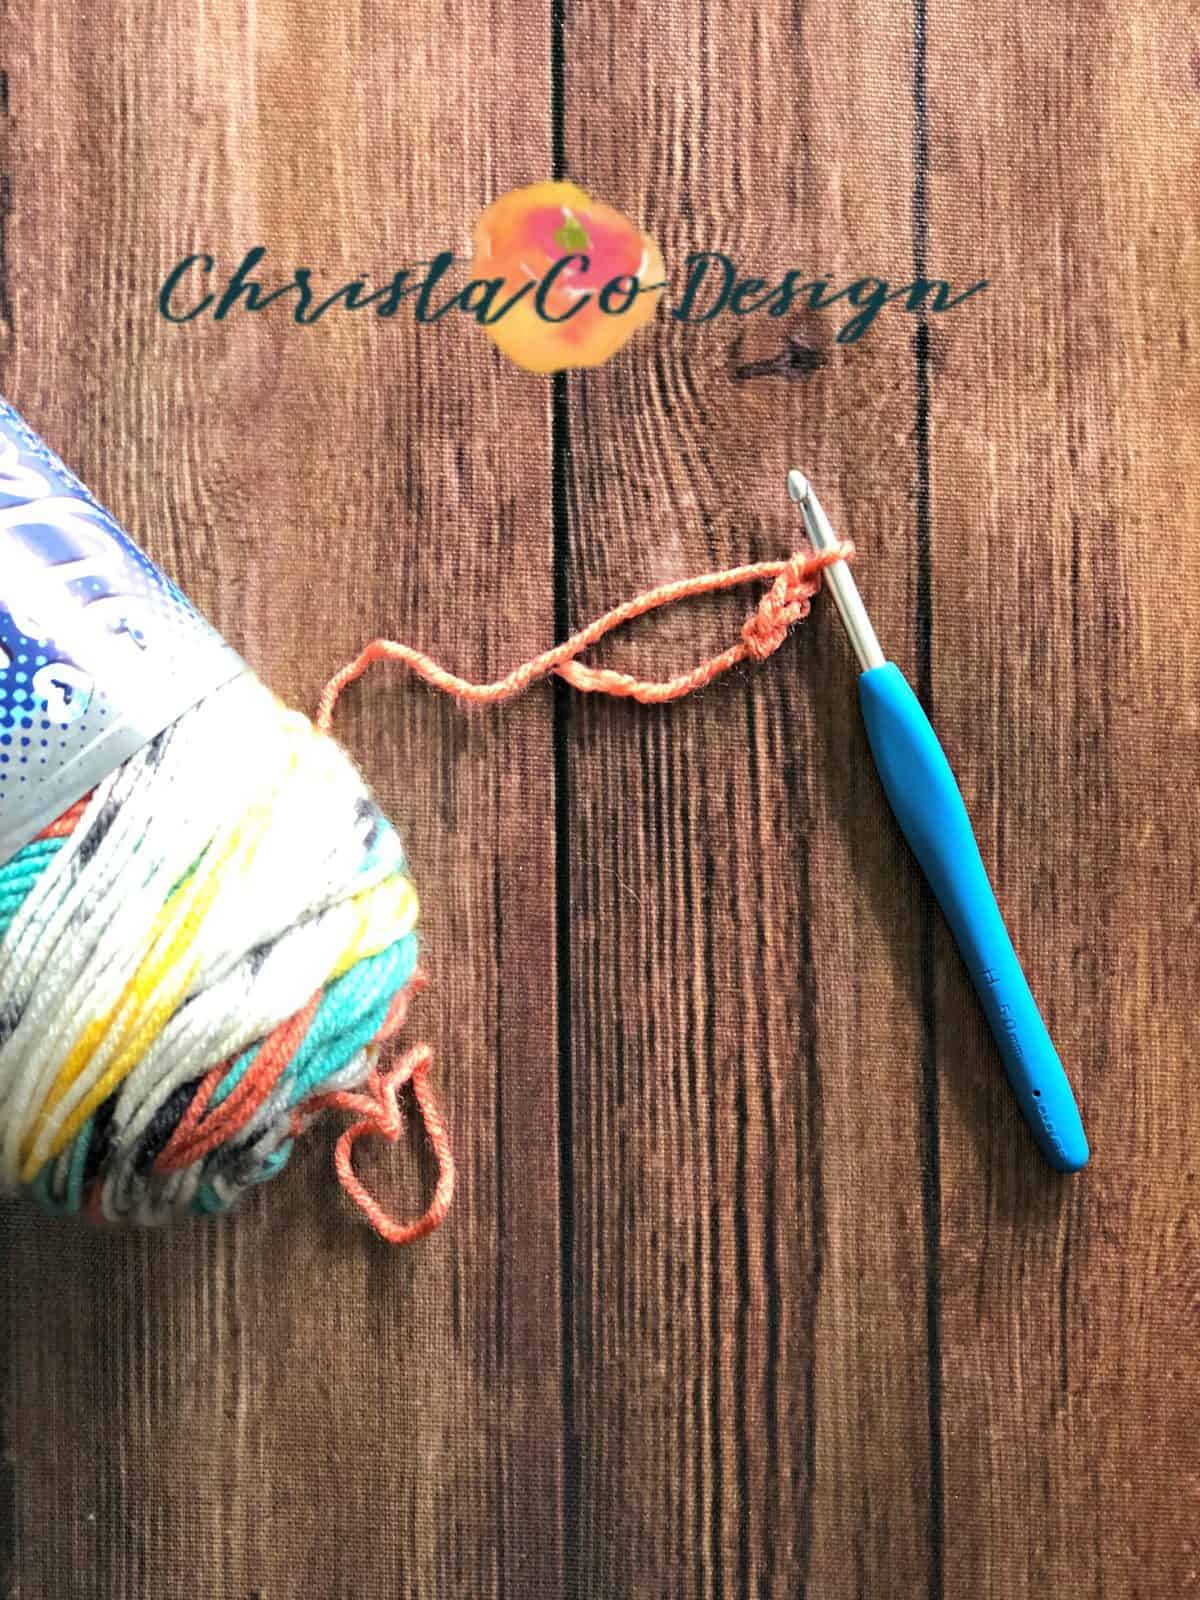 Ch 3
Ch 3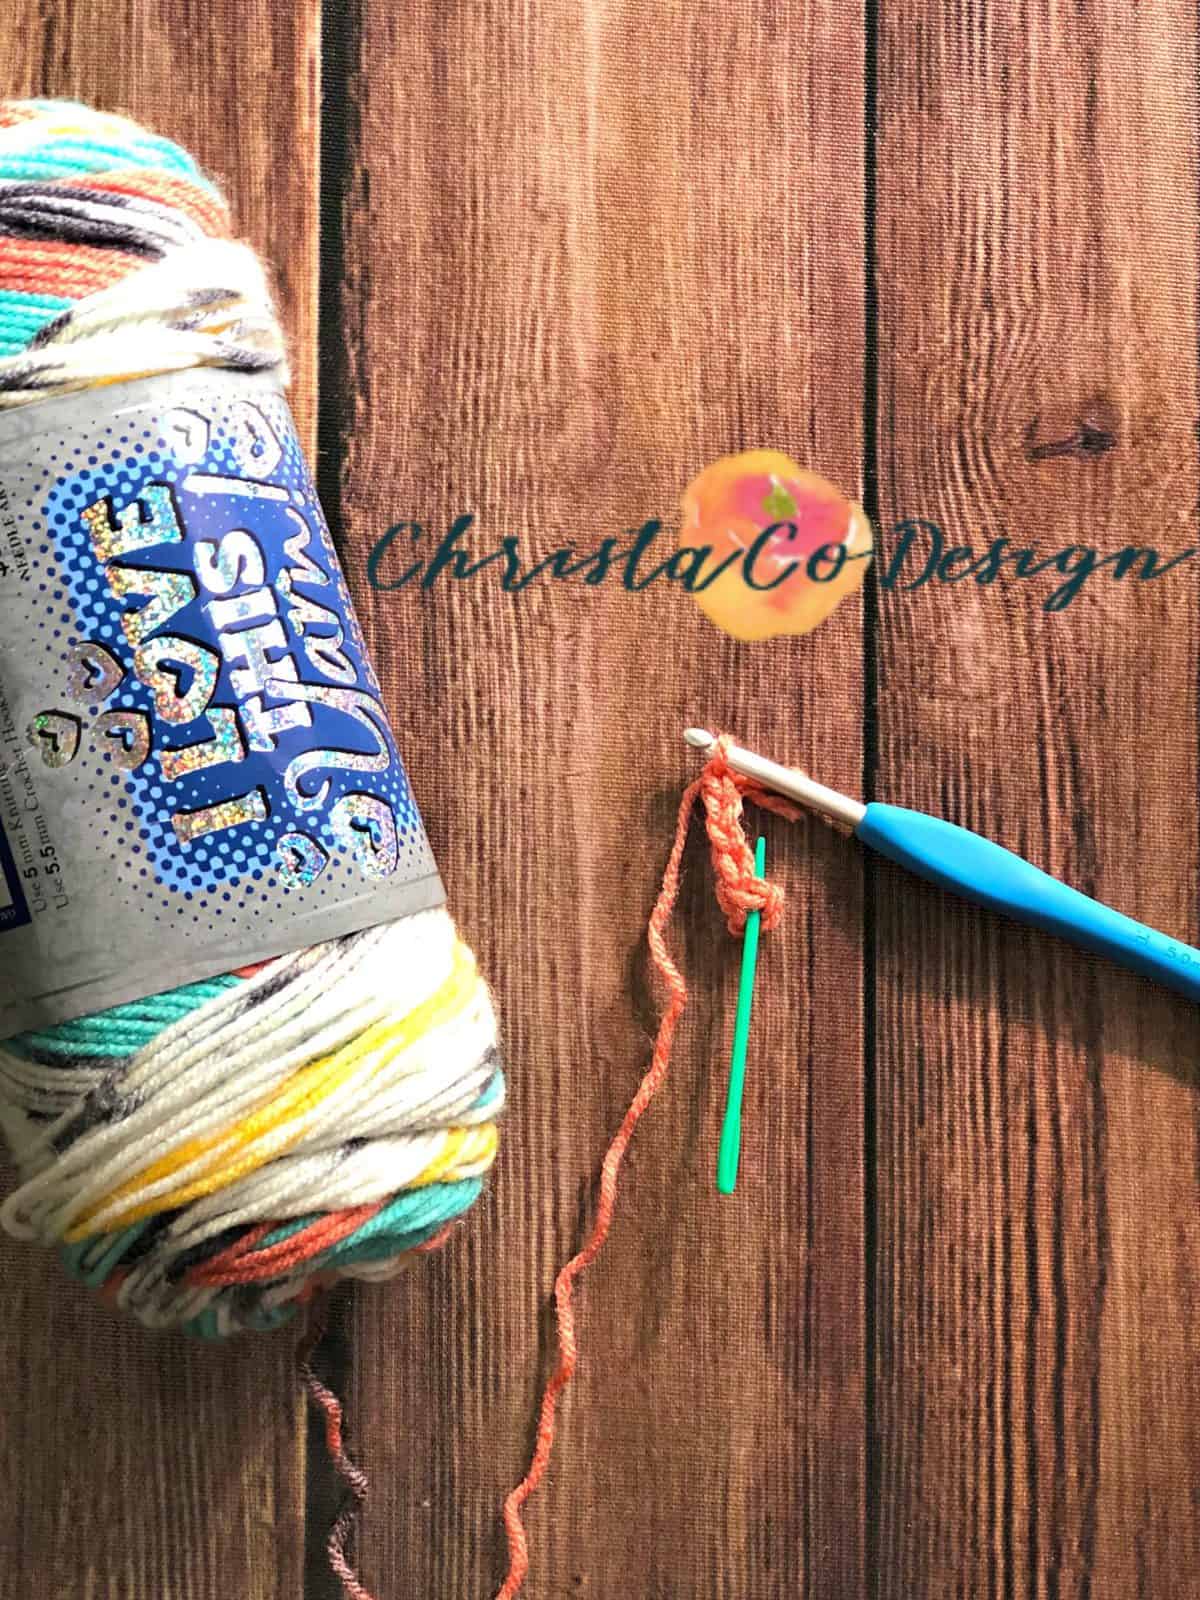 Slip stitch to 1st ch to make a circle.
- Ch 4 (counts as a dc + ch 1), In the circle you formed: 3dc,
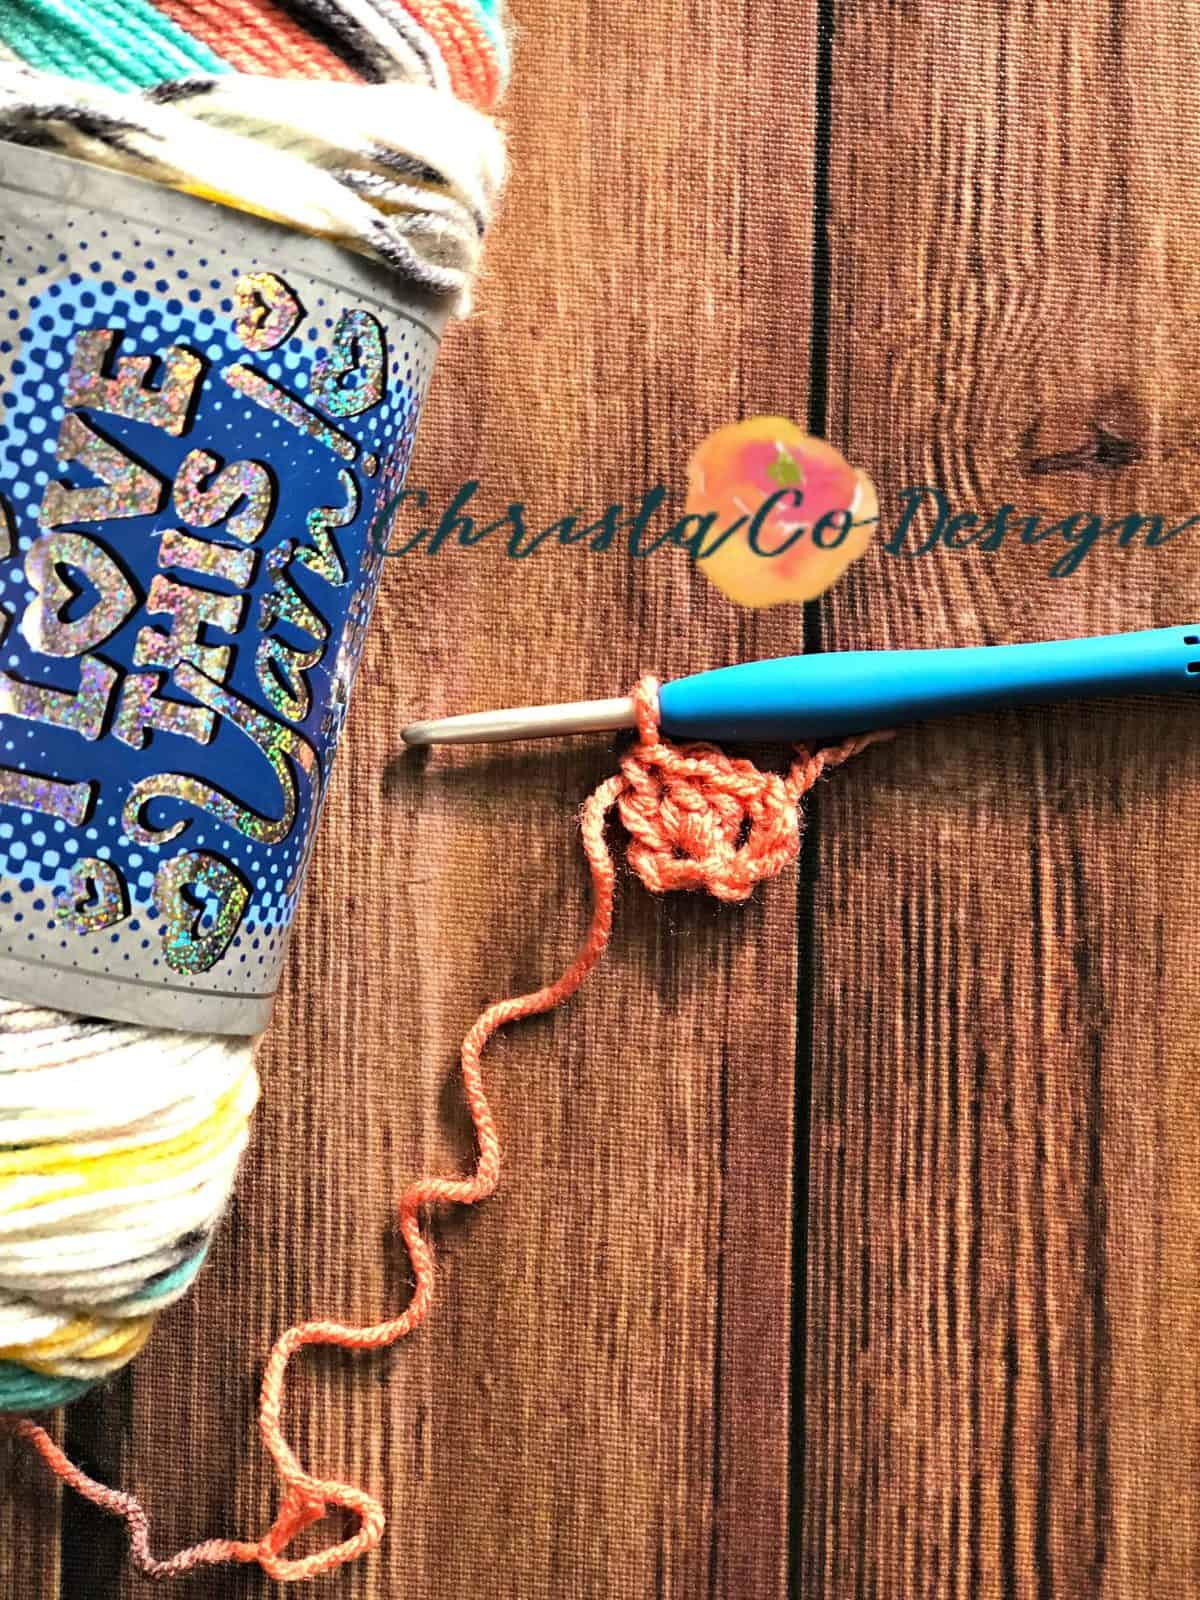
- ch 2 (this will be the bottom tip of your scarf),
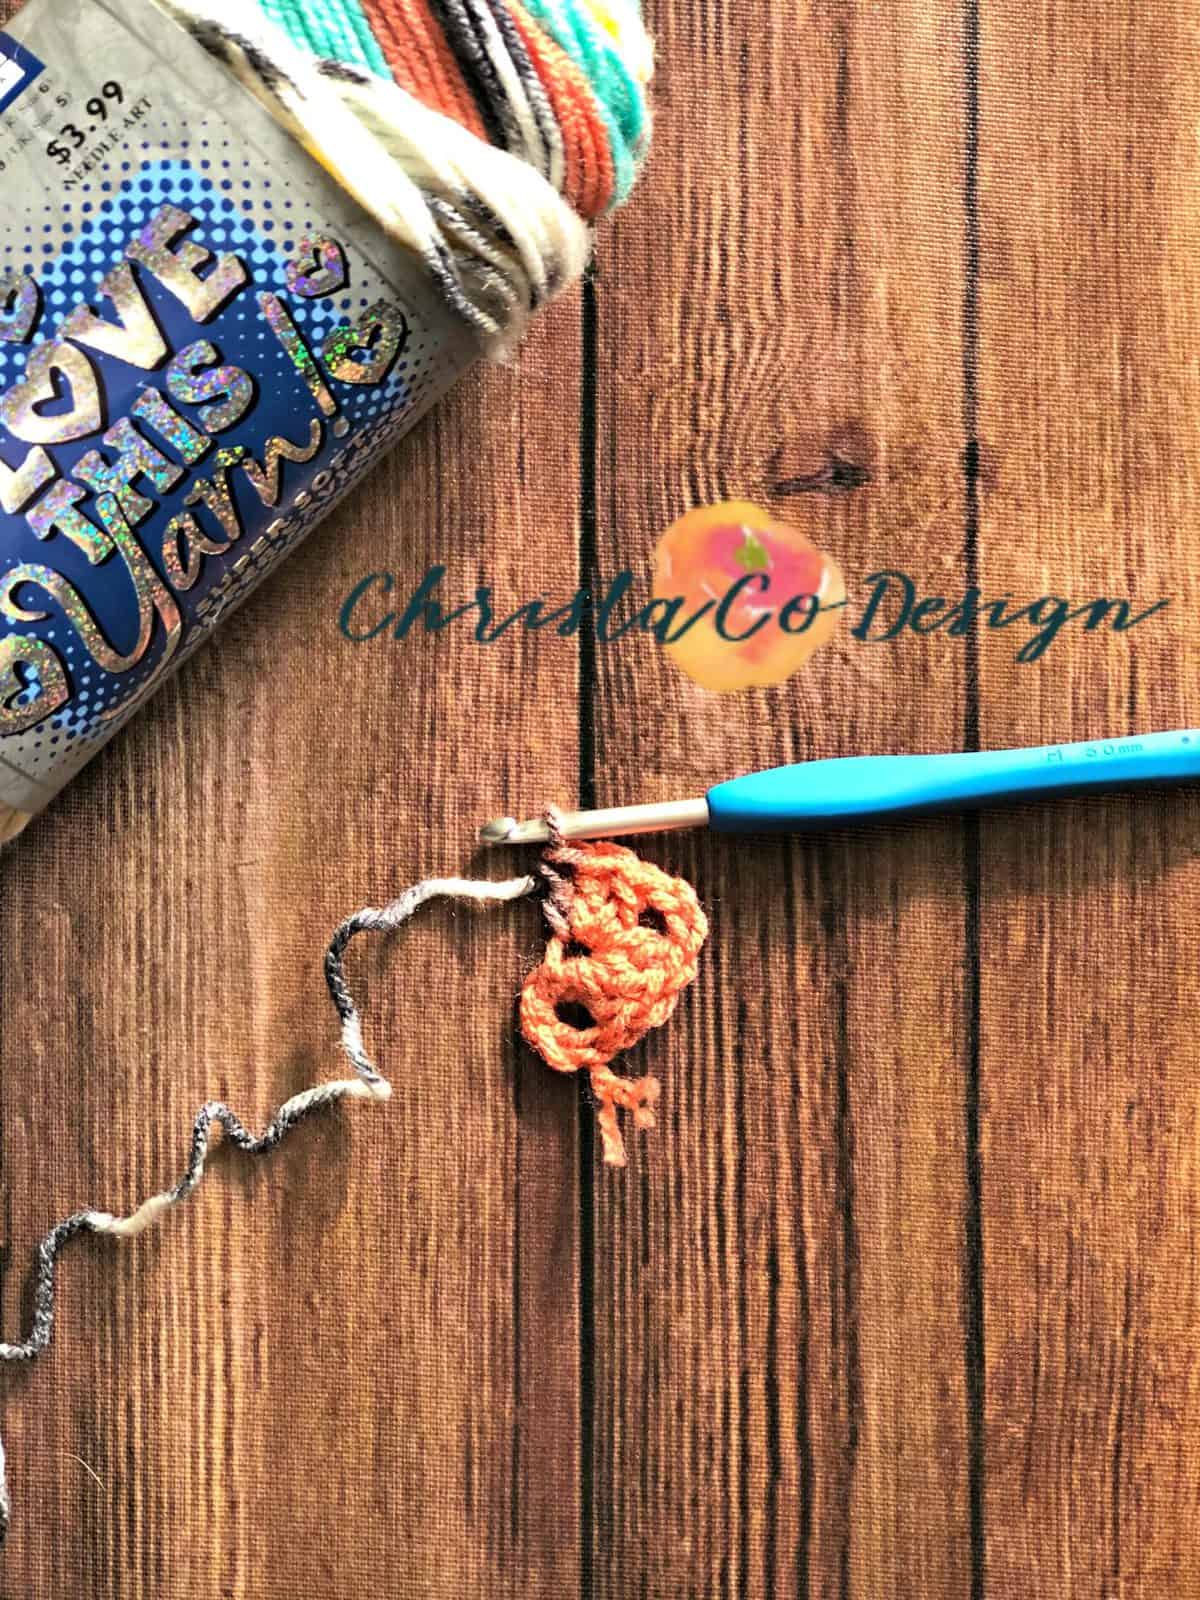 3dc,
3dc,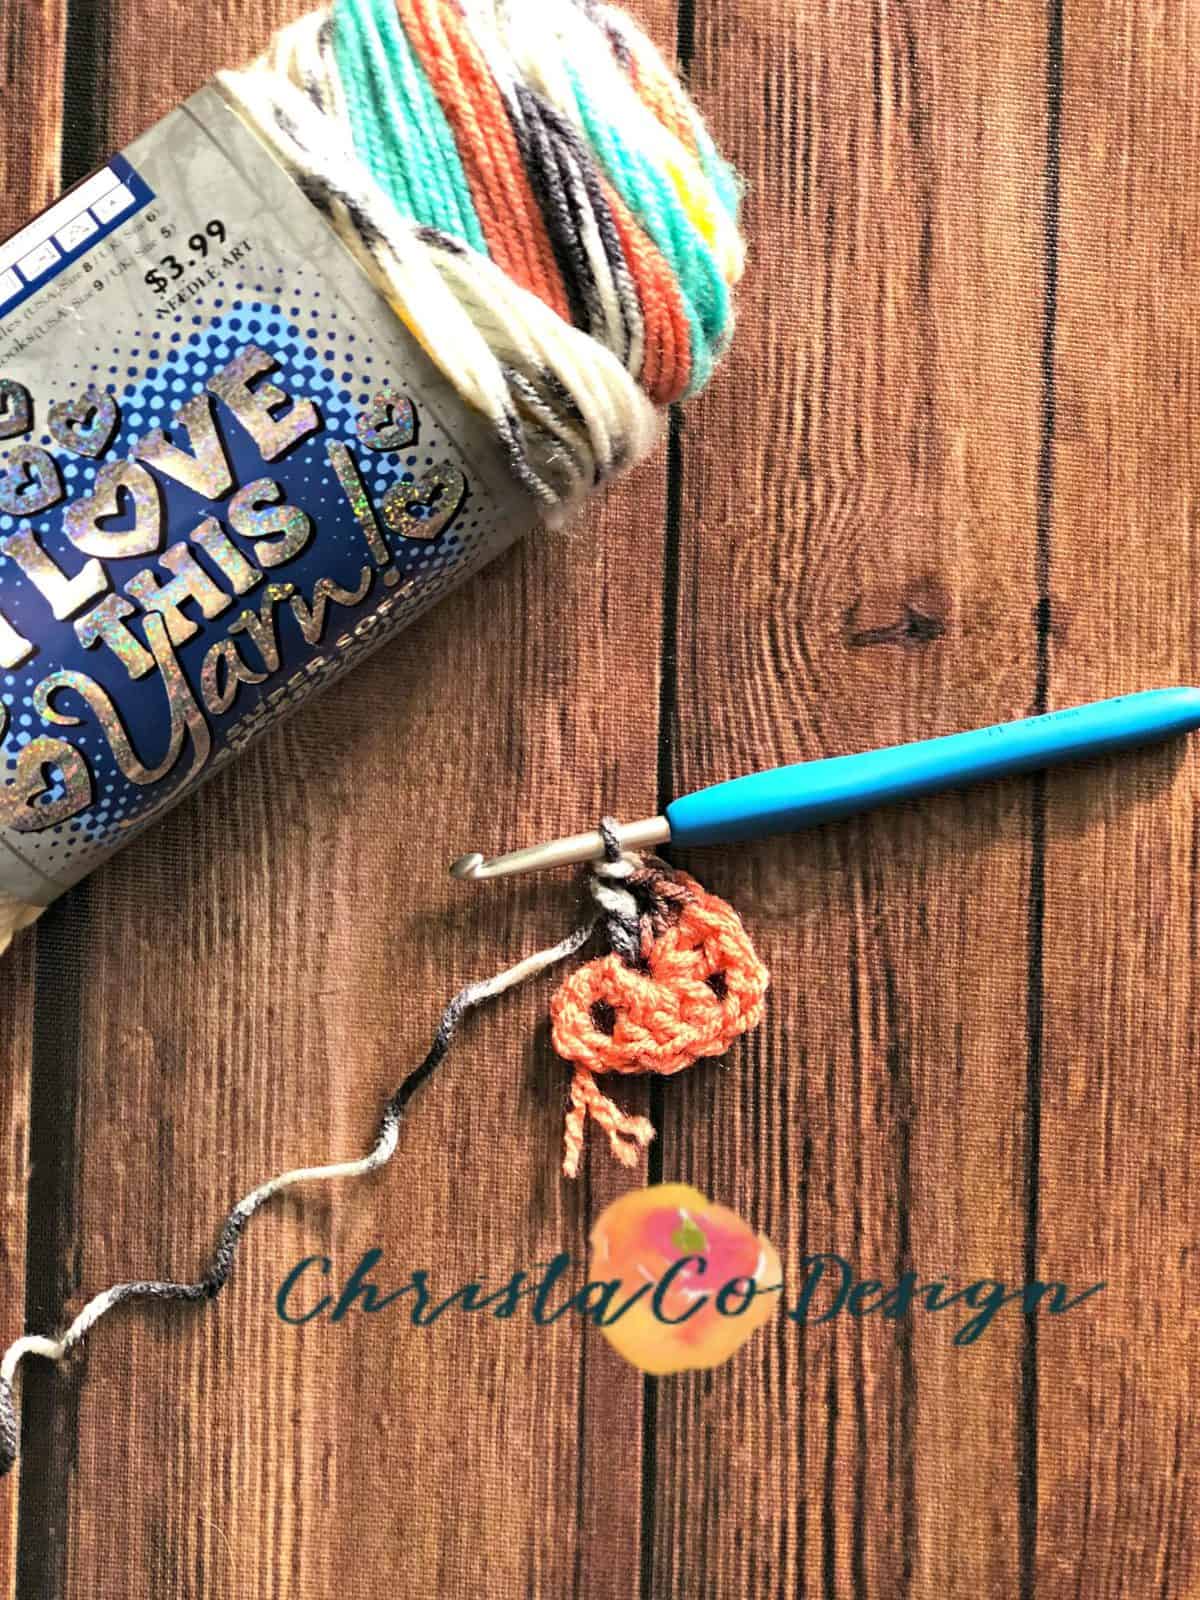 ch 1, dc, this completes your first row (2 grannies & 2 dcs),
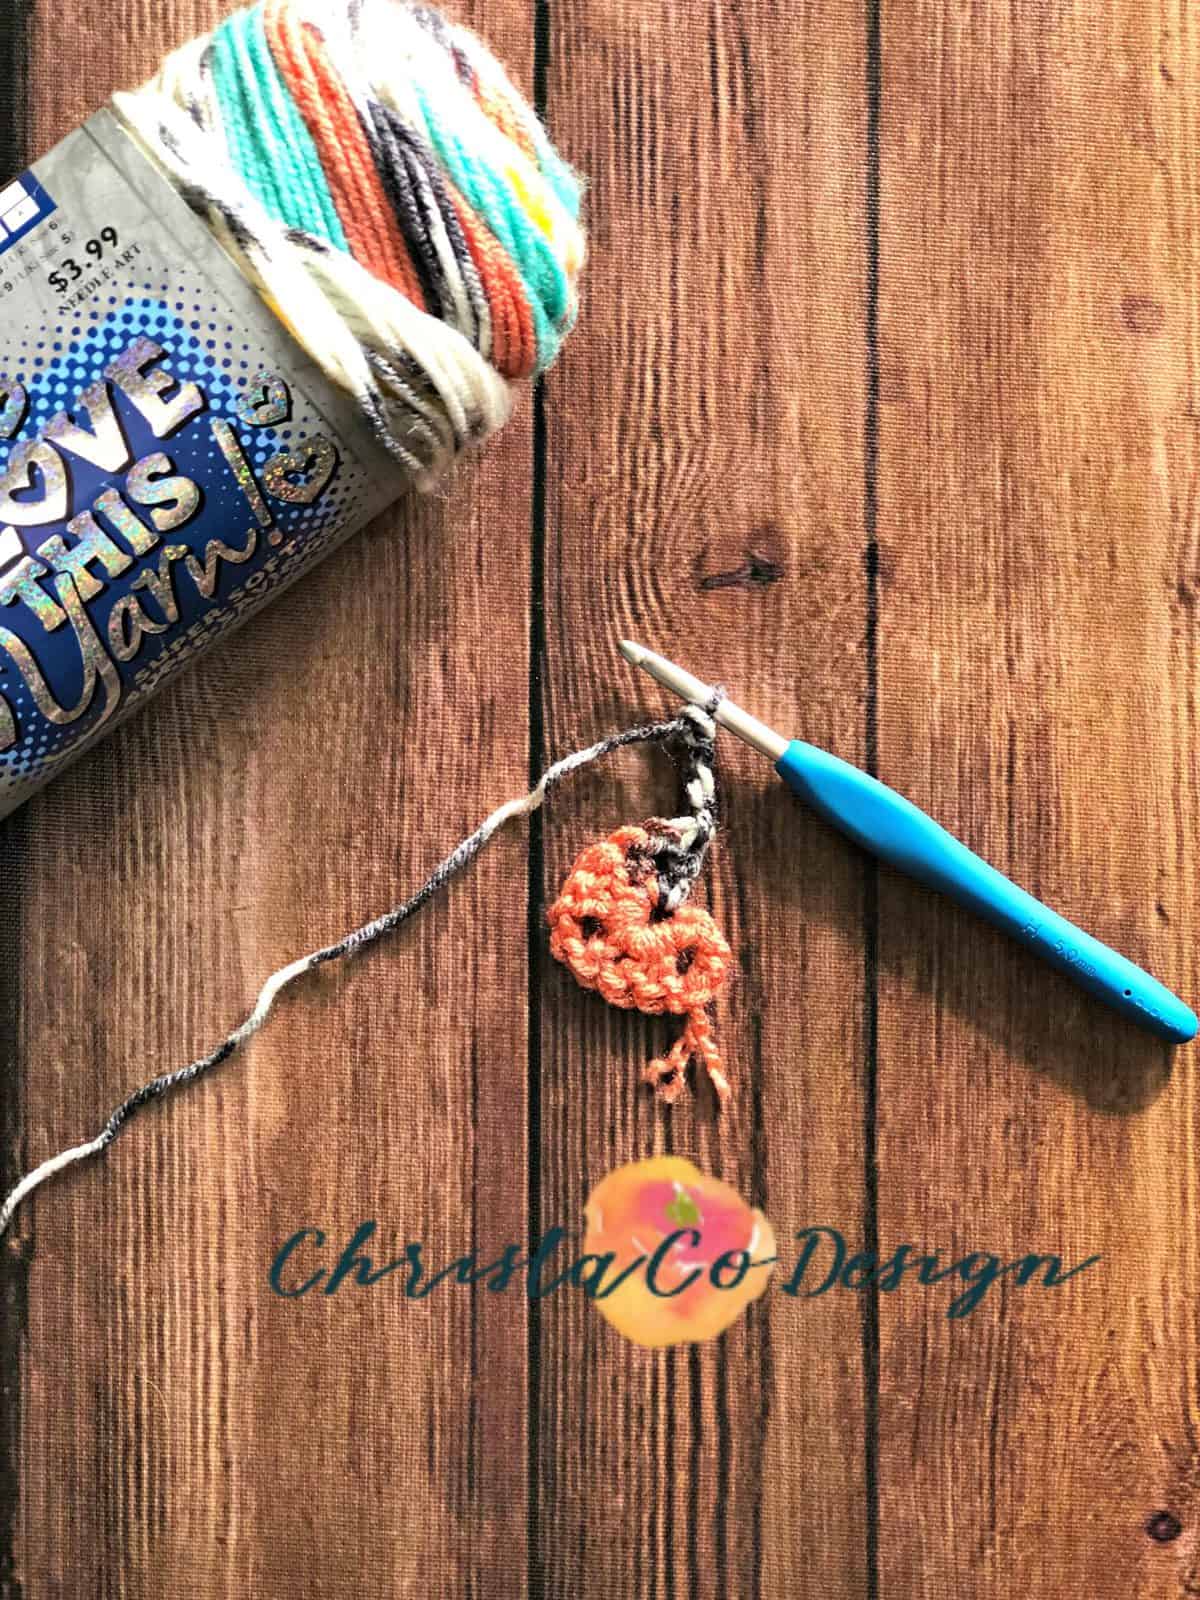 turn your work and begin row 2: ch 4 (counts as a dc + ch 1)
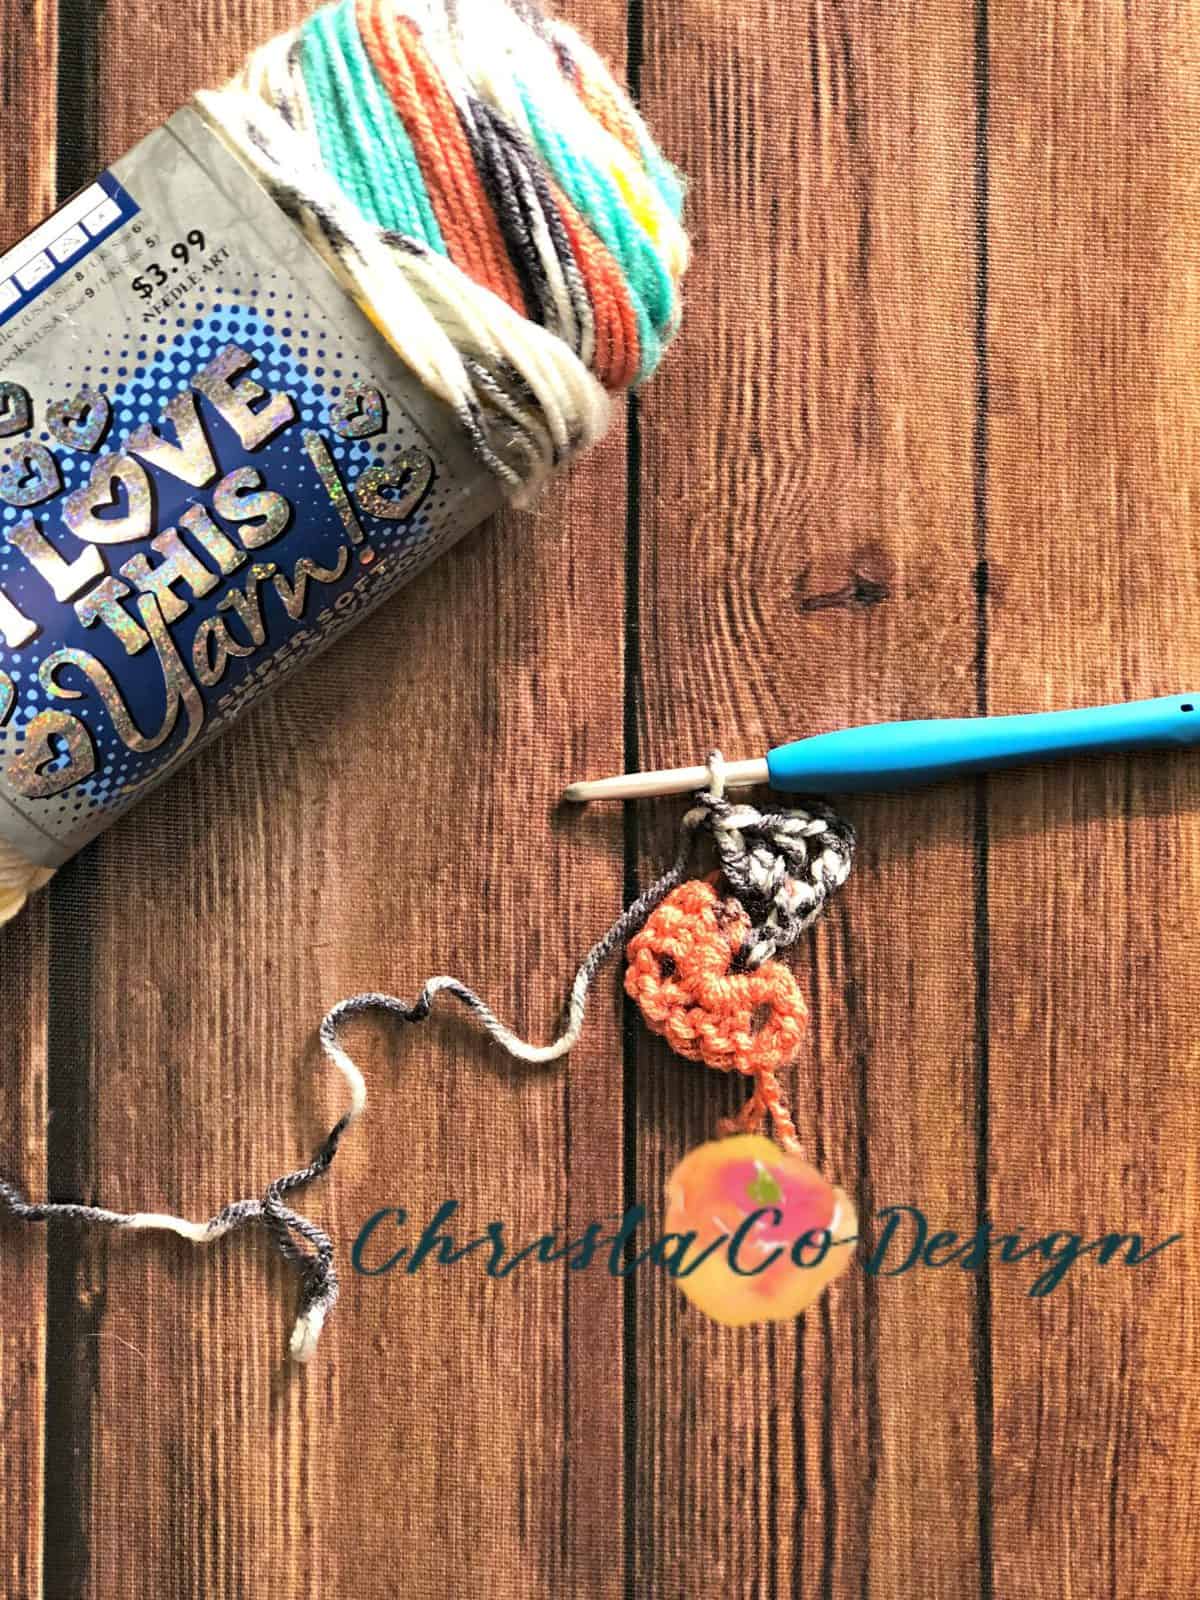 Into the 1st ch 1 space from the previous row: 3dc, ch 1,
 in the ch 2 tip space: 3dc, ch 2,
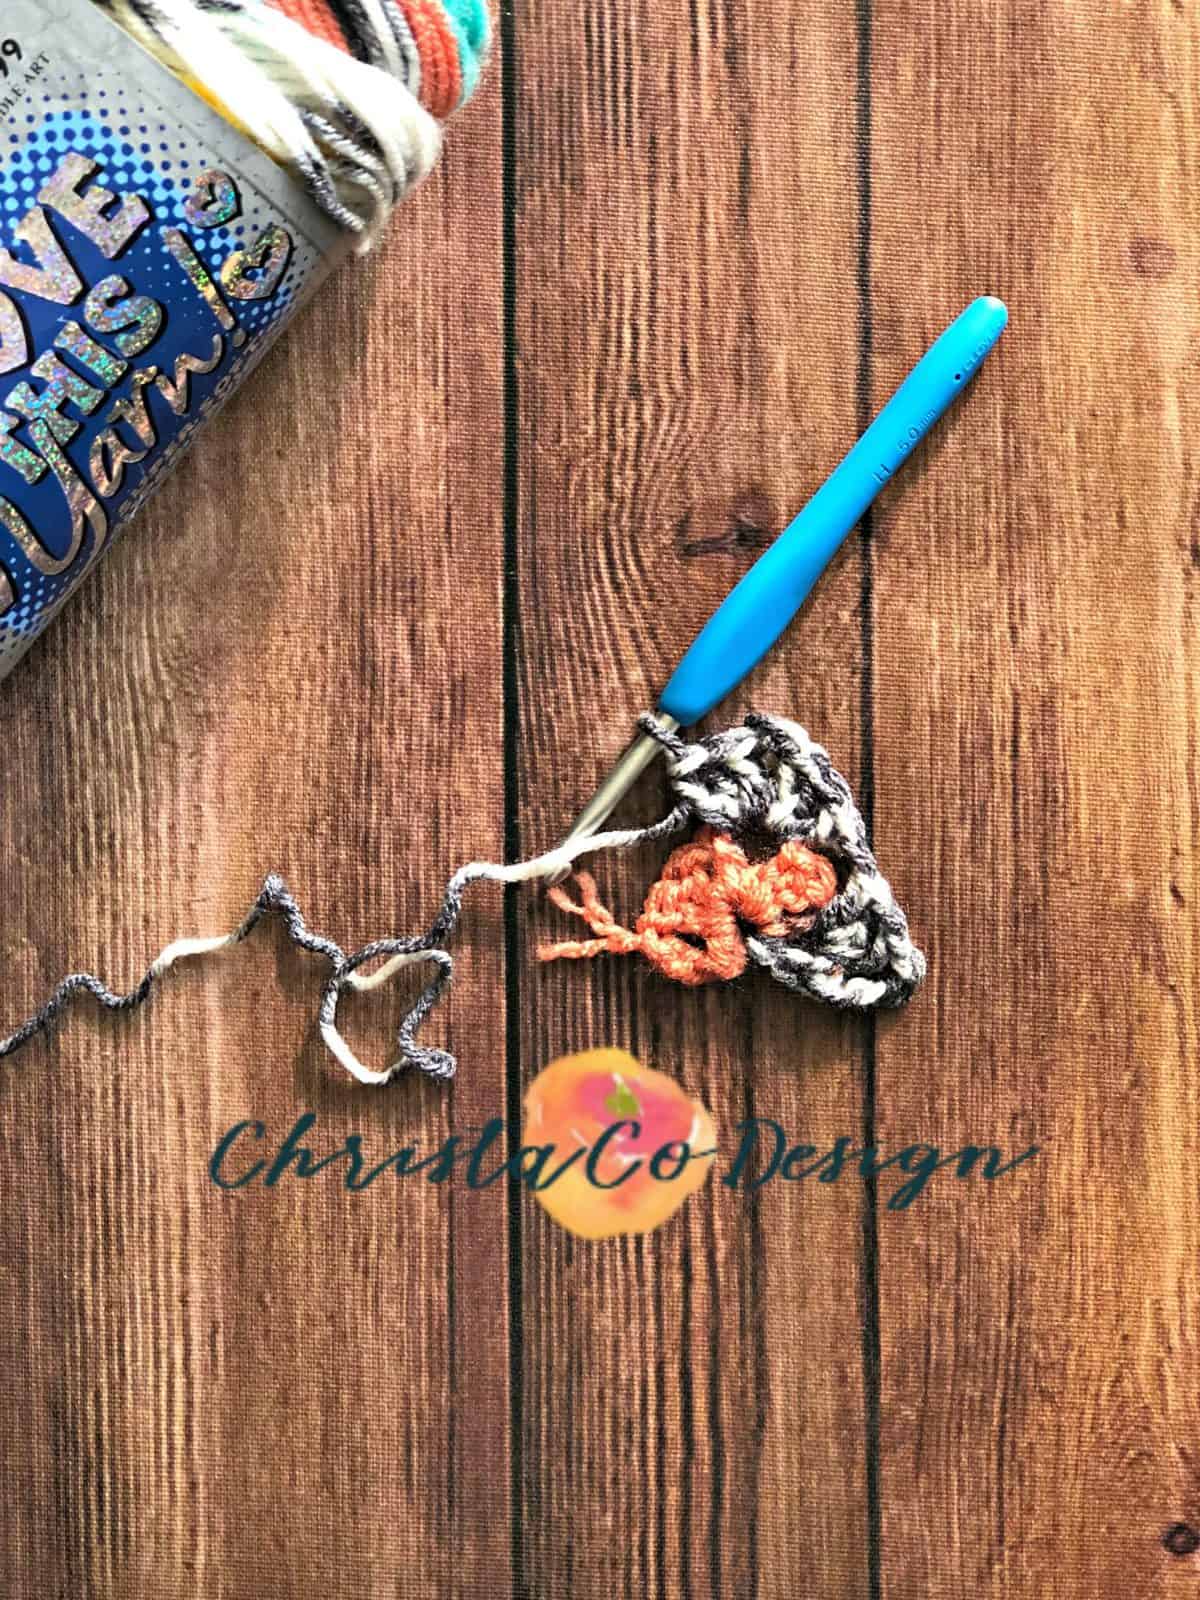 Into the same ch 2 space: 3dc, ch 1,
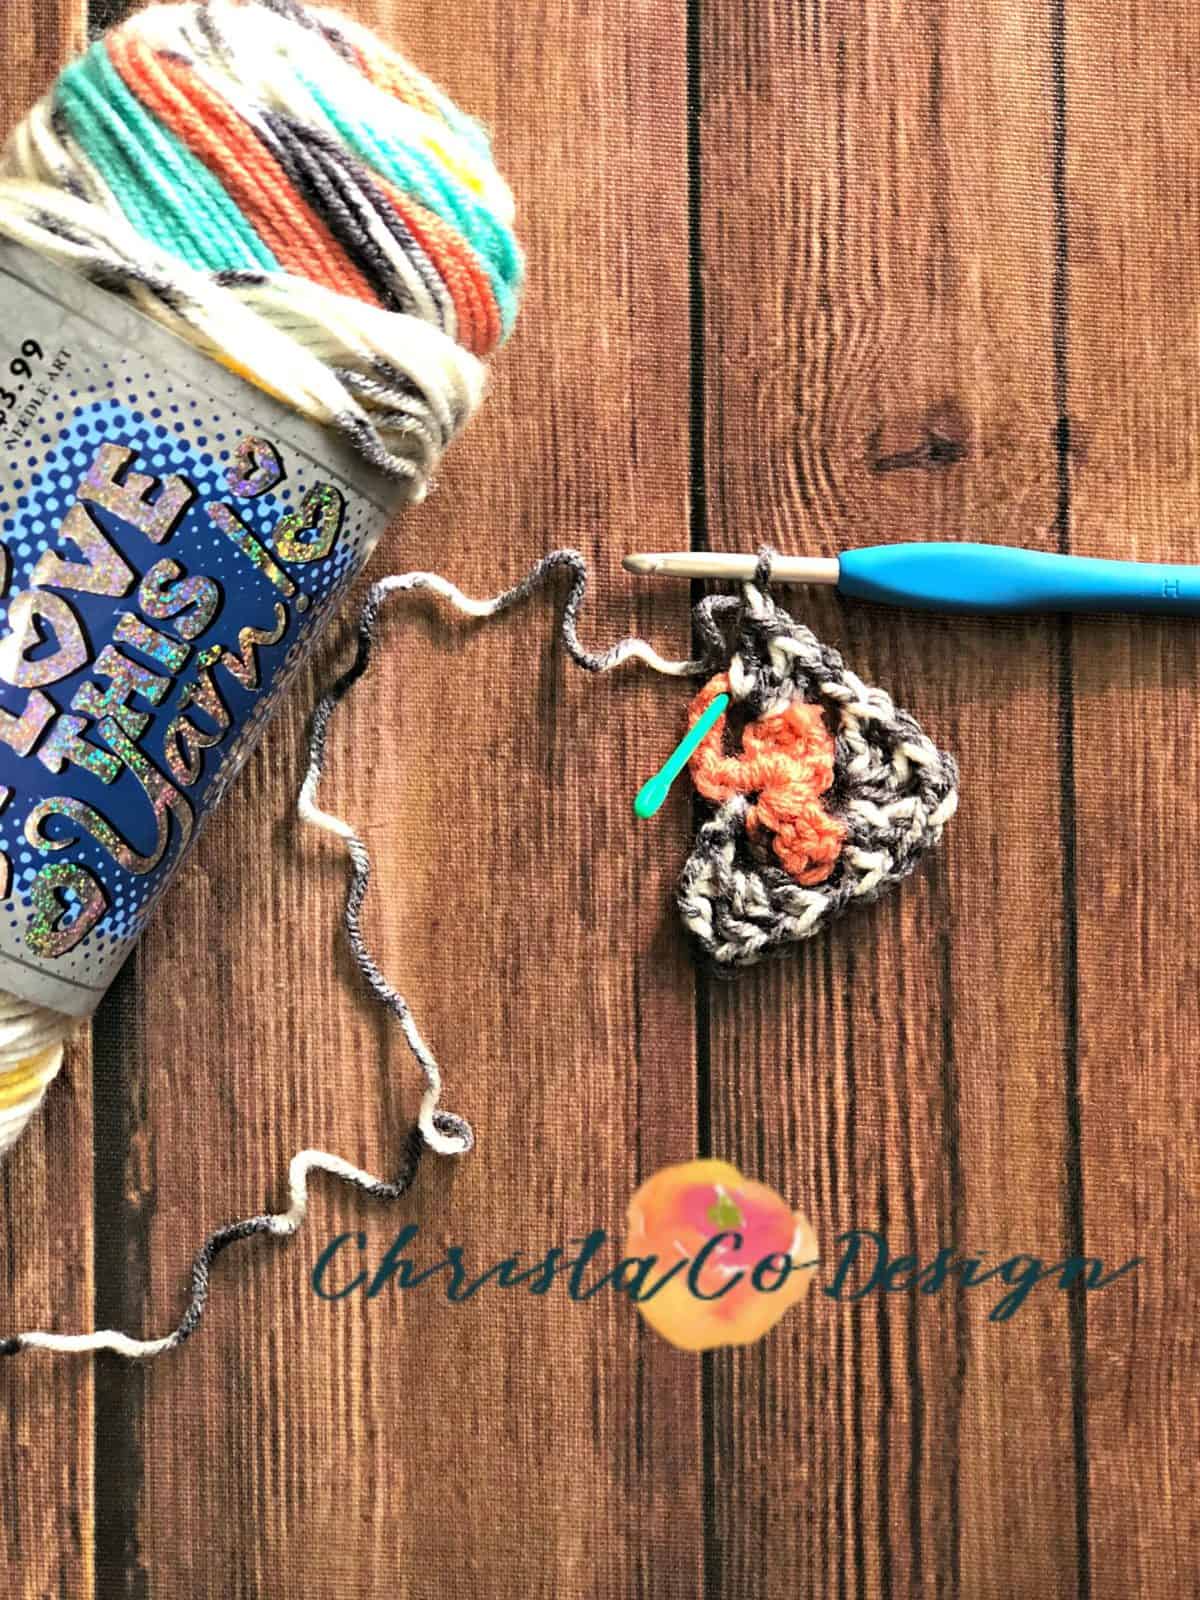 In the last ch 1 space from the previous row: 3 dc, ch 1, (green yarn needle marks the top of the ch 3 from the previous row, this is where you will do the next step)
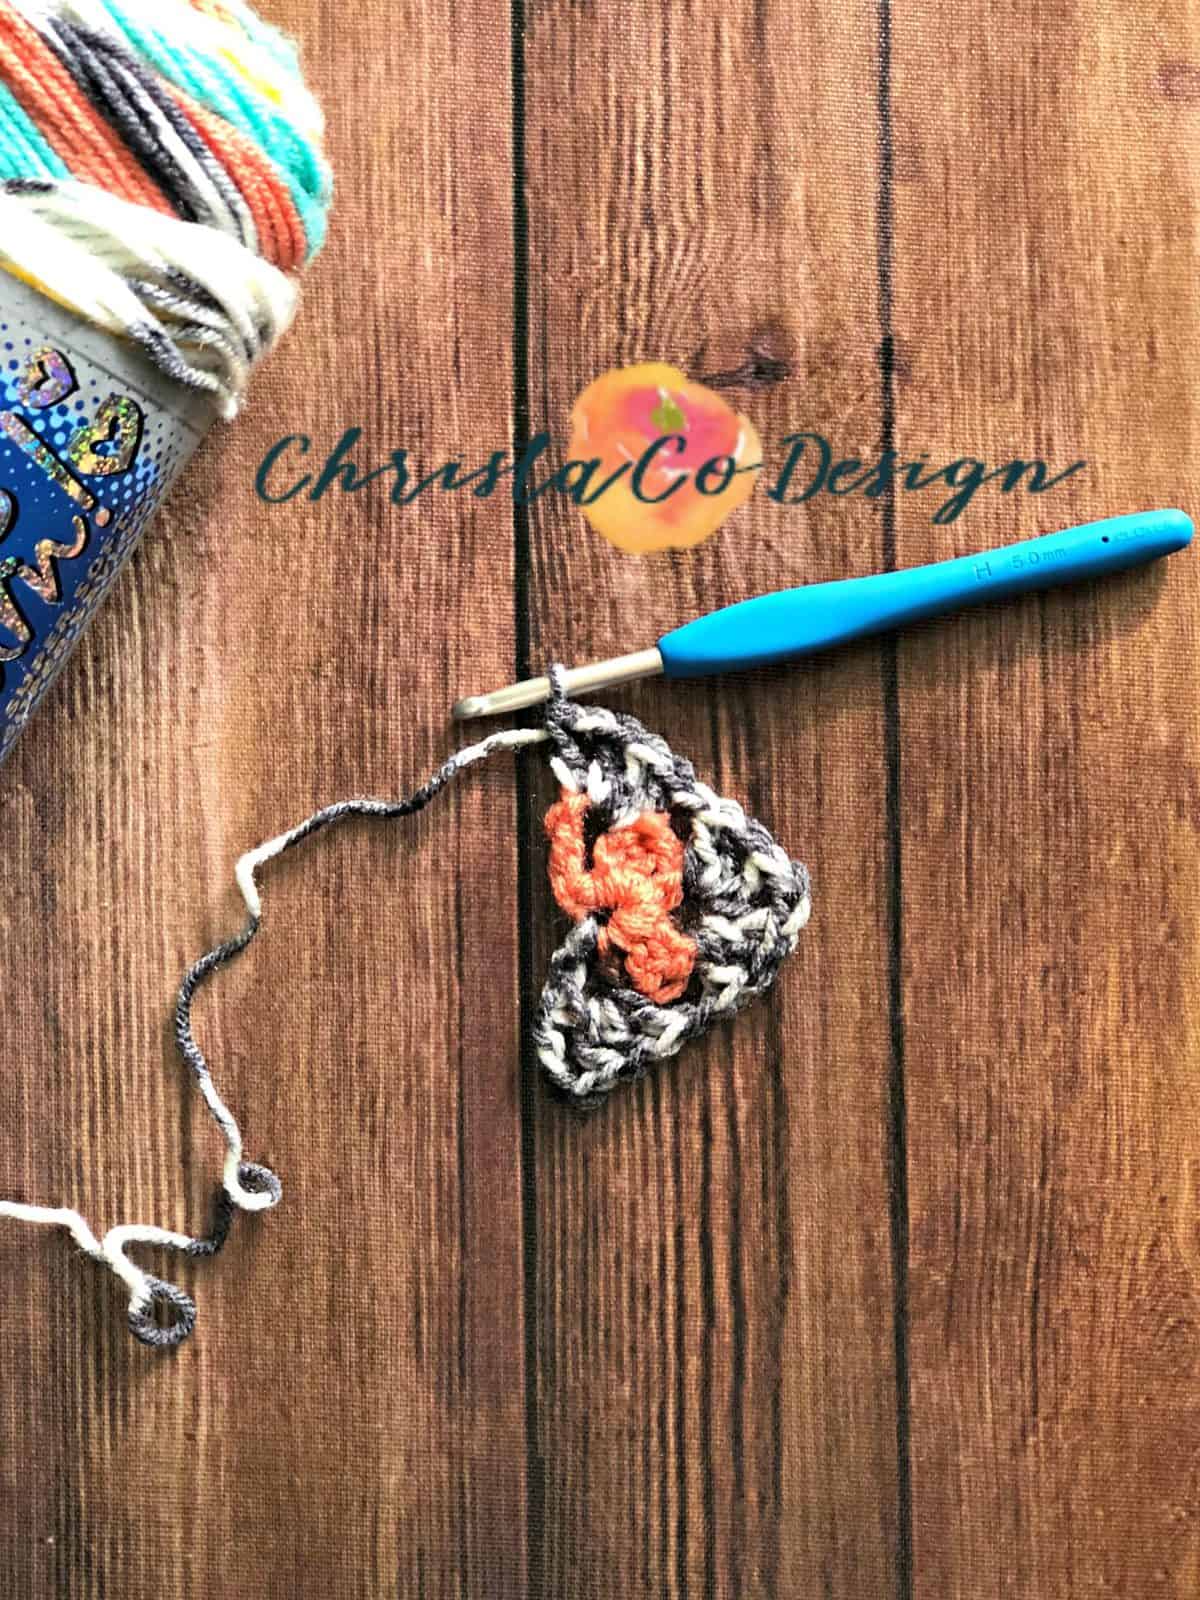 dc in top of ch 3, turn. (This is row 2 and it has 4 grannies and 2 dcs)
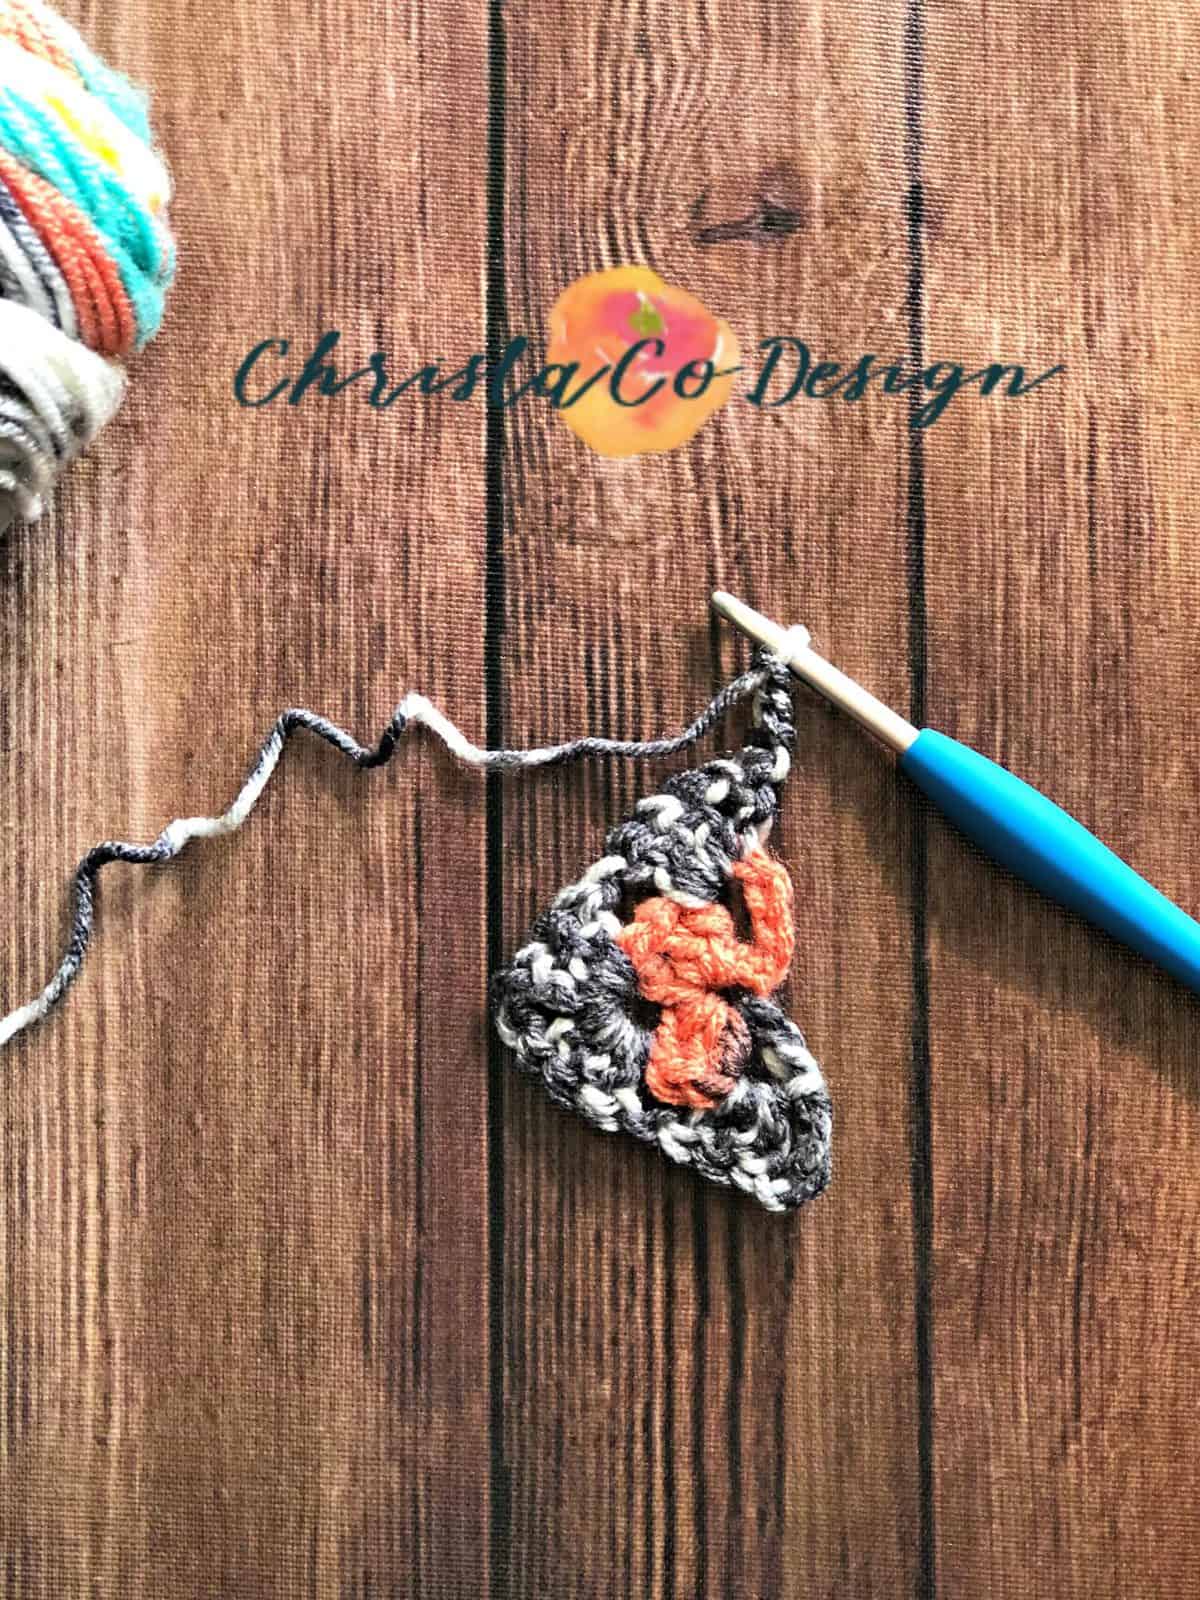 Ch 4 (counts as dc + ch 1),
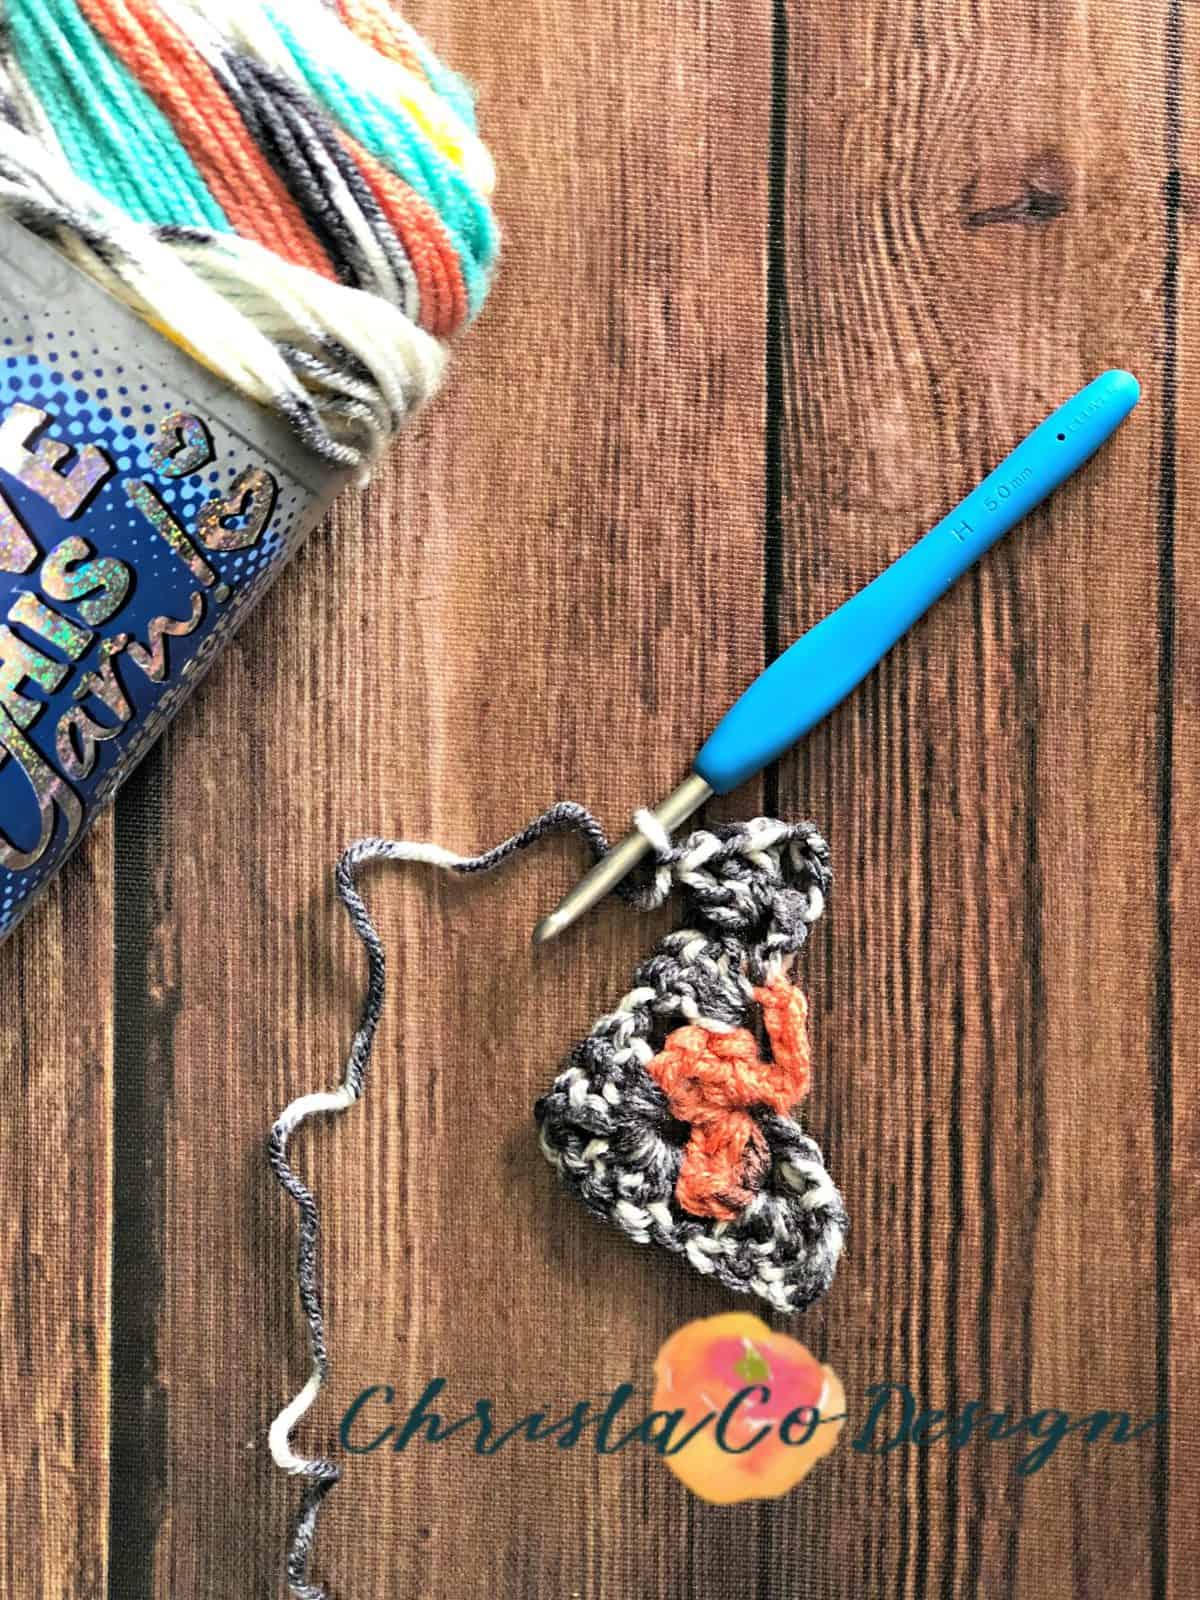 In first ch 1 space of previous row: 3 dc, ch 1,
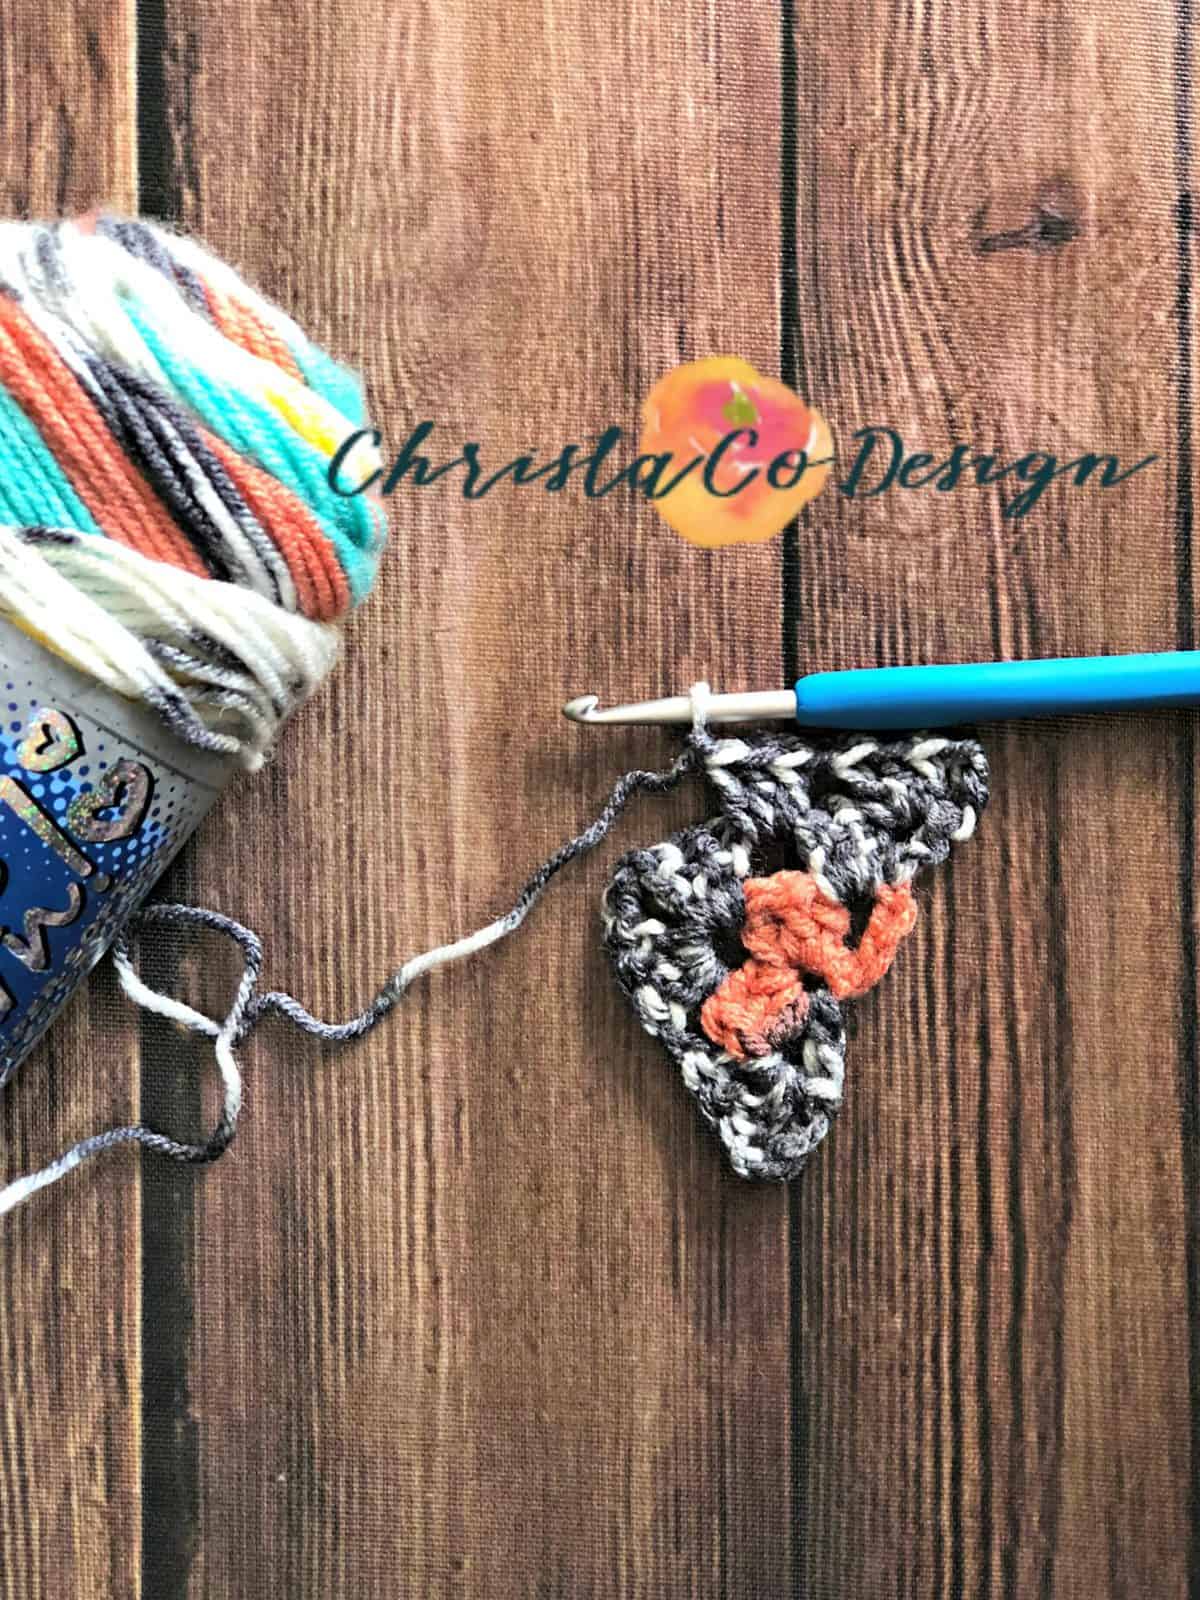 3dc, ch 1 in the next ch 1 space from the previous row,
 for the tip in ch 2 space: 3dc, ch 2, 3dc, ch 1,
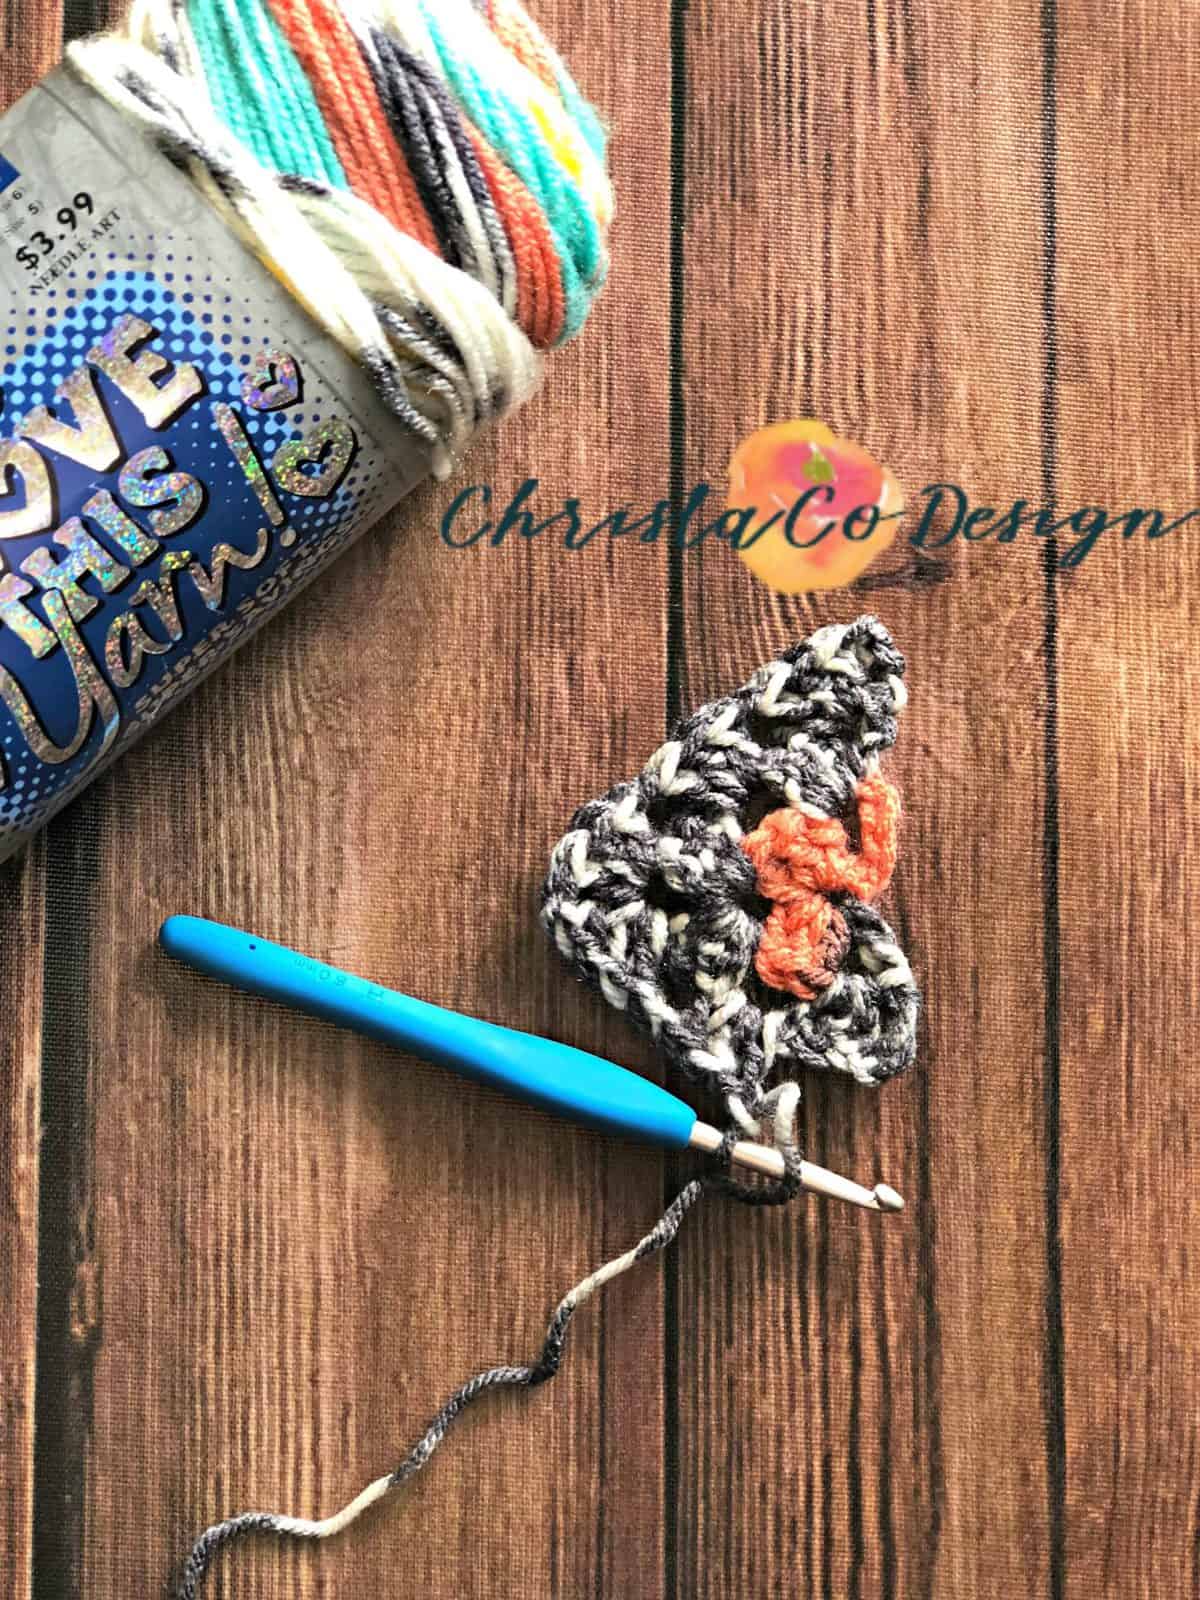 in next ch 1 spc: 3dc, ch 1,
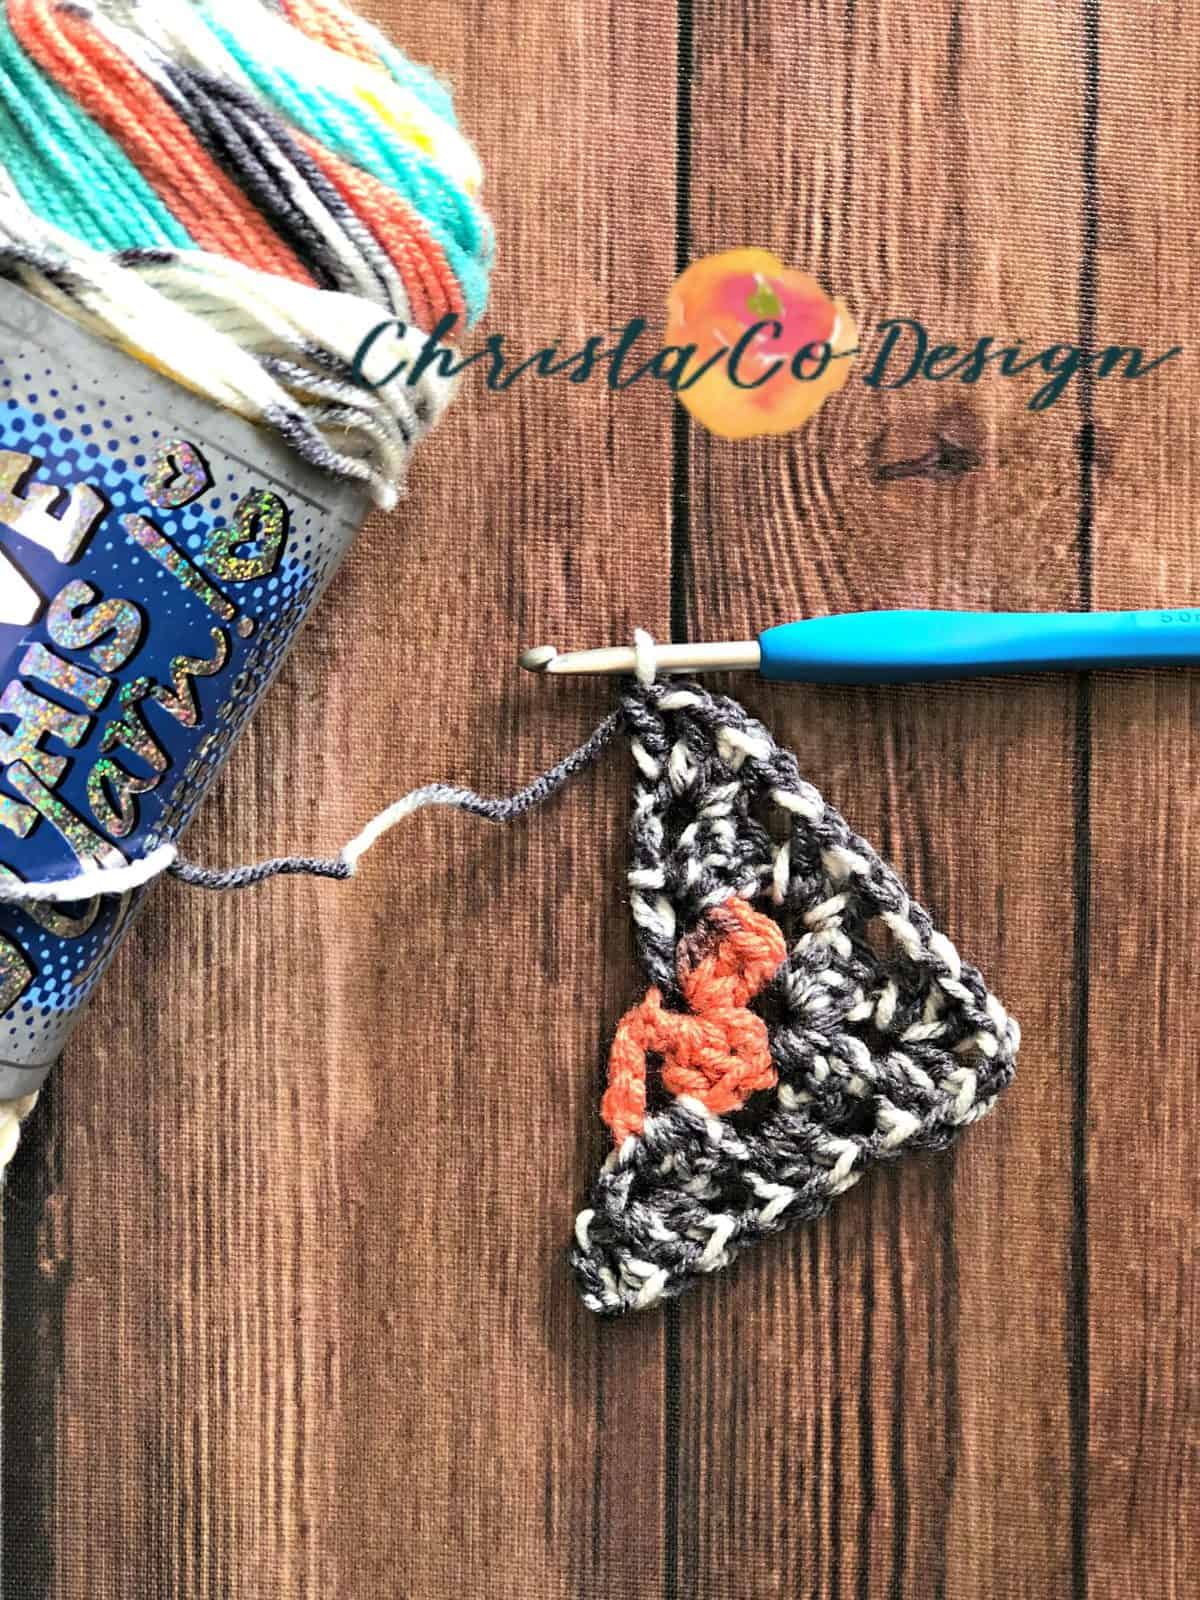 in last ch spc: 3dc, ch 1, then place a dc in the 3rd ch of ch 4 and turn. (Row 3: 6 grannies, 2dcs)
- Rows 4-33:
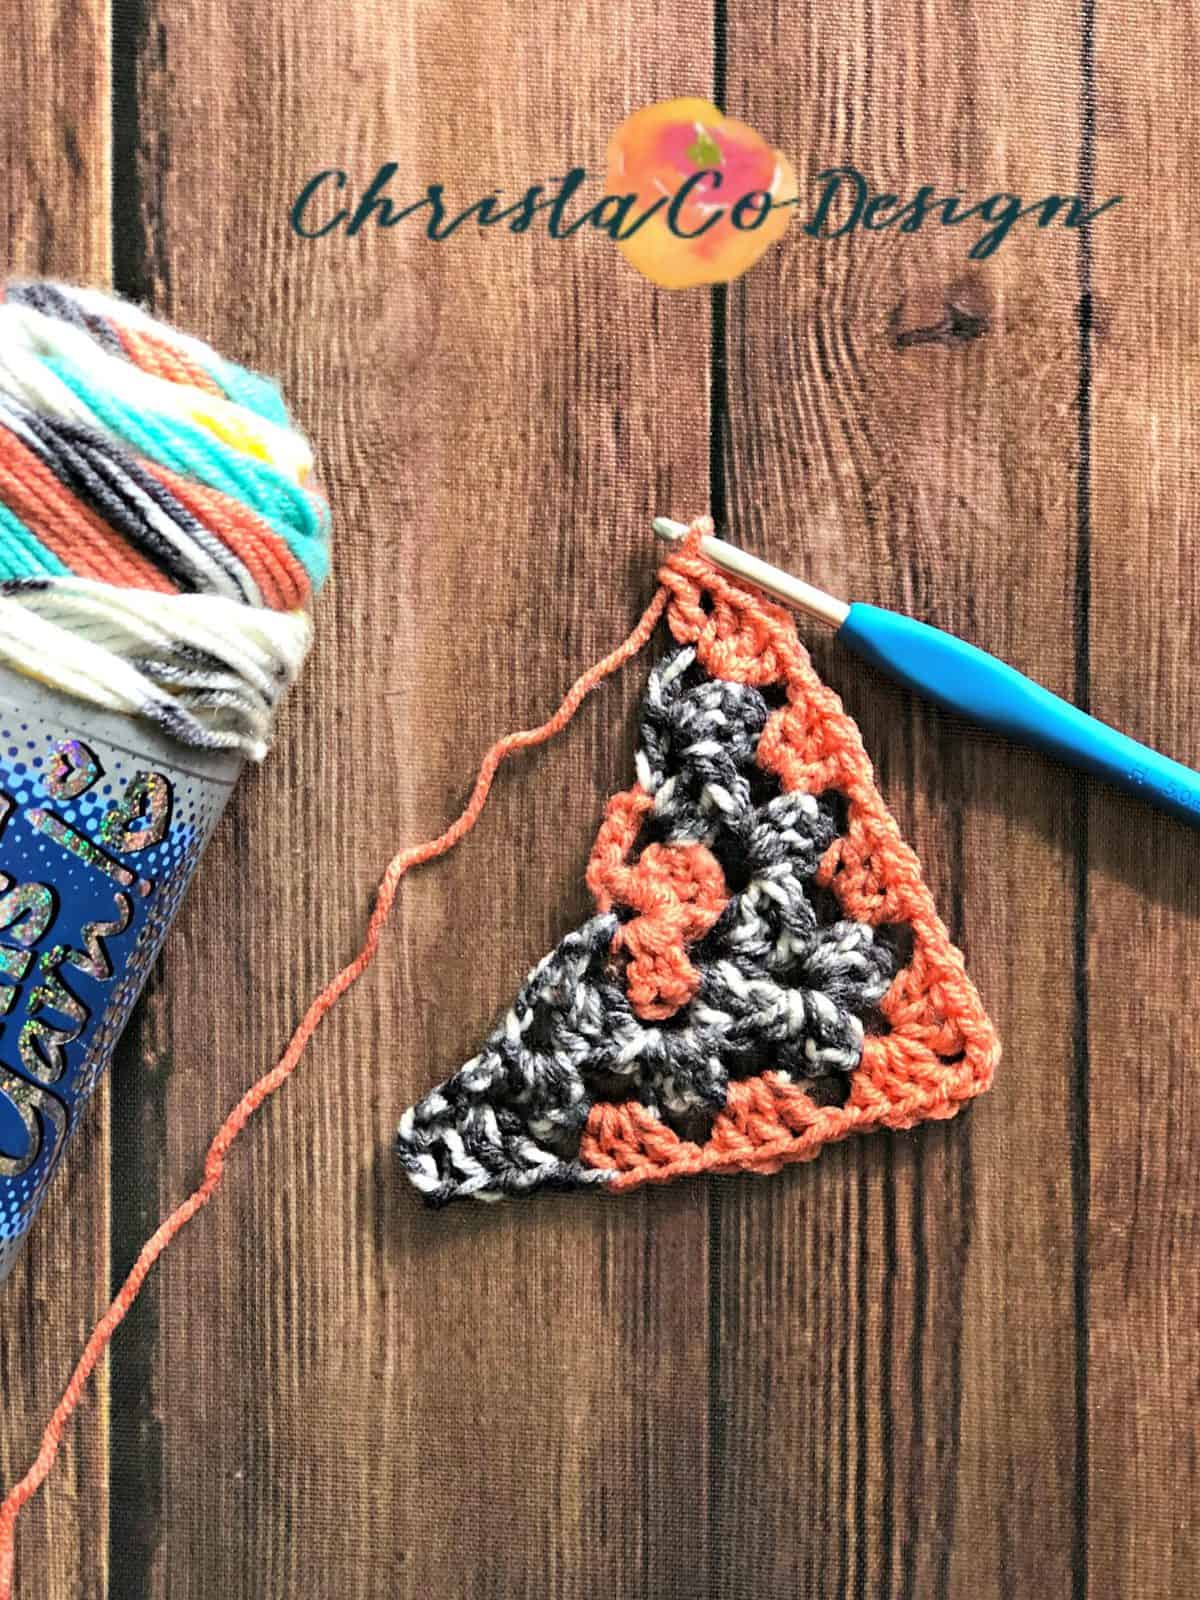 Continue to repeat: Ch 4 (counts as dc + ch 1), *{3dc, ch 1 in next ch 1 spc}, repeat from * until the ch 2 spc (tip), then *{3dc, ch 2, 3dc in the ch 2 spc of the tip, ch 1}, then continue to repeat *{3dc, ch 1} in each ch 1 spc, dc in 3rd ch of ch 4, turn. (Row 4: 8 grannies & 2 dcs, Row 5: 10 grannies & 2 dcs, Row 6: 12 grannies & 2dcs… Row 33: 66 grannies & 2 dcs) Each row will increase by 2 grannies.
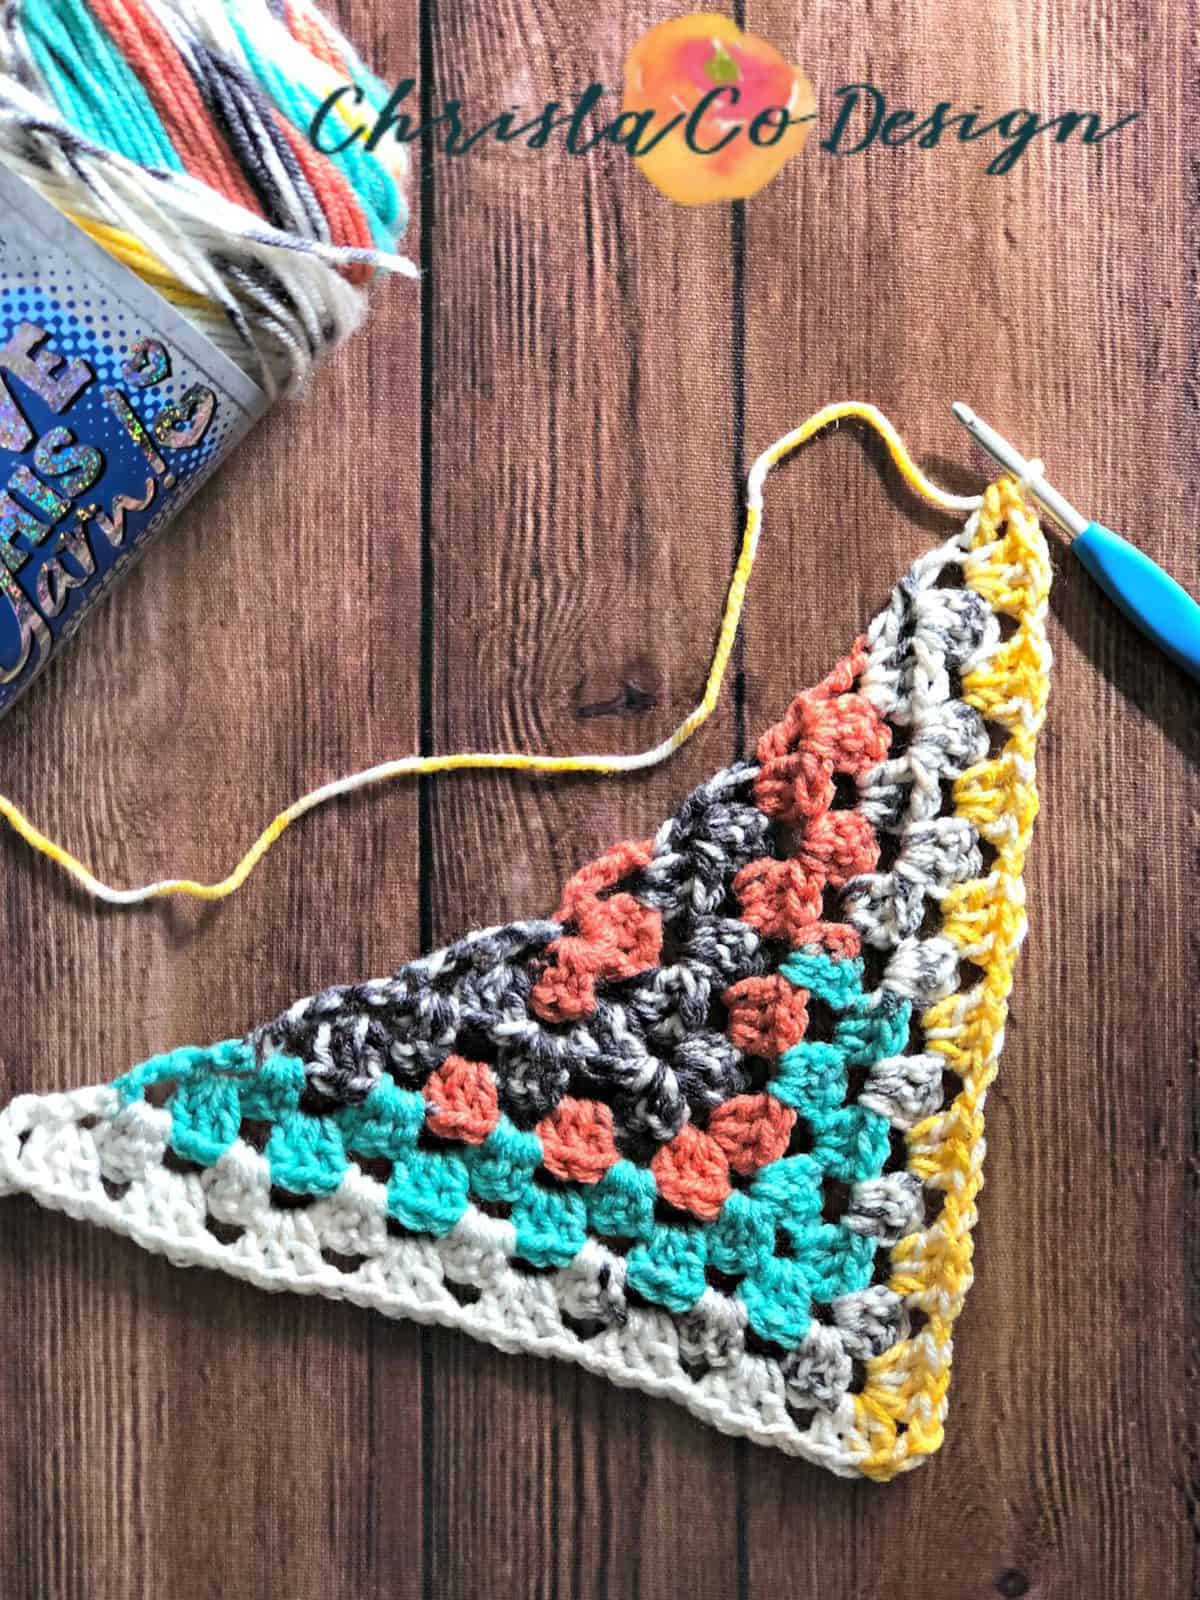
Finish off by weaving in ends and trimming any excess. - Tassels:
For the tassels I cut about 24 pieces yarn 12″ long for each corner. I laid one longer piece of yarn out and placed the 24 pieces of yarn on it, then used the single piece to tie a knot and secure the yarn together in the center. I threaded the tied end up to tie it on to the scarf. Then I used the other end to wrap around the top of the tassel to form the bulb.
Recommended Products
As an Amazon Associate and member of other affiliate programs, I earn from qualifying purchases.


wonderful! i love this granny triangle scarf! the tutorial is so easy, good job!
Thank you!
Love this yarn and pattern!!
Beautiful colors. Definitely on my to make list.
Love this pattern and the color too.
Just discovered you on Facebook. Love your granny triangle scarf!
Beatiful scarf!!!
♥️ Love this scarf!
Love the colors!
This design is beautiful ty so much for sharing!
Love this shawl. Tassels are fun!
Love that yarn and scarf. Thanks for the giveaway
I’ve admired Painted Canyon for ages – would be so exciting to win & get a chance to work with it!
Don’t you just love Painted Canyon?
Great tutorial, and beautiful shawl. Thanks!
I’m currently addicted to triangle scarves, tassels, and self-striping yarn so this design is perfect! I think I may be allergic to weaving in ends. Long live the self-striping yarn trend! I recently discovered Hobby Lobby and I’m in love with their yarn, but I’ve never seen this beautiful color.
you have wonderful patterns! I enjoyed scrolling through them. I have never seen this yarn in person, I love the way it worked up
Very pretty scarf!!
It won’t let me like for the giveaway.
I love this yarn ! have seen it everywhere and want to get my hands on it ! i have also been on a granny stitch kick ♡♡♡ love this amazing tutorial … thankthankthank you ♡
Gorgeous pattern and yarn. Thank you for sharing. And thank you for the opportunity to win.
Lovely scarf.
This is beautiful! And I really love your yarn choice, really eye catching!! Hope I’m the lucky winner!!
This yarn is beautiful
Love the way this turned out!!! ?
this looks super cute and something I might be able to handle
So pretty! Love this yarn!
I LOVE this yarn … but haven’t known exactly what to make with it. NOW I know!!! This is awesome!!!
I love the scarf–it’s really pretty, especially in that yarn.
Lovely scarf pattern and absolutely beautiful yarn. I am crocheting so many Spring scarves and ponchos right now. They are in demand from a lot of my friends and family members.
One of my favorite scarf designs and a beautiful color way!
Absolutely gorgeous pattern! It is on my todo list. Thank you.
beautiful work!
This was a lovely pattern to showcase the beautiful yarn! Nicely done.
I love this yarn! 🙂 and Love this pattern!
Beautiful
Beautiful work!! I love Painted Canyon! I bought a skein for myself and ended up making my aunt a pillow for Mothers Day with it. I’d LOVE to win some more to make her a matching blanket!
Love how this yarn works up! ❤️ And I am in love with triangle scarves.
I’ve seen so many projects with yarn. It’s very pretty!
Am not much of a fan of working with many colors as that leads to weaving in ends, but I do love projects with many colors, and this yarn is perfect!!!
I really want to make one of these!
Thank you for the giveaway!
Thank you! And good luck!
Thank you & good luck!
Thank you & good luck!
Thank you for this beautiful pattern! And the awesome giveaway!!
That’s so pretty
Thank you & good luck!
Hi! Thank you & good luck!
Thank you & good luck!
Thank you & good luck!
Thank you & good luck!
Thank you & good luck!
Thanks! They are fun aren’t they!? Good luck!
Thank you! Good luck!
It’s such a fun colorway! Good luck!
What a beautiful design!
I love the design
Love the scarf and the painted canyon Yarn. Thanks for the chance.
I do! I love seeing the projects everyone completes with it. Good luck!
Thank you & good luck!
Yes!! The ends always get me! It’s such a relief to work with self striping yarn ?
Thank you! Good luck!
Thank you! Good luck!
Hmmm, there should be a little star ⭐️ button at the bottom of the post. Sorry about that!
Thank you! It’s such a fun one! Good luck!
You’re welcome! Good luck!
Thank you! Good luck!
Thank you! Good luck!
Definitely! Good luck!
Thank you! Good luck!
Thank you! You totally could do it! Good luck!
Thank you! Good luck!
Thank you! Good luck!
Thank you! Good luck!
Thank you! It’s such a great layering piece this time of year for sure. Good luck!
Thank you! Good luck!
Thank you! Good luck!
Thank you! Good luck!
Thank you! Good luck!
Thank you! Good luck!
Thank you! Good luck!
Thank you! Oh I bet this yarn makes a gorgeous pillow! Good luck!
Thank you! Good luck!
Thank you! Good luck!
Isn’t it though? Saves so much time! Good luck!
You should! Good luck!
You’re welcome and good luck!
Thank you! Good luck!
Thank you! Good luck!
THAnks for sharing your nice patterns with a lot of photo instructions! For visual learners
You’re welcome! Good luck!
LOVE THIS TUTORIAL. I just finished one with turquoise sky color. Haven’t decided if I want tassels or fringe tho. ??
Thank you! I love turquoise, I bet you’re is gorgeous ? I know deciding between the two is hard!!
How am I just now stumbling across your blog? So many gorgeous patterns! I absolutely LOVE the colors of this scarf!
Thank you!
Beautiful – can’t wait to make this one!
Thank you!
How do you get your scarf to lay like it does in the picture? I’ve washed mine and even used fabric softener, but it still doesn’t lay like it should. I feel like it’s choking me and it looks like I’m wearing a huge bandana. A video tutorial would be great. Thanks!
Hi Lauren,
I’m sorry it’s not laying how you want it. It sounds like you’ve tried all the right things. Making it bigger, might help. Or in future, loosening up the tension some-with a bigger hook. I’ll have to see about doing a tutorial on the next one I make!