
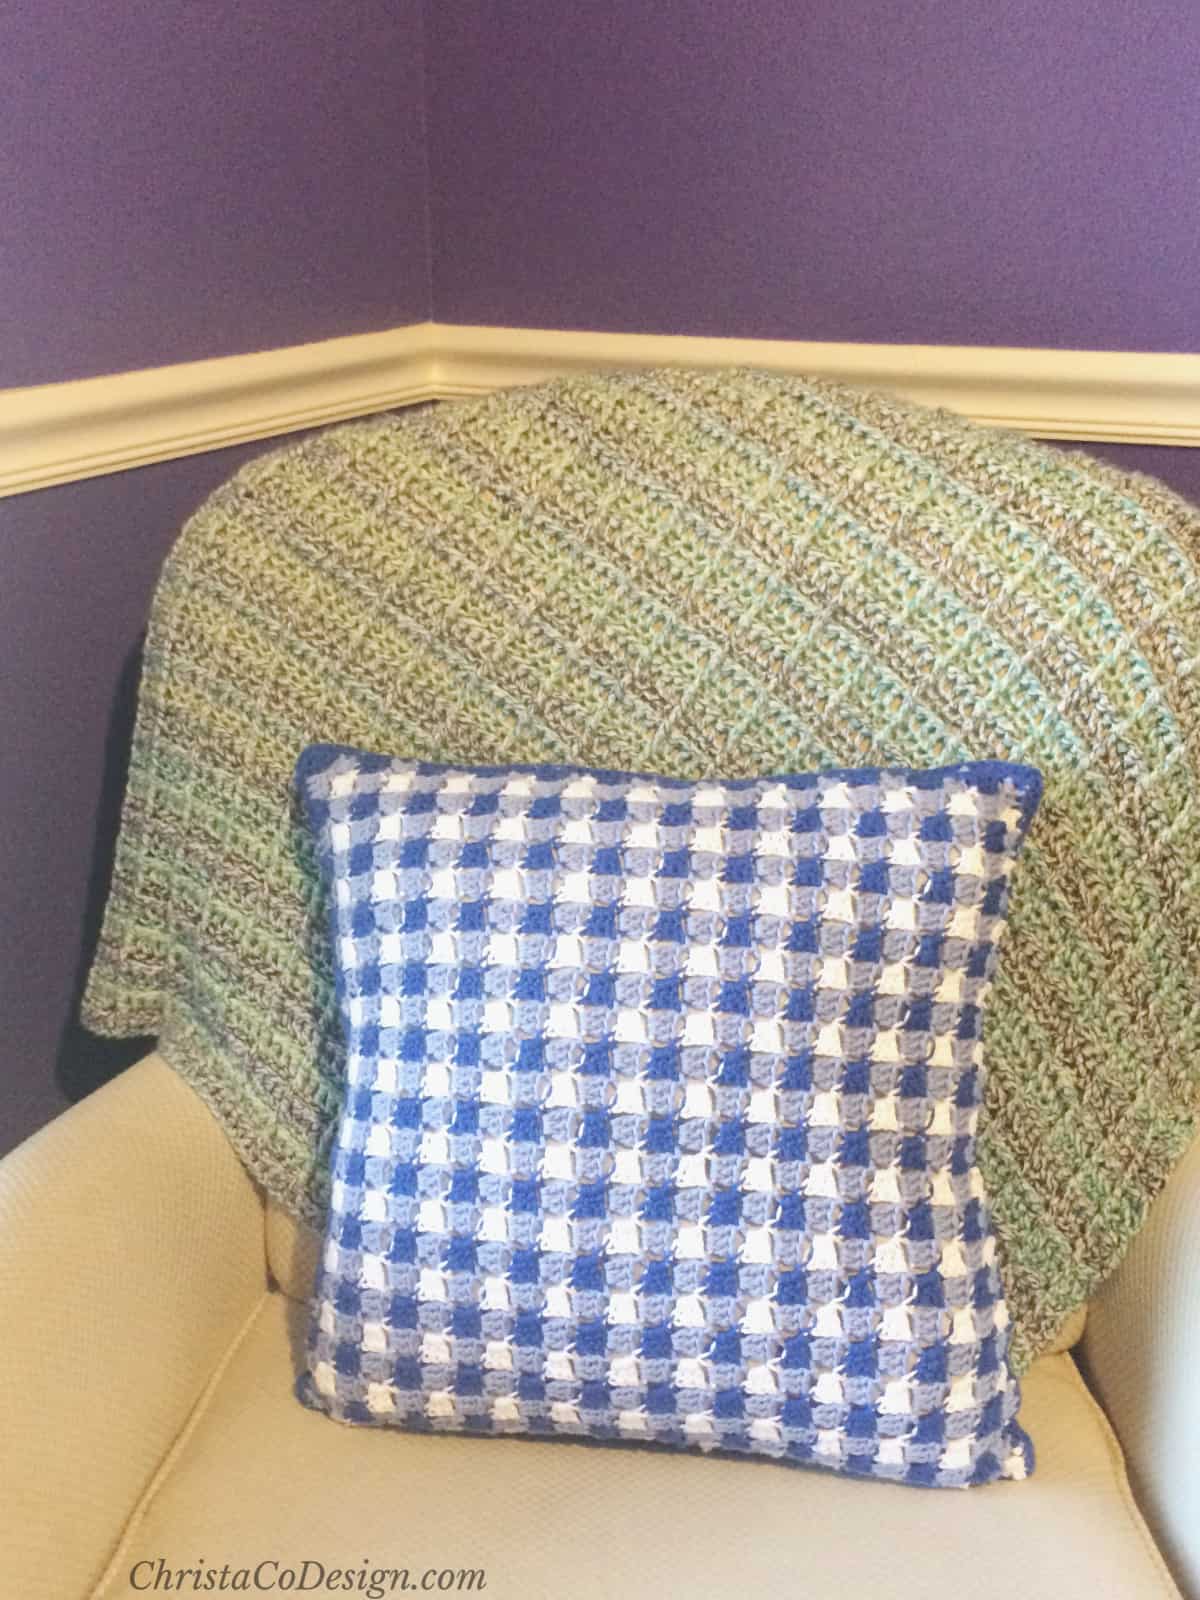
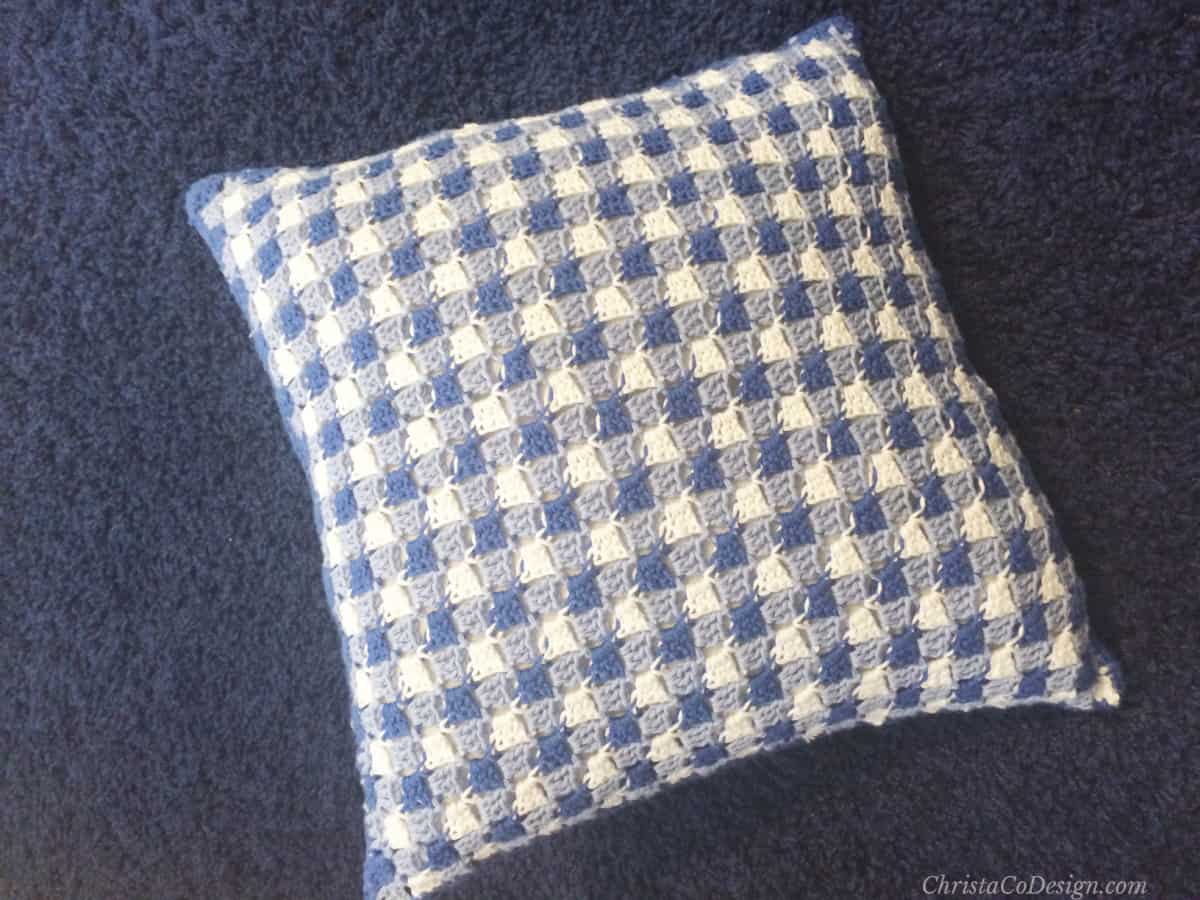
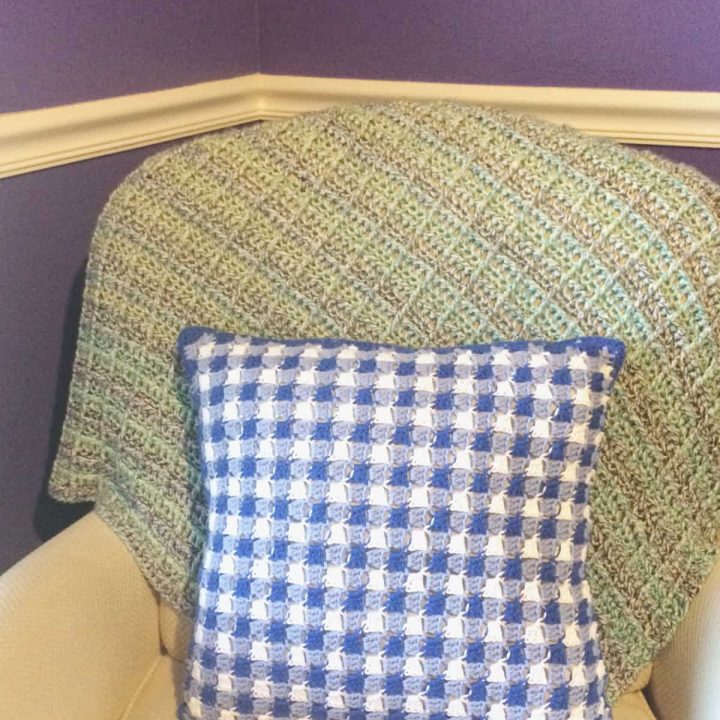
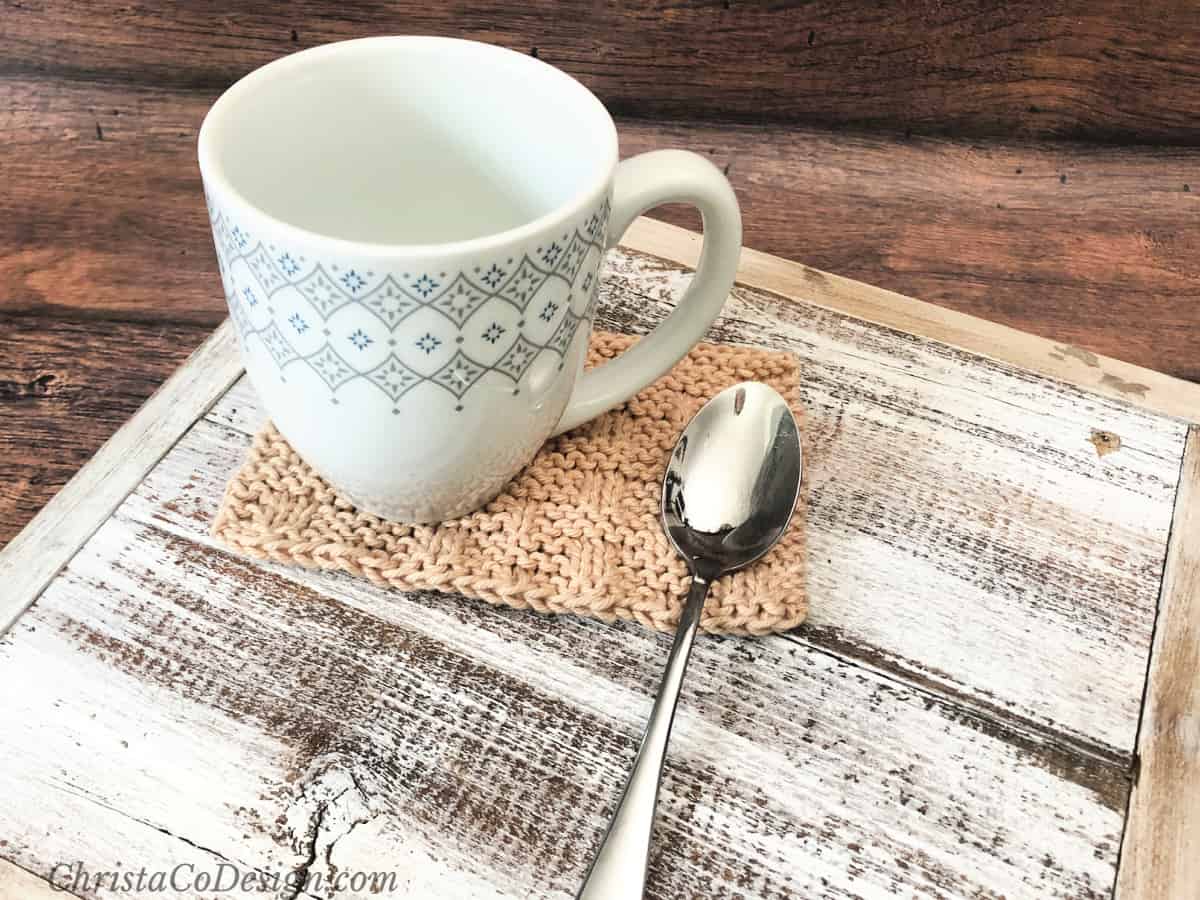
C2C Crochet Pillow Pattern Gingham Pillow
Create a Gingham Crochet Pillow from two corner to corner crochet squares. This C2C crochet pillow pattern achieves the gingham look with blues and white.

This post contains affiliate links, I may earn a fee. Read more disclosure policy.
Join the ChristaCoDesign Newsletter
Never miss a pattern!
This free crochet pattern includes written instructions, photo tutorial and color graph for those familiar with the corner to corner method.
You can purchase the ad-free, well formatted PDF Pattern in one of my shops. Scroll down for the free pattern!
Notes About the C2C Crochet Technique
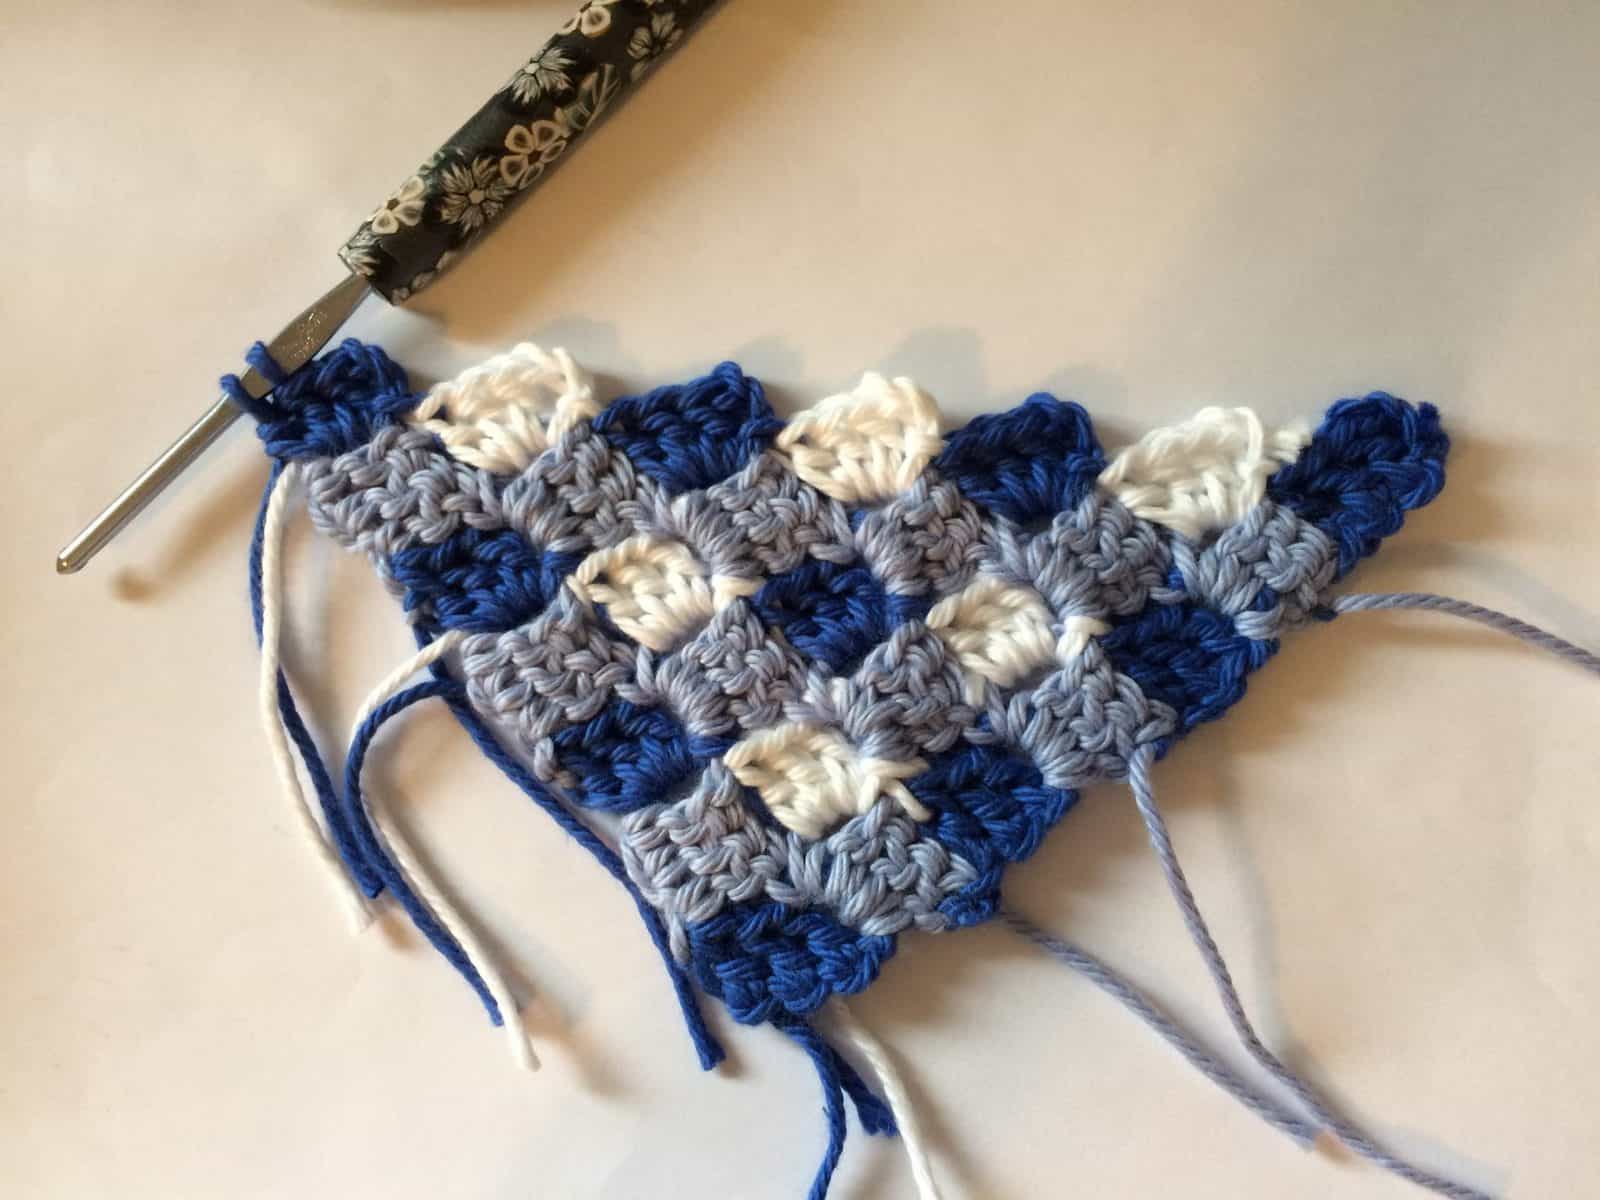
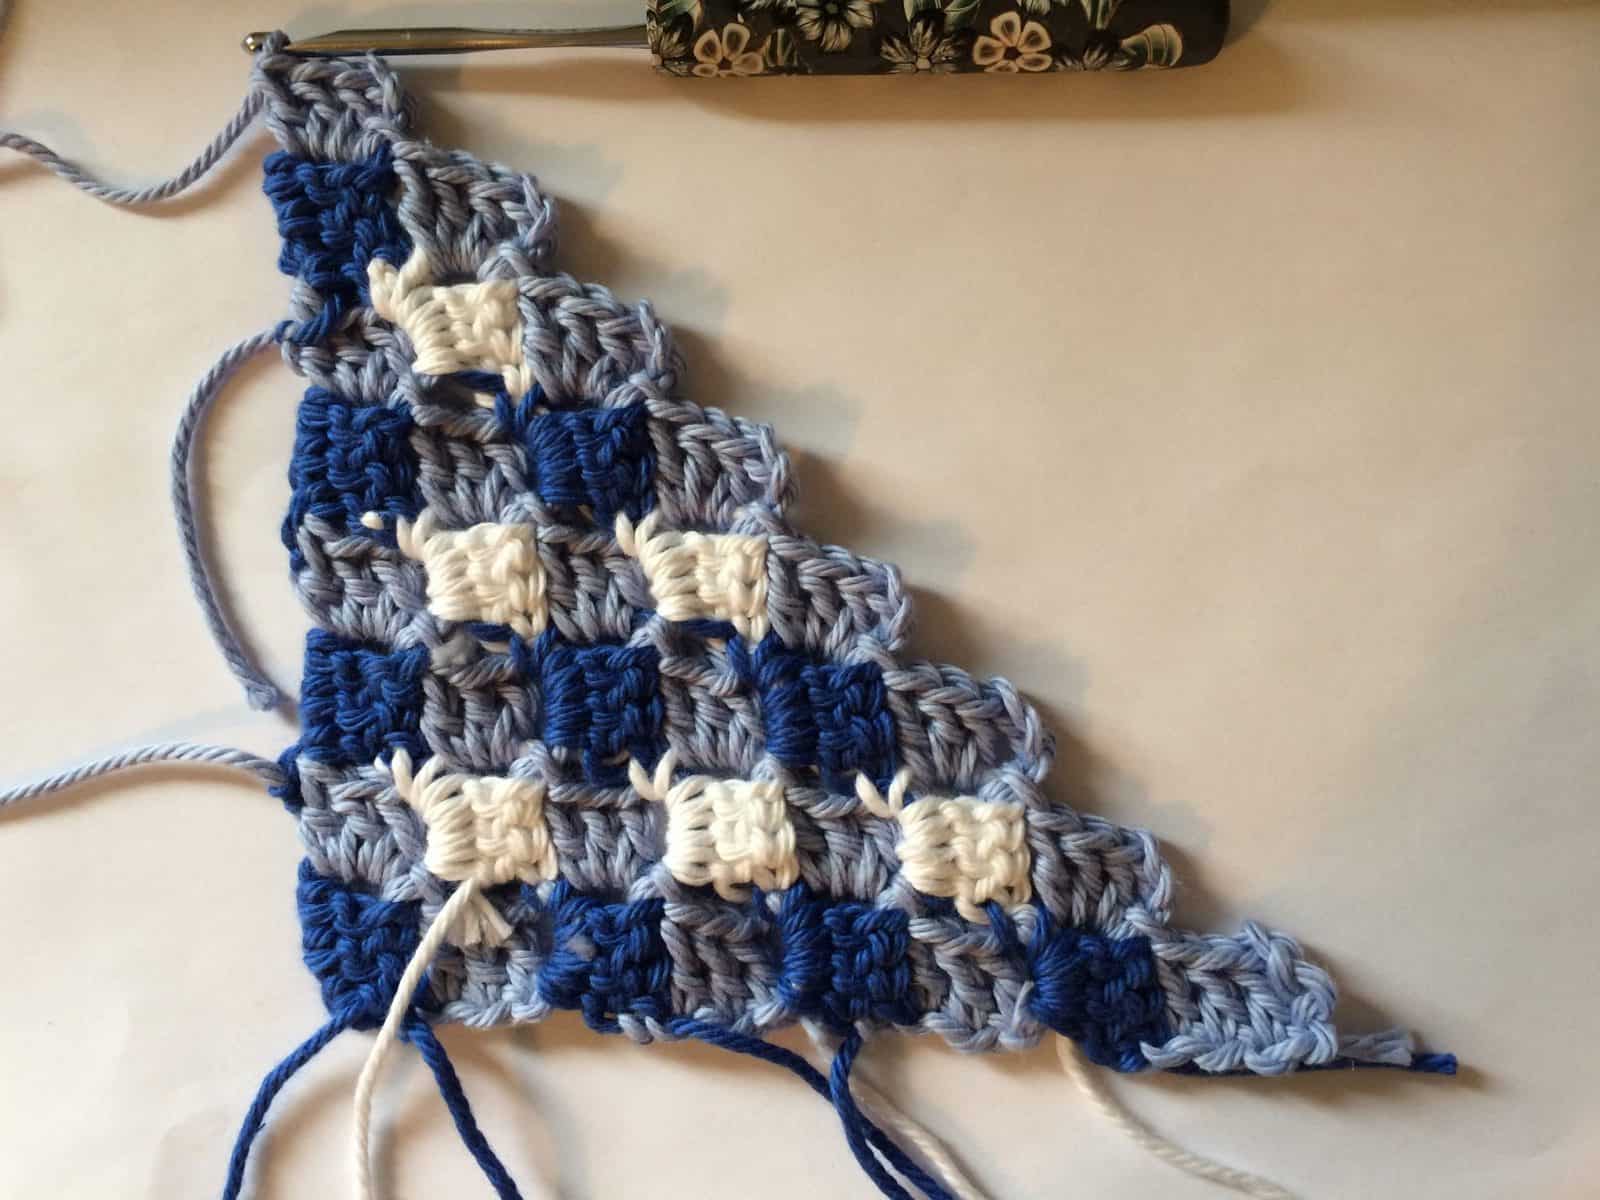
The C2C technique works up as a diagonal row. To begin, your work forms a triangle. Each row increases that triangle, until you reach the widest point in your project.
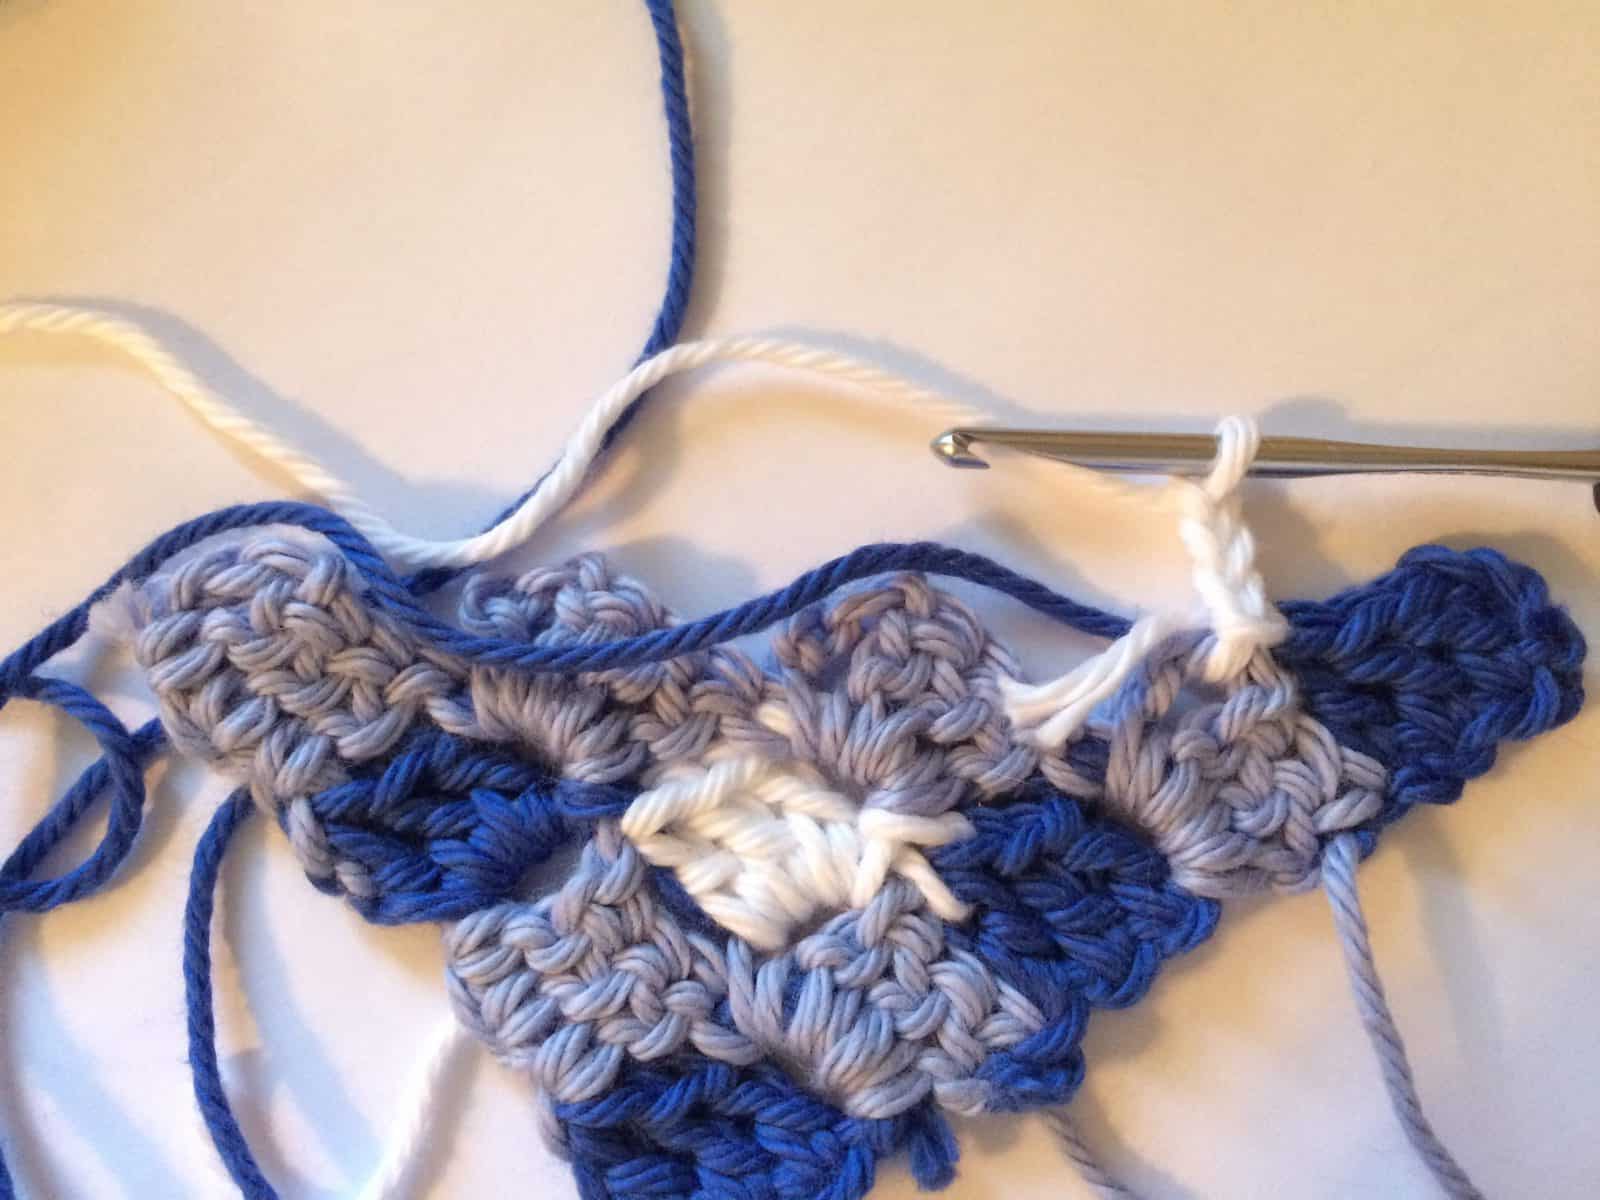
Next you begin decreasing row by row, finally finishing when it’s a square. Every row is blocks of double crochet stitches.
The c2c blocks all start with a chain 3, which counts as 1 double crochet, and then you add 3 double crochet for a total of 4 stitches per block. The only exception is the first block of a new row.
The first block of a new row, when increasing, starts with a Chain 6. To decrease C2C, the row starts with 3 slip stitches before continuing to crochet your blocks.
You can also learn C2C in this tutorial with video.
The Yarn
I chose a royal blue color, called Royalty, a soft blue, called Periwinkle and white to create this crochet pillow cover pattern. This combination give the gingham vibe I was going for.
I use cotton yarn in this sample, but acrylic and other fibers will also work.

More Free Crochet Patterns
The Trentino Pillow crochet pattern features an easy color work design.
The Grana washcloth is a free pattern that has a great tutorial for learning this stitch. And the sample is in a solid color, so no color changes!
Check out this snowflake blanket, another easy c2c crochet pattern in bulky yarn.
Materials:
- 720 yd #4 medium worsted weight yarn,* divided in 3 different colors: Color A Dark Blue (360 yd), Color B Light Blue (180 yd) and Color C White (180 yd).
- Pictured in: I Love This Cotton yarn (100% cotton, 180 yd / 3.5 oz) Colors: Color A (2) Royalty, Color B (1) Periwinkle and Color C (1) White.
- 3.75 mm US crochet hook size F,* or hook needed to meet gauge.
- 18″ X 18″ pillow insert, measuring tape and scissors
- Tapestry needle for weaving in ends and sewing your finished pillowcase together.
Sts/Abbreviations-US Terms
c2c – corner to corner
ch(s) – chain(s)
dc – double crochet
rep – repeat
RS – right side
sc – single crochet
sk – skip the indicated st
sl st – slip stitch
st (s) – stitch (es)
WS – wrong side
Gauge:
4 dc = 3/4″ adjust your hook size accordingly
Finished pillow squares are 16″ X 16″ before edging.
Skill Level
Easy
Helpful Tutorials
How to crochet corner to corner (c2c).
Tips for working corner to corner.
Change colors at the end of a row.
Change colors in the middle of a row.
You can purchase the ad-free, well formatted PDF Pattern in one of my shops. Scroll down for the free pattern!
If you’re familiar with corner to corner, the c2c graph pattern and written instructions are included in the pattern, as well as the step by step photo tutorial.
Scroll down for the free C2C crochet pillow pattern!
C2C Crochet Pillow Pattern in Gingham
Learn how to crochet a gingham pillow in C2C crochet.
Materials
- 720 yd #4 medium worsted weight yarn, divided in 3 colors: Color A Dark Blue (360 yd), Color B Light Blue (180 yd) and Color C White (180 yd).
- Pictured in: I Love This Cotton yarn (100% cotton, 180 yd / 3.5 oz) Colors: Color A (2) Royalty, Color B (1) Periwinkle and Color C (1) White.
- 18″ X 18″ pillowform, measuring tape and scissors
Tools
- 3.75 mm US Hook size F, or hook needed to meet gauge.
- Yarn needle for weaving in ends and sewing your finished pillowcase together.
Instructions
- Written Instructions (make 2) Scroll down for the step by step photo tutorial on how to crochet this corner to corner pillow.
← Row 1 [RS]: (Dark Blue) x 1 (1 square)
→ Row 2 [WS]: (Light Blue) x 2 (2 squares)
← Row 3 [RS]: (Dark Blue) x 1, (White) x 1, (Dark Blue) x 1 (3 squares)
→ Row 4 [WS]: (Light Blue) x 4 (4 squares)
← Row 5 [RS]: (Dark Blue) x 1, (White) x 1, (Dark Blue) x 1, (White) x 1, (Dark Blue) x 1 (5 squares)
→ Row 6 [WS]: (Light Blue) x 6 (6 squares)
← Row 7 [RS]: (Dark Blue) x 1, (White) x 1, (Dark Blue) x 1, (White) x 1, (Dark Blue) x 1, (White) x 1, (Dark Blue) x 1 (7 squares)
→ Row 8 [WS]: (Light Blue) x 8 (8 squares)
← Row 9 [RS]: (Dark Blue) x 1, (White) x 1, (Dark Blue) x 1, (White) x 1, (Dark Blue) x 1, (White) x 1, (Dark Blue) x 1, (White) x 1, (Dark Blue) x 1 (9 squares)
→ Row 10 [WS]: (Light Blue) x 10 (10 squares)
← Row 11 [RS]: (Dark Blue) x 1, (White) x 1, (Dark Blue) x 1, (White) x 1, (Dark Blue) x 1, (White) x 1, (Dark Blue) x 1, (White) x 1, (Dark Blue) x 1, (White) x 1, (Dark Blue) x 1 (11 squares)
→ Row 12 [WS]: (Light Blue) x 12 (12 squares)
← Row 13 [RS]: (Dark Blue) x 1, (White) x 1, (Dark Blue) x 1, (White) x 1, (Dark Blue) x 1, (White) x 1, (Dark Blue) x 1, (White) x 1, (Dark Blue) x 1, (White) x 1, (Dark Blue) x 1, (White) x 1, (Dark Blue) x 1 (13 squares)
→ Row 14 [WS]: (Light Blue) x 14 (14 squares)
← Row 15 [RS]: (Dark Blue) x 1, (White) x 1, (Dark Blue) x 1, (White) x 1, (Dark Blue) x 1, (White) x 1, (Dark Blue) x 1, (White) x 1, (Dark Blue) x 1, (White) x 1, (Dark Blue) x 1, (White) x 1, (Dark Blue) x 1, (White) x 1, (Dark Blue) x 1 (15 squares)
→ Row 16 [WS]: (Light Blue) x 16 (16 squares)
← Row 17 [RS]: (Dark Blue) x 1, (White) x 1, (Dark Blue) x 1, (White) x 1, (Dark Blue) x 1, (White) x 1, (Dark Blue) x 1, (White) x 1, (Dark Blue) x 1, (White) x 1, (Dark Blue) x 1, (White) x 1, (Dark Blue) x 1, (White) x 1, (Dark Blue) x 1, (White) x 1, (Dark Blue) x 1 (17 squares)
→ Row 18 [WS]: (Light Blue) x 18 (18 squares)
← Row 19 [RS]: (Dark Blue) x 1, (White) x 1, (Dark Blue) x 1, (White) x 1, (Dark Blue) x 1, (White) x 1, (Dark Blue) x 1, (White) x 1, (Dark Blue) x 1, (White) x 1, (Dark Blue) x 1, (White) x 1, (Dark Blue) x 1, (White) x 1, (Dark Blue) x 1, (White) x 1, (Dark Blue) x 1, (White) x 1, (Dark Blue) x 1 (19 squares)
→ Row 20 [WS]: (Light Blue) x 20 (20 squares)
← Row 21 [RS]: (Dark Blue) x 1, (White) x 1, (Dark Blue) x 1, (White) x 1, (Dark Blue) x 1, (White) x 1, (Dark Blue) x 1, (White) x 1, (Dark Blue) x 1, (White) x 1, (Dark Blue) x 1, (White) x 1, (Dark Blue) x 1, (White) x 1, (Dark Blue) x 1, (White) x 1, (Dark Blue) x 1, (White) x 1, (Dark Blue) x 1, (White) x 1, (Dark Blue) x 1 (21 squares)
→ Row 22 [WS]: (Light Blue) x 22 (22 squares)
← Row 23 [RS]: (Dark Blue) x 1, (White) x 1, (Dark Blue) x 1, (White) x 1, (Dark Blue) x 1, (White) x 1, (Dark Blue) x 1, (White) x 1, (Dark Blue) x 1, (White) x 1, (Dark Blue) x 1, (White) x 1, (Dark Blue) x 1, (White) x 1, (Dark Blue) x 1, (White) x 1, (Dark Blue) x 1, (White) x 1, (Dark Blue) x 1, (White) x 1, (Dark Blue) x 1, (White) x 1, (Dark Blue) x 1 (23 squares)
→ Row 24 [WS]: (Light Blue) x 24 (24 squares)
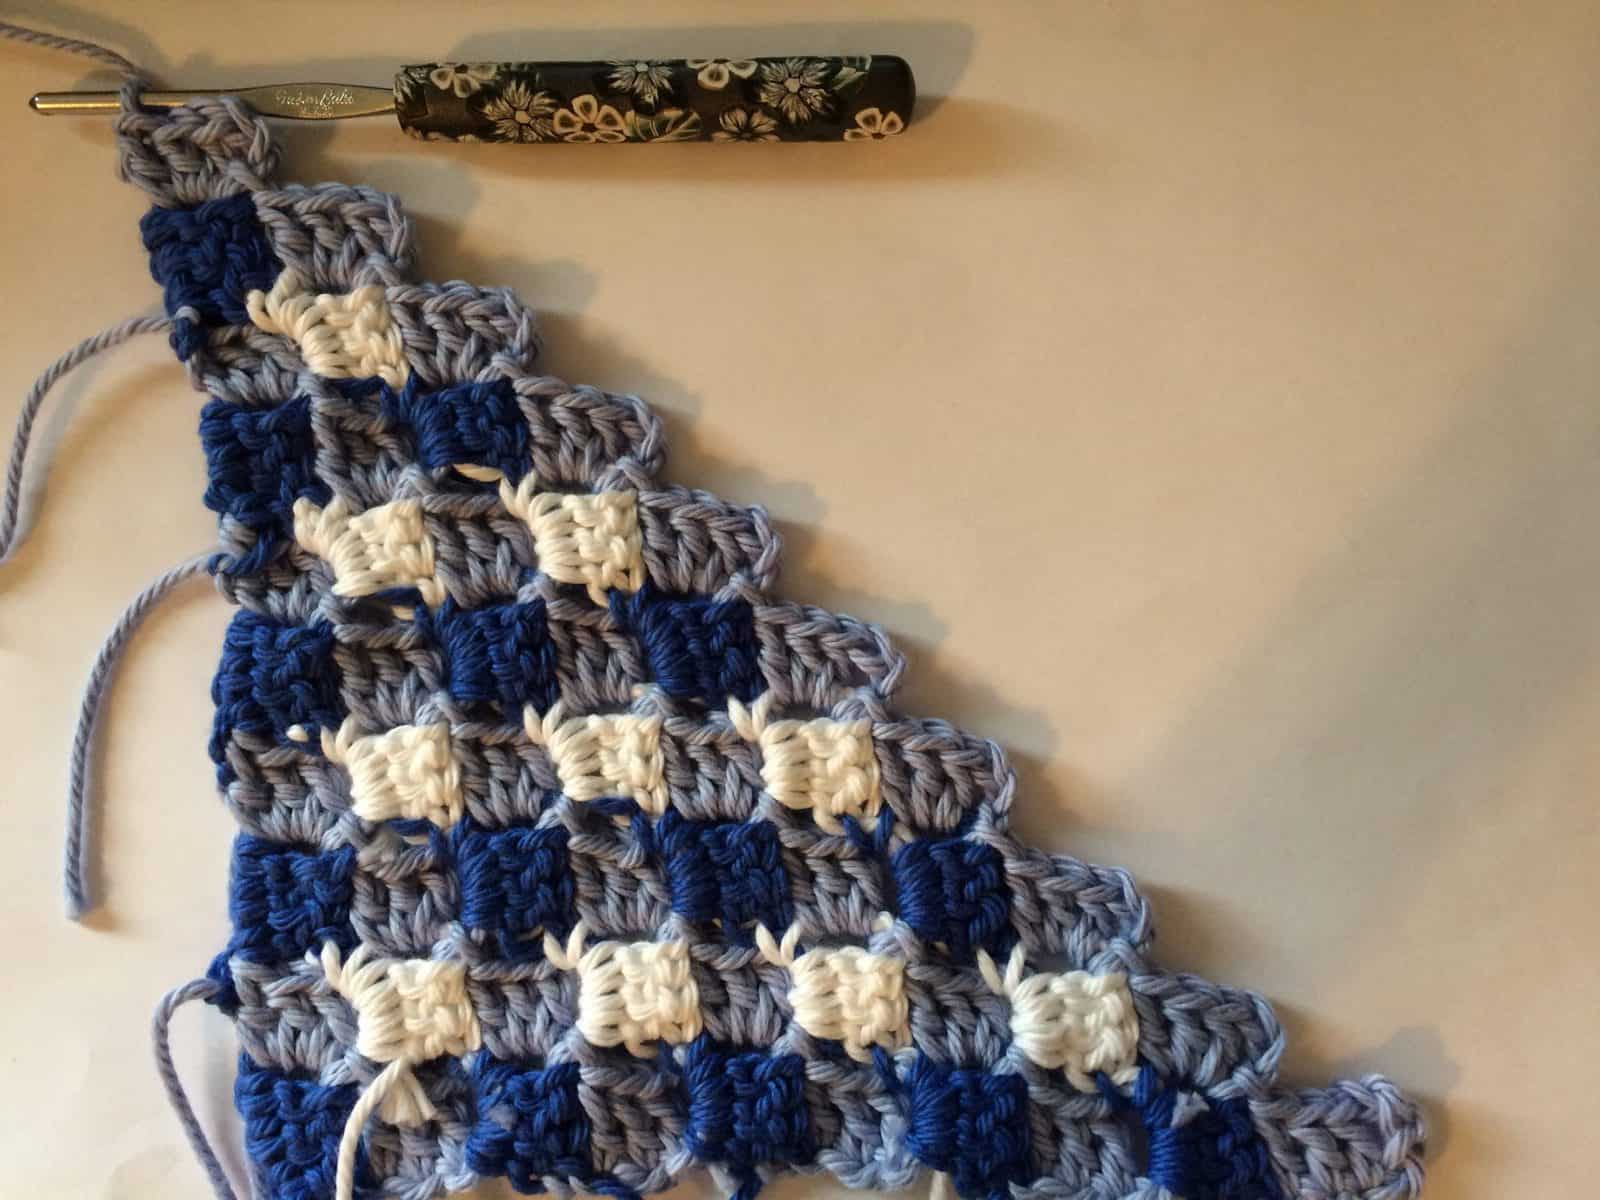
Corner
← Row 25 [RS]: (White) x 1, (Dark Blue) x 1, (White) x 1, (Dark Blue) x 1, (White) x 1, (Dark Blue) x 1, (White) x 1, (Dark Blue) x 1, (White) x 1, (Dark Blue) x 1, (White) x 1, (Dark Blue) x 1, (White) x 1, (Dark Blue) x 1, (White) x 1, (Dark Blue) x 1, (White) x 1, (Dark Blue) x 1, (White) x 1, (Dark Blue) x 1, (White) x 1, (Dark Blue) x 1, (White) x 1 (23 squares)
→ Row 26 [WS]: (Light Blue) x 22 (22 squares)
← Row 27 [RS]: (White) x 1, (Dark Blue) x 1, (White) x 1, (Dark Blue) x 1, (White) x 1, (Dark Blue) x 1, (White) x 1, (Dark Blue) x 1, (White) x 1, (Dark Blue) x 1, (White) x 1, (Dark Blue) x 1, (White) x 1, (Dark Blue) x 1, (White) x 1, (Dark Blue) x 1, (White) x 1, (Dark Blue) x 1, (White) x 1, (Dark Blue) x 1, (White) x 1 (21 squares)
→ Row 28 [WS]: (Light Blue) x 20 (20 squares)
← Row 29 [RS]: (White) x 1, (Dark Blue) x 1, (White) x 1, (Dark Blue) x 1, (White) x 1, (Dark Blue) x 1, (White) x 1, (Dark Blue) x 1, (White) x 1, (Dark Blue) x 1, (White) x 1, (Dark Blue) x 1, (White) x 1, (Dark Blue) x 1, (White) x 1, (Dark Blue) x 1, (White) x 1, (Dark Blue) x 1, (White) x 1 (19 squares)
→ Row 30 [WS]: (Light Blue) x 18 (18 squares)
← Row 31 [RS]: (White) x 1, (Dark Blue) x 1, (White) x 1, (Dark Blue) x 1, (White) x 1, (Dark Blue) x 1, (White) x 1, (Dark Blue) x 1, (White) x 1, (Dark Blue) x 1, (White) x 1, (Dark Blue) x 1, (White) x 1, (Dark Blue) x 1, (White) x 1, (Dark Blue) x 1, (White) x 1 (17 squares)
→ Row 32 [WS]: (Light Blue) x 16 (16 squares)
← Row 33 [RS]: (White) x 1, (Dark Blue) x 1, (White) x 1, (Dark Blue) x 1, (White) x 1, (Dark Blue) x 1, (White) x 1, (Dark Blue) x 1, (White) x 1, (Dark Blue) x 1, (White) x 1, (Dark Blue) x 1, (White) x 1, (Dark Blue) x 1, (White) x 1 (15 squares)
→ Row 34 [WS]: (Light Blue) x 14 (14 squares)
← Row 35 [RS]: (White) x 1, (Dark Blue) x 1, (White) x 1, (Dark Blue) x 1, (White) x 1, (Dark Blue) x 1, (White) x 1, (Dark Blue) x 1, (White) x 1, (Dark Blue) x 1, (White) x 1, (Dark Blue) x 1, (White) x 1 (13 squares)
→ Row 36 [WS]: (Light Blue) x 12 (12 squares)
← Row 37 [RS]: (White) x 1, (Dark Blue) x 1, (White) x 1, (Dark Blue) x 1, (White) x 1, (Dark Blue) x 1, (White) x 1, (Dark Blue) x 1, (White) x 1, (Dark Blue) x 1, (White) x 1 (11 squares)
→ Row 38 [WS]: (Light Blue) x 10 (10 squares)
← Row 39 [RS]: (White) x 1, (Dark Blue) x 1, (White) x 1, (Dark Blue) x 1, (White) x 1, (Dark Blue) x 1, (White) x 1, (Dark Blue) x 1, (White) x 1 (9 squares)
→ Row 40 [WS]: (Light Blue) x 8 (8 squares)
← Row 41 [RS]: (White) x 1, (Dark Blue) x 1, (White) x 1, (Dark Blue) x 1, (White) x 1, (Dark Blue) x 1, (White) x 1 (7 squares)
→ Row 42 [WS]: (Light Blue) x 6 (6 squares)
← Row 43 [RS]: (White) x 1, (Dark Blue) x 1, (White) x 1, (Dark Blue) x 1, (White) x 1 (5 squares)
→ Row 44 [WS]: (Light Blue) x 4 (4 squares)
← Row 45 [RS]: (White) x 1, (Dark Blue) x 1, (White) x 1 (3 squares)
→ Row 46 [WS]: (Light Blue) x 2 (2 squares)
← Row 47 [RS]: (White) x 1 (1 square)
Total: (Light Blue) x 288, (White) x 144, (Dark Blue) x 144
Once both squares are complete scroll down for finishing and seaming.
Color Chart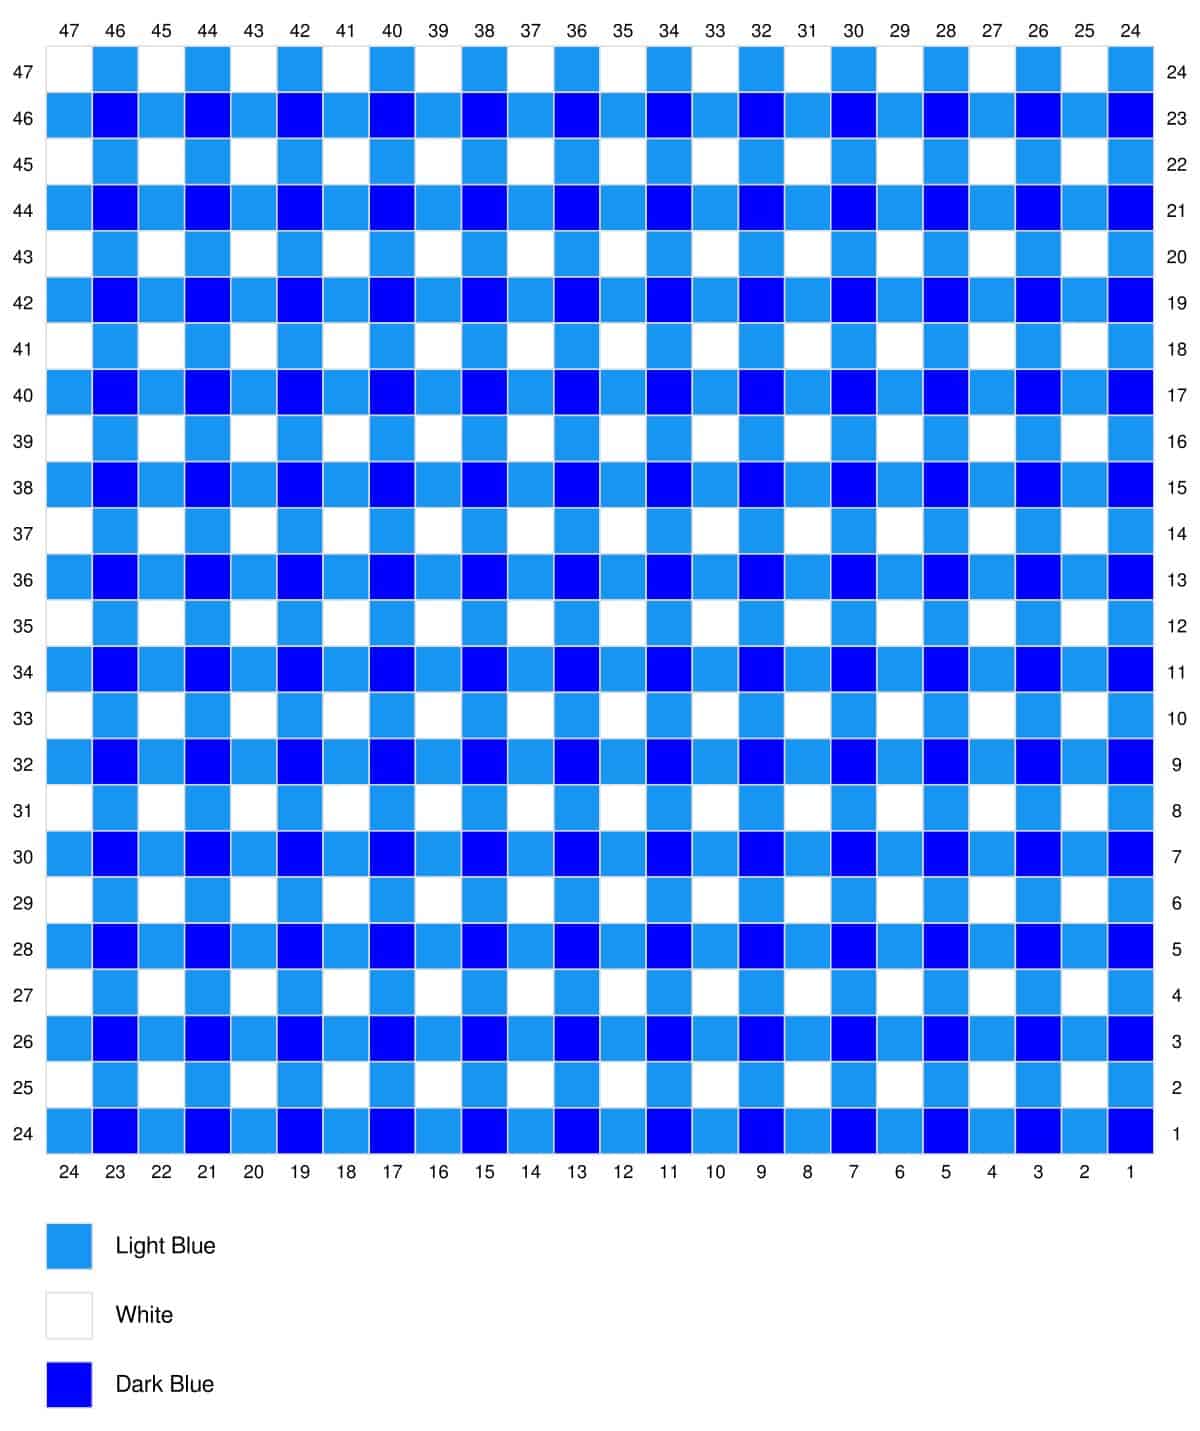
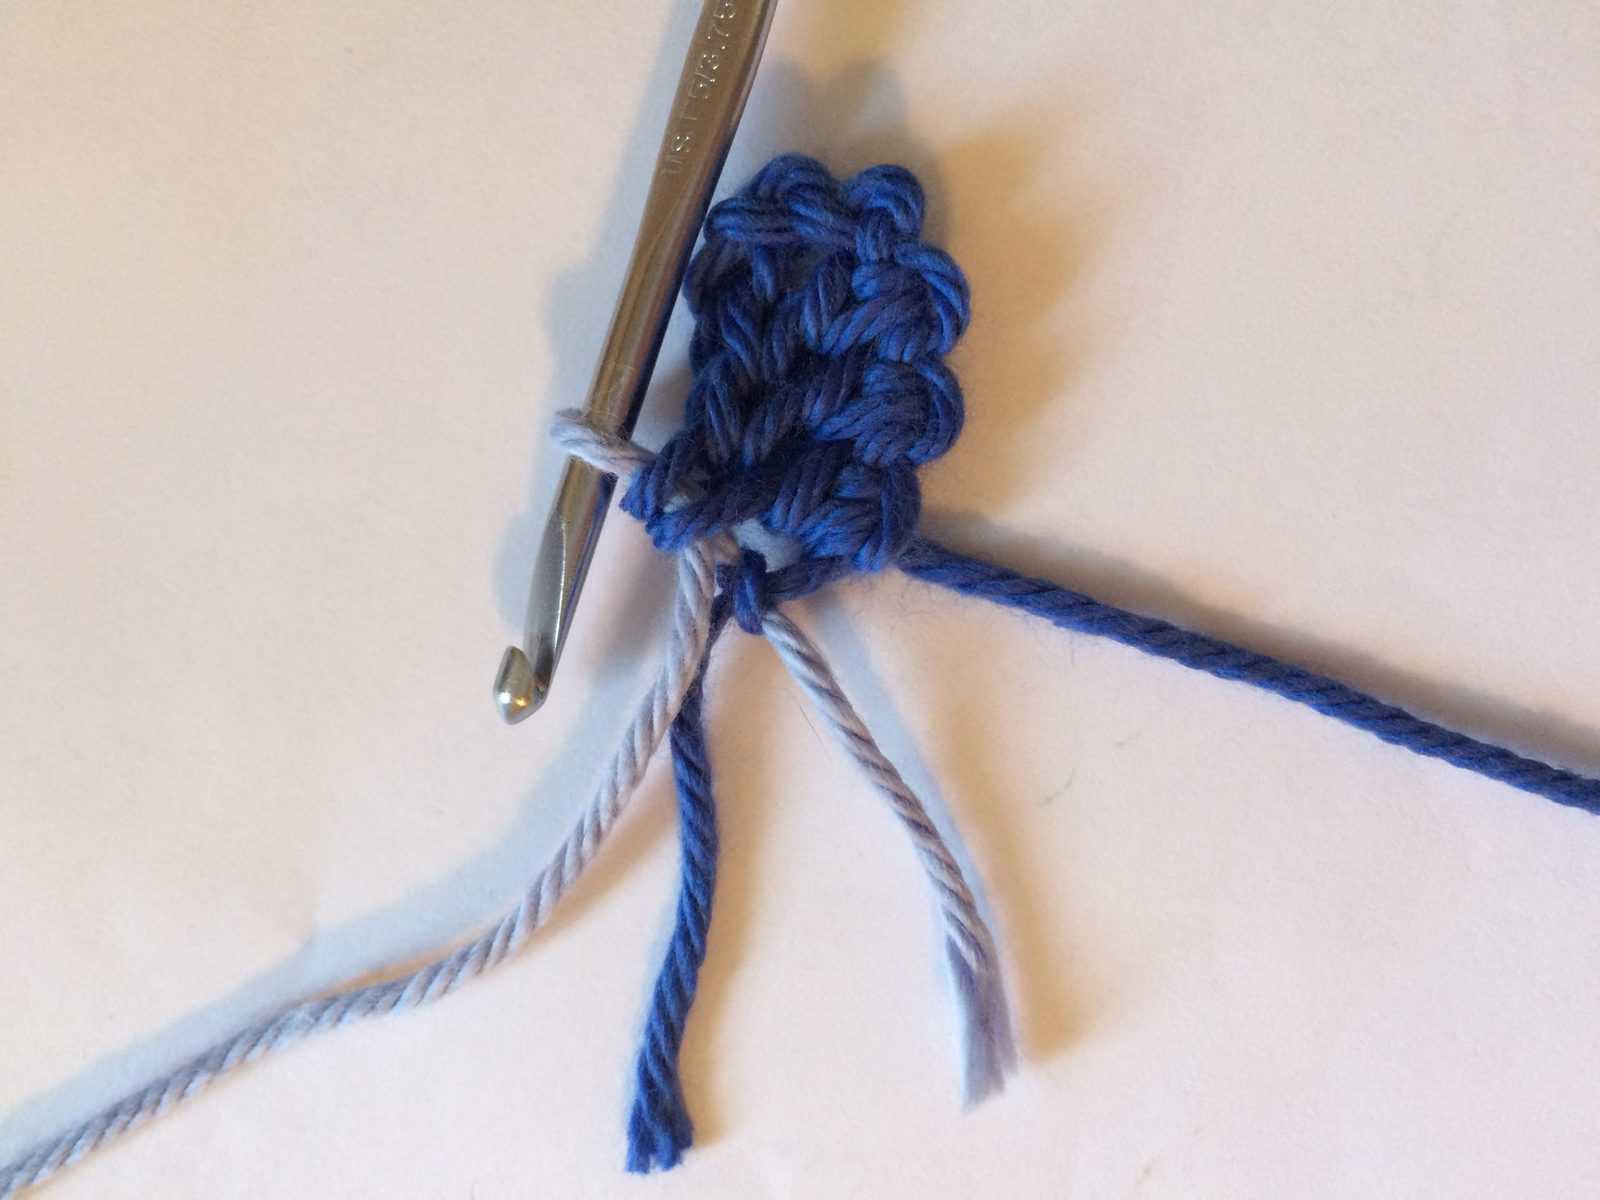
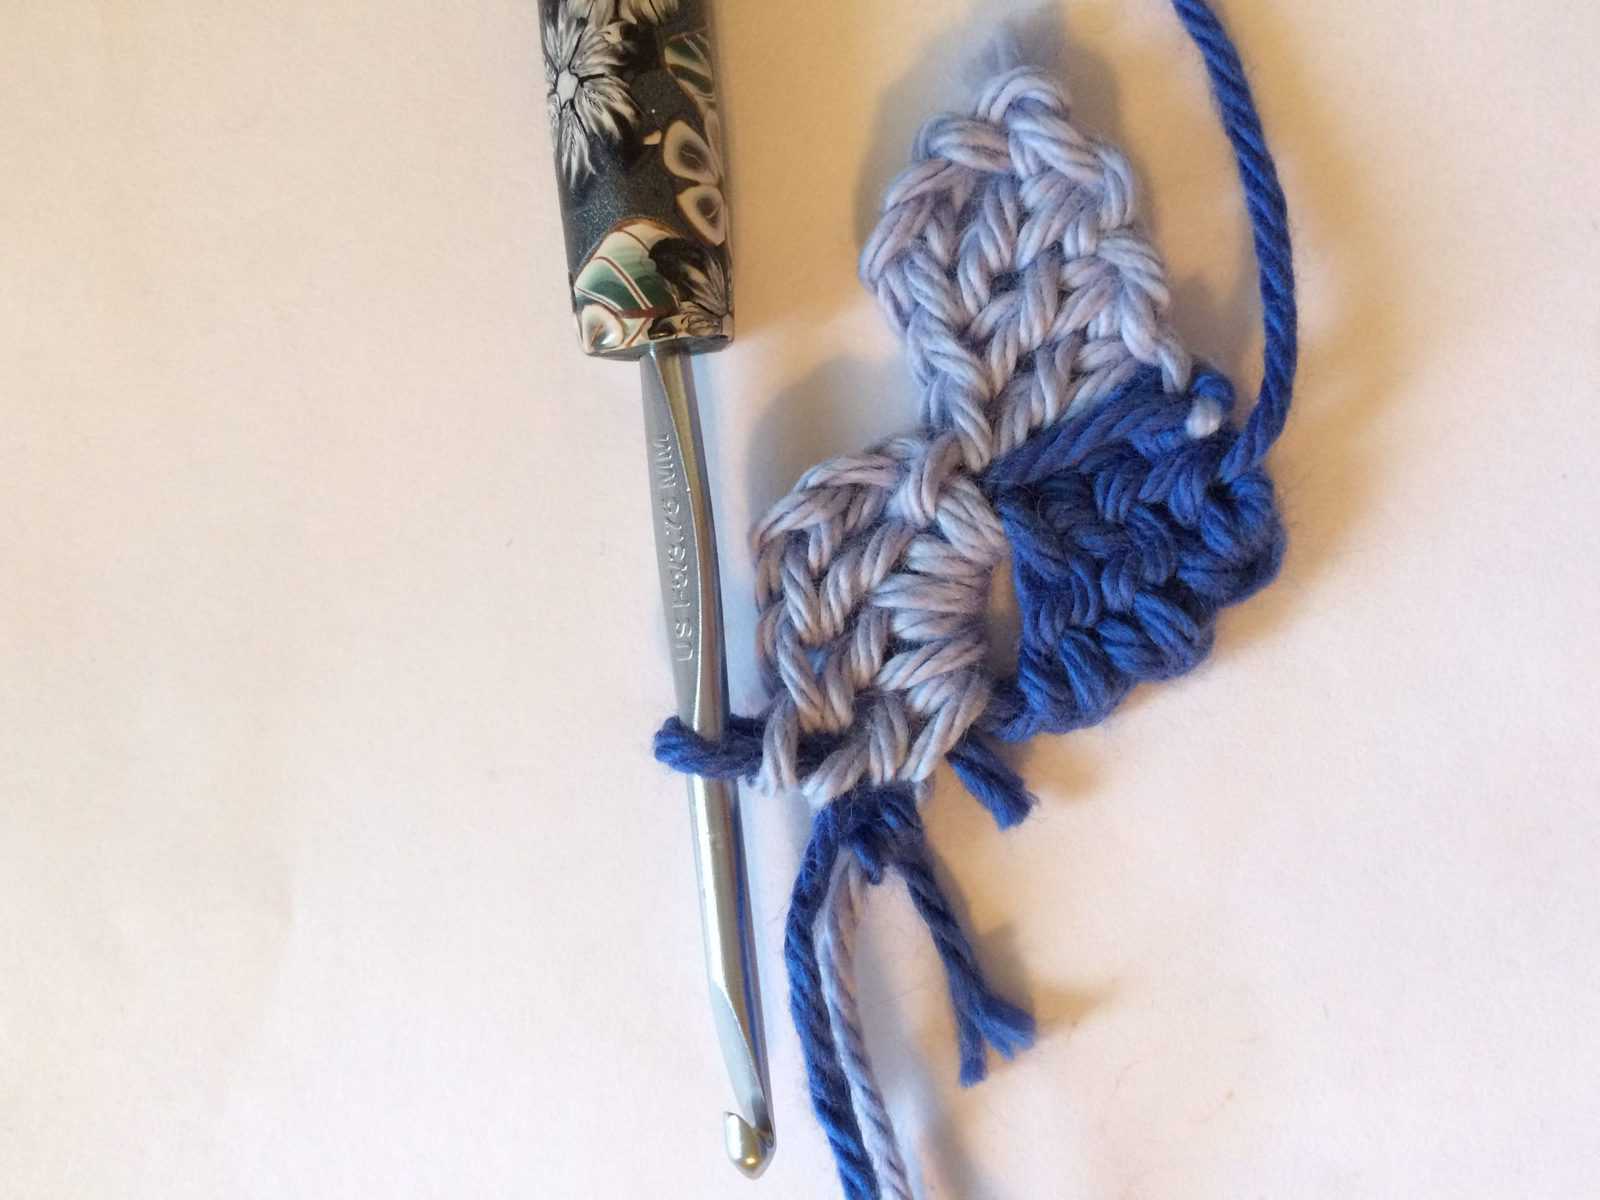
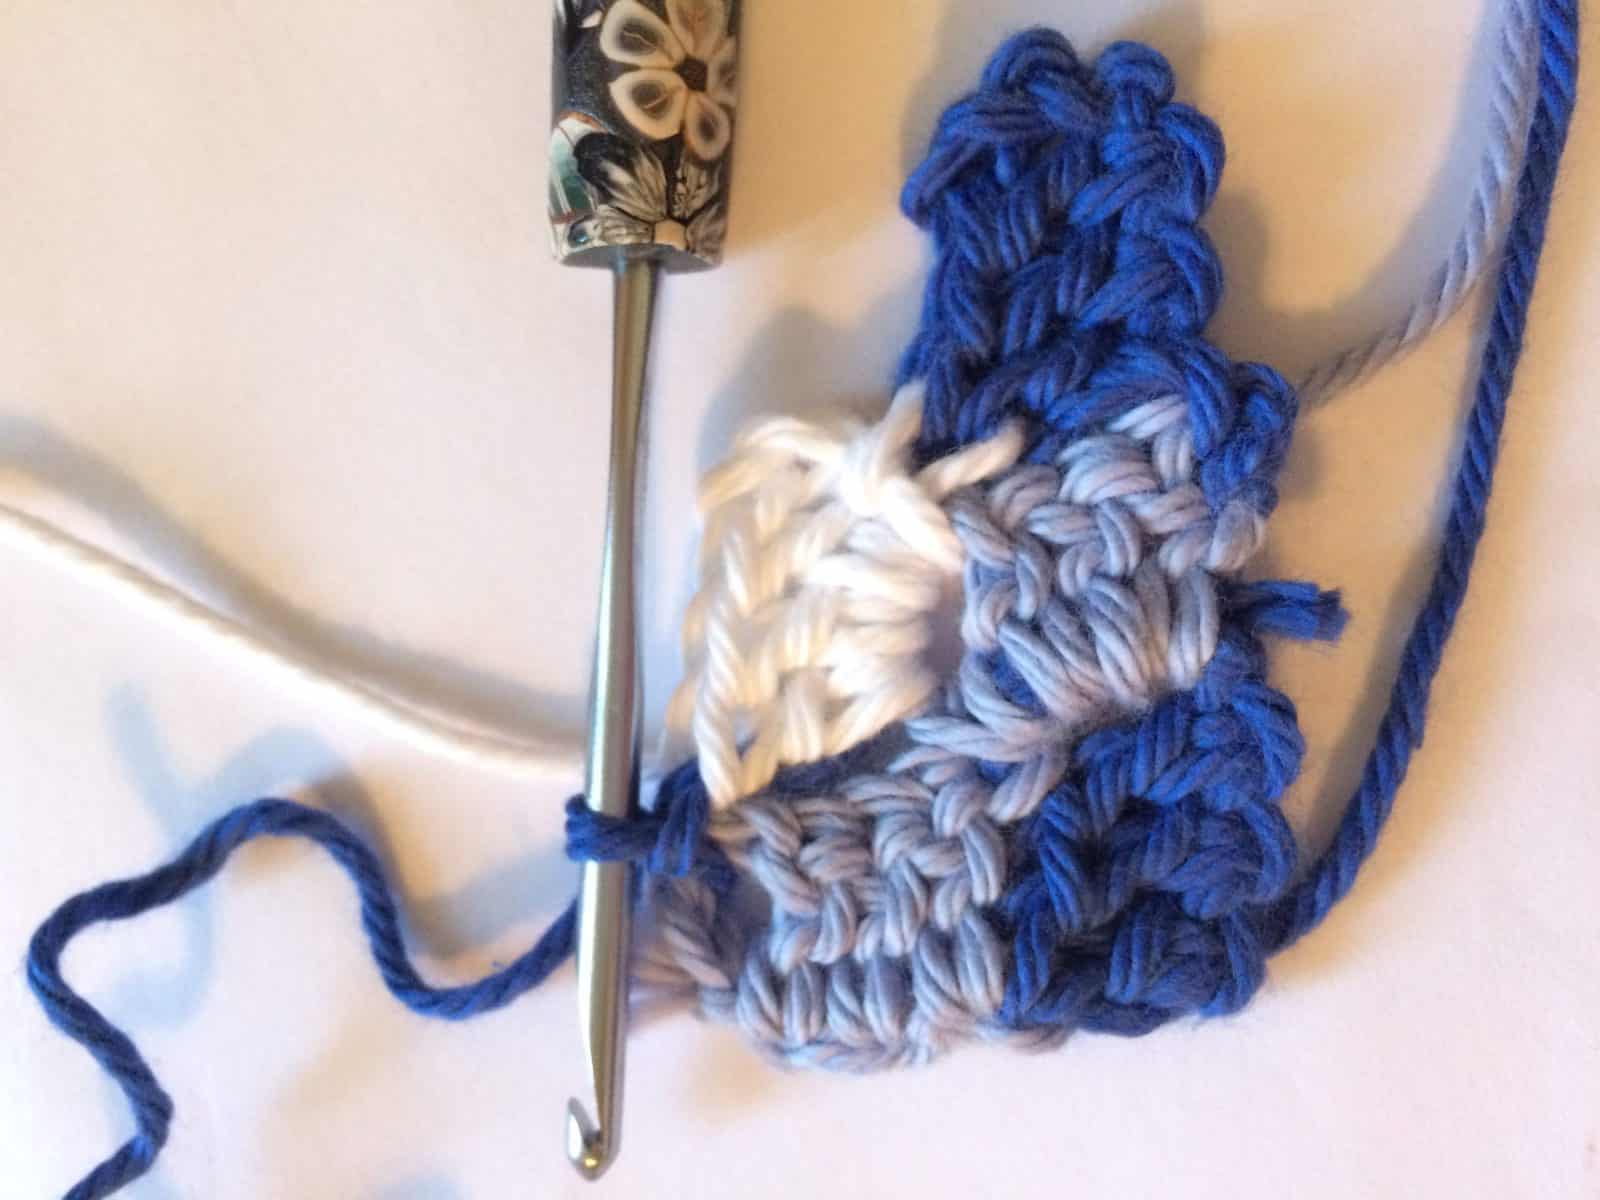
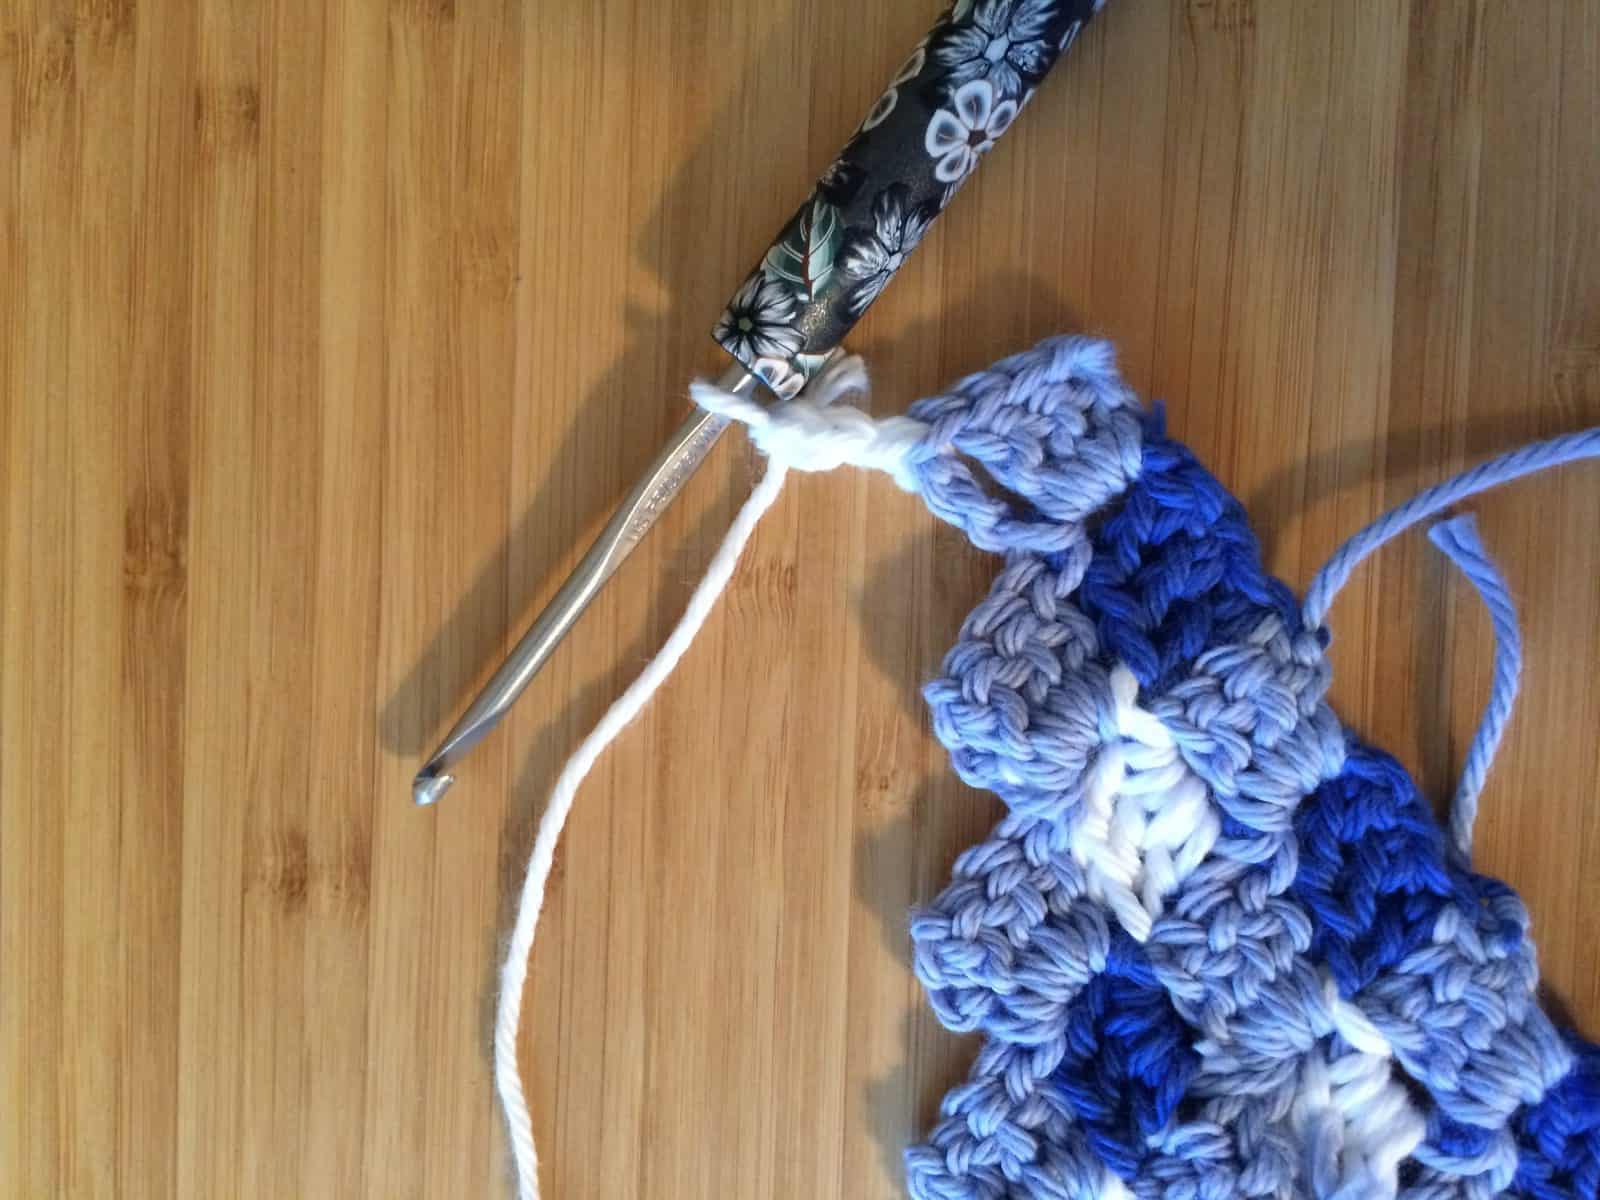
How to crochet your first block:
Row 1: Ch 6 in Color A.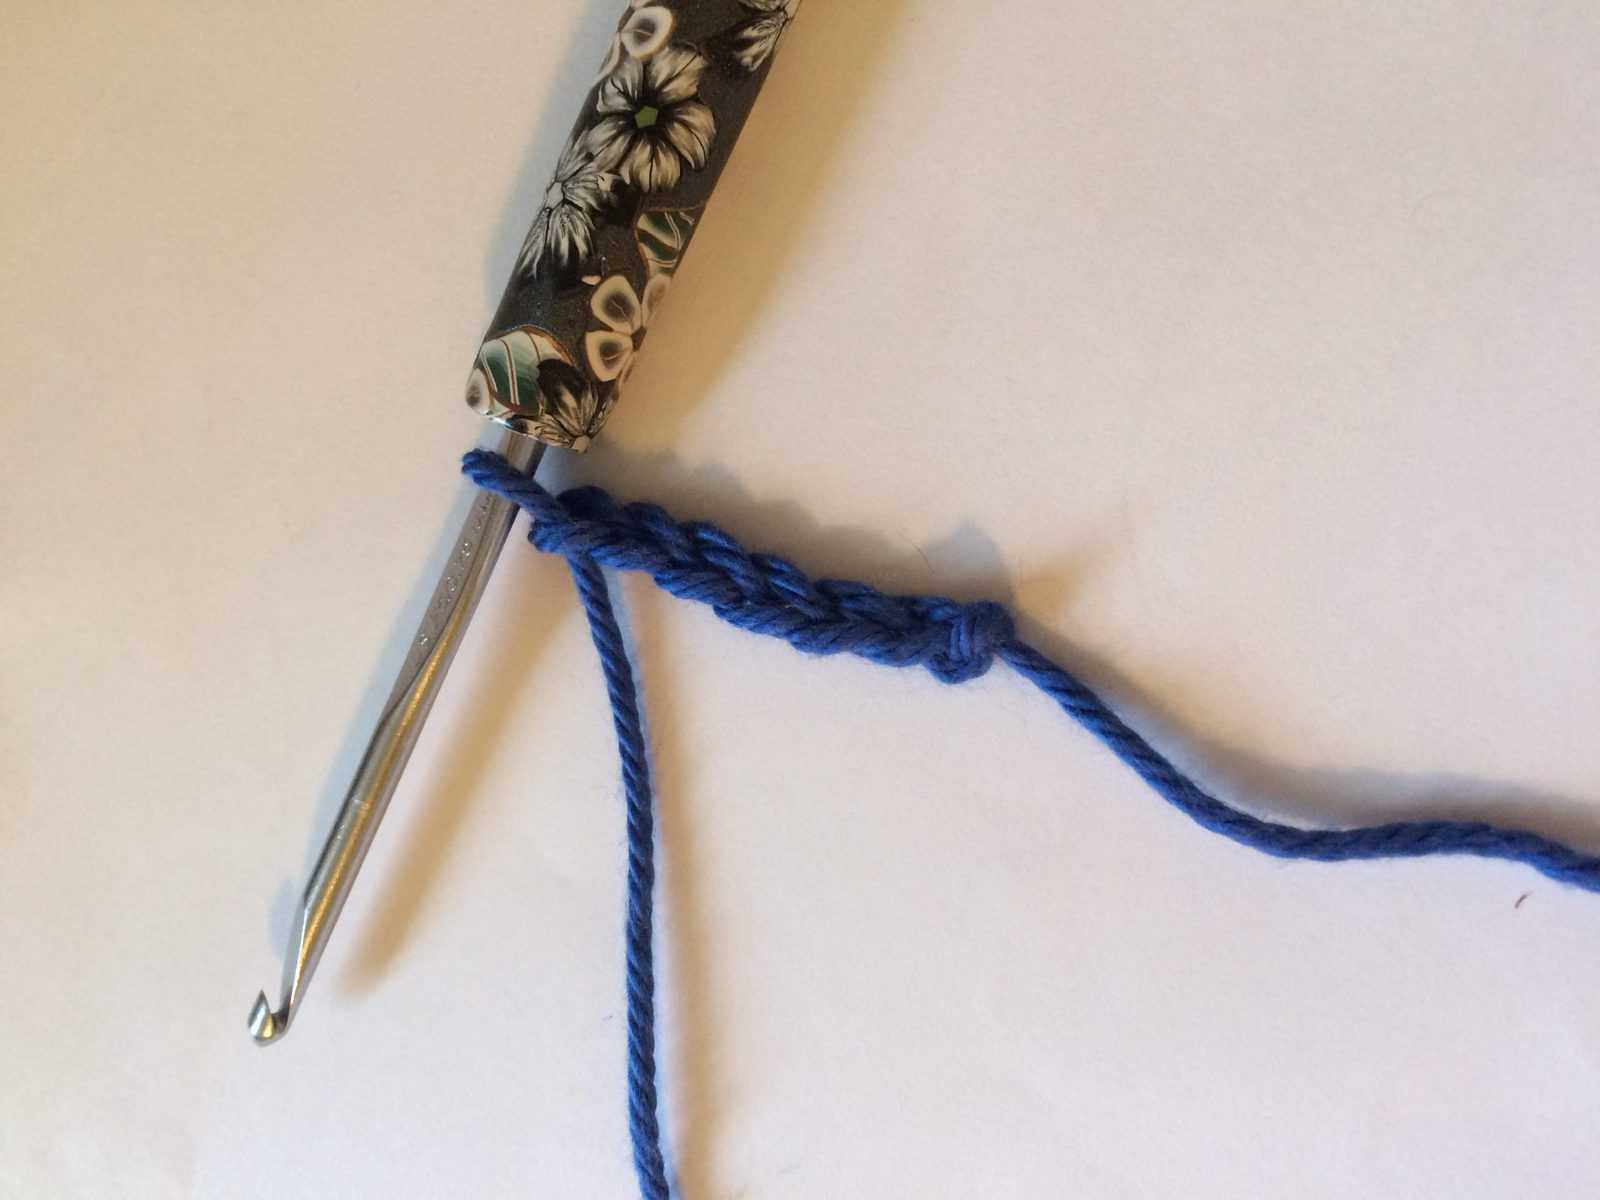
- Dc into 4th ch from hook.
- Dc in next ch.
- Begin dc into the last ch, but stop at the last step to change colors.
- Finish your last dc in Color B. One block complete. Turn.
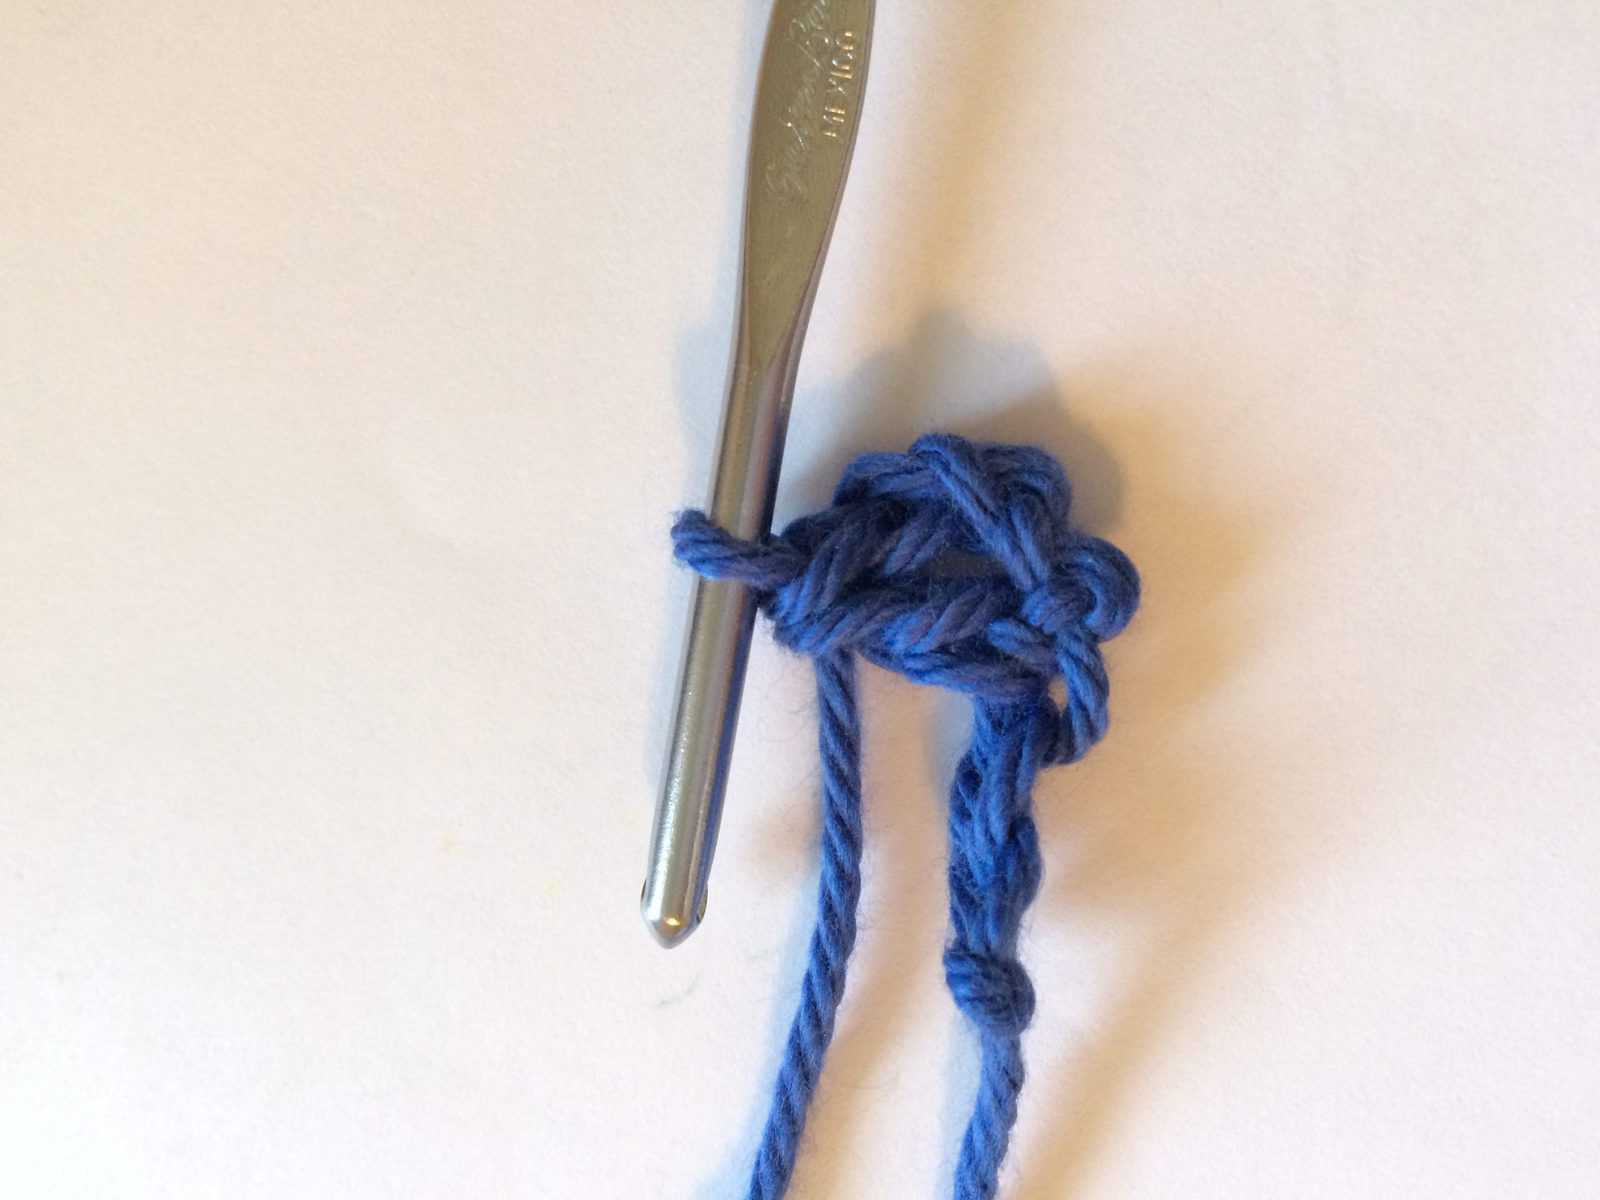
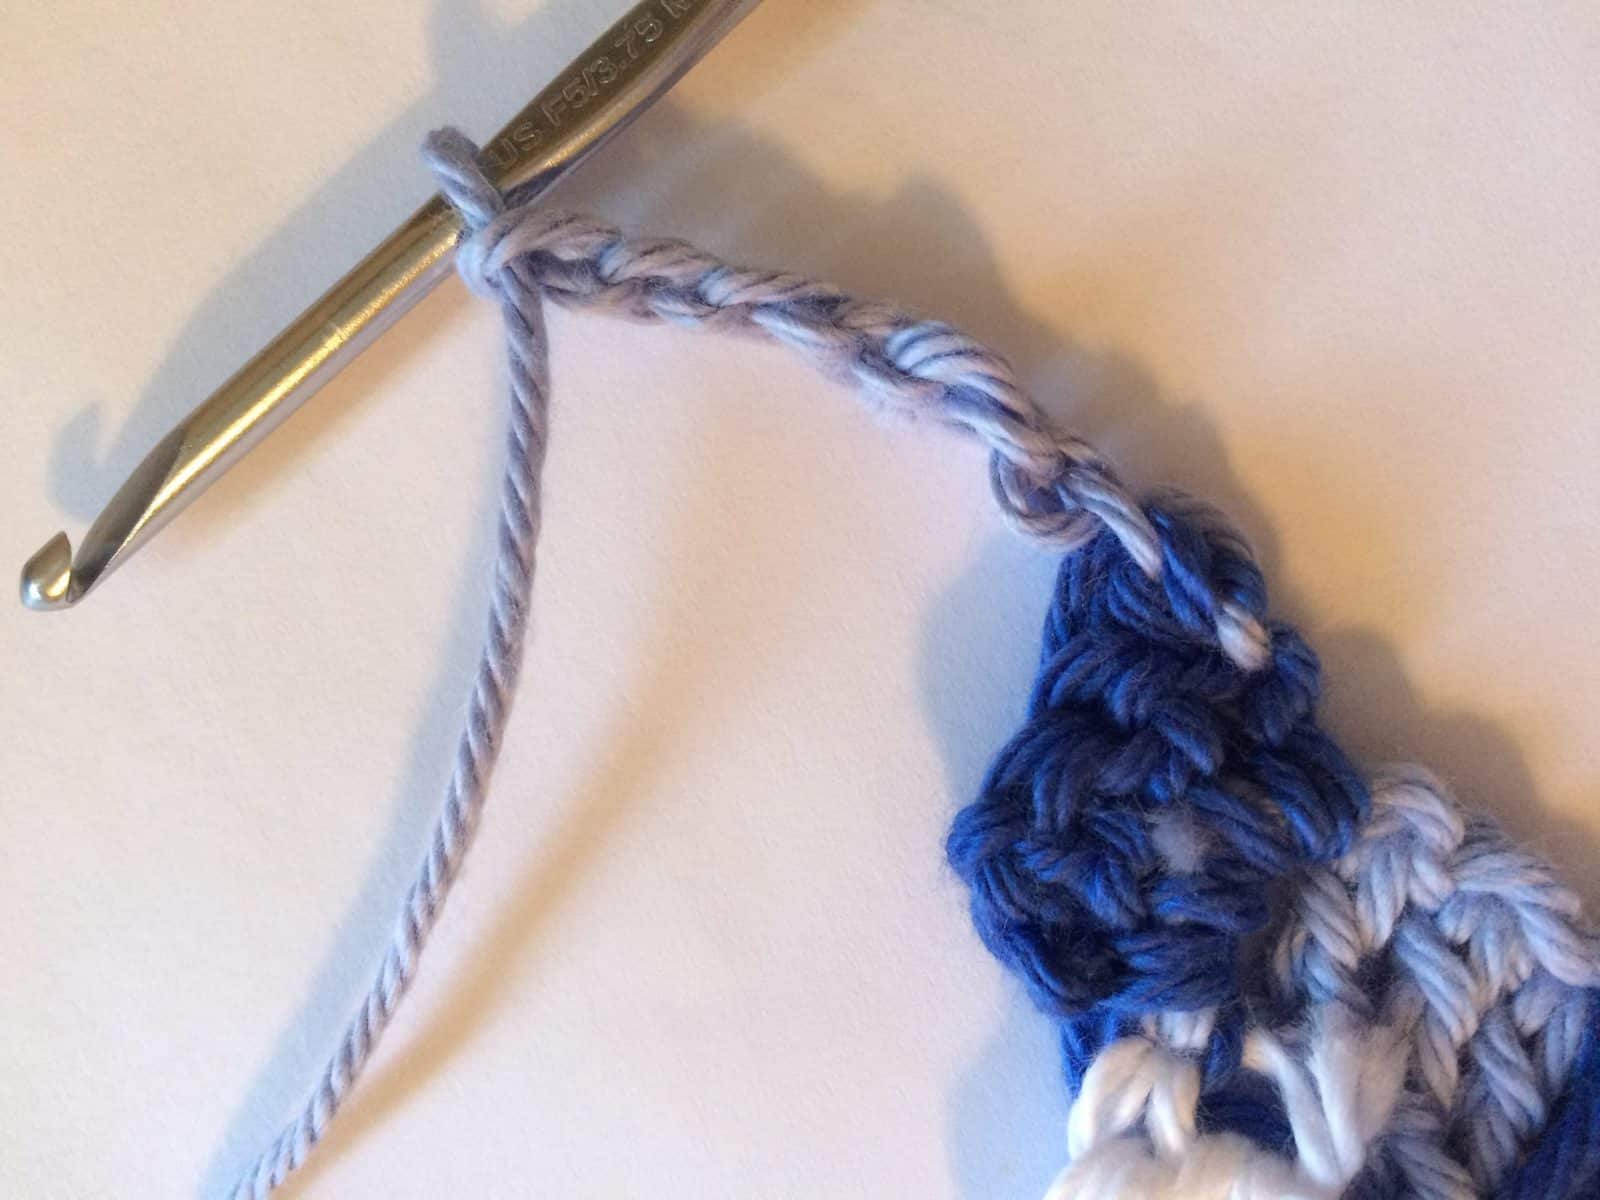
- Row 2:
Ch 6 in Color B.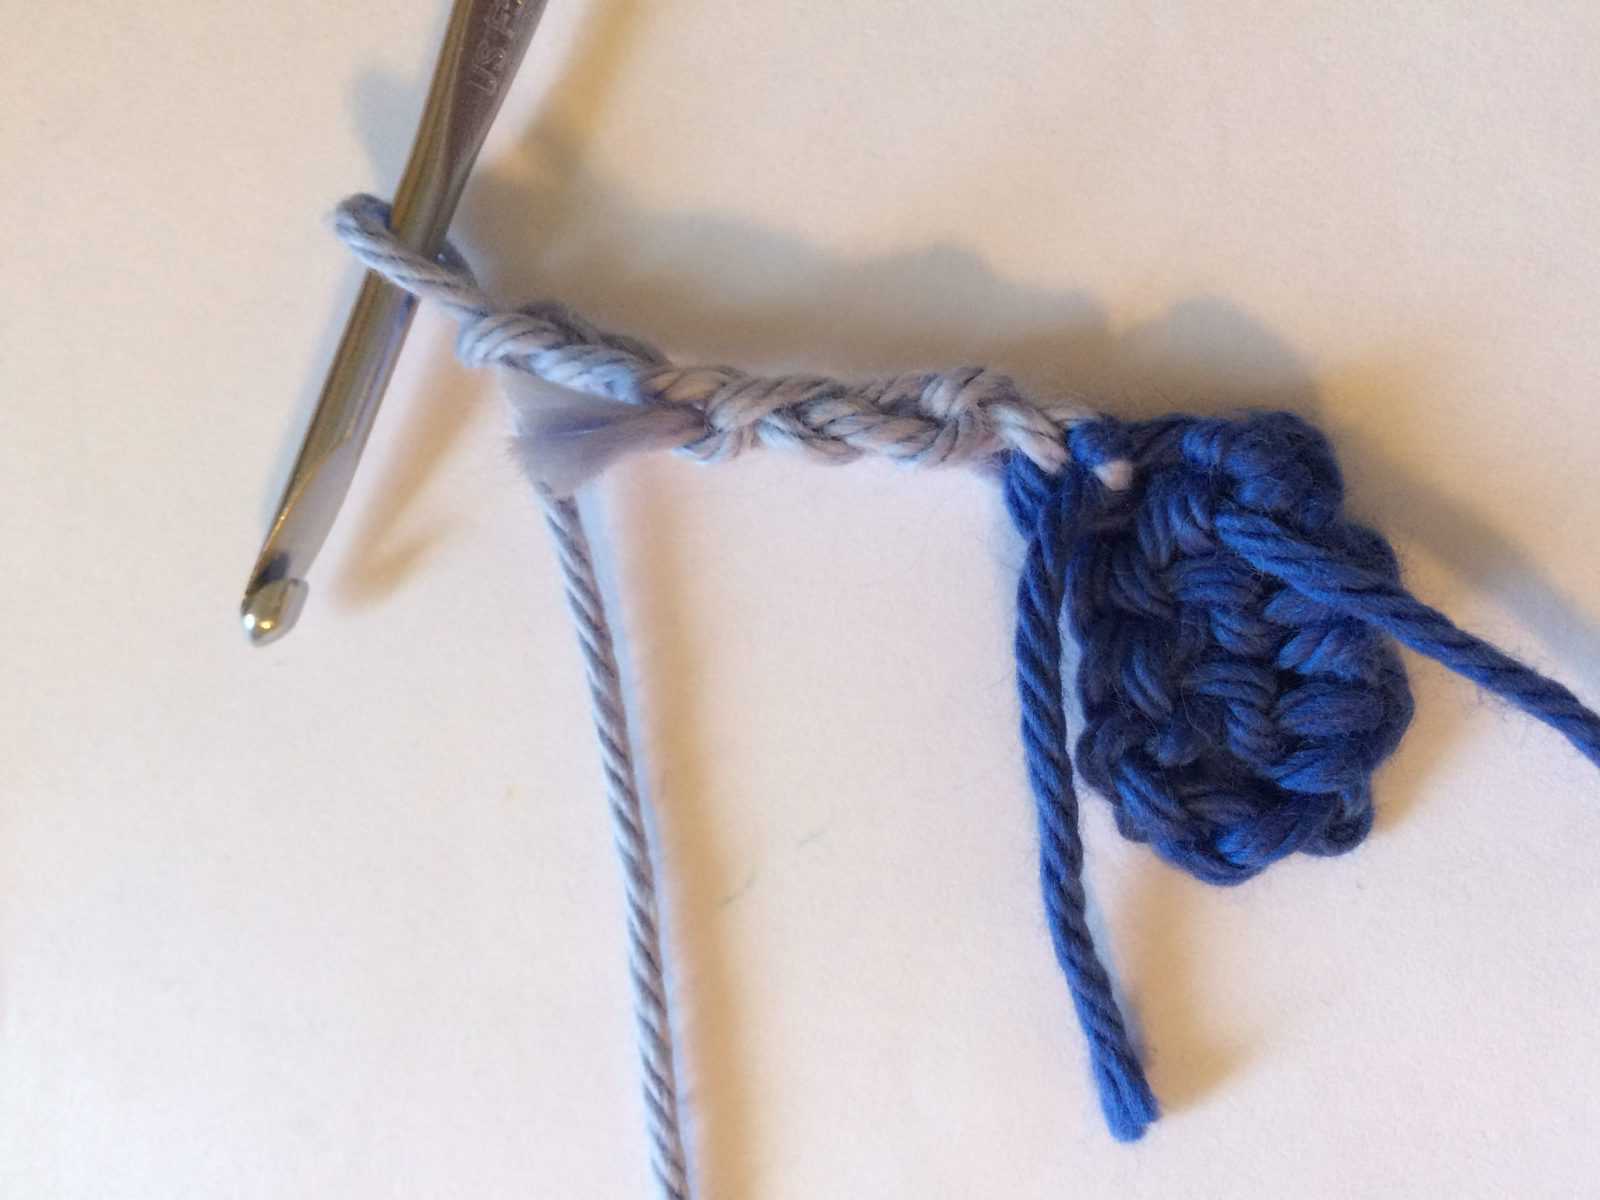
- Dc in 4th ch from hook and in next 2 chs. (4 dc)

- To join this block to the first block in Row 1, sl st between to the ch 3 sp.
- Ch 3
- Place 3 dc in ch 3 sp.
- Change to Color A on last st. Turn.
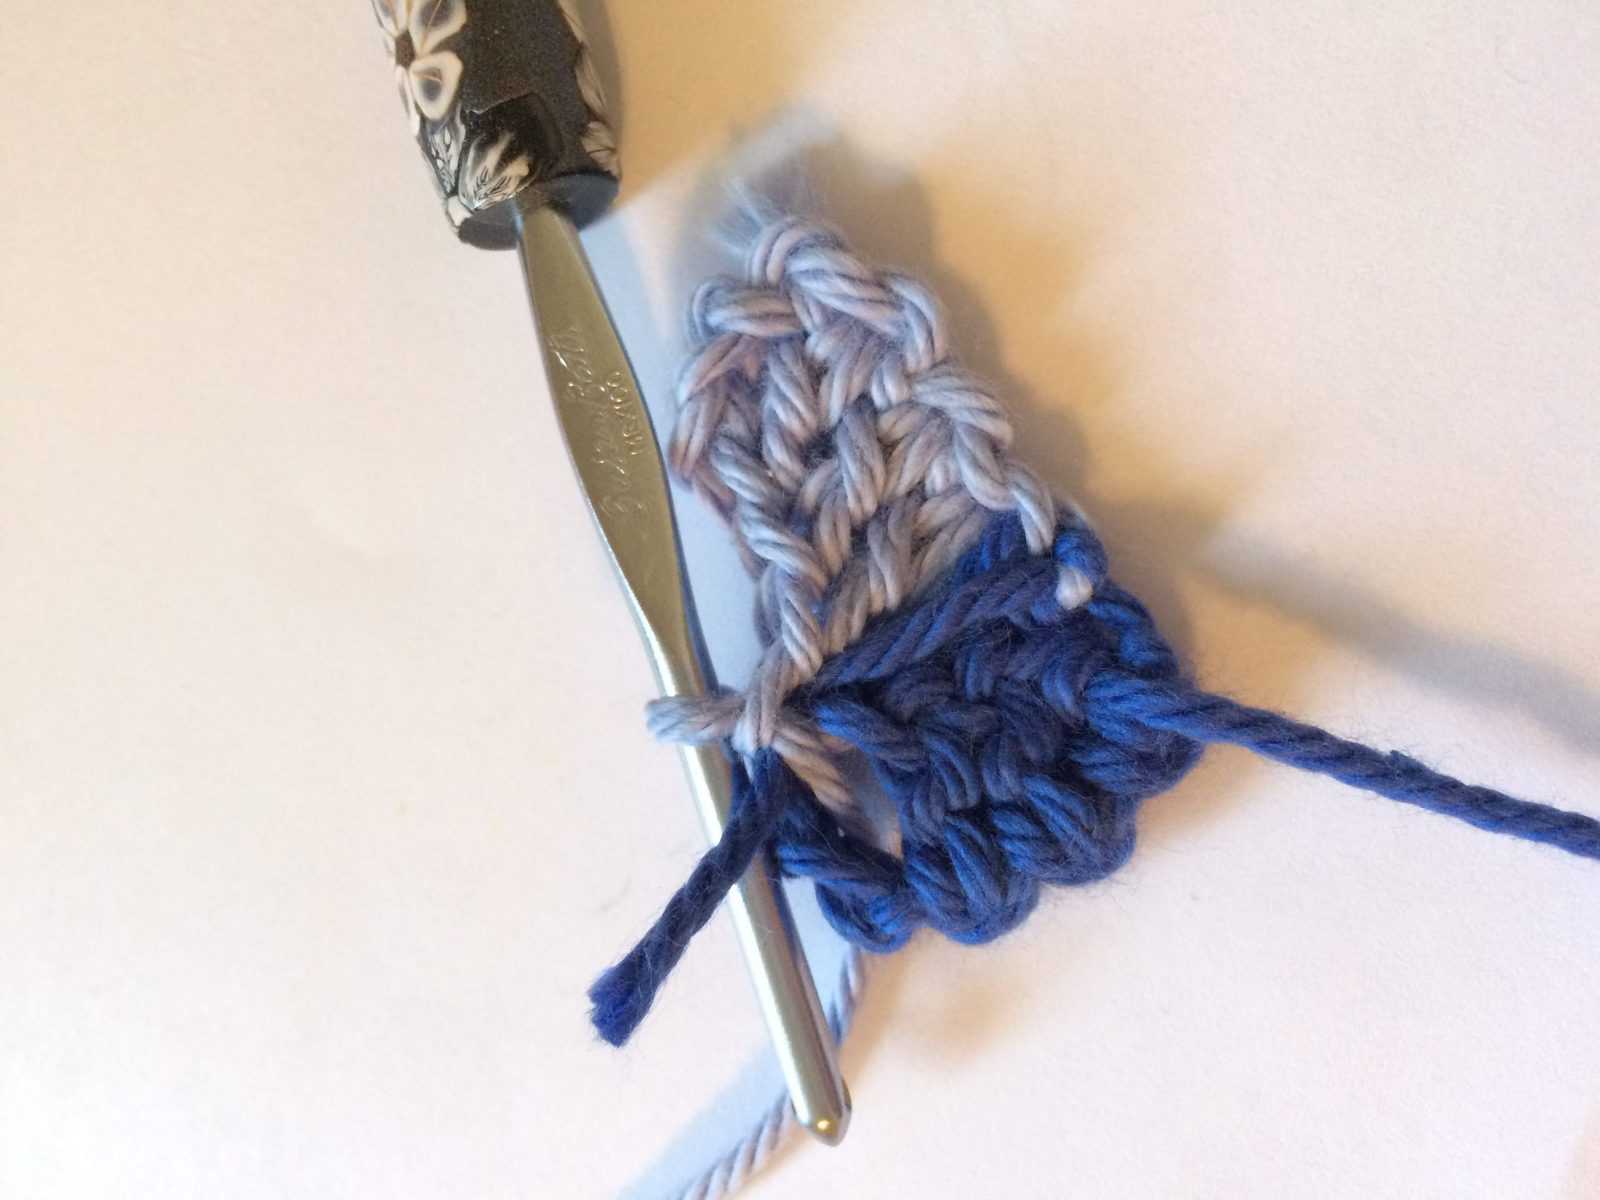
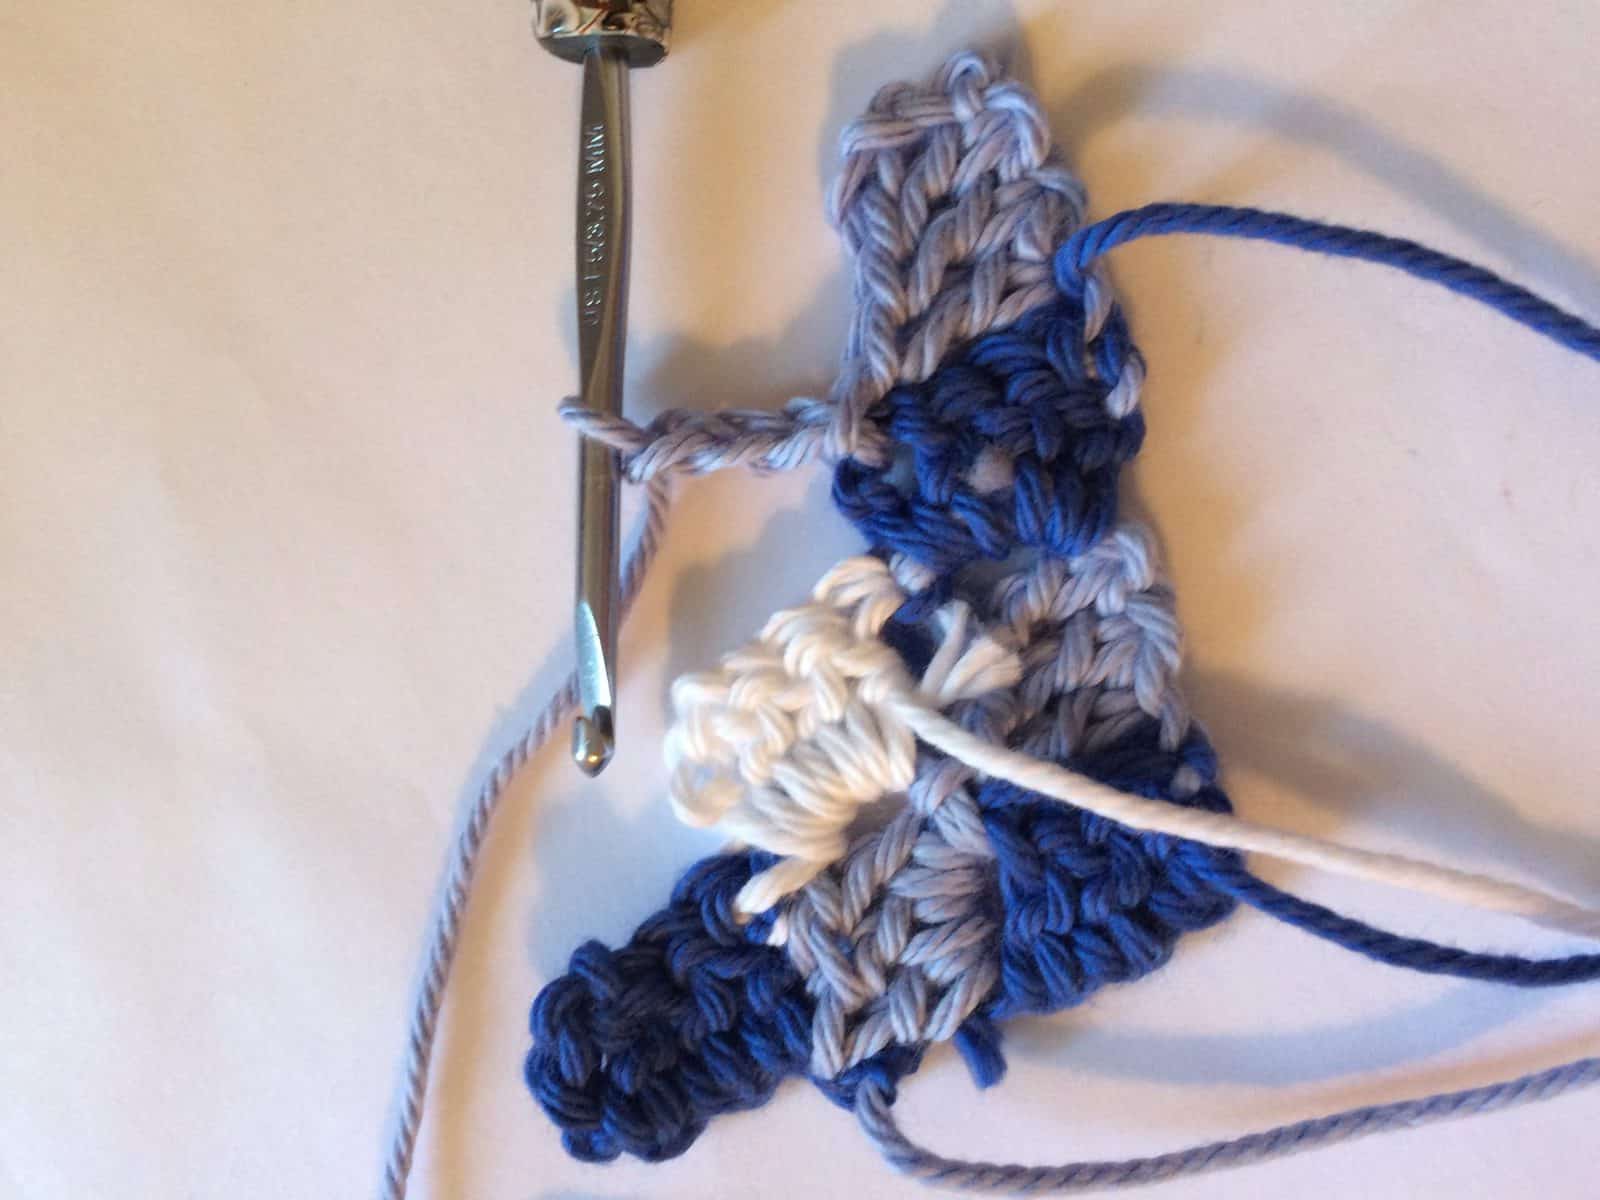
- Row 3:
In Color A, ch 6.
- Dc in 4th ch from hook and in last 3 chs.
Change to Color C in last st.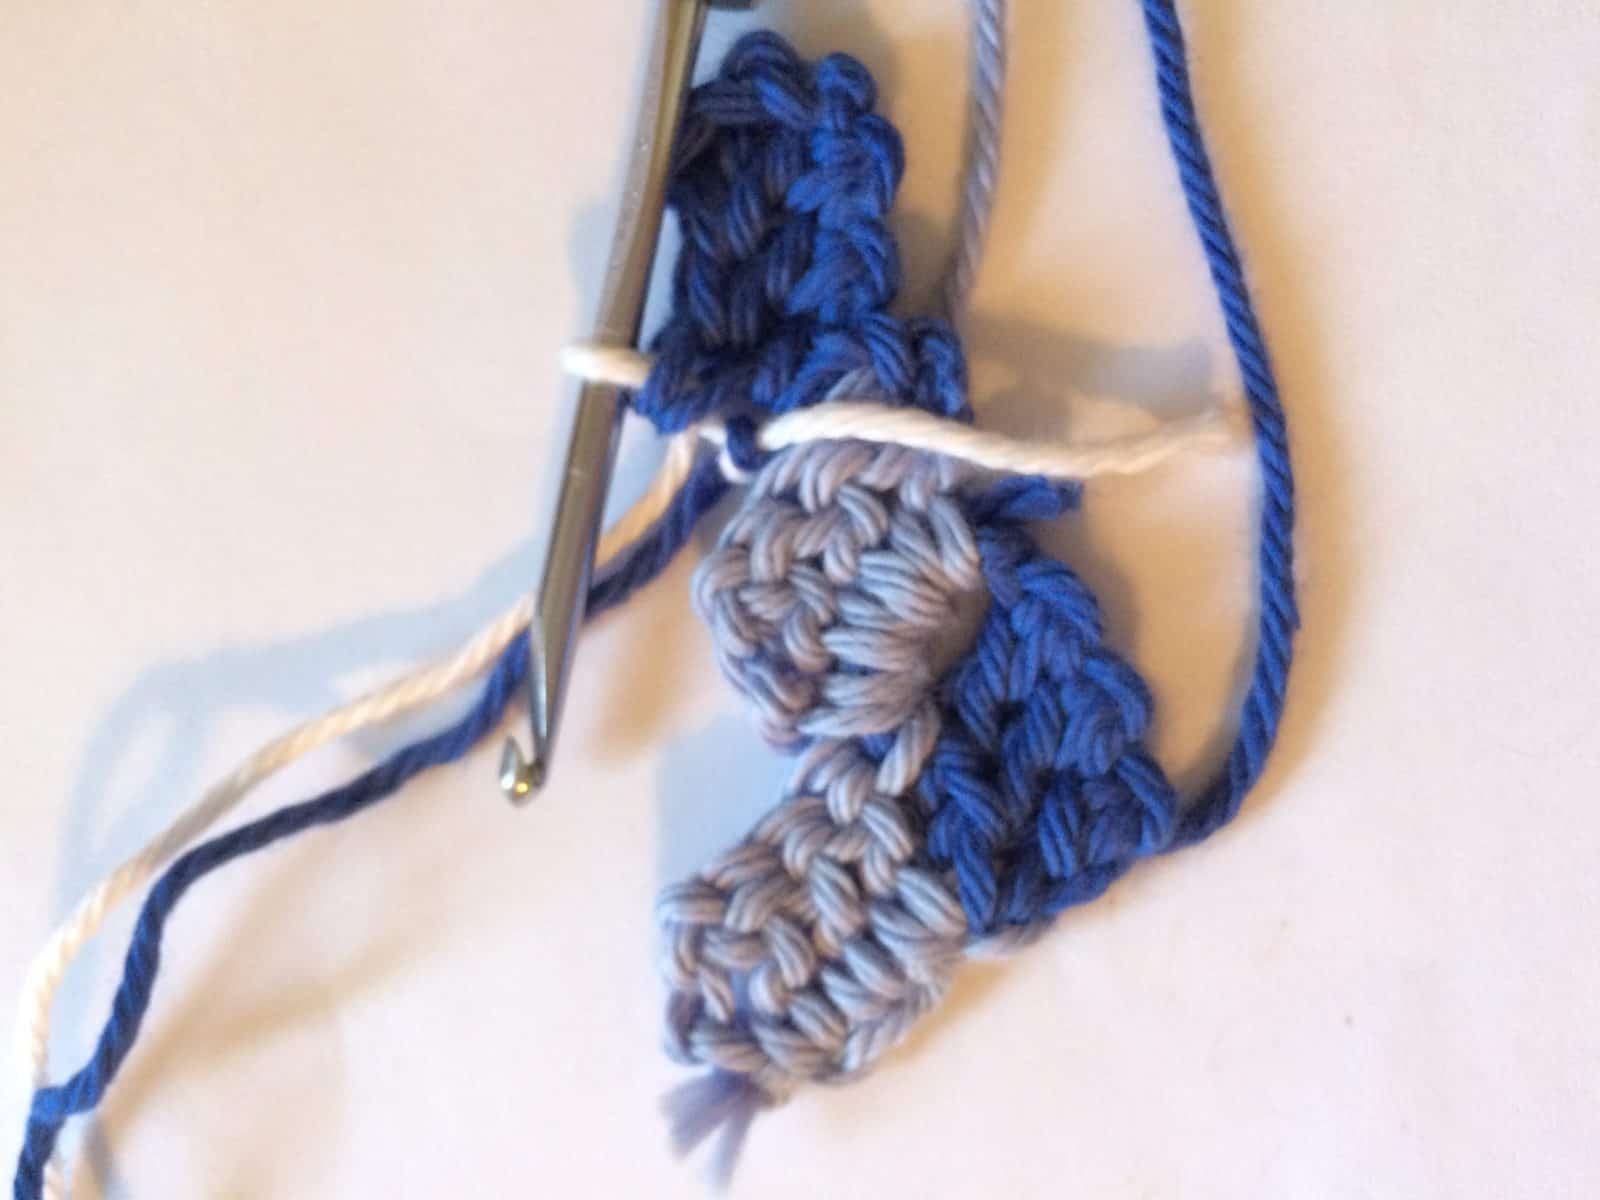
- Sl st to ch 3 sp of next block.
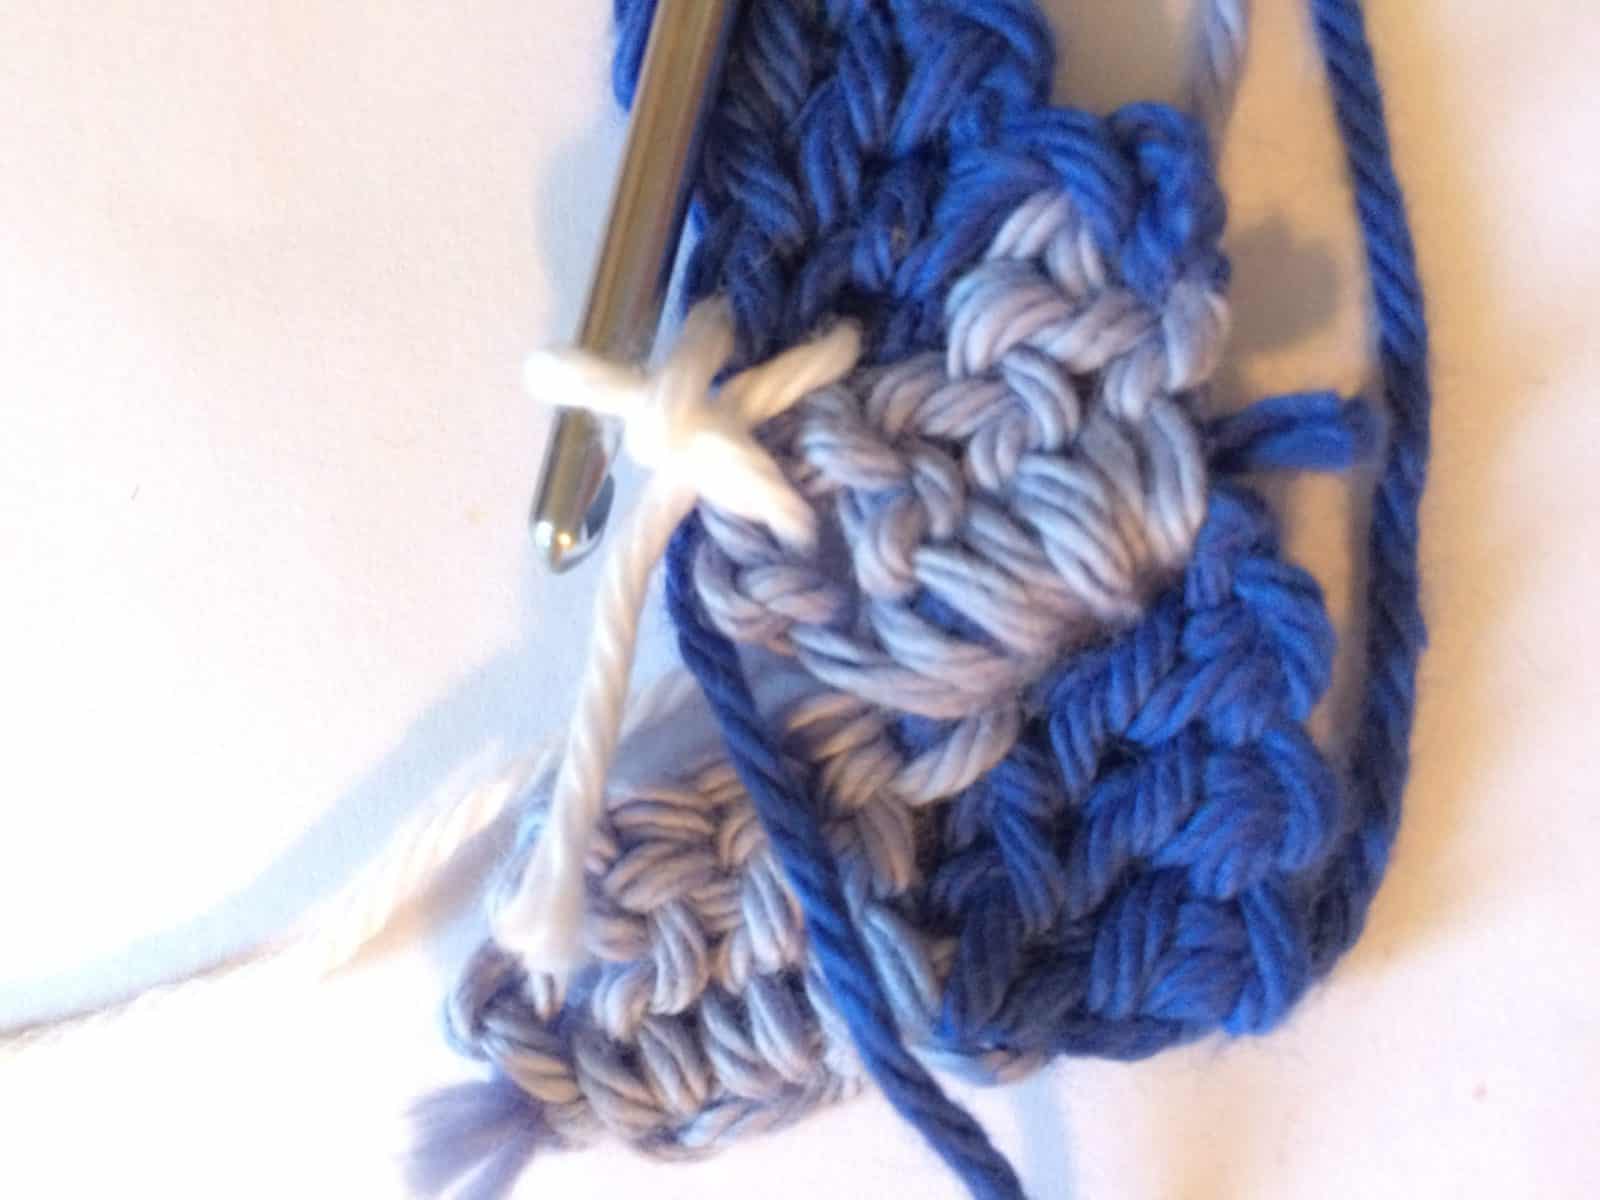
- Ch 3, dc 3. Change to Color A on last DC.
- Sl st to next block.
- Ch 3, Dc 3, change to Color B on last dc, turn.

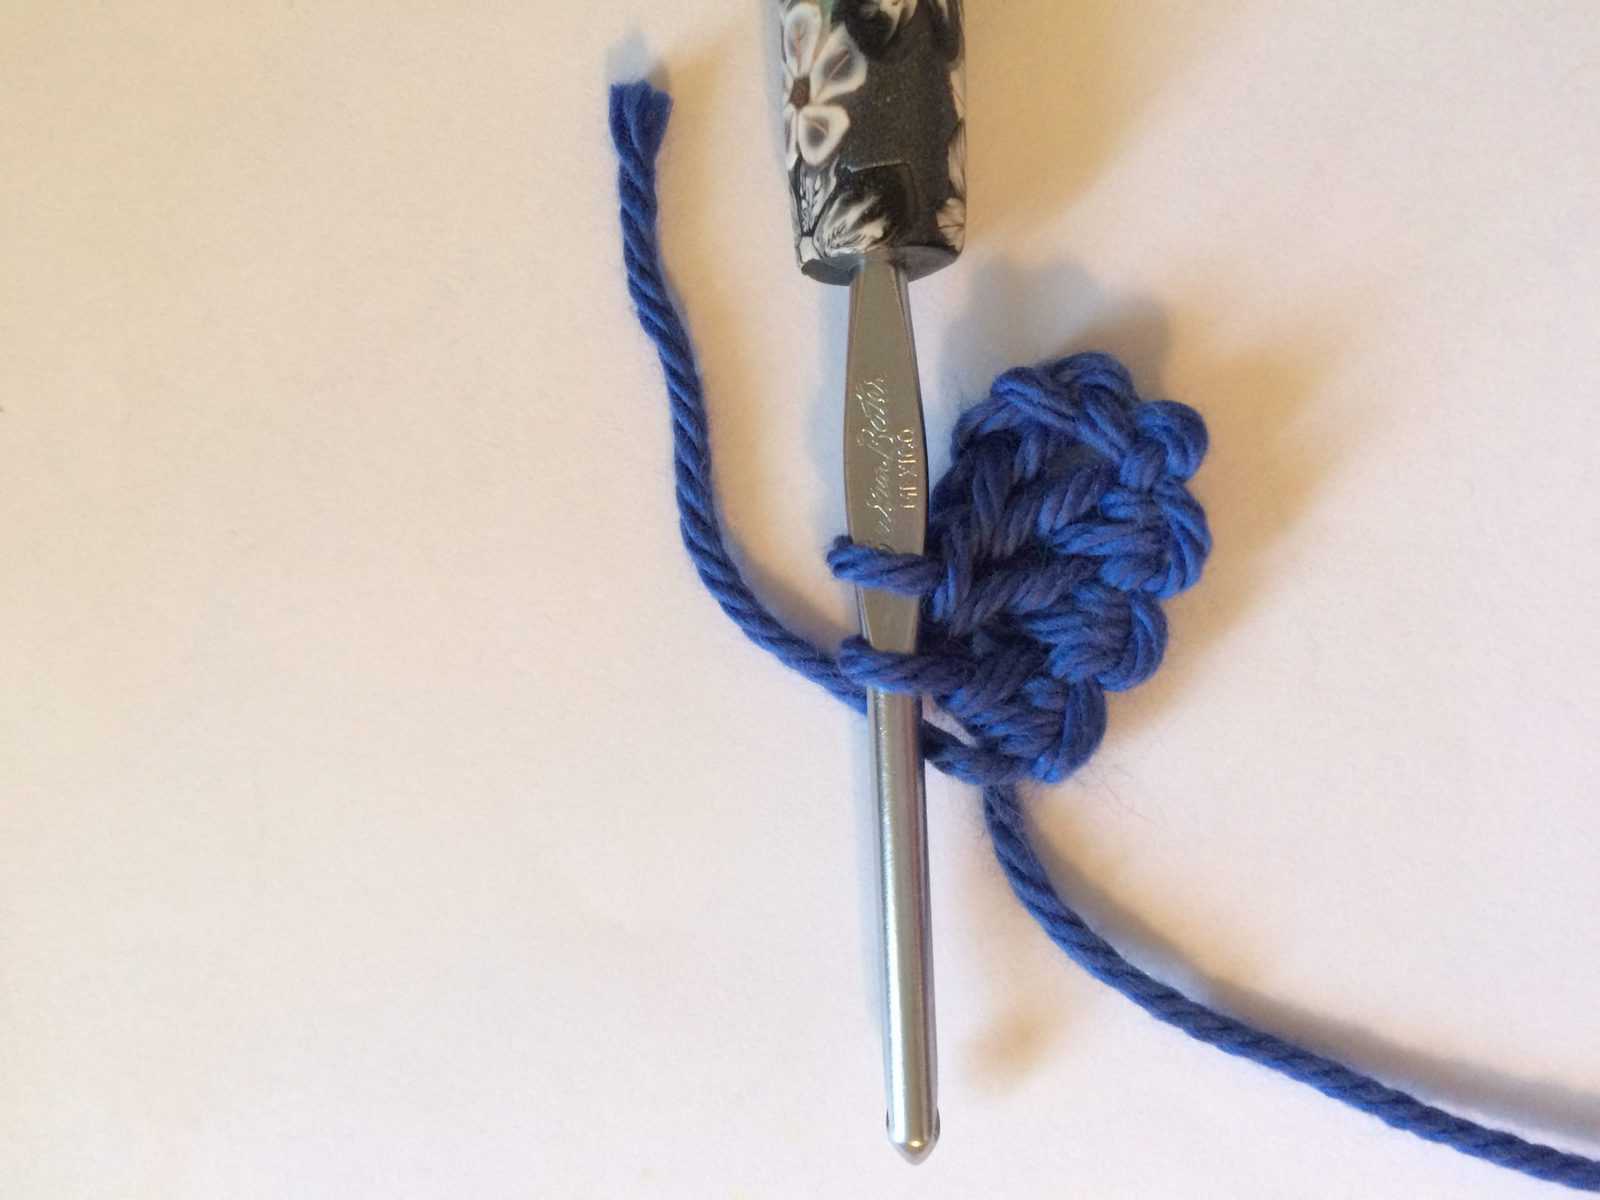
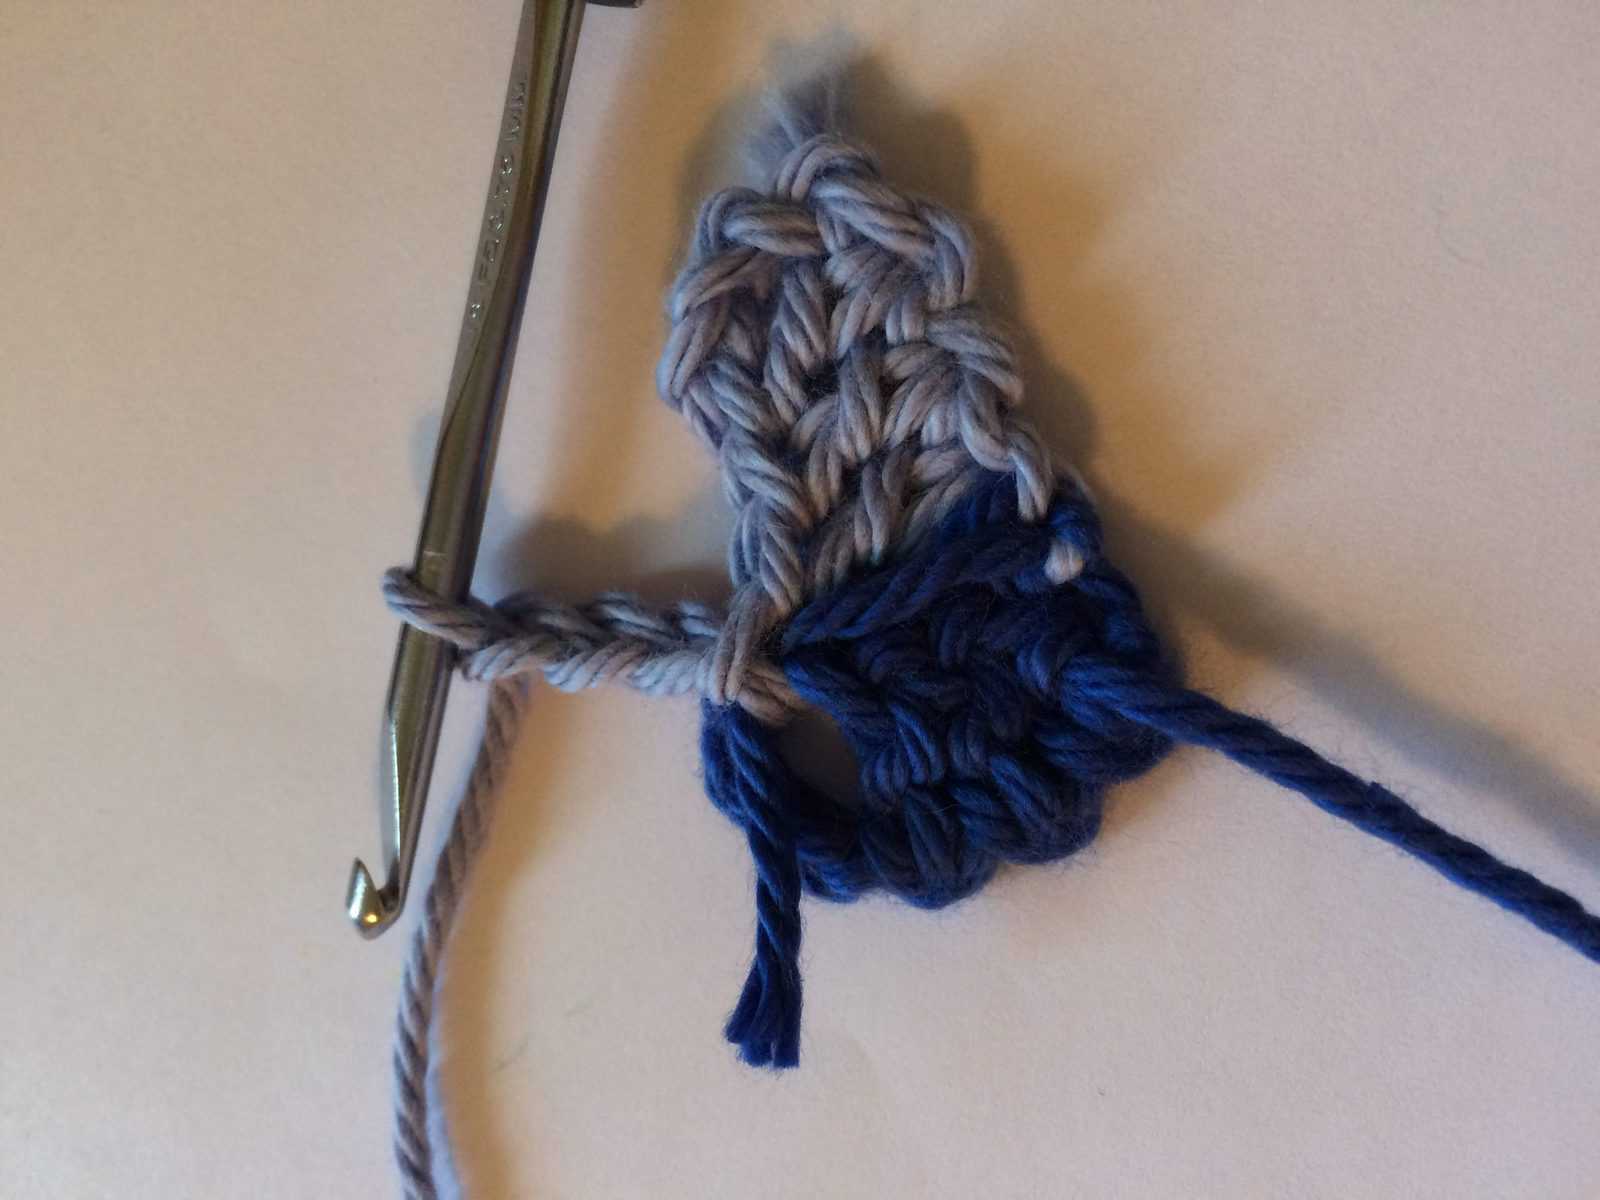
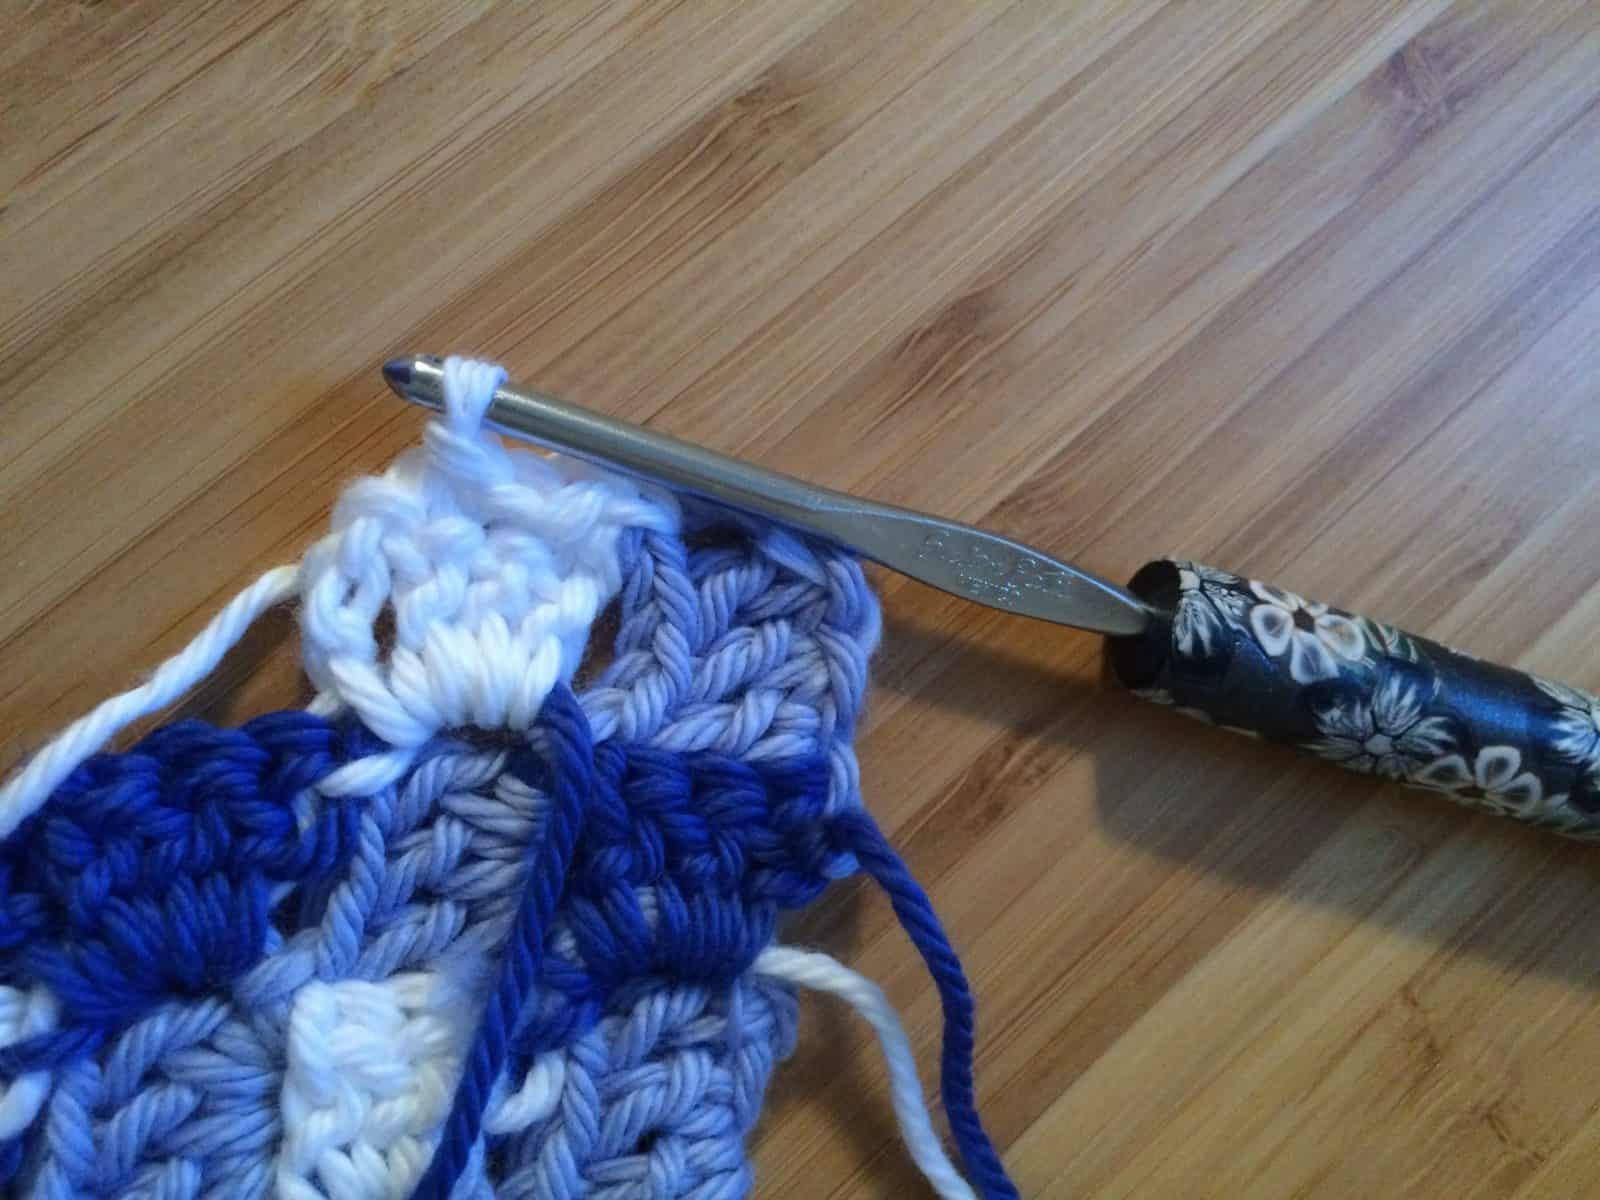
Row 4: - Ch 6. Dc into 4th ch from hook and in next 3 chs.
- Sl st to next block and ch 3, dc 3.
- Sl st to next block, ch 3, dc 3.
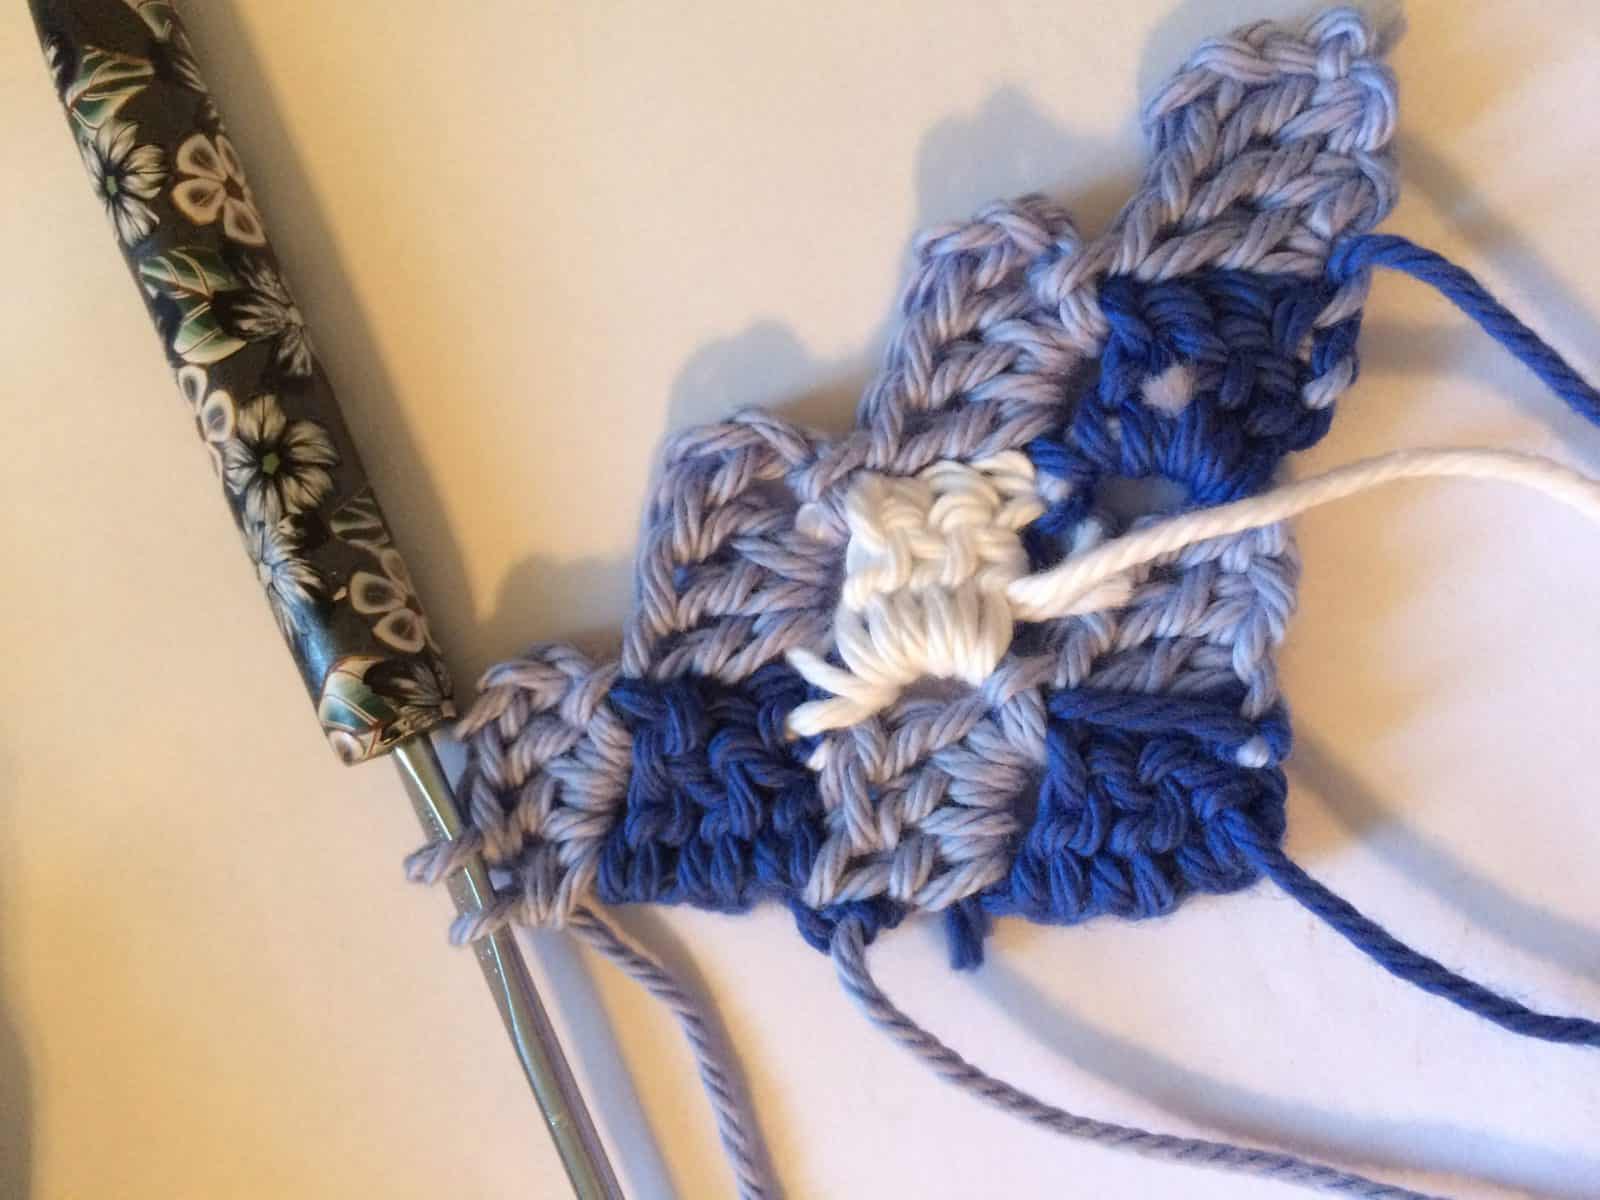
- Sl st to next block, ch 3, dc 3. Change to Color A on last dc.
- Row 5:
Ch 6, Dc in 4th ch from hook and last 3 chs. Change to Color C on last dc.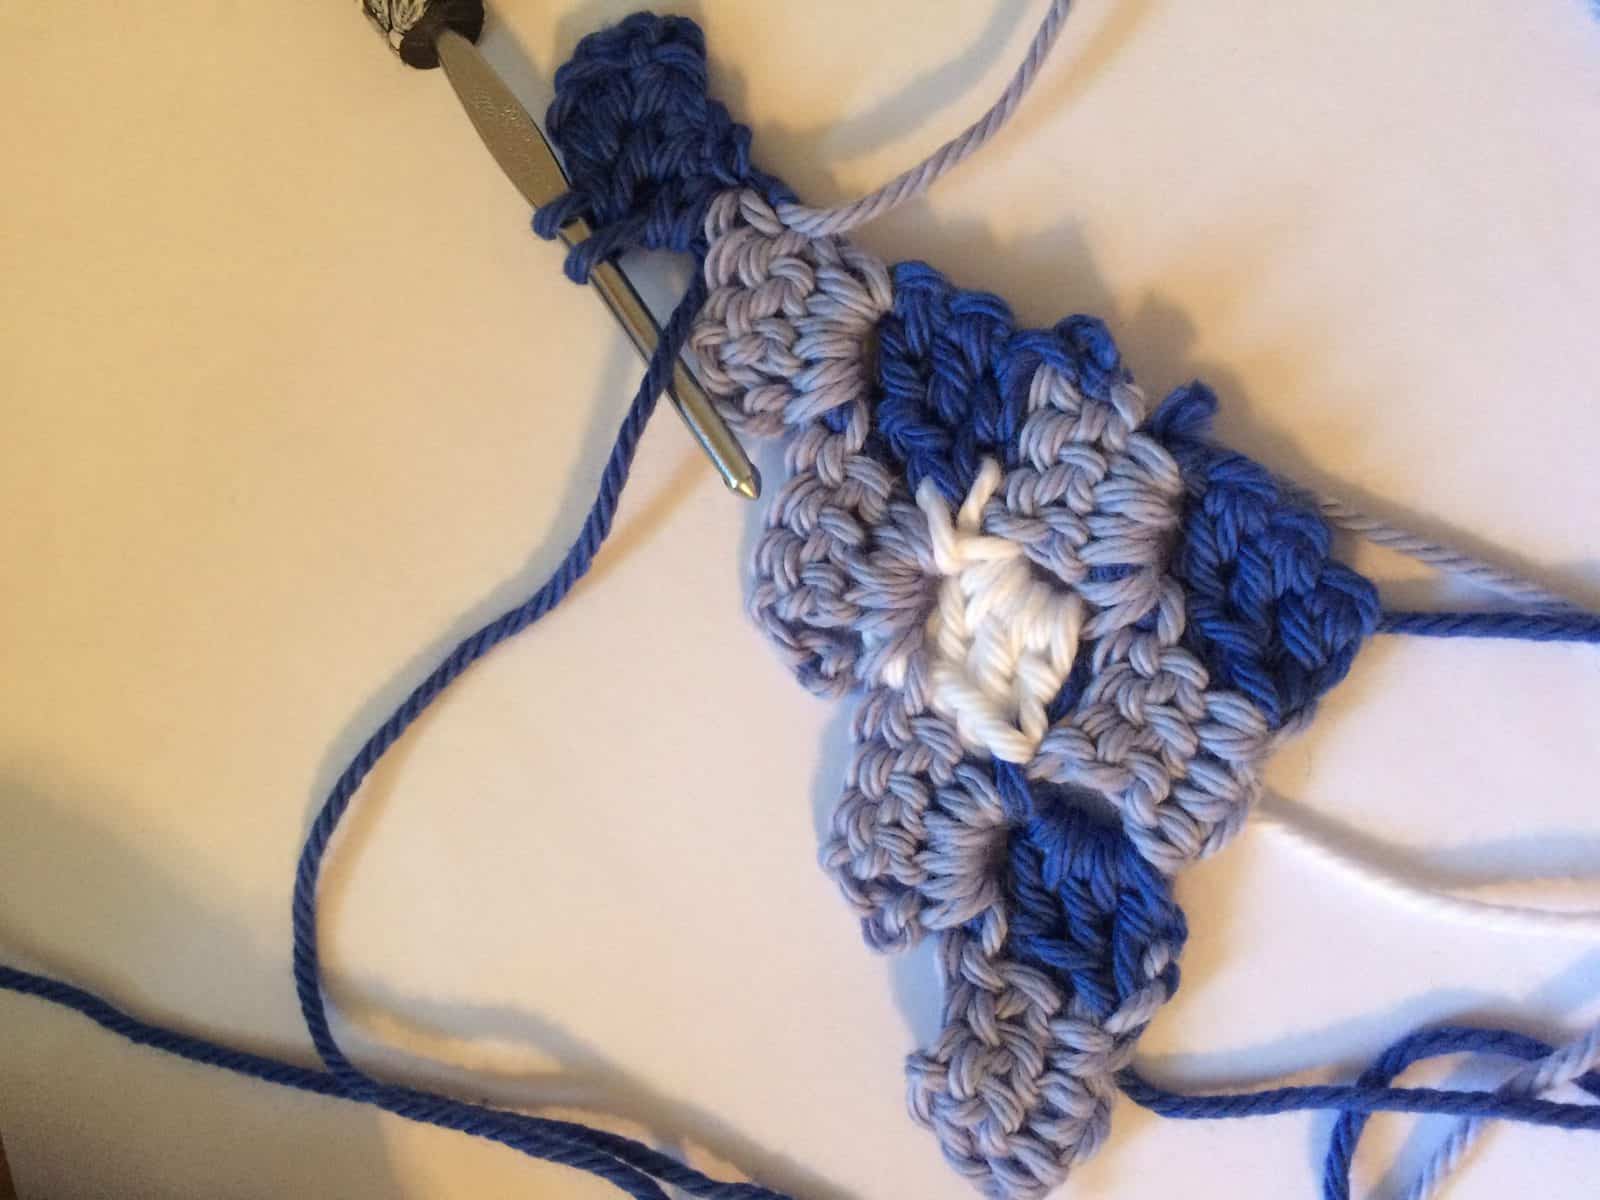
- Sl st to next block, Ch 3, dc 3. Change to Color A on last dc.
- Sl st to next block, Ch 3, Dc 3. Change to Color C on last dc.

- Ch 3, dc 3, change to Color A and sl st to next block.
- Ch 3, dc 3, change to Color B and turn.
- Row 6:
Ch 6, dc in 4th ch from hook and in last 3 chains, sl st to join. - Ch 3, dc 3, sl st to join. Rep across to last block.
- Ch 3, dc 3, change to Color A on last dc, turn.

- Row 7: Ch 6, dc in 4th ch from hook and in last 3 chs, change to Color C on last dc, sl st to join.
- Ch 3, dc 3, change to Color A on last dc, sl st to join.
- Ch 3, dc 3, change to Color C on last dc, sl st to join.
- Ch 3, dc 3, change to Color A on last dc, sl st to join.
- Ch 3, dc 3, change toColor C on last dc, sl st to join.
- Ch 3, dc 3, change to Color A on last dc, sl st to join.
- Ch 3, dc 3, change to Color B on last dc, turn.
- Row 8:
Ch 6, dc in 4th ch from hook and in last 3 chs, sl st to join. - Ch 3, dc 3, sl st to join. Repeat across to last block.
- Ch 3, dc 3, change to Color A on last dc, turn.
- Row 9: Continue the pattern: 9 blocks, alternating between Color A and Color C.
- Row 10: Continue the pattern: 10 blocks, all Color B.
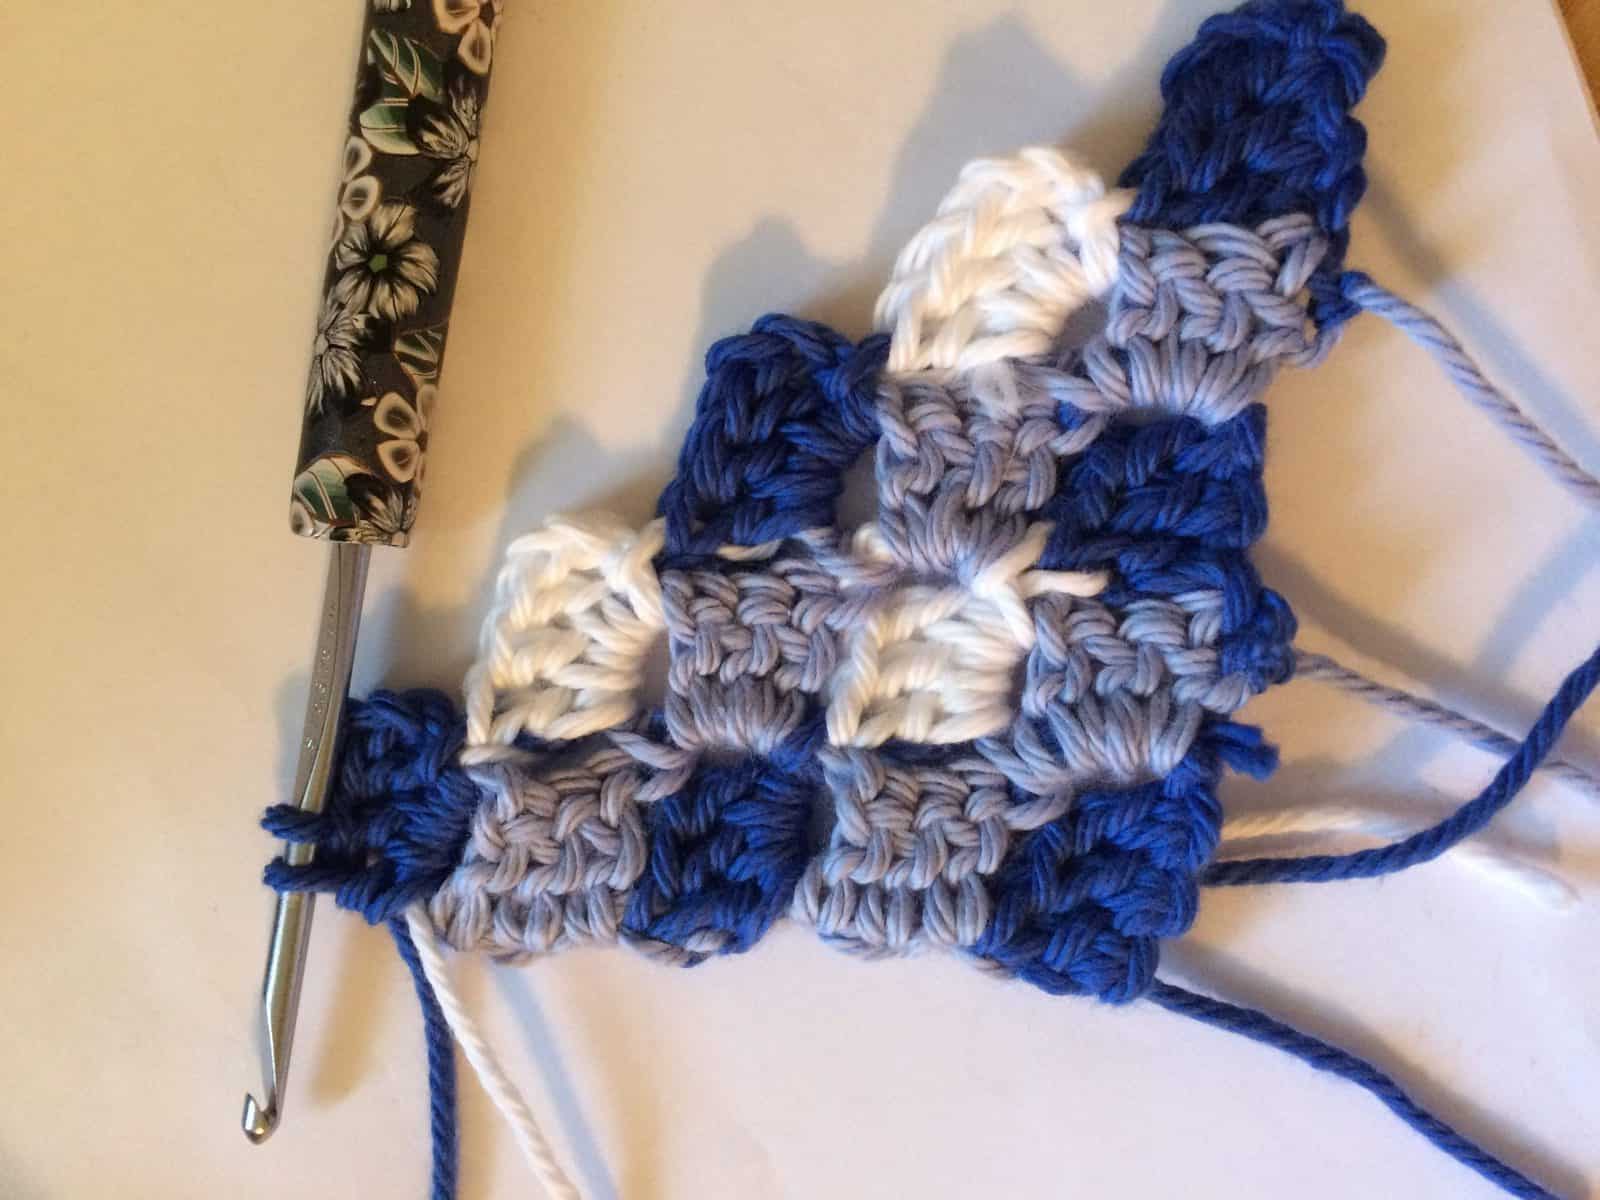
- Rows 11-24: Continue the alternating pattern until your triangle measures 16″ tall for an 18″ throw pillow = 24 rows.

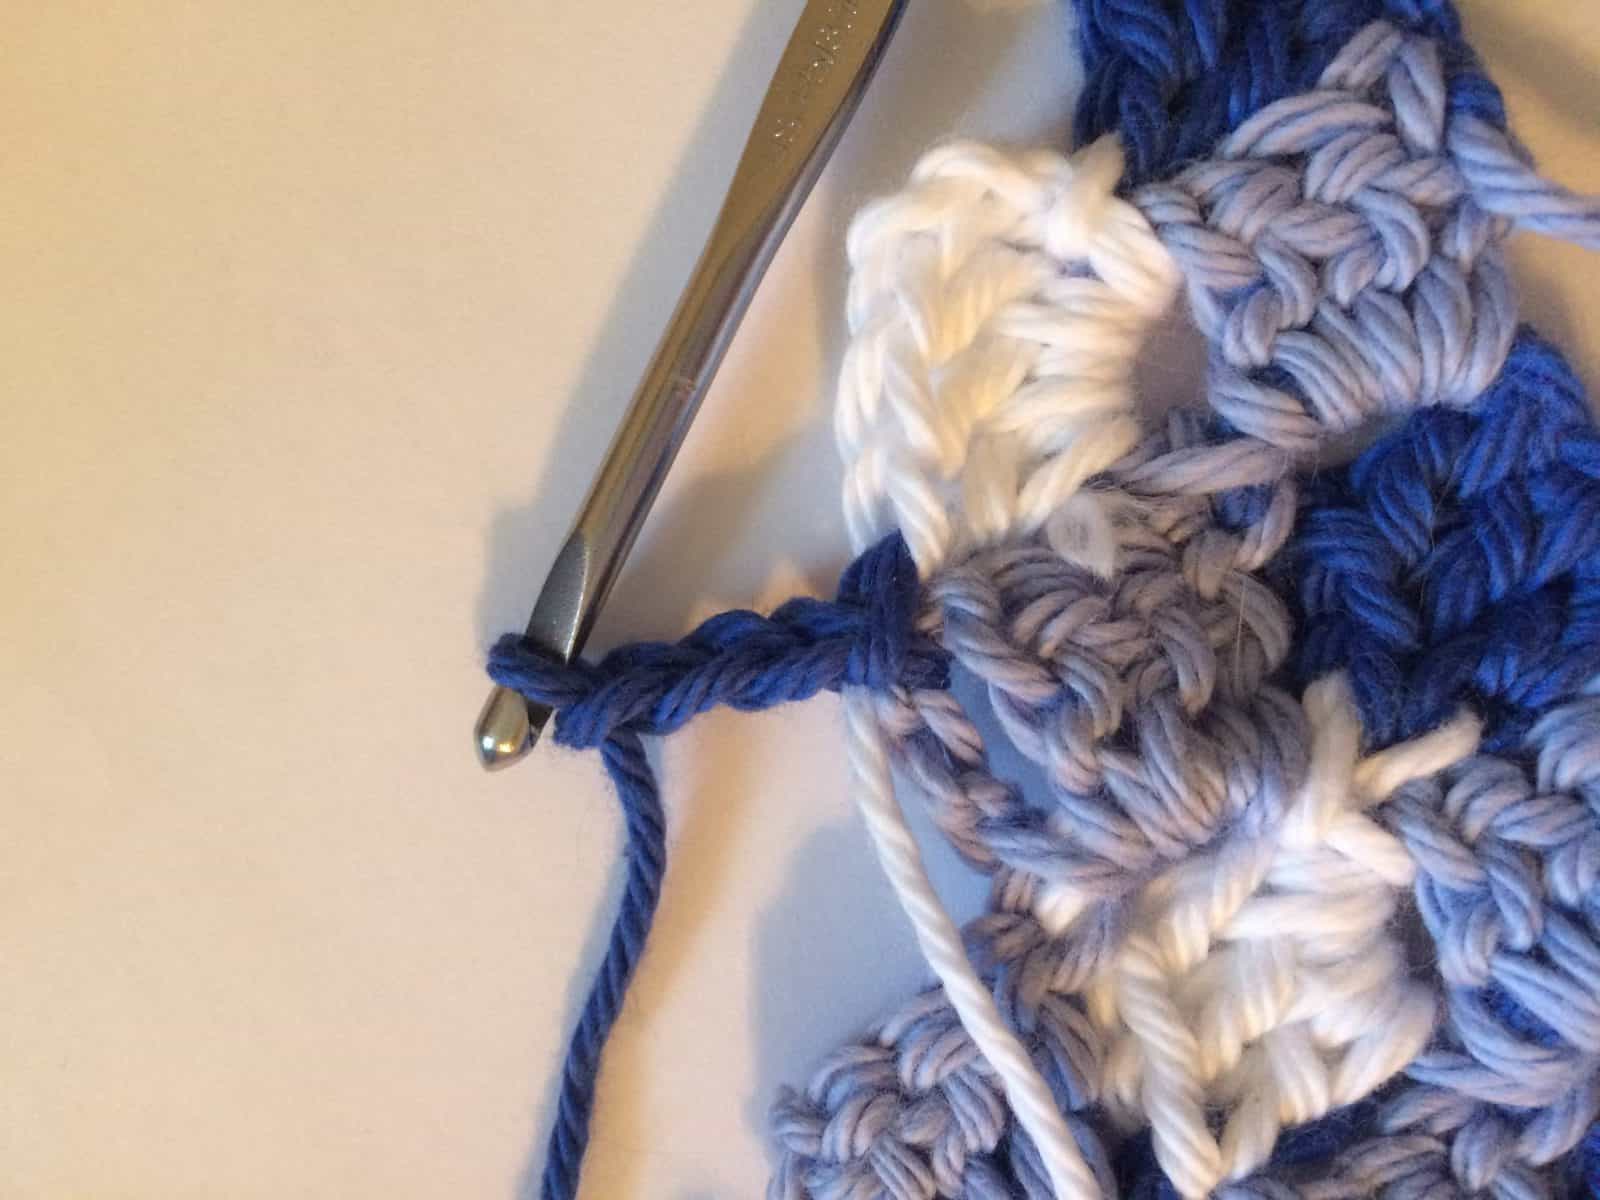
- How to Decrease C2C Corner to Corner
Row 25-47: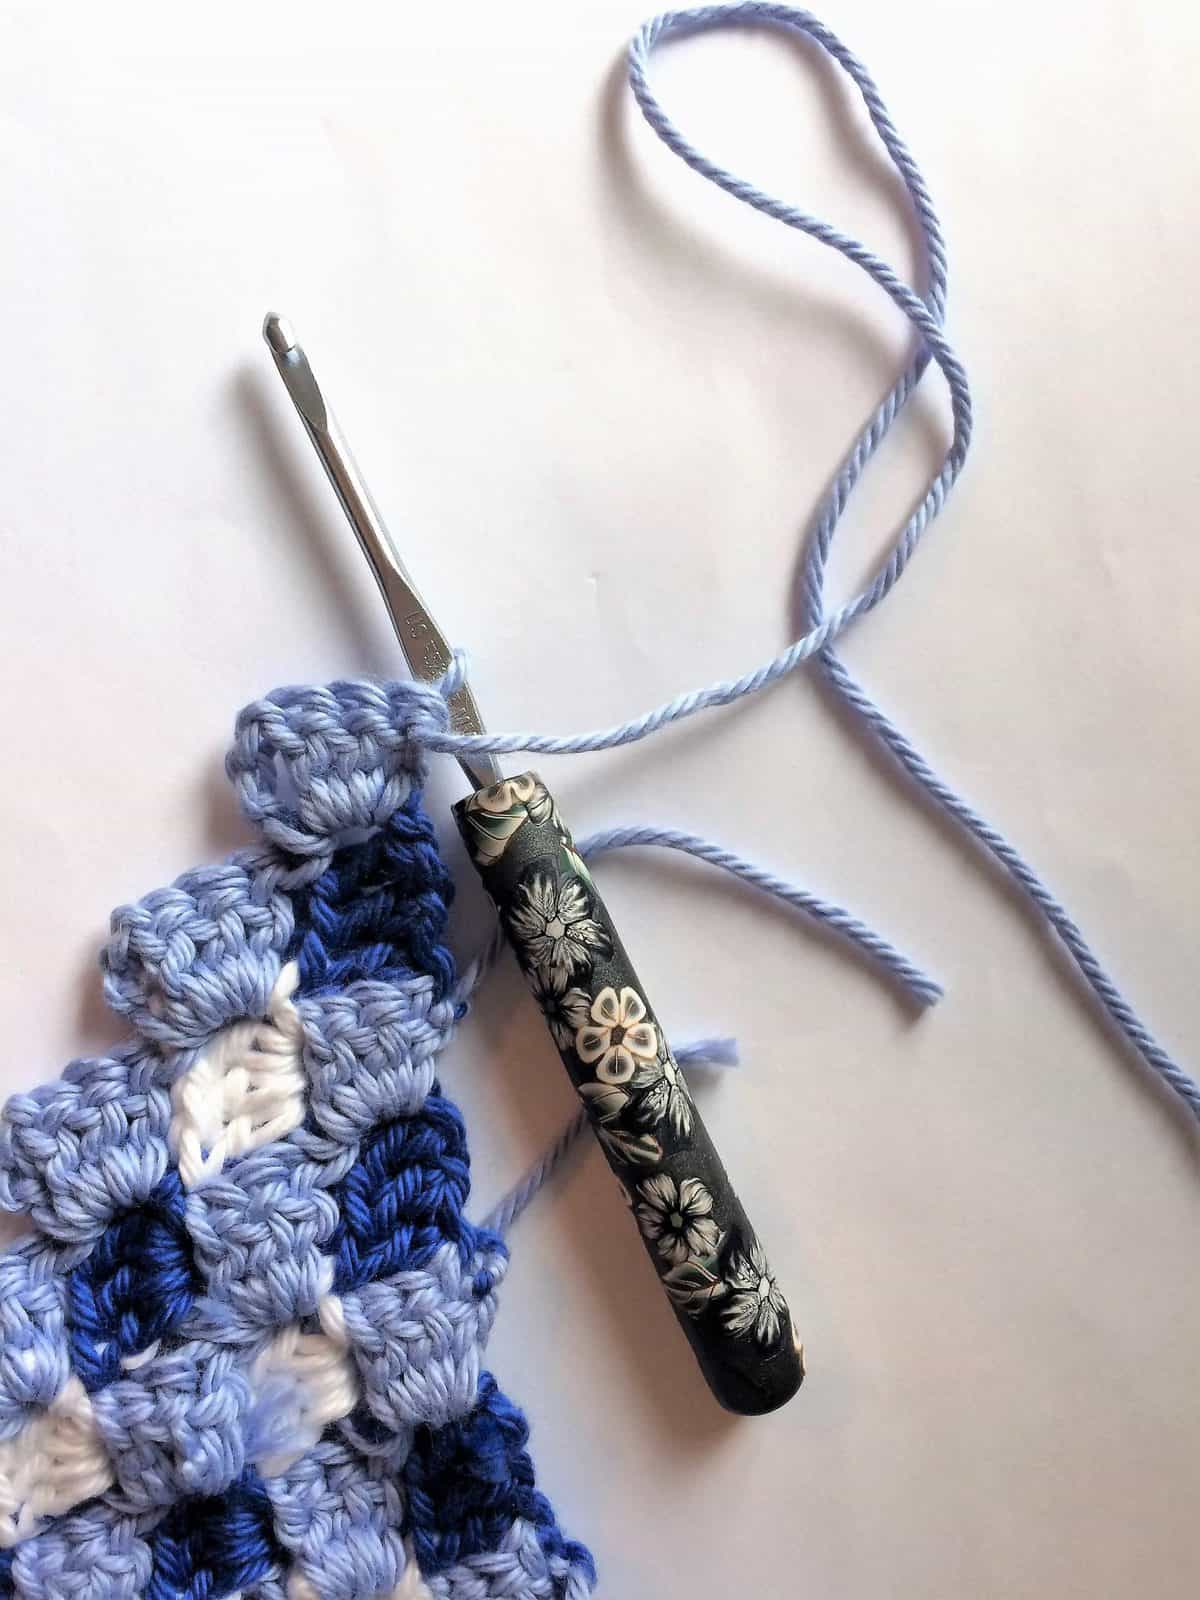 On the last block of Row 24, sl st across 3 times.
- Join Color C, crochet one block in Color C, change to Color A and crochet one block.
 Continue the alternating pattern across the row.
- When you reach the end, don't join, turn.
- Join your last block to next block with a sl st.

- Sl st 3 times across your last block (white here).
- Join next color and crochet blocks in pattern across the row.
- Continue crocheting your rows in the alternating pattern, decrease every row as above.

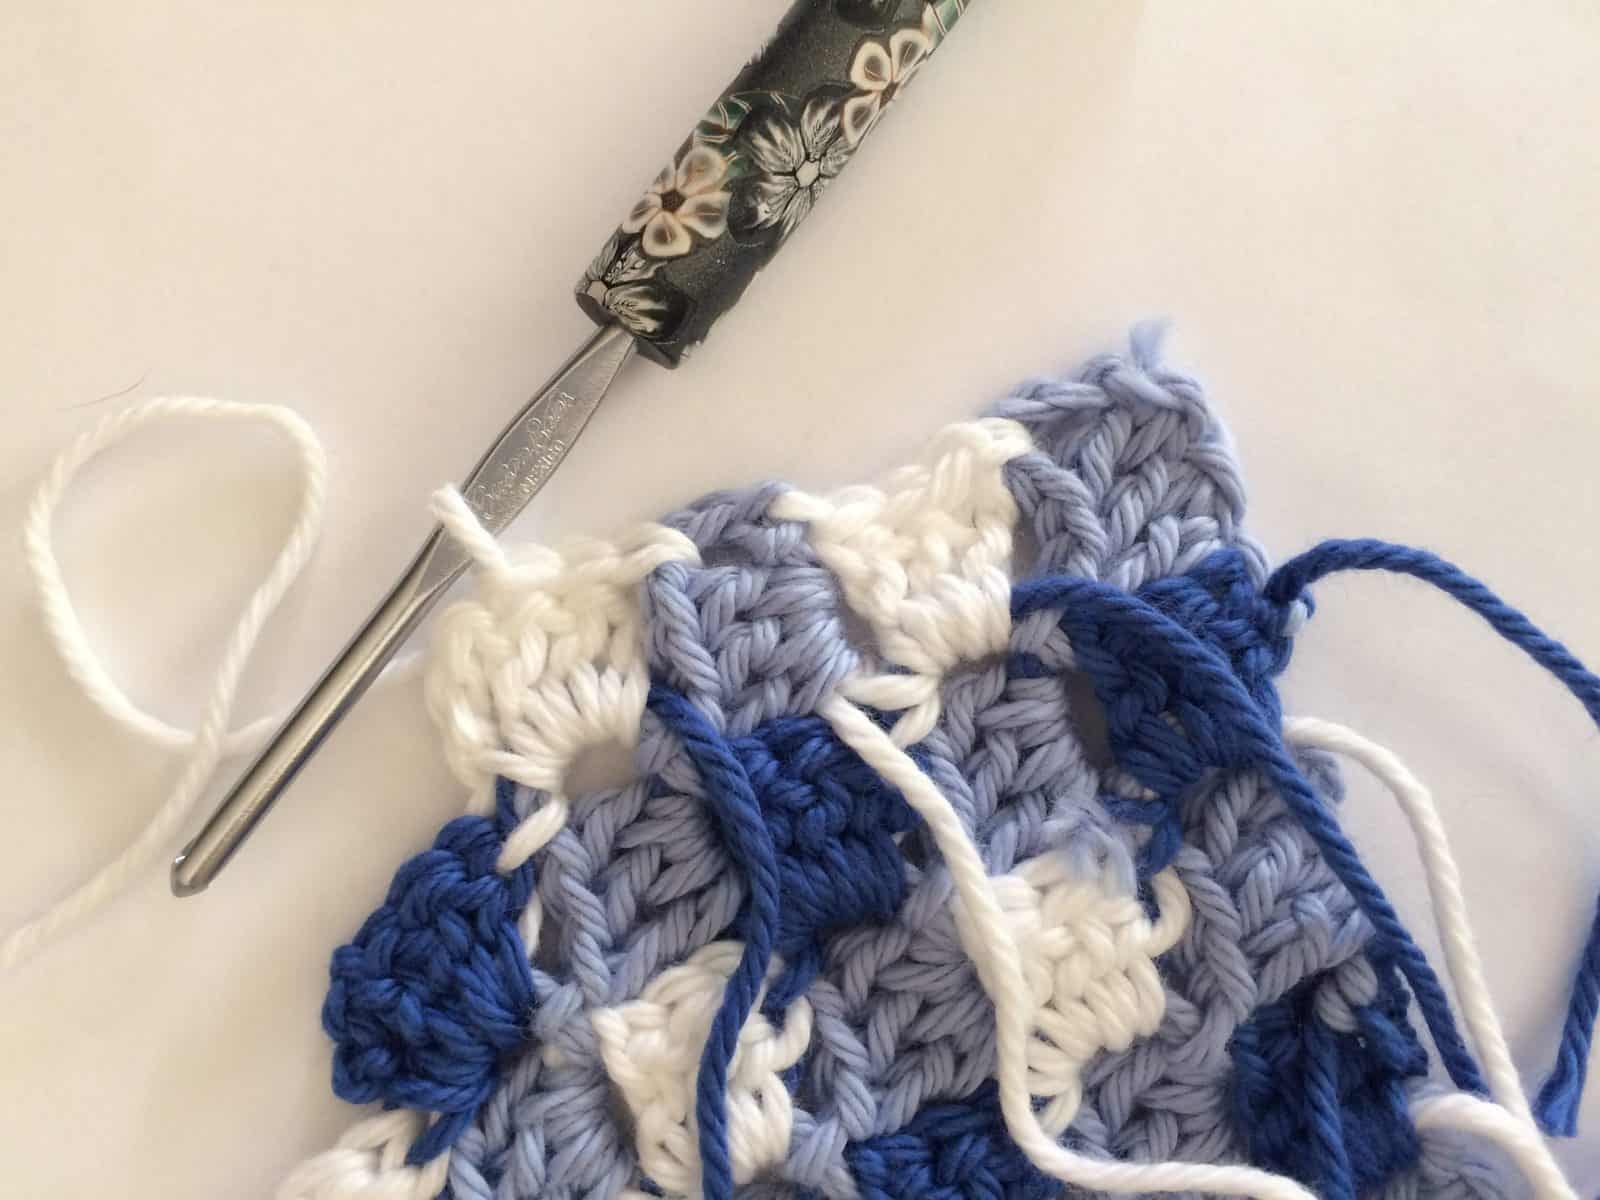
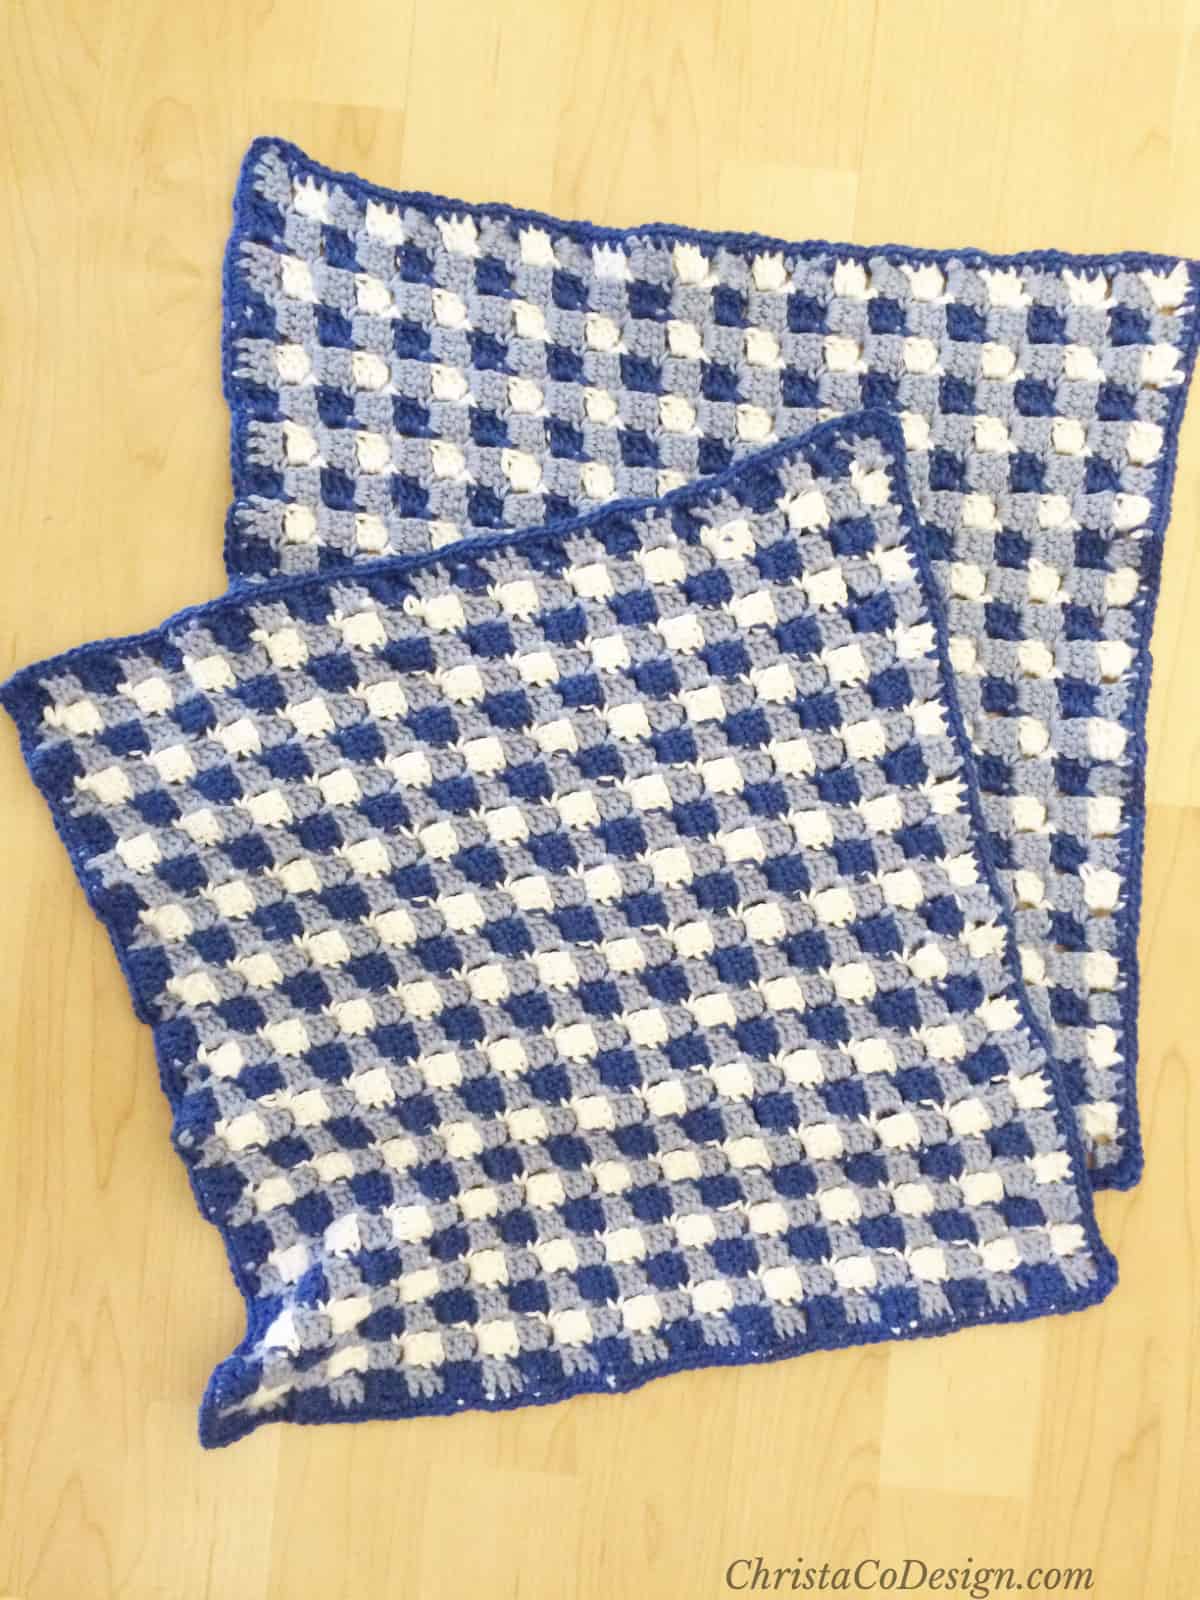
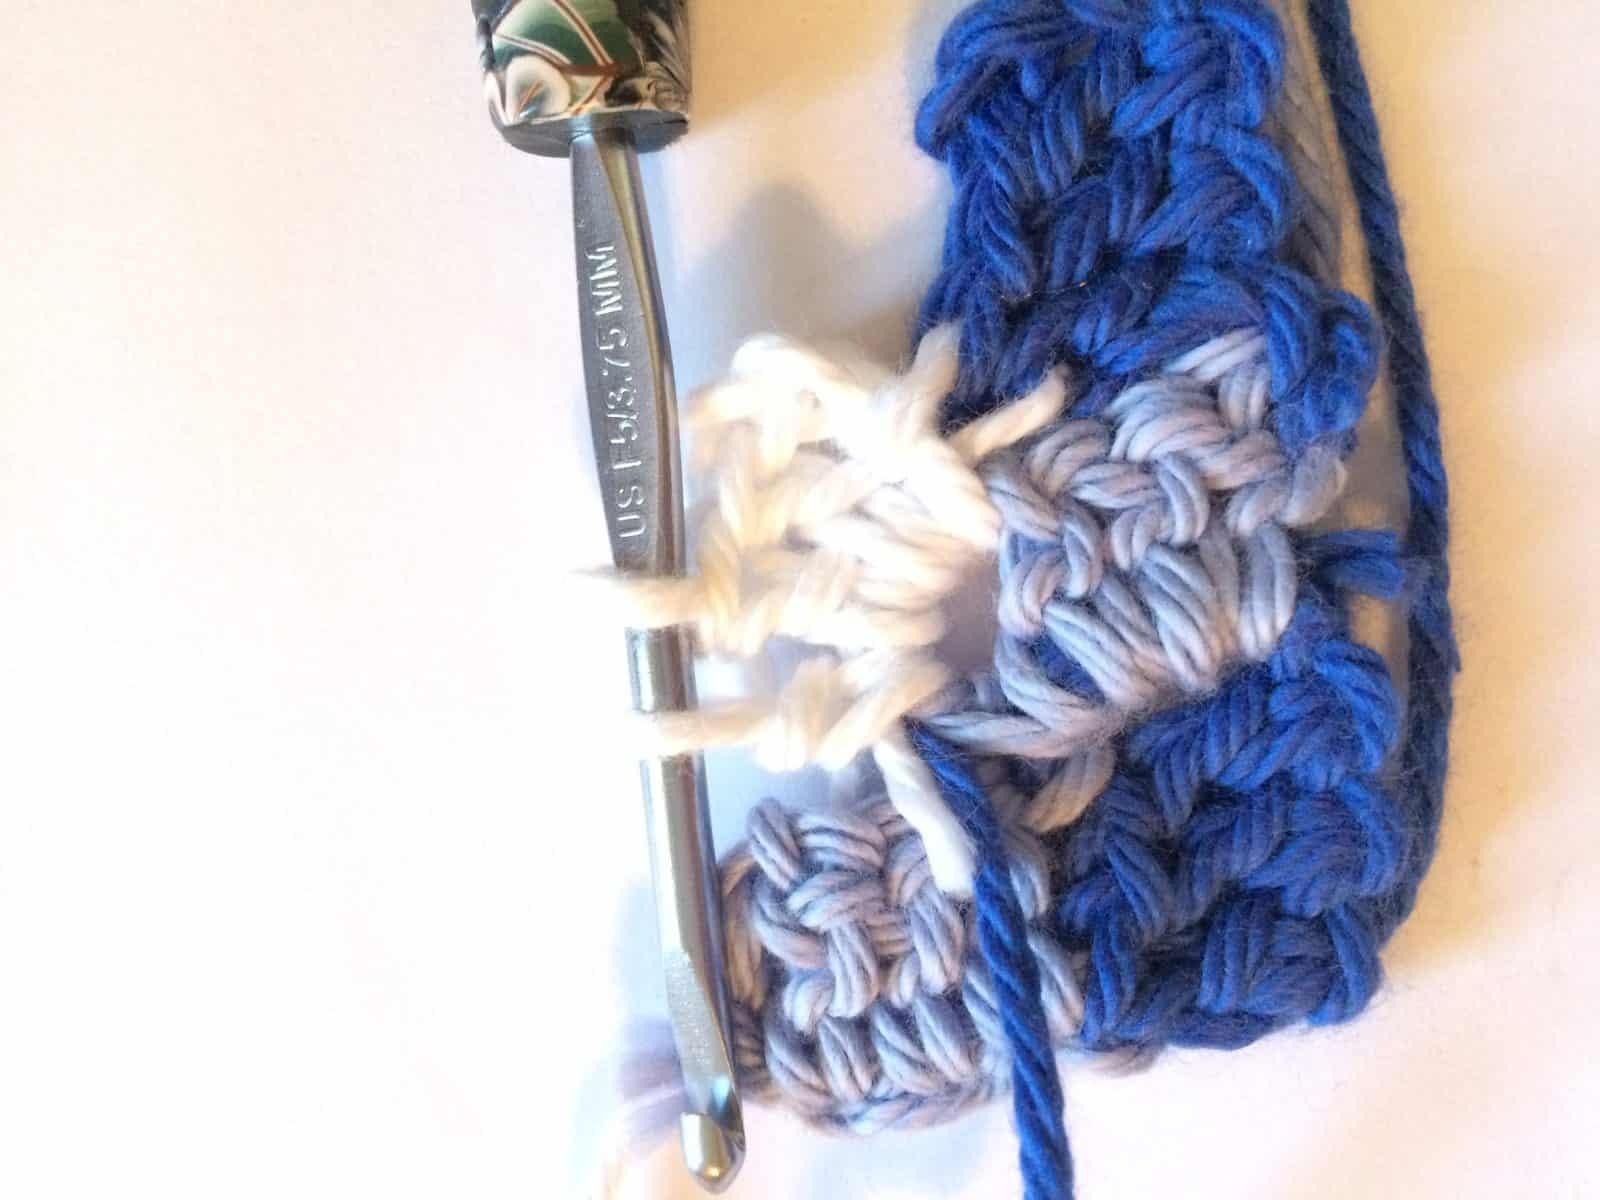
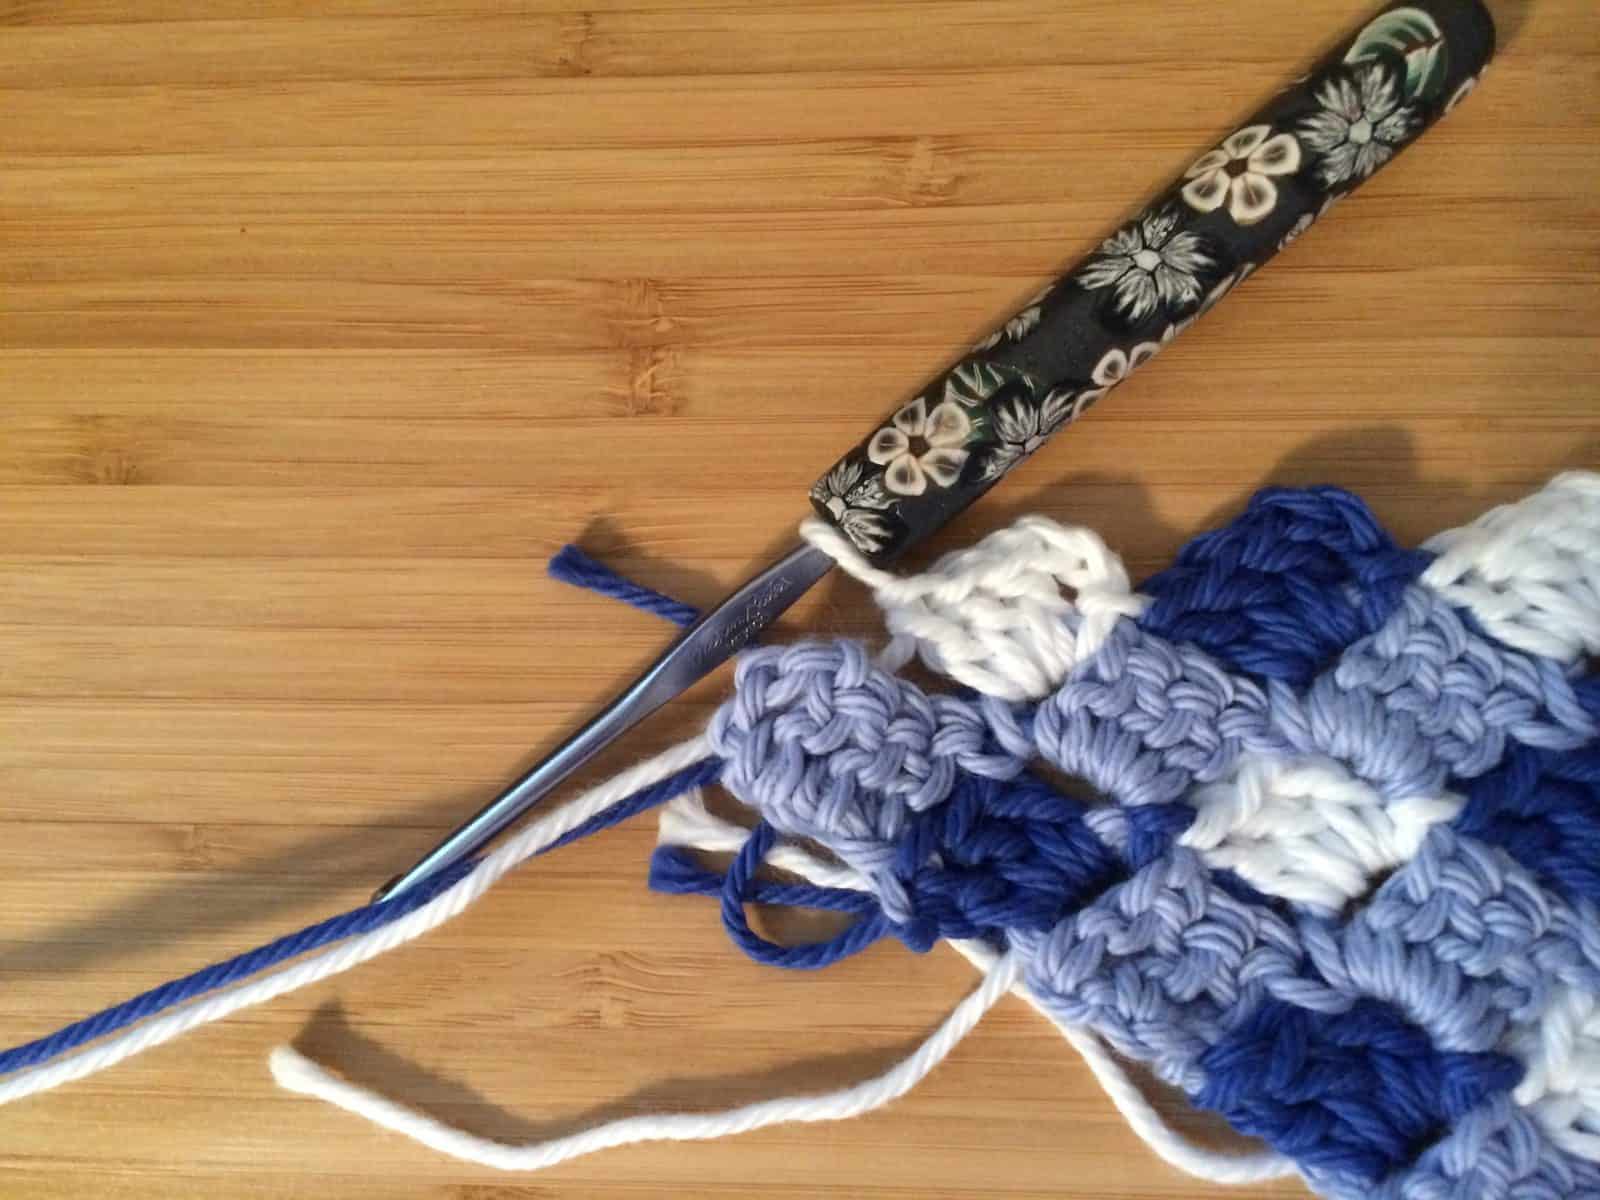
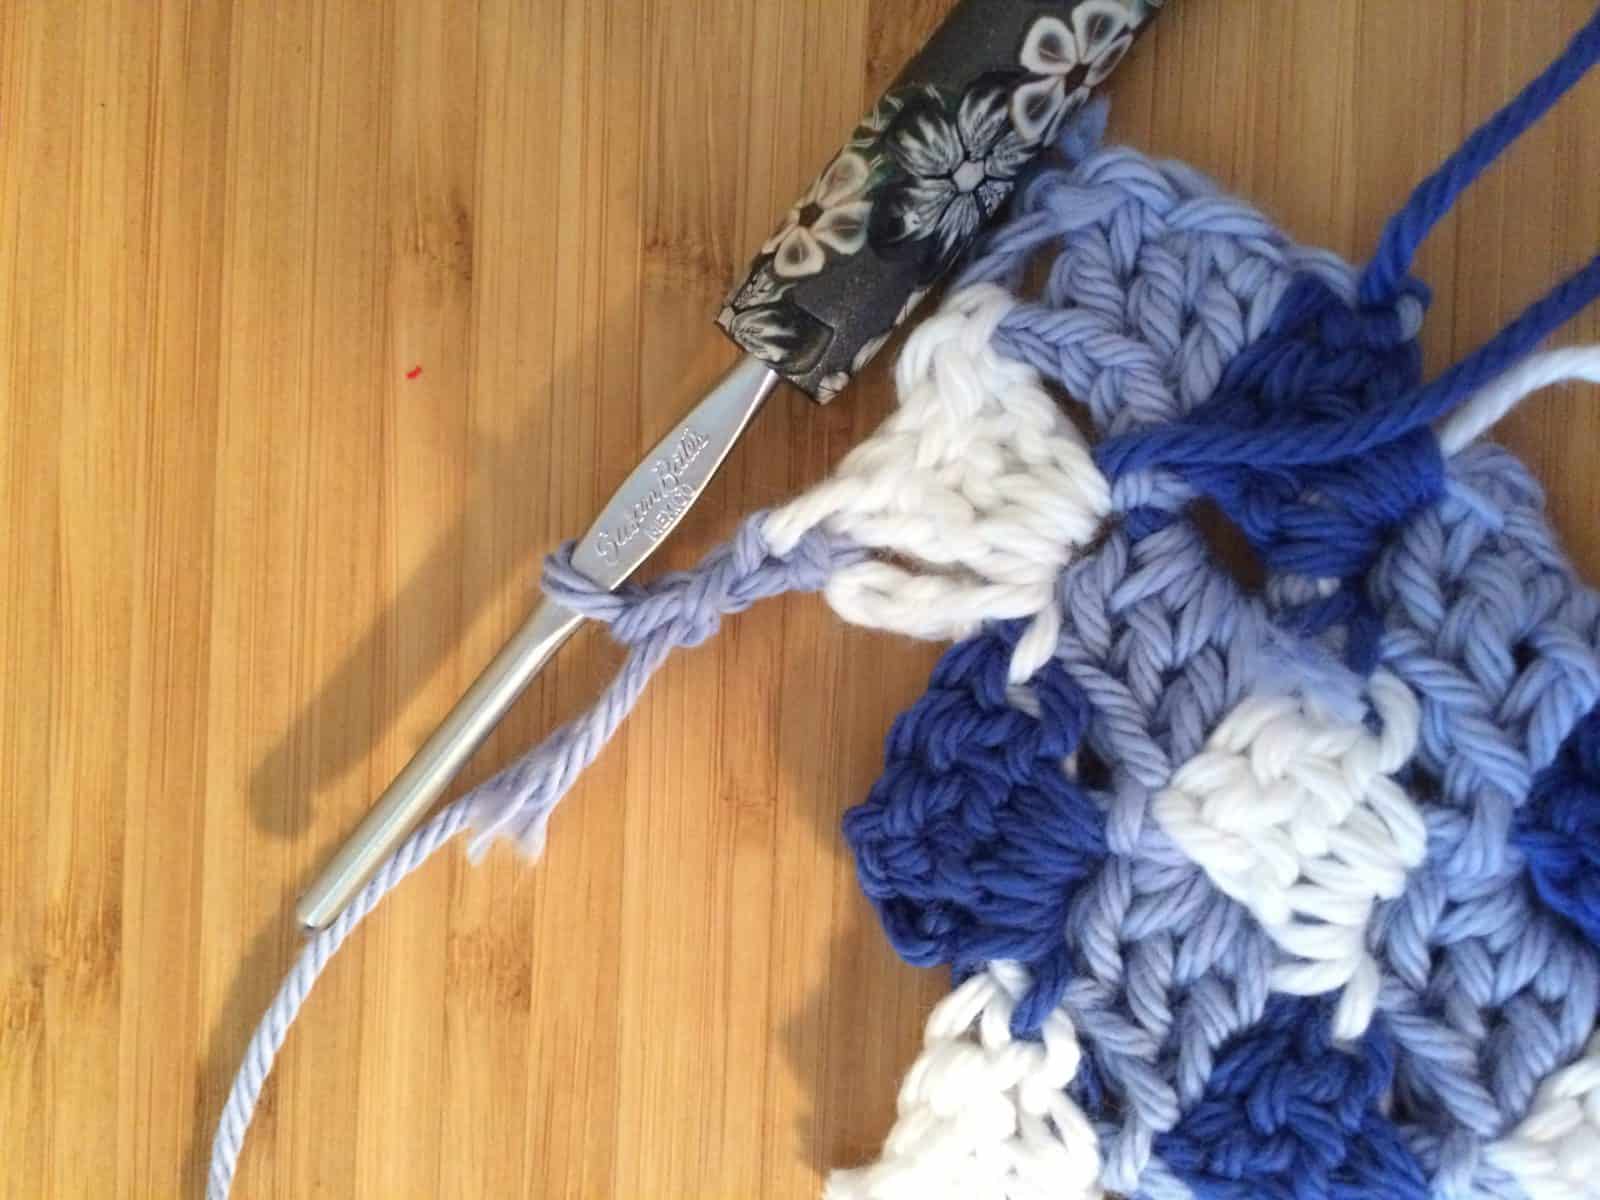
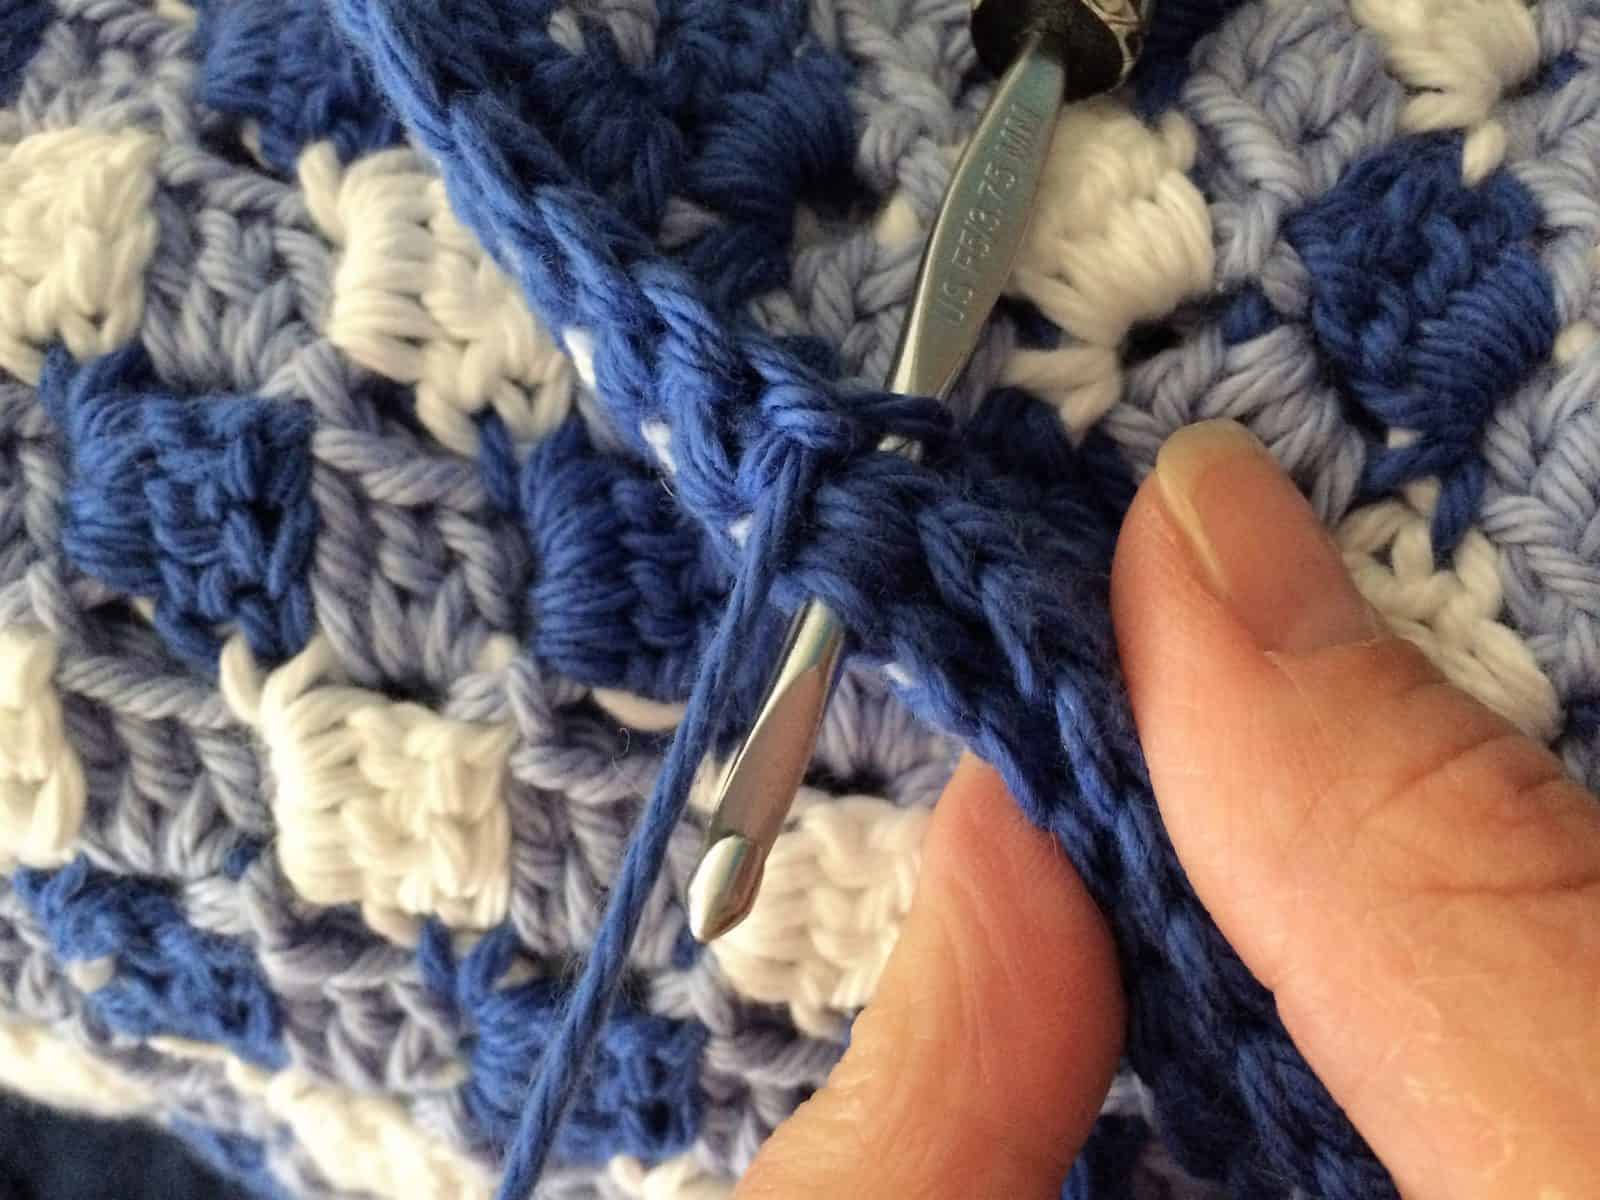
- Make 2 squares. Weave in ends that are in the middle section, not around the outer edge (as pictured above).
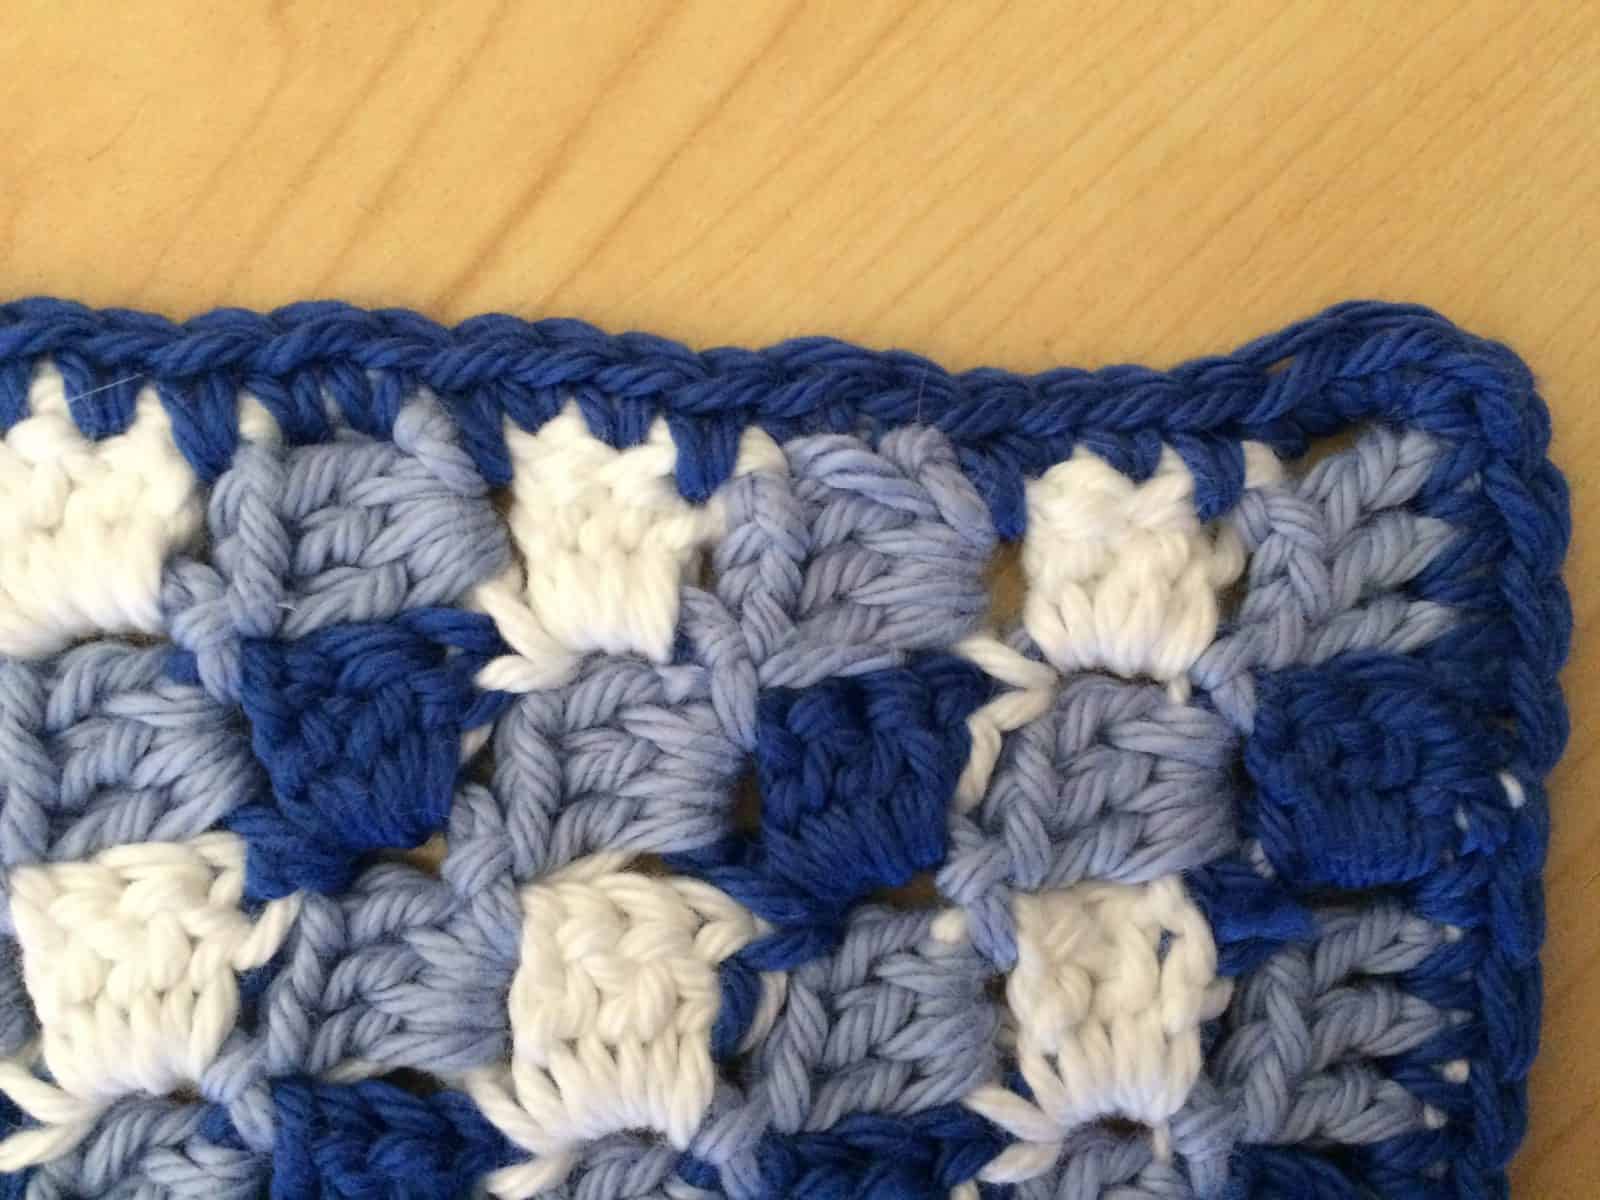
- Border:
This is where you crochet over all those tails!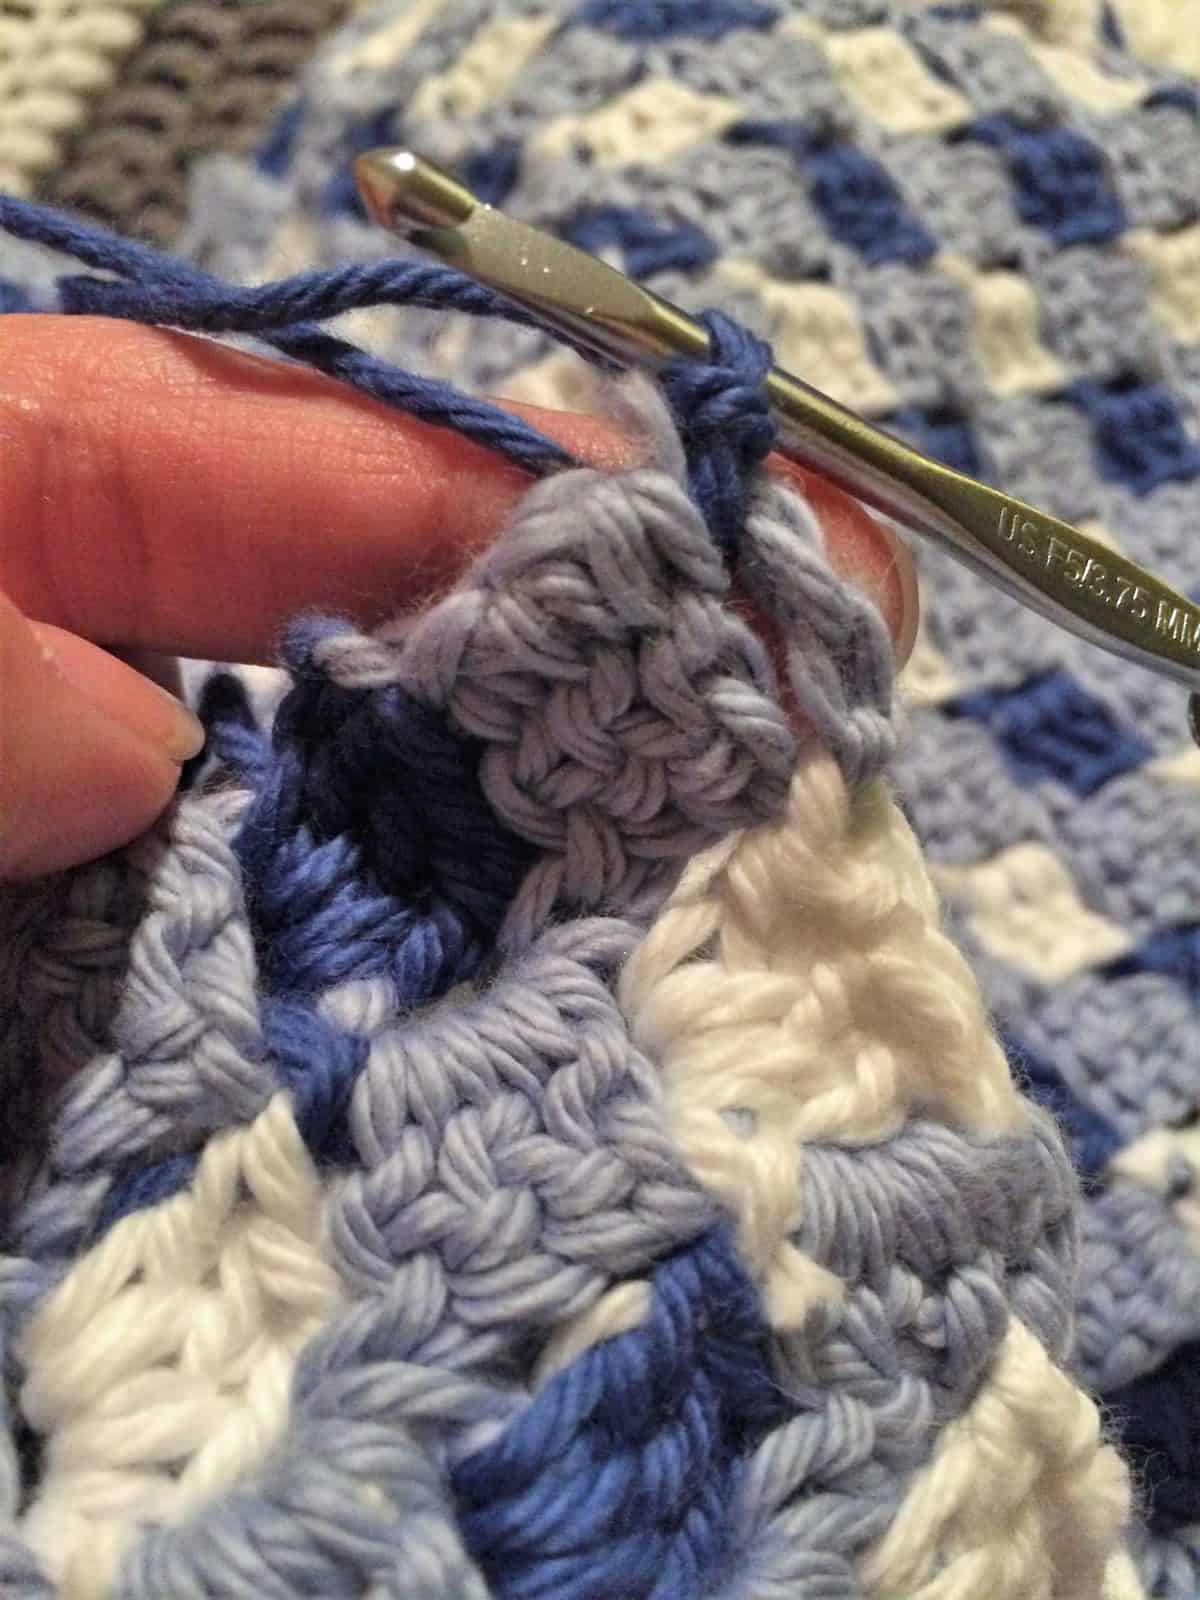
- First join Color A in any corner.
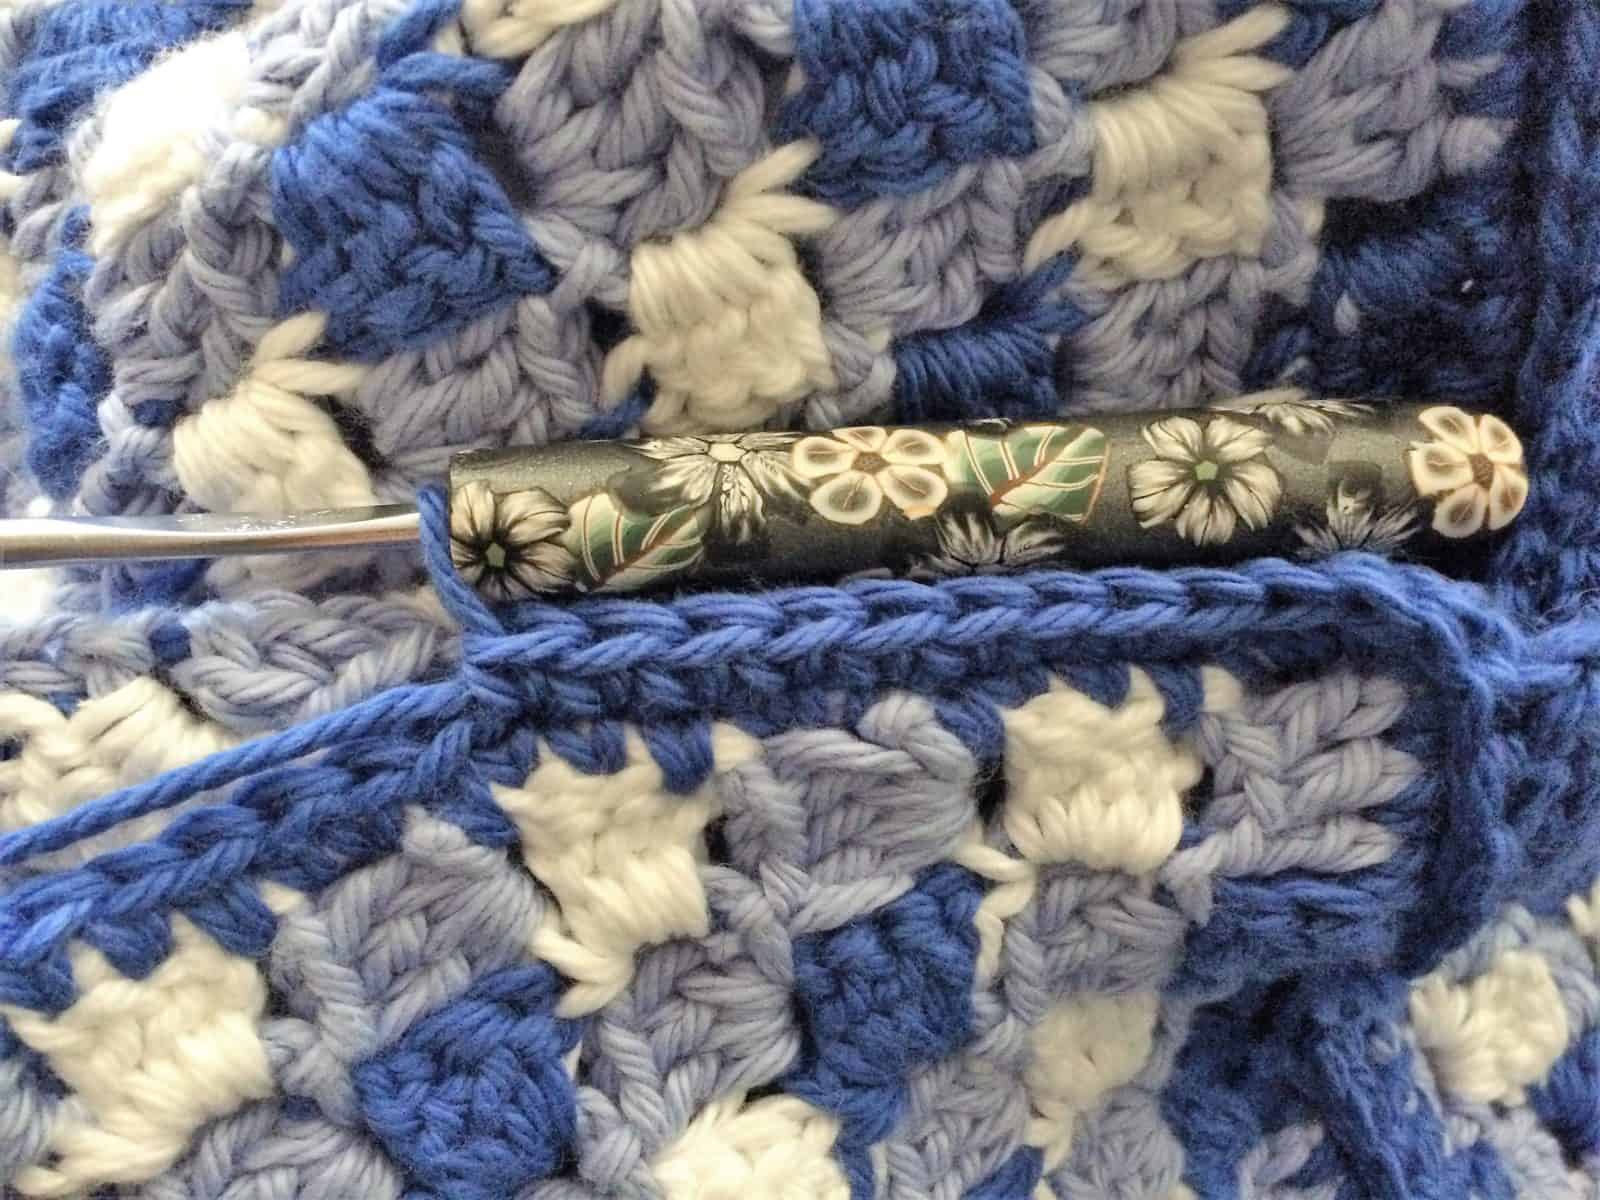
- Then sc around your square, placing about 3 sc per box. In corners, place (sc, ch.1, sc). I have a tutorial on how to add a single crochet border to a blanket if you need more info.
- Repeat on second square.
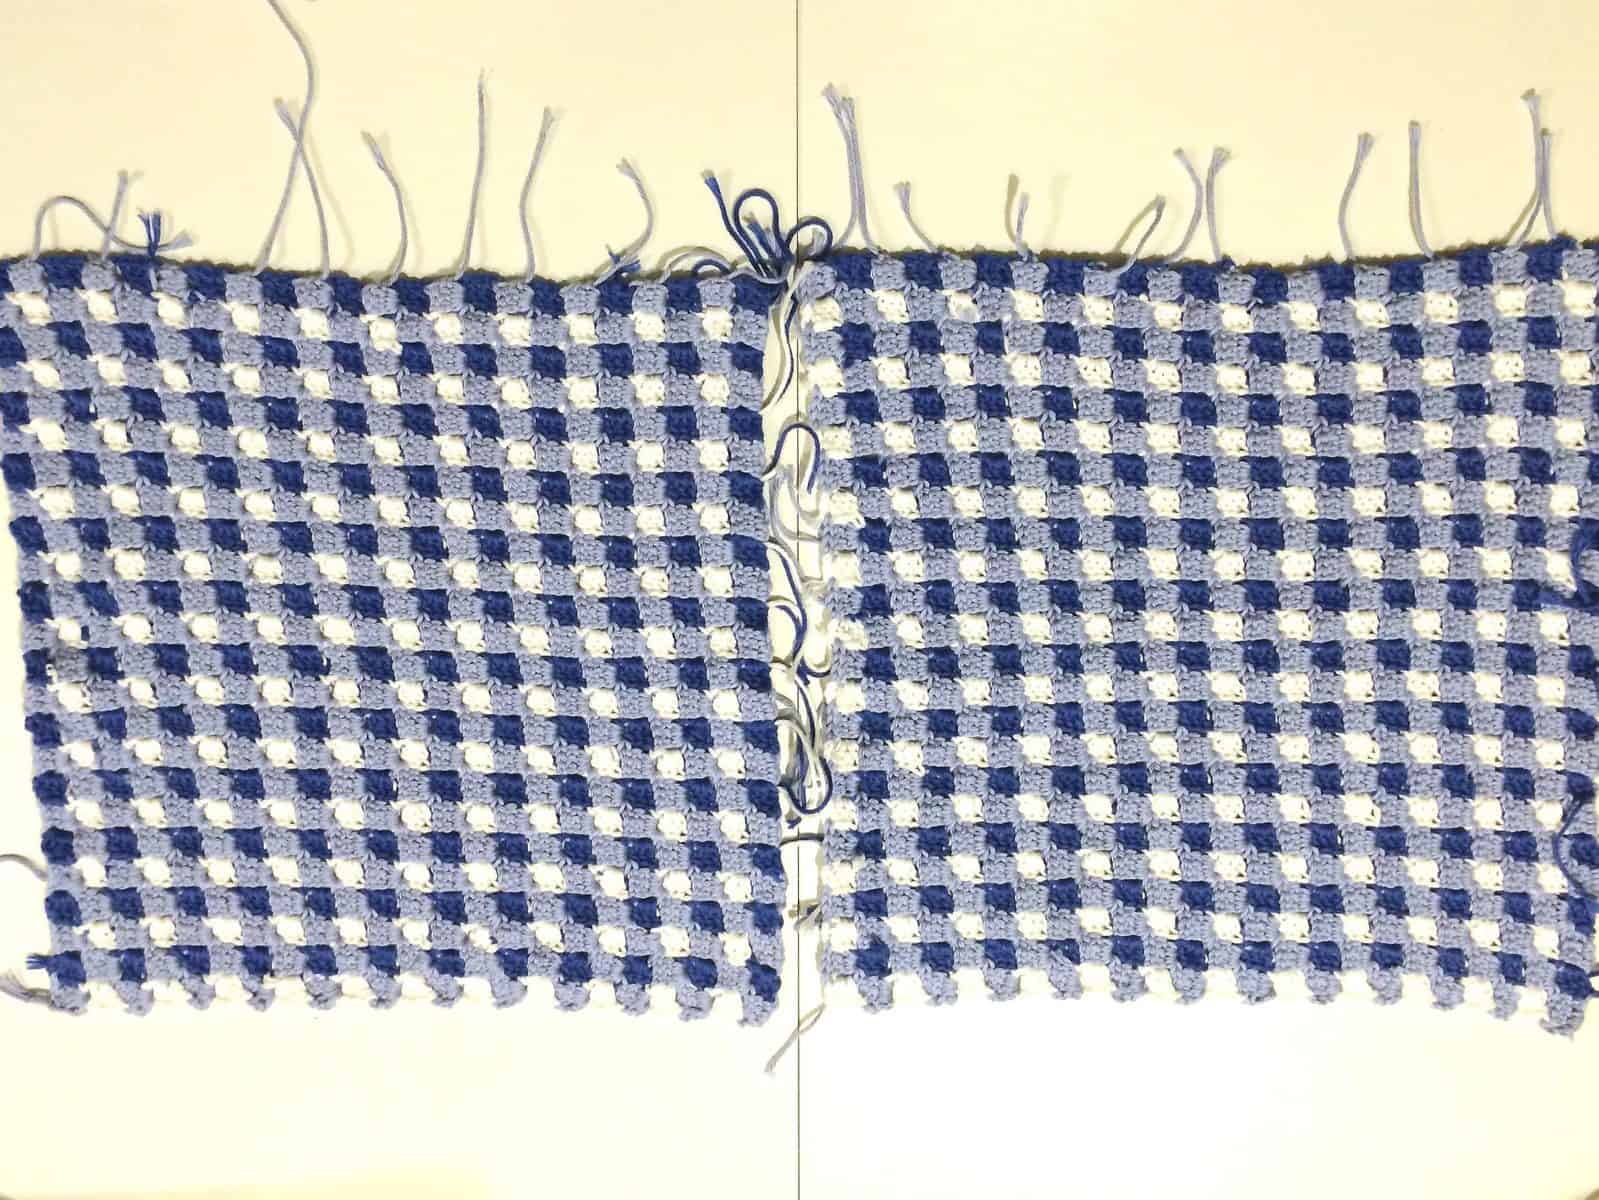
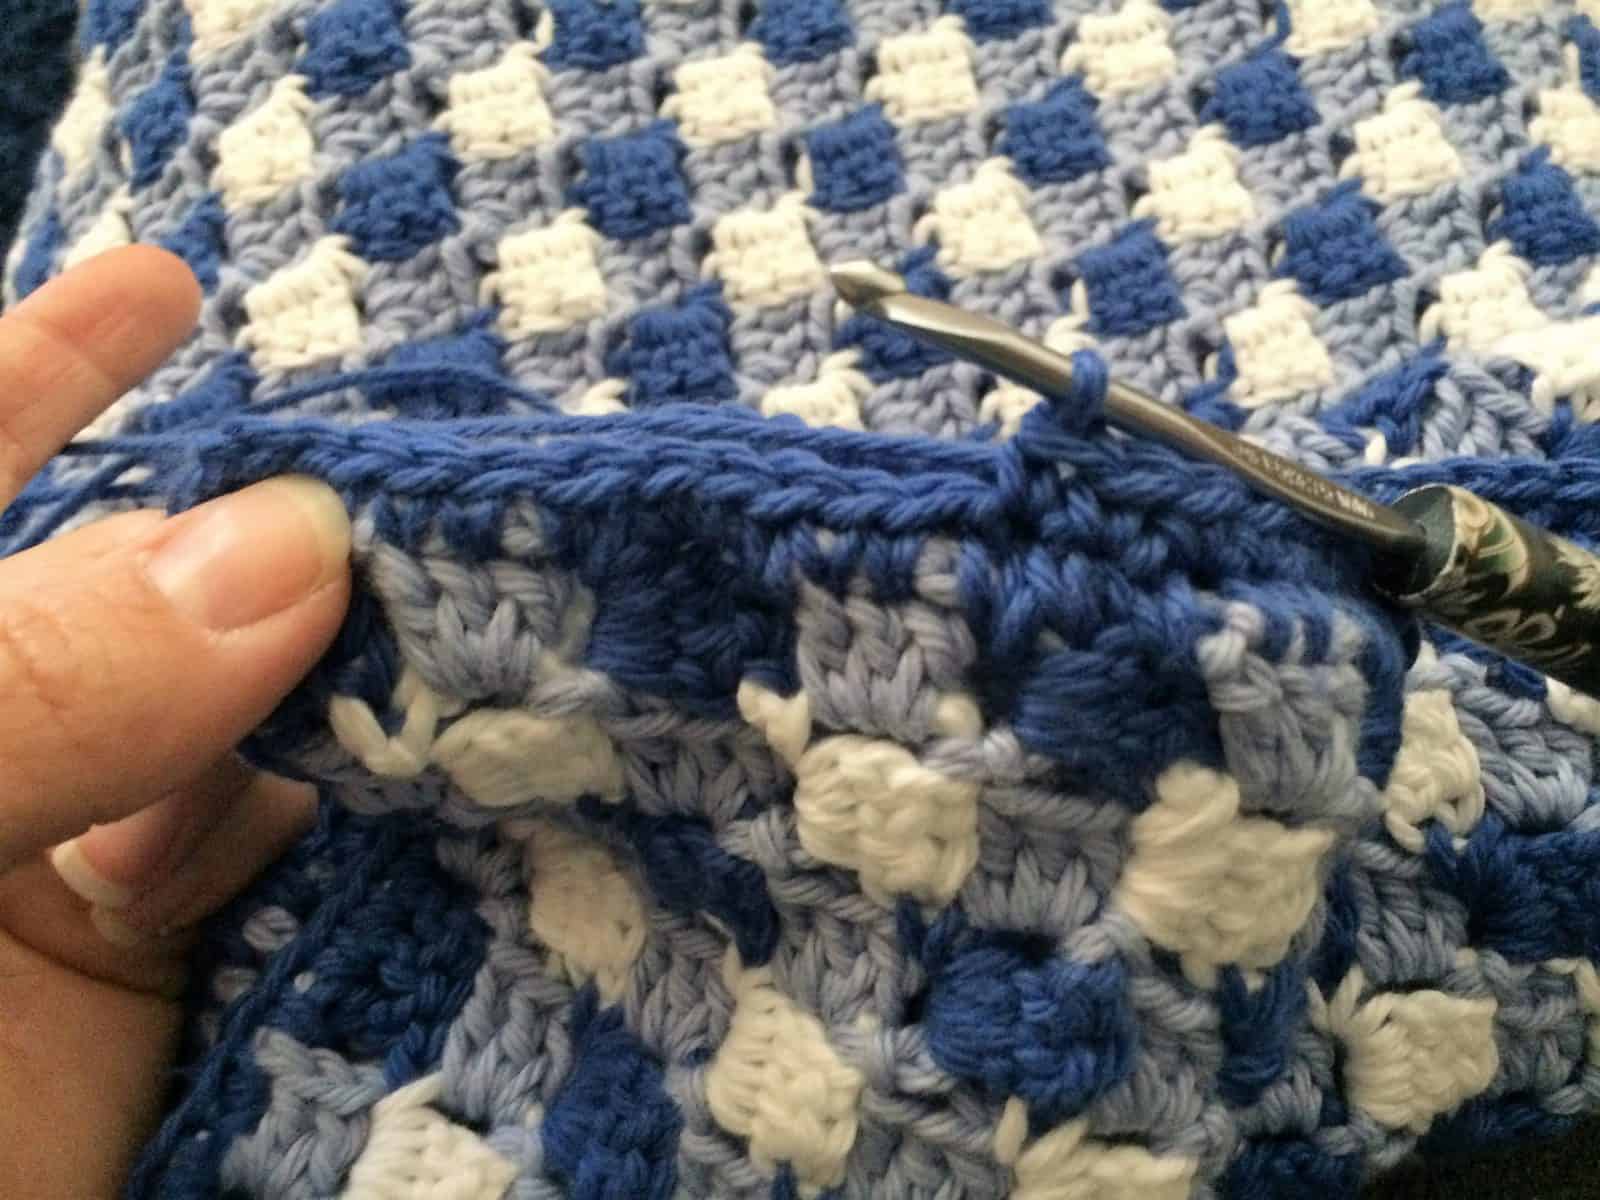
- To Join:
Lay your squares on top of one another. Make sure to match up your square pattern.
- The bottom open edge is white & light blue squares (the other three are dark blue & light blue).
- Next line up your border sts from both squares. Single crochet the two squares together on three sides only.
- When you come to a corner, place all (sc, ch 1, sc) in stitch, to keep them squared.
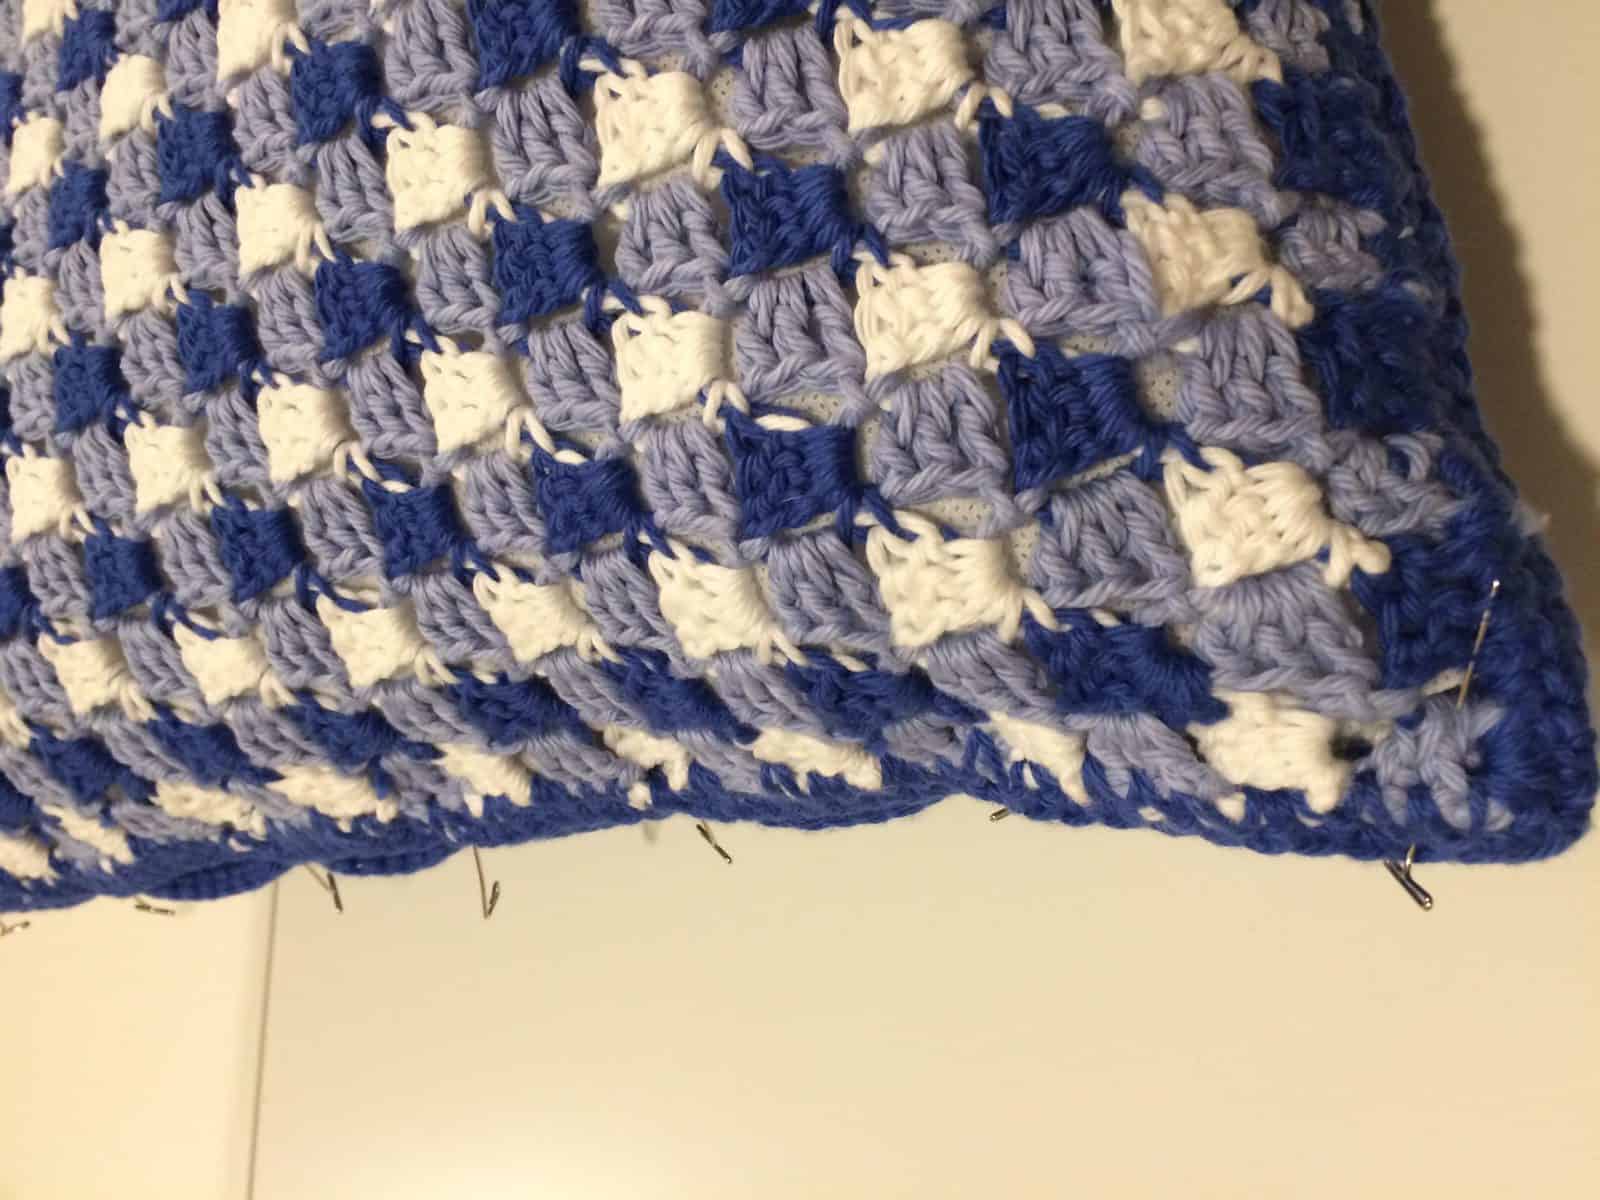
- Be sure to leave the bottom edge open for stuffing your pillow form inside.
- To finish your pillow:
Now, stuff your square pillow form inside. - Pin last side together.

- Sew it together.
- Use your yarn needle and a length of Color A yarn for sewing. I usually double the length of the area I want to sew. So if it measures 18″, then I’d use 36″+ to sew it together.

Now you’ll have a nice seam edging around your pillow.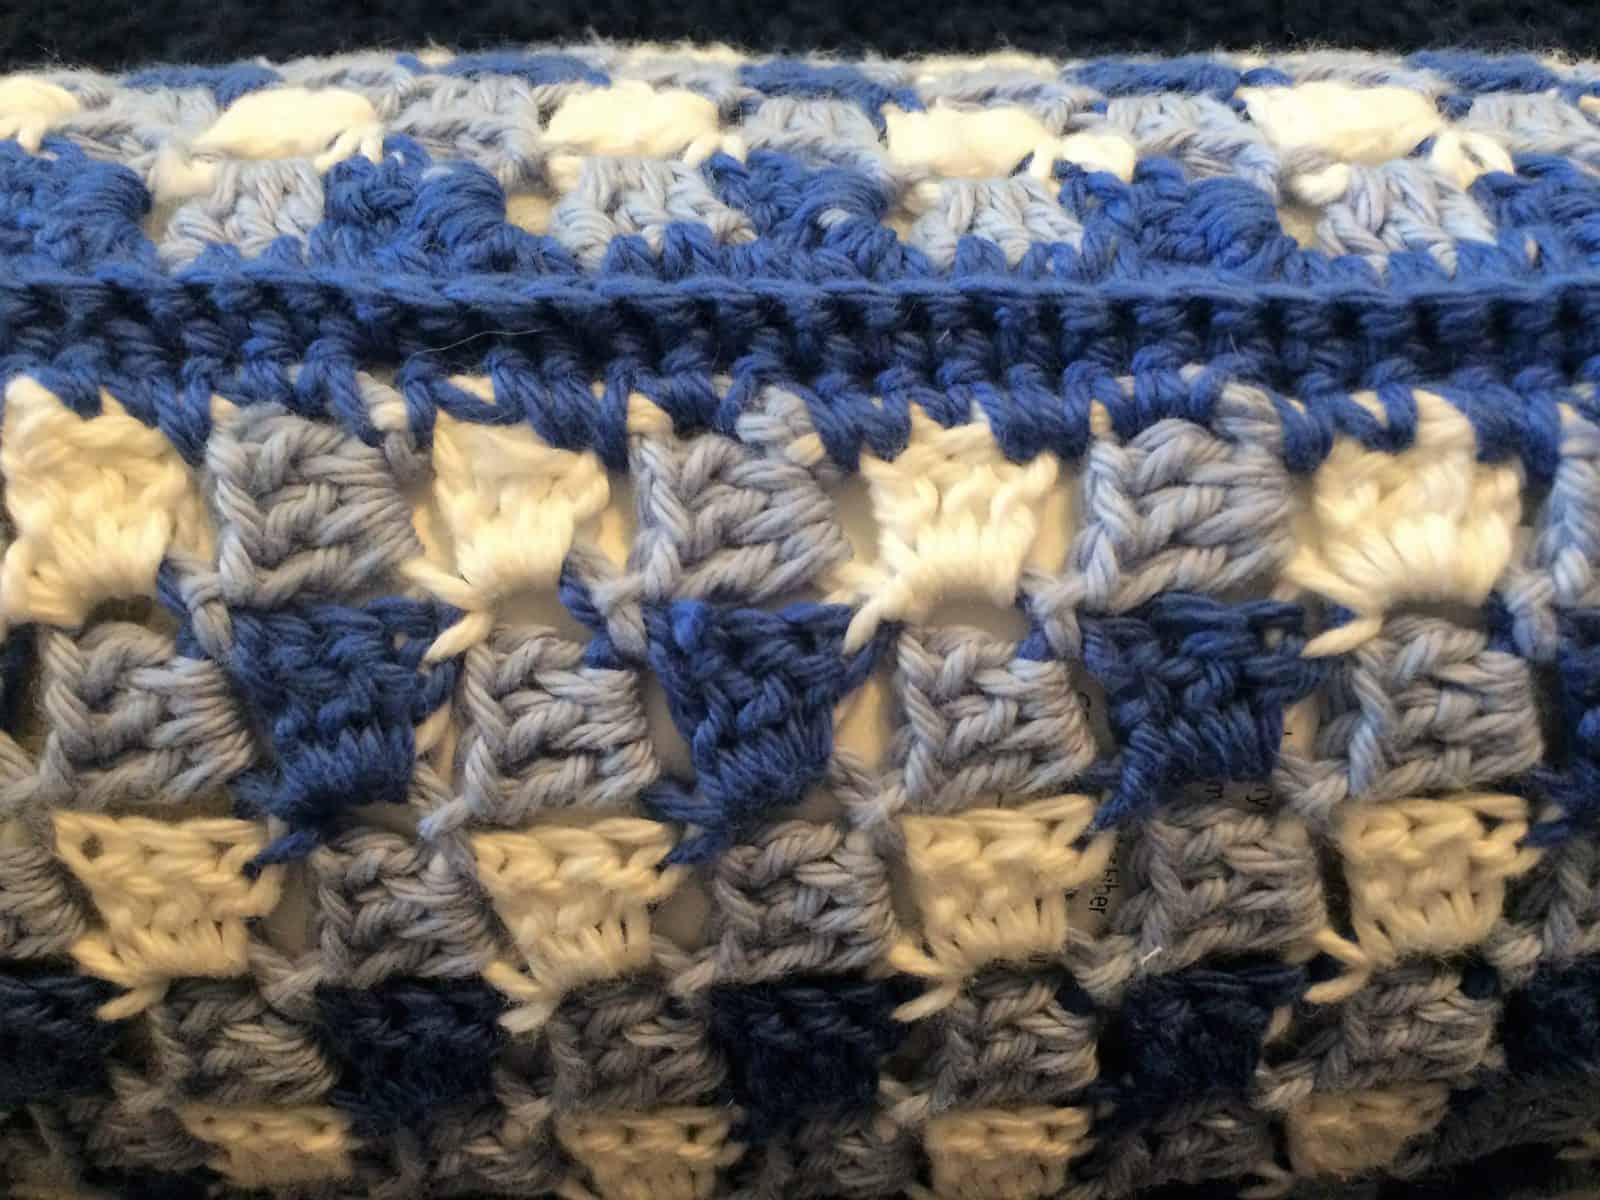
Recommended Products
As an Amazon Associate and member of other affiliate programs, I earn from qualifying purchases.


I subscribed to your newsletter so I would receive a free color chart – “Get this pattern as a printable color chart when you join my email list!” But I didn’t see any download appear with the chart. How can I get this?
Uh oh, that doesn’t sound good! Sorry to hear that. I’ll look into shortly when I can get to the computer. If you would send me your email address to [email protected] then I will email it to you when I get a chance.
I love this!!! Now I have ANOTHER thing to make. When will I EVER get all the things done I want? lol
Haha! I hear you, so much I want to make and so little time! Why do my kids want dinner every day 😉