How To Undo Knit Stitches Knitting Tutorial + Video
Sometimes we make a mistake and need to undo it. It can be so frustrating to find out you made a purl stitch instead of a knit stitch or vice versa. But it’s actually a pretty easy fix called tinking.

This post contains affiliate links, I may earn a fee. Read more disclosure policy.
Join the ChristaCoDesign Newsletter
Never miss a pattern!
As a new knitter you’re going to make knitting mistakes. Not to worry, it’s a part of the learning process! And honestly, even seasoned knitters make mistakes now and again.
If you made a mistake in your knitting, first stop and take a deep breath. Second, don’t panic! It’s totally normal for beginner knitters to feel frustrated, but it’s fixable.
The easiest way to fix a knit mistake on the same row is just to tink back (or undo) your stitches to the last stitch that is correct. Then you’ll be before where the stitch was that needs to be fixed. Then you knit the correct stitches.
It’s important to be sure you’re undoing the stitches correctly and they’re not sitting the wrong way on the needle. The first step is to make sure you’re on the front of the work.
Be sure to insert the left needle into the stitches on the right hand needle from the front of the stitch. This is the same way you insert the needle when you make a knit stitch.

Other Common Mistakes
If you insert the needle incorrectly you may have a twisted stitch. This is also an easy fix by knitting it through the back leg.
It’s pretty common for new knitters to create accidental yarn overs. This makes extra stitches! A yarn over is a valid knit increase that’s often used in lace patterns.
You can also undo stitches by ripping back, or frogging back to the problem area. But if your mistake is in the same row, the best way to fix it is by tinking back each stitch.
Video Tutorial
You can watch the short video tutorial on how to do this technique on my YouTube.

How to Undo a Knit Stitch
Learn how to tink back or undo a knit stitch mistake.
Materials
- Your project.
Tools
- Knitting needles.
Instructions
- For this tutorial we're working on the right side (RS).I'm working in the round here so the back of the work is automatically away from me. If you are working flat, in rows then be sure you're on the front of your work.
- The stitch we need to fix is in the same row or round. So we need to undo several stitches back in order to correct the mistake.
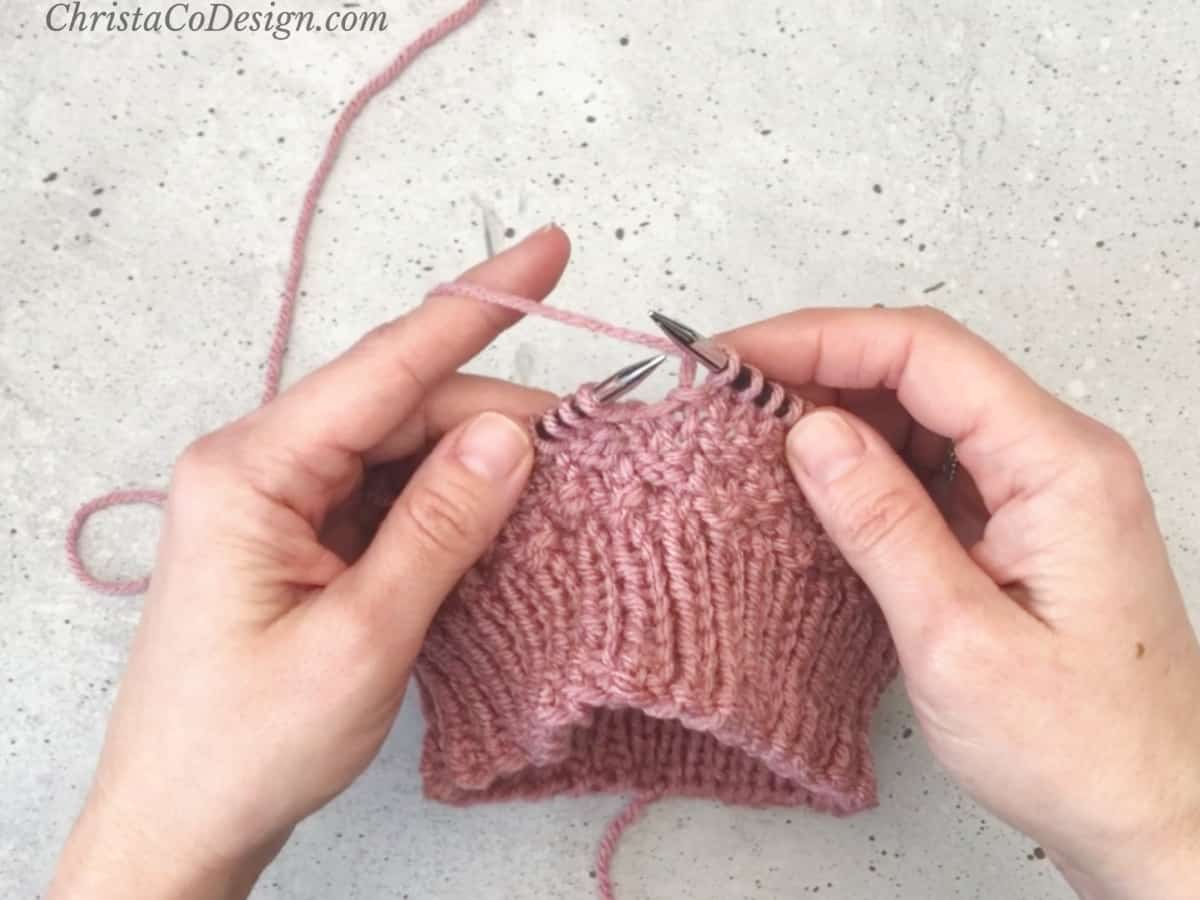
- The working yarn is coming from our right-hand needle. Pull the working yarn up to see the stitch on your needle better. This is the stitch we will undo.

- Insert the left-hand needle into the stitch from the front to the back.
 Insert the needle tip in the center of the stitch, to the right of the left leg of the stitch. This insures it will sit the correct way on your needle.
- Then slide the right needle out, leaving the unknit stitch on the left needle.
 Here the old stitch is now on the left needle and it's seated correctly, ready to be knit.
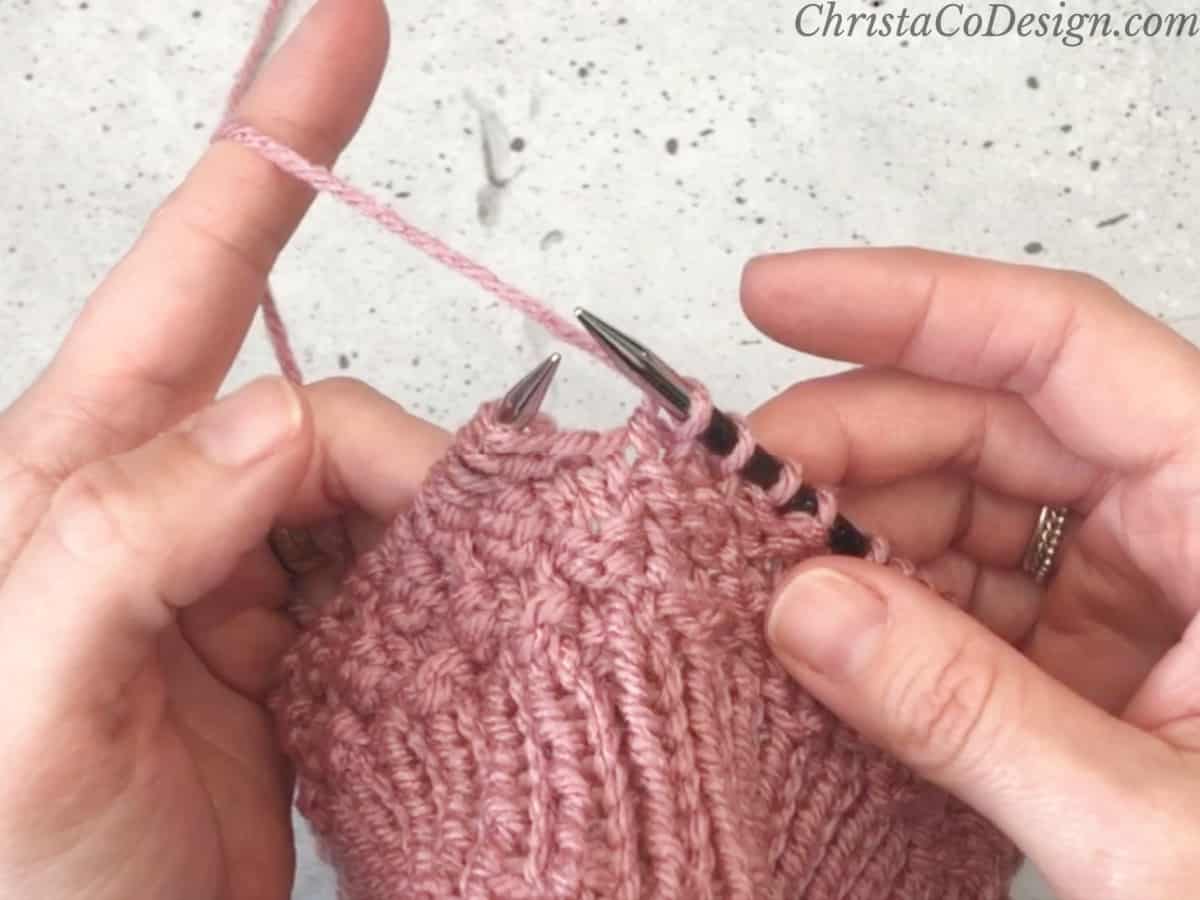
- Keep repeating in each stitch until you have unknit the incorrect stitch.
- Then continue knitting your stitches normally, making your new stitch correctly.
Notes
Anytime you tink back or frog your work it's a good idea to check that you have the correct number of stitch on your needle still!
Recommended Products
As an Amazon Associate and member of other affiliate programs, I earn from qualifying purchases.