
Learn to Crochet The Jasmine Stitch Step By Step
Learn how to crochet the beautiful Jasmine stitch in this step by step tutorial with pictures and video.

This post contains affiliate links, I may earn a fee. Read more disclosure policy.
Join the ChristaCoDesign Newsletter
Never miss a pattern!
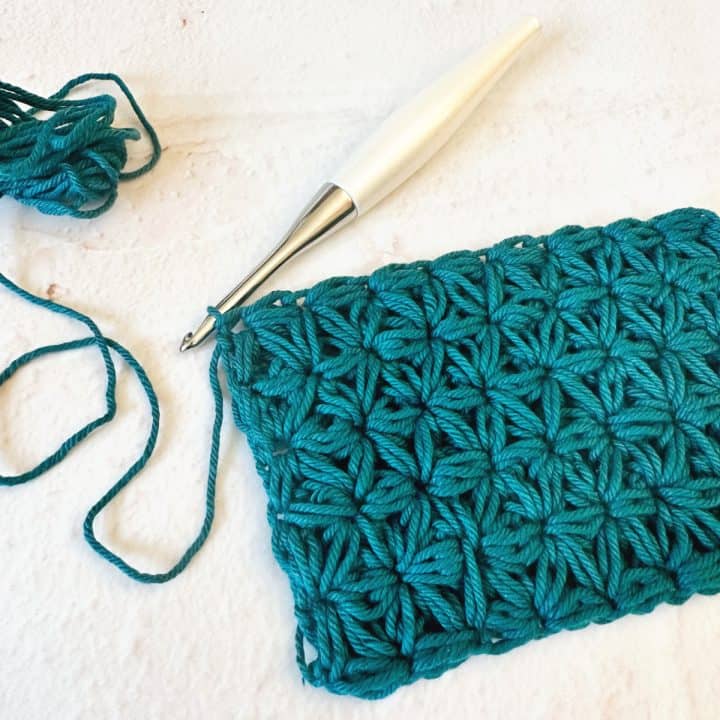
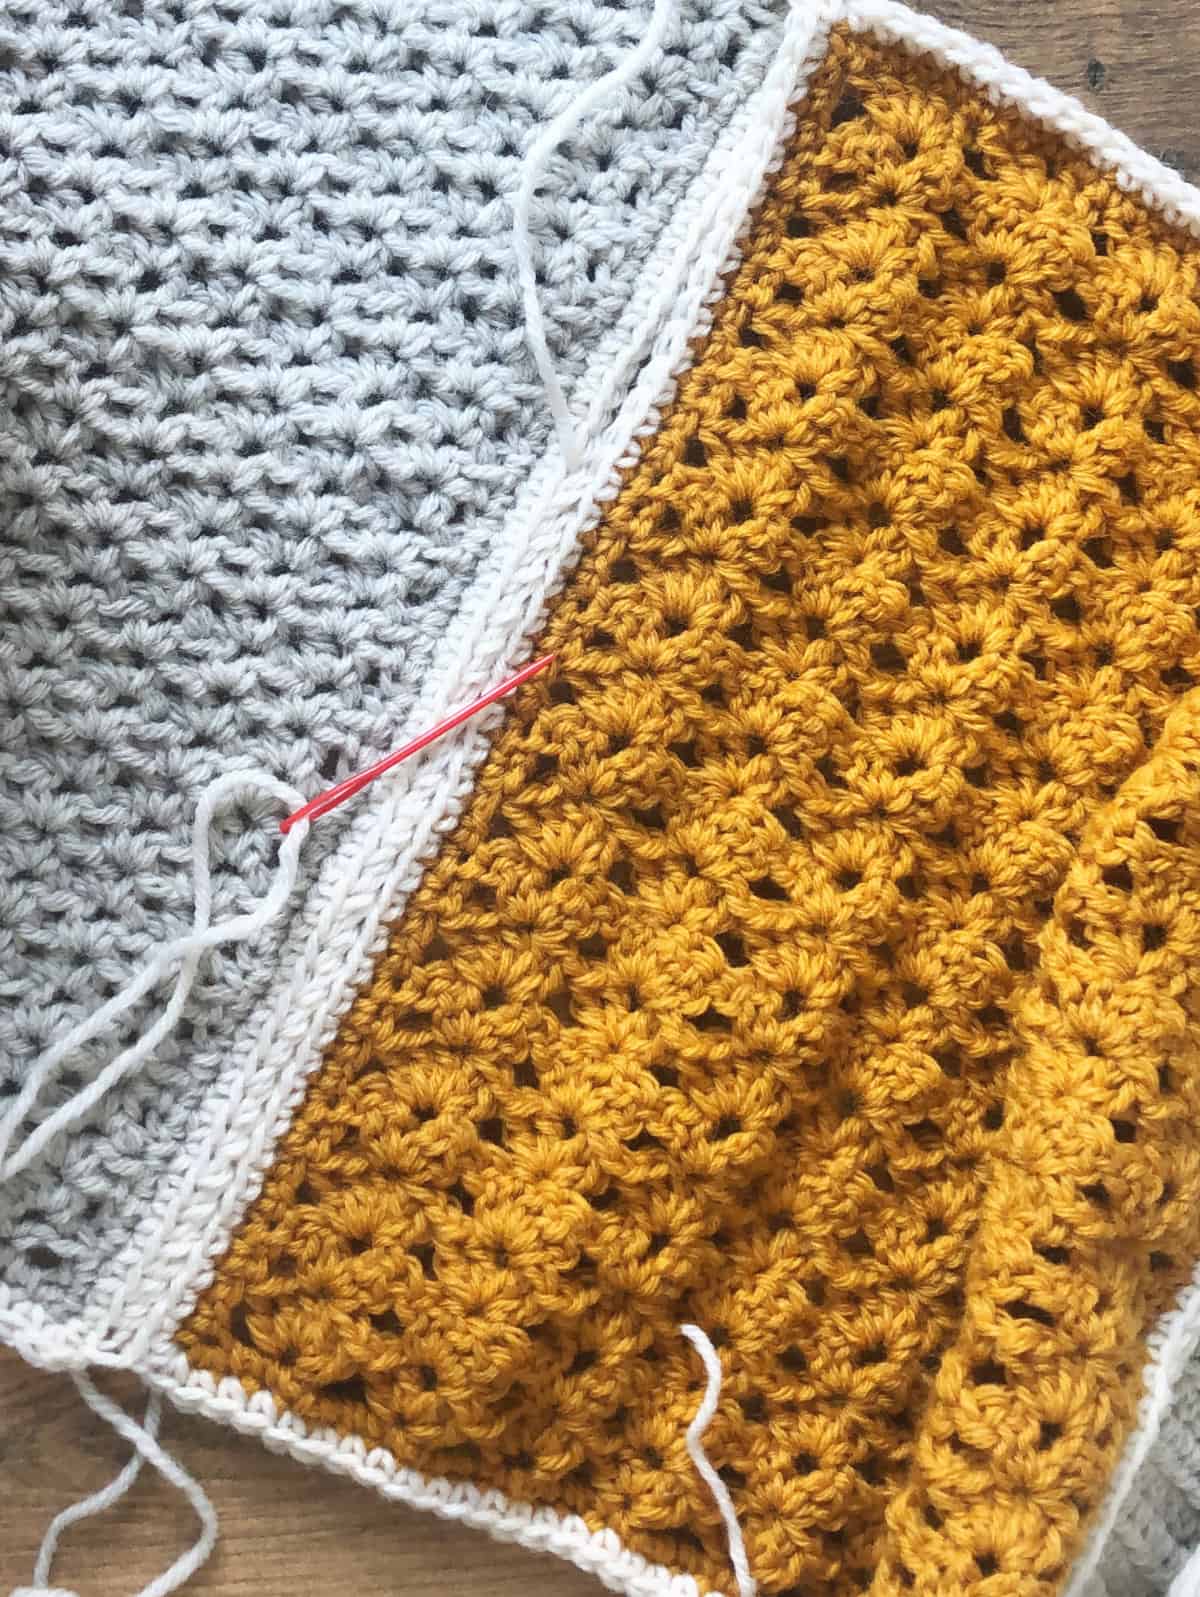
The crochet jasmine stitch is made with clusters of puff stitches. Once you’ve worked a few rows they’re grouped to resemble the jasmine flower.
The beauty of this stitch is that it’s a reversible stitch. It looks the same on both the right side and wrong side of your work.
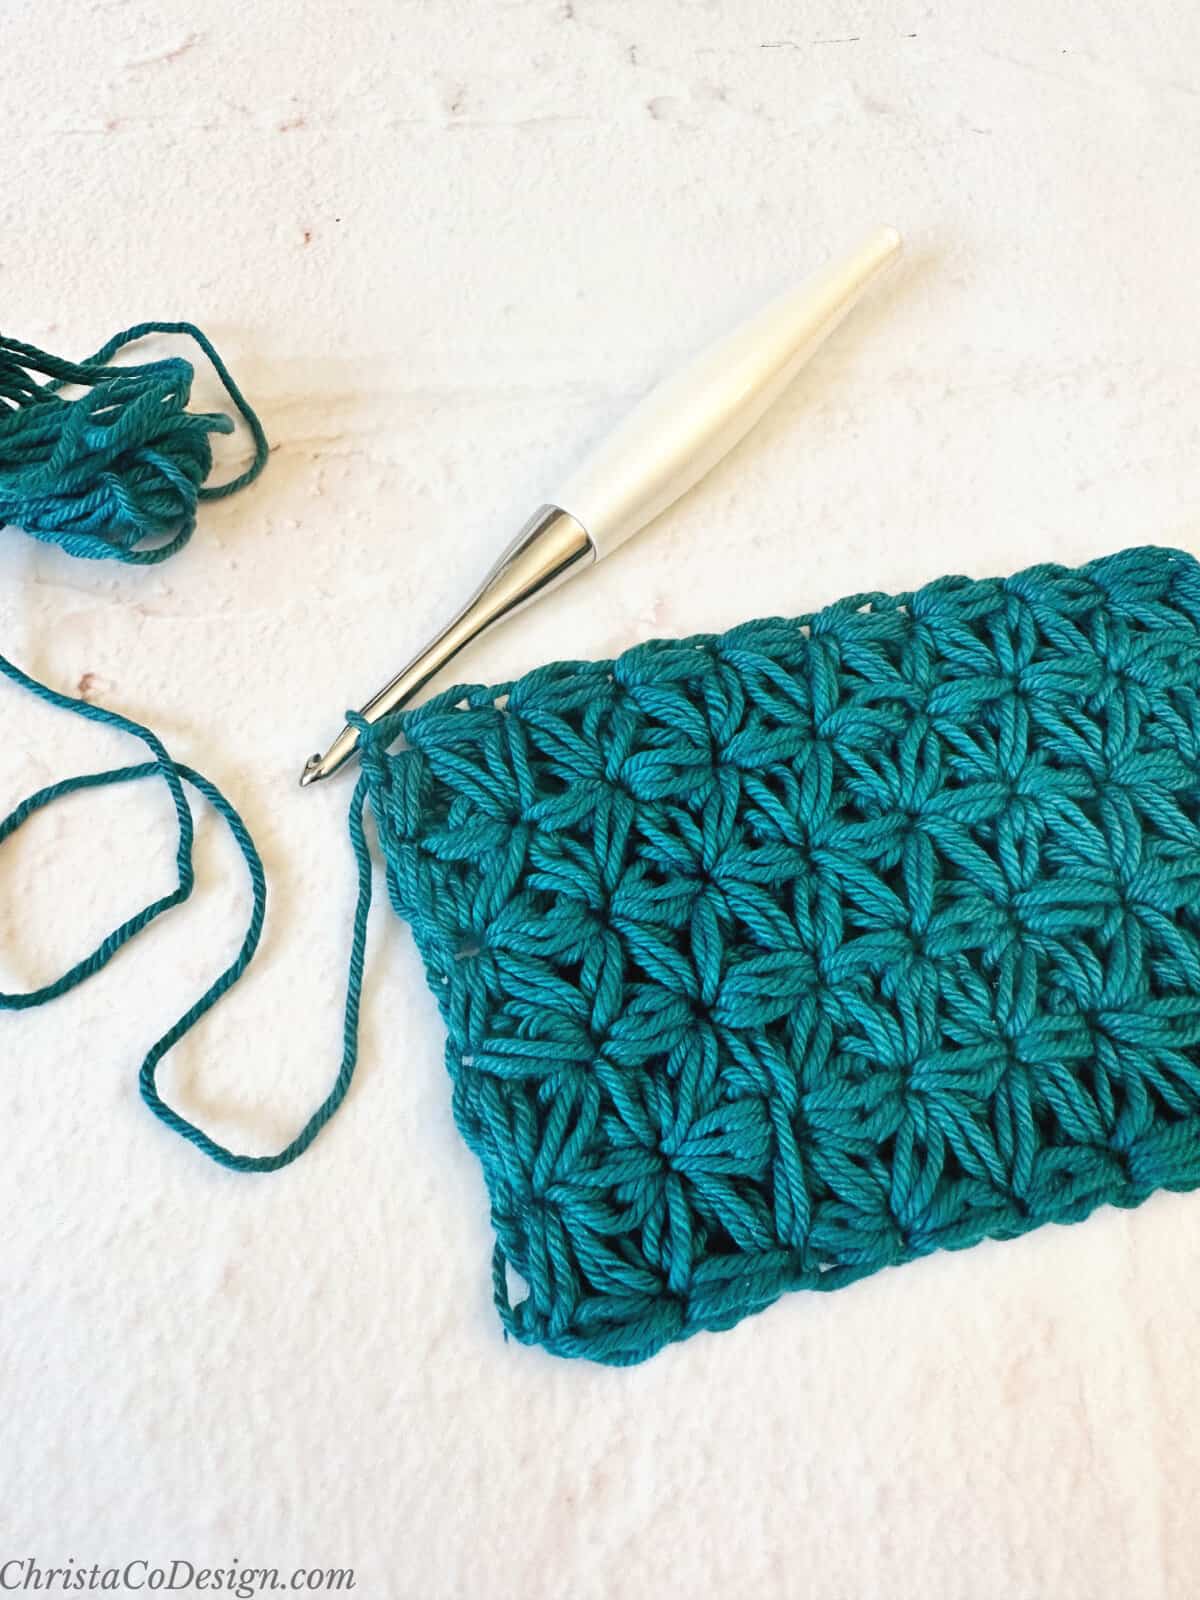
It’s a very thick stitch. For that reason I’ve chose to work a smaller puff stitch cluster. You can increase the number of loops for each puff stitch to make each one thicker. Be aware this stitch is a yarn eater.
Materials
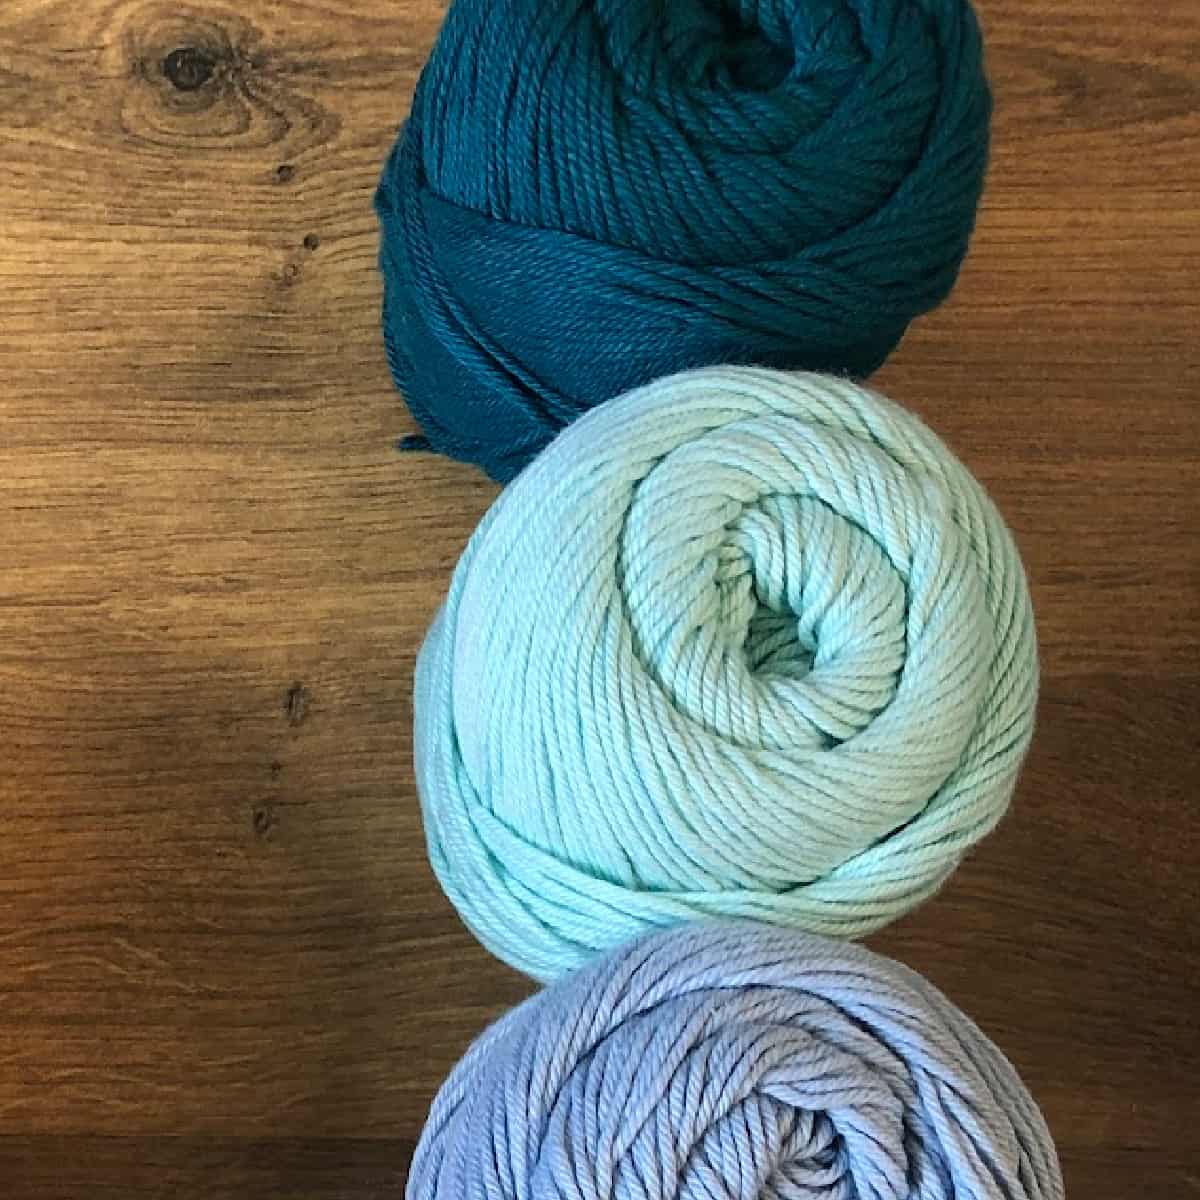
You’ll need yarn and the corresponding hook size. I’m using a #4 medium worsted weight yarn with a 5 mm crochet hook.
We’ll start with a foundation row of puff stitches, and build out our Jasmine star stitches from there.
I use the same puff stitch as I use in the Piemonte Blanket which is a free crochet pattern here.
Skill Level
Intermediate to Advanced
This is one of those crochet stitches that becomes easy once you learn it. However, there is a bit of a learning curve the first time you make it.
Get the free trivet pattern featuring this beautiful stitch here.
Video
Watch the free video tutorial on my YouTube channel.
Jasmine Crochet Stitch Photo Tutorial
Learn how to crochet the beautiful Jasmin stitch in this step by step tutorial with pictures and video.
Materials
- #4 medium worsted weight yarn I'm using Dishie Yarn (100% cotton, 190 yd / 100 g).
Tools
- 5 mm hook (US Size H-8), or crochet hook to match your yarn.
Instructions
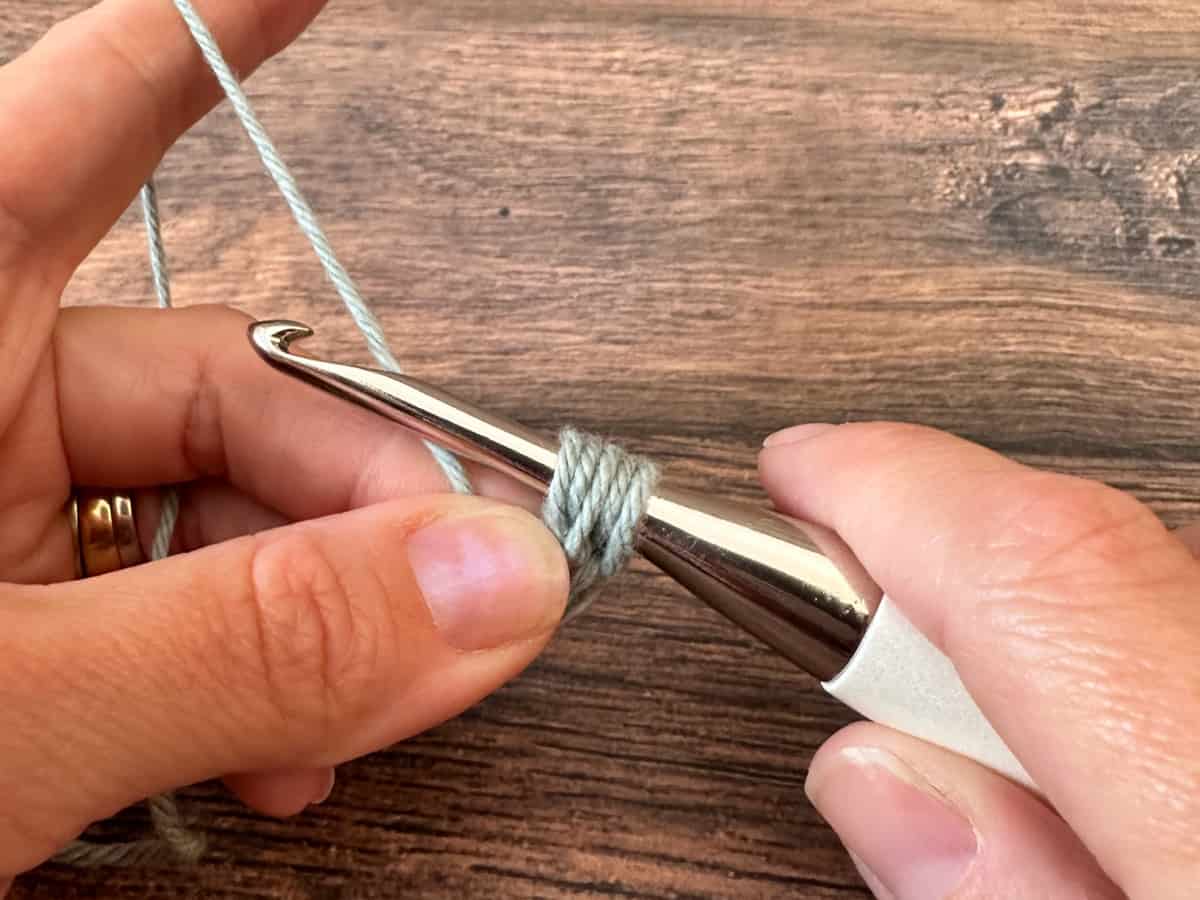
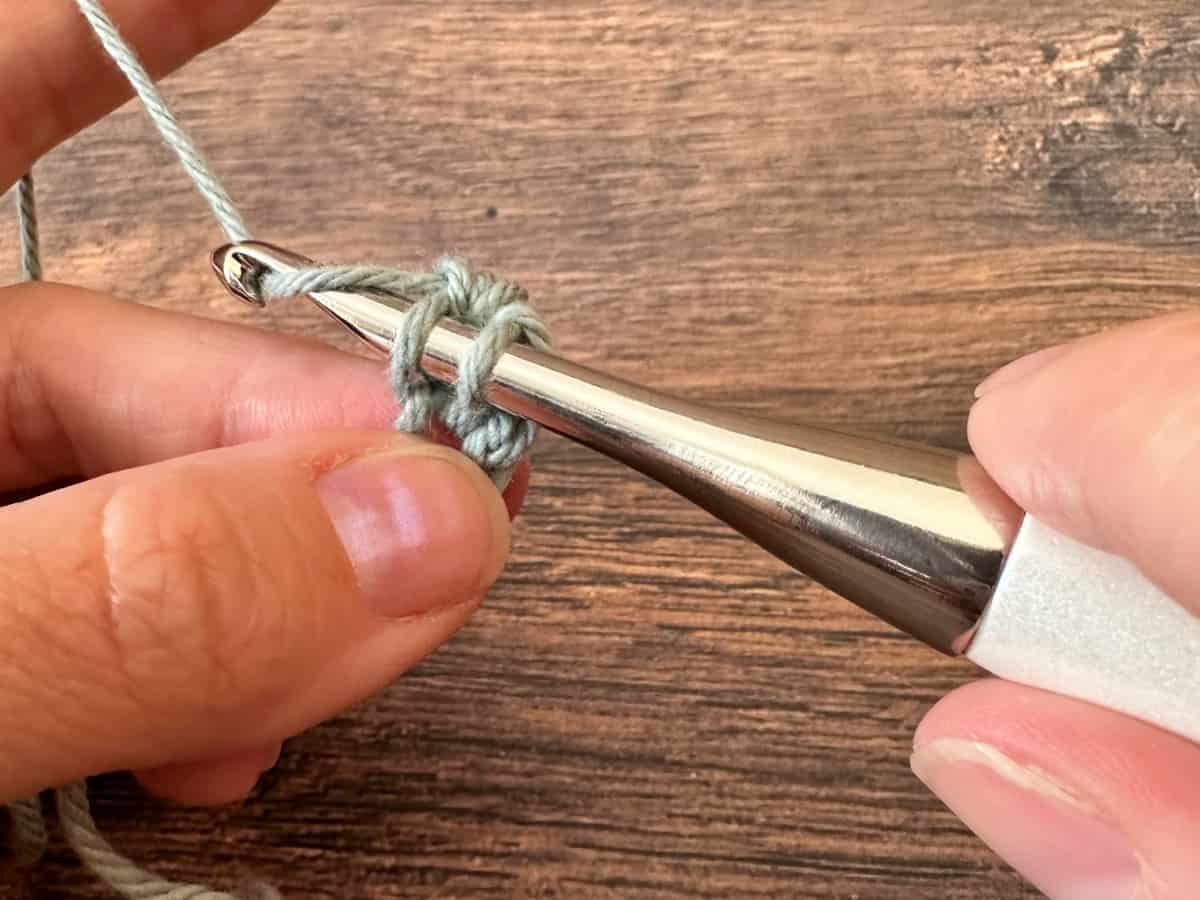
- Start with a slip knot on your hook. Row 1. Ch 1

- Pull up the loop on your hook so it's about as tall as a double crochet. First we'll make the foundation puff row.
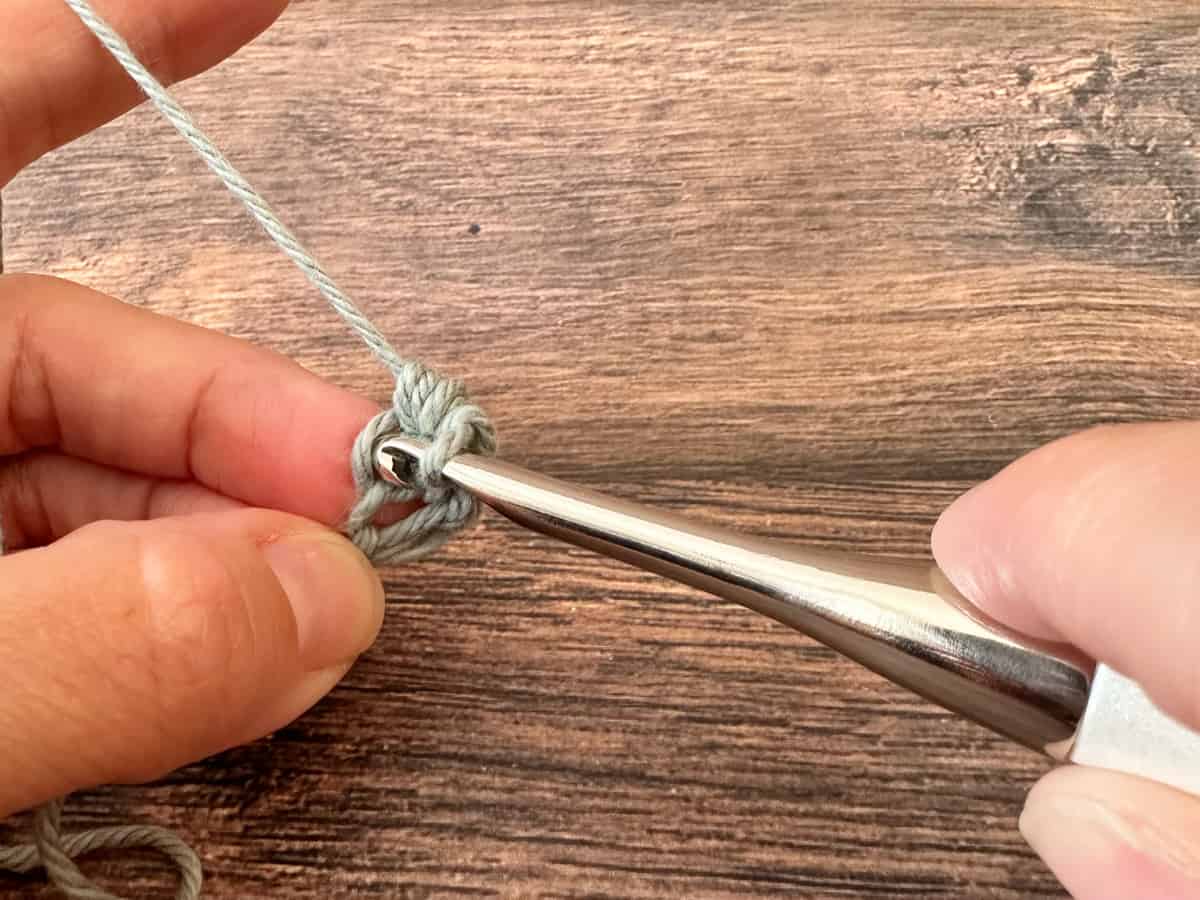
- Yarn over and insert the hook in the first ch.
 3 loops on hook.
 - Yarn over and pull up a loop.
 3 loops on hook.
 - Yarn over and inset hook into same spot again.
 5 loops on hook.
 - Hold the working yarn at the base of the stitch. You'll need to keep holding this spot through the next steps as you will work into it afterwards.
- Yarn over, keep hold of the yarn at the base of the stitch.

- Pull through all 5 loops on your hook, keep holding the yarn at the base.

- Insert the hook into the loop you've been holding at the base.
- Yarn over
 3 loops on hook.
 - Pull up a loop
 2 loops on hook.
 - Yarn over
 3 loops on hook.
 - Pull through both loops on your hook.
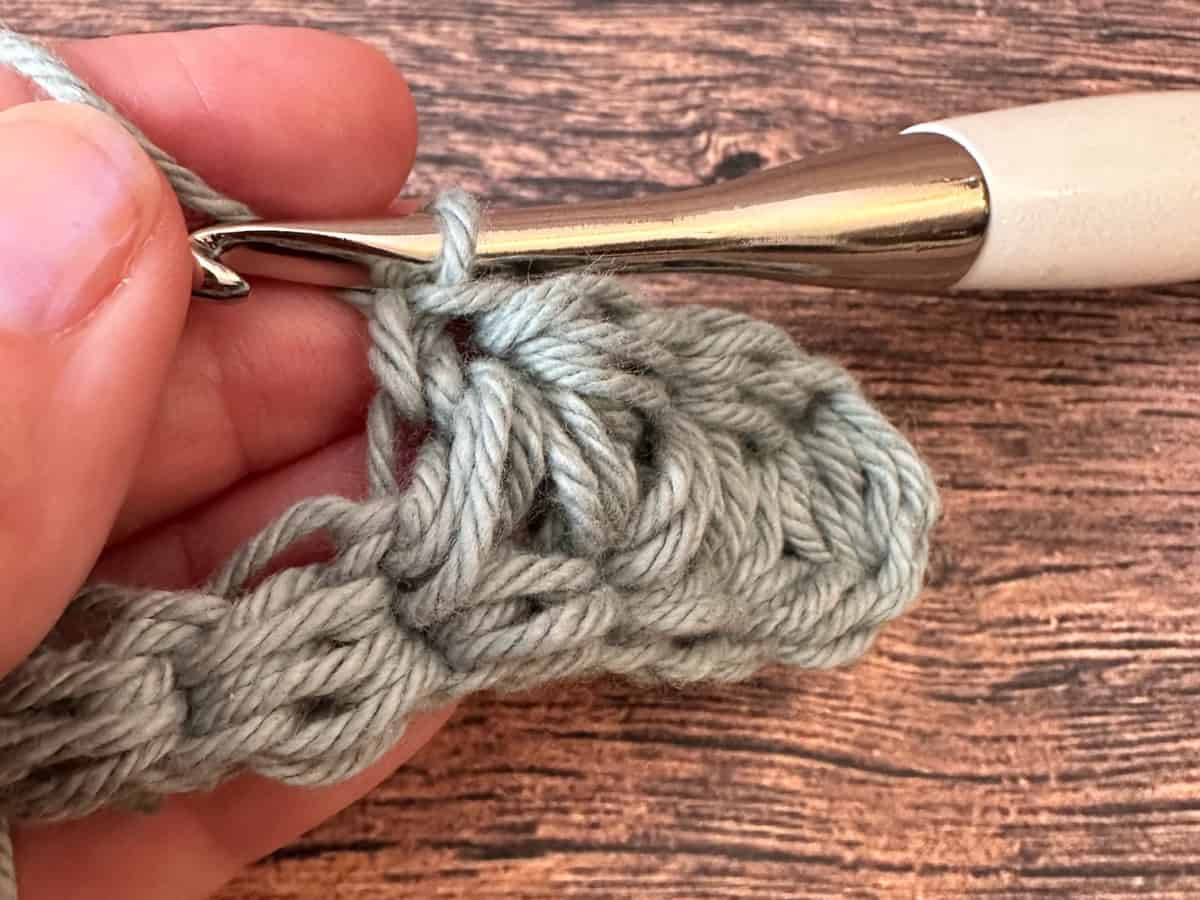
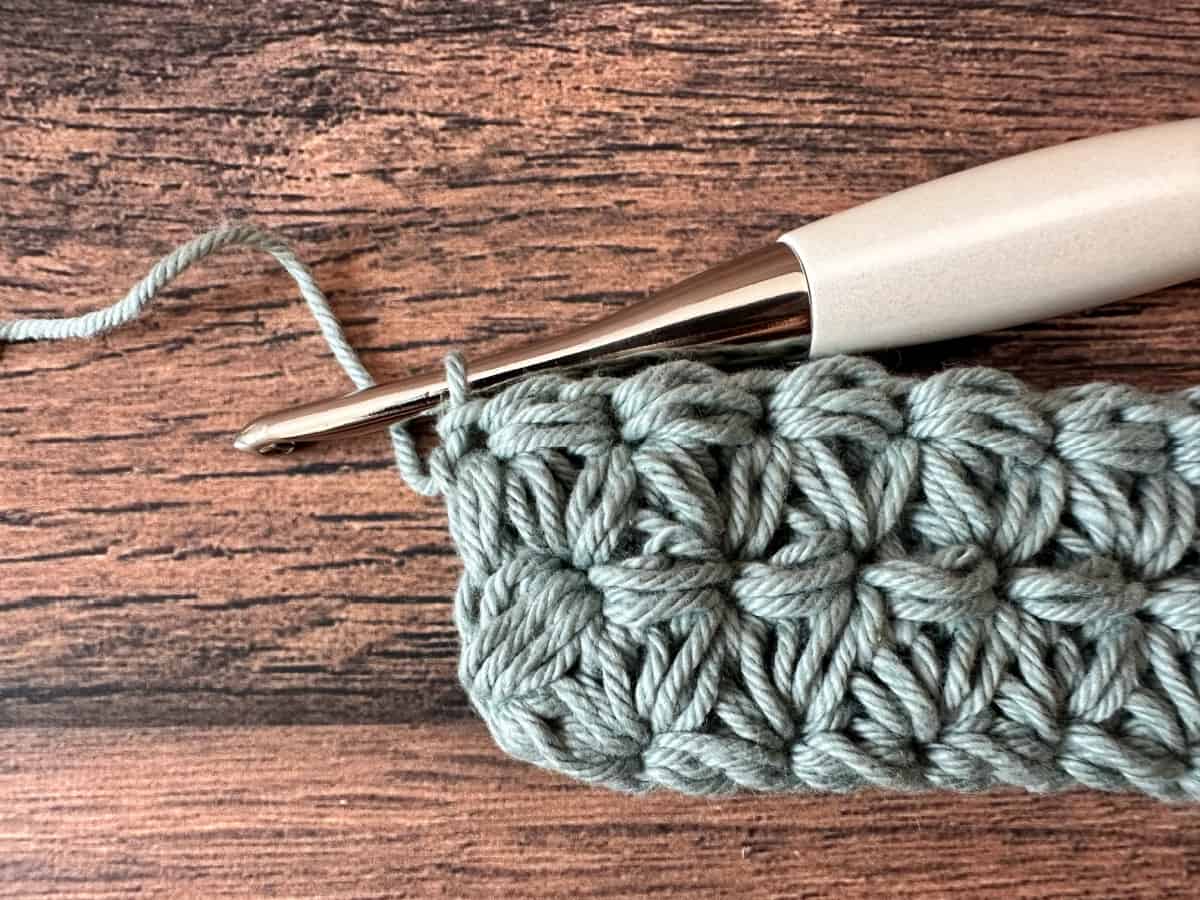
 One jasmin stitch completed.
 - Pull up a long loop.

- Yarn over and insert hook into same stitch you just made, pull up a loop.
 3 loops on the hook.
 - Repeat last step again
 5 loops on hook.
 - Hold yarn at base of stitch, yo and pull through all 5 loops on your hook.

- Insert hook into held loop, yo and pull up a loop, yo and pull through both loops to complete another jasmin stitch.

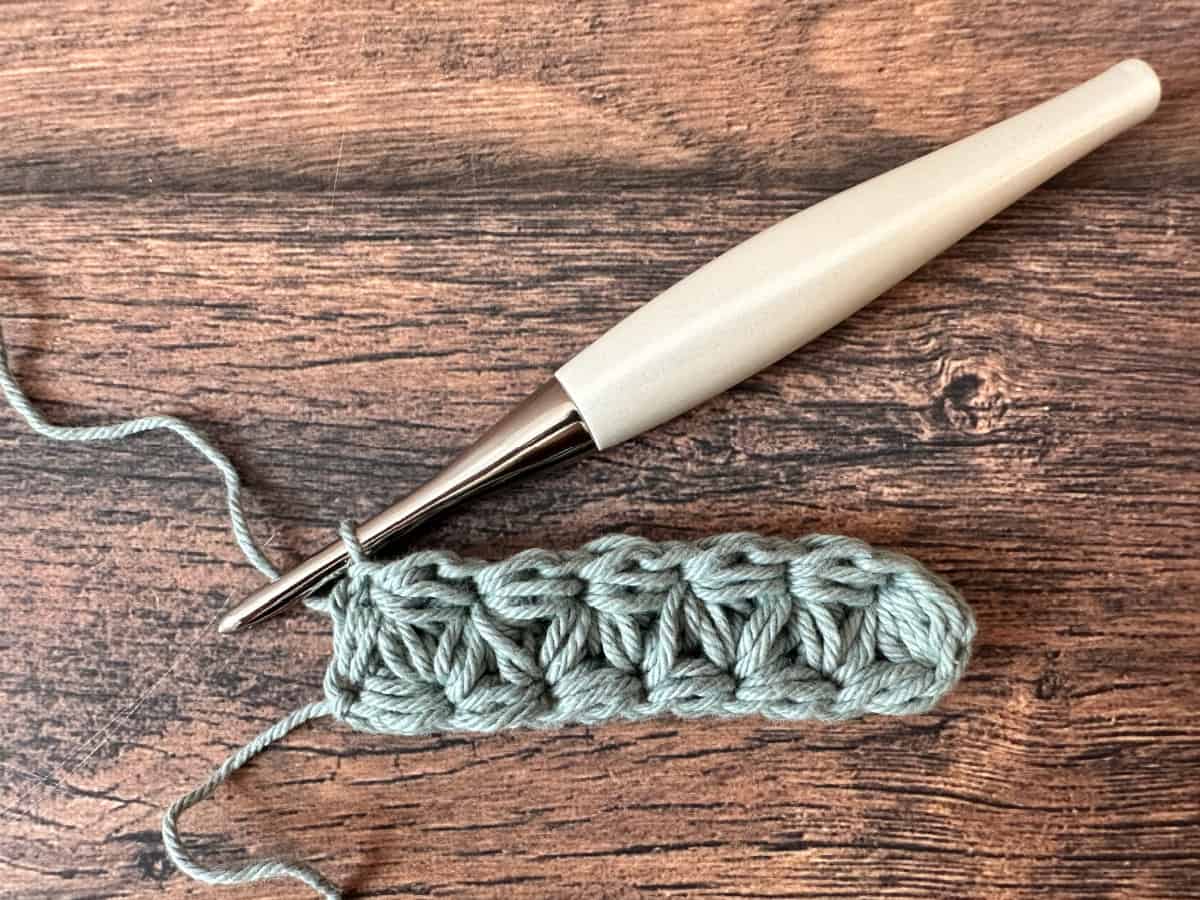
- Repeat steps 15 - 18 to create a chain of puff stitches. Here my stitch count is 6. Work to the desired width of your project.
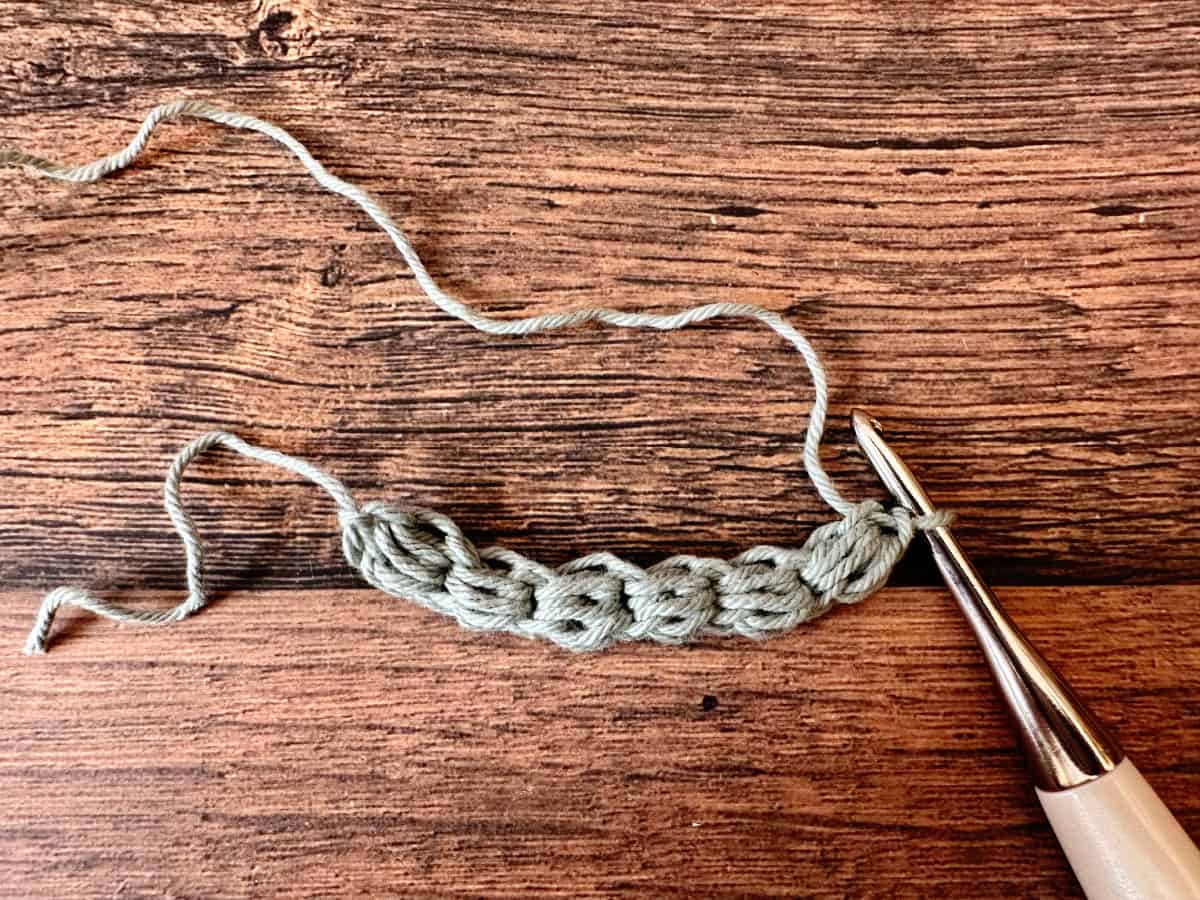 The last foundation puff stitch will be a turning stitch for our next row.
 - Row 2. Pull up a long loop, yo and insert hook in same st, yo and pull up a loop, yo and insert hook in same st, yo and pull up a loop
- Keeping these 5 loops on your hook, yo and insert hook in next st between puff sts, yo and pull up a loop 2X to add 4 more loops on your hook (9 total).

- Yo and insert hook in next st, yo and pull up a loop 2X to add 4 more loops to your hook for a total of 13 loops on your hook.

- Hold working yarn at base of last st, yo and pull through all 13 loops.

- Insert hook into spot at base you were holding,
 yo and pull up a loop.
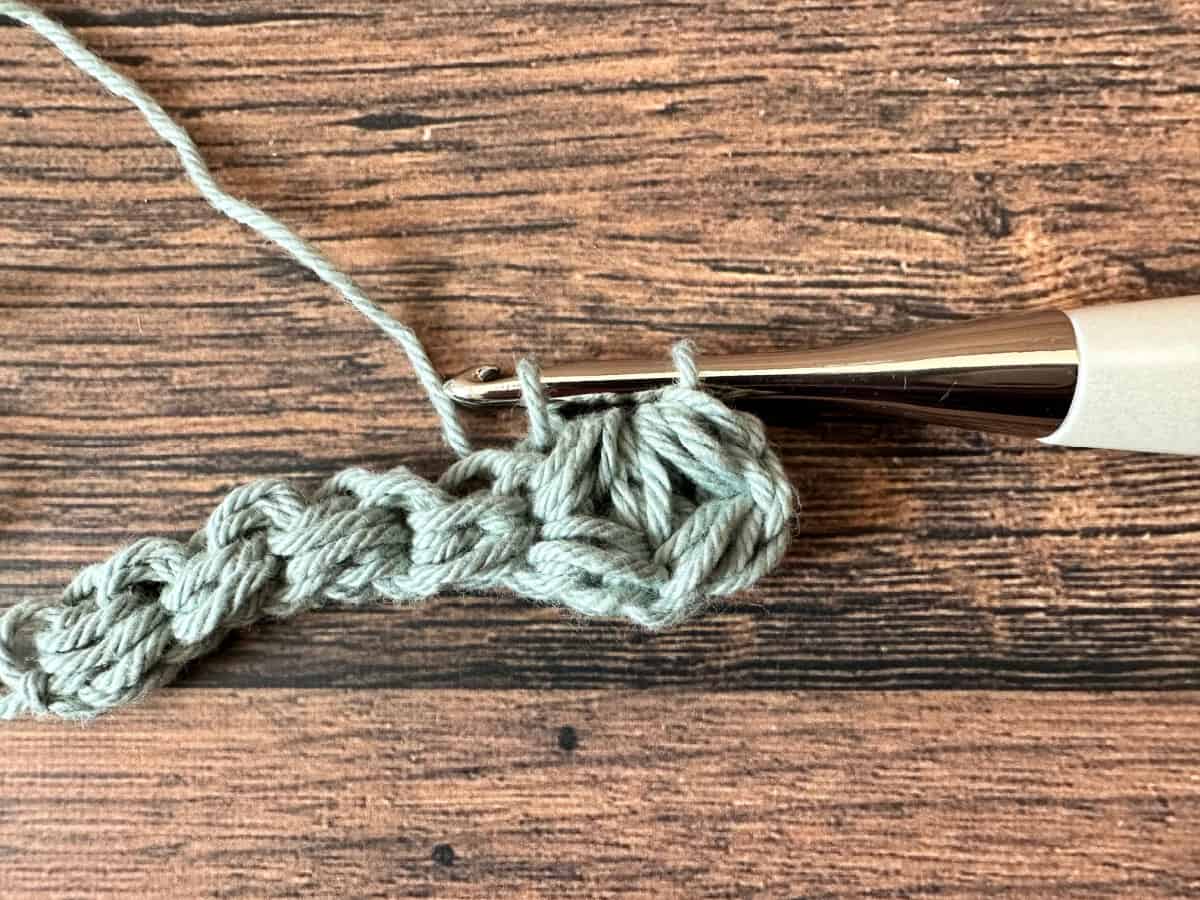
- Yo and pull through both loops on hook.
 This completes your first st.
 - Starting in the same stitch and working over the next two sts repeat steps 20 - 22.

- Rep step 23.

- Rep step 24.

- Finish it by repeating step 25.

- Starting in the same stitch follow step 20.

- Rep step 21.

- Rep step 22.

- Finish by repeating steps 23 - 25.
- Continue to repeat steps 20 - 25 across the row.
- When you get to the last stitch at the end of the row

- You will work the stitch normally

- Ending in the very first stitch you made

- After you complete the last stitch
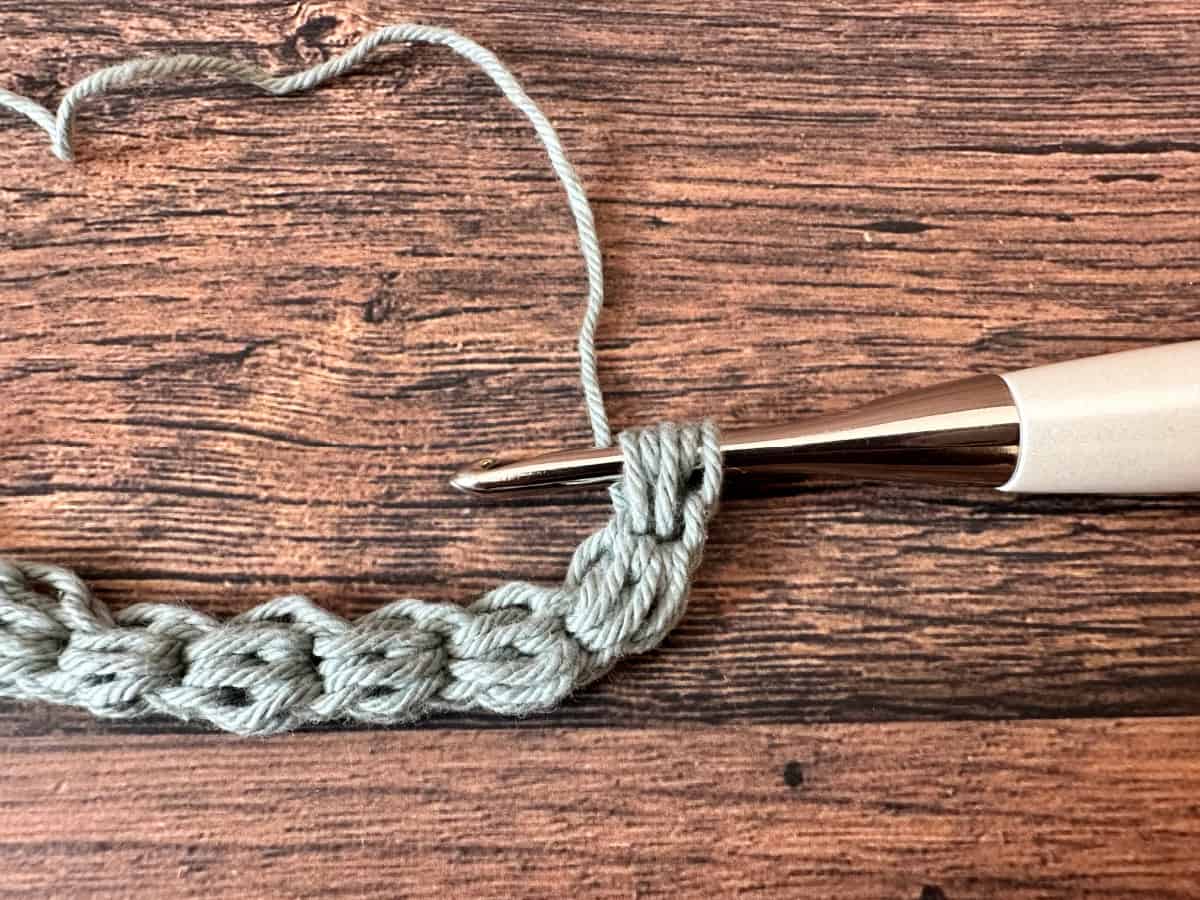
- Turn your work and pull up a long loop to start Row 3.
- You will start each row with a single finished jasmine stitch, it serves as a turning chain to get us started on a new row. Yo and insert hook into same st, yo and pull up a loop.
 3 loops on hook.
 - Yo and insert hook back into same st, yo and pull up a loop.
 5 loops on hook.
 - Continue by holding the yarn at the base, yo and pull through all 5 loops..
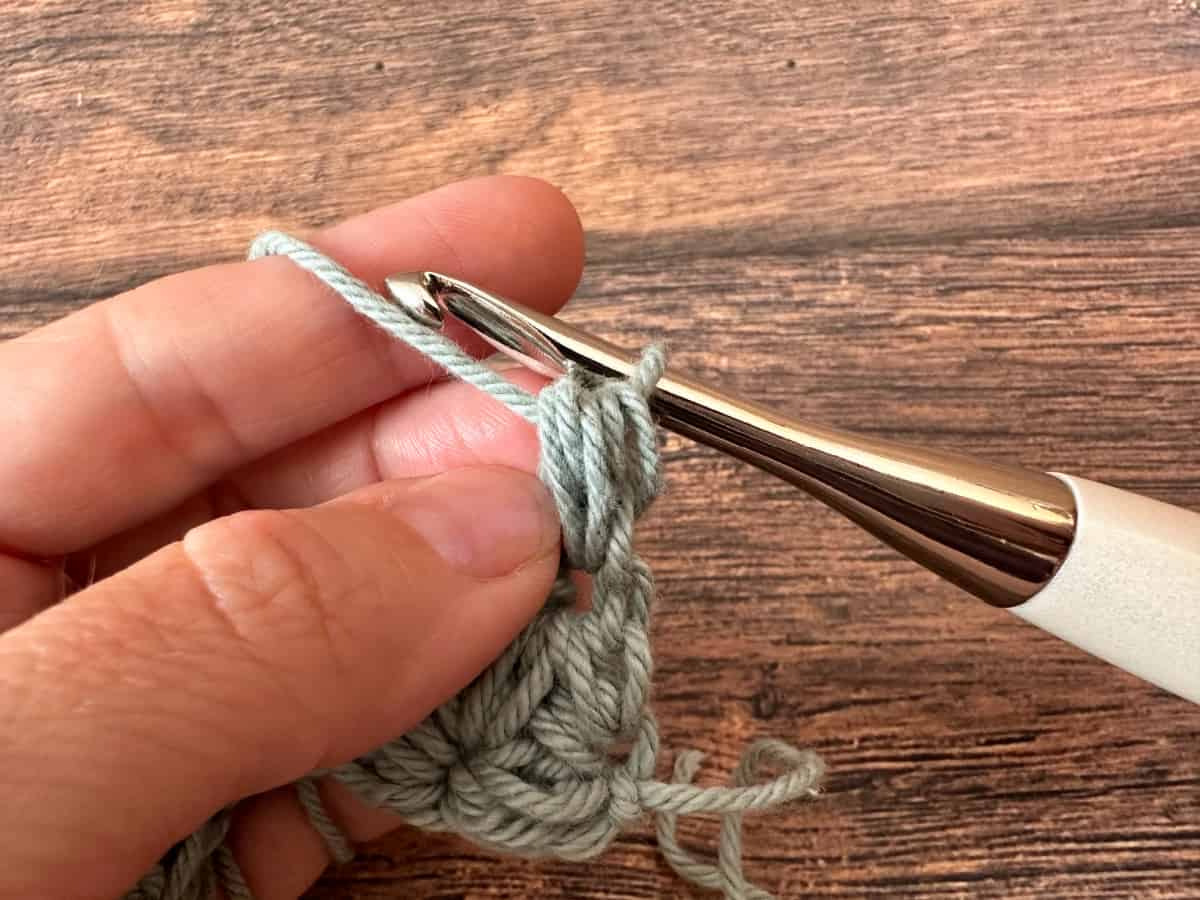
- Close the first stitch by inserting the hook in the loop you're holding, yo and pull up a loop (2 loops on hook), yo and pull through those 2 loops.
 You will start each new row this way.
 - Follow steps 20 -25.
 Start in the top of the stitch you just made. 5 loops.
 - Work into the base of the stitch next.
 9 loops on hook.
 - Work into the base of the following st.
 13 loops on hook.
 - Finish the stitch.

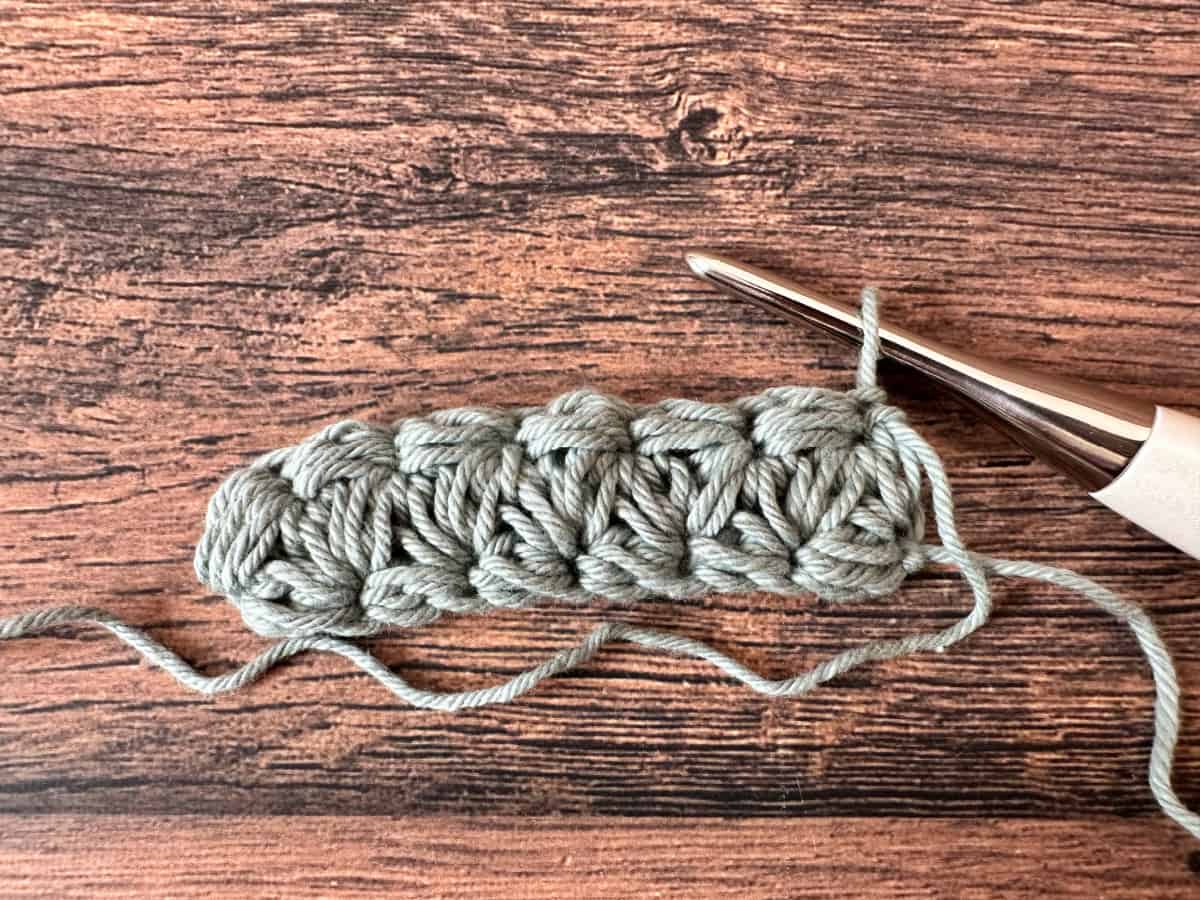
- Keep working them across the row.

- The ending jasmine stitch is worked the same.

- Start where you are,

- Continue to next st,

- Finish in last puff st at end of your row.

- Close the last jasmine st the same way.
- Continue to repeat row 3 for the next row and for the length of your project.
- To finish off, after the last cluster you close it as you normally would, then pull up a long loop and cut a tail of at least 6". Pull it through the last stitch.
- Weave in end your ends.
Recommended Products
As an Amazon Associate and member of other affiliate programs, I earn from qualifying purchases.

Thank you for extra long tutorial. This will be wonderful when I do it maybe 50 times, and it becomes more familar to me. It is so gorgeous. 1st project will become a hair band so I show off those beautiful Jasmine flowers. Thank you!
You’re so welcome. It’s a beautiful stitch and I think a hair band is a perfect project for it!
Do you know what multiple of foundation puff stitches are needed to have the pattern work out right when scaled up or down? I’d love to make a blanket, but I’m not sure how to know the number of foundation stitches to start with besides trial and error. Thanks!!
Hi Rachael, this is a great question. For the jasmine stitch there is not a stitch multiple since you’re making the stitches and the first row at the same time. This means you just keep going on your first row for as wide as you need, but turning and working row 2. I hope this helps! I think this would be a beautiful blanket too.