Uneven Berry Stitch Crochet Photo Tutorial
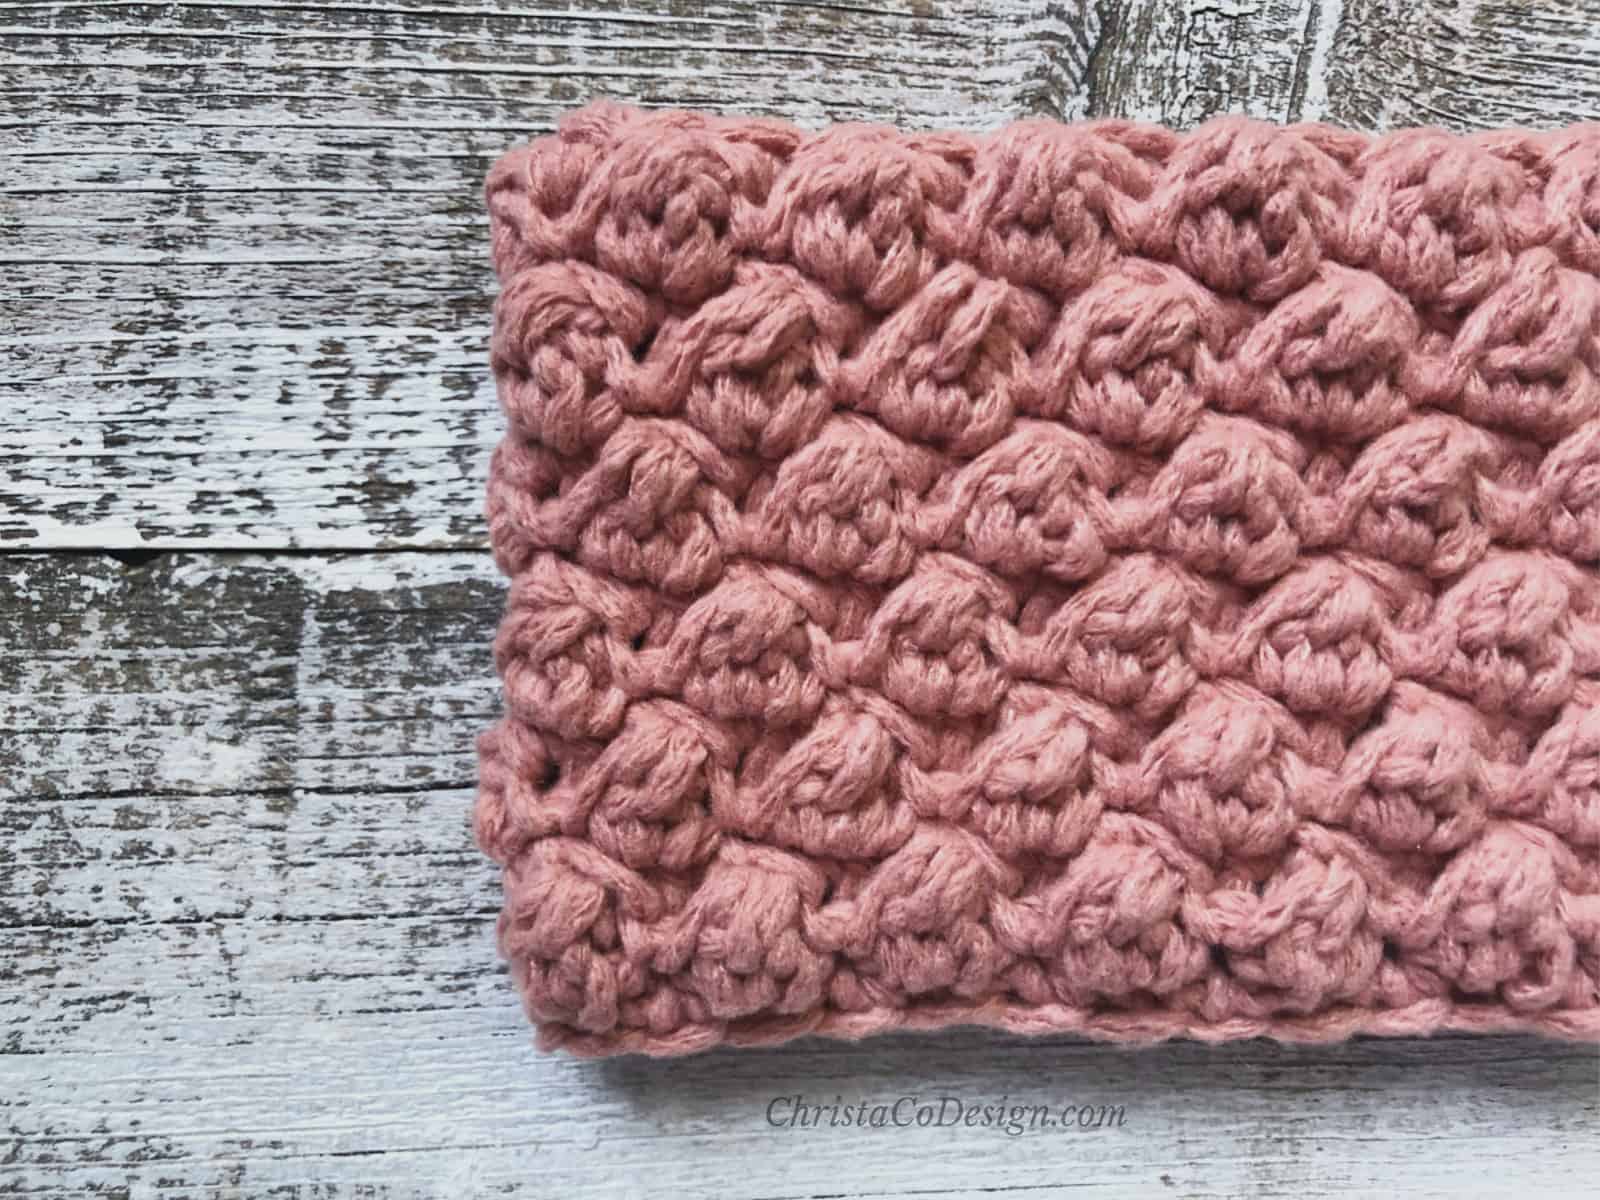
The Uneven Berry Stitch creates a highly textured crochet pattern that works for many projects. Crochet cup cozies, blankets, scarves, I think this crochet stitch can make so many handmade items look fabulous.

This post contains affiliate links, I may earn a fee. Read more disclosure policy.
Join the ChristaCoDesign Newsletter
Never miss a pattern!
This stitch tutorial includes step by step how to crochet the uneven berry stitch. As this stitch pattern is staggered, it is worked over a series of rows. The photo tutorial demonstrates each row, with a focus on beginning and ending those rows.
I do love a bobble stitch, and the uneven berry stitch reminds me a bit of a bobble or popcorn stitch. It’s made in a similar way and the end result is somewhere in the middle for size. Of course, much of that depends on the yarn and project.
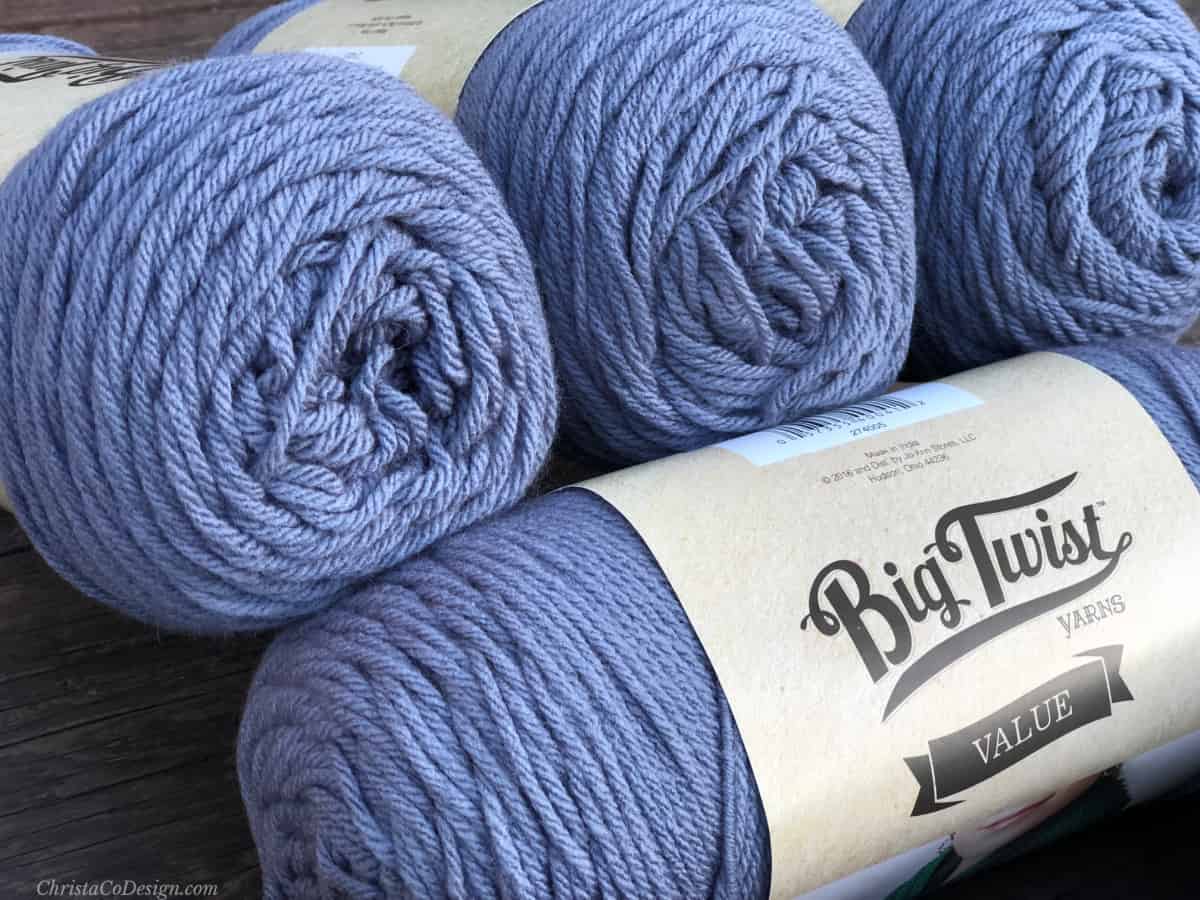
The Yarn
For the uneven berry stitch tutorial here I’ve used medium worsted weight yarn and 5mm hook. This stitch is suitable for almost any weight yarn and compatible hook. I created a Berry Christmas Mug Cozy in the uneven berry stitch with cotton yarn and I love the stitch definition.

This mug cozy is crocheted in Premier Yarn’s Rodeo, which is a worsted weight cotton. I bet the uneven berry stitch would look amazing in chunky yarn too. What other projects would you crochet with this stitch?
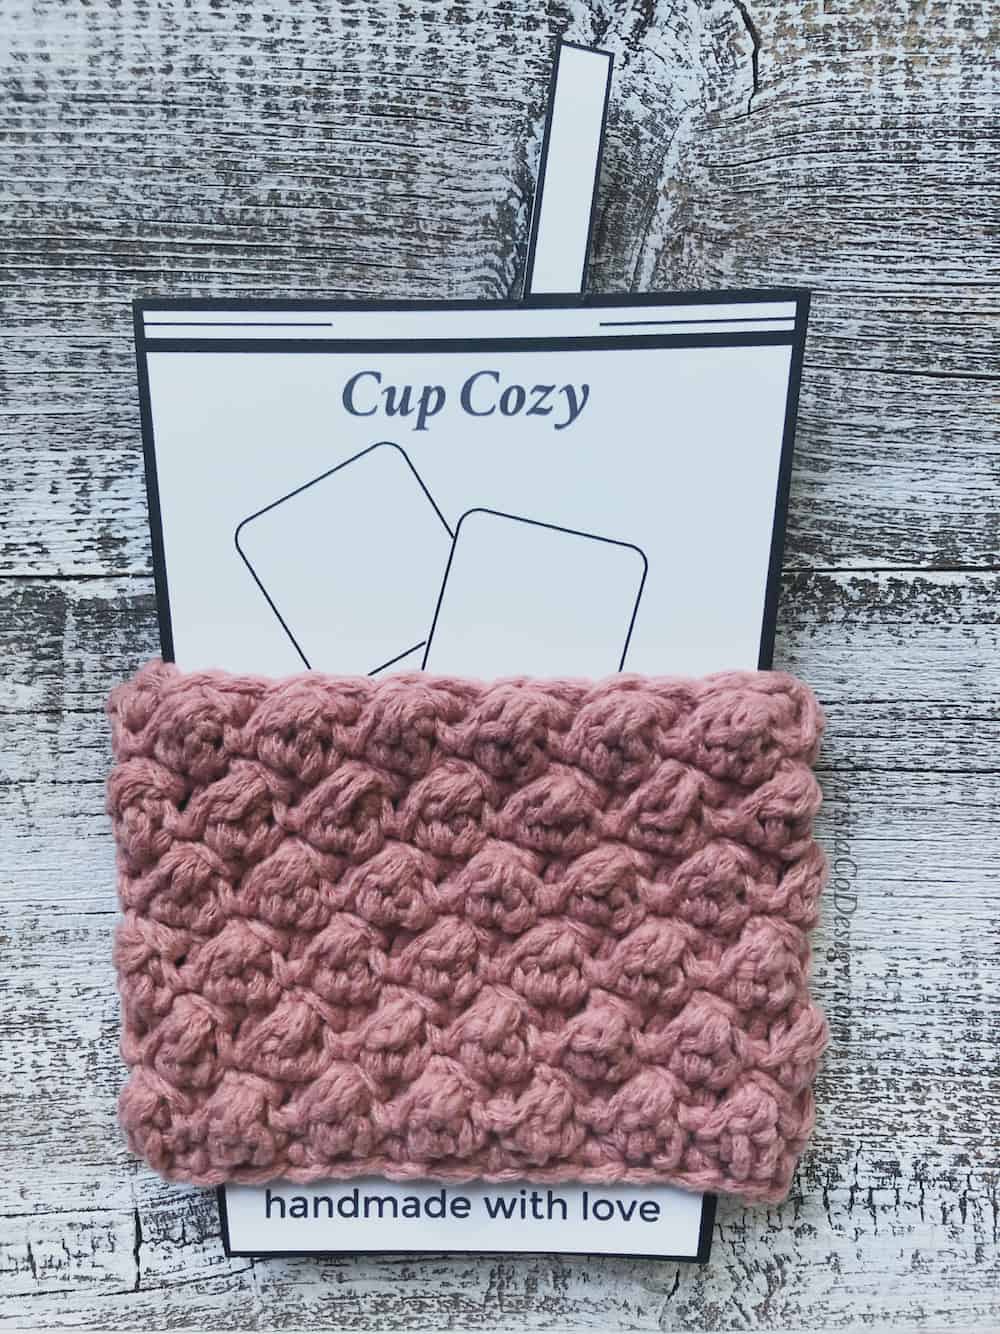
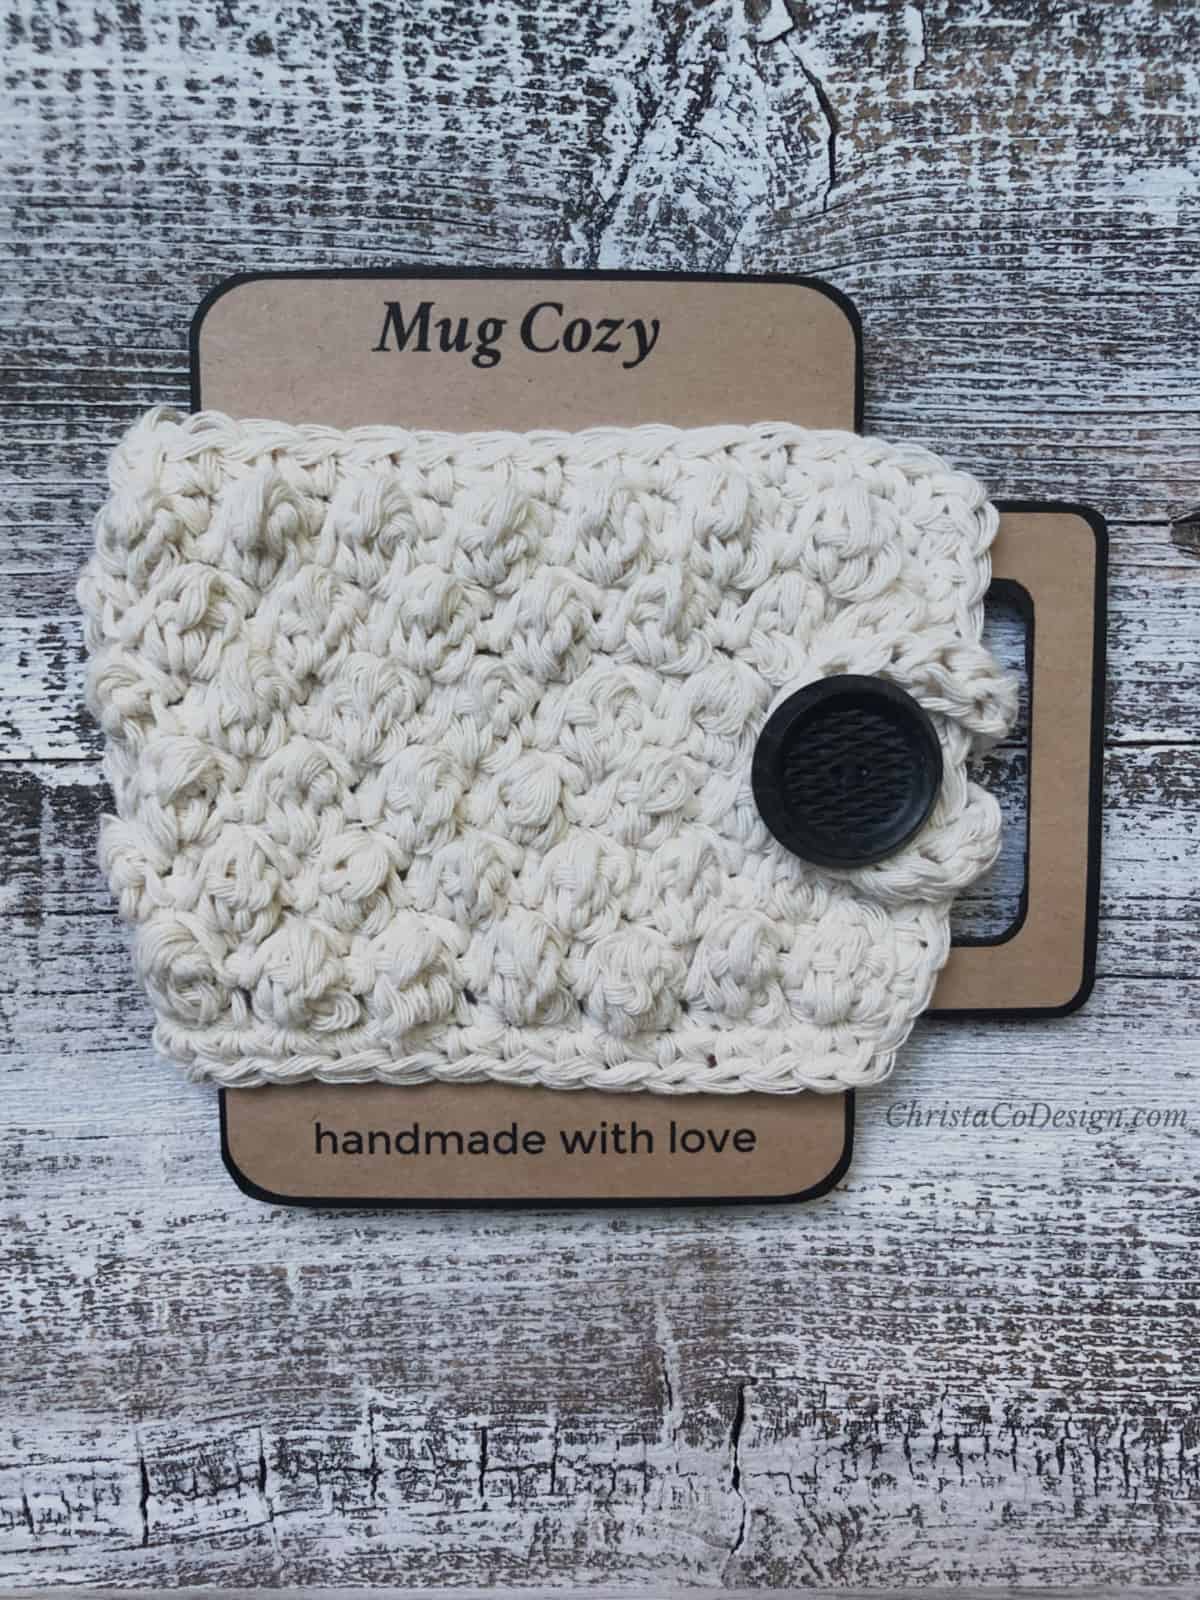
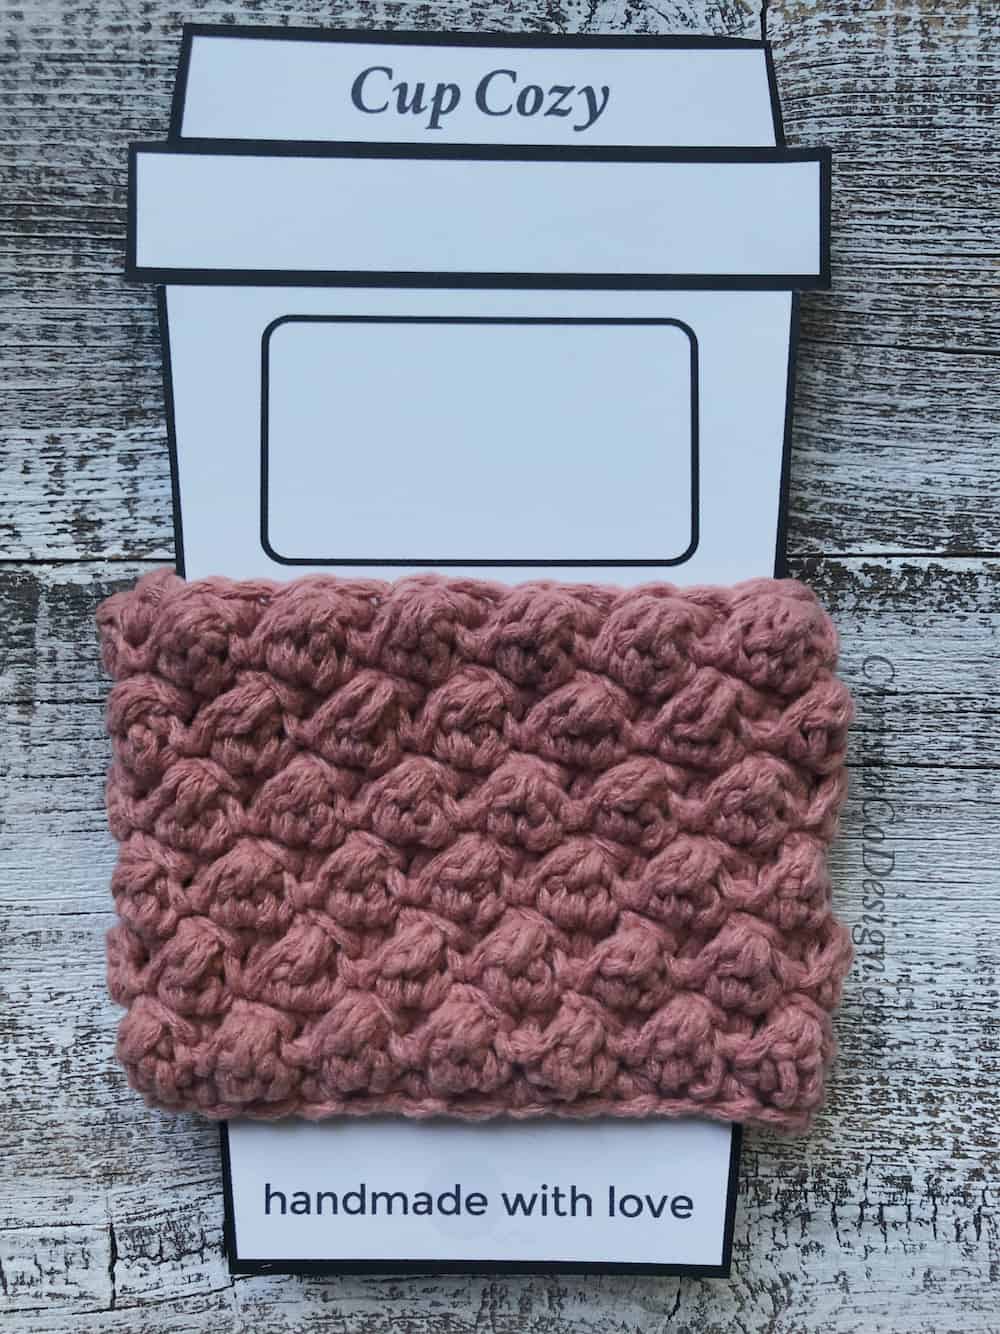
Once I crocheted the pink Berry Christmas Cup Cozy, I knew I needed some Printables to make these little projects even more giftable. I created printables for an iced coffee cup cozy, a to go coffee cozy and mug cozy that can be found in my Etsy shop.
For even more bobblicious greatness, you can check out Sarah’s post about the differences between Puff, Bobble & Popcorn stitches. She includes a little tutorial swatch for each which makes it easy to compare them.
Materials
- #4 med worsted weight yarn, pictured is Red Heart’s Amore in Chai
- 5mm (H) hook
- Yarn needle
- Measuring tape
- Scissors
Notes
- Ch 1 counts as a stitch and you will work into it on the next row.
- The ch 1 used to close the berry st does not count as a st. So you will need to skip it so as not to increase your st counts.
- To simplify keeping track of stitches, I’ve included the ch 1 used to close the berry st in the stitch count, but remember not to work into them.
Gauge
3.5 sc x 4 rows sc = 1”
In the pattern Rows 1-5 = 1.25”
Construction
The Uneven Berry Stitch is worked over a four row repeat.
Fit/Adjustment
The stitch multiple is 2. So you can chain any even number to get started on this stitch. I would recommend stopping after a Row 5 repeat when determining length.
Stitches/Abbreviations
ch-chain
sl st-slip stitch
sk-skip
RS-right side
WS-wrong side
Berry Stitch
I’ve started with how to crochet a single berry stitch here to give you a brief overview of what it looks like. Next we’ll start from the beginning and work through all four rows of this stitch repeat. Since it’s an alternating stitch the fabric created is highly textured and beautiful.
- First yo & insert hook into st to be worked, yo & pull up a loop (3 loops on your hook),
- Next yo & pull through one loop on your hook (3 loops on your hook,
- Then yo & insert your hook into the same st, yo & pull up a loop, (5 loops on your hook)
- And yo & pull through one loop,
- Finally yo & pull through all 5 loops on your hook, ch 1 to close (not pictured here).
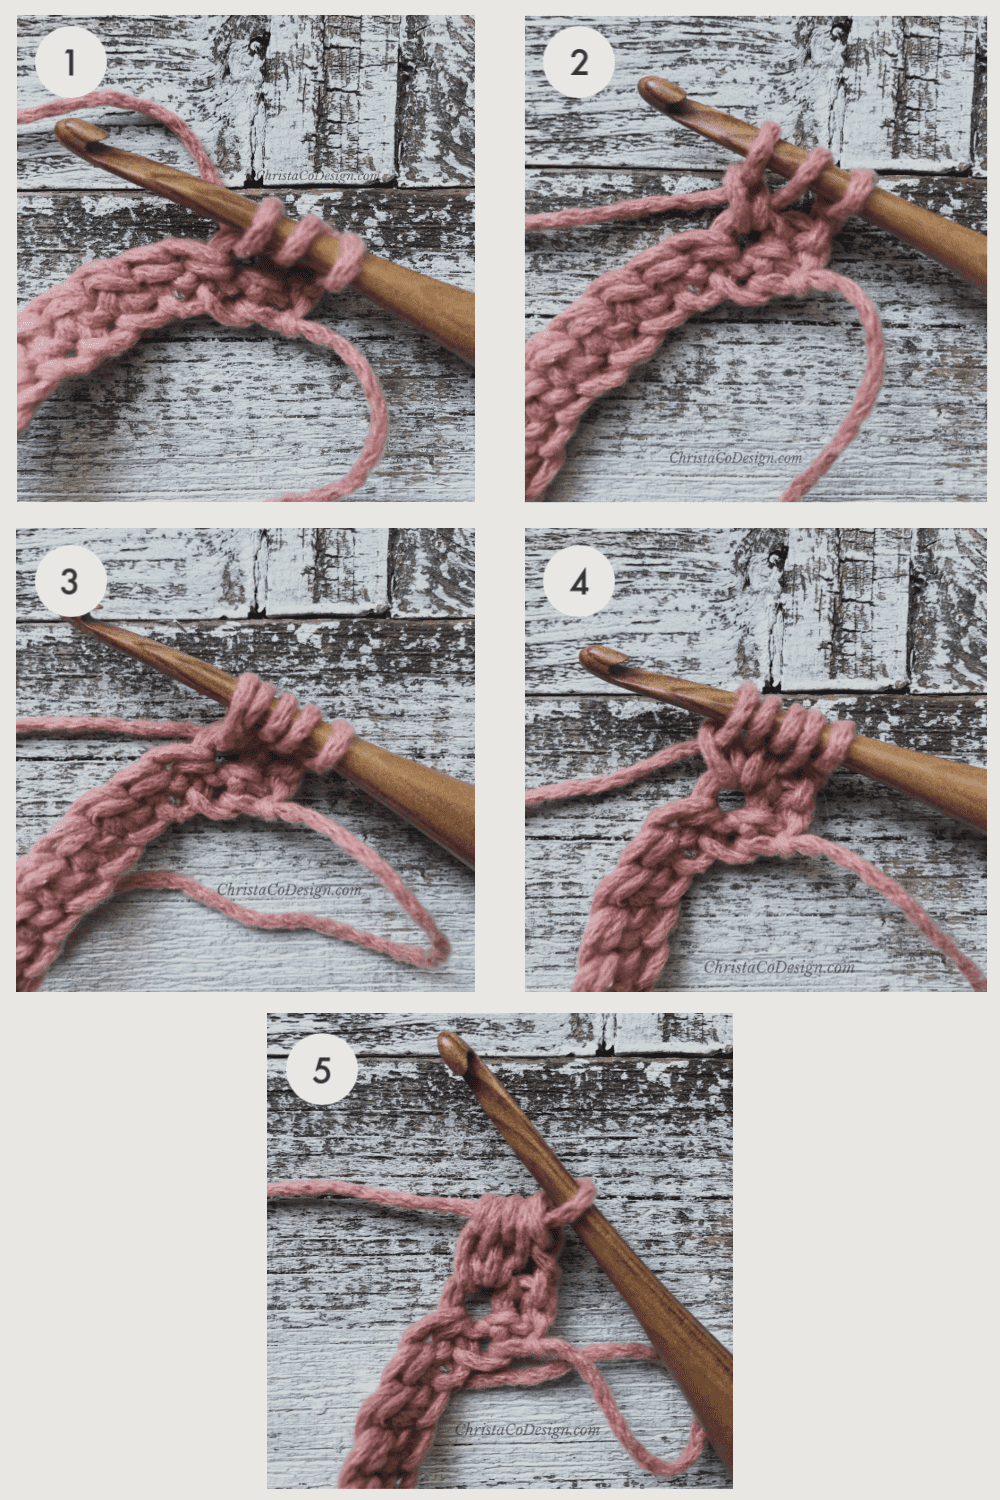
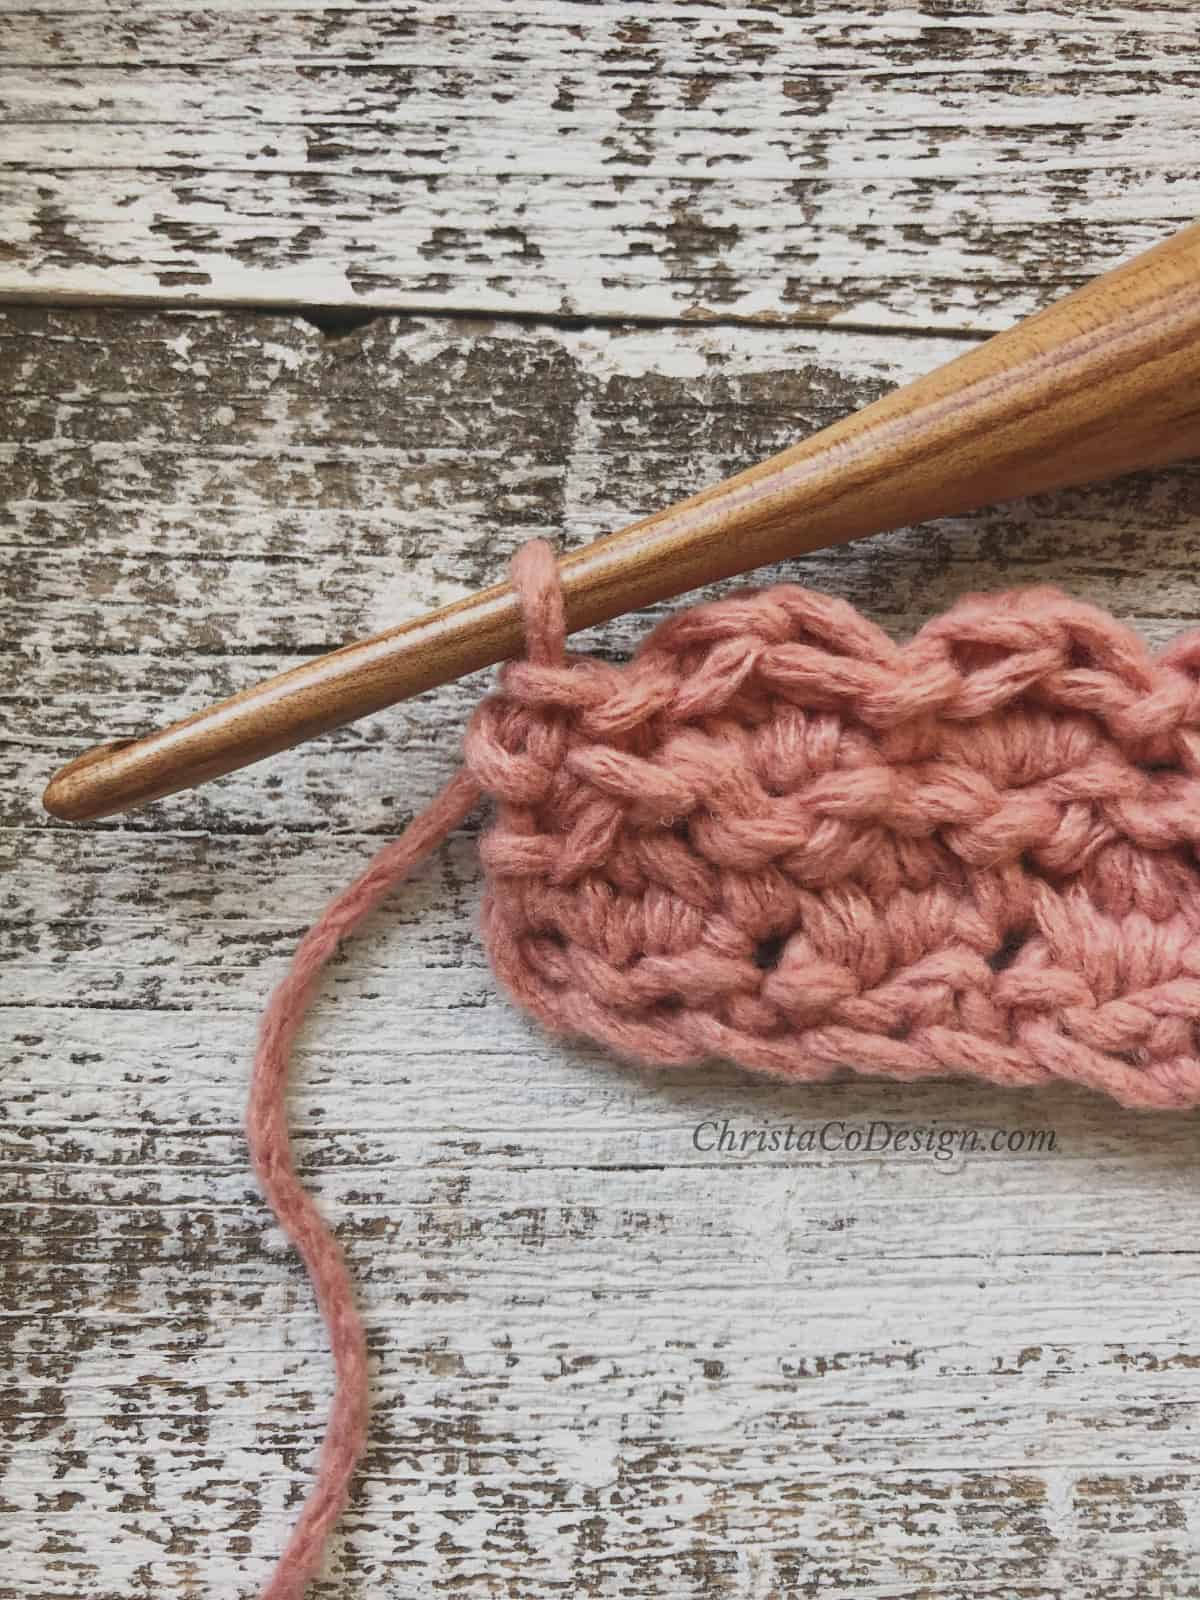
When you work your berry stitches, you will be on the wrong side of your fabric. So we’re looking at the back of the berry stitch here.
How to work the Uneven Berry Stitch
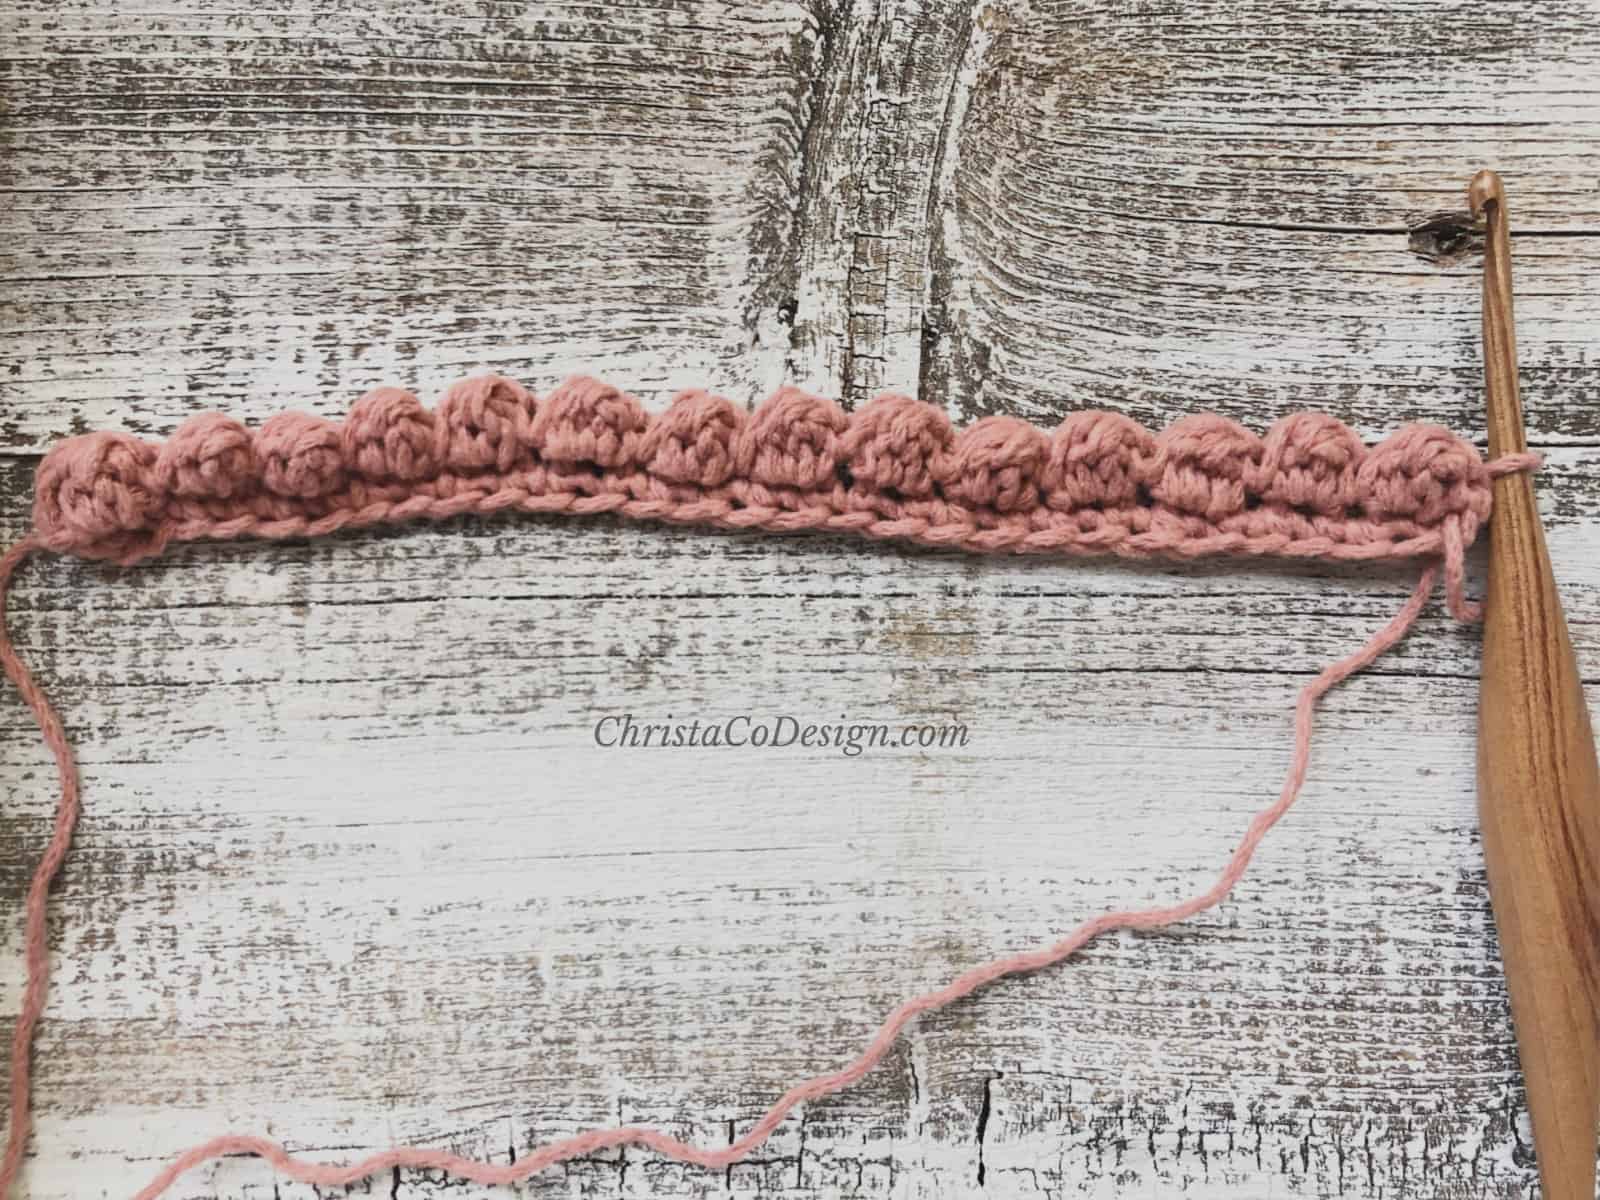
Now we’ll work up a swatch of uneven berry stitches. Remember you can start with any even number.
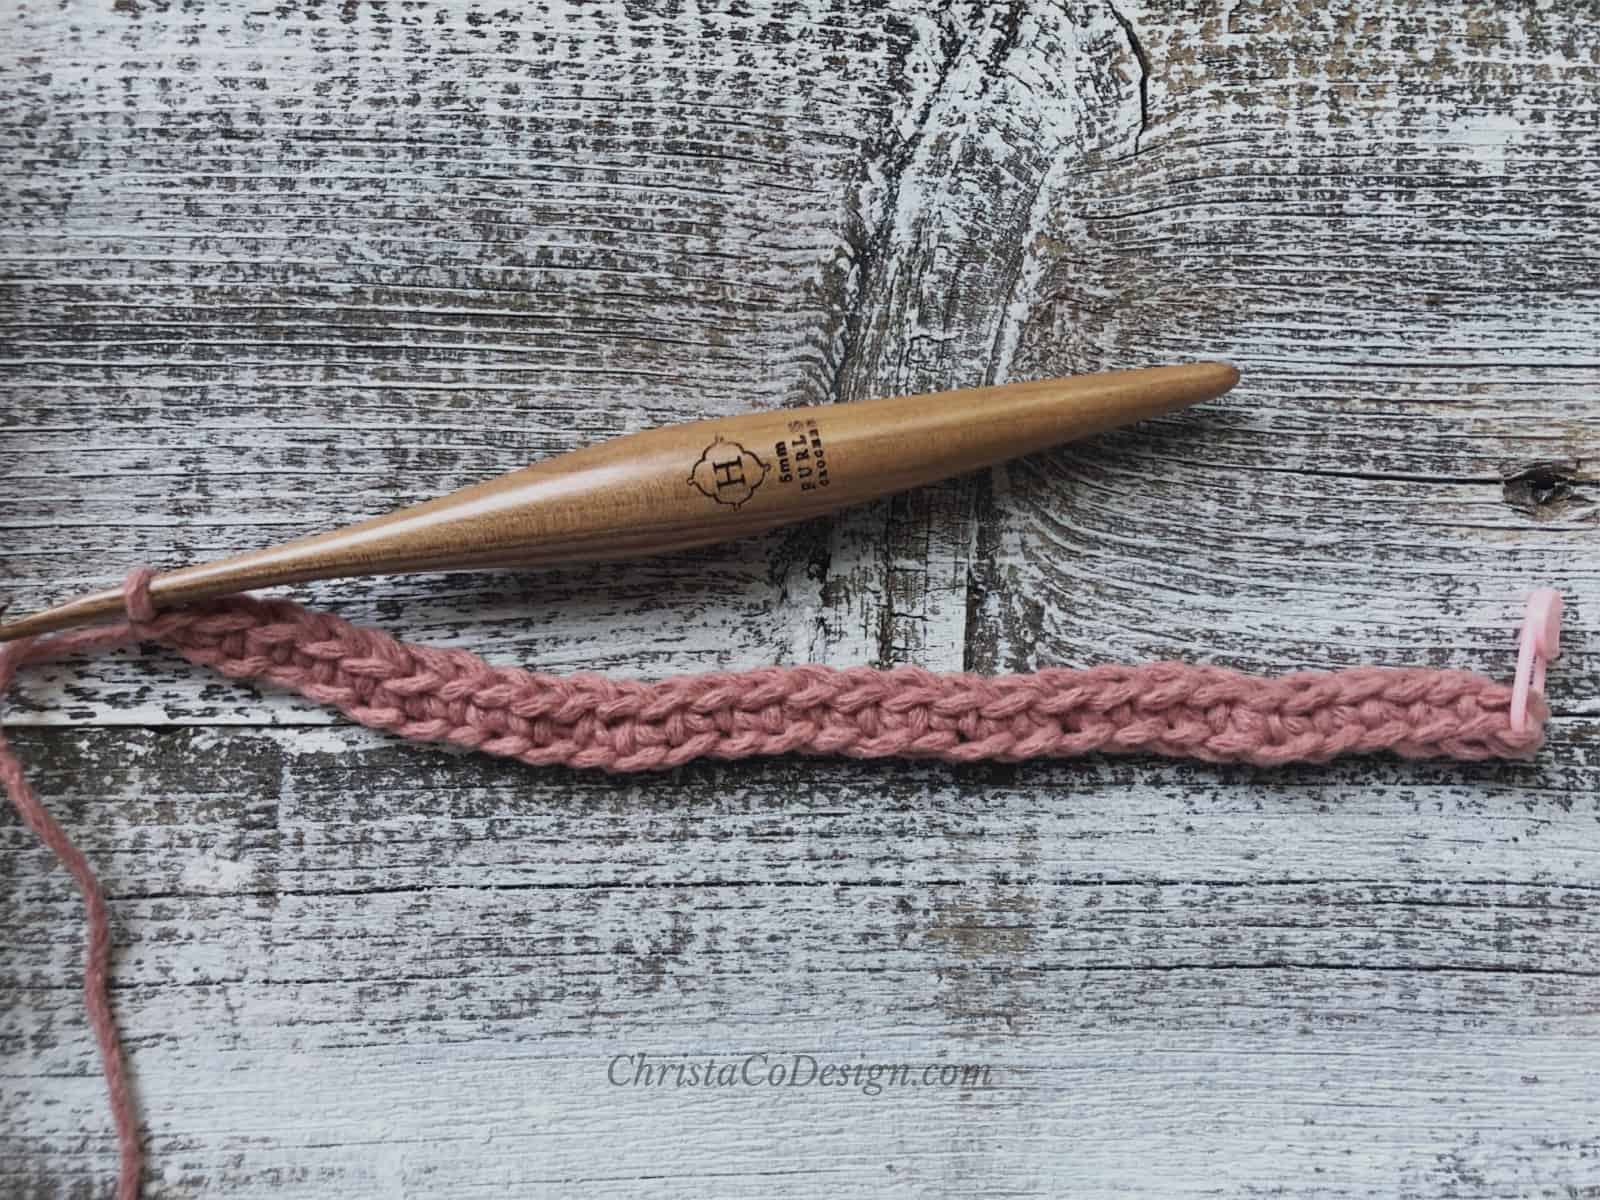
Ch 30,
Row 1. Sc in 3rd ch from hook (you will crochet into sk chs as turning ch on next row-marked by pink st marker here) and each ch across. (29 sts)


Row 2. Ch 1 (counts), sk first st, *{Berry st in next sc, sl st in next sc} rep from * across,
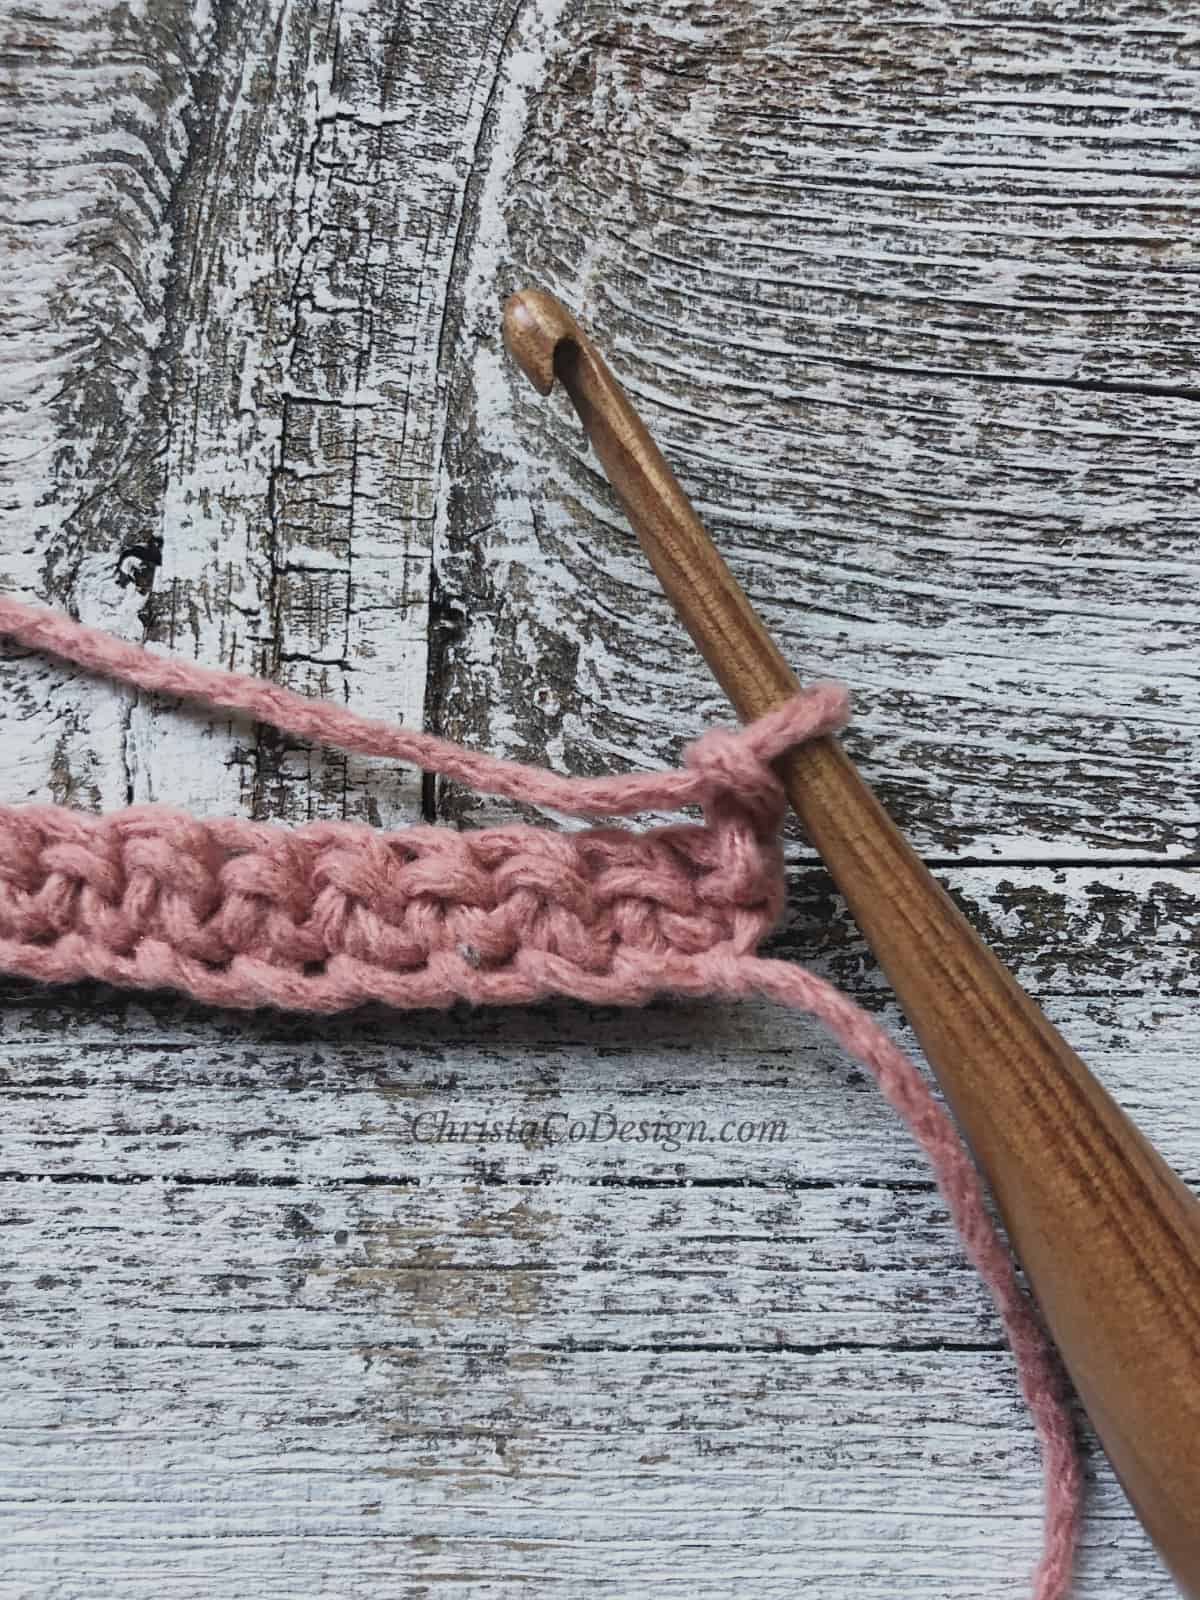

the last sl st will be in the turning ch (skipped sts from first row-marked by pink st marker here), turn. (43 sts, including turning ch and all ch 1s)
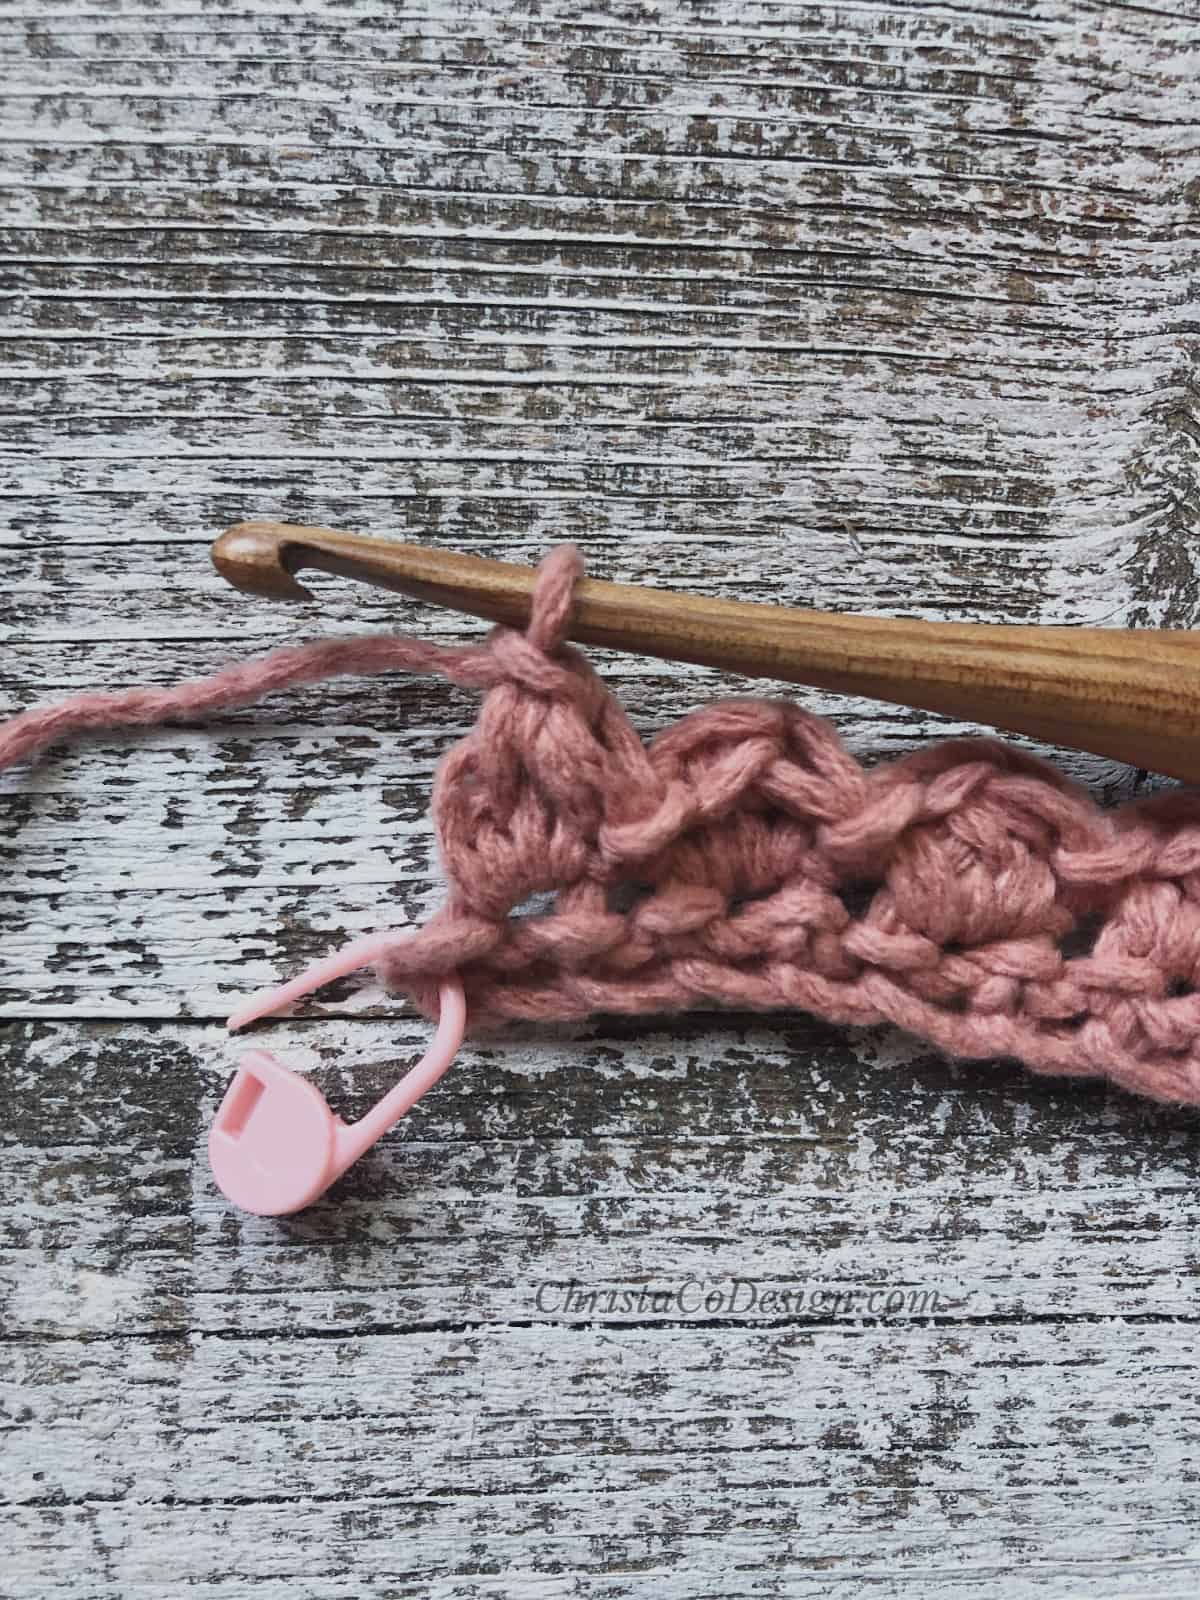

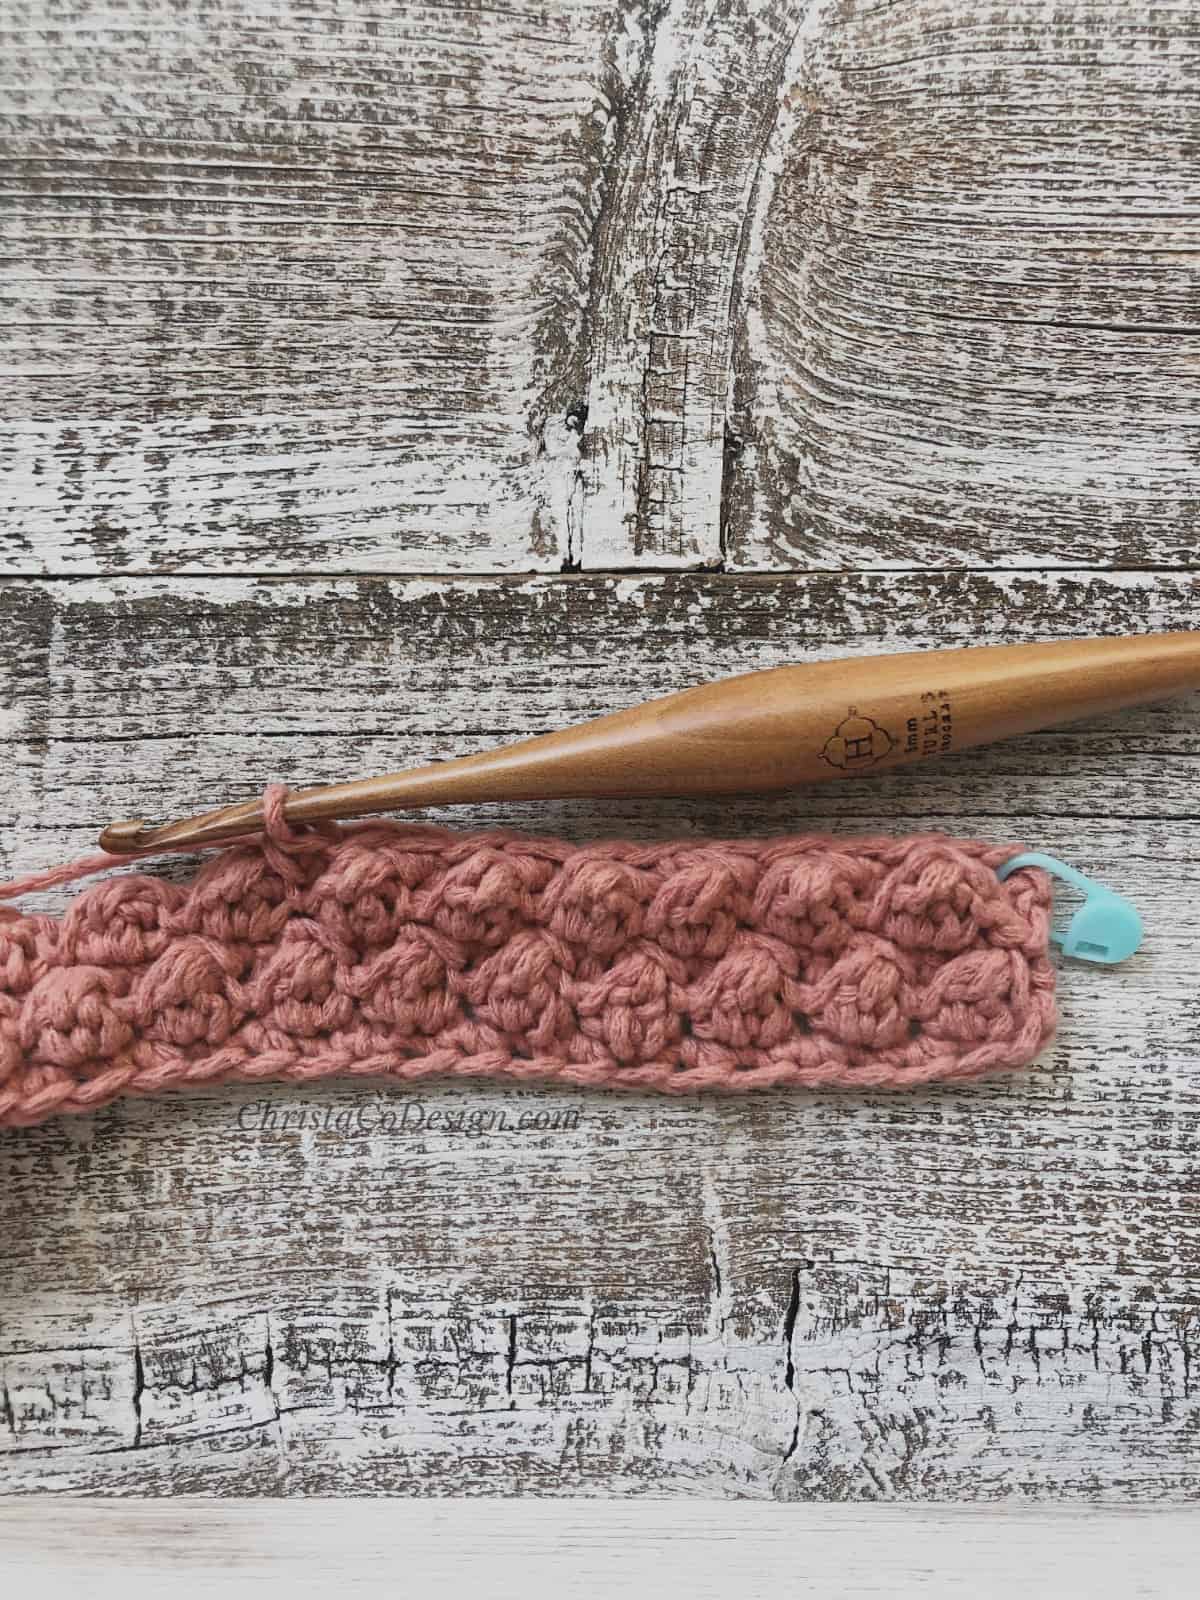
Once you turn your work, you’ll see how your berry stitches pop out.
Row 3. Ch 1 (counts), keep using a st marker here to help you remember *
{sk the ch 1 used to close the berry st and sl st in top of berry st,


sc in next sl st (which is between berry sts)} rep from * to end,
last sc will be in the turning ch, turn. (29 sts)


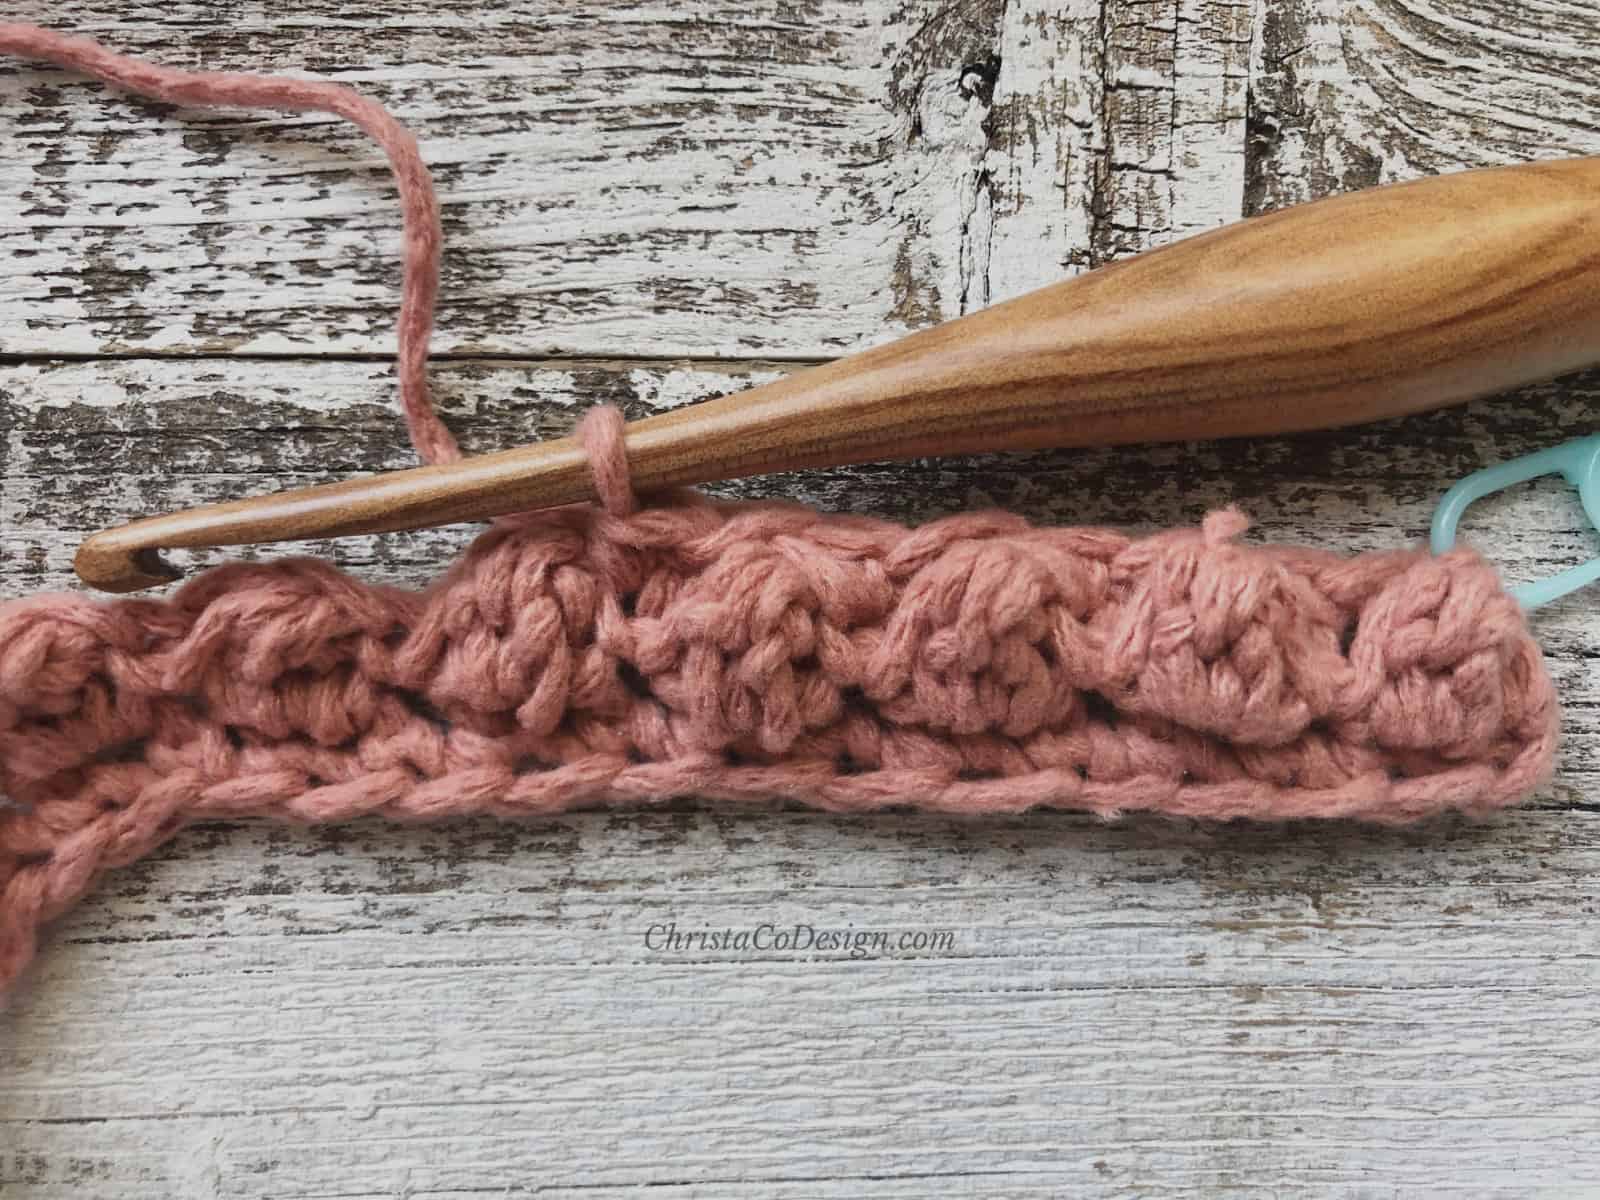
Row 4. Ch 1 (counts), sk first sc, *{sl st in next sl st, berry st in next sc}


rep from * across, to last two sts, sl st in next st and sc in last st, turn. (42 sts including all chs)

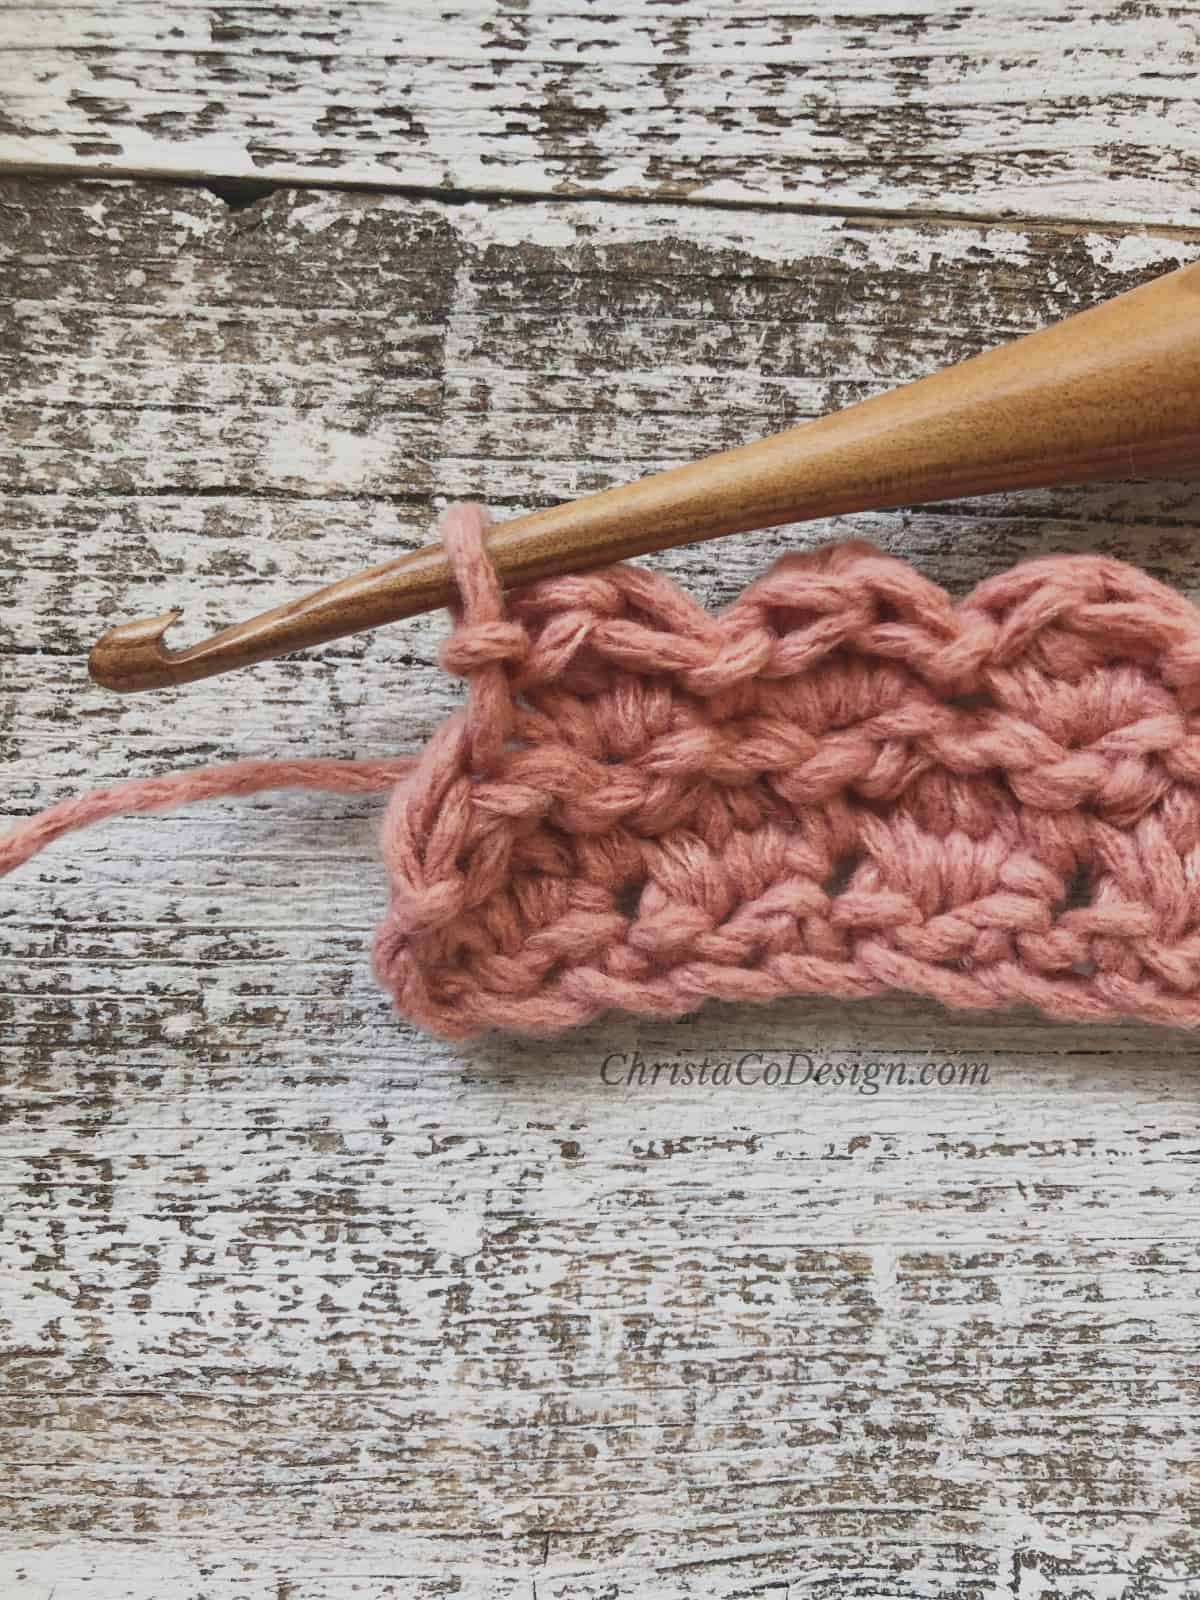
Row 5. Ch 1 (counts), sk first sc *{sc in next sl st, sk the ch 1 used to close the berry st, sl st in next Berry st} rep from * to last two sts, sc in next sl st and sl st in turning ch, turn. (29 sts)
Rep rows 2-5 again, or to desired height.