
The Crochet Christmas Lights Blanket Free Pattern
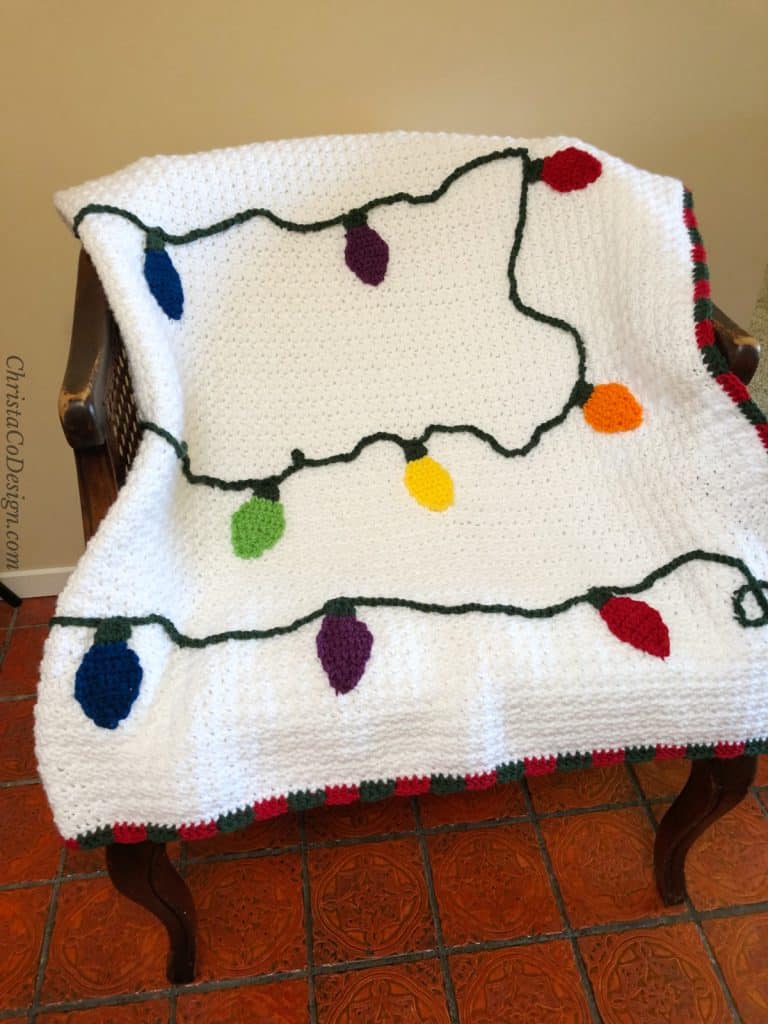
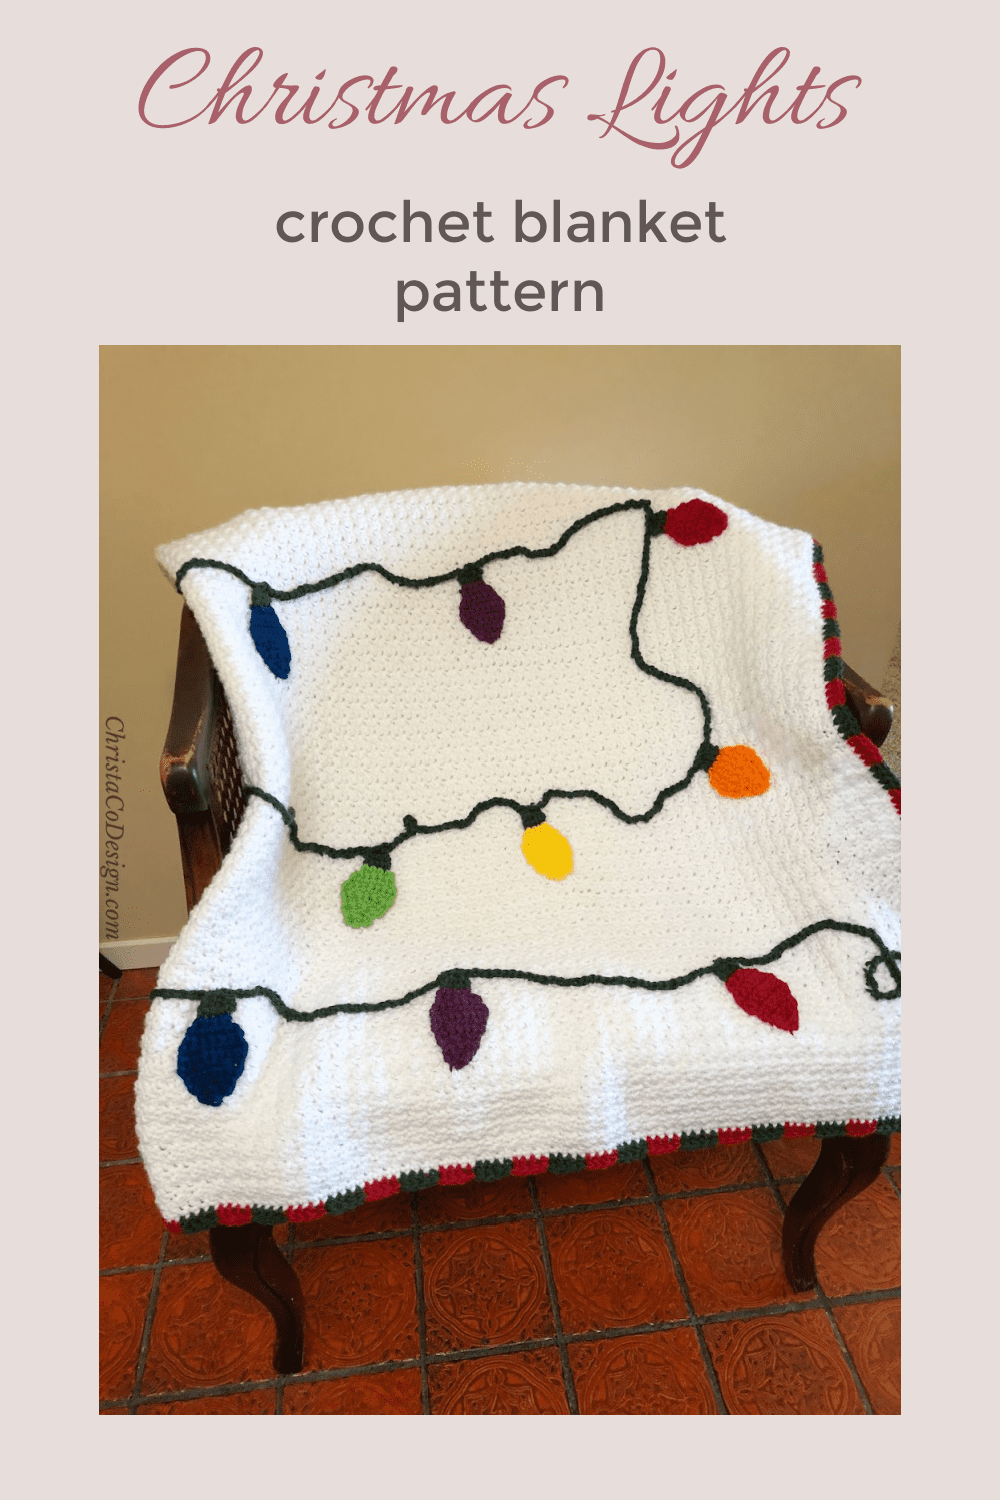
The Christmas Lights Blanket pattern is a festive way to add to your Christmas decor. The simple stitches create a beautiful texture. The crochet Christmas lights add a whimsical touch to this Christmas afghan.

This post contains affiliate links, I may earn a fee. Read more disclosure policy.
Join the ChristaCoDesign Newsletter
Never miss a pattern!
Keep the whole family comfy this holiday season with a favorite – Christmas lights! Bring the beauty and light of Christmastime in to your home with a custom cozy crochet Christmas throw.
This free crochet pattern includes 10 blanket sizes. It makes a great gift for Christmas morning.

You can purchase the ad-free, well formatted PDF Pattern in one of my shops. Scroll down for the free pattern!
Since the crochet lights are sewn on after the blanket is complete, it’s a great way to customize it. If you like unique designs then you can vary the colors and arrangement.
For those who prefer it, I include the colors I use here and the placement, as well as detailed instructions for crocheting and assembling your blanket.
The lights are the perfect way to use up scrap yarn, especially in all the festive colors.

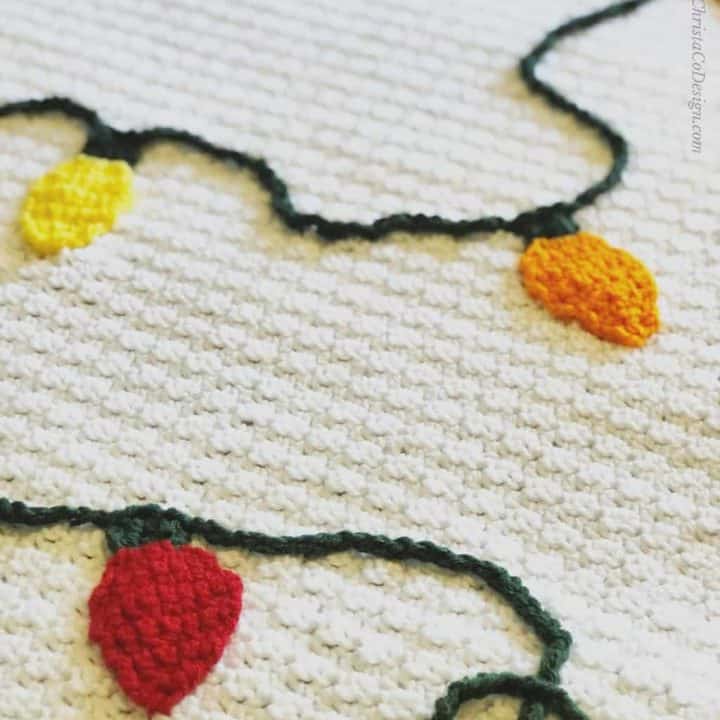
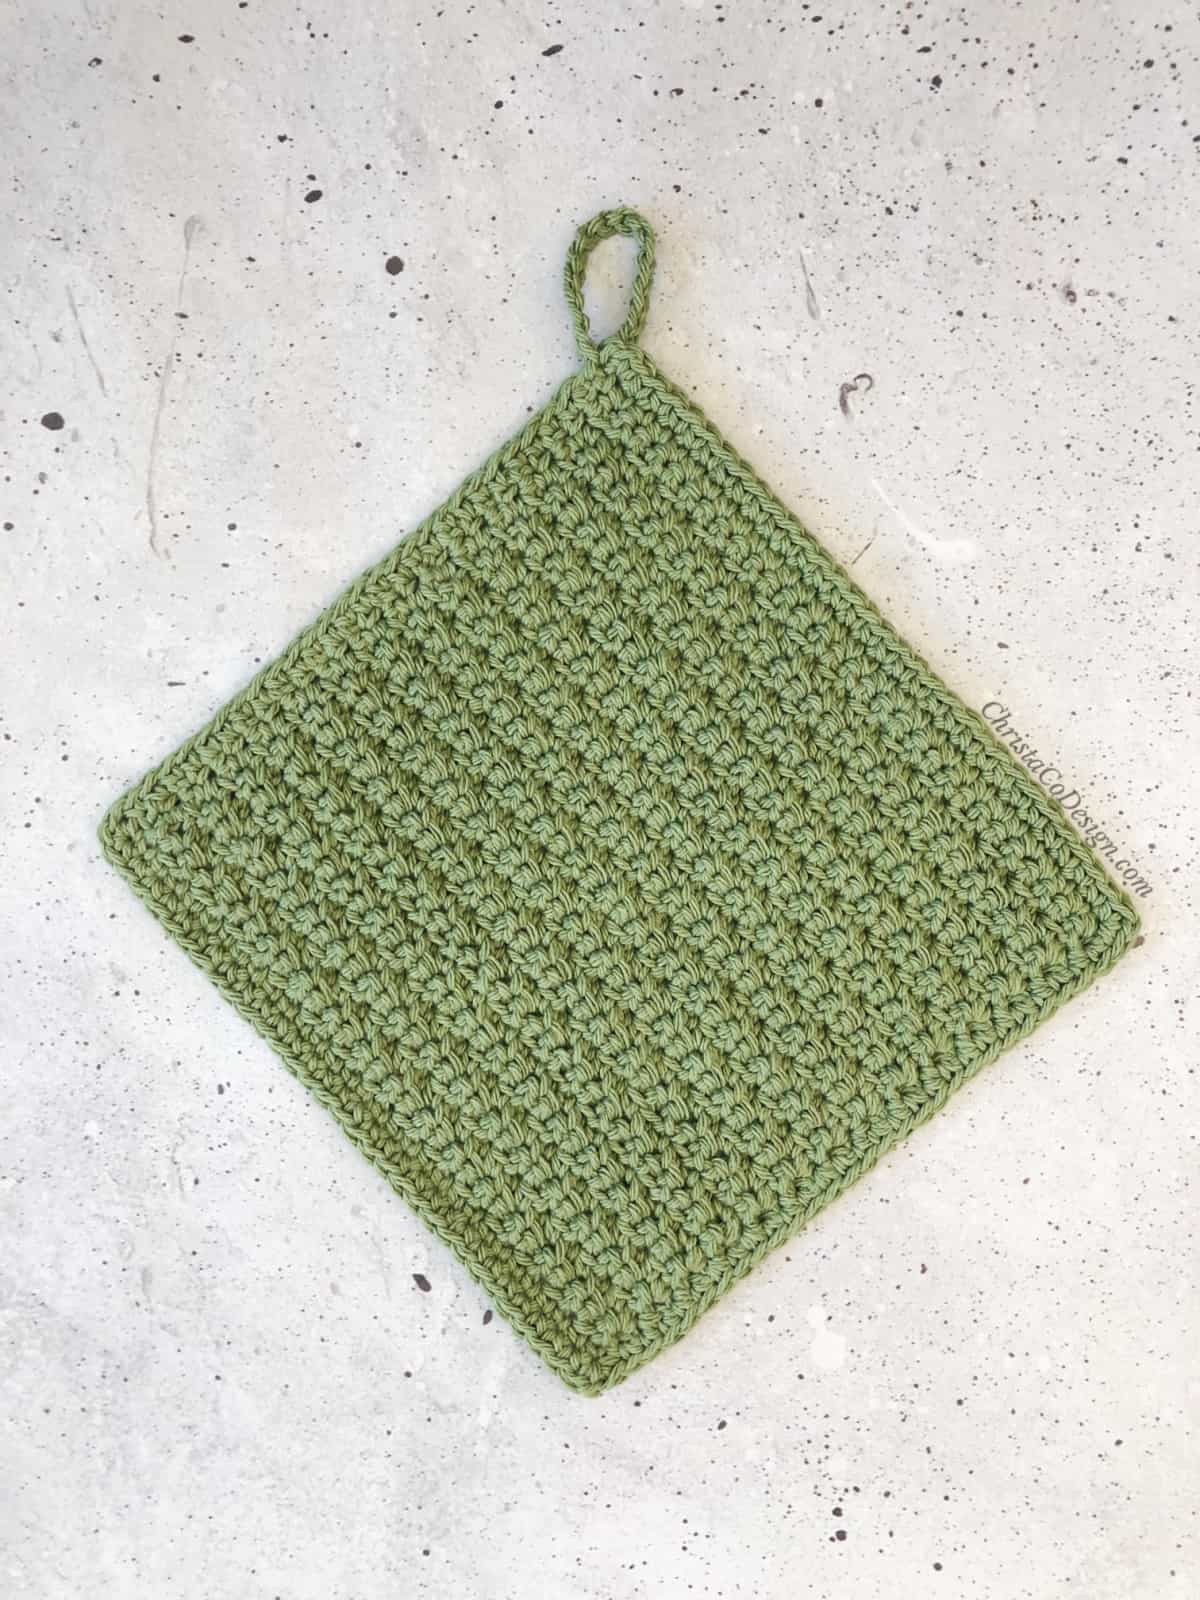
The lemon peel stitch gives the white yarn a snowy look, and a nice texture. I love the visual interest of this stitch, especially in a single color.
This stitch is perfect for a more solid blanket too, without too many “holes.” It’s an easy pattern for an level crocheter.
The blanket and Christmas lights are worked separately, then the lights are sewn on to the blanket.
This pattern is for the lights, blanket and how to add the Christmas light appliqués. You can find the free pattern for only the Christmas Light Appliqués here.
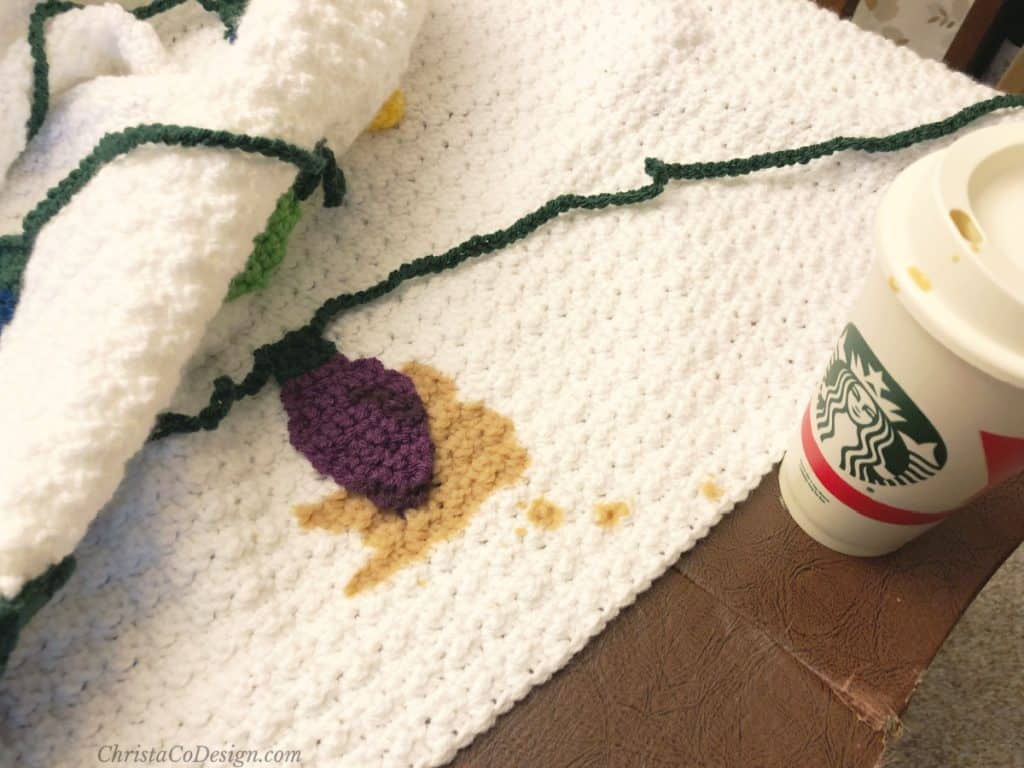
I did have one little snafu, so you may decide to omit the coffee when sewing your lights down! Notice how I even had a lid on my cup, a lot of good it did me!
As you can see, I was in the middle of adding the lights so it wasn’t really washable yet. I rinsed the spot by hand in cold water and sprayed some Spray ‘n Wash on it until I could wash it. And thankfully, it all came out. Phew!

Before adding a border to your blanket, it’s always a good idea to work single crochet stitches around the entire blanket in the same color. This helps your border pop on your beautiful blanket.
More Free Crochet Blanket Patterns
If you have some jumbo yarn, or just love working with #7 yarn check out the Chunky Chevron Blanket crochet pattern.
Here I’ve put together a list of 10 Easy to Crochet blankets. Be sure to get some easy crochet blanket border ideas!
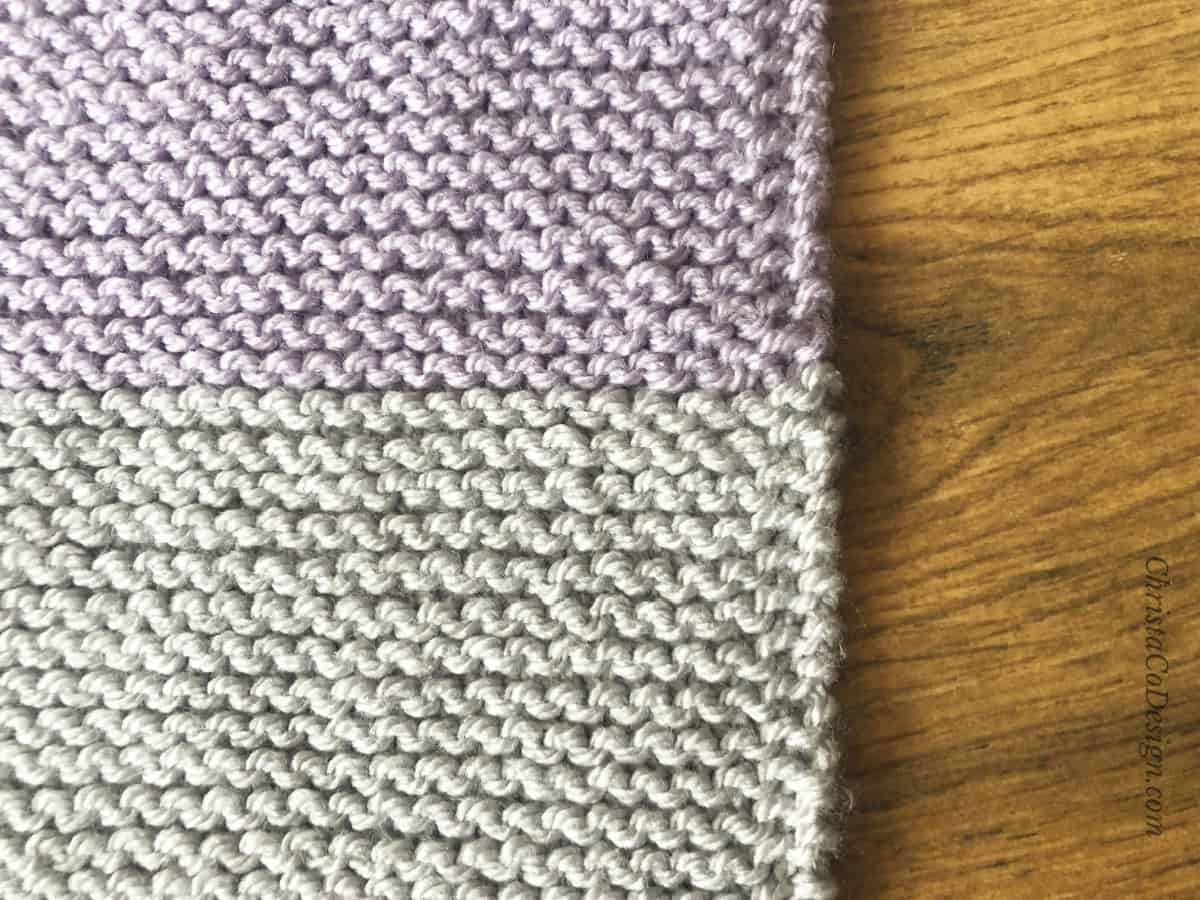
If you’re also a knitter, you’ll love the Bella Vita Blanket knitting pattern it’s a quick and easy one!
Materials
5 mm (H-8) crochet hook, or hook compatible with yarn. I love my Furls Peppermint Swirl*! I mean it was made for Christmas crocheting!
- #4 medium worsted weight yarn pictured in I Love This Yarn from Hobby Lobby (100% acrylic yarn, 7oz/199g, 355yd/325m); colors: white, green, and red for the blanket; plus yellow, orange, light green, blue & purple for the Christmas Lights:
- Lovey – 10 yd ea color
- Baby – 15 yd ea color
- Receiving – 20 yd ea color
- Toddler – 25 yd ea color
- Sm Throw – 25 yd ea color
- Lg Throw – 30 yd ea color
- Twin – 30 yd ea color
- Full – 30 yd ea color
- Queen –35 yd ea color
- King – 40 yd ea color
Main Blanket Yarn by Size
For the main blanket you’ll need 3 colors of yarn: white (Color A) for the blanket, red (Color B) for the border/bulbs and green (Color C) for the border/chain/bulb bases.
- Lovey – 12″ / 30.5 cm x 12″ / 30.5 cm you’ll need approximately 177 yd / 162 m of yarn; divided in Color A 103 yd / 94 m, Color B 18 yd /17 m and Color C 56 yd / 51 m.
- Baby – 32” / 82 cm x 33.5” / 85 cm you’ll need approximately 1012 yd / 926 m of yarn; divided in Color A 835 yd / 764 m, Color B 60 yd / 55 m and Color C 117 yd / 107 m.
- Receiving – 36″ / 92 cm x 35.5″/ 90 cm you’ll need approximately 1100 yd / 1005 m of yarn; divided in Color A 988 yd / 903 m, Color B 76 yd / 70 m and Color C 152 yd / 139 m.
- Toddler – 40″ / 102 cm x 51.5″ / 131 cm you’ll need approximately 1917 yd / 1753 m of yarn; divided in Color A 1594 yd / 1458 m Color B 114 yd / 104 m and Color C 209 yd / 211 m.
- Sm Throw – 45″ / 114.25 cm x 59.5″ / 151 cm you’ll need approximately 2448 yd / 2239 m of yarn; divided in Color A 1947 yd / 1780 m, Color B 203 yd / 186 m and Color C 298 yd / 163 m.
- Lg Throw – 54″ / 137 cm x 59.5″ / 151 cm you’ll need approximately 2938 yd / 2687 m of yarn; divided in Color A 2318 yd / 2120 m, Color B 253 yd / 232 m and Color C 367 yd / 336 m.
- Twin – 66″ / 168 cm x 89.5″ / 228 cm you’ll need approximately 5370 yd / 4911 m of yarn; divided in Color A 4572 yd / 4181 m, Color B 400 yd / 366 m and Color C 398 yd / 364 m.
- Full – 80″ / 203 cm x 107.5″ / 273 cm you’ll need approximately 7570 yd / 6922 m of yarn; divided in Color A 6656 yd / 6086 m, Color B 400 yd /366 m and Color C 514 yd / 470m.
- Queen – 90″ / 229cm x 107.5″ / 273 cm you’ll need approximately 8524 yd / 7795 m of yarn; divided in Color A 7489 yd / 6848 m, Color B 451 yd / 413 m and Color C 584 yd / 534 m.
- King – 108″ / 275 cm x 107.5″ / 273 cm you’ll need approximately 10281 yd / 9491 m of yarn; divided in Color A 8985 yd / 8216 m, Color B 540 yd / 494 m and Color C 756 yd / 691 m.
Notes
- Finished size of each lightbulb is 3.25” / 1.5cm long.
- Pattern begins with the lightbulb pattern, followed by the blanket pattern and finally the assembly instructions.
- The blanket stitch pattern is alternating sc and dc stitches. You’ll start each row with a sc and end each row with a dc. Sc into dc and dc into sc.
- Stitch multiple is 2 plus 1 for the starting chain.
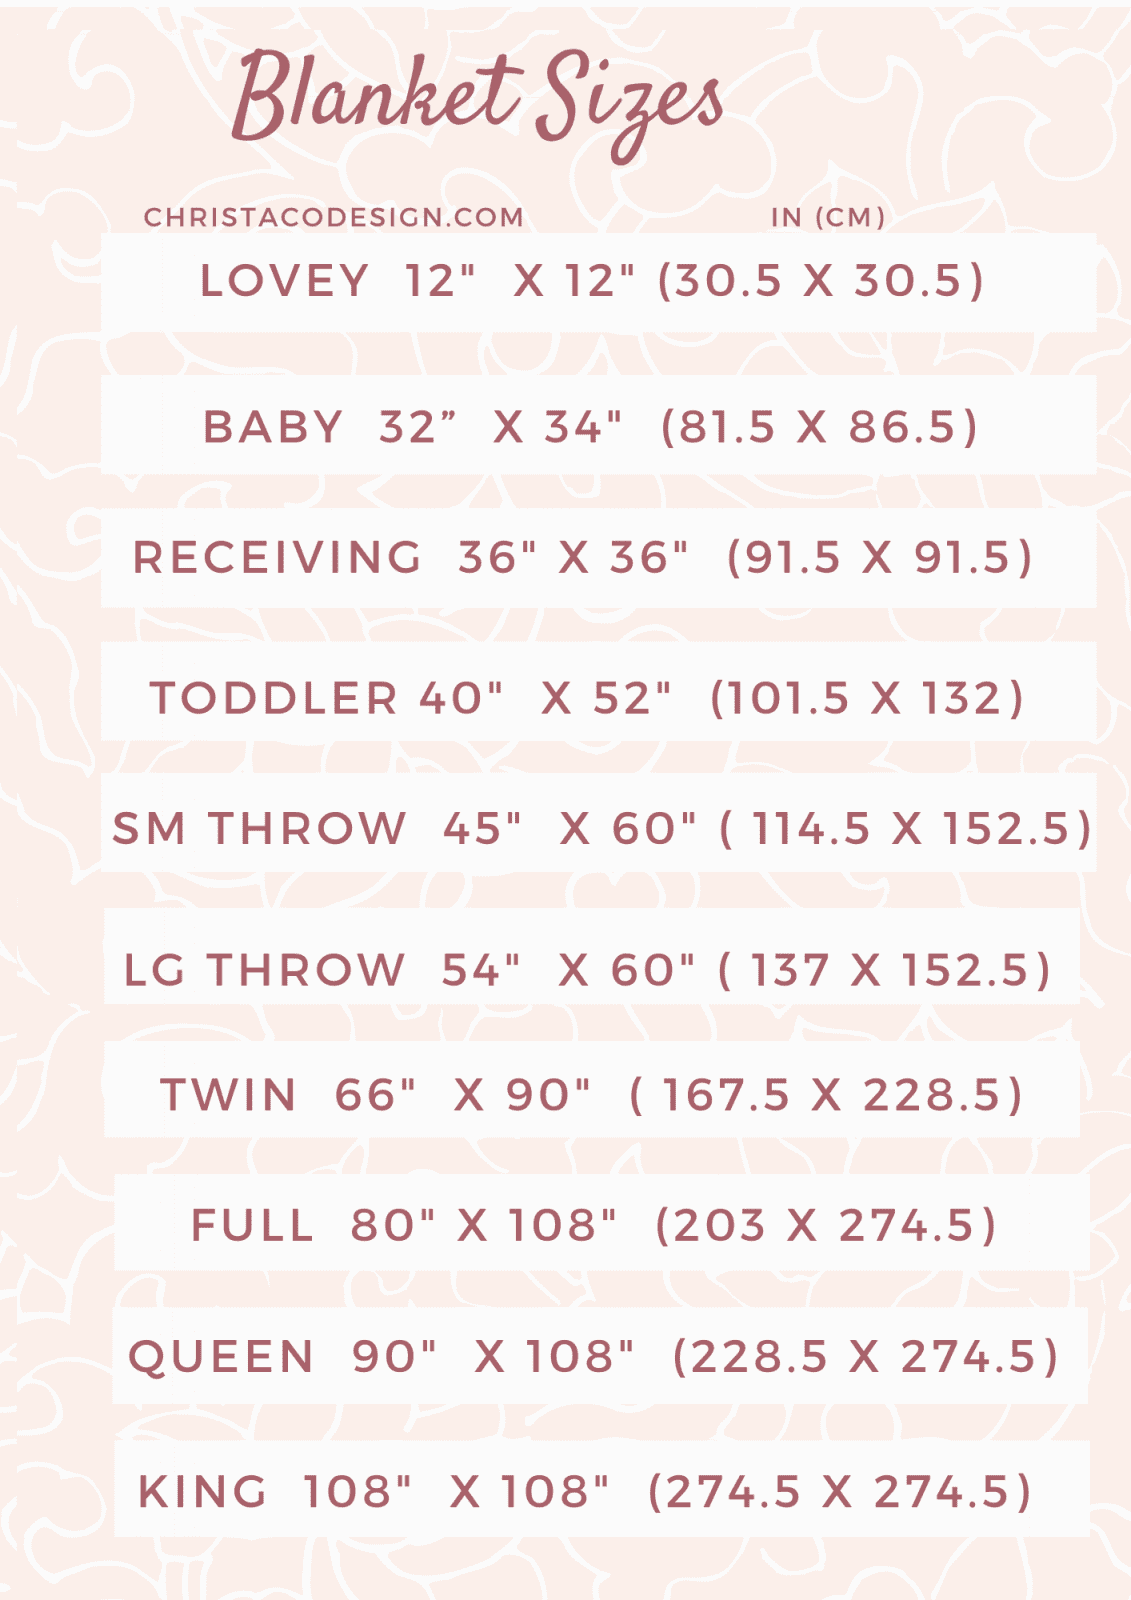
Downloadable Blanket Sizes Chart
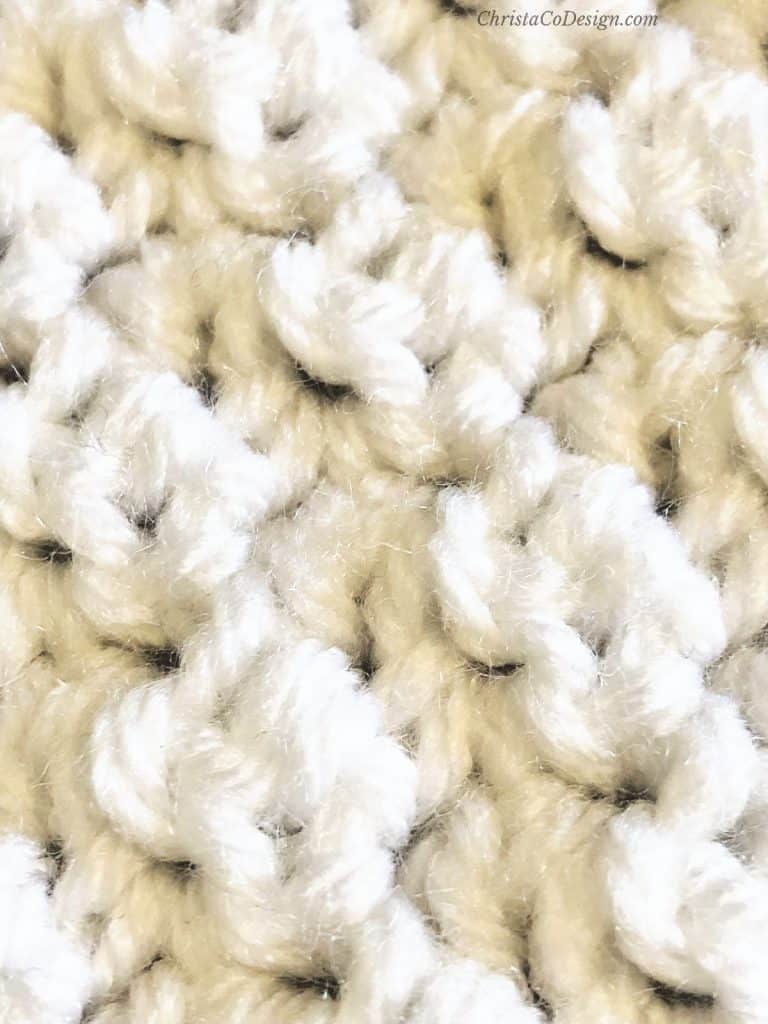
Stitch Tutorial
Check out the Lemon Peel Stitch Tutorial for step by step photos and video tutorial on how to crochet this stitch. It’s one of those simple crochet patterns with only one repeat row that you’ll have memorized in no time.
Gauge
1”/2.5cm x 1”/2.5cm = 4 sc x 4 rows (lightbulbs)
4”/10cm x 4”/10cm = 6 sc/dc pairs (12 stitches) x 12 rows (blanket)
Skill Level
Easy
Get the free Christmas Light Applique Pattern here.
Pin It
You can purchase the ad-free, well formatted PDF Pattern in one of my shops. Scroll down for the free pattern!
Scroll down for the written pattern!
Pattern Instructions
Crochet Christmas Lights Blanket Free Pattern
The Crochet Christmas Lights Blanket is a free throw blanket crochet pattern.
Materials
- #4 medium worsted weight yarn pictured in Hobby Lobby’s I Love This Yarn (100% acrylic, 7oz/199g, 355yd/325m); color: white, green, and red for the blanket; plus yellow, orange, light green, blue & purple for the Christmas Lights.
Tools
- 5 mm (H) hook, or hook needed to meet gauge.
- tapestry needle
- scissors
- measuring tape
Instructions
- Lightbulb Pattern
Make the number of bulbs listed below according to your size. # each of red, yellow, orange, light green, blue and purple, or your desired color combinations.
Lovey – 2 of each color (12 total).
Baby – 3 of each color (18 total).
Receiving – 4 of each color (24 total).
Toddler – 5 of each color (30 total).
Sm Throw – 5 of each color (30 total).
Lg Throw – 6 of each color (36 total).
Twin – 6 of each color (36 total).
Full – 6 of each color (36 total).
Queen – 7 of each (42 total).
King – 8 of each color (64 total).
In green (or black for light base):
Row 1. Ch 5, sc into the 2nd chain from your hook and in each ch across, turn. (4)
Row 2. Ch 1, sc in each sc across, change to red on the last sc, turn. (4)
Row 3. In red (or bulb color), Ch 1, sc in each sc across, turn. (4)
Row 4. Ch 1, 2 sc in the 1st sc, 1 sc in each of the next 2 sc, 2 sc in the last sc, turn. (6)
Row 5. Ch 1, sc in each sc across, turn. (6)
Row 6. Ch 1, 2sc in the first sc, 1 sc in each of the next 4 sc, 2sc in the last sc, turn. (8)
Row 7. Ch 1, sc in each sc across, turn. (8)
Row 8. Ch 1, sc in the 1st, sc2tog the next 2, sc in the next 2, sc2tog the next 2, sc in the last sc, turn. (6)
Row 9. Ch 1, sc in each stitch across, turn (6)
Row 10. Ch 1, sc in the 1st sc, sc2tog the next 2, sc2tog the next 2, sc in the last, turn. (4)
Row 11. Ch 1, sc in each stitch across, turn (4)
Row 12. Ch 1, sc2tog the next 2 stitches, sc2tog the last 2 stitches, turn. (2)
Row 13. Ch 1, sc2tog, leave a long tail for sewing onto blanket.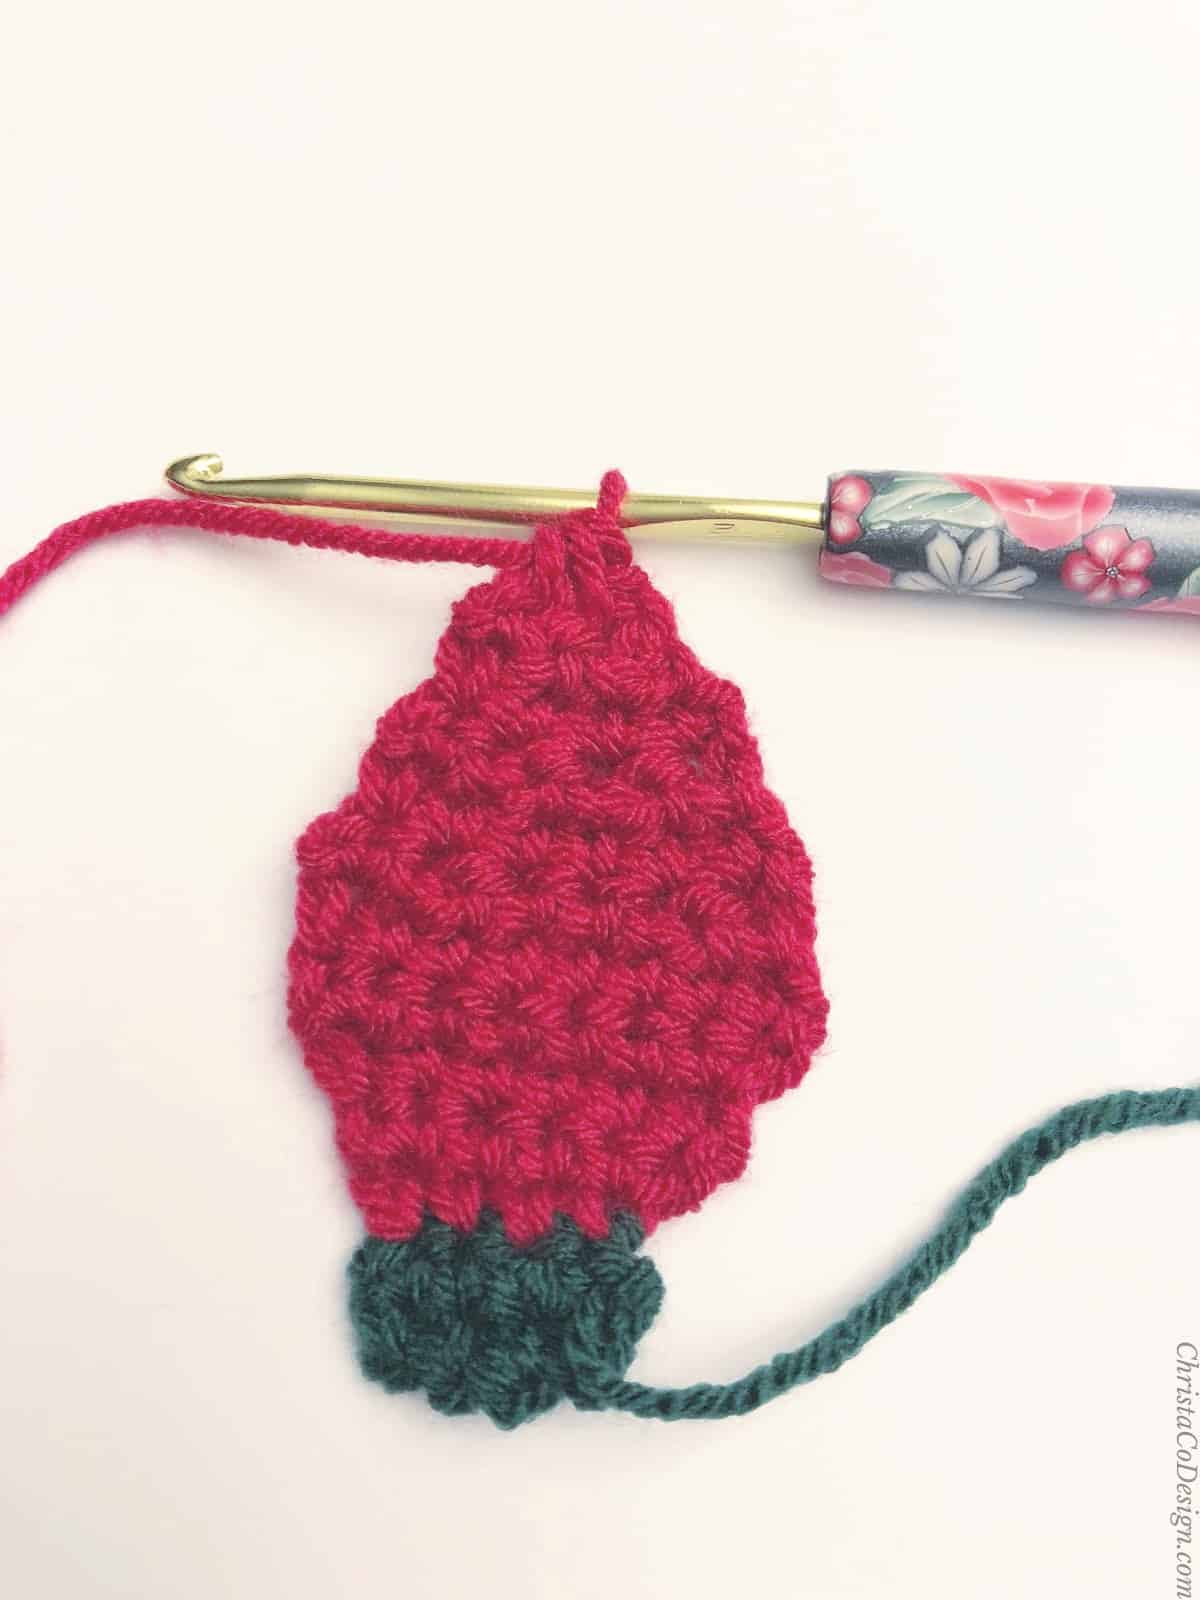
Rep for each lightbulb. See list above for number to make per color for each blanket size. - Blanket Pattern
- Starting Chain by SIze
Lovey 12″ / 30.5 cm x 12″ / 30.5 cm Ch 37
Baby 32” / 82 cm x 33.5” / 85 cm Ch 97
Receiving 36″ / 92 cm x 35.5″/ 90 cm Ch 109
Toddler 40″ / 102 cm x 51.5″ / 131 cm Ch 121
Sm Throw 45″ / 114.25 cm x 59.5″ / 151 cm Ch 135
Lg Throw 54″ / 137 cm x 59.5″ / 151 cm Ch 163
Twin 66″ / 168 cm x 89.5″ / 228 cm Ch 199
Full 80″ / 203 cm x 107.5″ / 273 cm Ch 241
Queen 90″ / 229cm x 107.5″ / 273 cm Ch 271
King 108″ / 275 cm x 107.5″ / 273 cm Ch 325 - Ch to the number from the list above for your size.
- Row 1. Sc in the second chain from your hook, dc in the next ch, *{sc in next ch, dc in next ch} rep from * across, turn.
- Row 2. Ch 1, sc in the same st, dc in the next sc, *{sc in the next dc, dc in the next sc} rep from * across, turn.
- Row 3. Rep Row 2 to the number of rows in the list below for your size, or until you reach your desired length.
- Rows by SIze
Lovey 12″ / 30.5 cm x 12″ / 30.5 cm 36 Rows
Baby 32” / 82 cm x 33.5” / 85 cm 102 Rows
Receiving 36″ / 92 cm x 35.5″/ 90 cm 108 Rows
Toddler 40″ / 102 cm x 51.5″ / 131 cm 156 Rows
Sm Throw 45″ / 114.25 cm x 59.5″ / 151 cm 180 Rows
Lg Throw 54″ / 137 cm x 59.5″ / 151 cm 180 Rows
Twin 66″ / 168 cm x 89.5″ / 228 cm 270 Rows
Full 80″ / 203 cm x 107.5″ / 273 cm 324 Rows
Queen 90″ / 229cm x 107.5″ / 273 cm 324 Rows
King 108″ / 275 cm x 107.5″ / 273 cm 324 Rows - Border
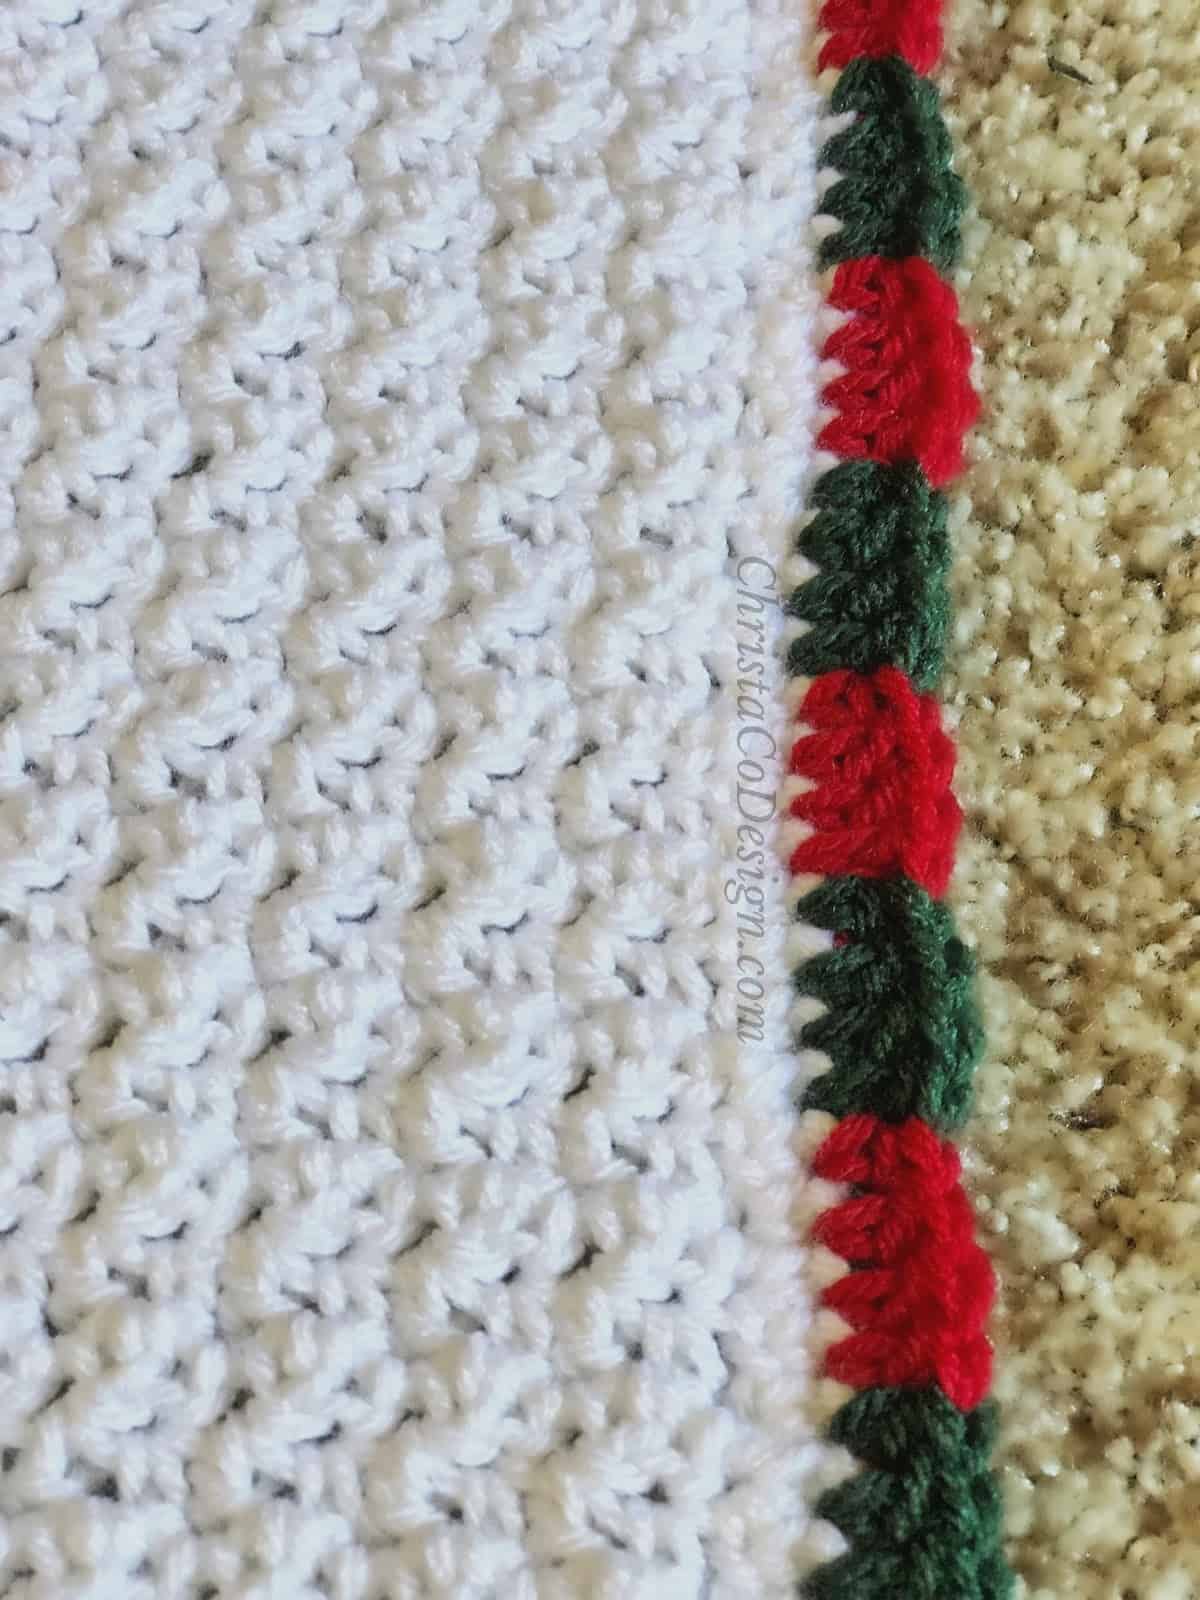
Color Changing Note:
I alternated between red and green every 4 stitches, and just carried my yarn under the next color's dc, picking it back up again when it was time to switch. It's similar to crocheting over your tails (only you don't cut the yarn!), so it comes with you and is ready when you change colors again. - Border Pattern
Join white yarn with a sl st to any corner.
1. Ch 1, sc evenly around the blanket, add (sc, ch 1, sc) to each corner.
2. Join red yarn to any corner ch 1 sp, ch 3 (counts as a dc), dc 3x more times in the same corner, *{changing to green on the last dc, in green: dc in the next 4 st, change to red on the last dc, in red: dc in the next 4 st} rep from * around, always placing 4 dc in the corner ch 1 sp.
Finish off. - Applique the Christmas Lights
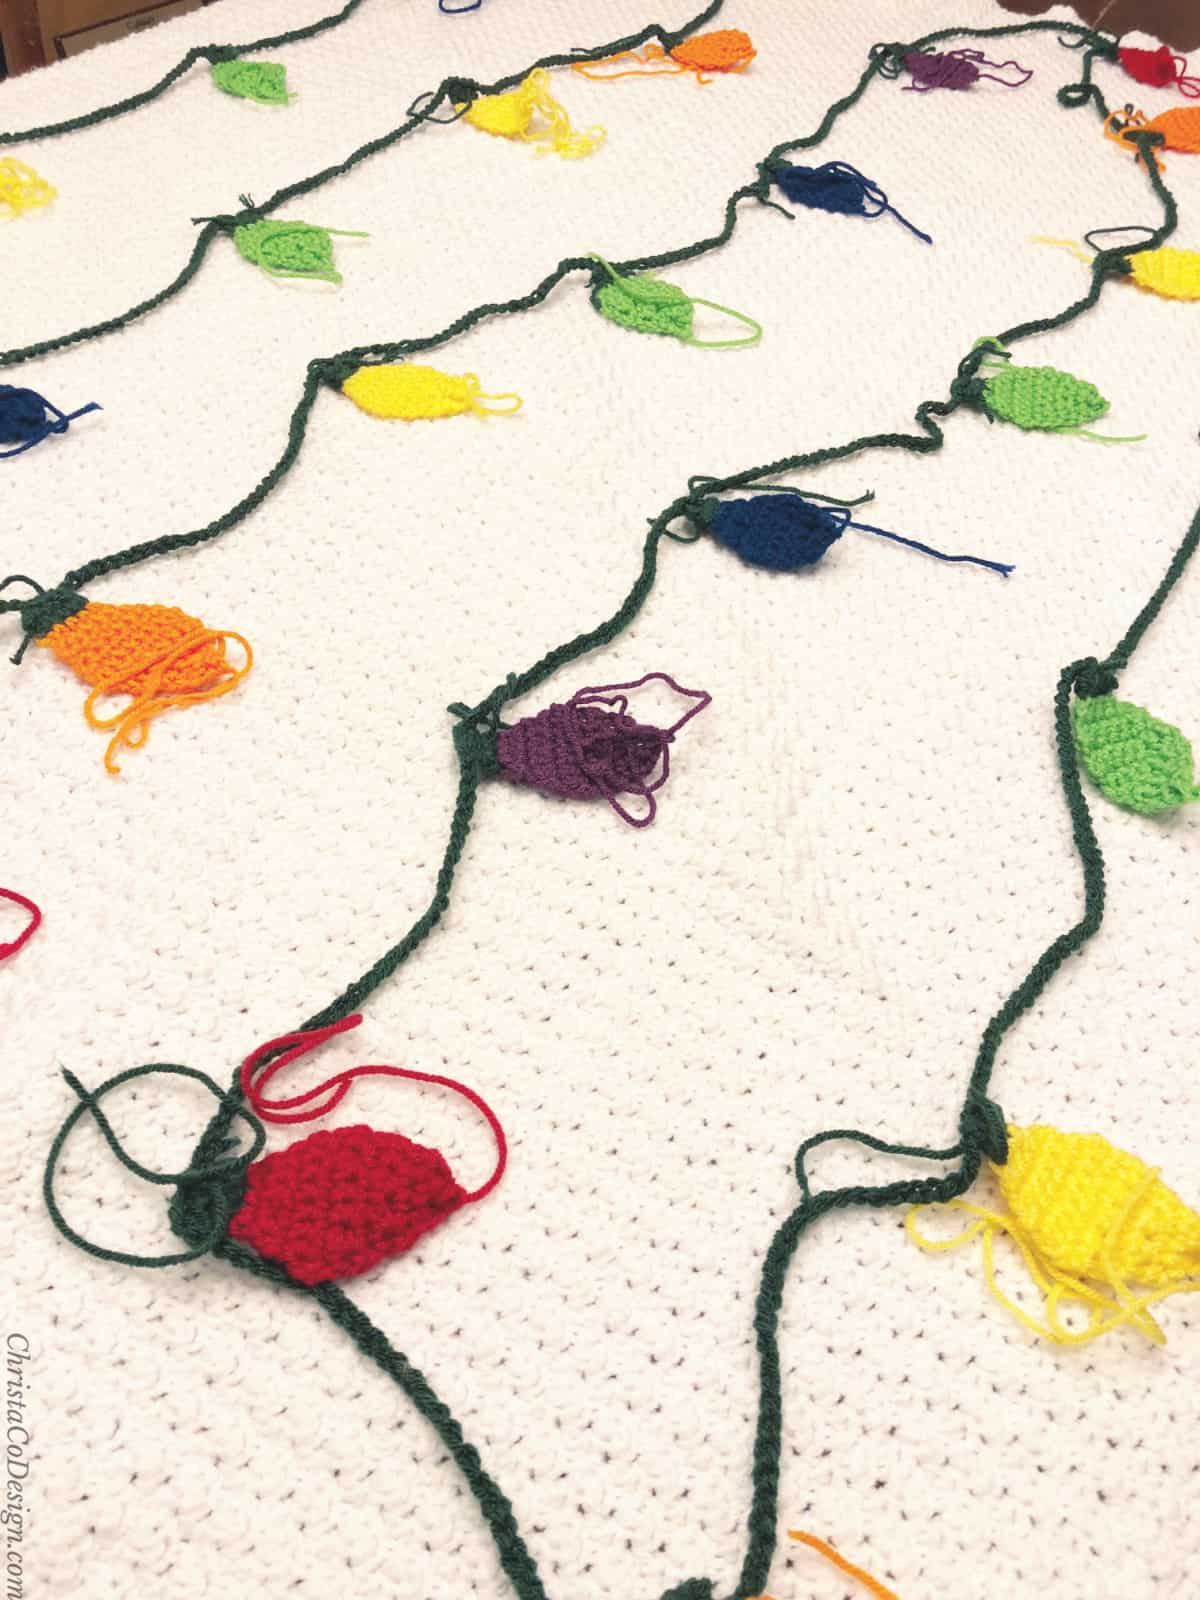
In green yarn crochet a basic chain. The length will depend on your blanket size, and how many loops ands whorls you add to your strand. I suggest crocheting a chain about 5X as long as your blanket, and then testing the layout. You can continue to add more chains, or rip some back if needed. - Then lay out the blanket, drape the chain back and forth on the blanket, in a wide zig zag.
- Place the lights on, spacing them 8” apart. If you want to add a loop or whorl between lights, then add more than 8” to give you enough chain to do so.
- Tilting the bulbs to one direction or the other helps to keep them from looking too uniform. Placing the colors in a standard ROYGBIV order will keep the colors looking great.
- Once you feel good about the layout, take a picture for reference or write down your color order/spacing/etc if different than my suggestions.
Stack your bulbs off to the side.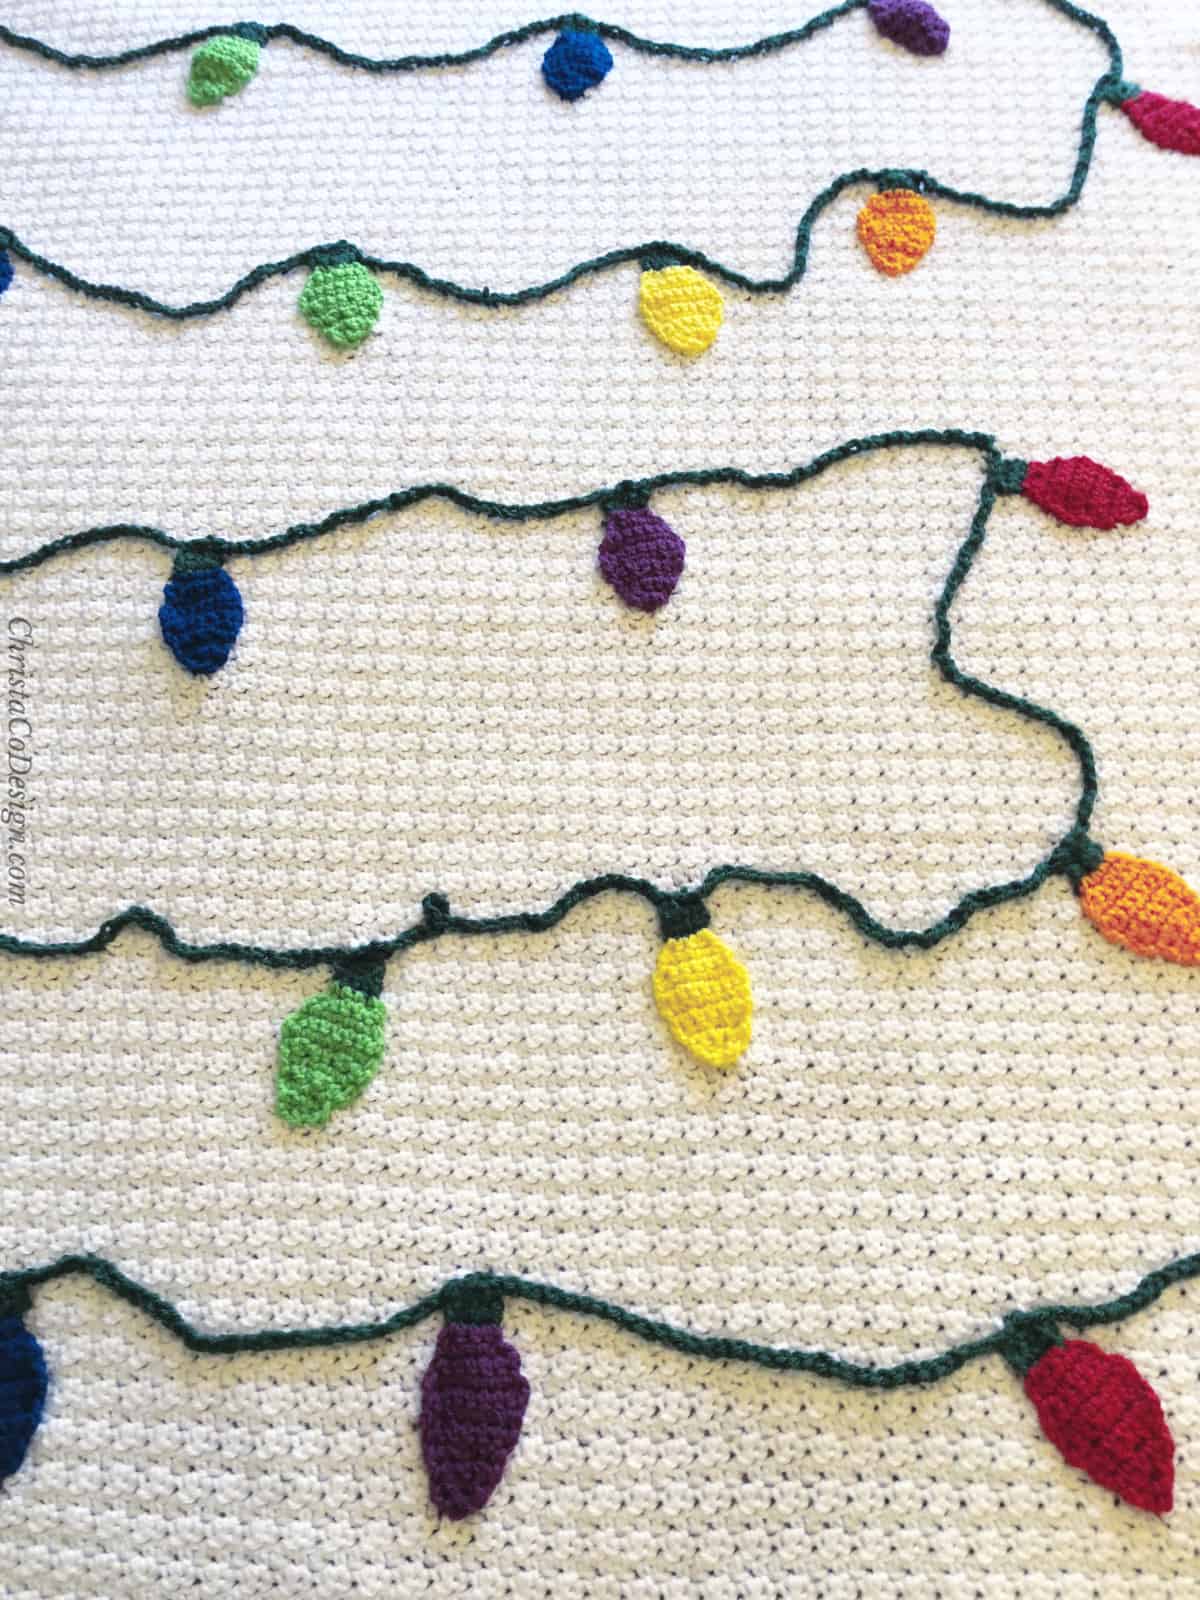
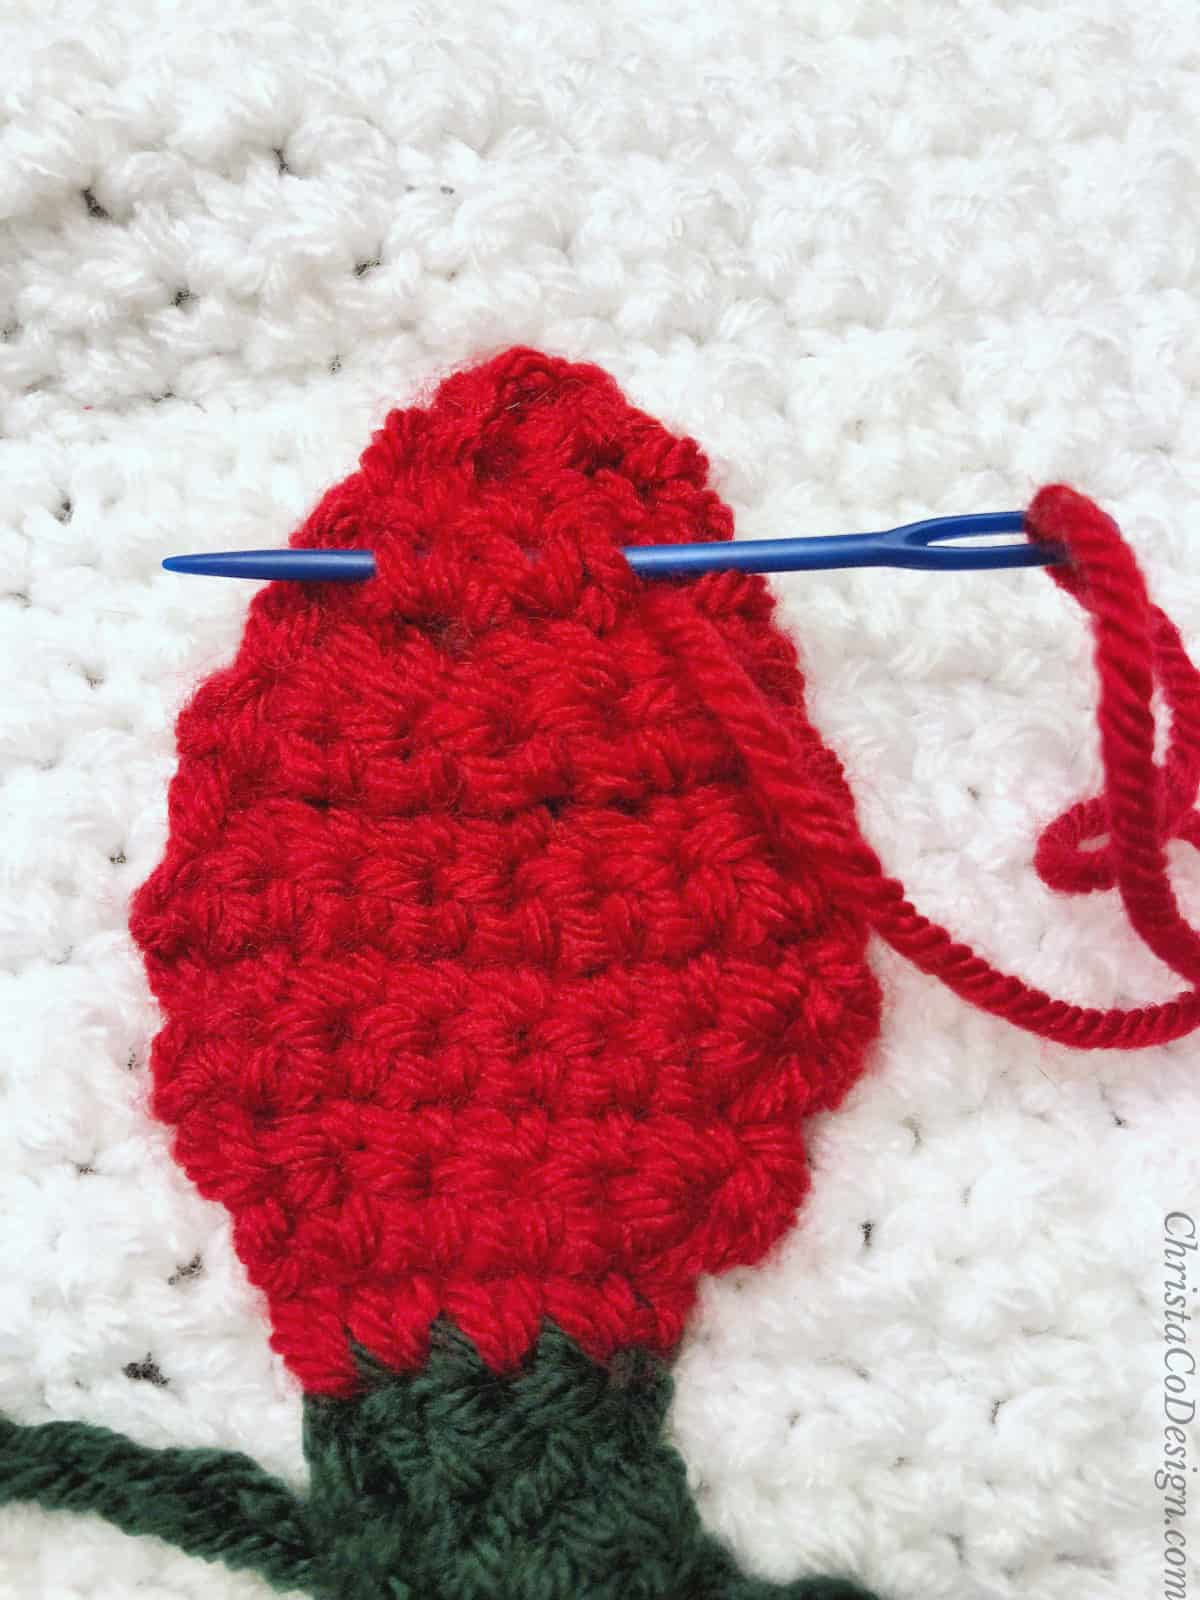
- Start by sewing down the green chain strand with a yarn needle and long length of green yarn.
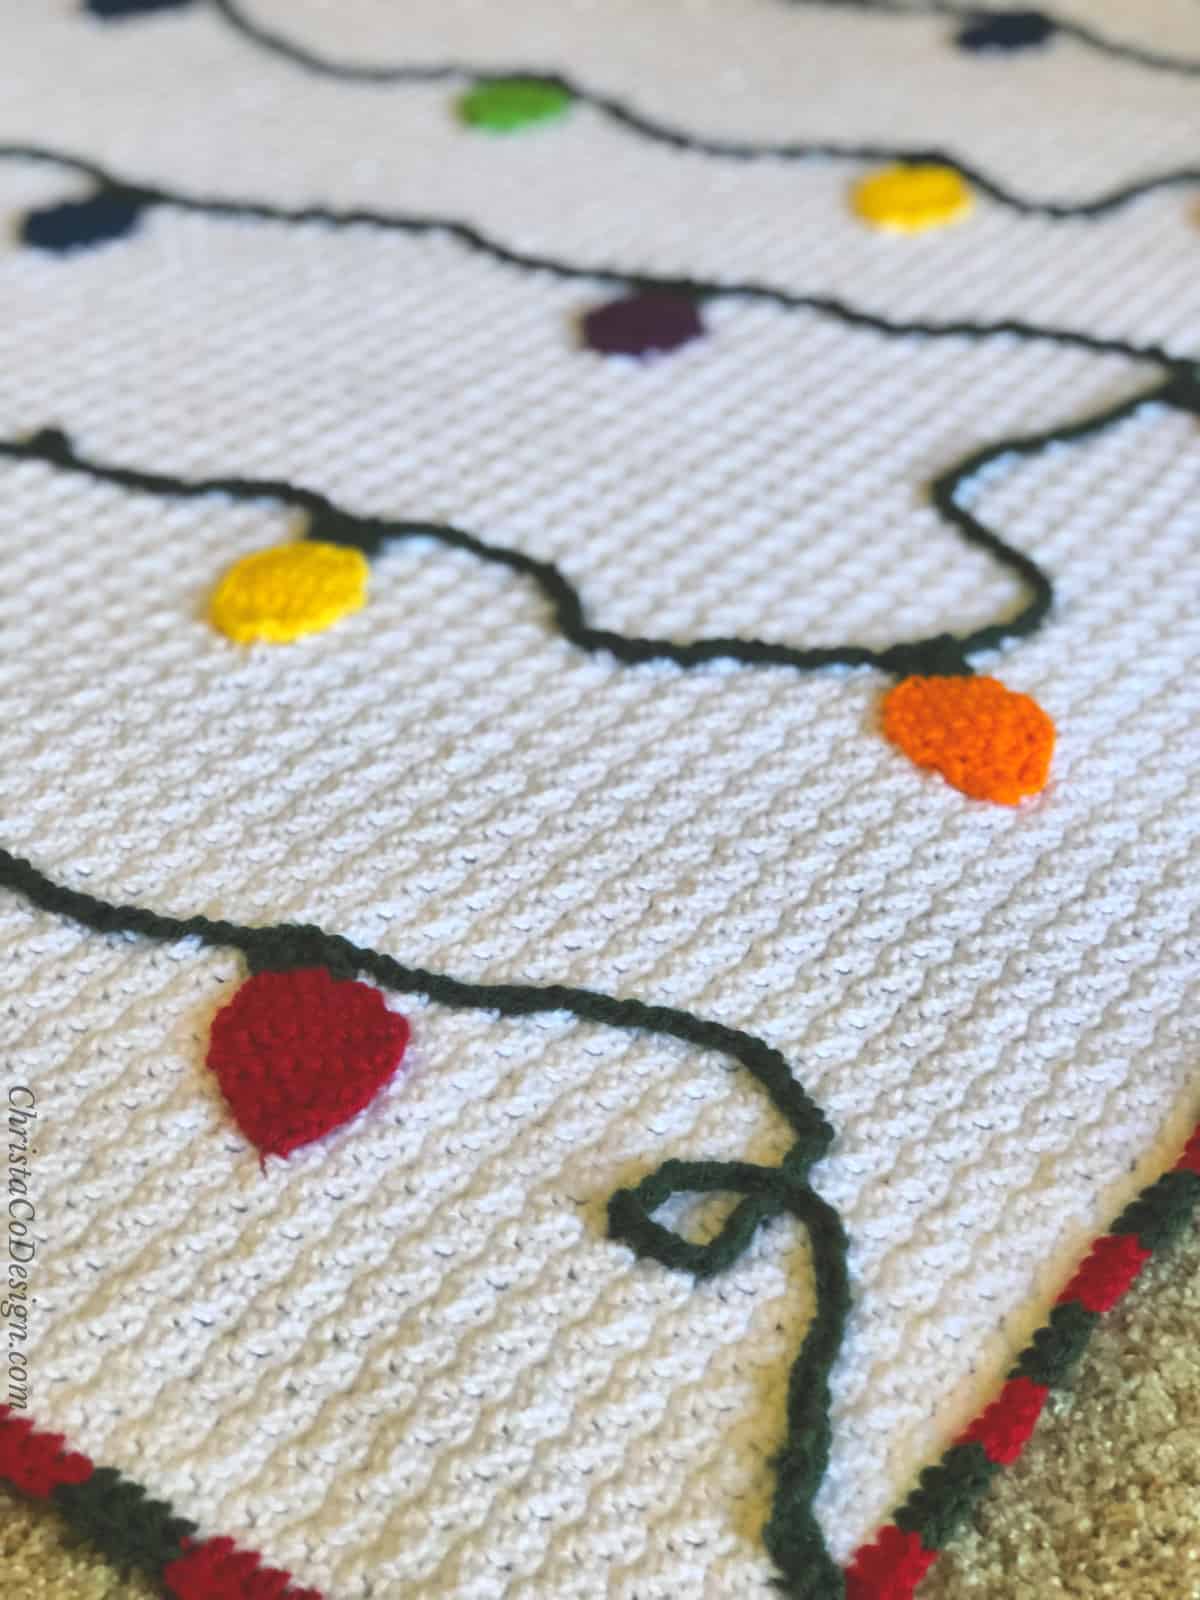
To keep this from showing through to the back side, just catch the top two strands of yarn, don’t go all the way through the blanket.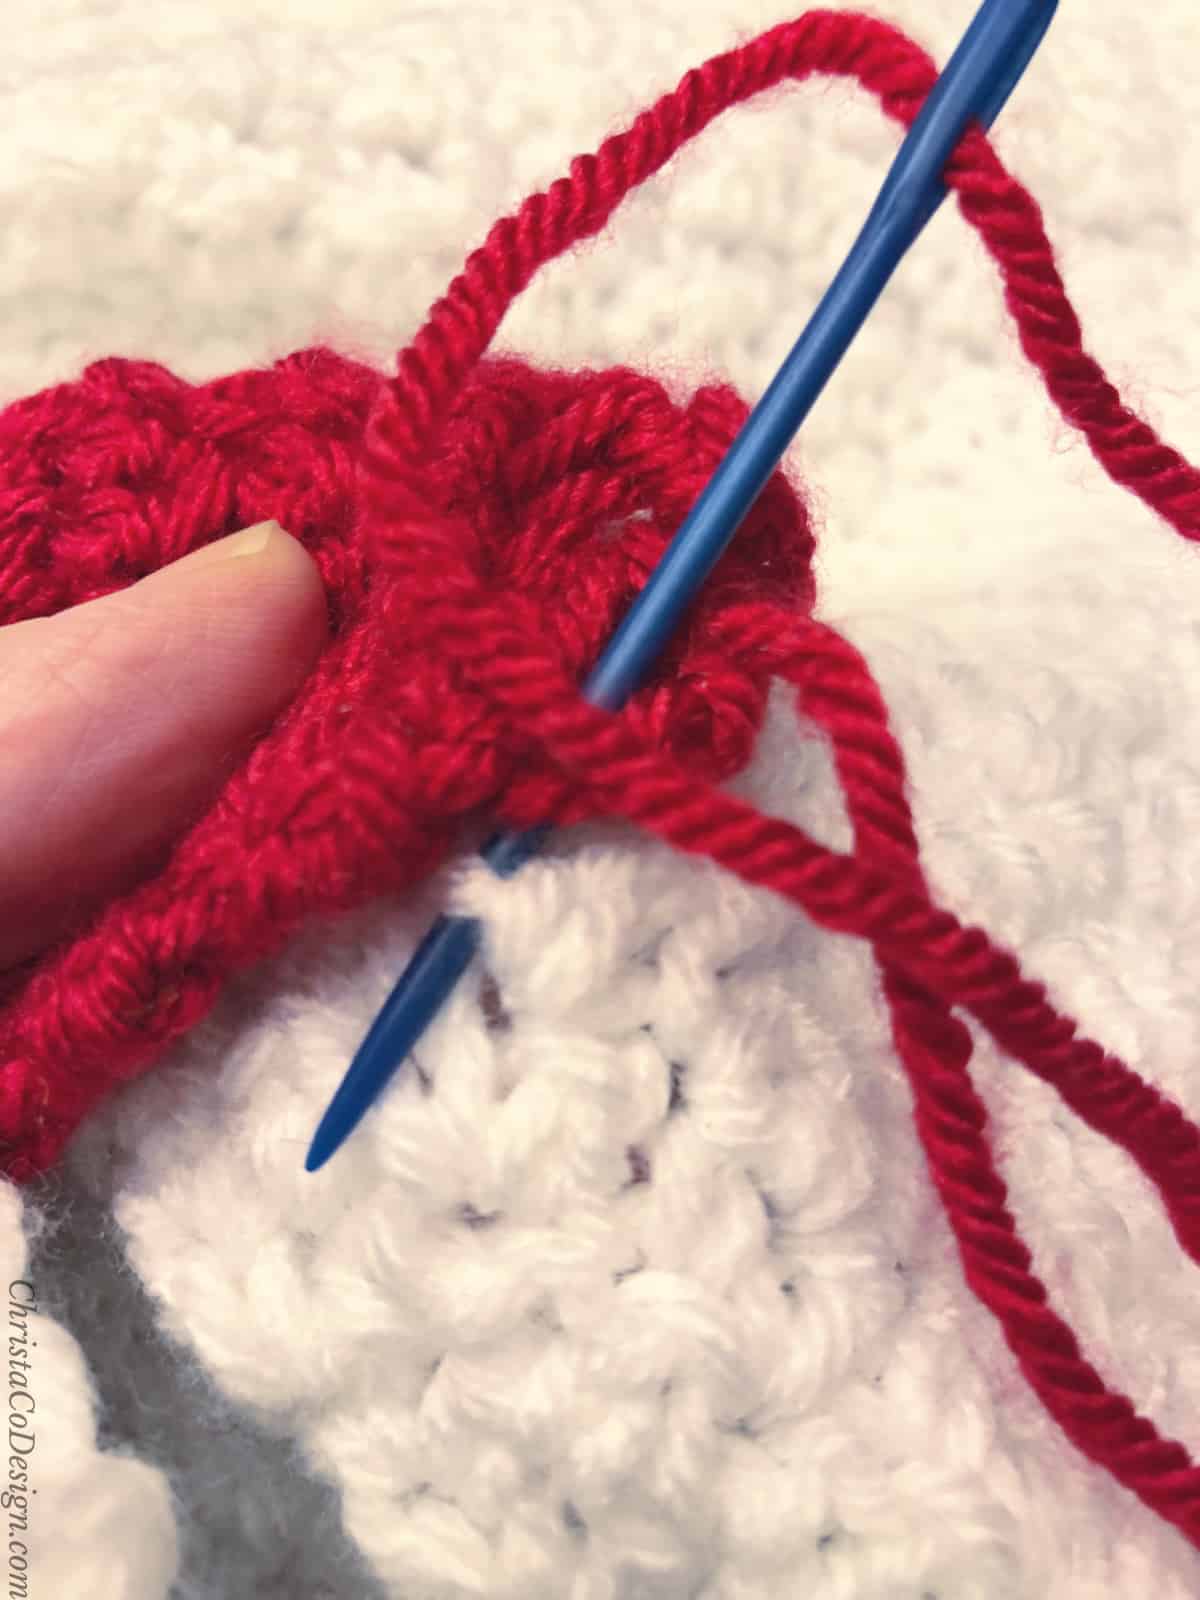
- Next, pin bulbs in place. Remember to space them evenly, but change up the direction they’re pointing.
- Sew them down with the yarn needle and long tails.
- Weave in all those ends which are easy to weave in behind the lights, as long as they’re secure.
Recommended Products
As an Amazon Associate and member of other affiliate programs, I earn from qualifying purchases.


This is one of the cutest Christmas blankets I have ever seen. Thank you!
This is so sweet!
I love the look of this blanket, it is so Christmas!
Thank you, I was pretty pleased with it and my aunt loved it too ❤️
I love this blanket! I’m going to give it a go as a throw for my sofa during Christmas time. ?♥️
Thank you! That’s a great idea, I hope you get to make it!