Crochet Baby Lovey with Photo Tutorial
Learn how to crochet the Larks Lovey. Use scraps of yarn to create a stunning striped lovey pattern. Crochet this small lovey onto a maple wood ring for a sweet gift.

This post contains affiliate links, I may earn a fee. Read more disclosure policy.
Join the ChristaCoDesign Newsletter
Never miss a pattern!
I love projects that use up the leftover odds and ends of yarn. I worked up a quick little lovey for a friend who’s expecting a baby soon with just few extra yarn balls.
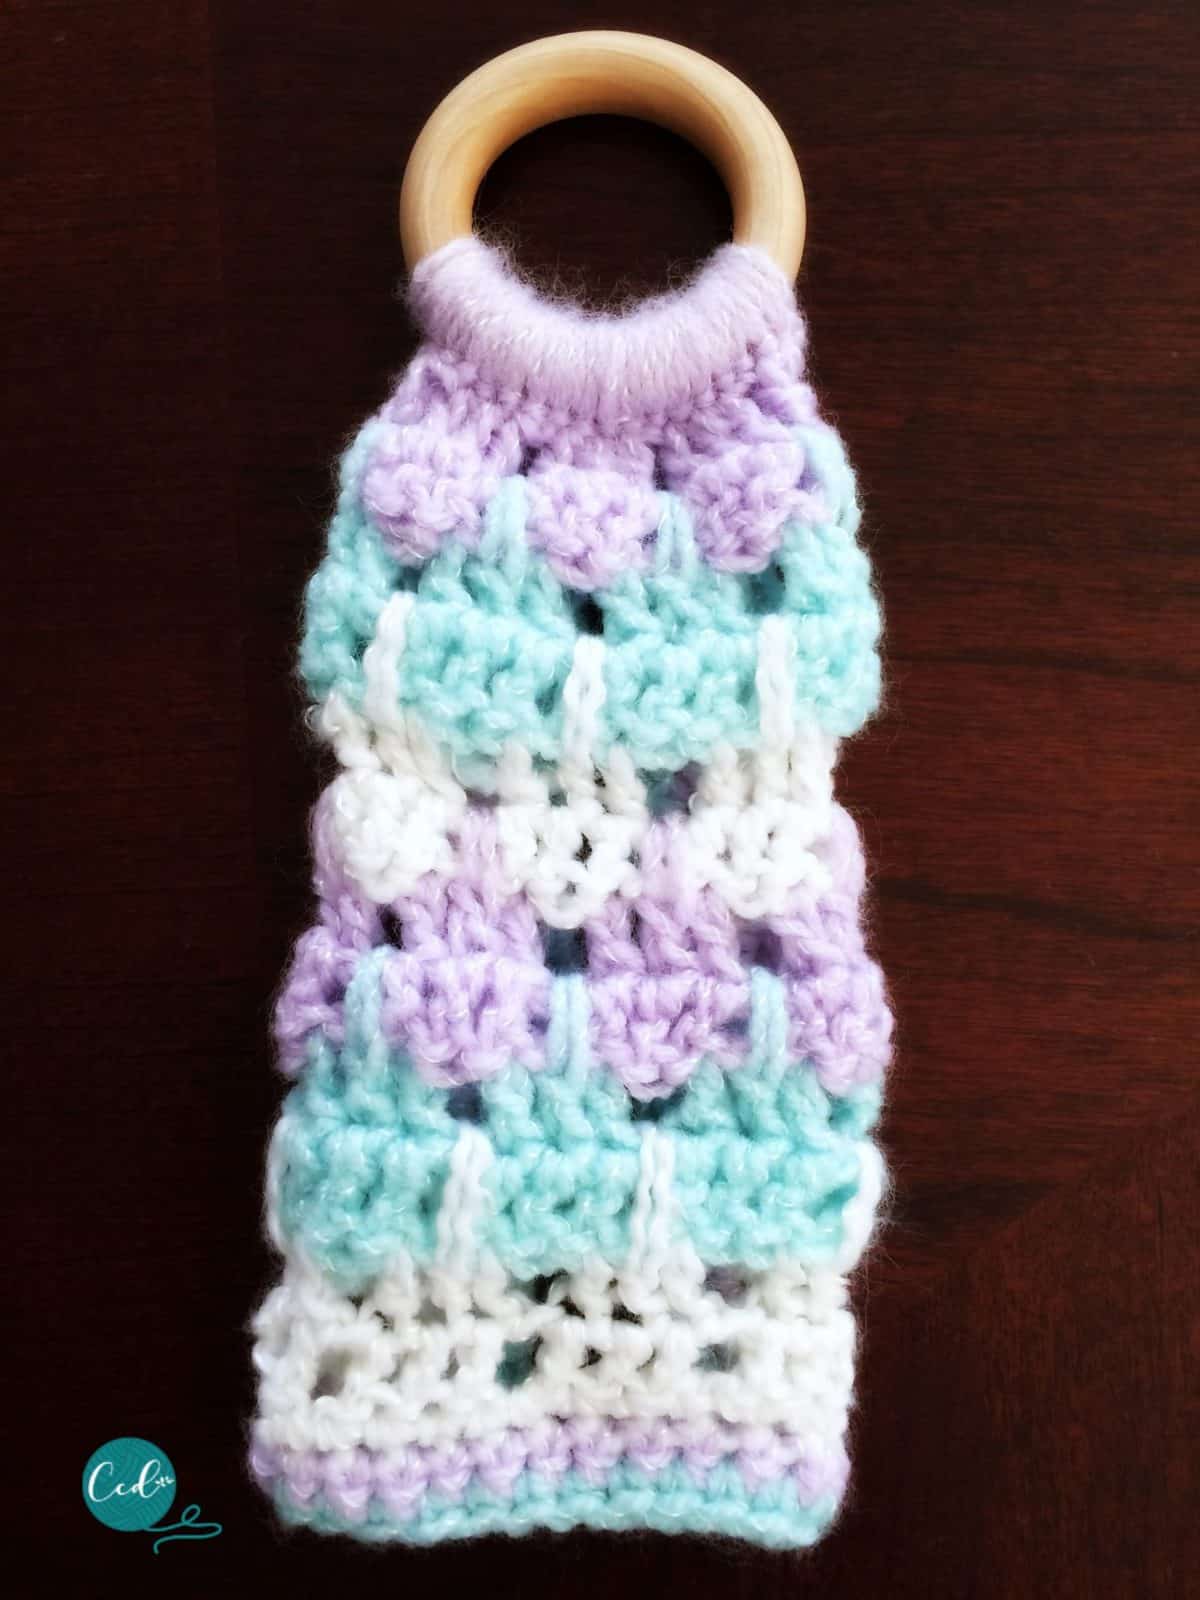
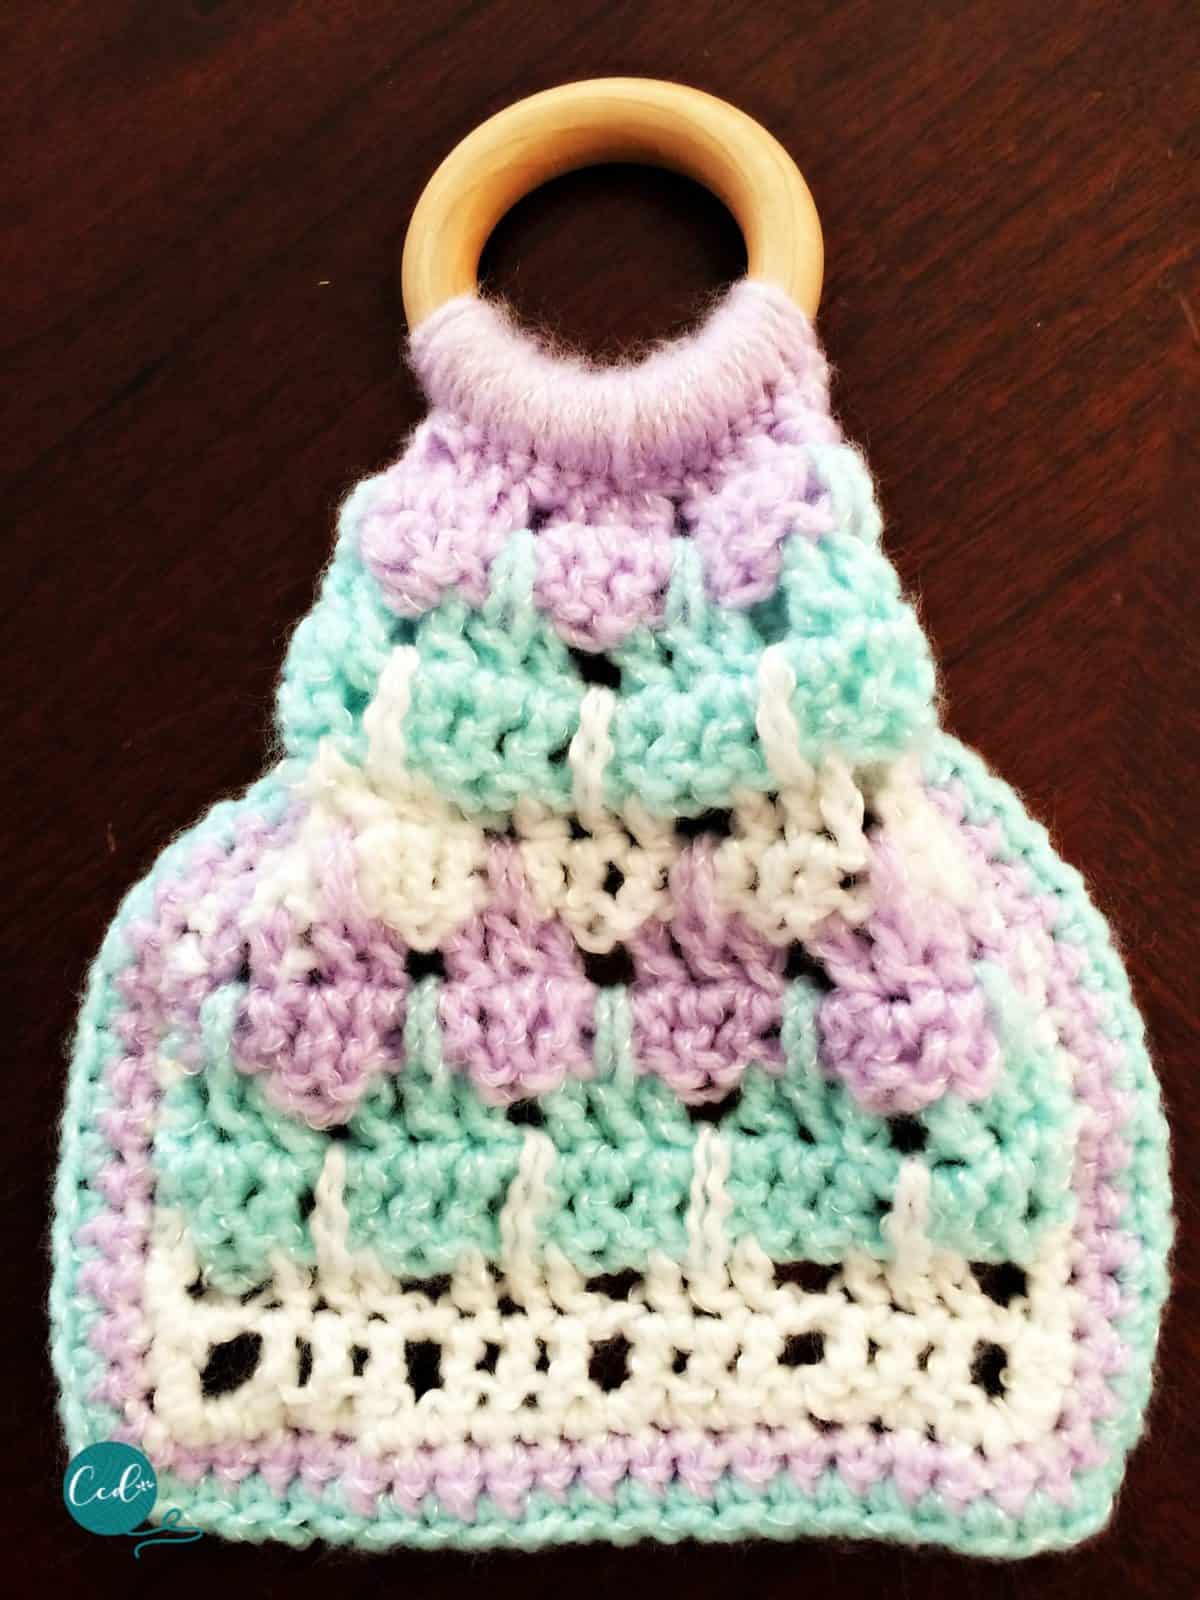
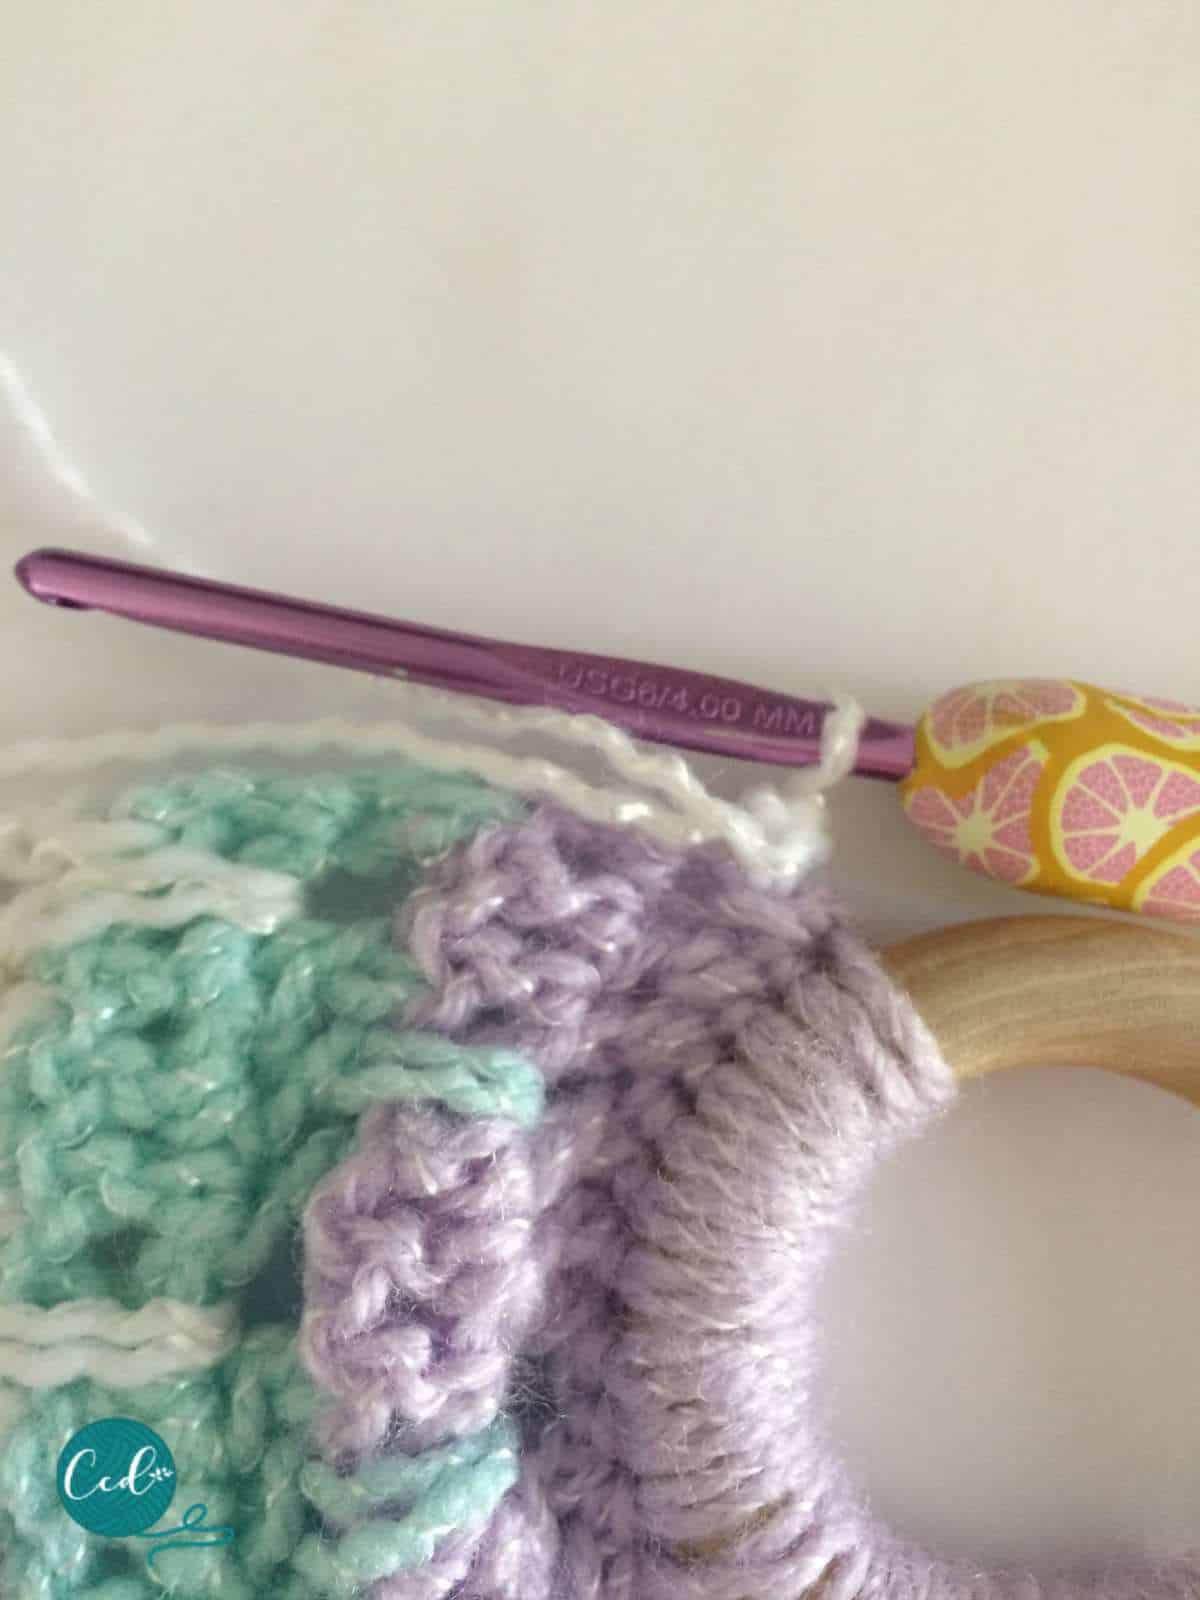
The lovey is crocheted directly around a maple wood ring. The finished piece is only 6″ long by 3″ wide. This is an easy and fast last minute gift for a baby shower.
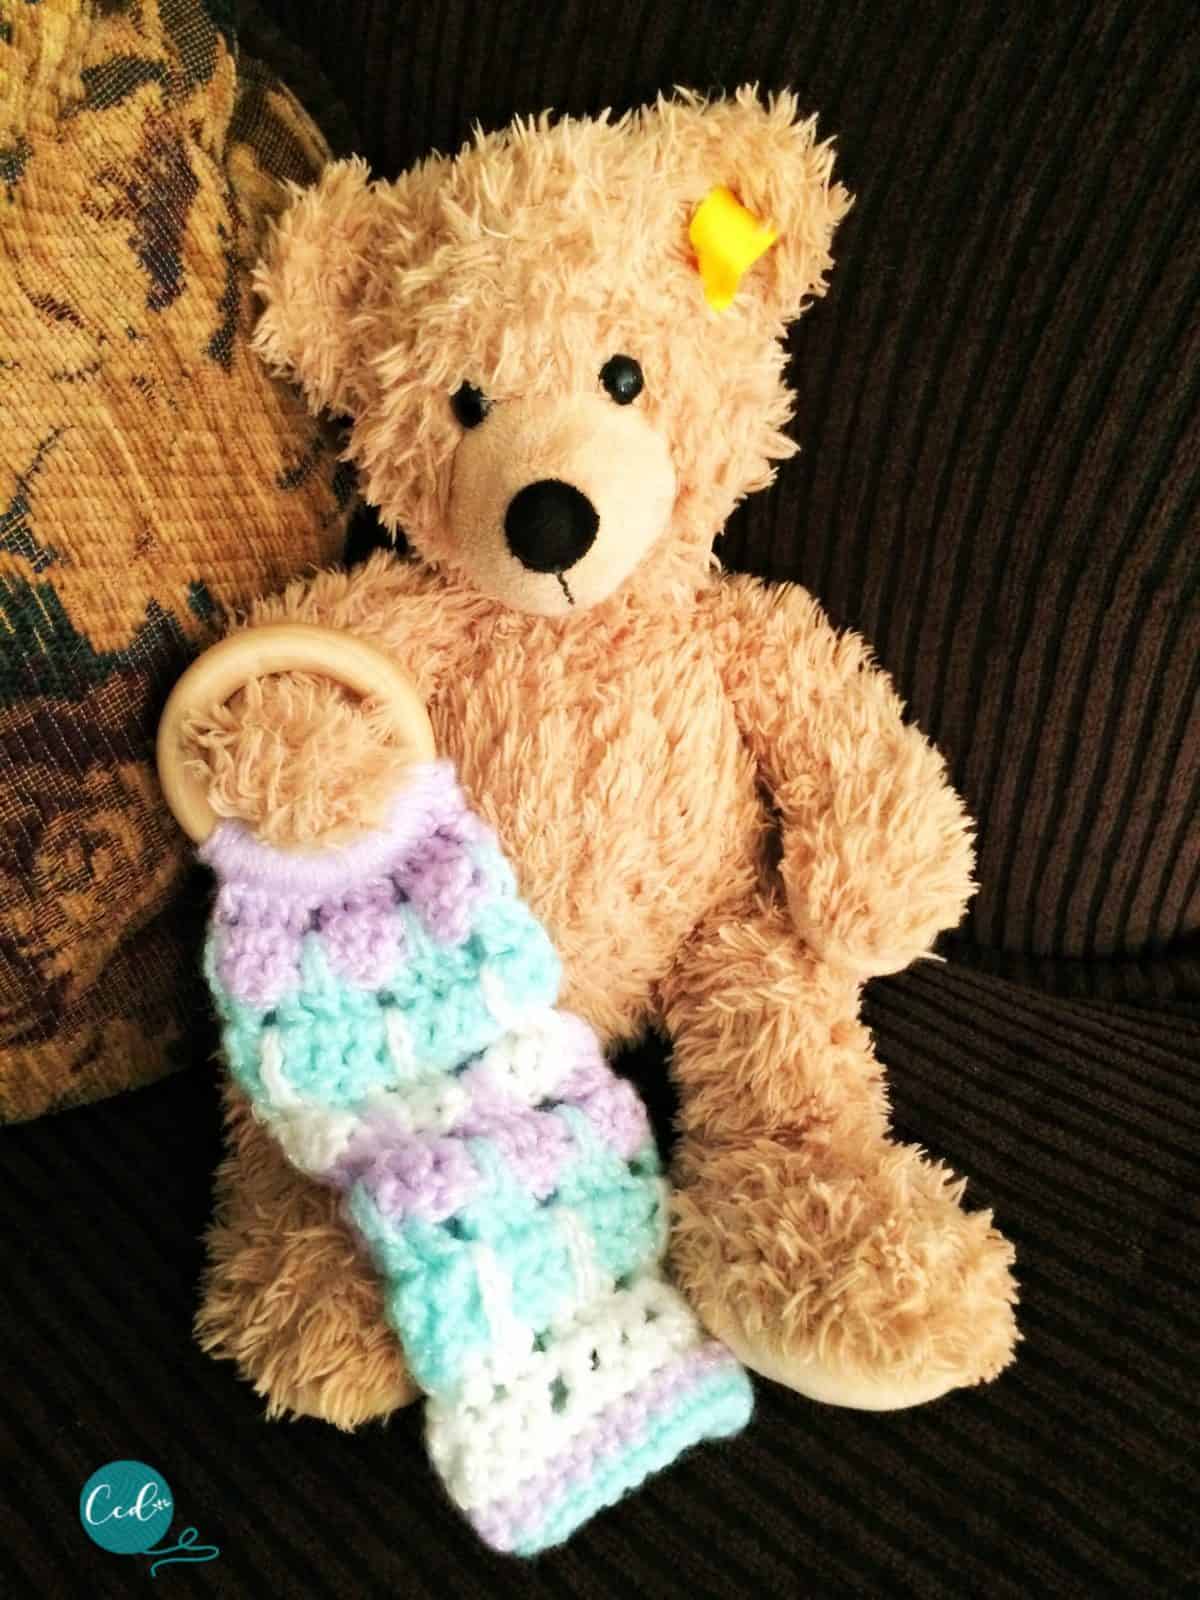
This crochet lovey folds up into a slim rectangle. This makes it easy to hold on either end.
You can purchase an ad-free pdf of this pattern in my Etsy shop. Scroll down for the free pattern with photo tutorial below.
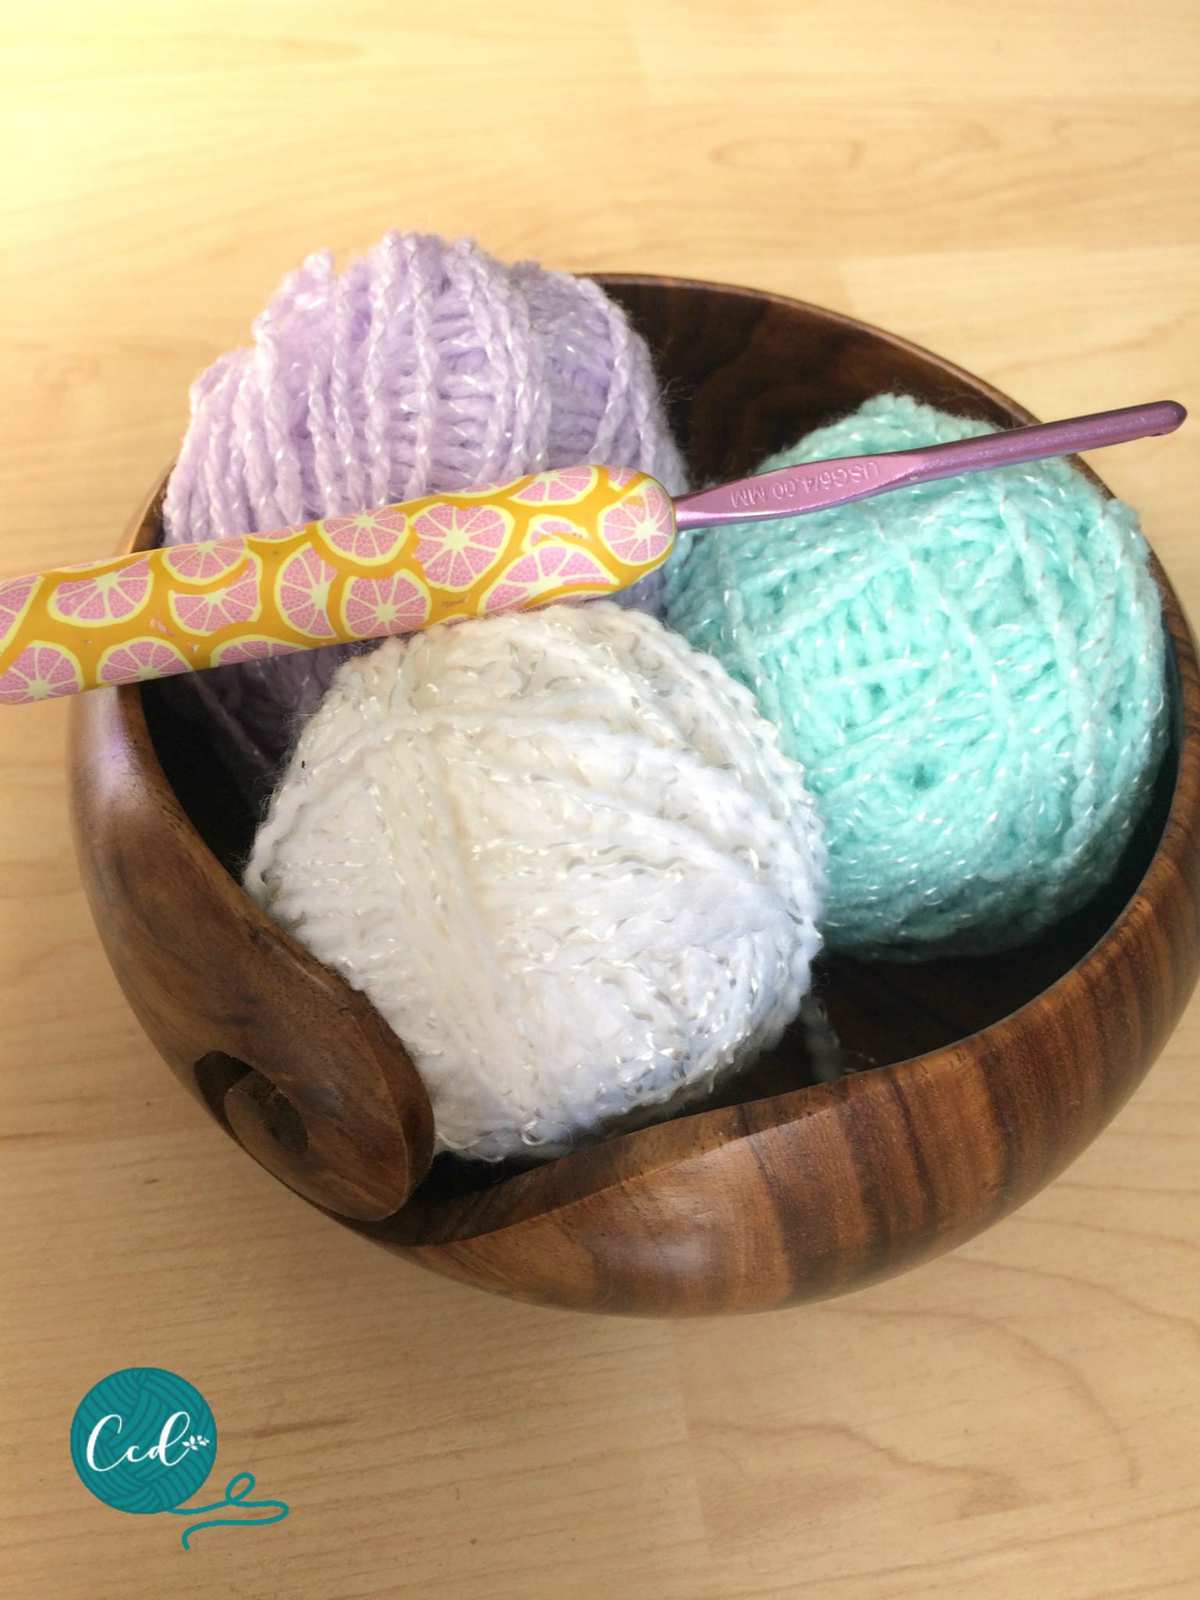
Materials
- 60 yds divided in 3 colors of #3 lightweight yarn (I used discontinued yarn from my stash, but Bernat Baby Coordinates is similar); worsted weight yarn will work just as well, but will yield a slightly larger lovey.
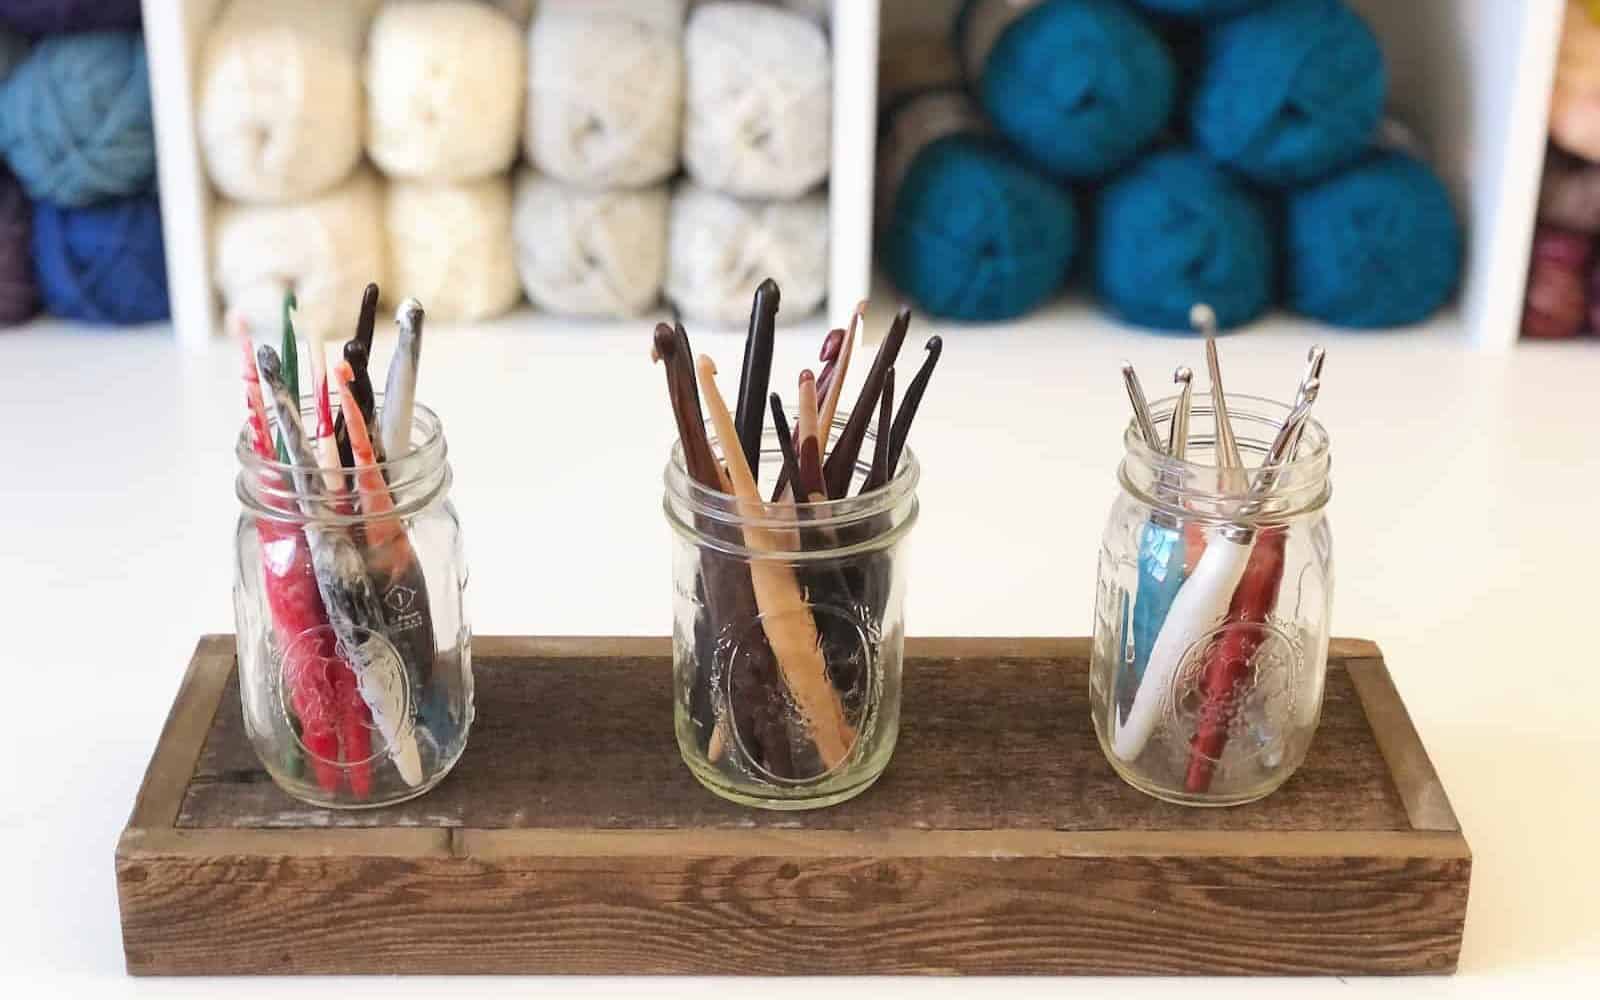
- 4 mm US size G–6 crochet hook,* or size needed to meet gauge.
- 2” Maple Wood Ring
- Yarn needle, measuring tape, scissors, stitch marker(s).
Pattern Notes
Ch 3 counts as first dc.
Ch 4 counts as 1st dc + ch 1
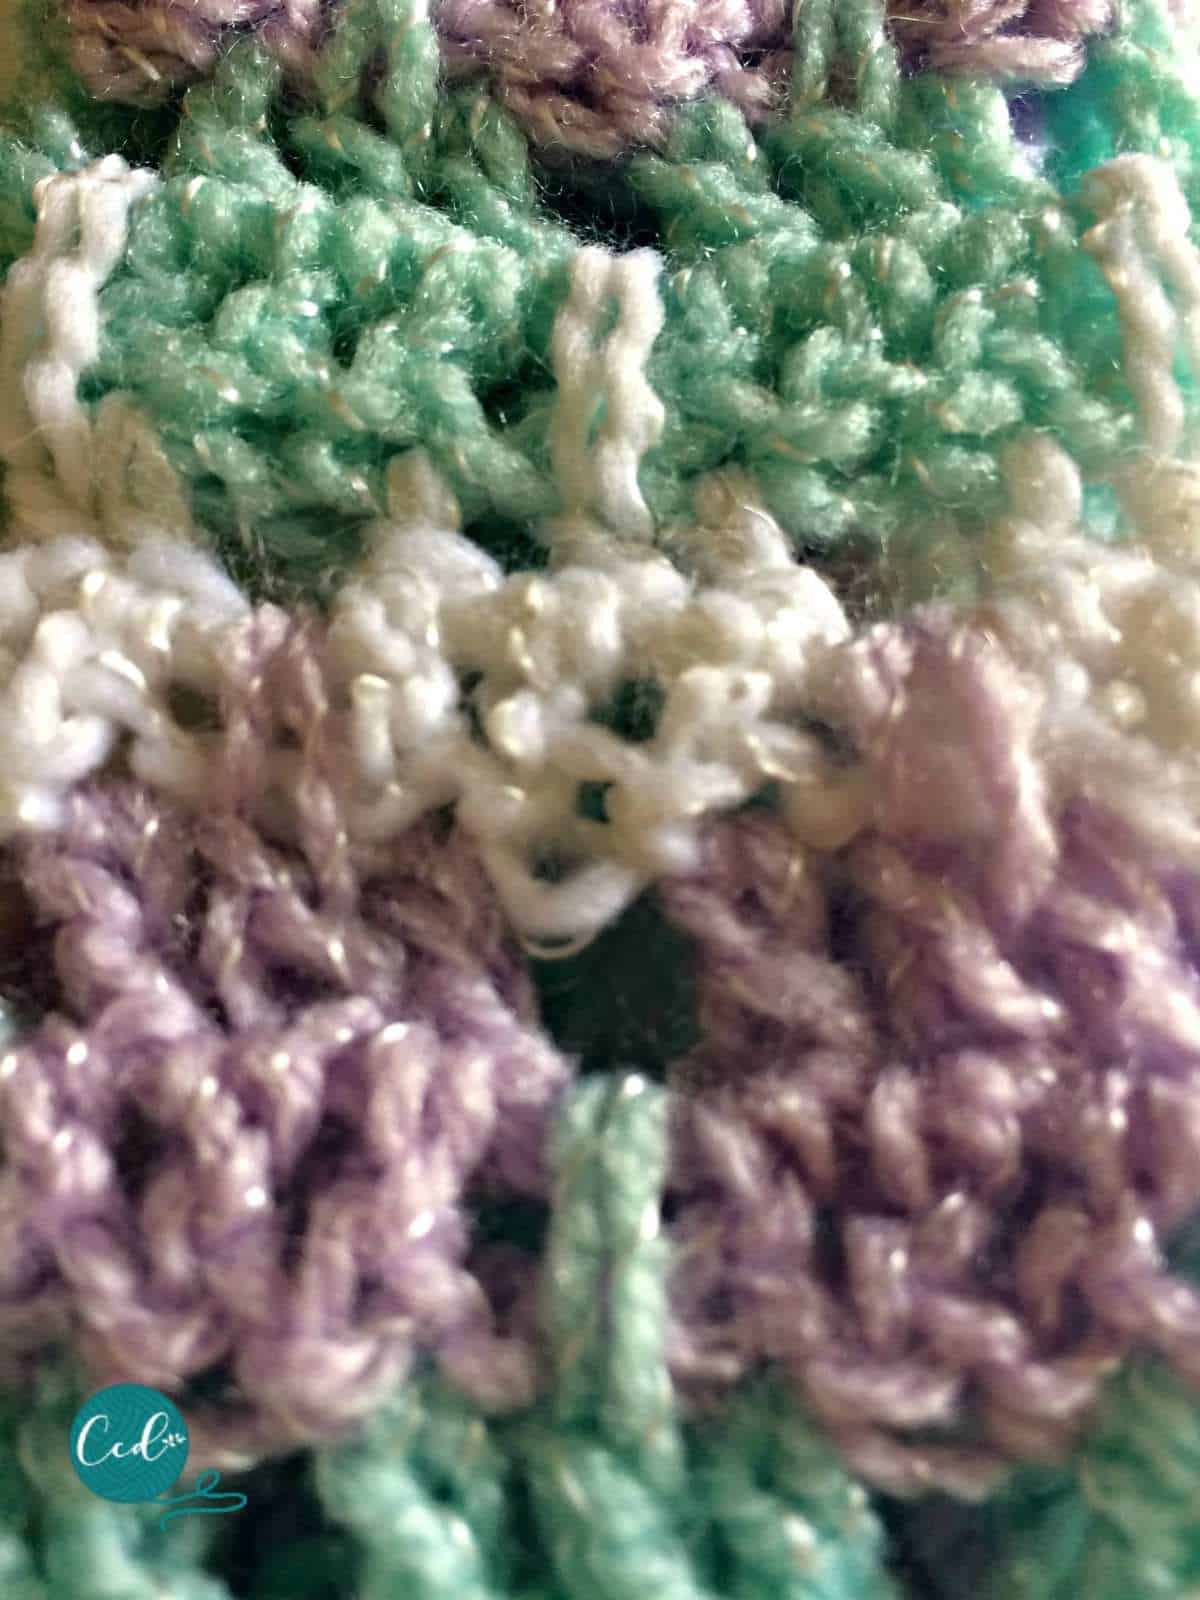
Color a=lavender
Color b=mint
Color c=white
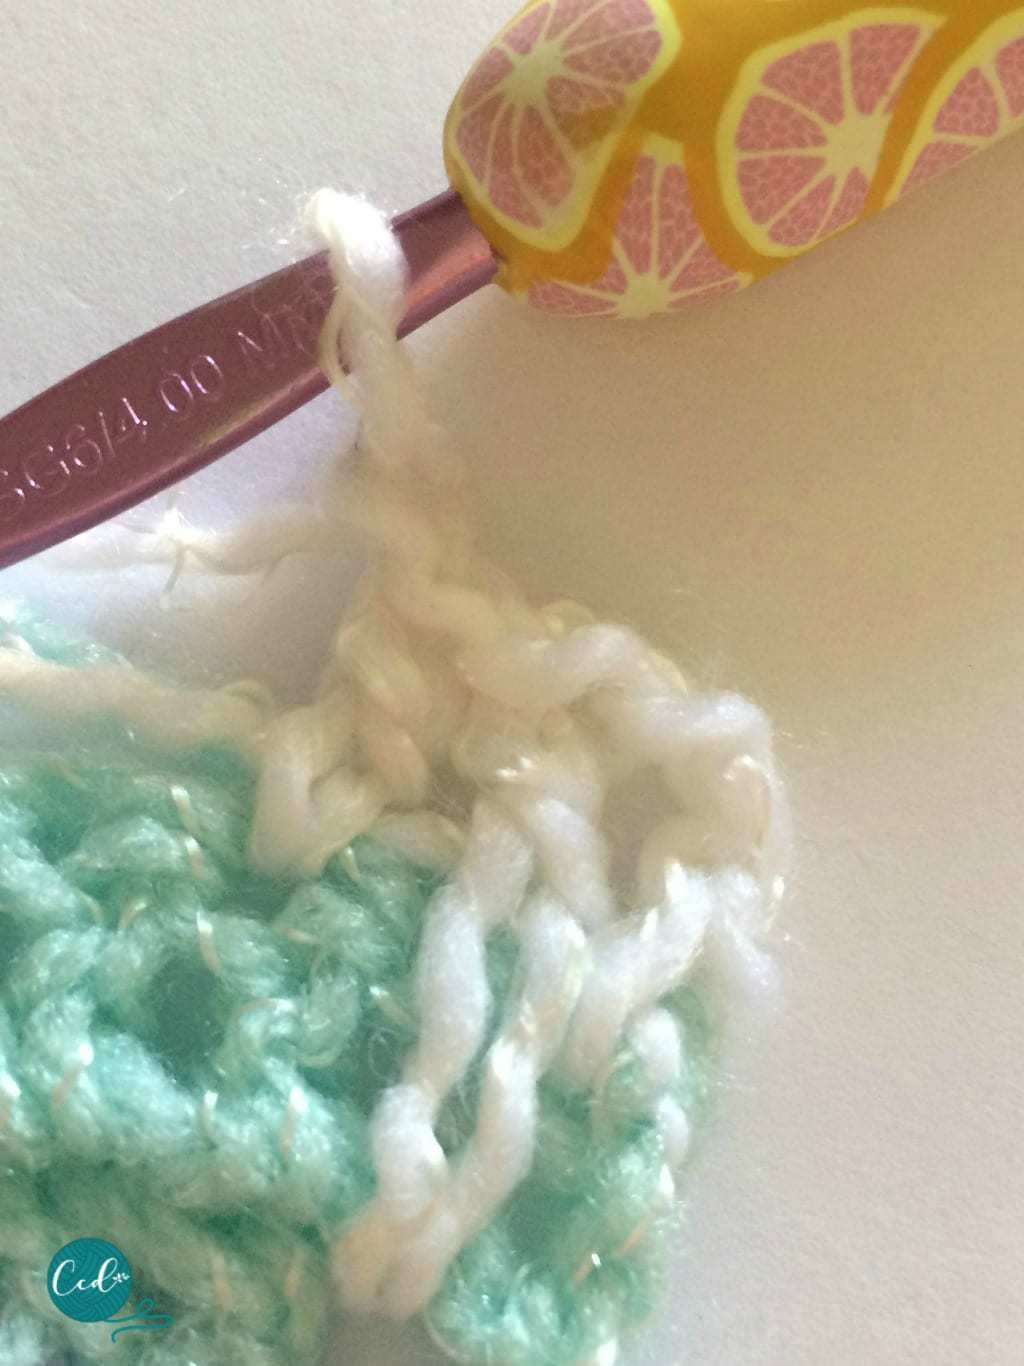
*Special Stitches-long double crochet make a normal DC, but instead of starting in the stitch, insert your hook down below into the chain space formed from the previous row. You’ll crochet it a bit loosely in order to keep the stitches you’re crocheting over flat.
Gauge
3 sts x 1 row (after blocking) to 1” (2.5 cm) measured in pattern.
Construction
The lovey is crocheted directly around a maple wood ring. The small blanket lovey is then crocheted in rows from the stitches on the ring.
Sizing
6″ long by 3″ wide
Skill Level
Intermediate
Stitches
US Terms
ch(s) – chain(s)
dc – double crochet
rep – repeat
rnd – round
sc – single crochet
sk – skip the indicated stitch
sl st – slip stitch
st(s) – stitch(es)
Pattern
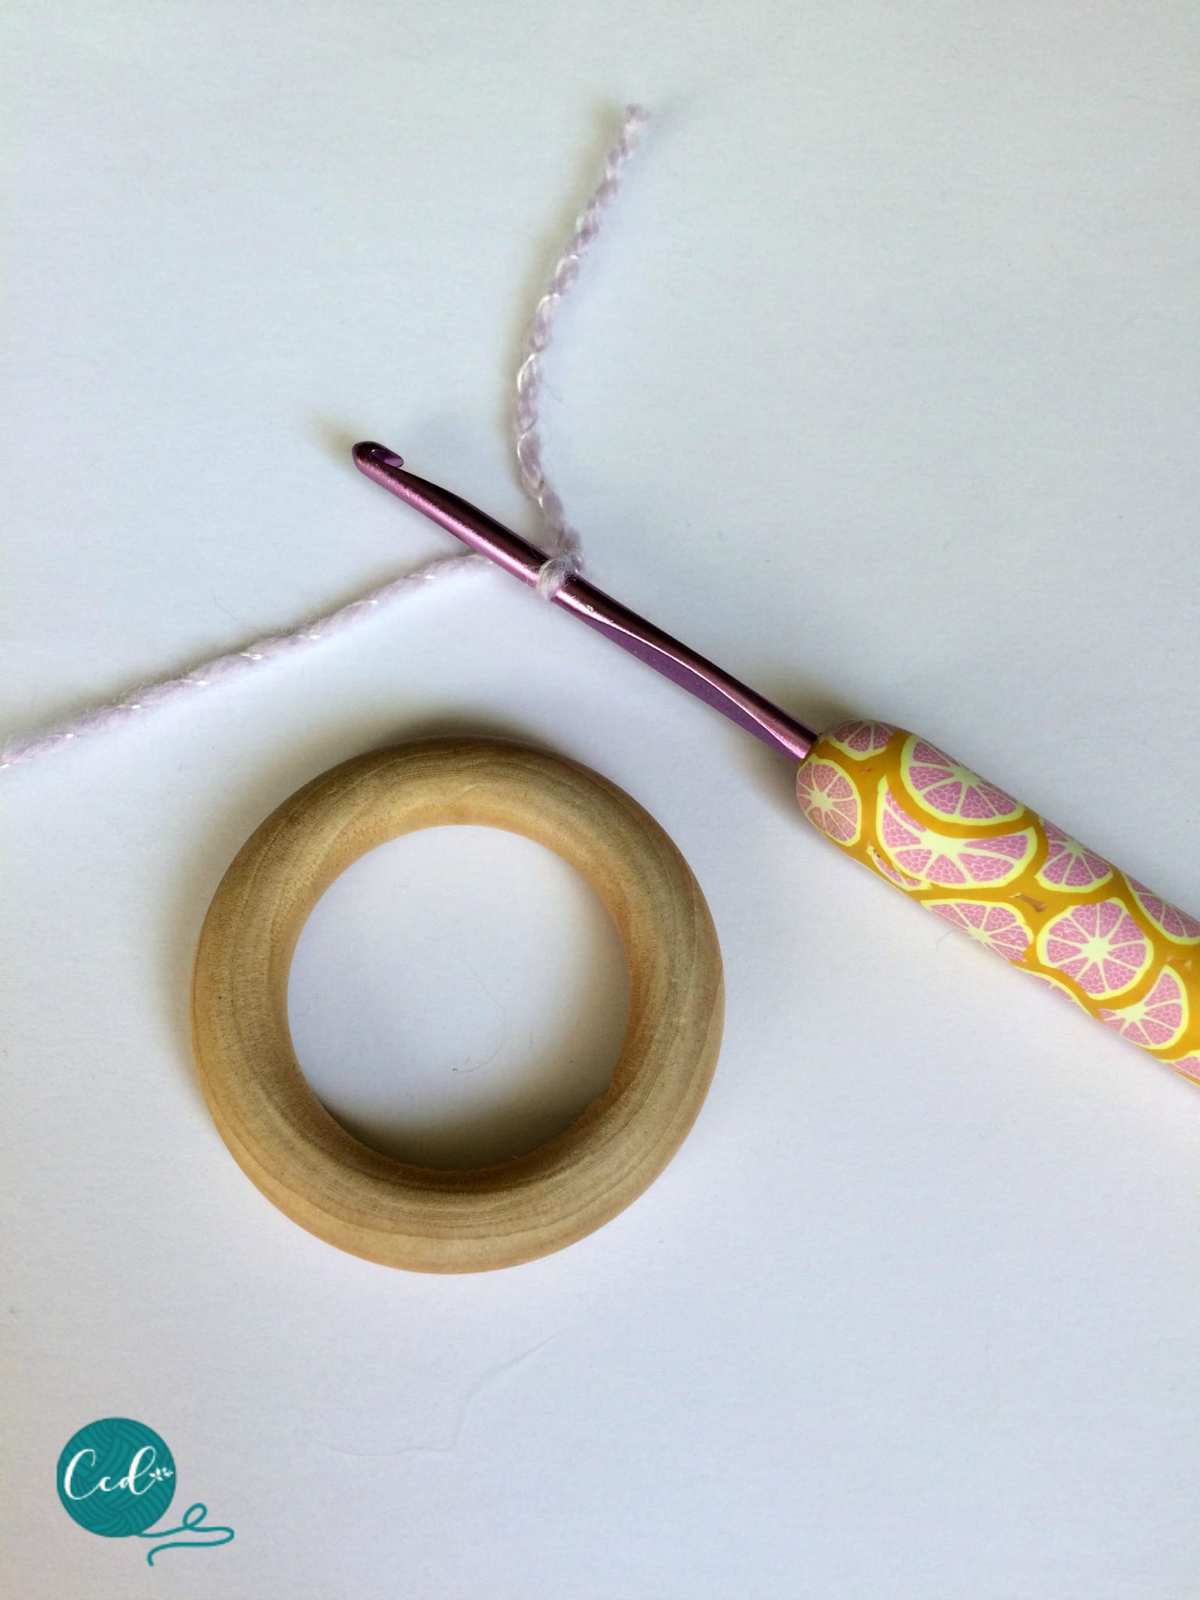
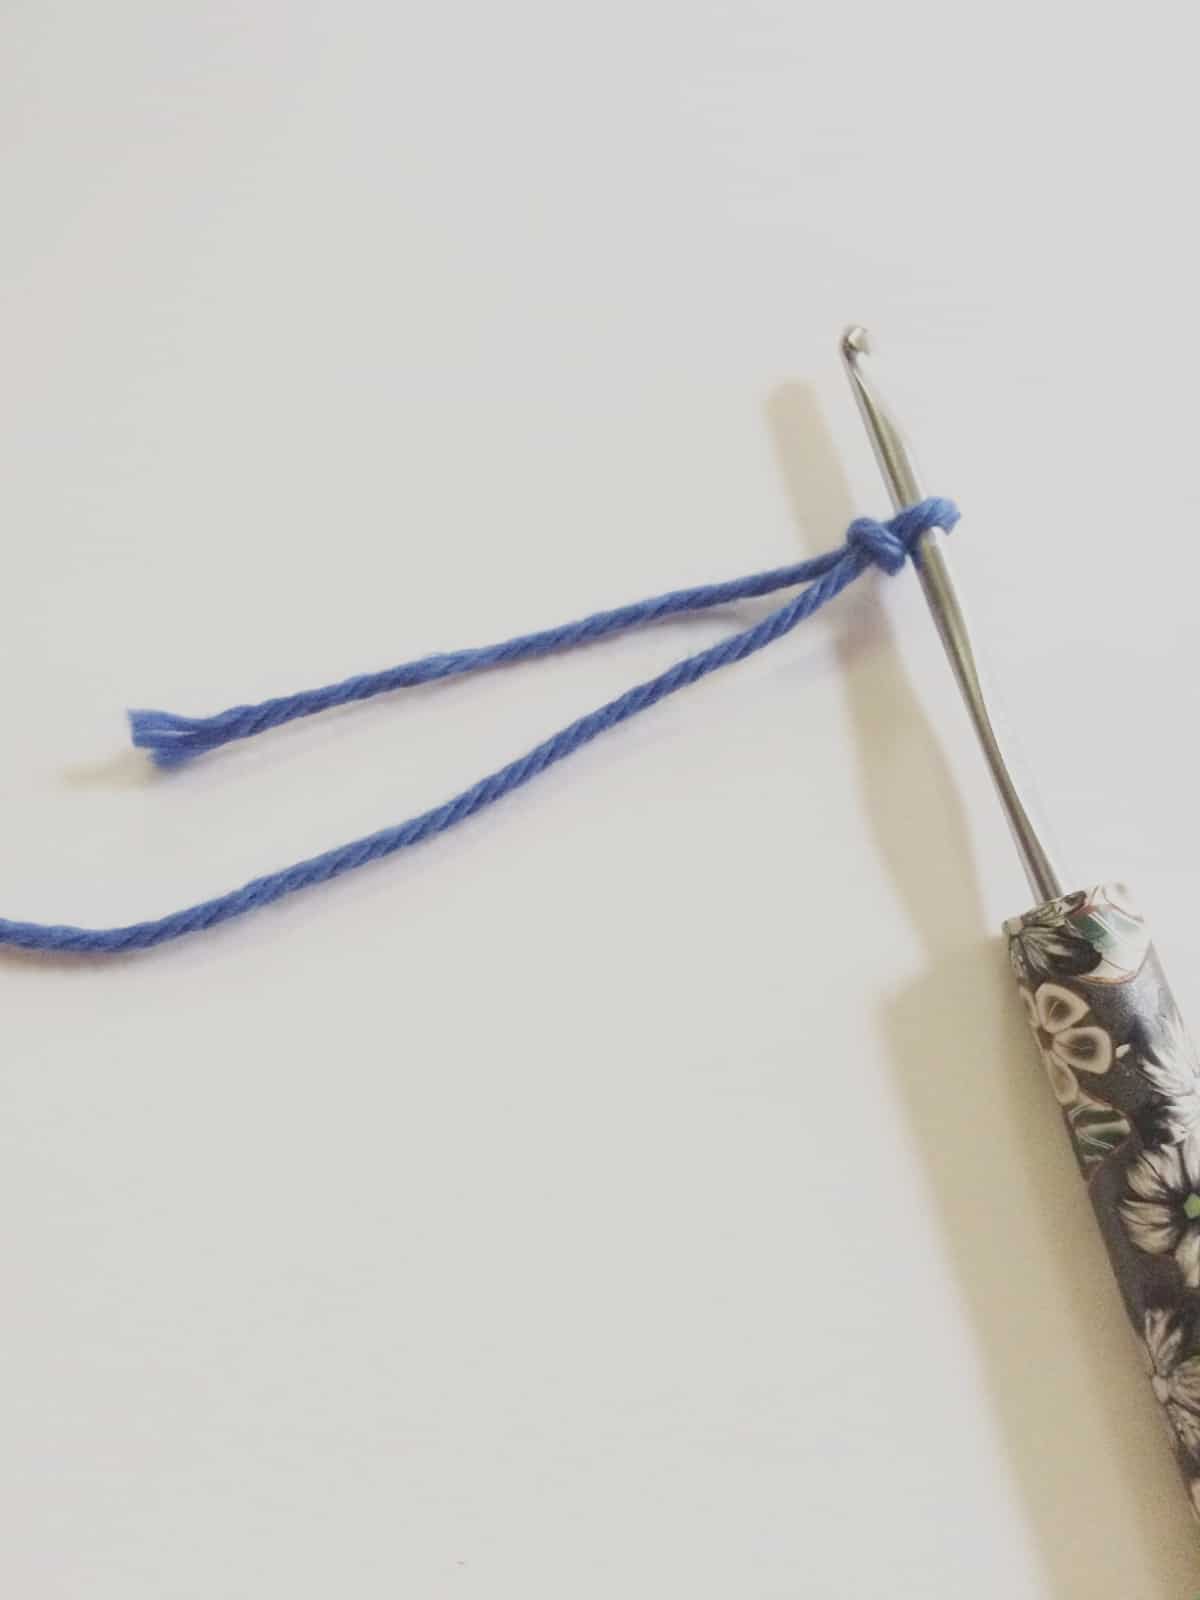
Begin with color a and make a slip knot on your hook.
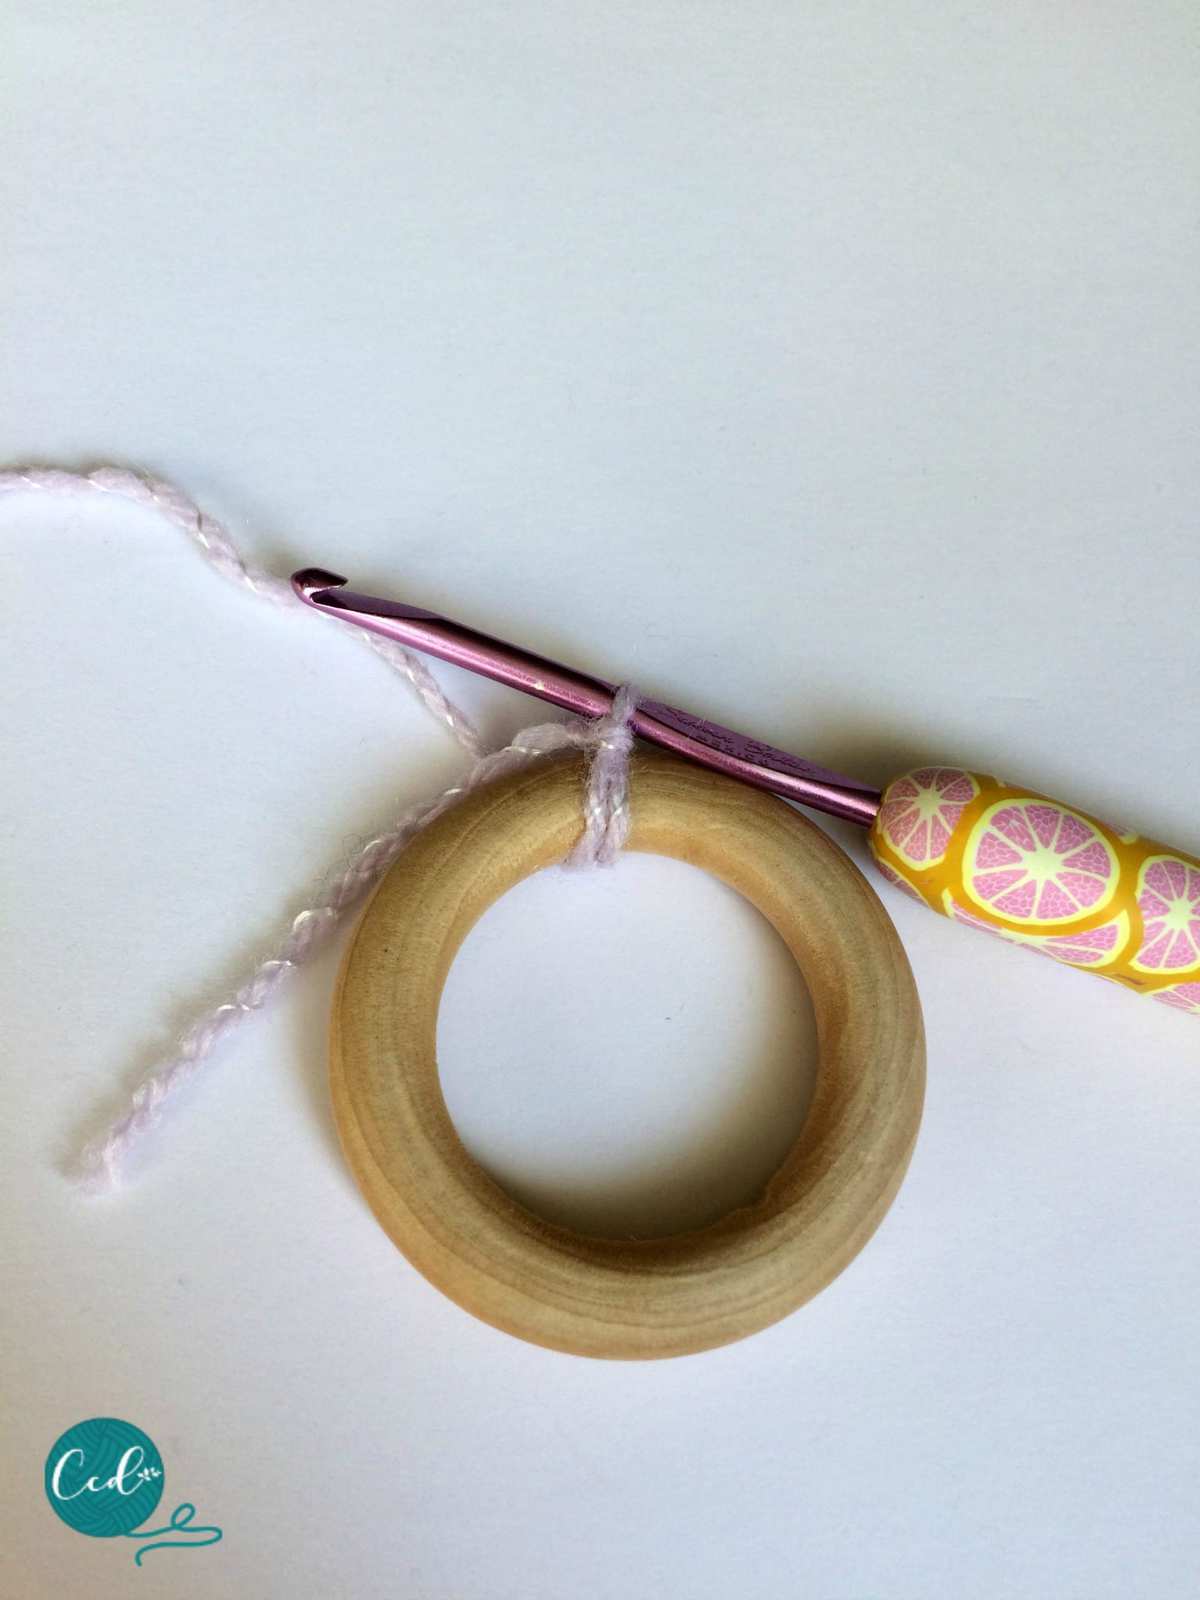
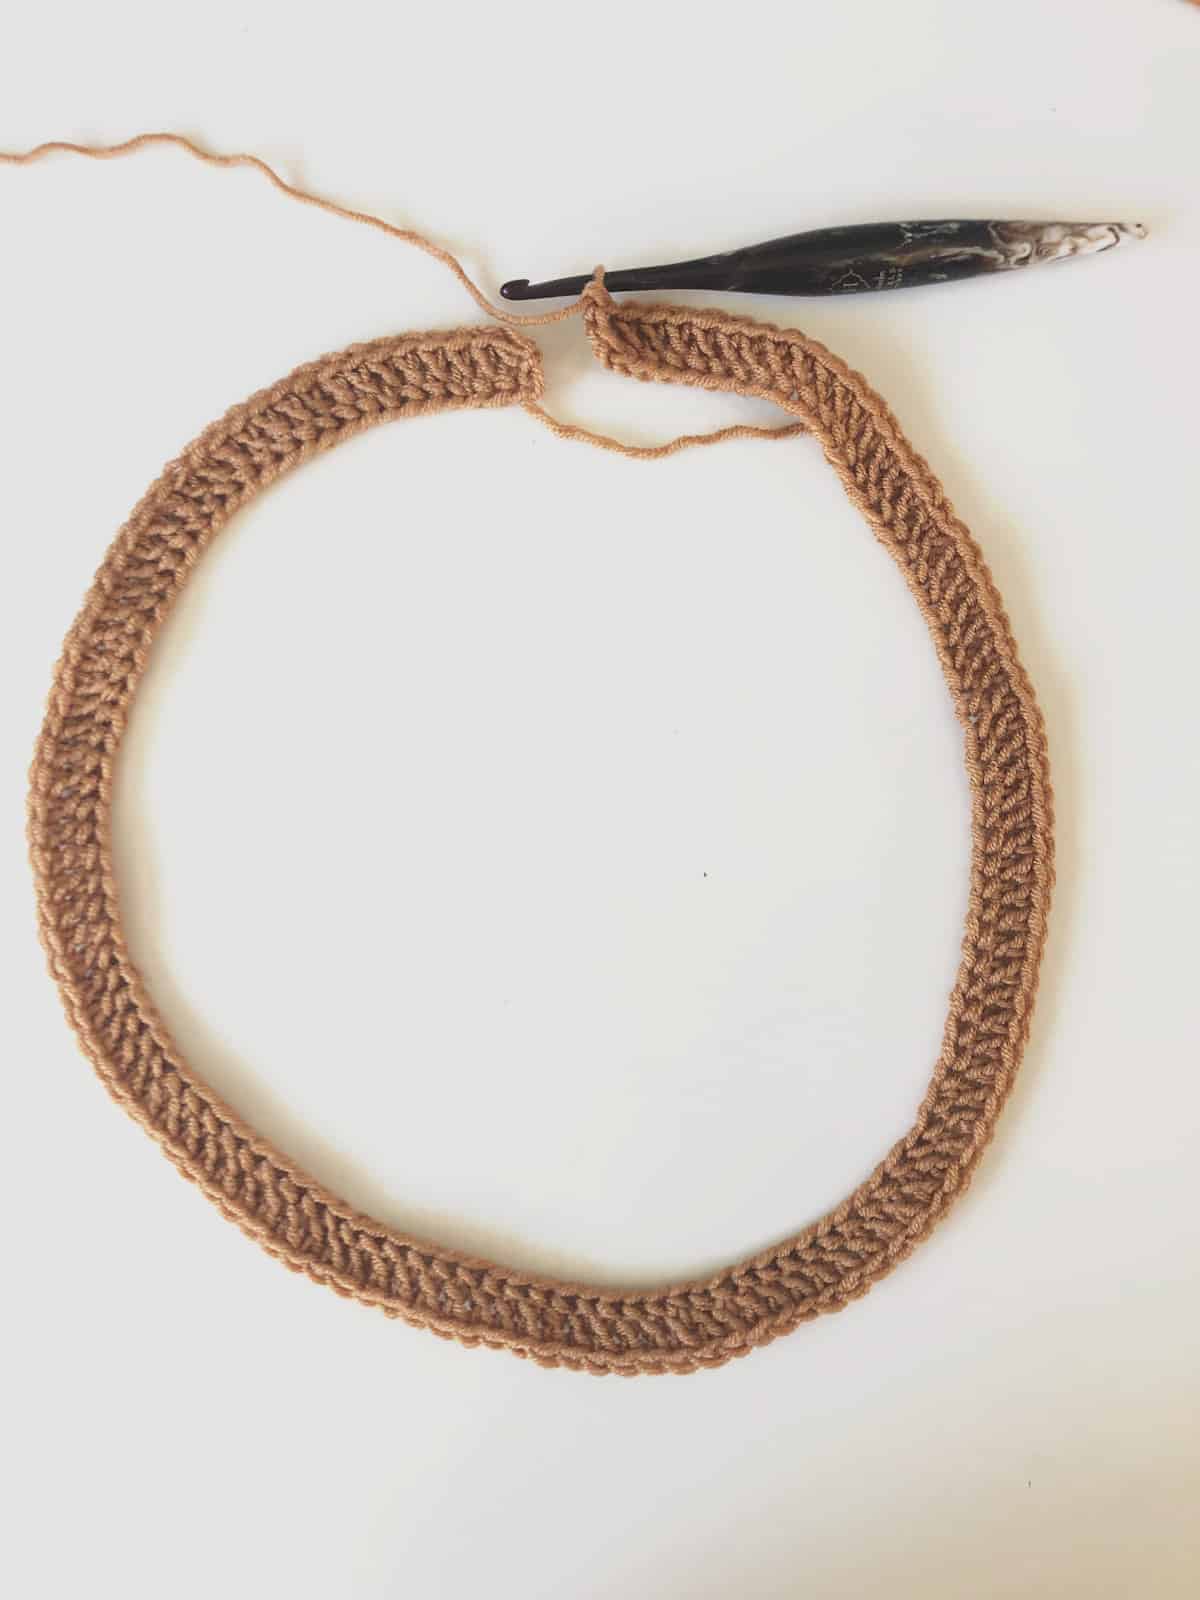
Insert your hook into the wood ring and slip stitch to the ring.
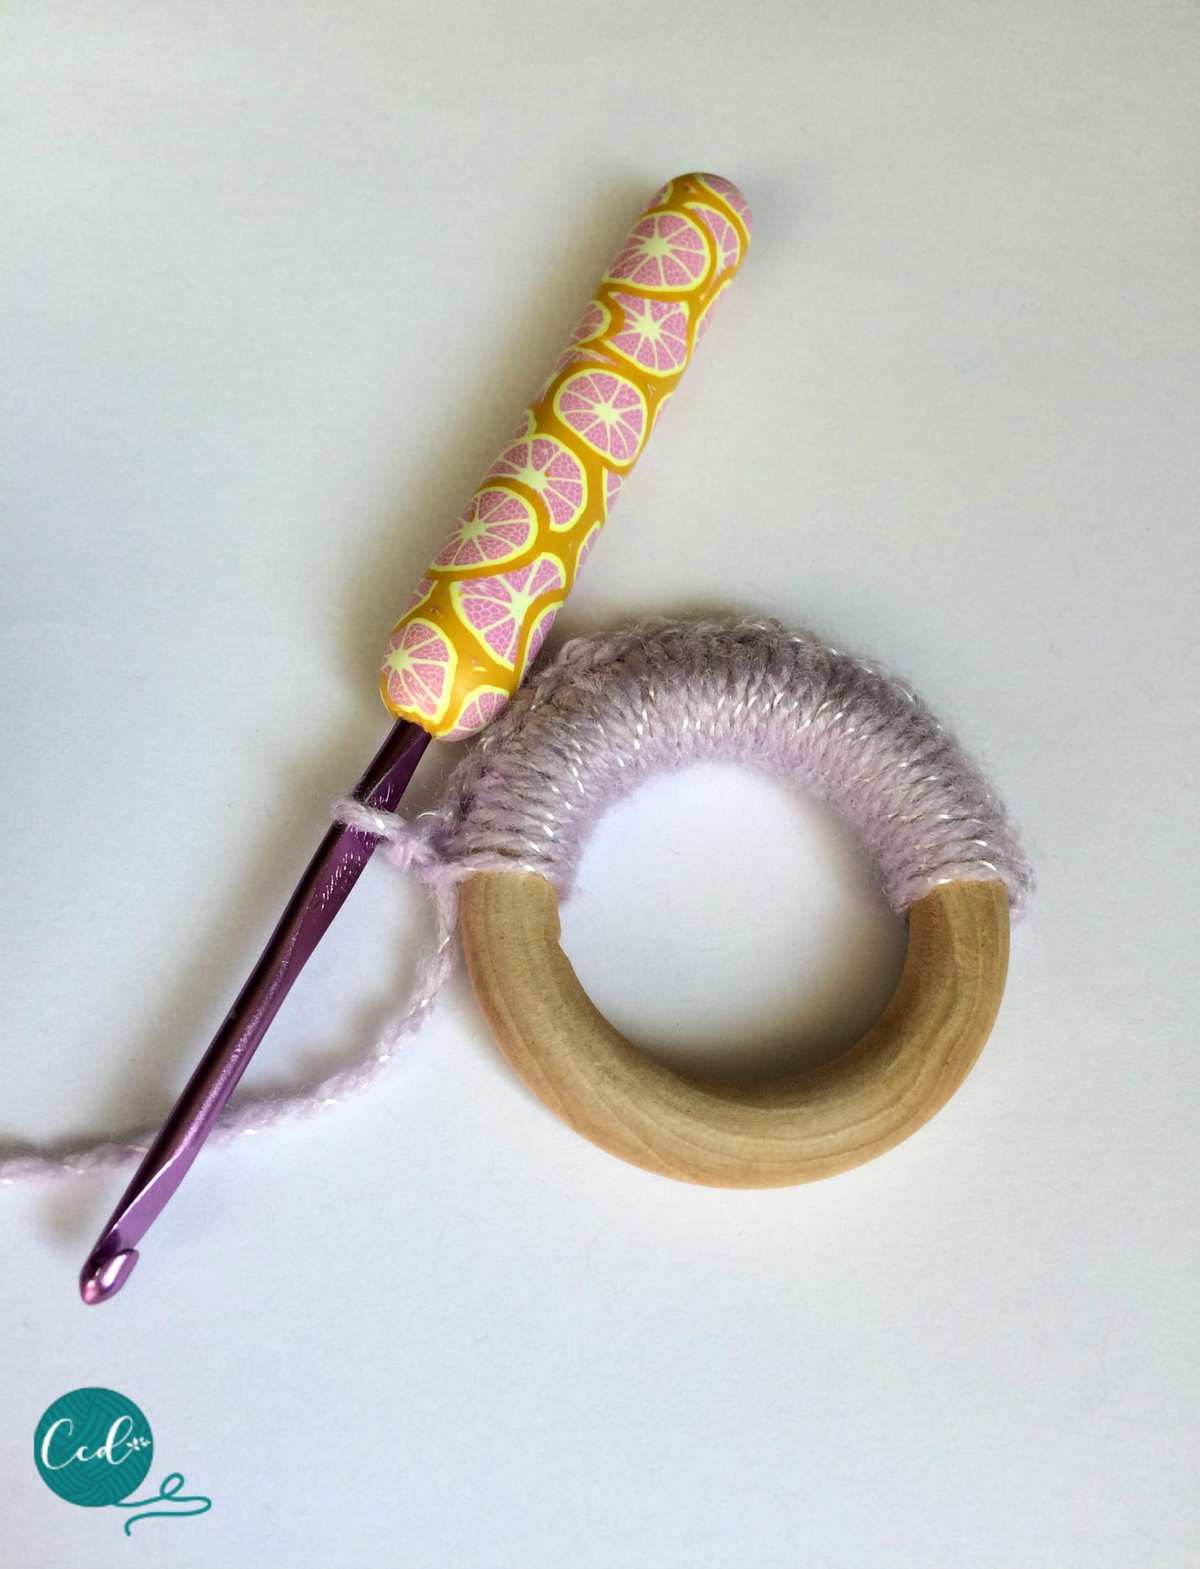
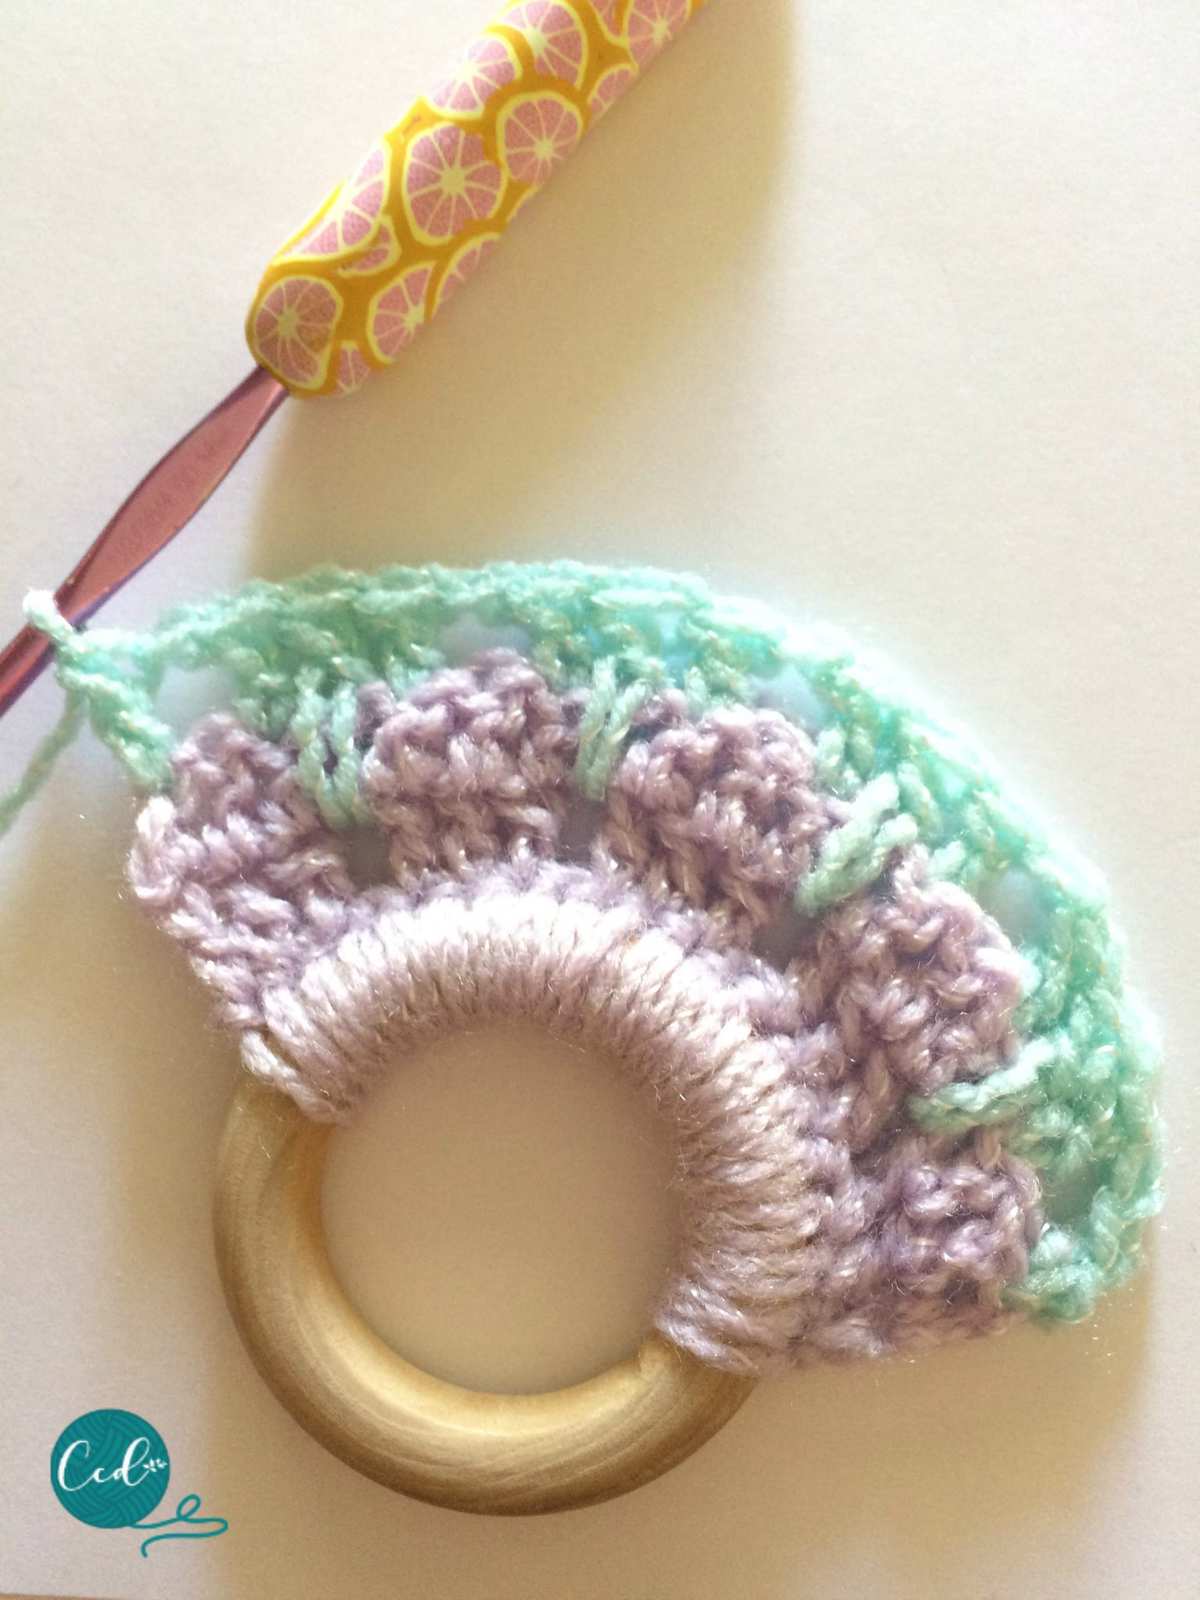
Row 1. Working around the ring place 19 sc on half ring, turn. [19 sts]
Row 2. Ch 1, sc in each st, turn. [19 sts]
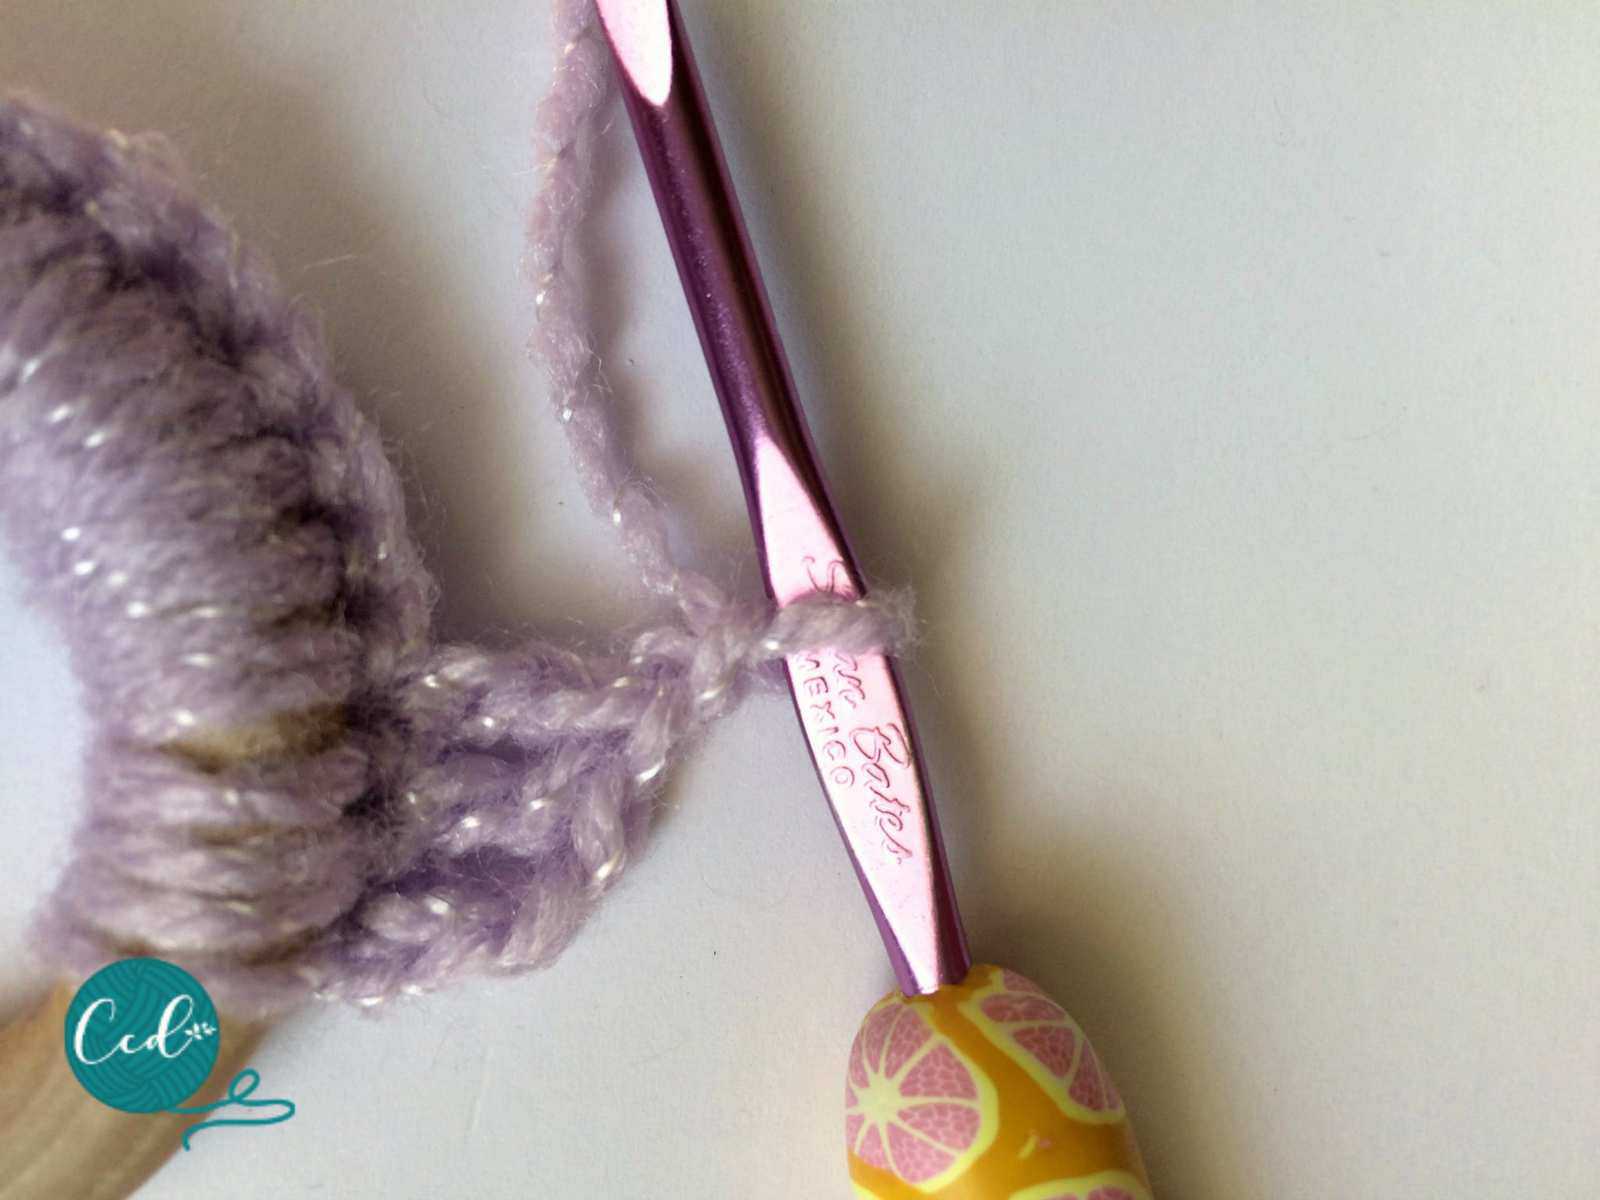
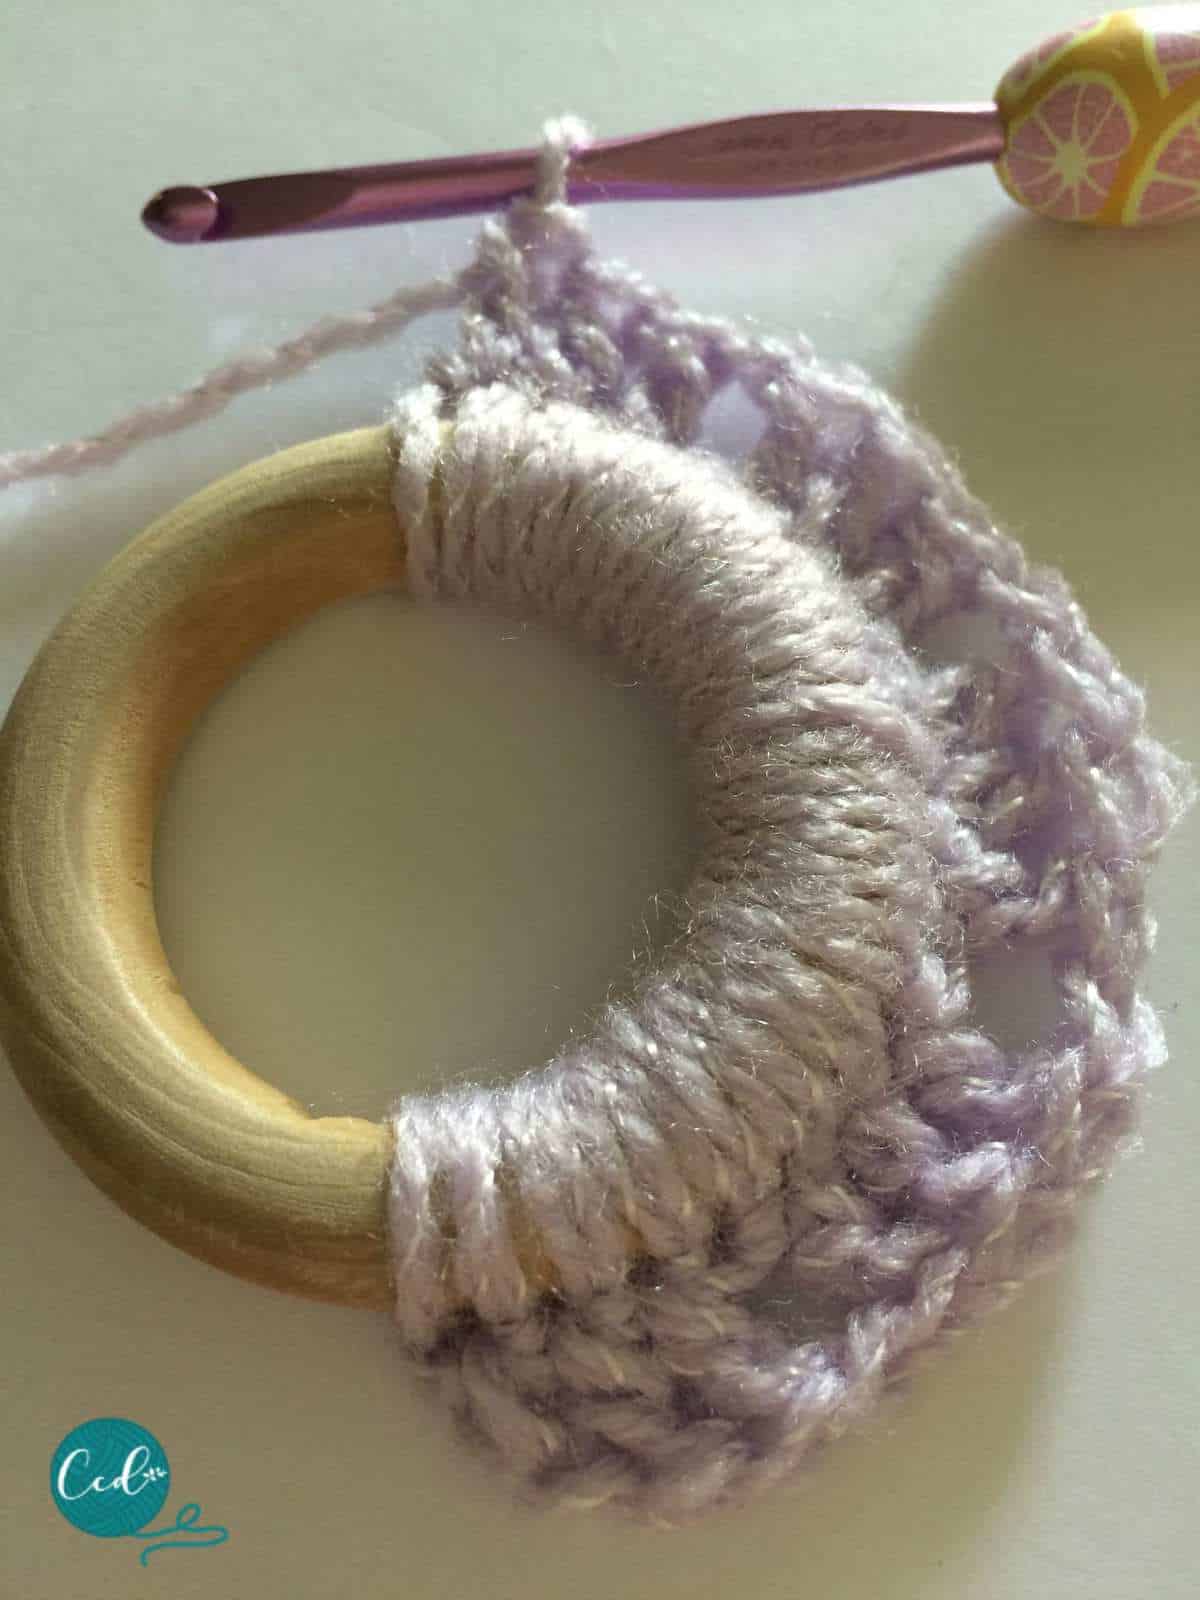
Row 3. Ch 3, dc in next 2 sts, ch 1, sk 1, dc in next 3 sts, *dc in next 3 sts, ch1, sk 1, dc in next 3 sts; rep from * to end, turn. [5 sets of 3 dc, with a ch 1 space in between]


Row 4. Ch 3, dc in next 2 sts, ch1, sk 1, *dc in next 3 sts, ch1, sk 1, dc in next 3 sts; rep from* to end, change to color b, turn. [5 sets of 3 dc, with a ch1 space in between]
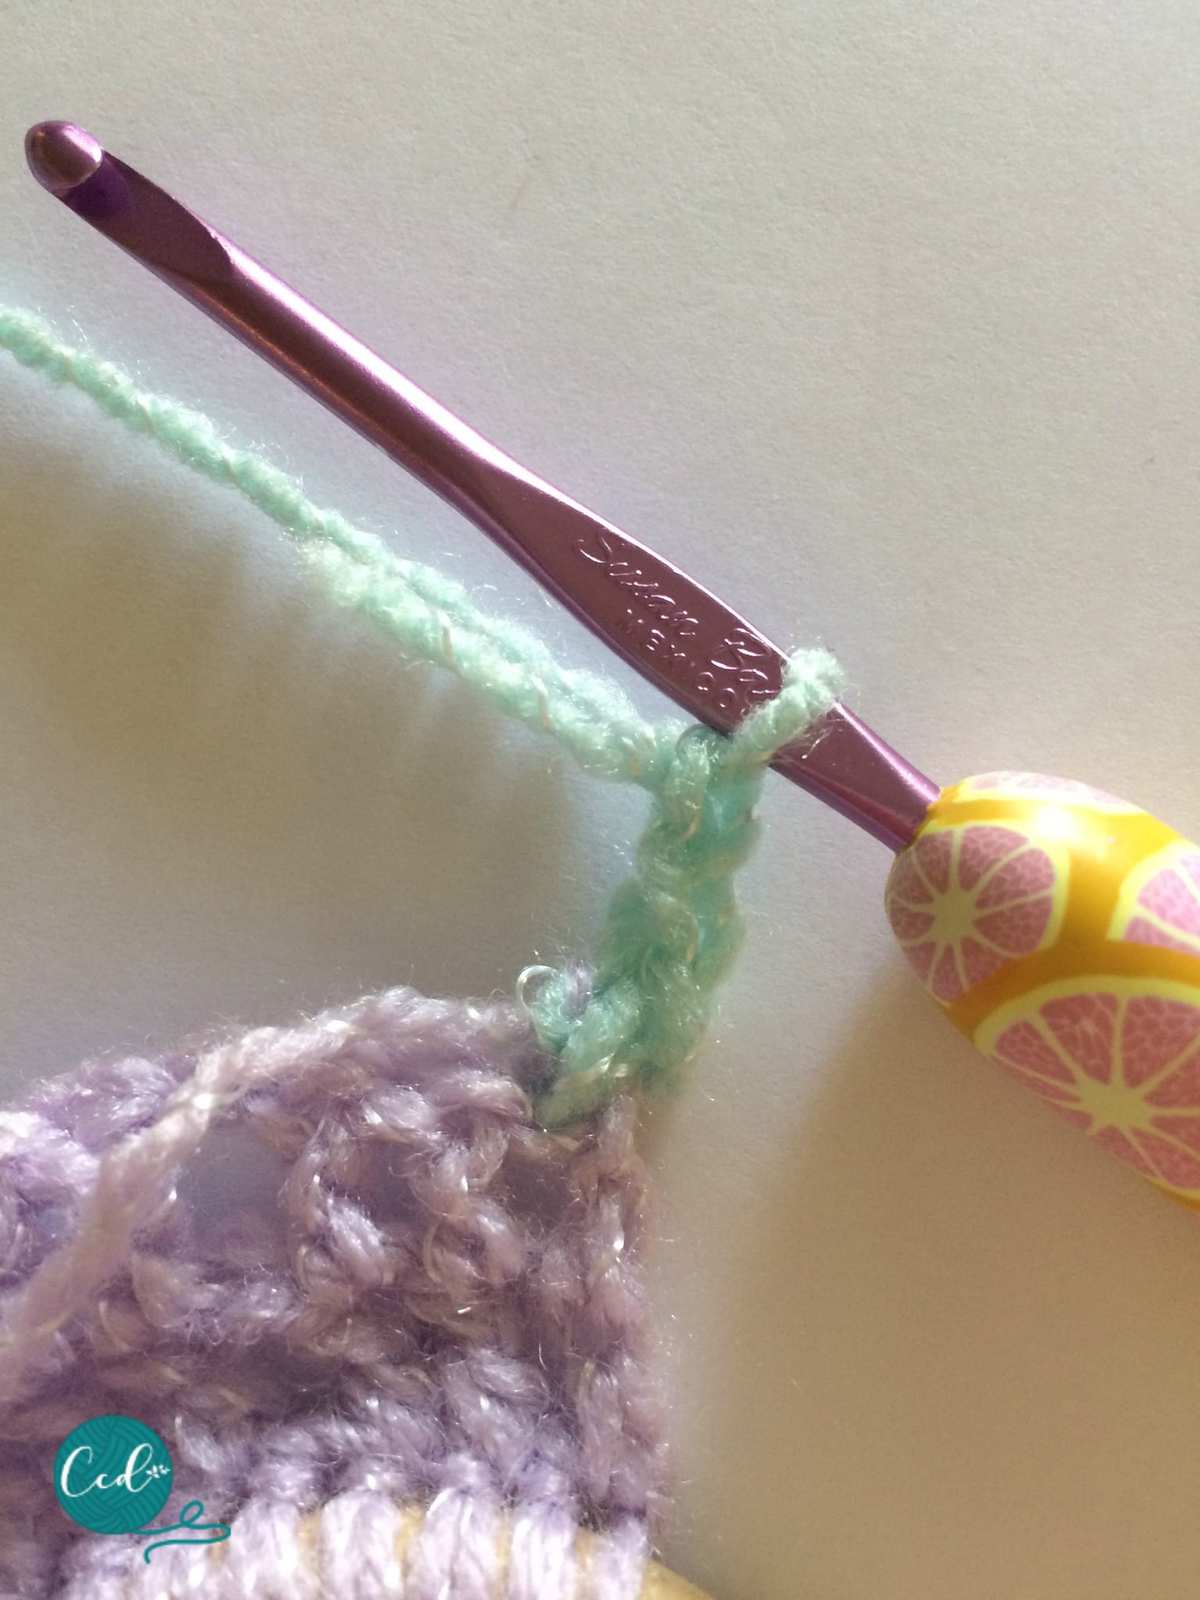
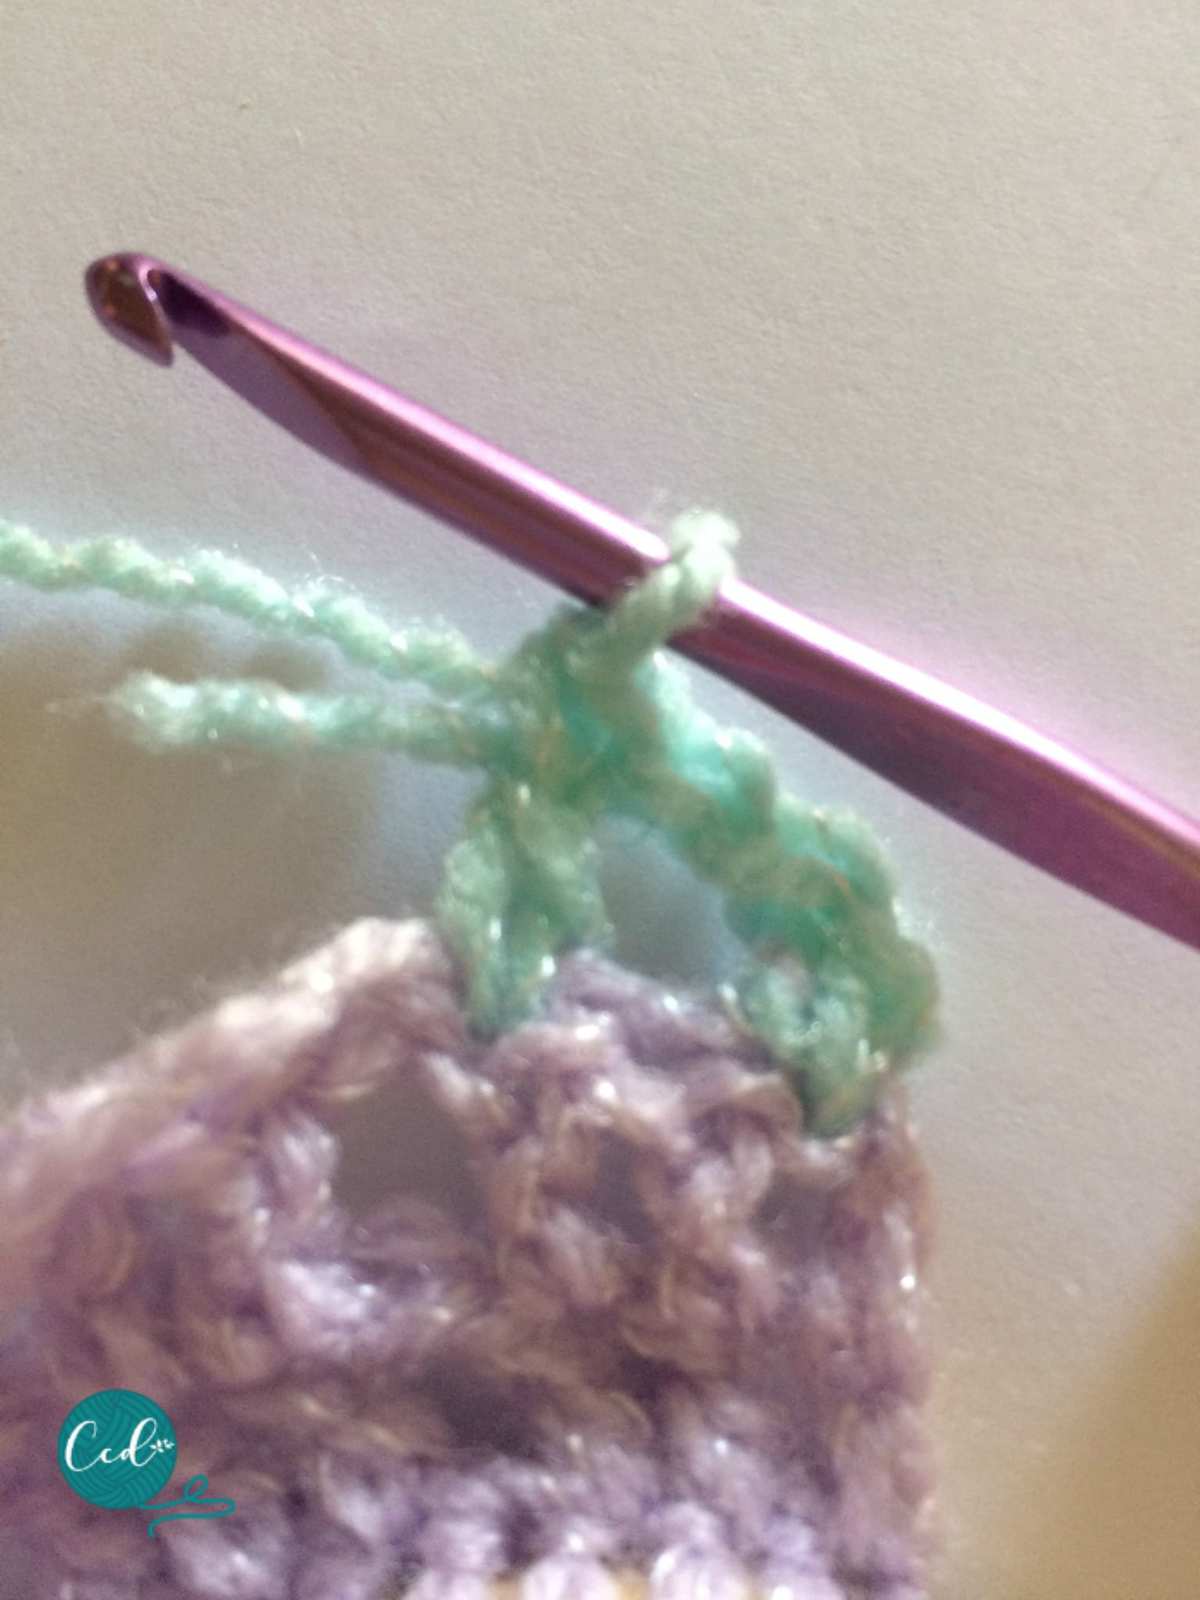
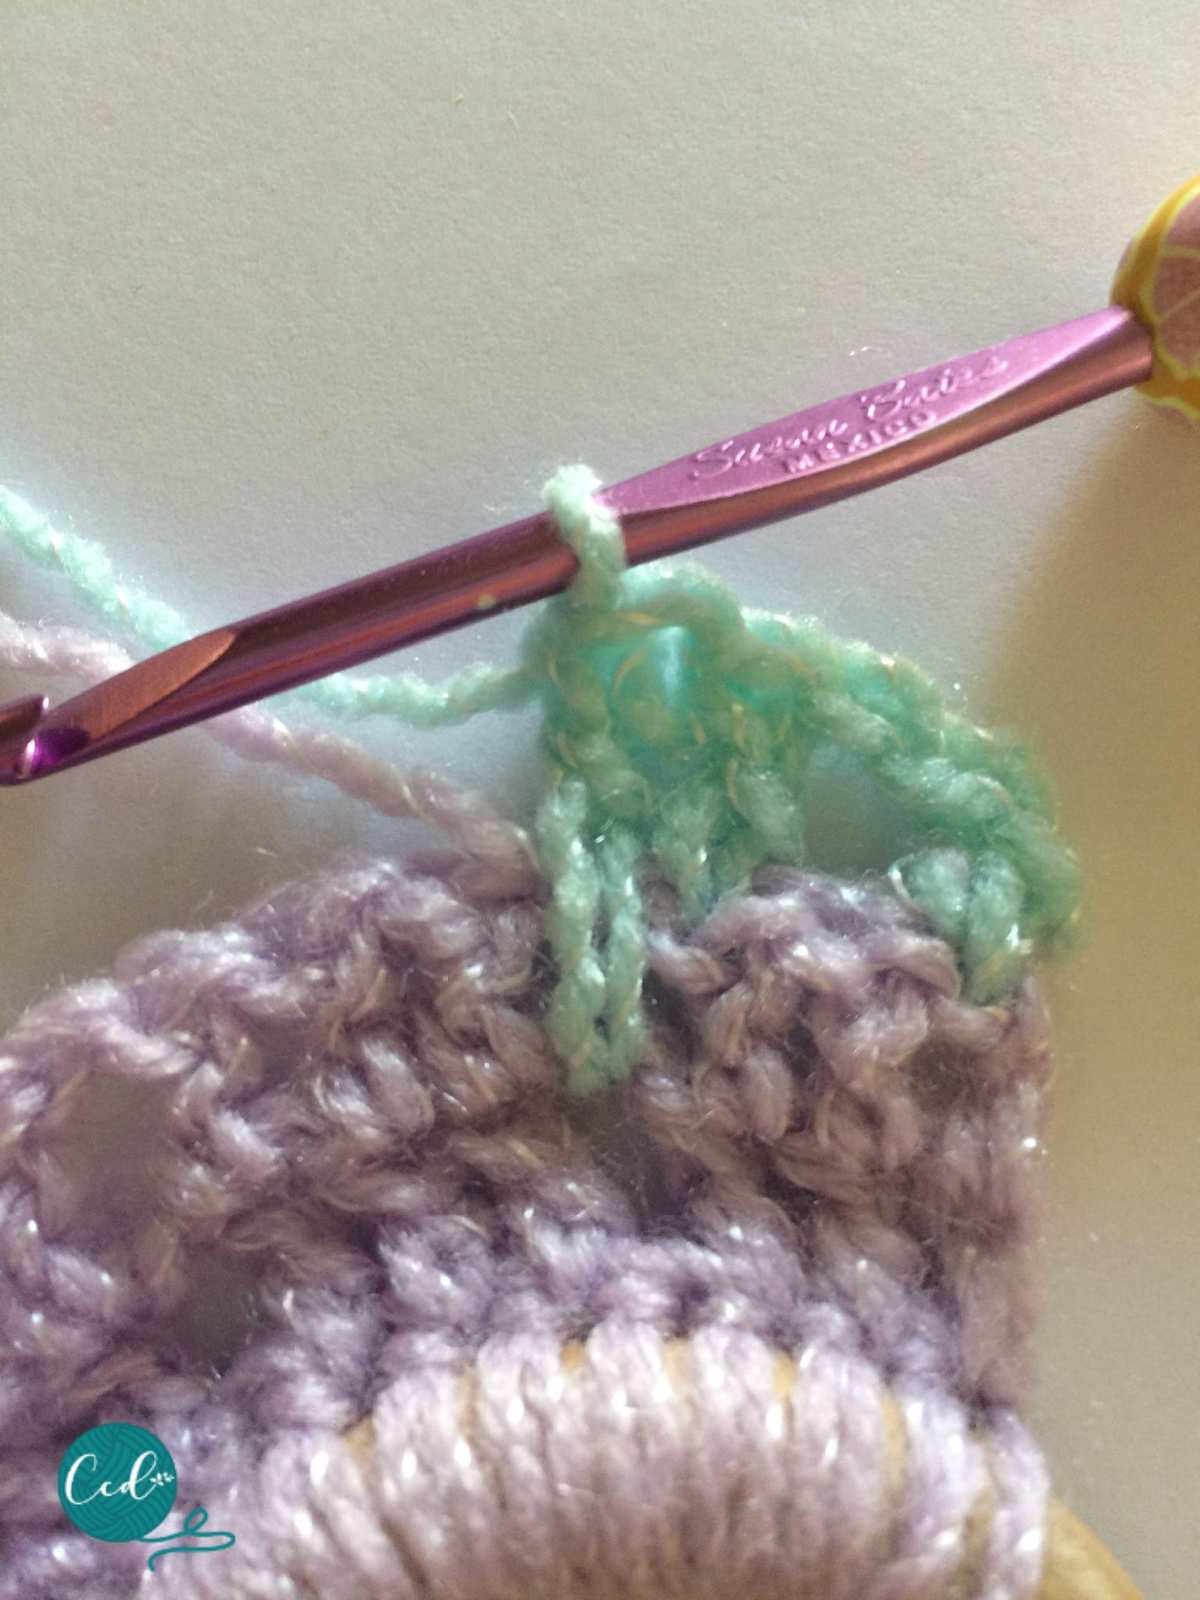

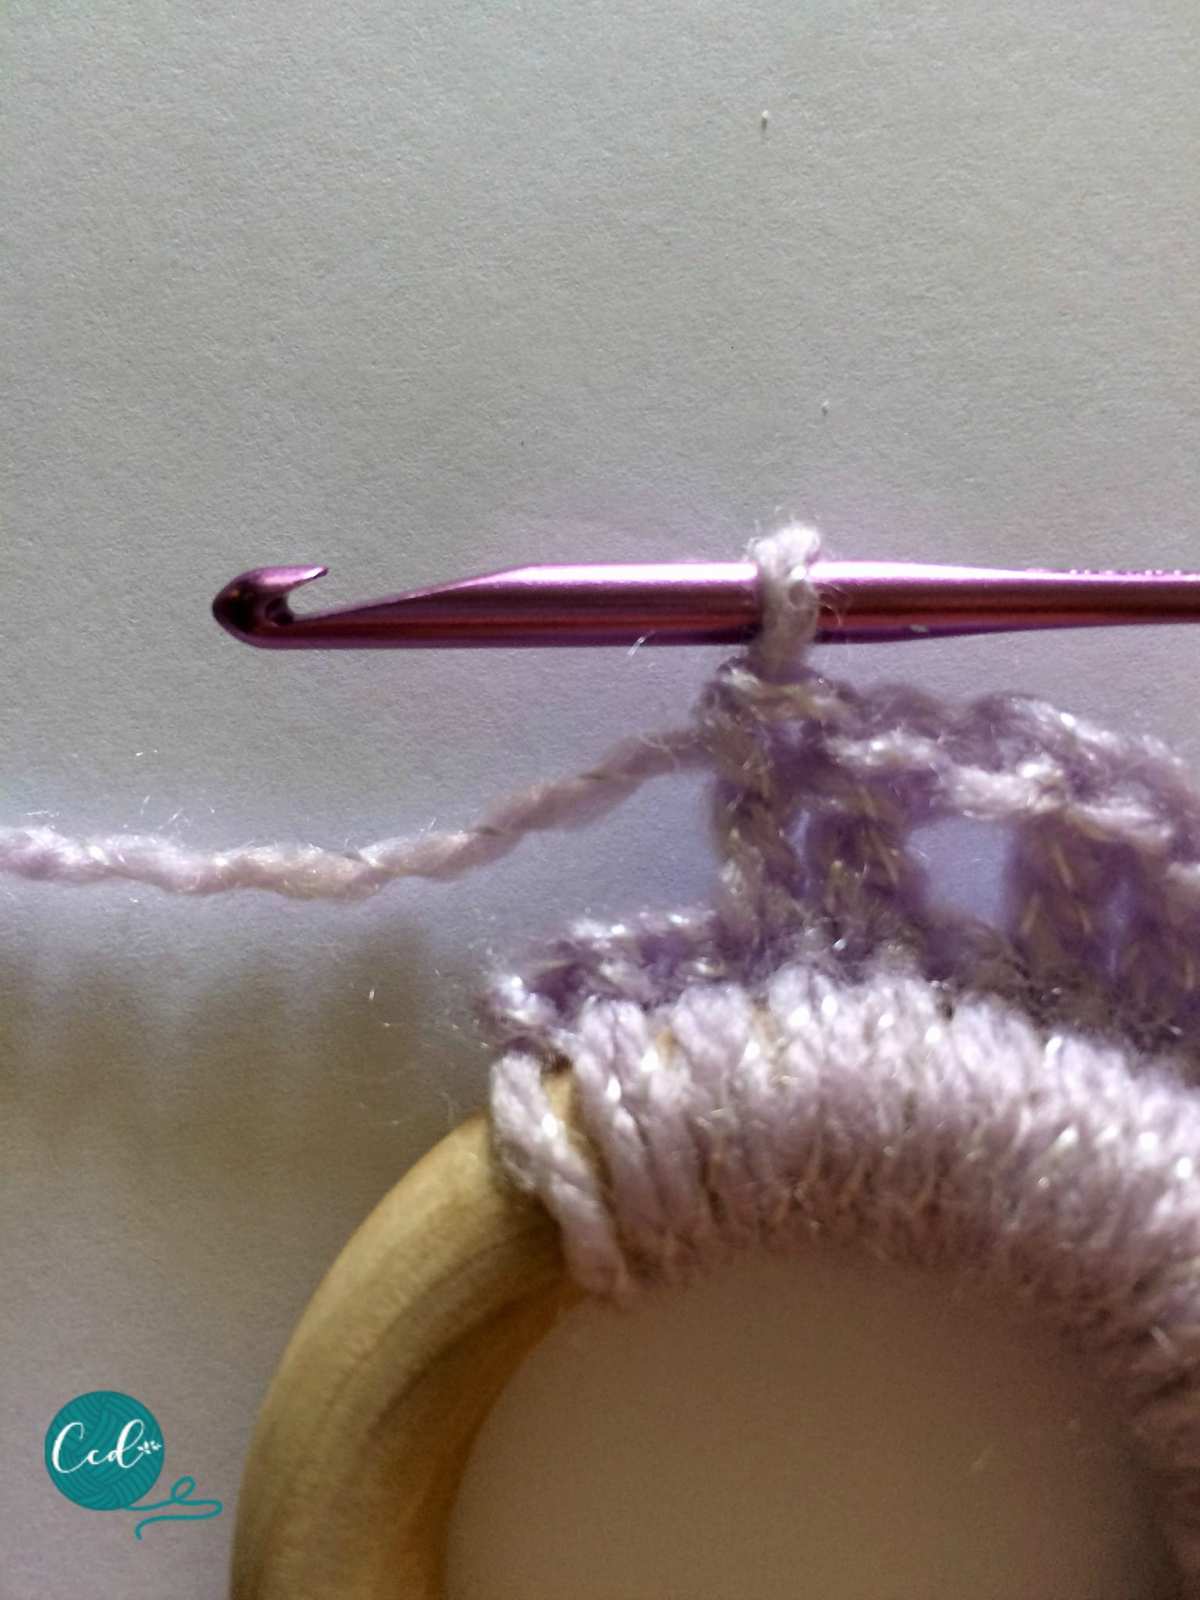
Row 5. In color b, ch 4, sk 1, *dc, long dc into space 2 rows previous, dc, ch1; rep until 1 st left, dc in last st, turn.
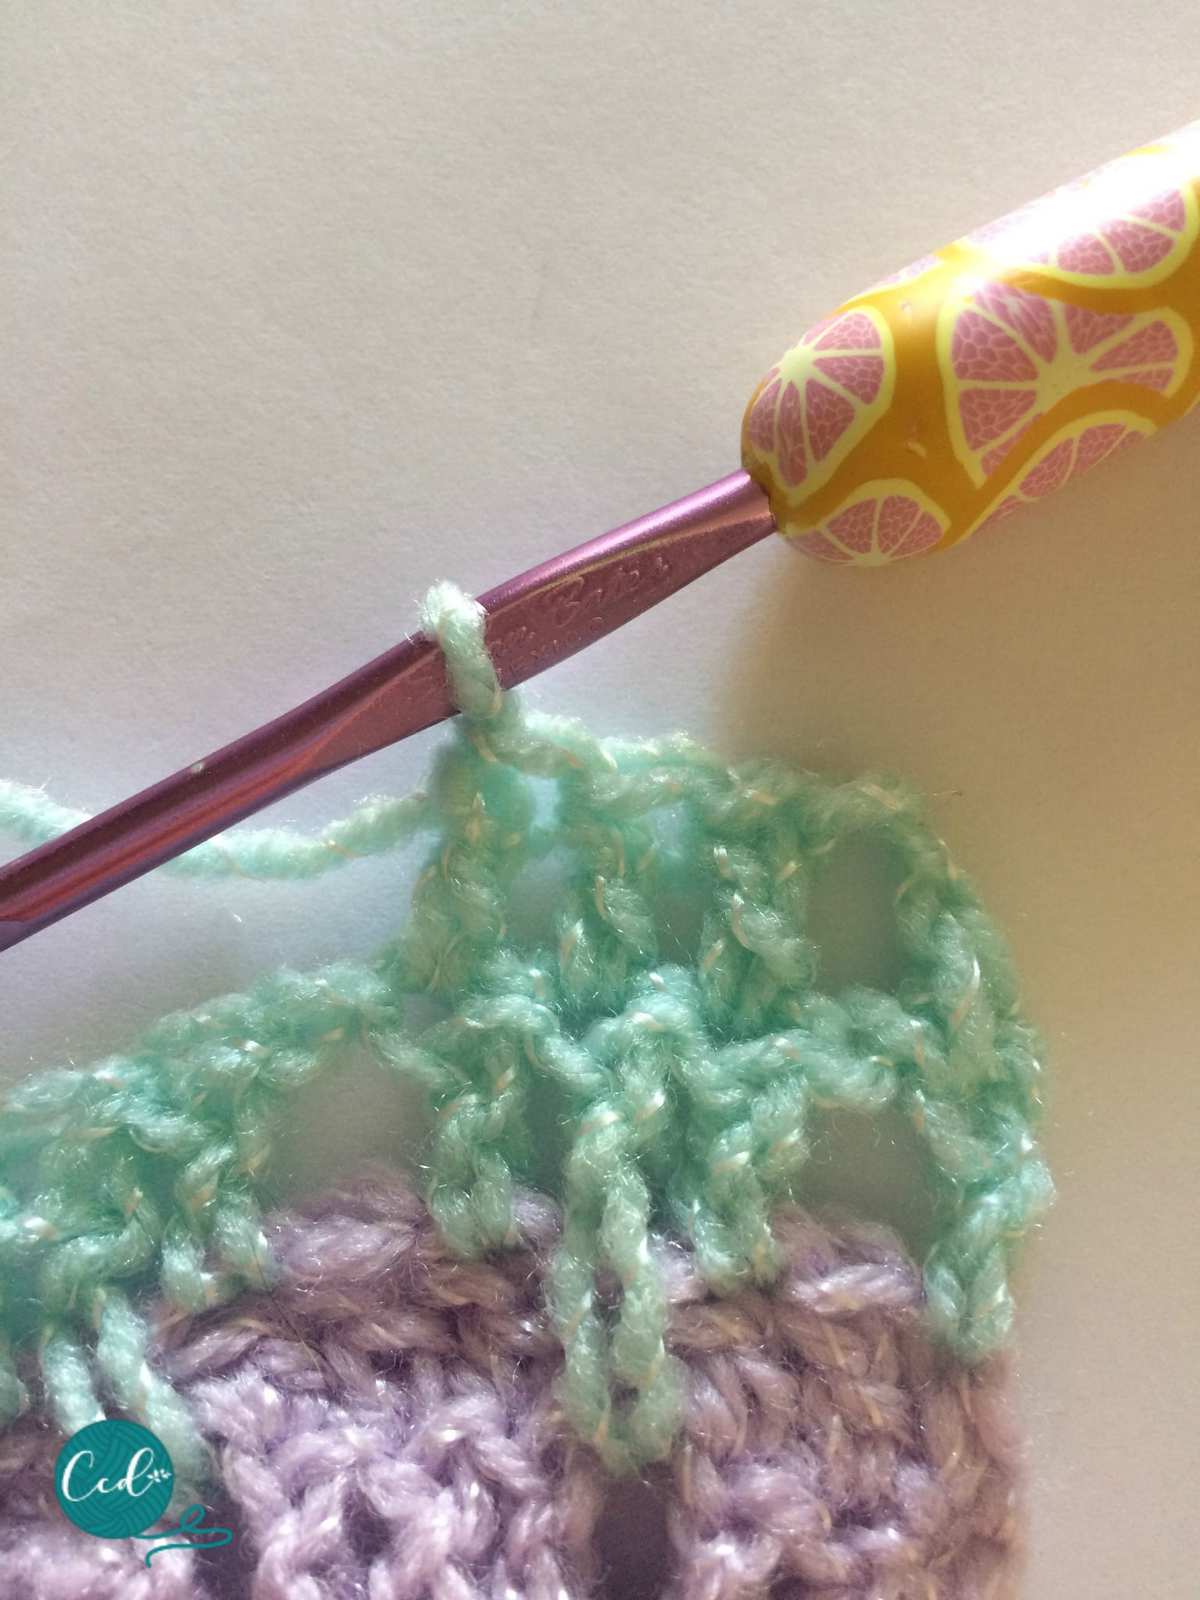
Row 6. Ch 4 (counts as 1st dc + ch1), sk 1, *dc in next 3 sts, ch 1, rep from * until 1 st left, dc in last st, change to color c, turn.
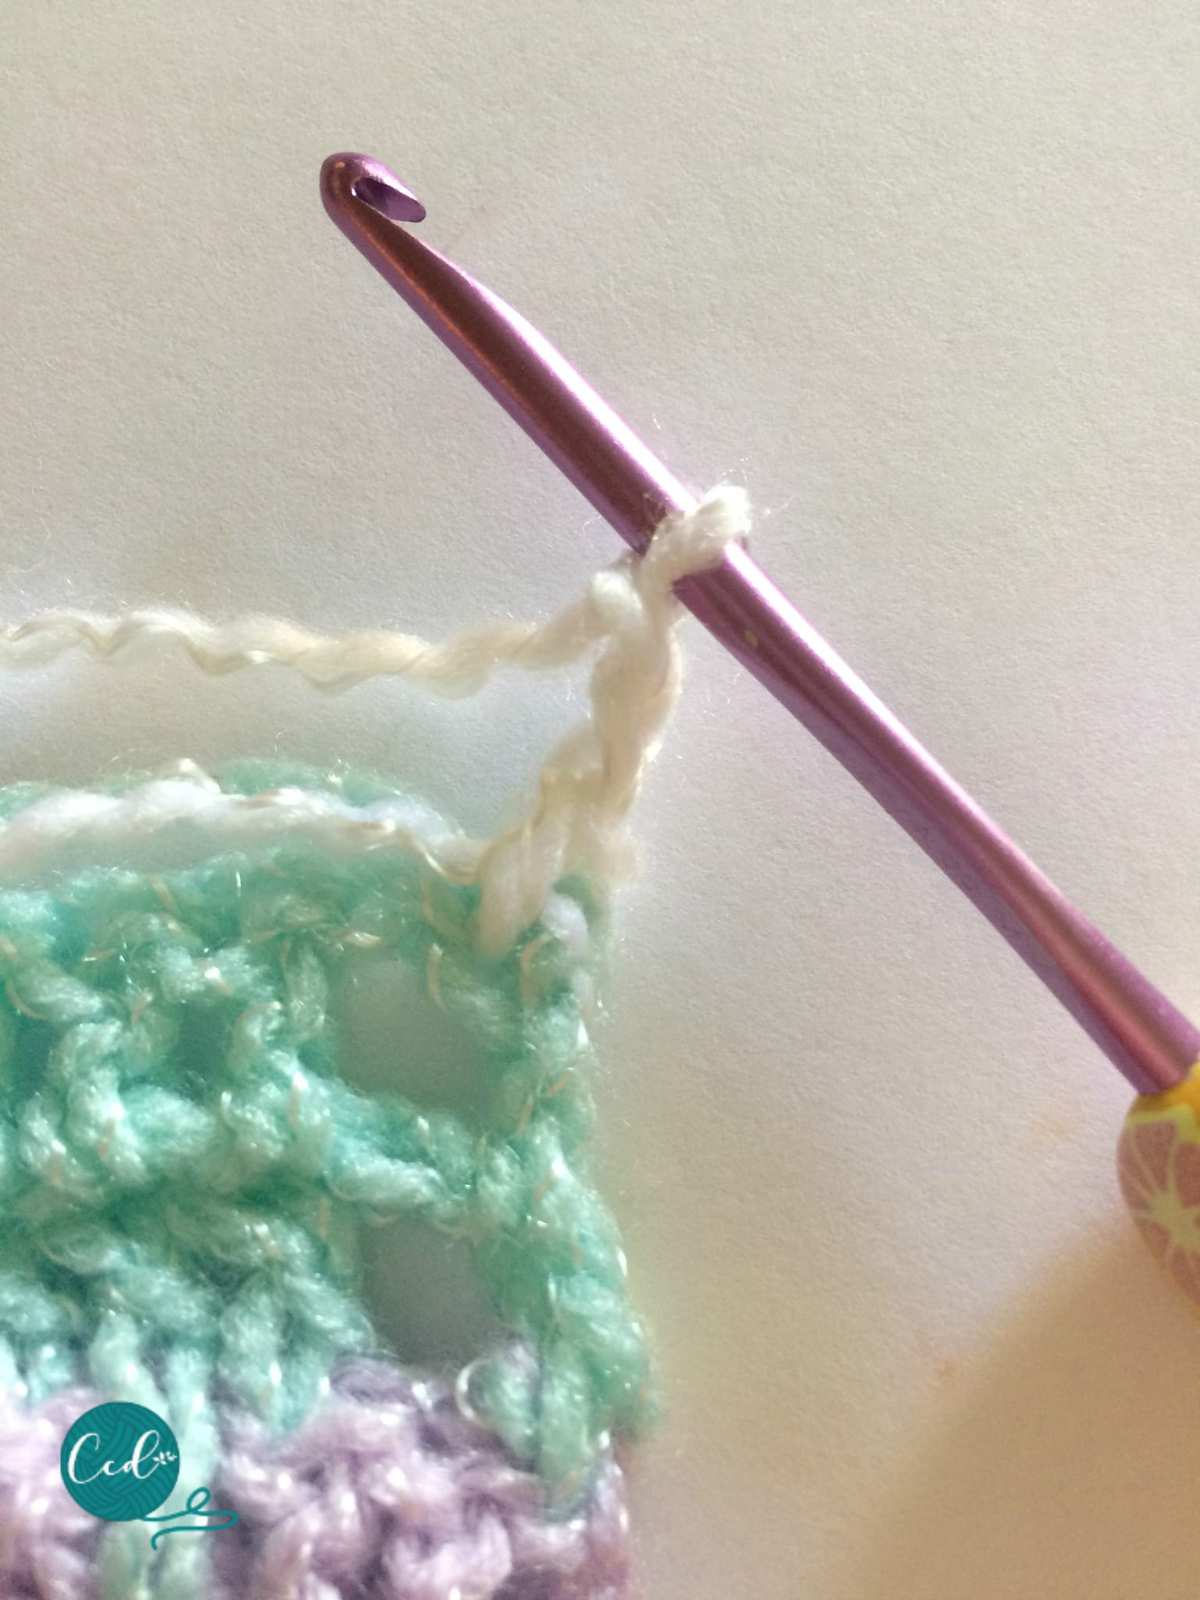
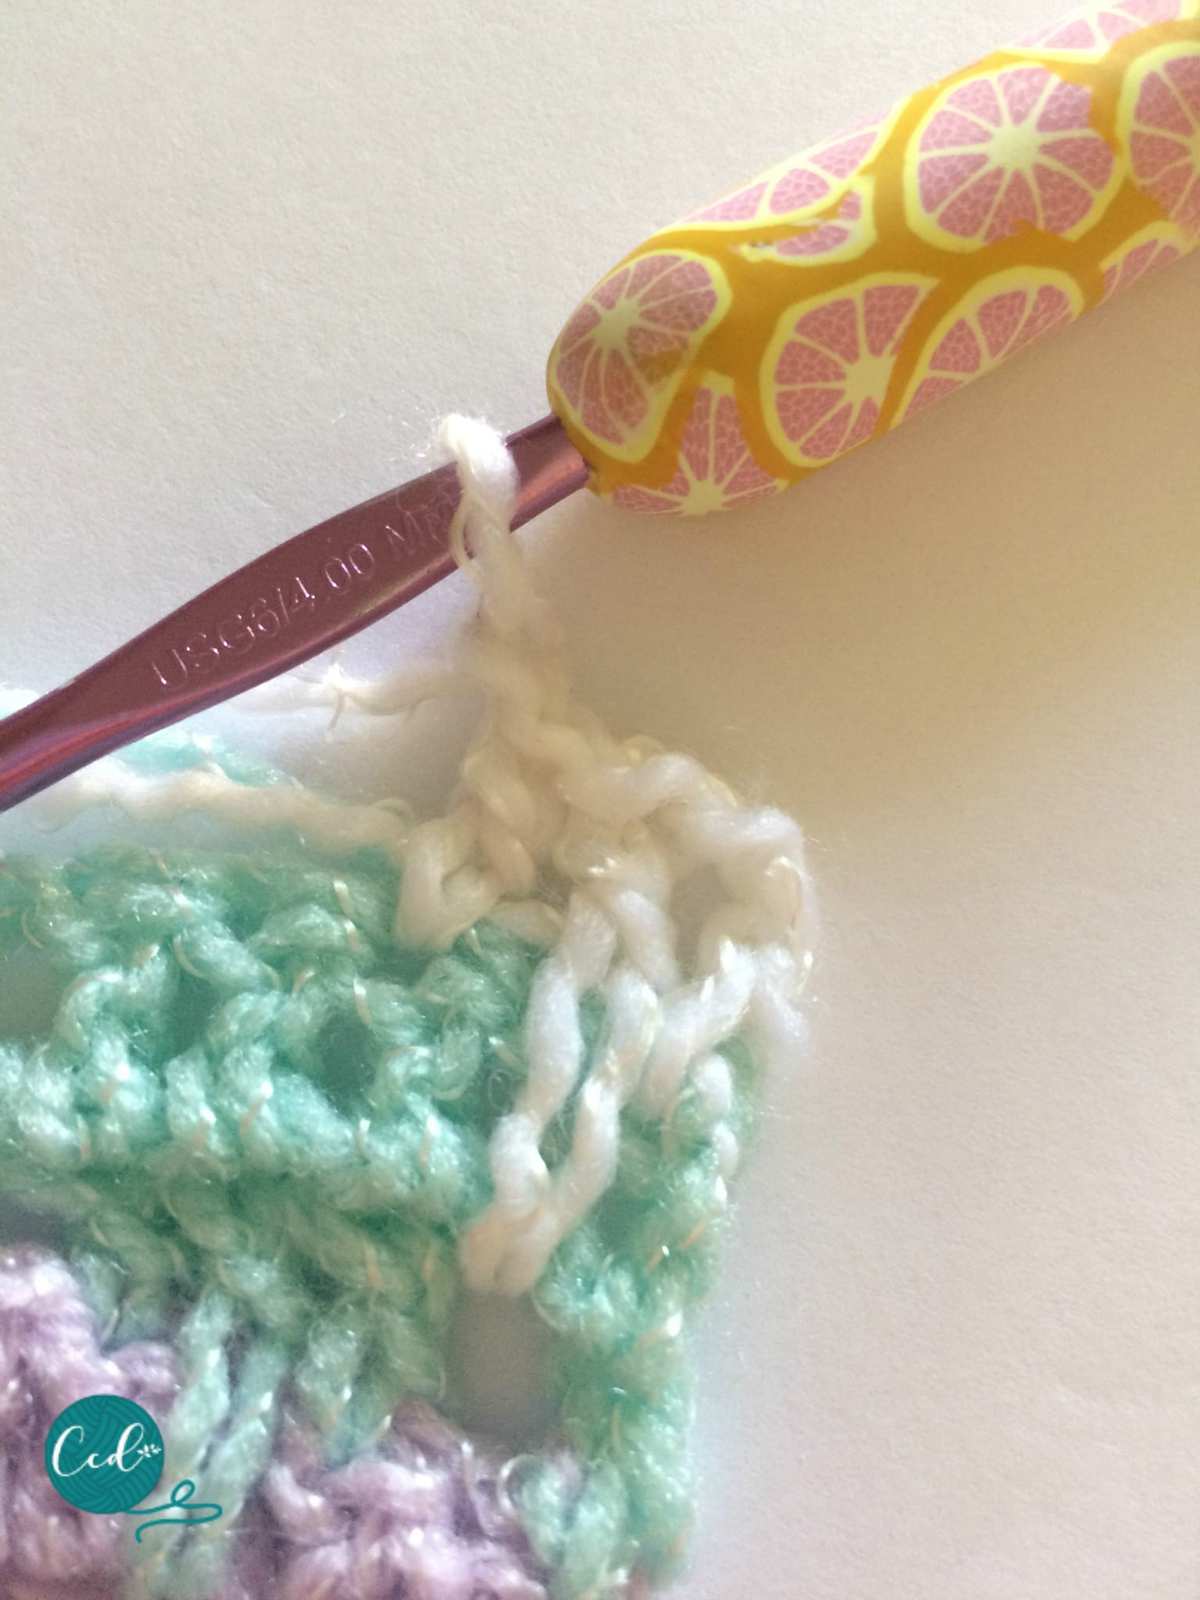
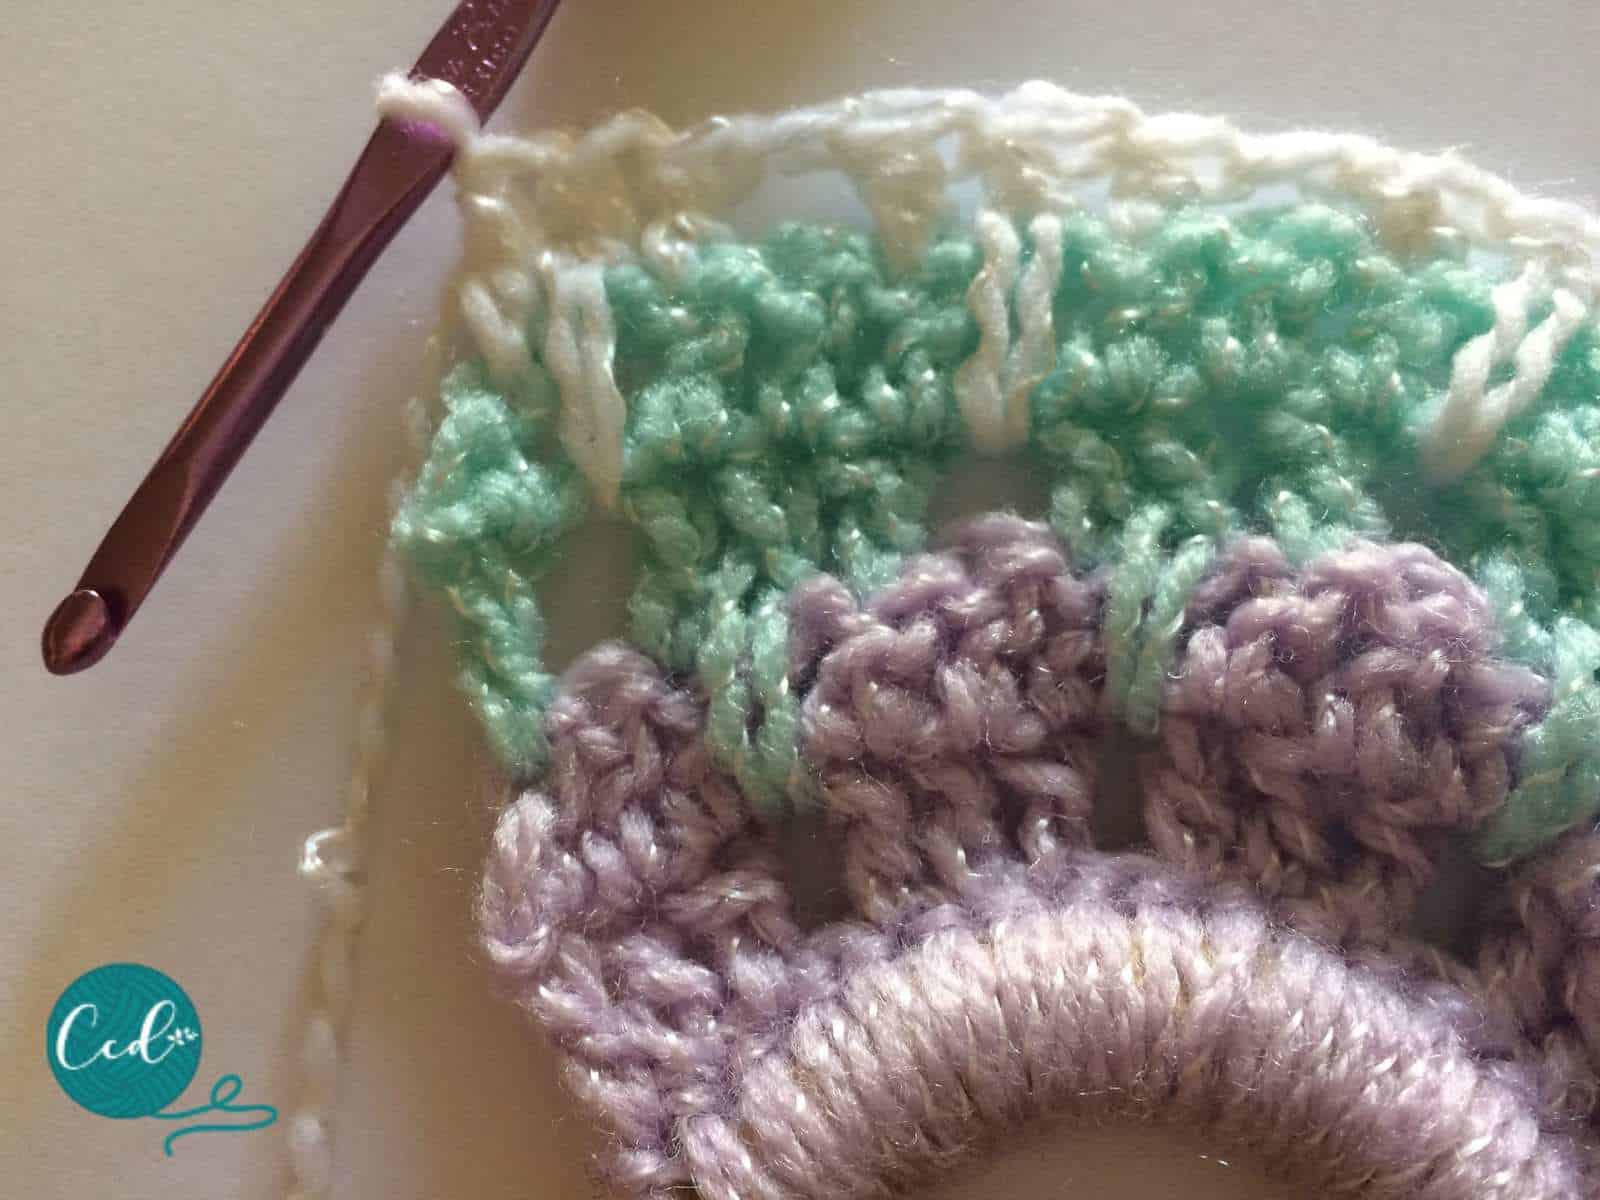
Row 7. In color c, ch 3, long dc, dc, ch1, sk 1, *dc, long dc, dc, ch 1, sk 1; rep * until 1 st left, dc in last st, turn.
Row 8. Ch 4, sk 1, *dc 3, ch 1; rep from * until 1 sts left, dc in last st, change to color a, turn.
Row 9. In color a, ch 3, long dc, dc, ch 1, sk 1, *dc, long dc, dc, ch 1, sk; rep * until 1 st left, dc in last st, turn.
Row 10. Ch 4, sk 1, *dc 3, ch 1; rep from * until 1 st left, dc in last st, change to color b, turn.
Row 11. In color b, ch 3, long dc, dc, ch1, sk 1, *dc, long dc, dc, ch 1, sk; rep * until 1 st left, dc in last st, turn.
Row 12. Ch 4, sk 1, *dc 3, ch 1; rep from * until 1 st left, dc in last st, change to color c, turn.
Row 13. In color c, ch 3, long dc, dc, ch1, sk 1, *dc, long dc, dc, ch1, sk1; rep * until 1 st left dc in last st.
Border
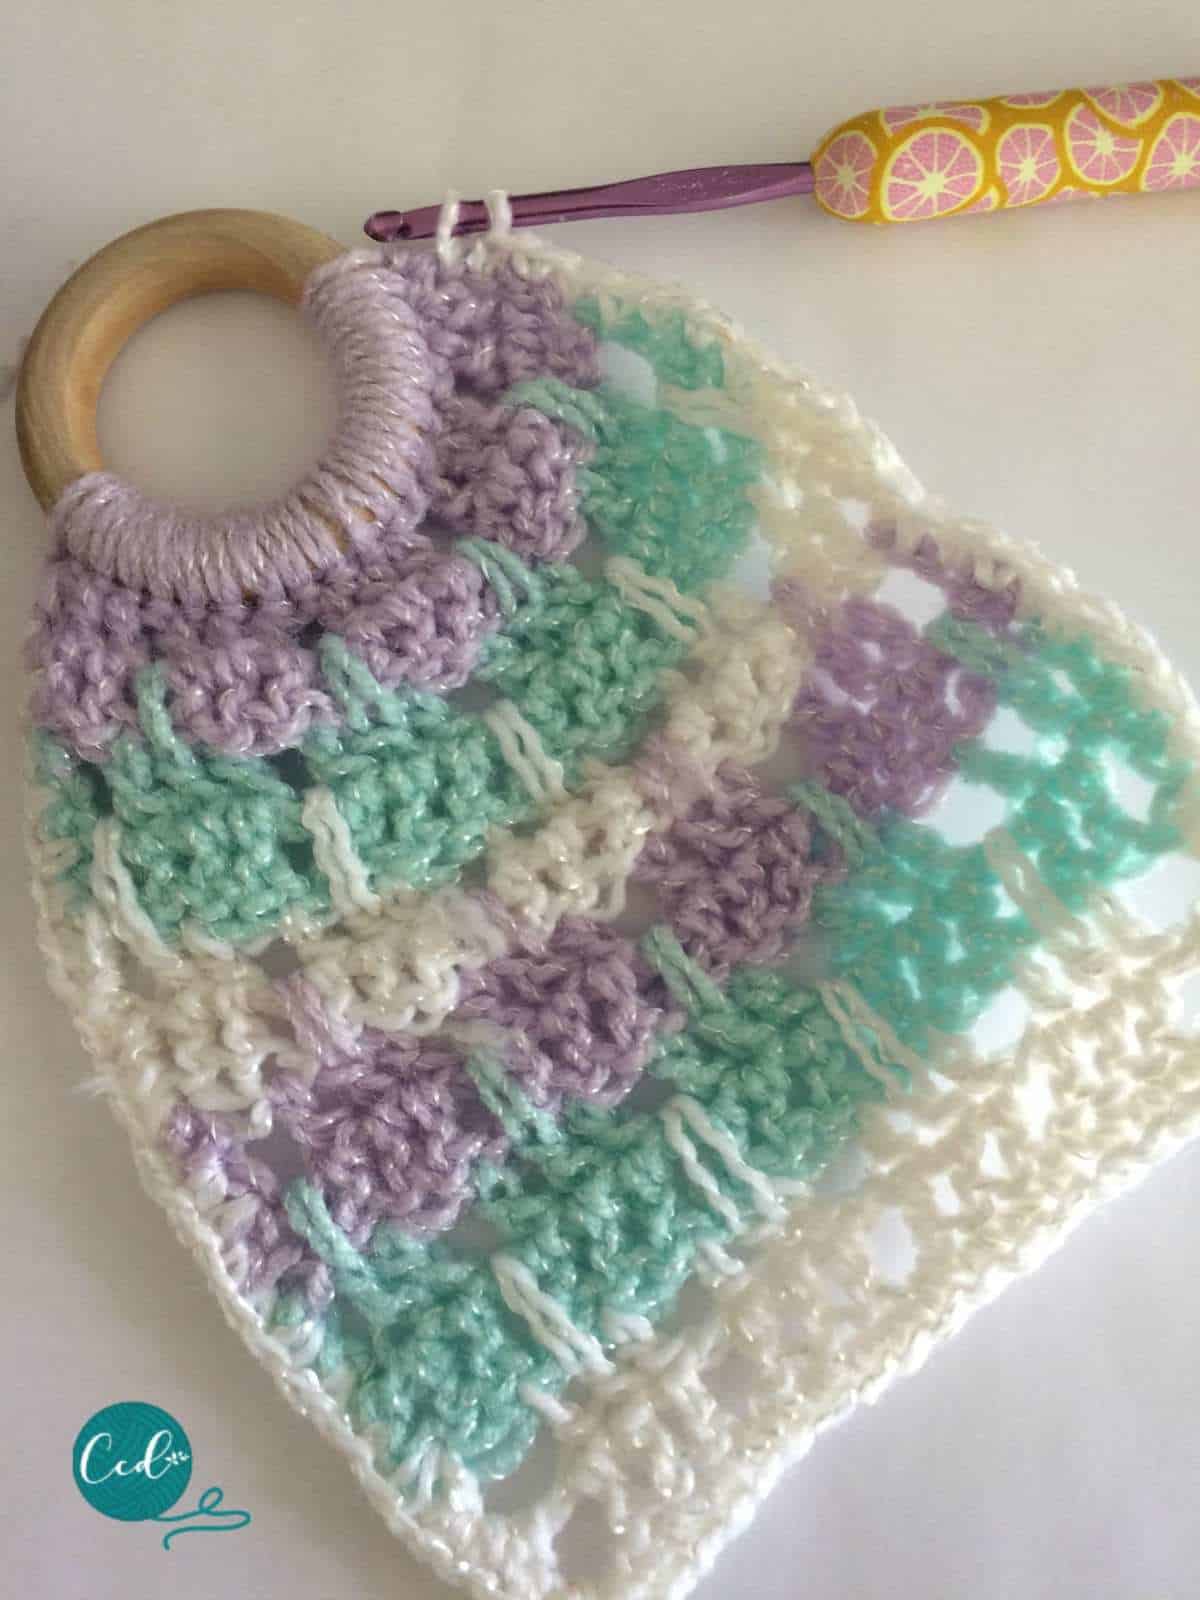

Rnd 1. Attach color c to first row of sc with a sl st. Sc evenly around, for the corners place (sc, ch 1, sc) until you reach the other side, change to color a.
Rnd 2. In color a, ch 1, turn and sc back around, for the corners (sc, ch 1, sc), change to color b.
Rnd 1. In color b, ch 1, turn and sc back around, for the corners (sc, ch 1, sc), leave a long tail for sewing together.
Using a yarn needle sew the upper two corners together and weave in end.


Using a yarn needle sew the upper two corners together and weave in end.
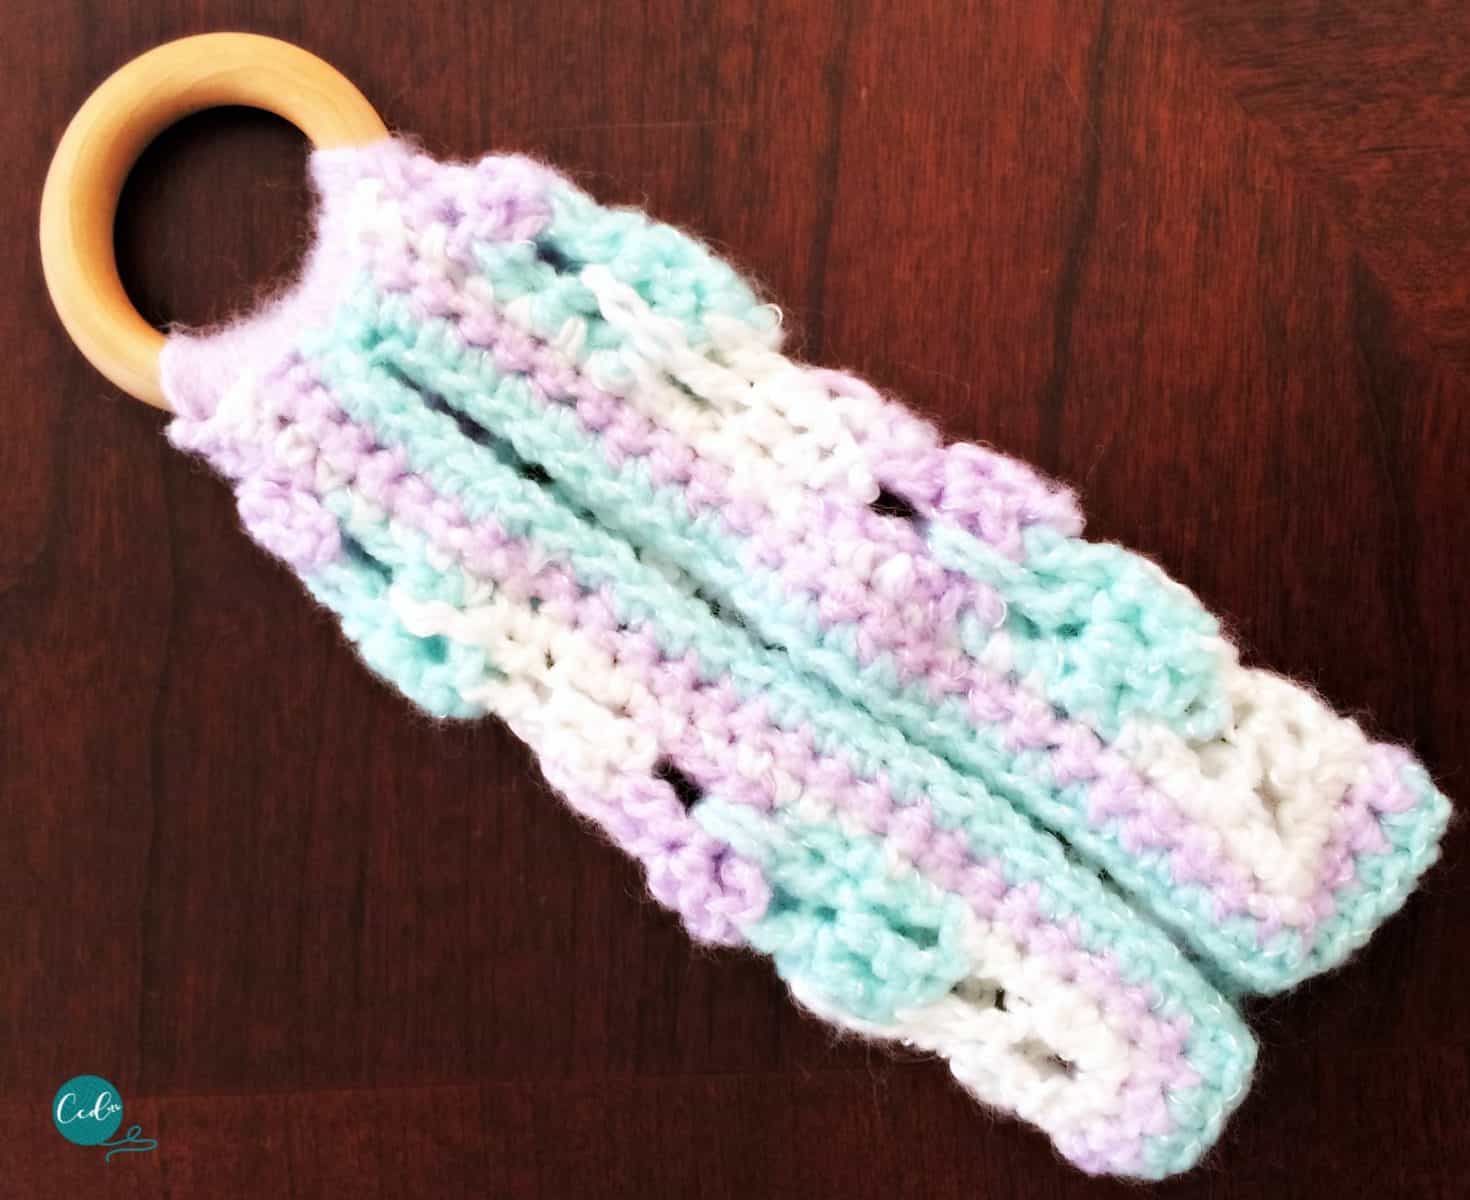
Back, with just the top corners sewn together.
Front view, perfect for little hands.
Hope you have fun working up a little lovey for a sweet baby in your life!