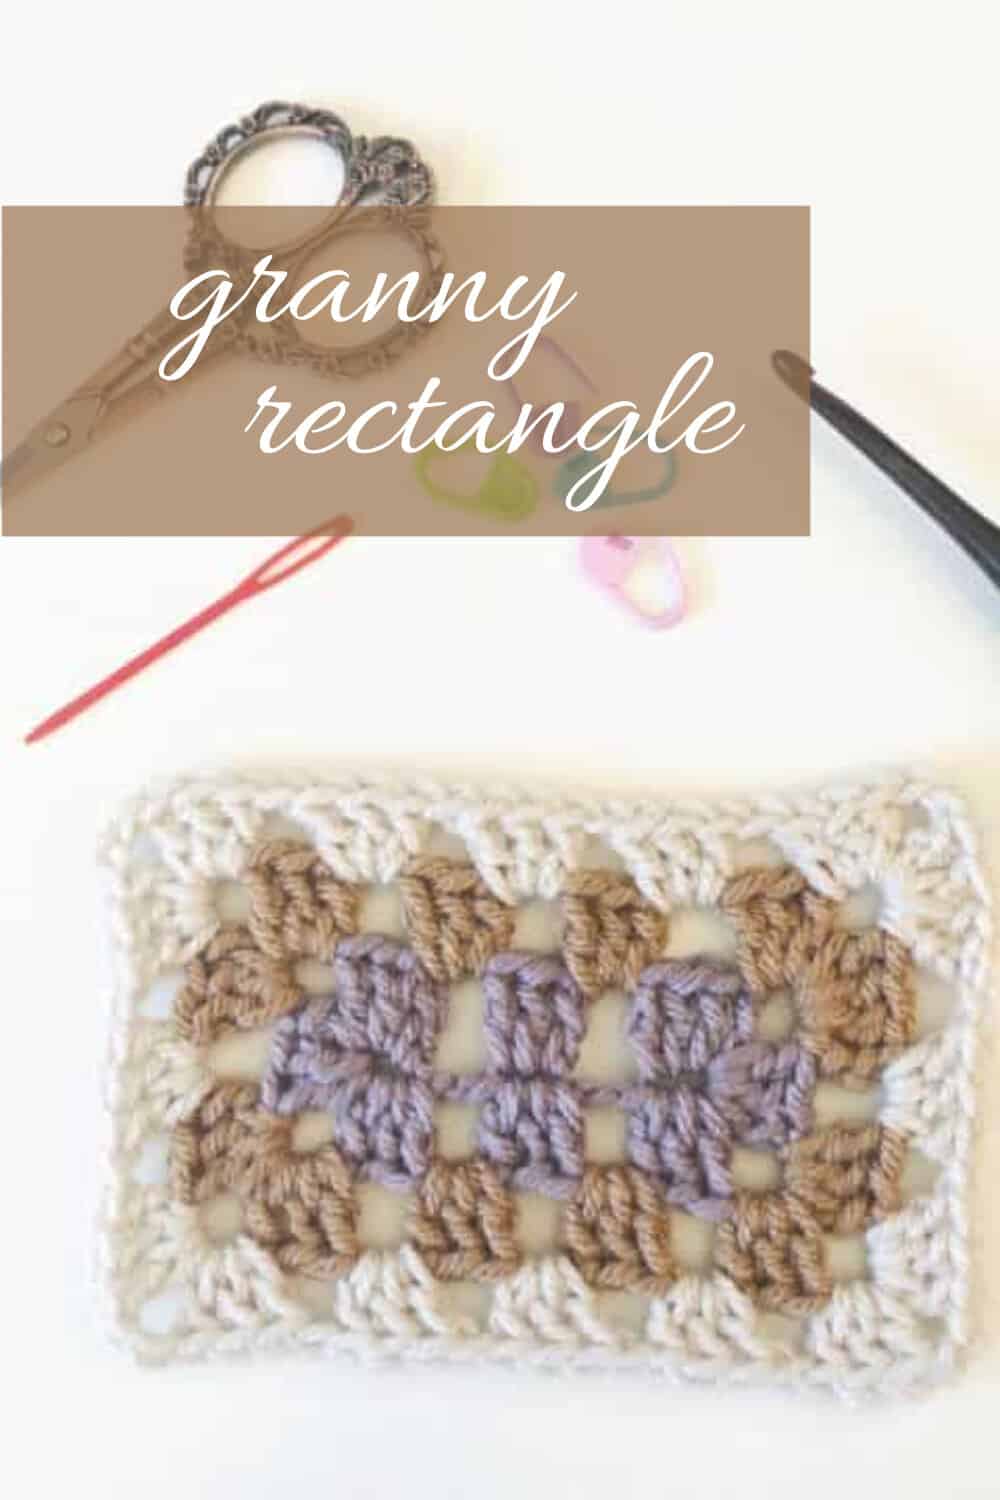
How to Crochet a Granny Rectangle
Learn how to crochet a granny rectangle. This step by step tutorial includes pictures for each step so it’s perfect for beginners.
I love a classic granny square blanket. One of the greatest things about granny squares is they’re also an easy pattern to make as rectangles and triangles too.
While getting started with a triangle and granny square pattern are very similar, a rectangle use a different crochet technique. In this photo tutorial I show you step by step how to make a basic granny rectangle.
This post contains affiliate links, I may earn a fee. Read more disclosure policy.
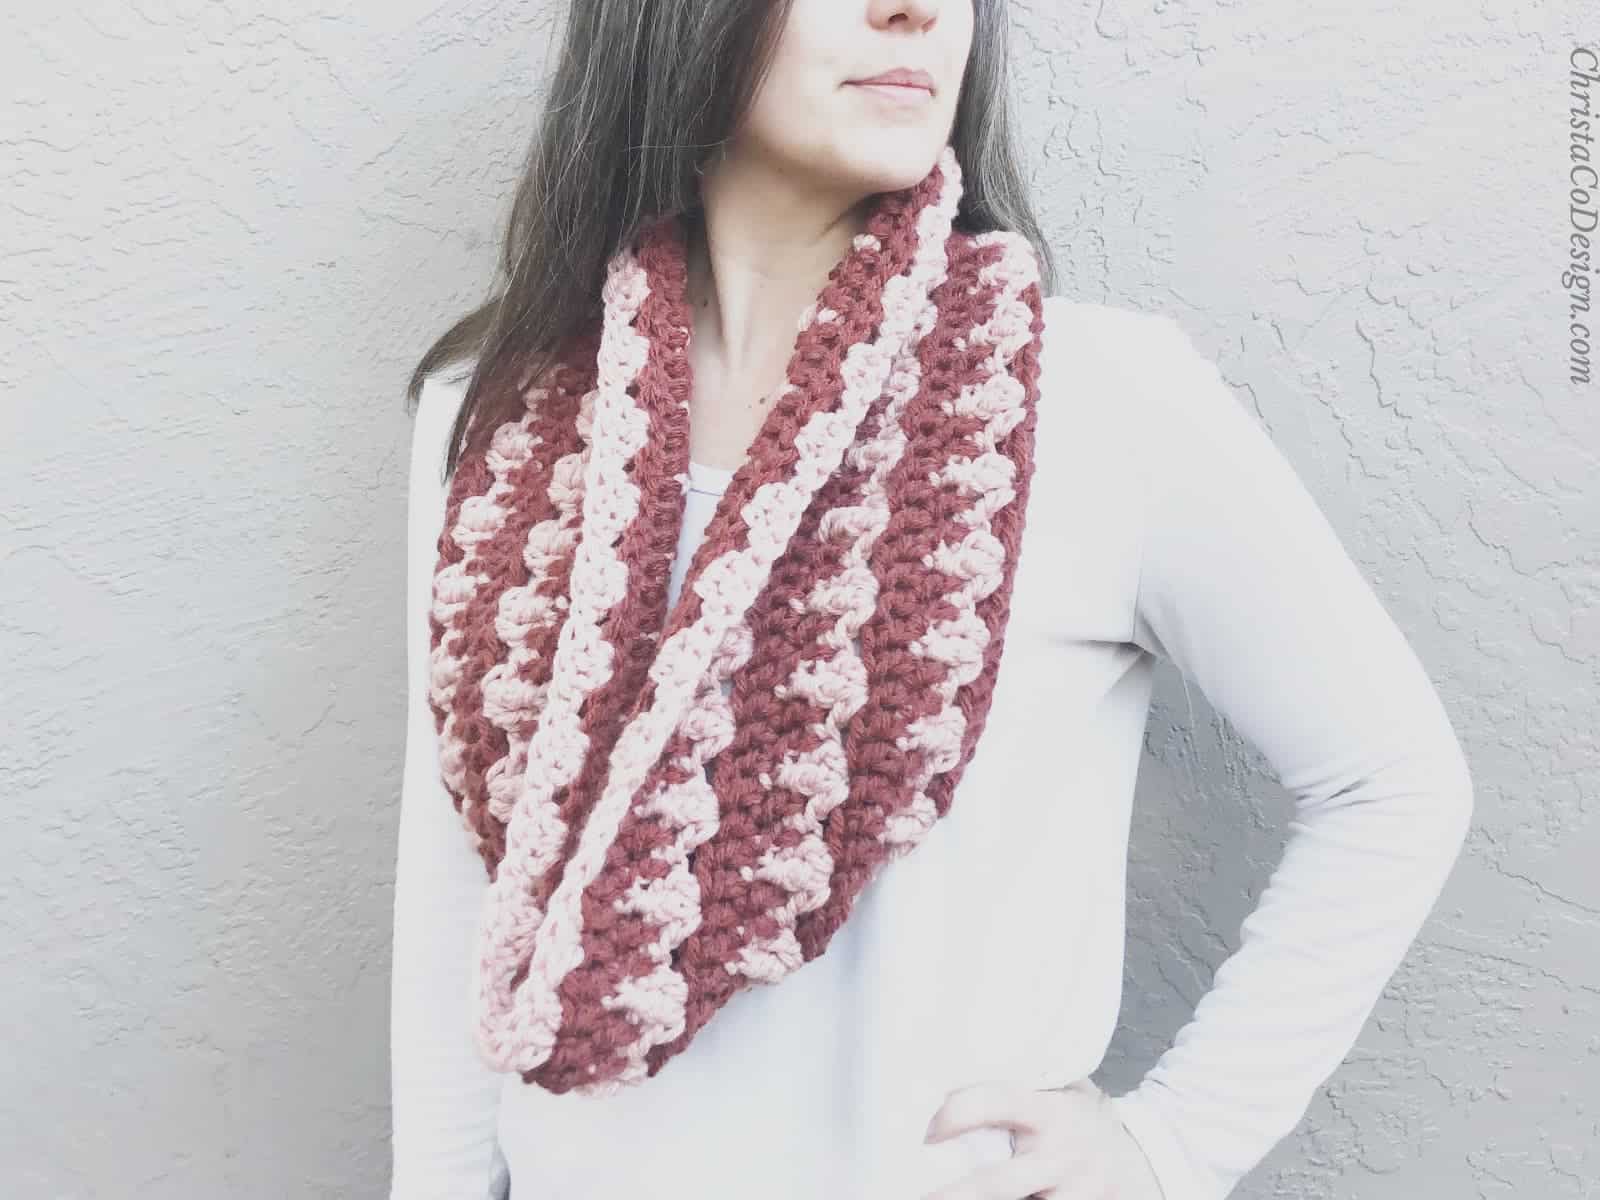
You can crochet a traditional granny rectangle into tablecloths, shawls and even a blanket pattern. There are so many uses and they make great gifts.
Free Patterns
Browse More
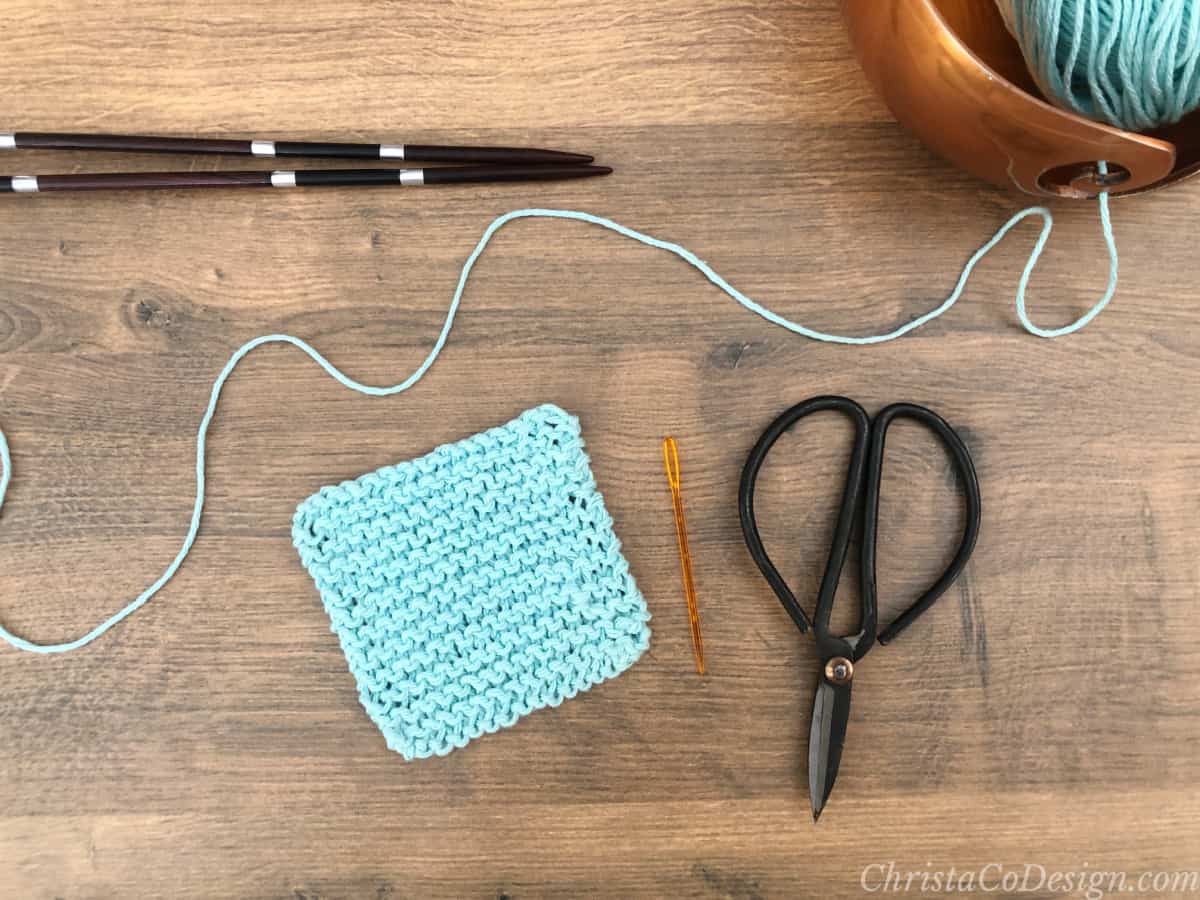
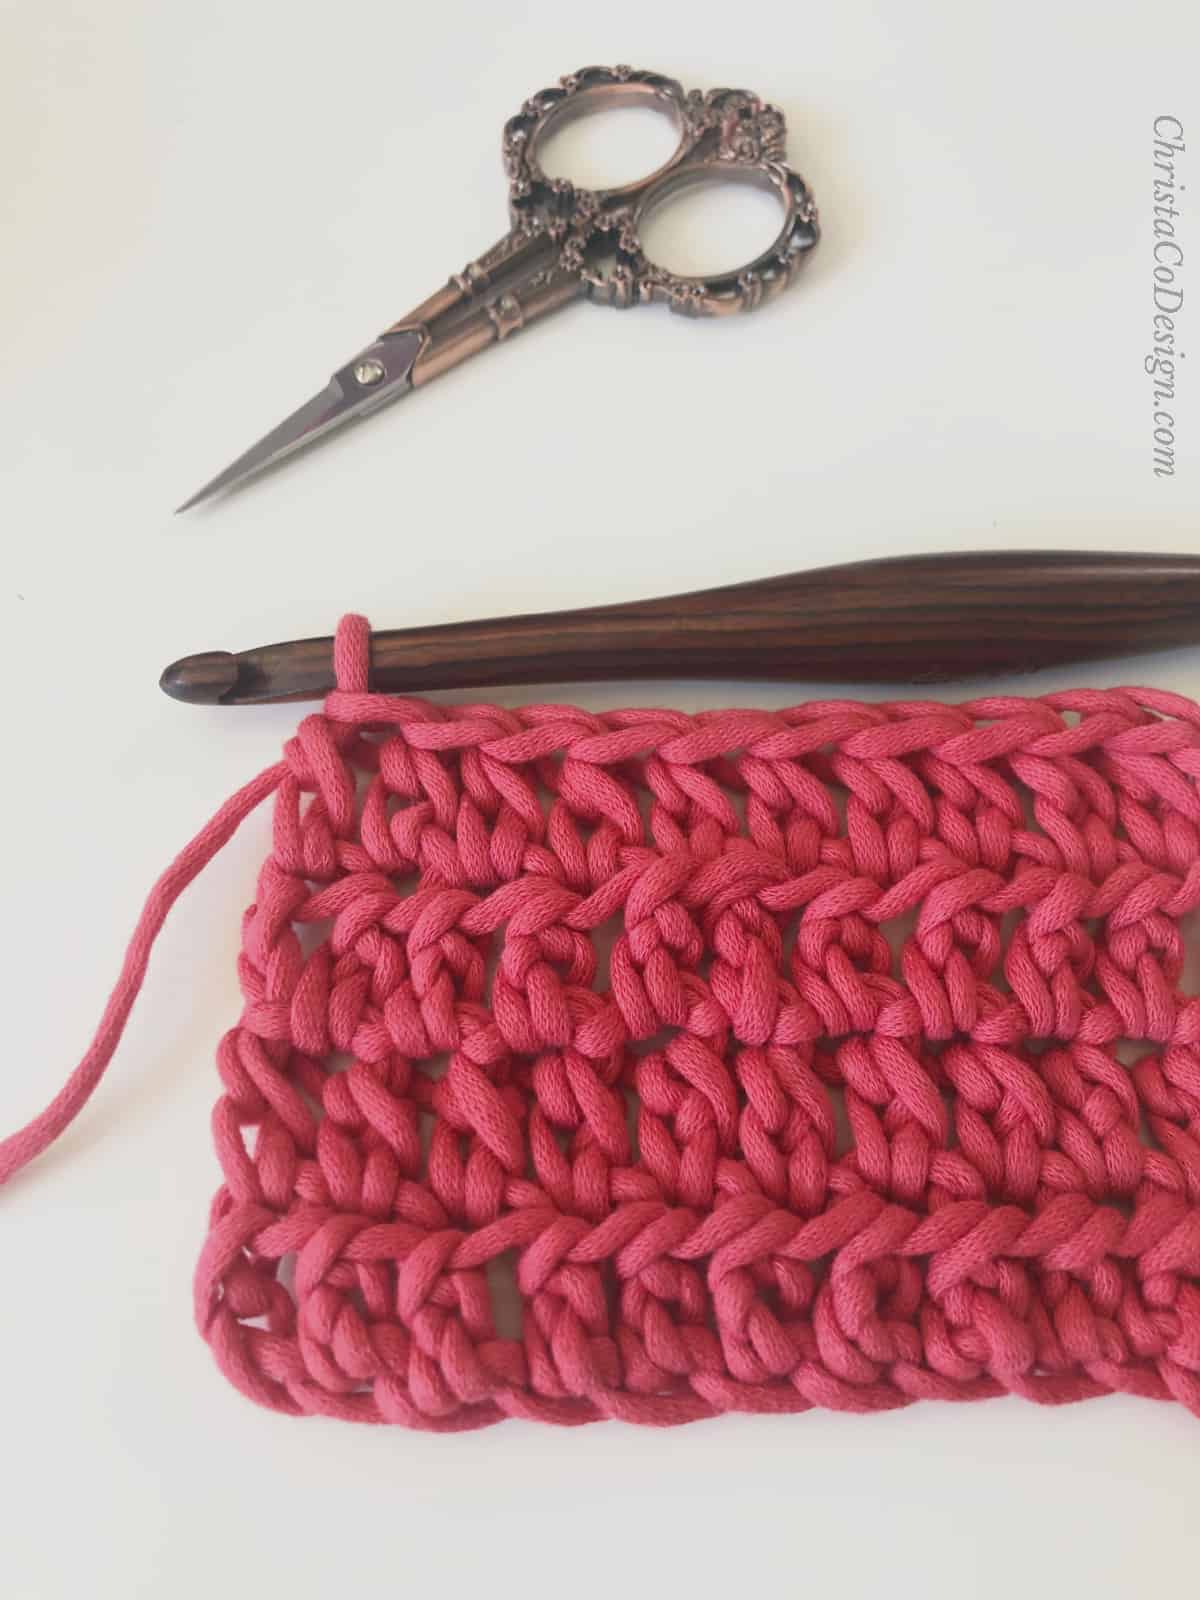
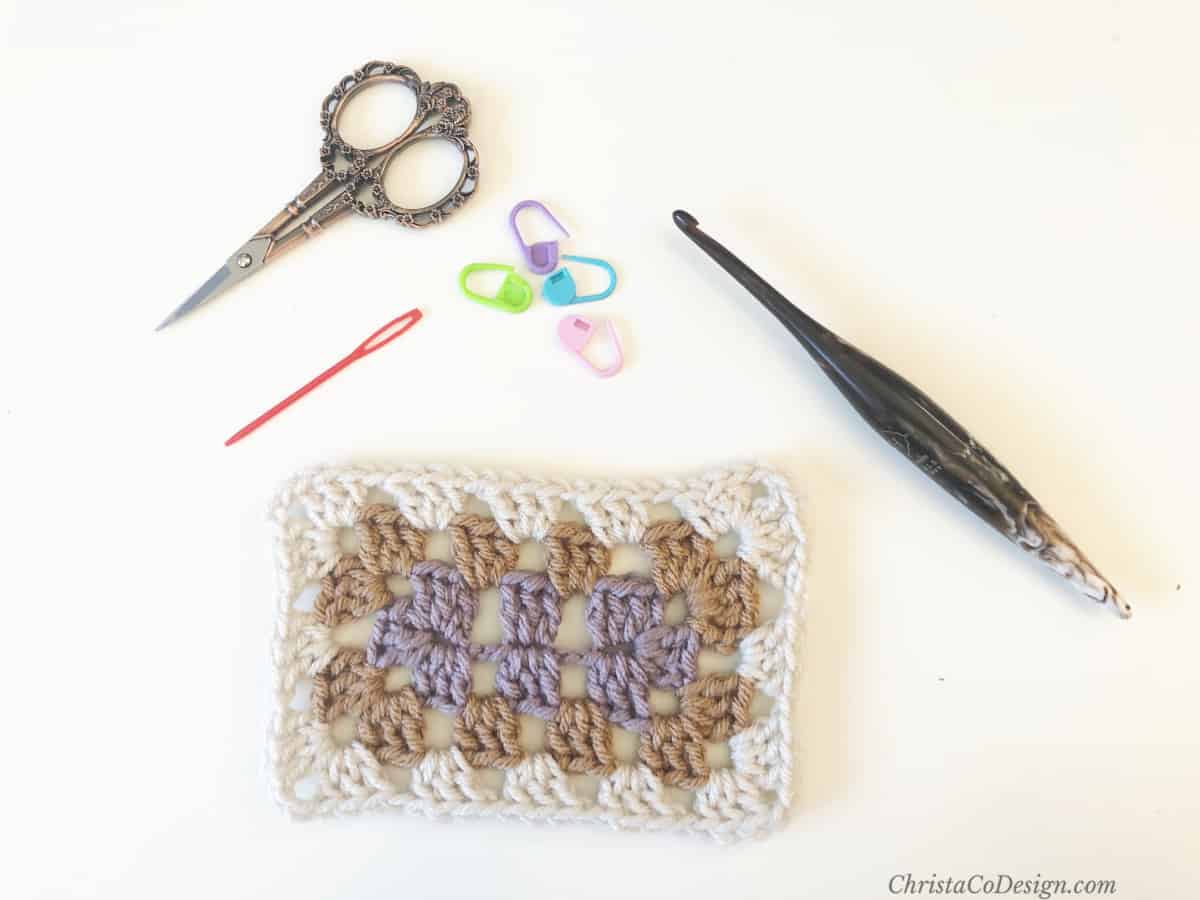
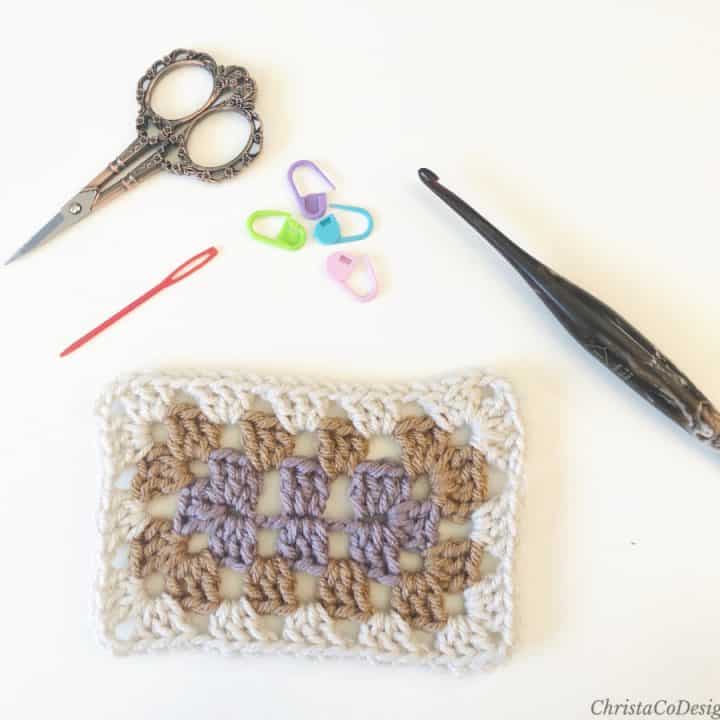
Materials
I’m using a #4 medium worsted weight yarn. A rectangle granny can be made using a different yarn weight, just be sure to adjust your hook. The size of yarn will effect the project size as well.
5 mm hook, or hook size to match your yarn.
Yarn needle, scissors, measuring tape.
Stitches / Abbreviations
ch – chain
sl st – slip stitch
Skill Level
Beginner
Granny Stitch
A granny stitch is a cluster of 3 double crochets in the same stitch. There are chain spaces between each dc cluster. Each granny is worked in the chain spaces between.
To increase a granny stitch simply work 2 granny clusters in each corner. The corners are defined by a chain 2 space, instead of the chain 1 spaces along the edges.
Construction
This crochet granny rectangle is worked in the round. To make the rectangle we’ll first start with a foundation chain and work on both sides to create the first round. Then join with a slip stitch to work in the round. You’ll then continue crocheting in the same direction around for the next round. Each round you will join with a slip stitch and continue.
Pin It
Scroll down for the free crochet pattern with pictures!
How to Crochet a Granny Rectangle
Learn how to crochet a granny rectangle with this step by step tutorial for beginners.
Materials
- #4 medium worsted weight yarn
Tools
- 5 mm crochet hook (US Size H-8)
Instructions
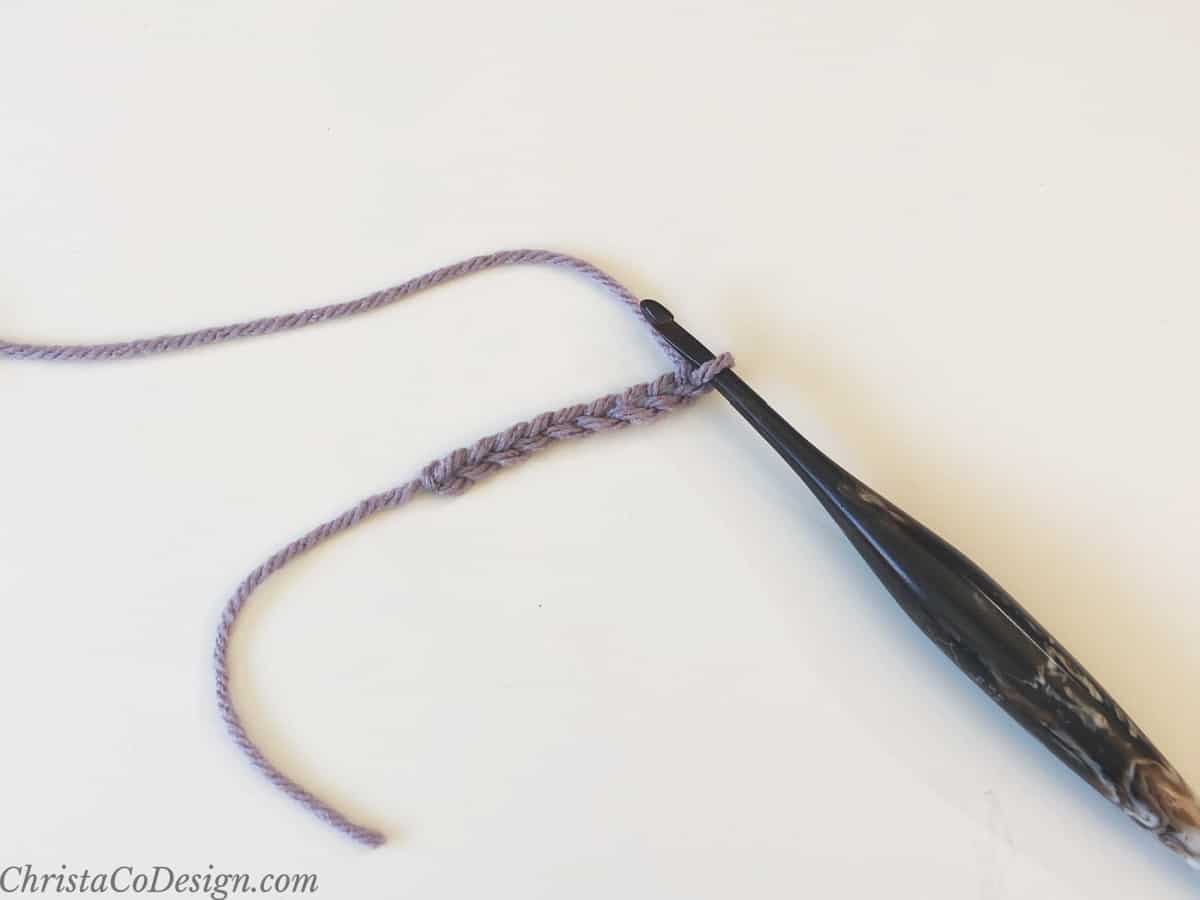
- Start with a slip knot on your hook and chain to a number that is a multiple of 3, i.e. 3, 6, 9, 12, etc.
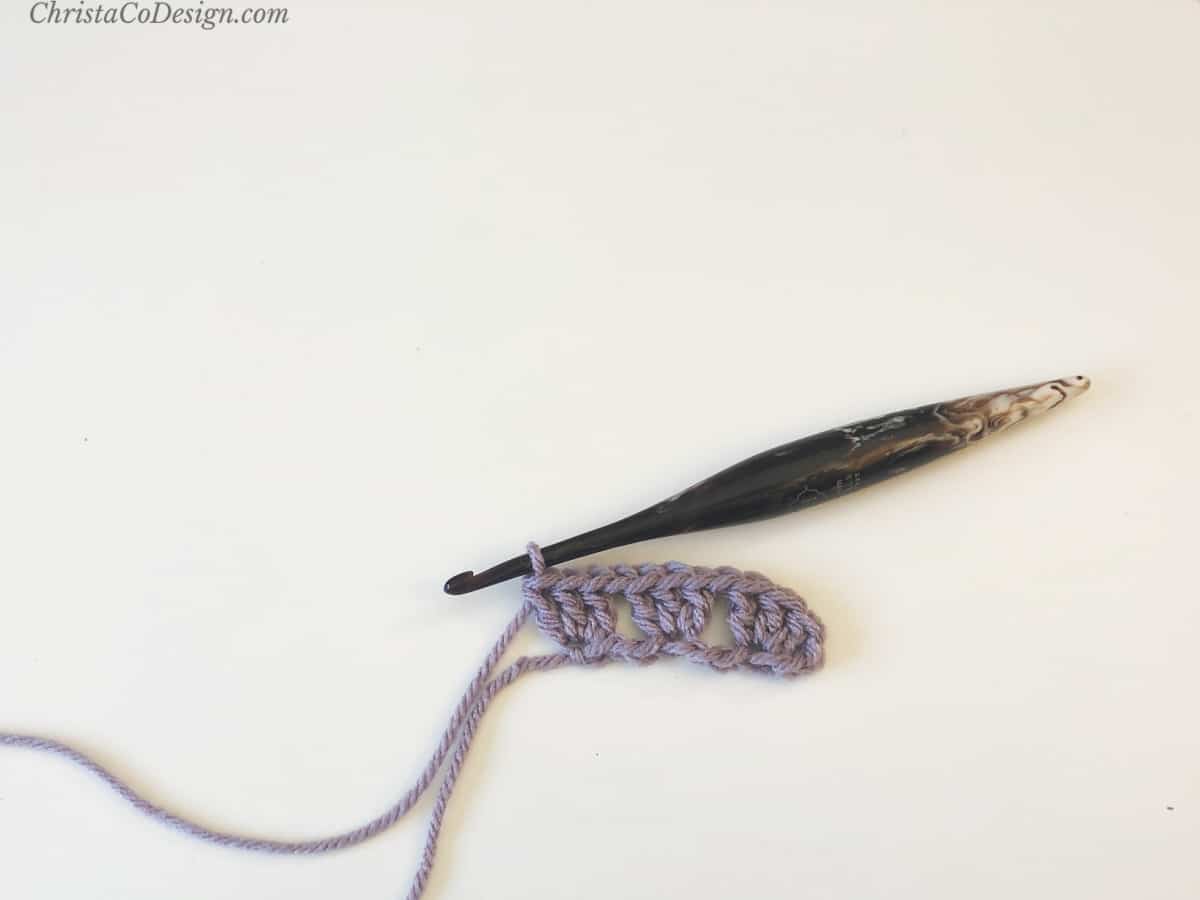
 I start with 9 chains for this tutorial which gives me 3 granny clusters in row 1. You can double it to 18 chains for 6 grannies. Or any number that's divisiable by 3. The longer your starting chain, the longer and narrower your rectangle will be.
 - Round 1. In the 3rd ch from your hook place 3 dc. The skipped chains do not count as a stitch here.
- Ch 1, sk 2 chs, place 3 dc in next ch
- Repeat step 3 across through the last ch. Here I only have 3 sets of granny clusters. You can start with more for a longer and narrower rectangle. Starting with 3 or 4 sets will give you a boxier rectangle.
- Ch 2, now we'll create the corner and continue crocheting around on the opposite side of foundation chain. We're going to work into the same chain st that this last granny is made in.
- In same ch work 3 dc, ch 2, again for the corner space
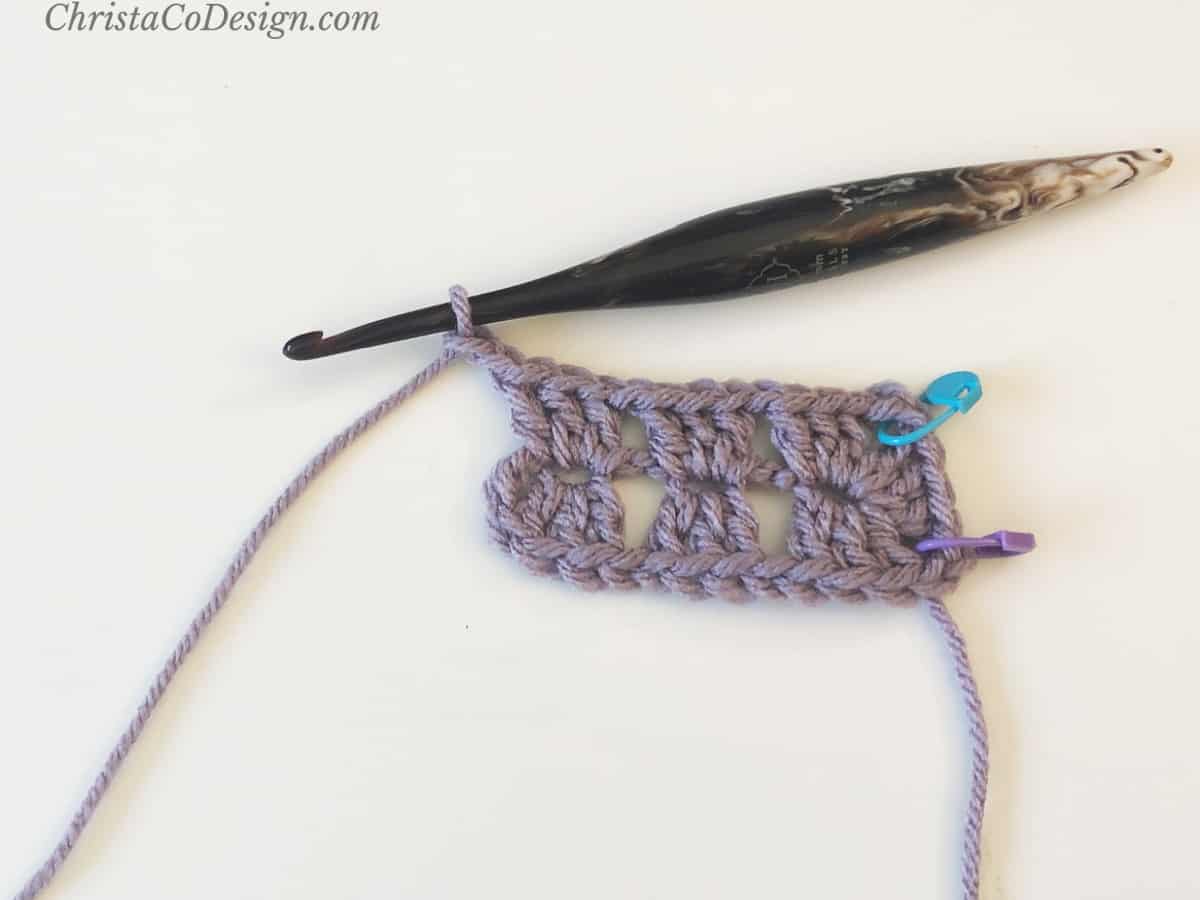
- Still in the same ch work 3 dc again Both corner stitches are marked with the blue and purple stitch markers here.
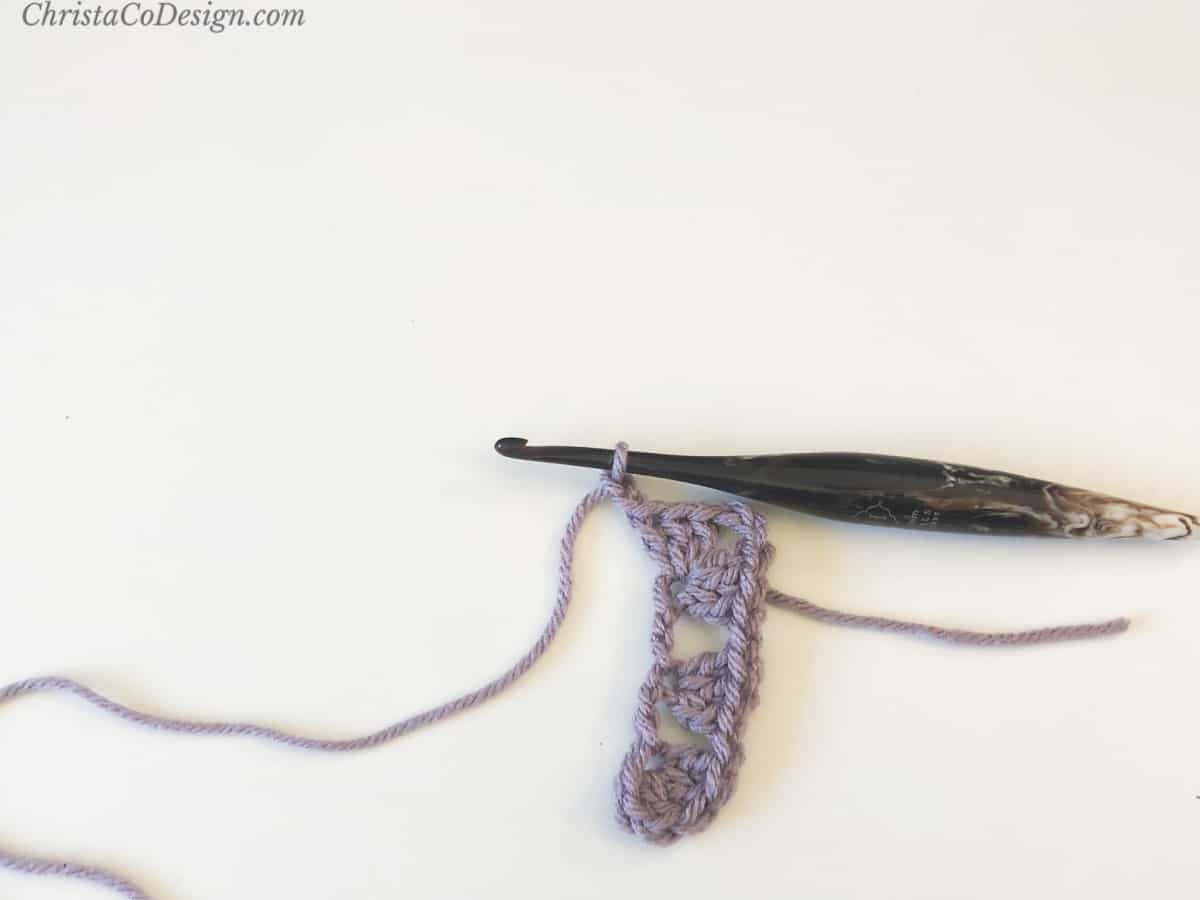
- Ch 1, sk the 2 chs and place 3 dc in the same ch as the granny cluster on opposite side, ch 1 again
- Sk the 2 chs, place 3 dc in same ch as the granny cluster on opposite side, ch 2 for the corner.
- Continue in the same ch, place 3 dc, ch 2 for last corner.
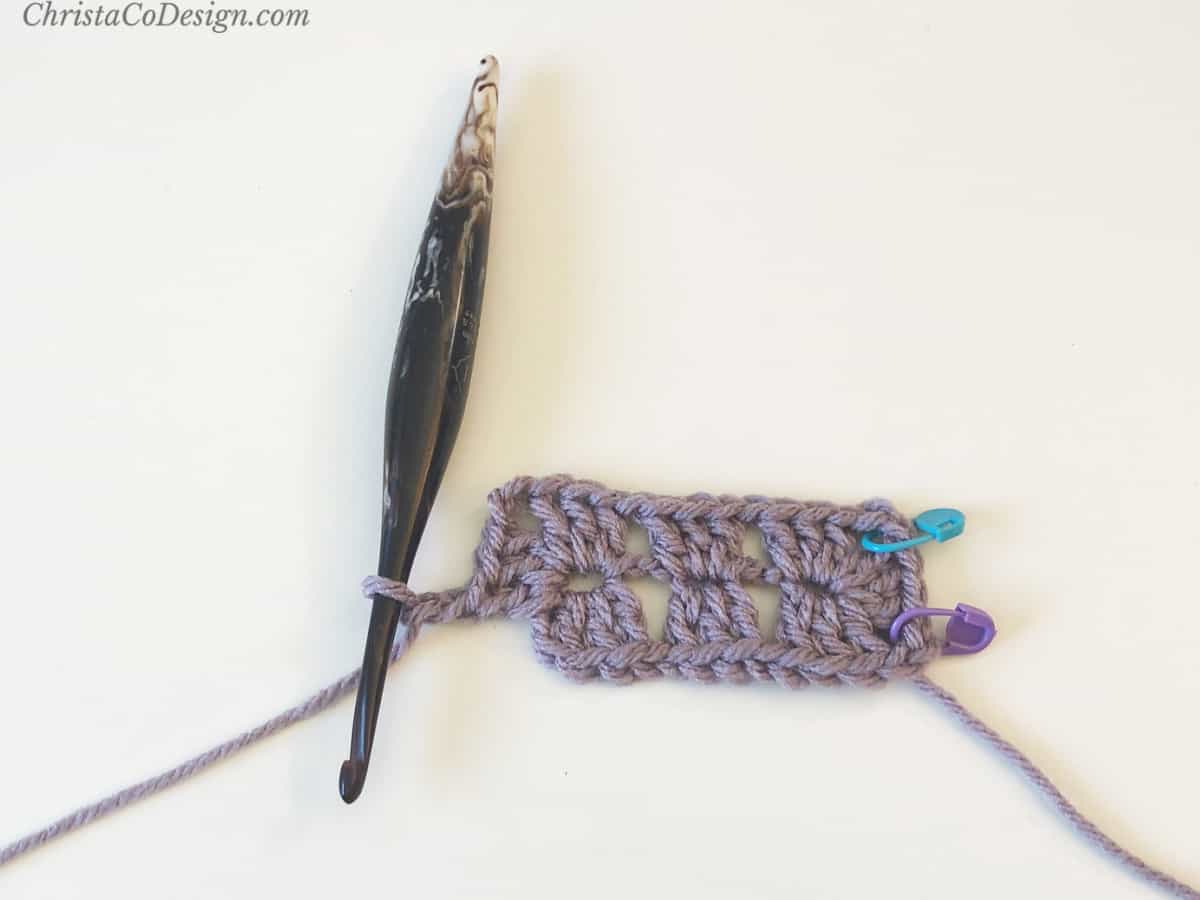
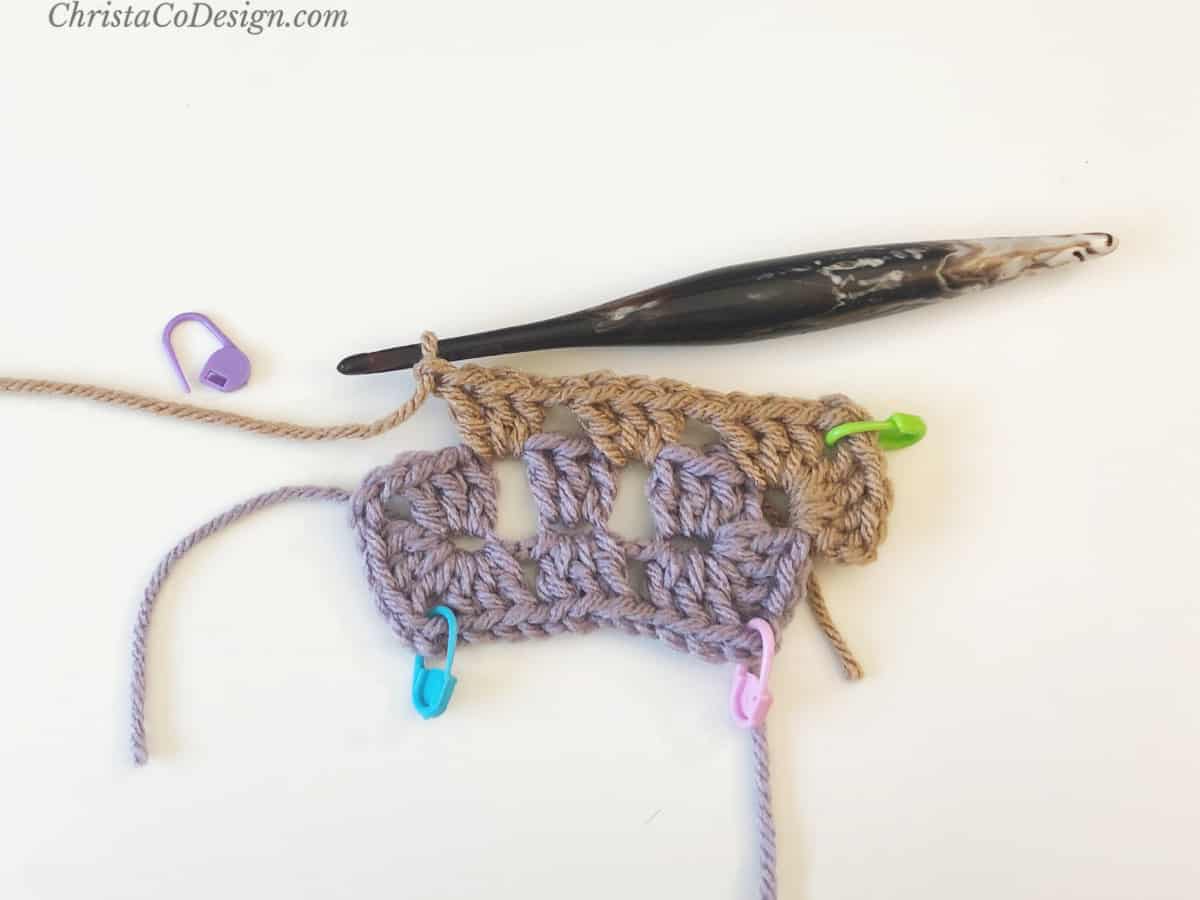
- Sl st to first stitch. Round 1 is complete
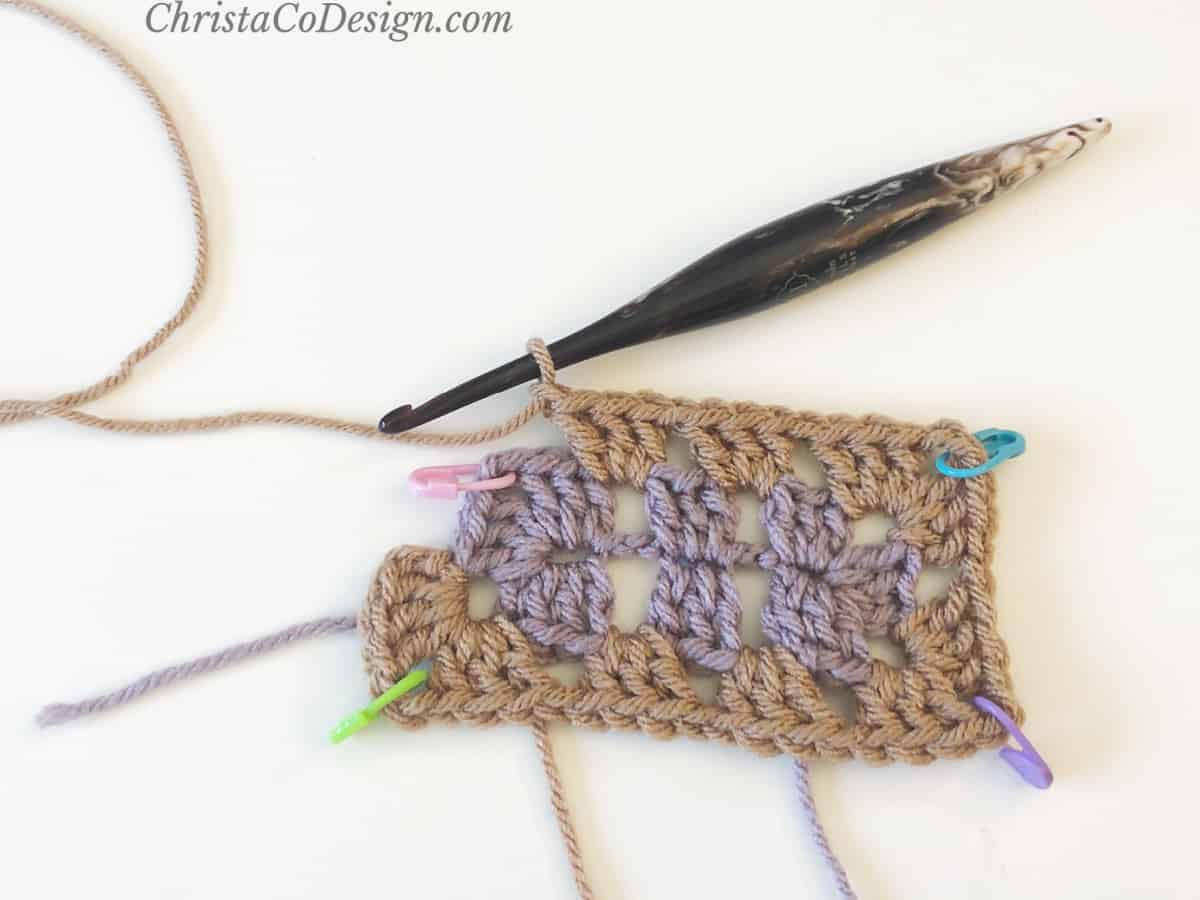
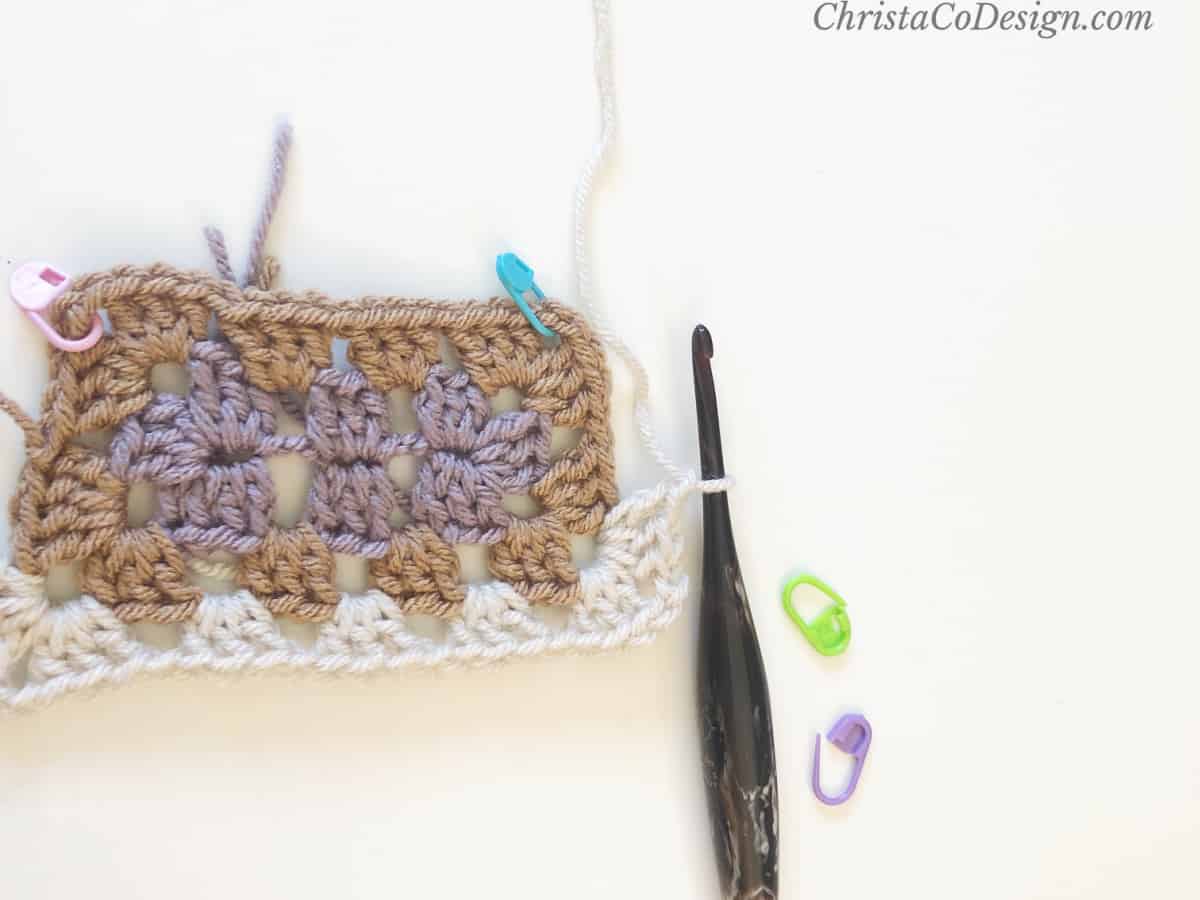
- Now we'll work 1 granny per ch 1 sp and 2 grannies in each corner ch 2 sp. The 4 corners are marked here with stitch markers.
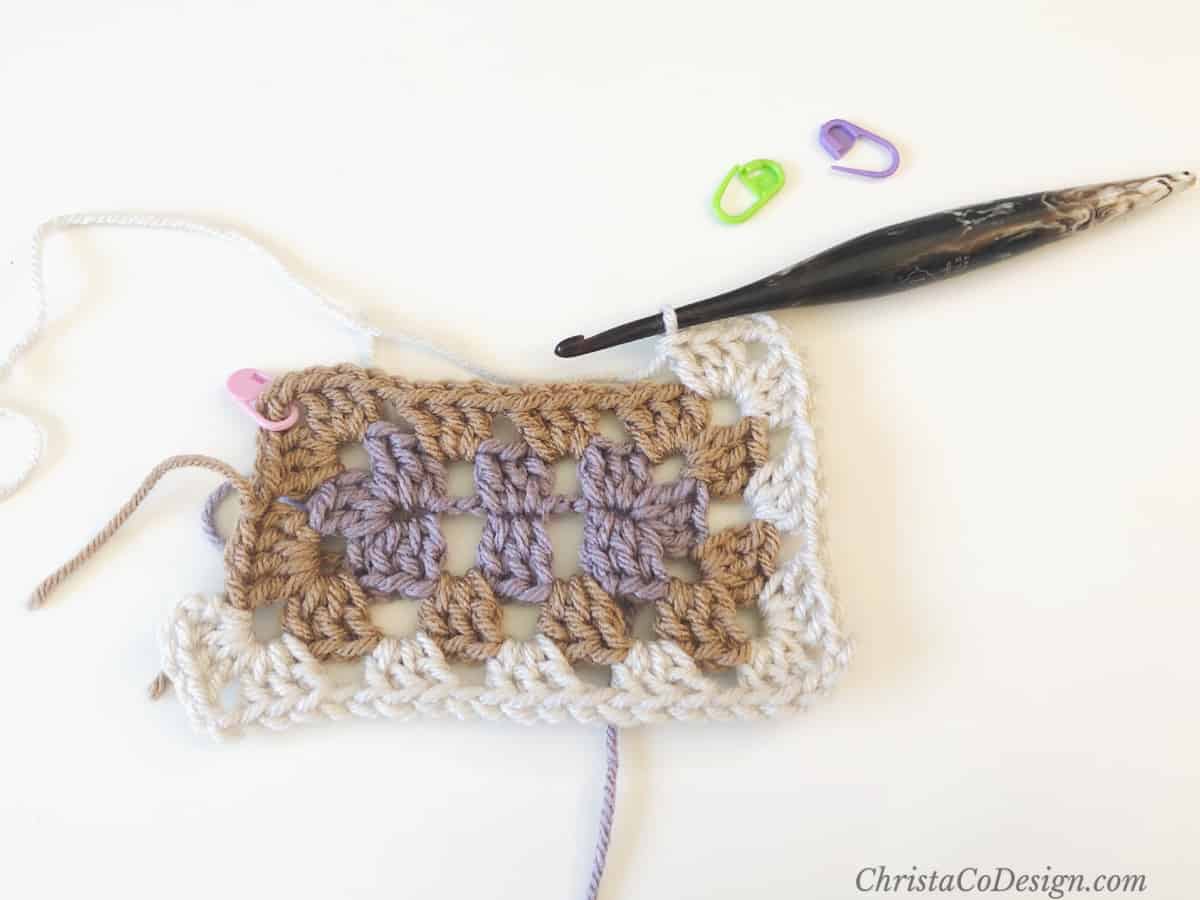
- Round 2. If changing colors cut yarn and join new color to corner with a sl st. Ch 2, these do not count.
- Work 3 dc, ch 2
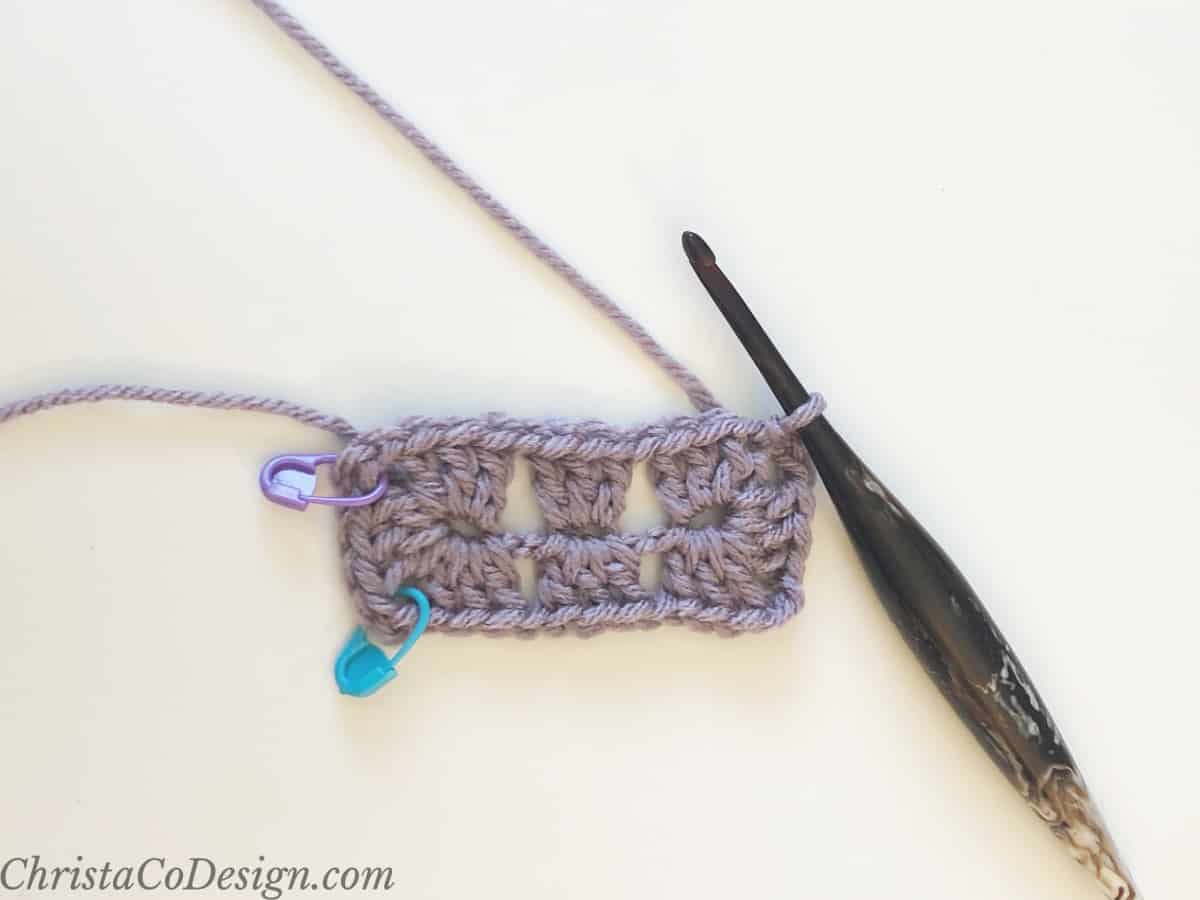
- Work a second set of 3 dc in the same corner The green stitch marker marks this first corner of Round 2.
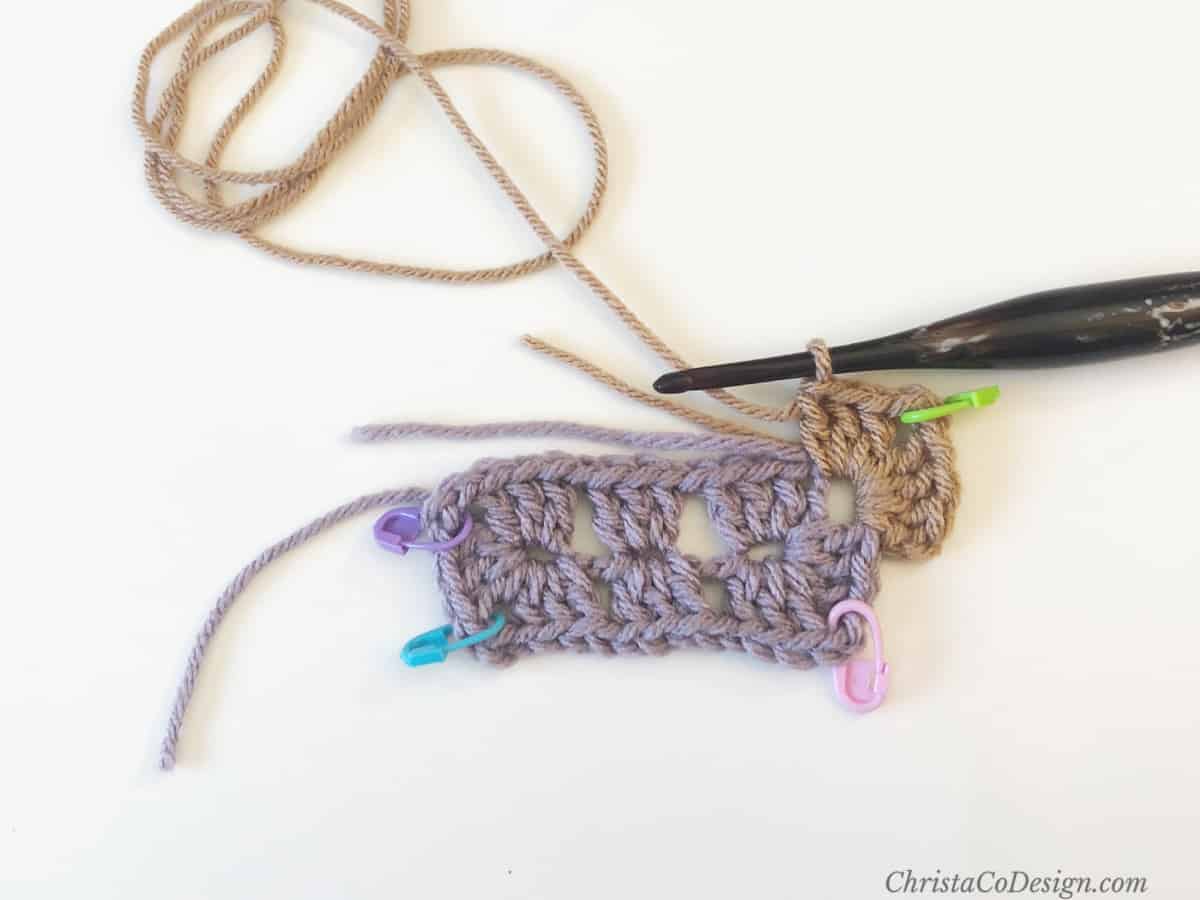
- Ch 1, sk the 3 dc granny cluster, work 3 dc in next ch 1 sp, ch 1
- Sk the 3 dc granny cluster, work 3 dc in next ch 1 sp, ch 1
- Corner: Sk the 3 dc granny cluster, work 3 dc in next ch 2 sp, ch 2
- In same corner sp work 3 dc
- Ch 1, sk 3 dc work 3 dc, ch 2, 3 dc all in corner ch 2 sp, ch 1
- Sk 3 dc, place 3 dc in next ch 1 sp, ch 1, sk 3 dc, place 3 dc in next ch 1 sp, ch 1, sk 3 dc,
- In last corner ch 2 sp work 3 dc, ch 2, 3 dc, ch 1
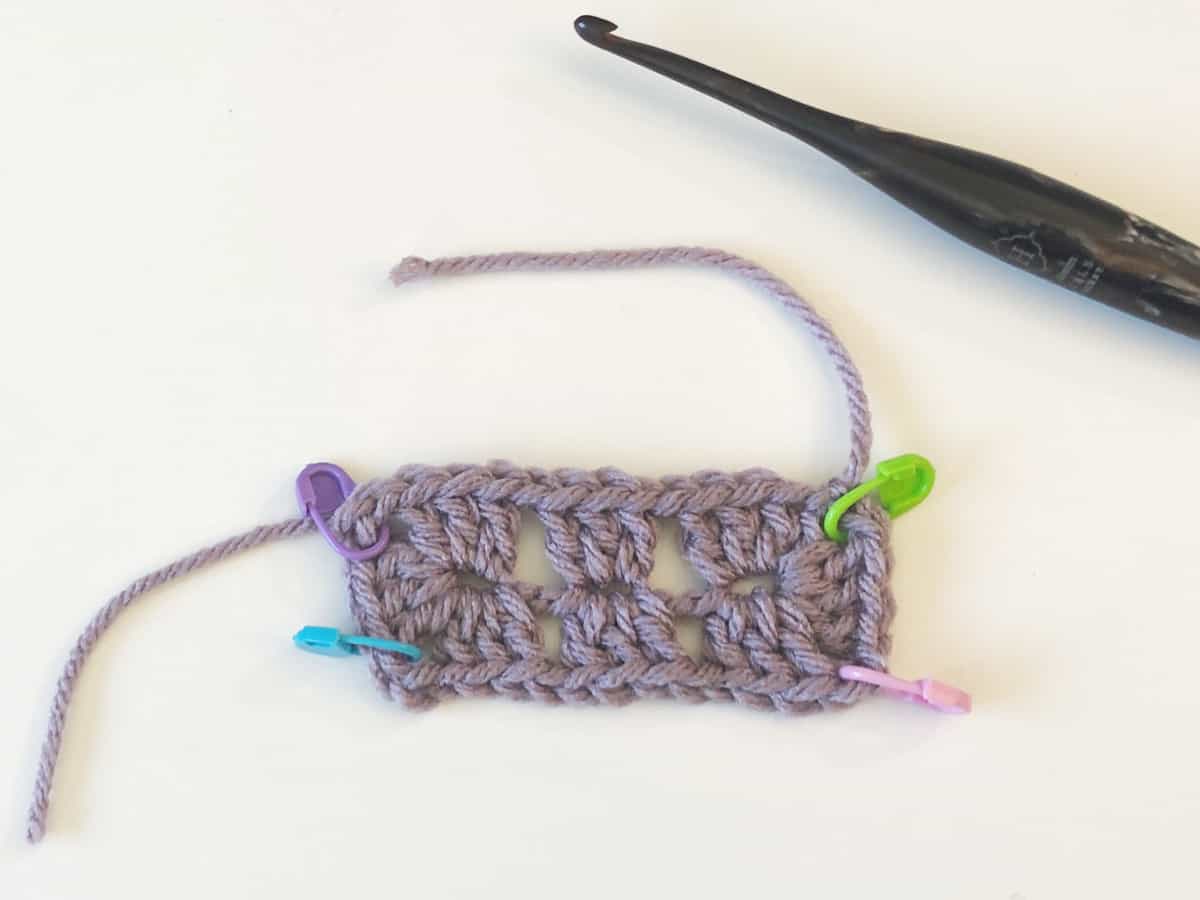
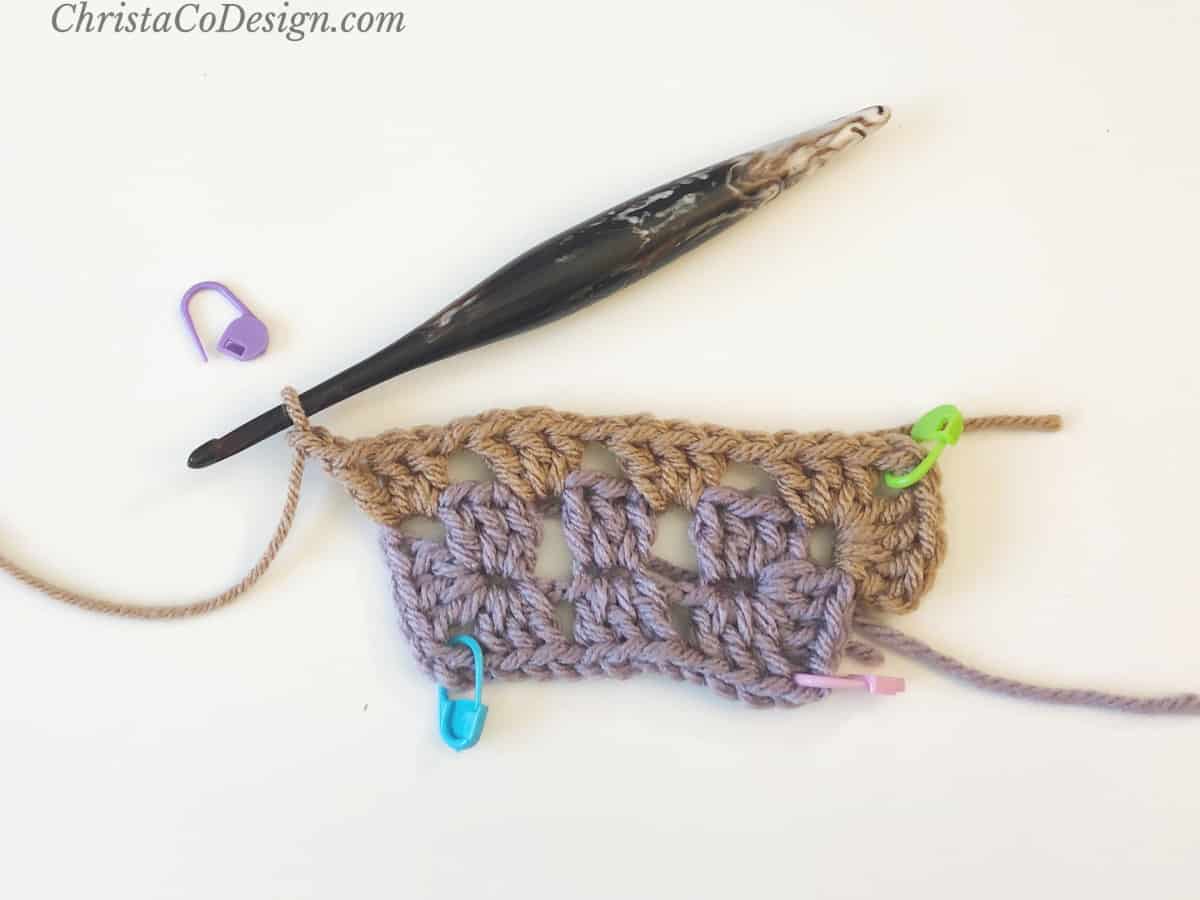
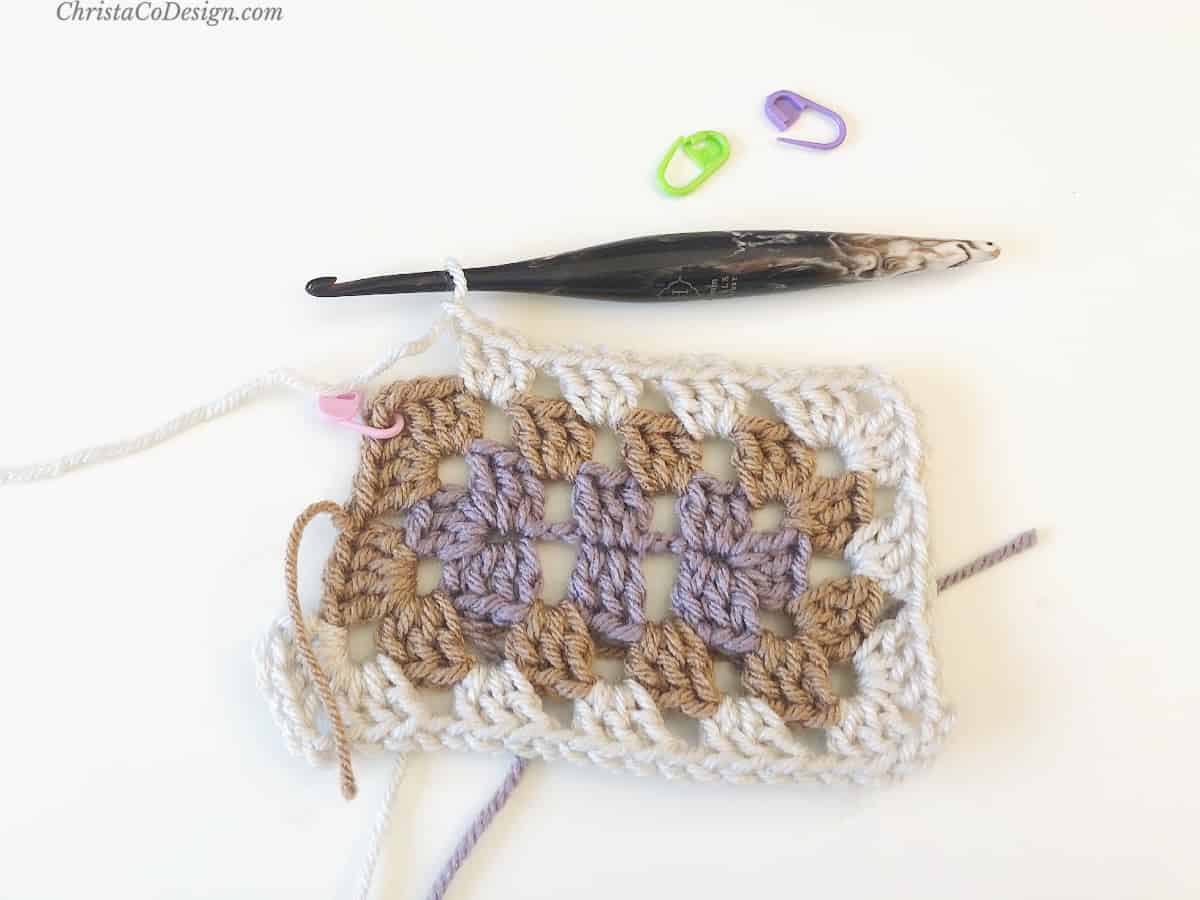
- Sl st to first dc to join round 2. If you continue in the same color, sl st over to the corner.
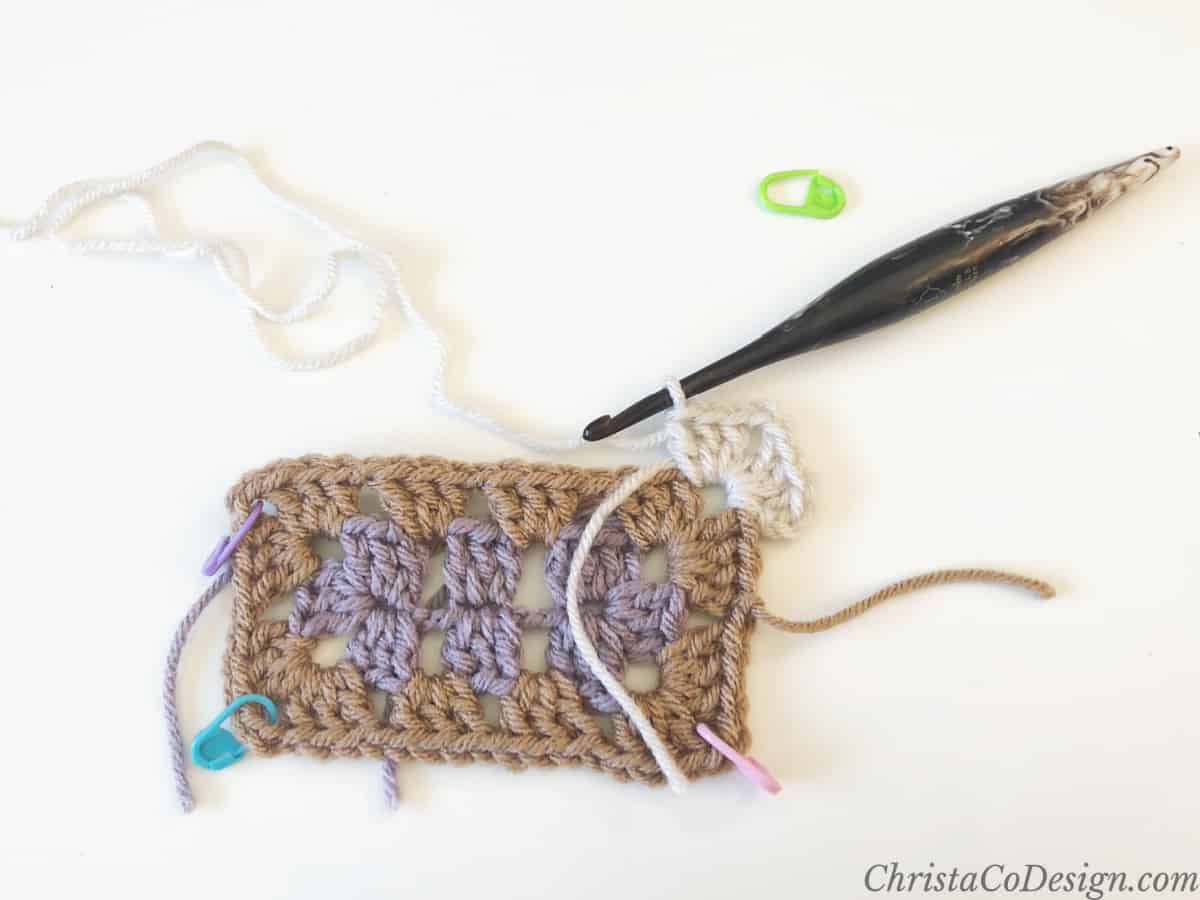
- Round 3. If changing colors cut yarn and join new color to corner with a sl st. Ch 2, these do not count.
- In first corner ch 2 sp place 3 dc, ch 2, 3 dc
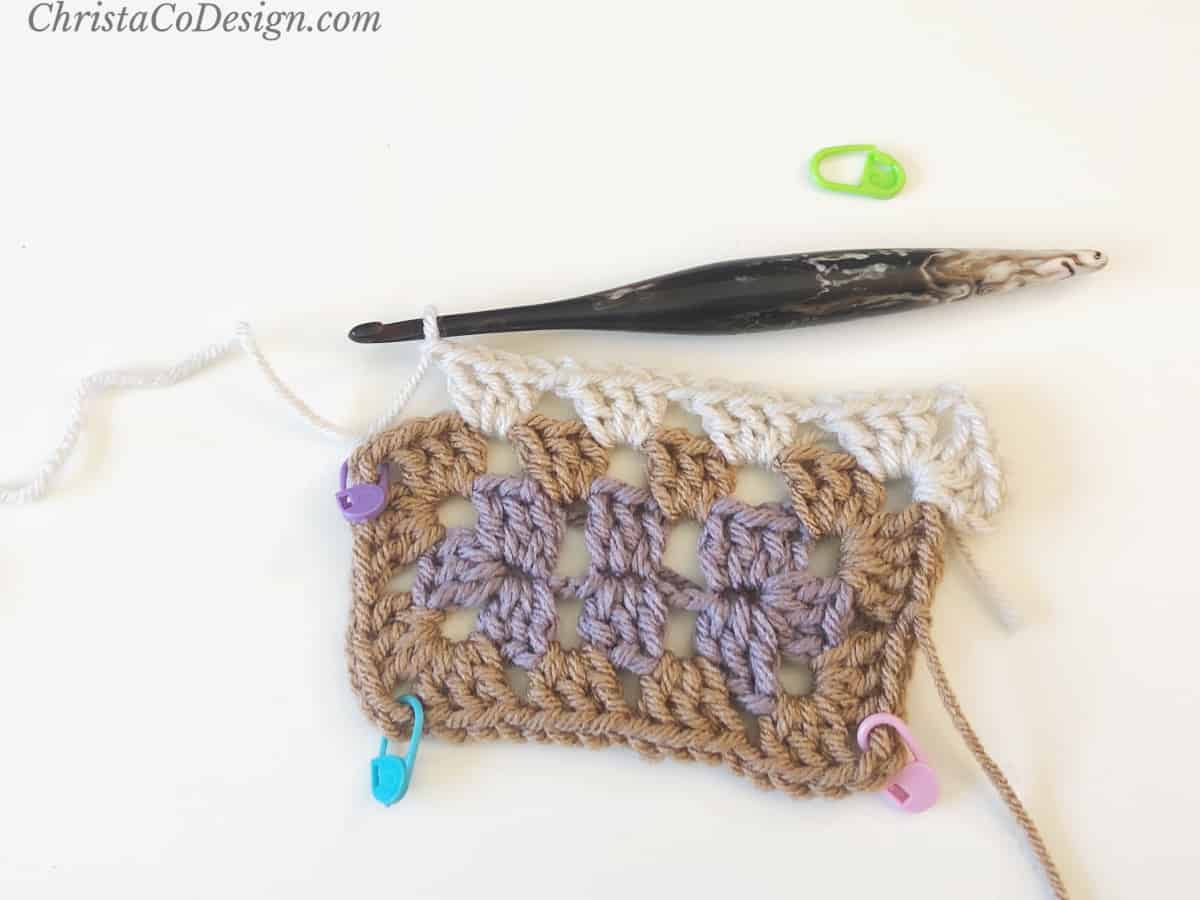
- *{Ch 1, sk 3, work 3 dc in ch 1 sp} rep from * across to the next corner
- Ch 1, sk 3, in corner ch 2 sp work 3 dc, ch 2, 3 dc, ch 1
- Sk 3, work 3 dc in ch 1 sp, ch 1, sk 3, in next corner ch 2 sp work 3 dc, ch 2, 3 dc
- *{Ch 1, sk 3, work 3 dc in ch 1 sp} rep * across to next corner
- Ch 1, sk 3 in corner ch 2 sp work 3 dc, ch 2, 3 dc
- Ch 1, sk 3, work 3 dc in ch 1 sp, ch 1

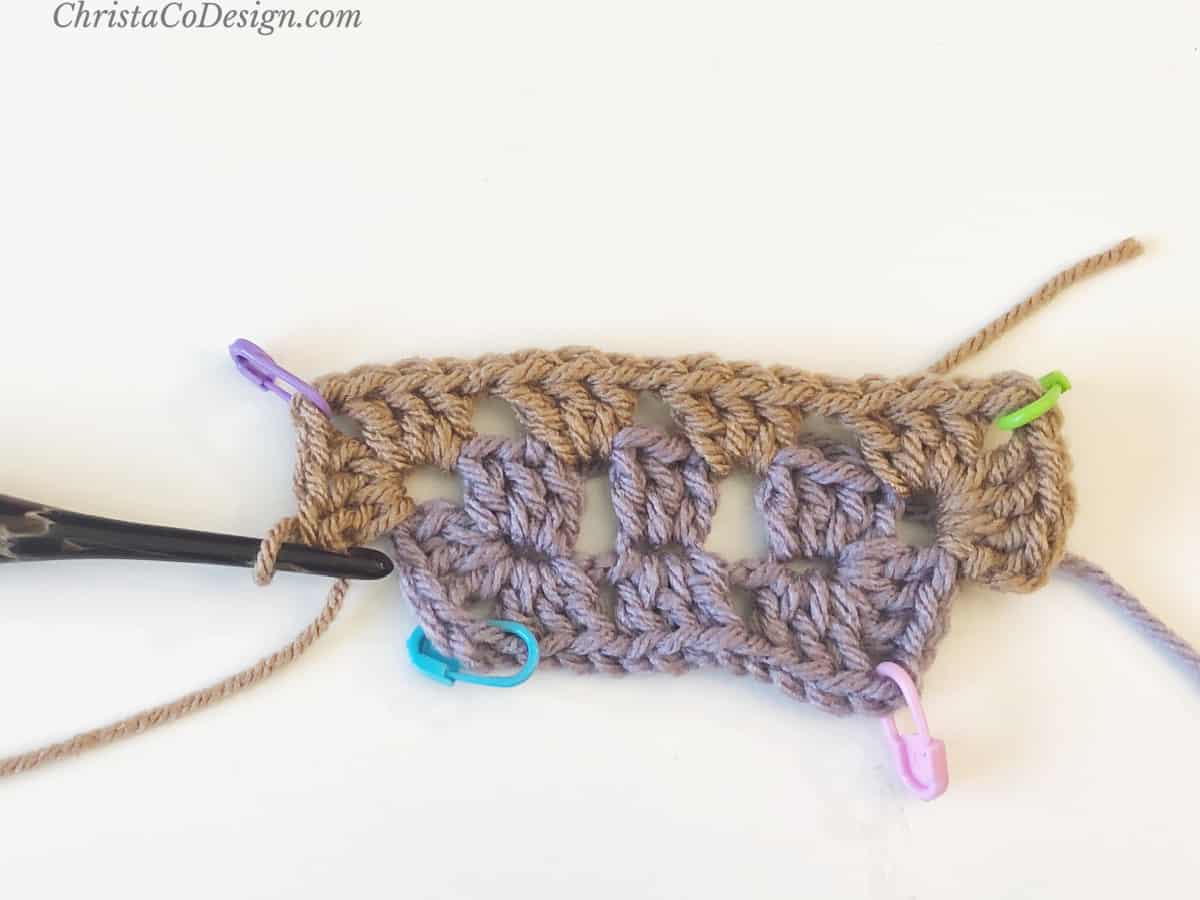
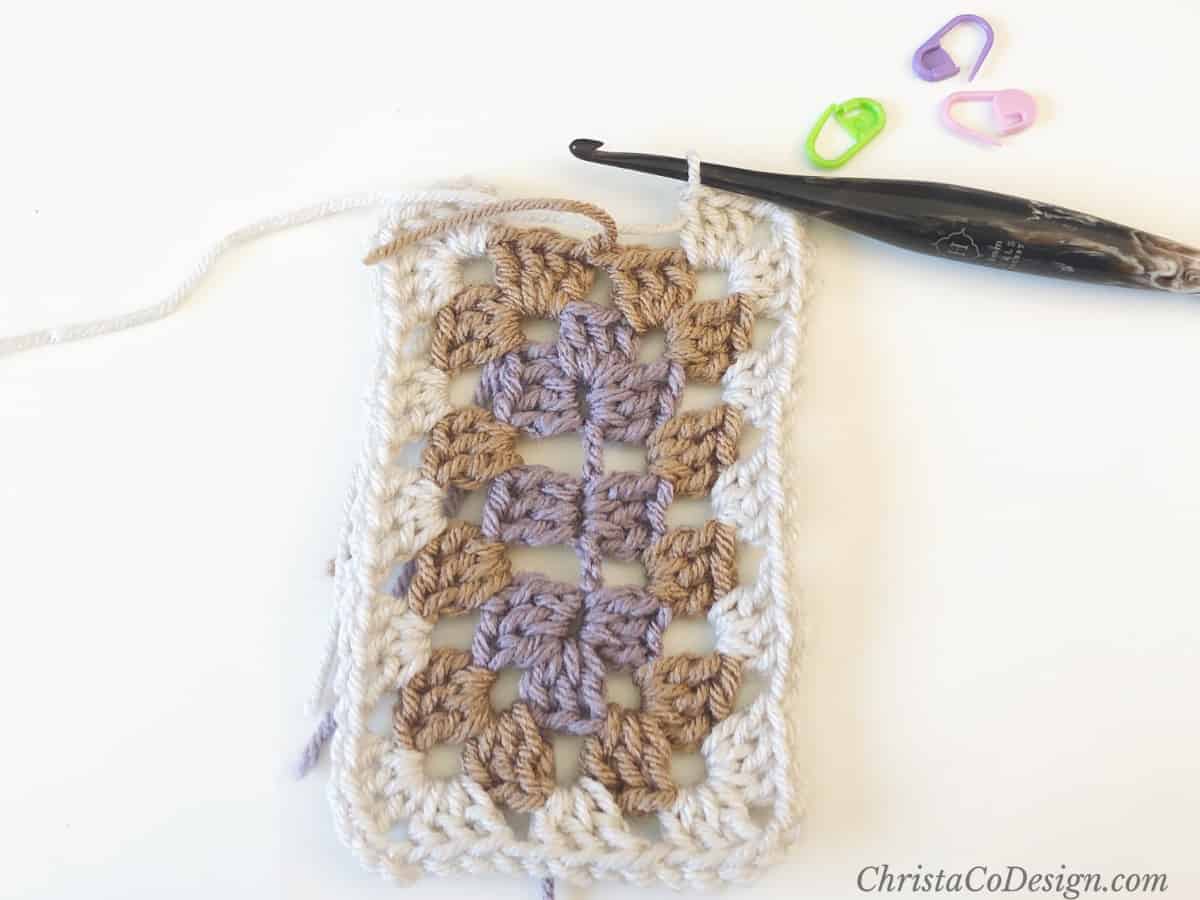
- Sk last 3 dc and sl st to first st.
- Rember to sl st over to the corner, or if changing colors, join with sl st and ch 2 to start the next round.
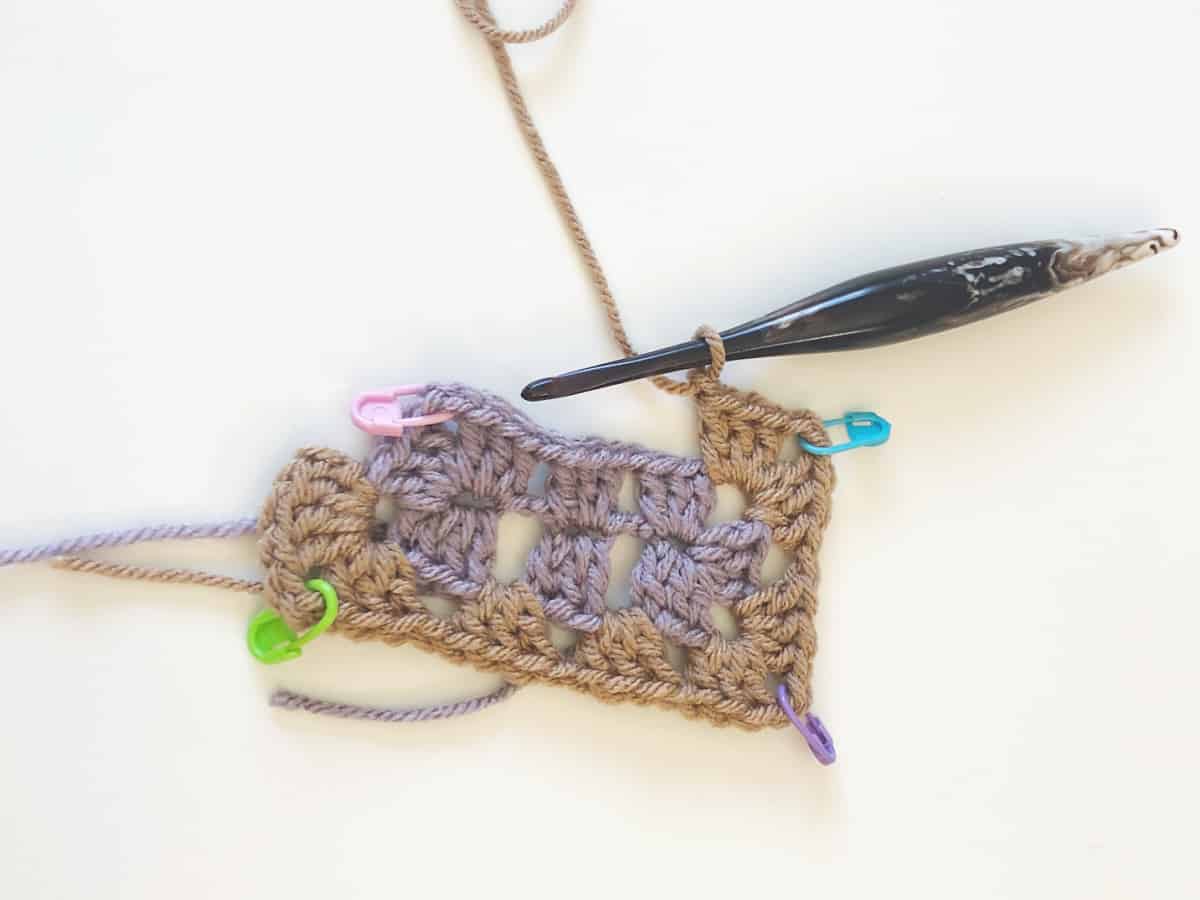
- Rnd 4. *{In corner ch 2 sp work 3 dc, ch 2, 3 dc, (ch 1, sk 3, work 3 dc in next ch 1 sp) rep from ( ) across to next corner} rep from * all the way around, join with sl st to first st. Each rnd will increase by 3 dc in each corner so 12 sts total.
- Keep repeating Rnd 4 until you've reached your desired size.
 I start with 9 chains for this tutorial which gives me 3 granny clusters in row 1. You can double it to 18 chains for 6 grannies. Or any number that's divisiable by 3. The longer your starting chain, the longer and narrower your rectangle will be.
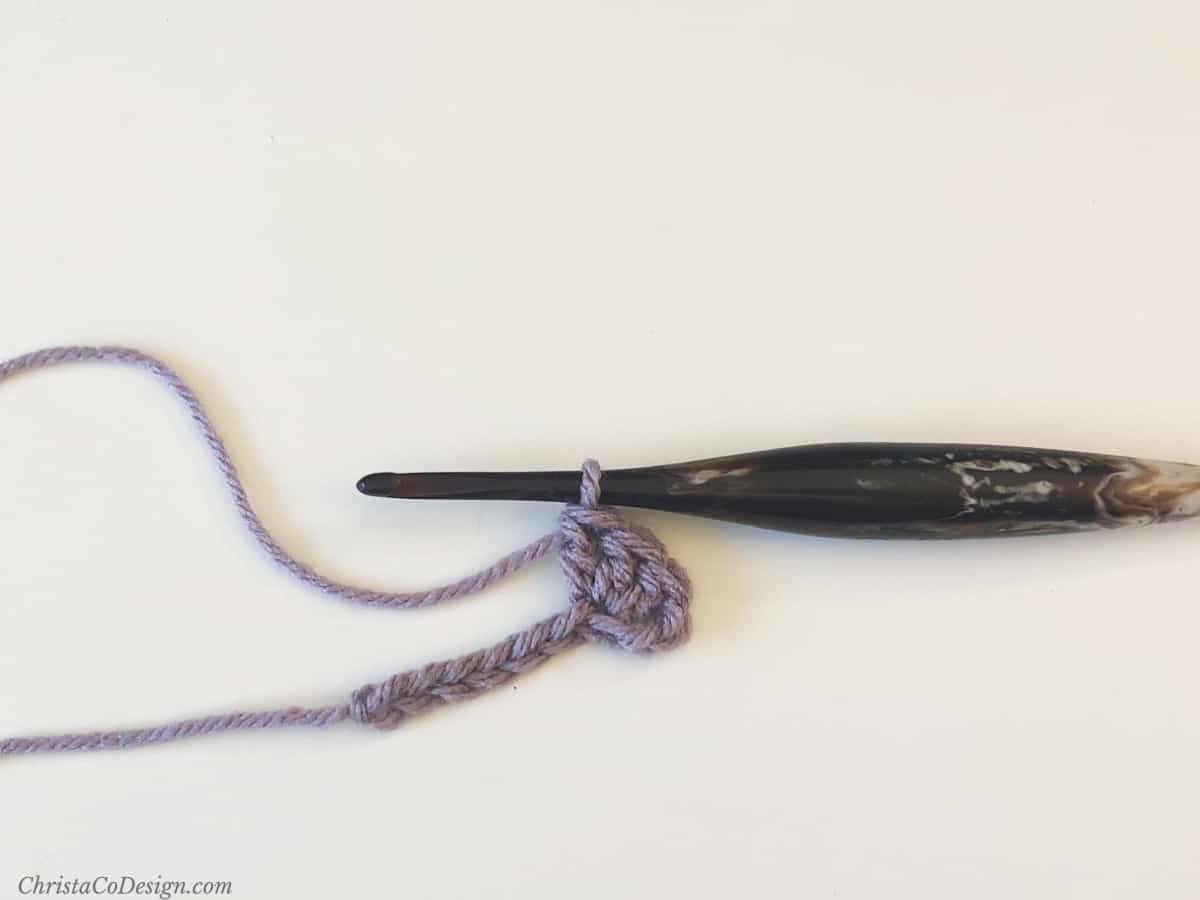

 Here I only have 3 sets of granny clusters. You can start with more for a longer and narrower rectangle. Starting with 3 or 4 sets will give you a boxier rectangle.
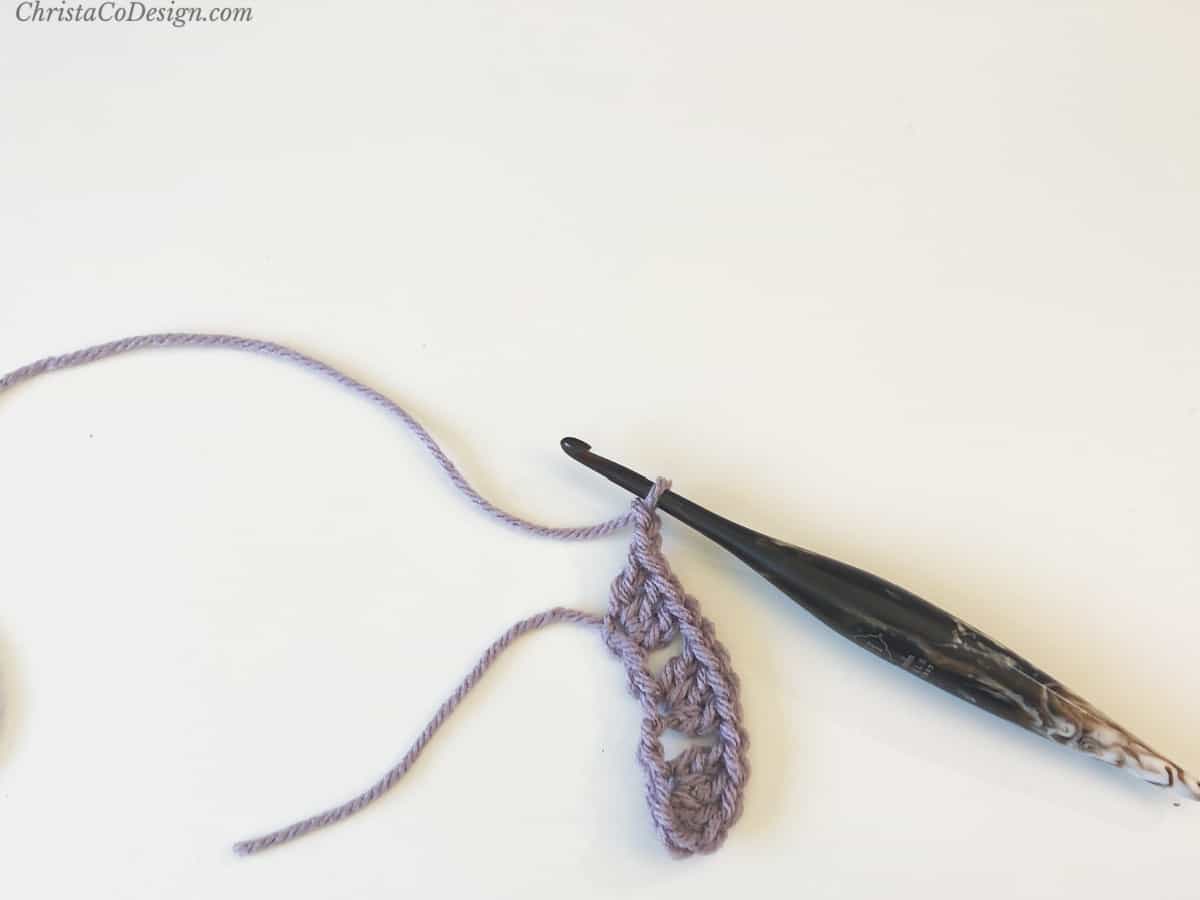
 Both corner stitches are marked with the blue and purple stitch markers here.
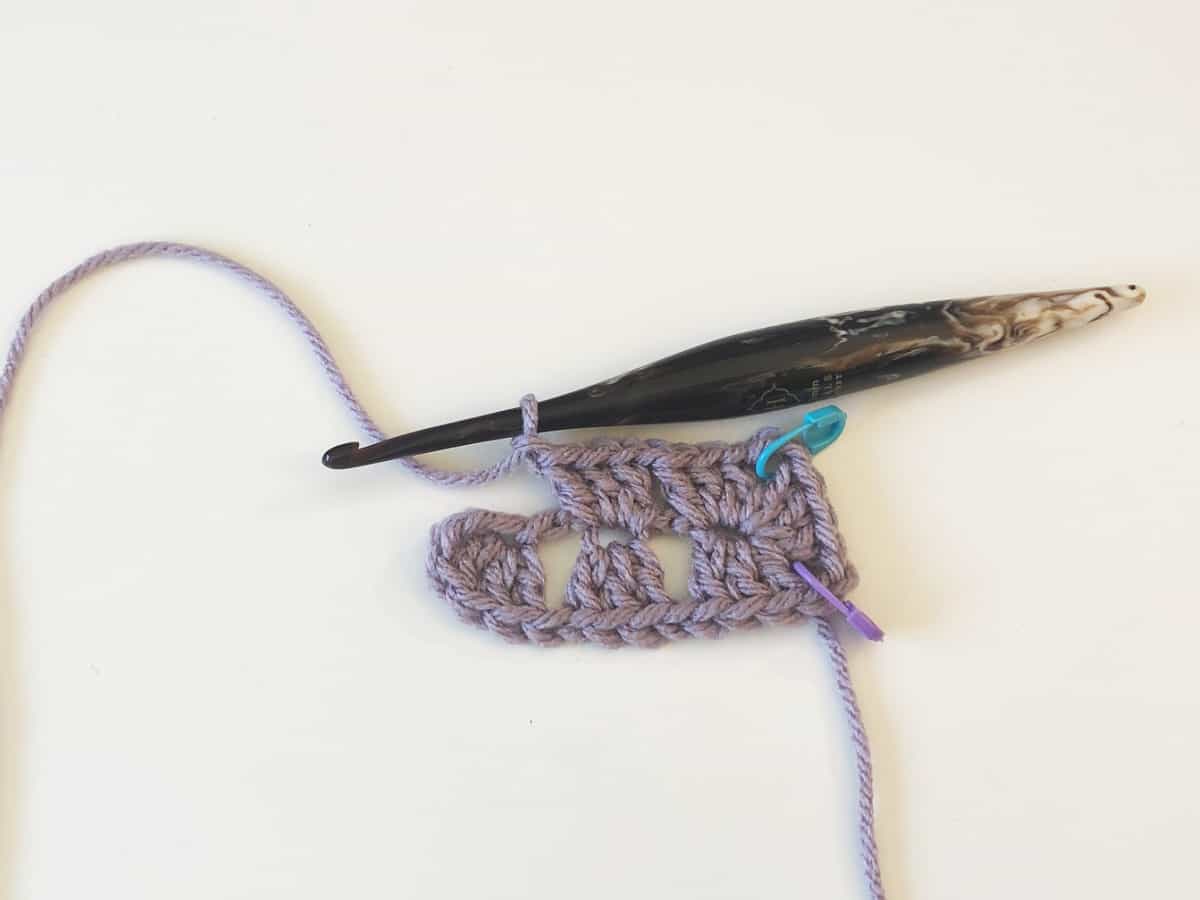
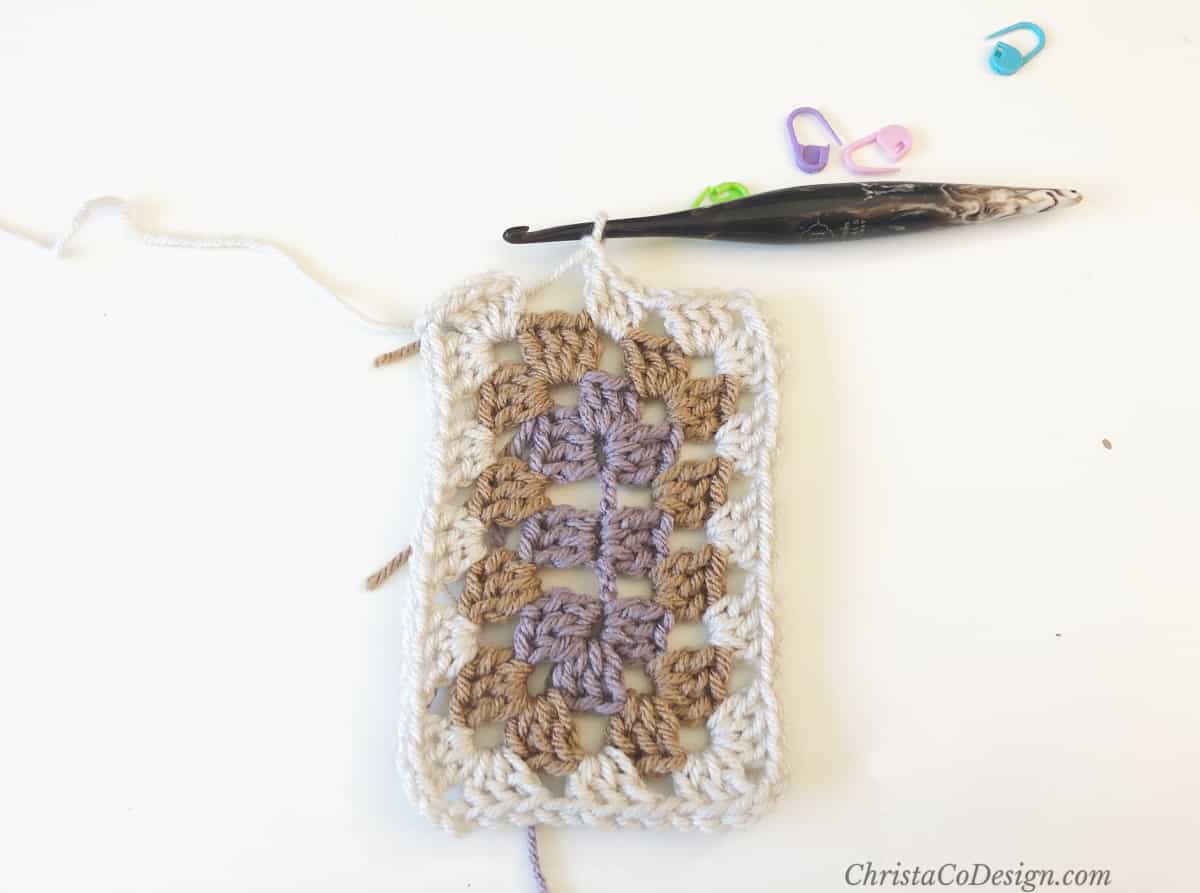
 The 4 corners are marked here with stitch markers.
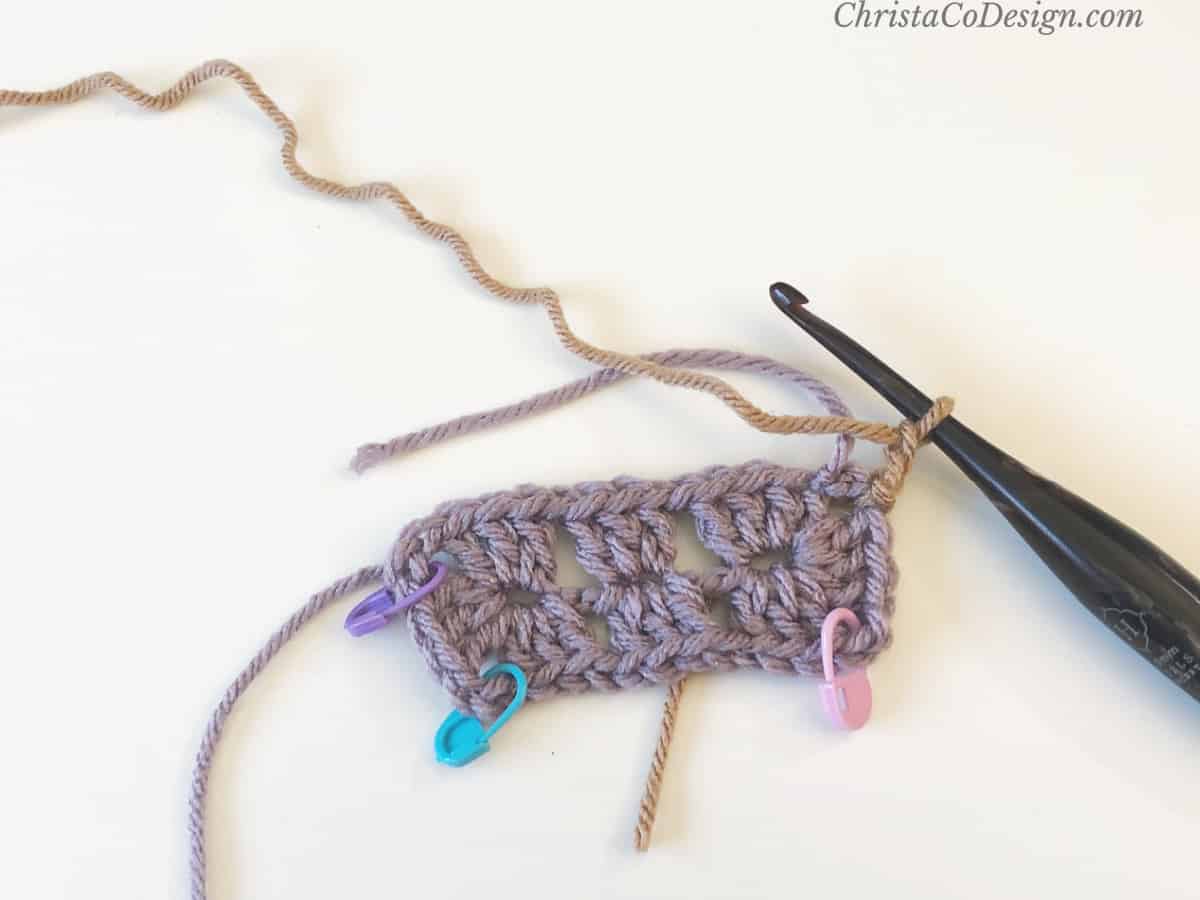
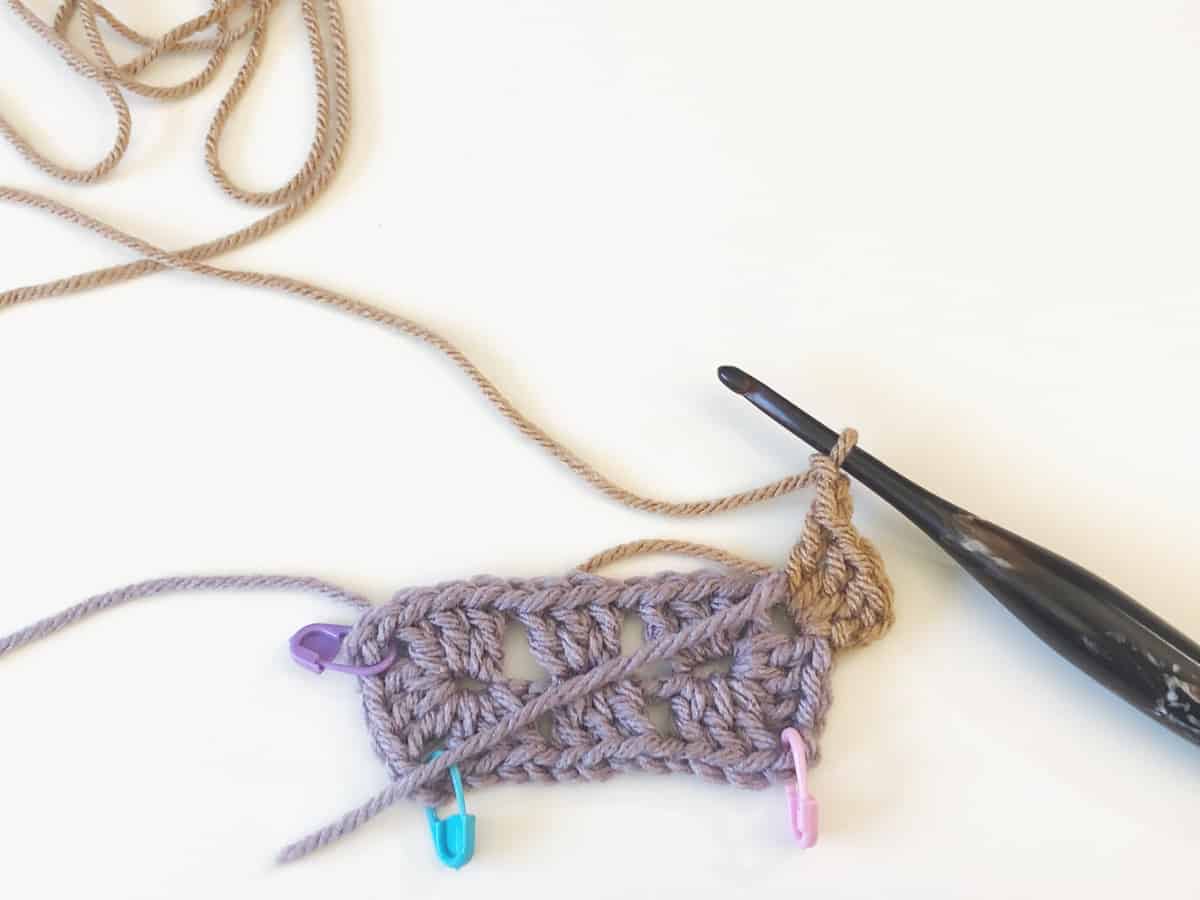
 The green stitch marker marks this first corner of Round 2.
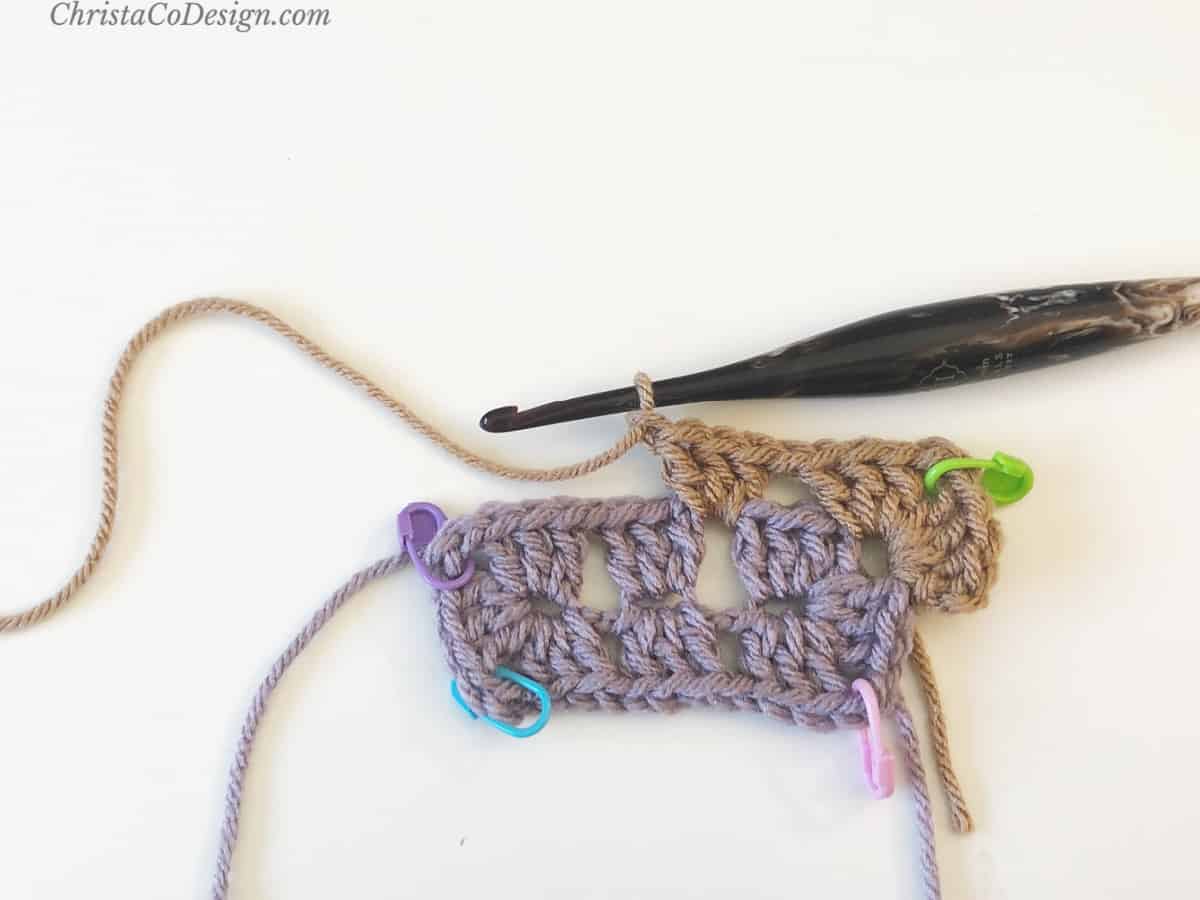

 If you continue in the same color, sl st over to the corner.
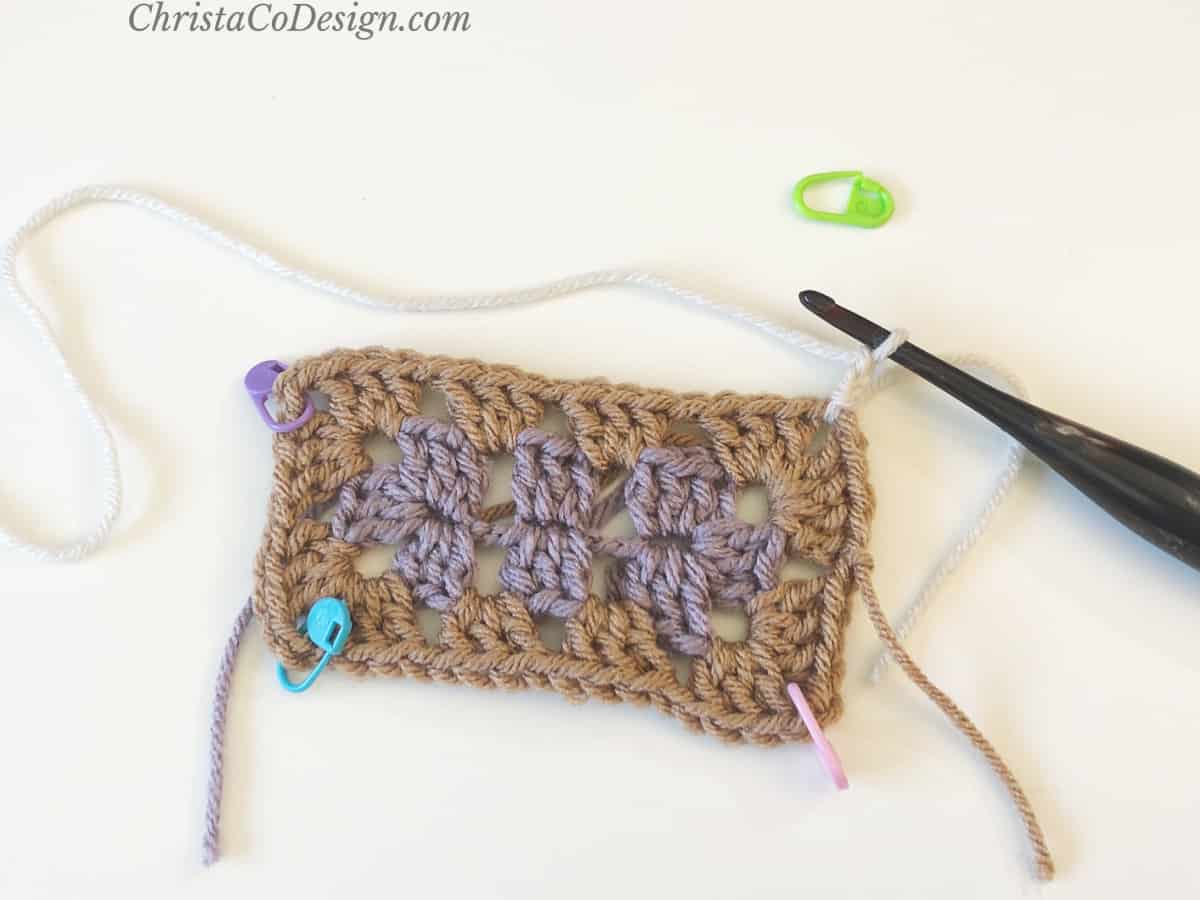
Recommended Products
As an Amazon Associate and member of other affiliate programs, I earn from qualifying purchases.