How to Crochet a Ruffle Edge or Ruffle Sleeve on Garments
Crocheting a ruffle is so much easier than it looks! Most of the time crocheters are trying to get their work to lay flat. But when you want to crochet ruffles, how do you do it?
To crochet a ruffle, simply add more stitches. It’s really that easy.
I bet, you already knew the answer. Have you ever been crocheting a circle for a hat and it gets wavy?
What’s happening is that there are too many stitches. With a ruffle, that’s exactly what we want.
This post contains affiliate links, I may earn a fee. Read more disclosure policy.
Here I will cover how to crochet a ruffle on a blanket, or shawl and as a sleeve on a garment.
How to crochet a ruffle on a blanket edge will be slightly different than crocheting a ruffle on a sleeve. However, the concept remains the same: add more stitches.
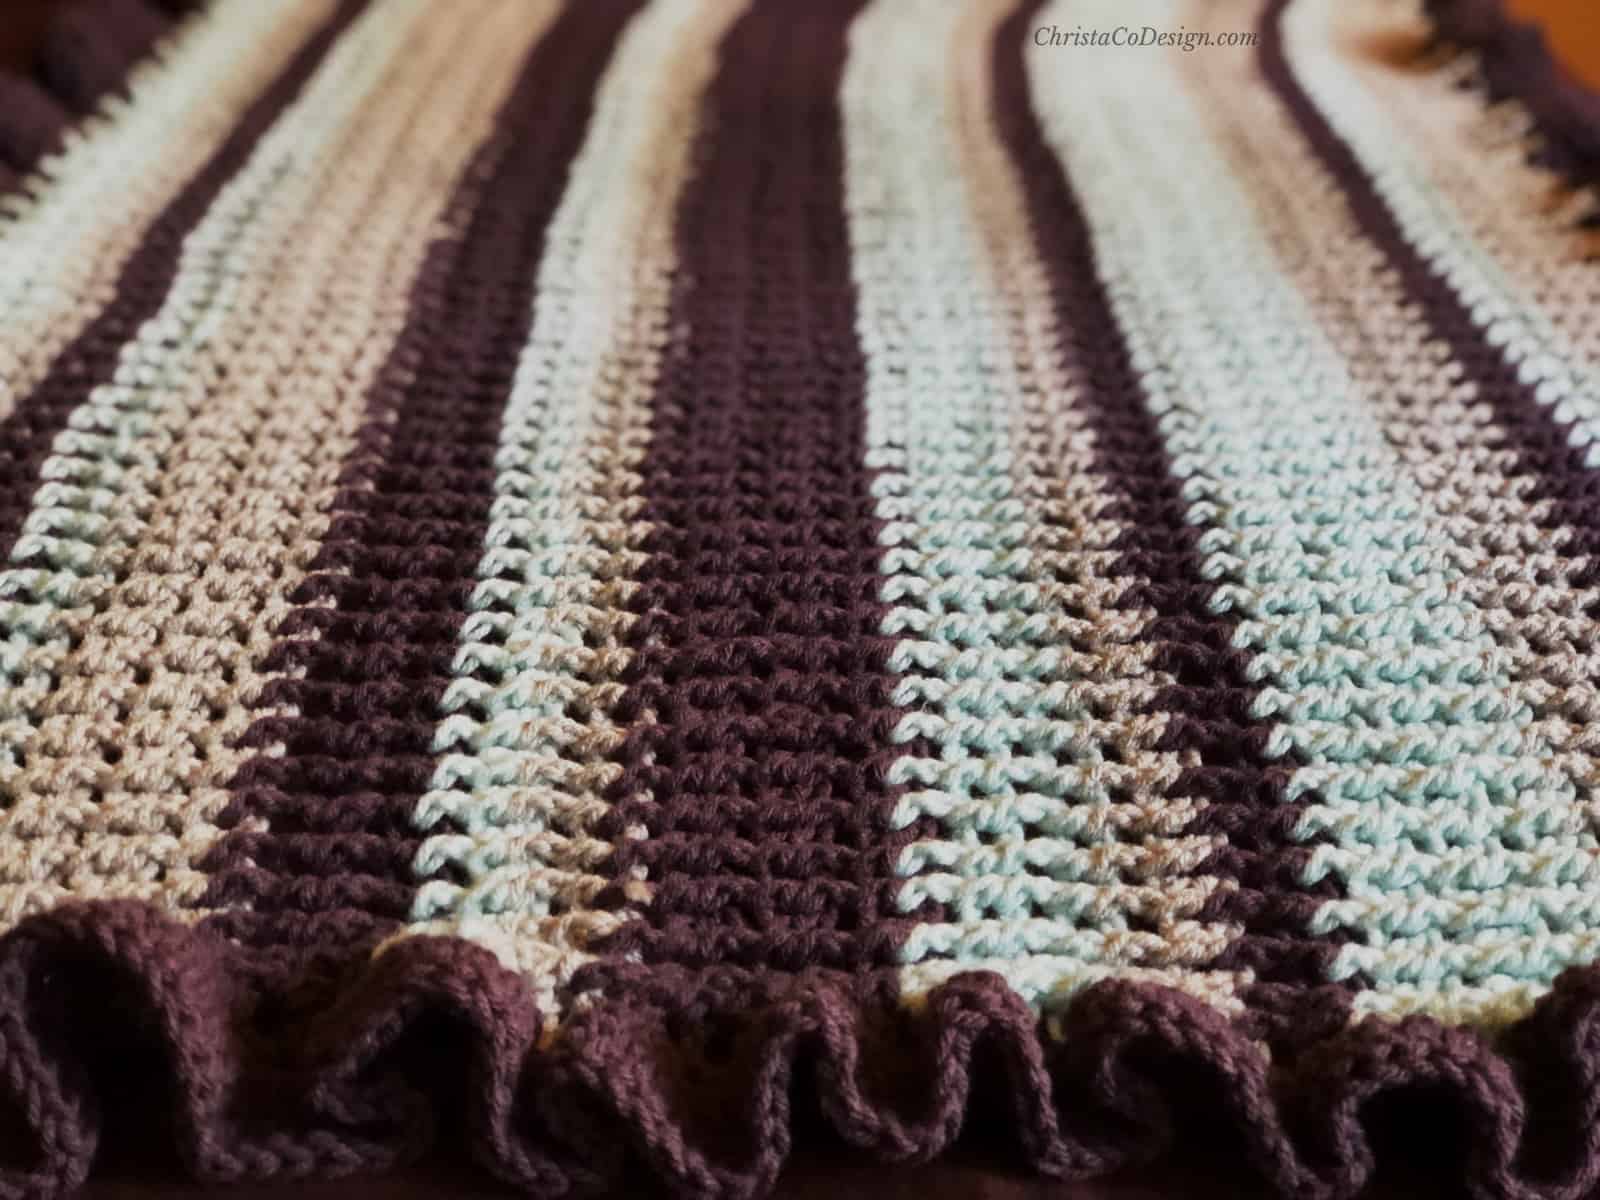
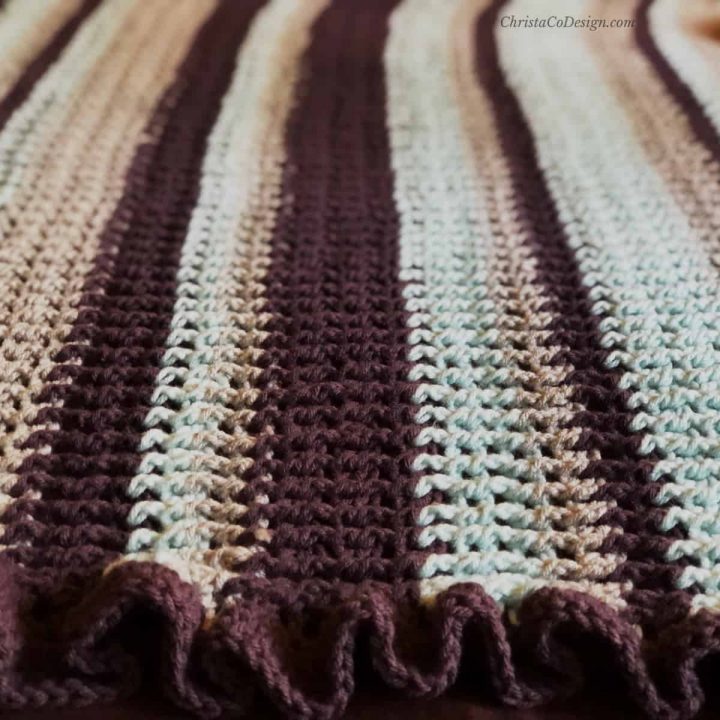
In my Strisce (pronounced stree-shay) Ruffle Edge Wrap the edging is a ruffle made with double crochet stitches. To get the perfect ruffle edge you want to follow a pattern of increases.
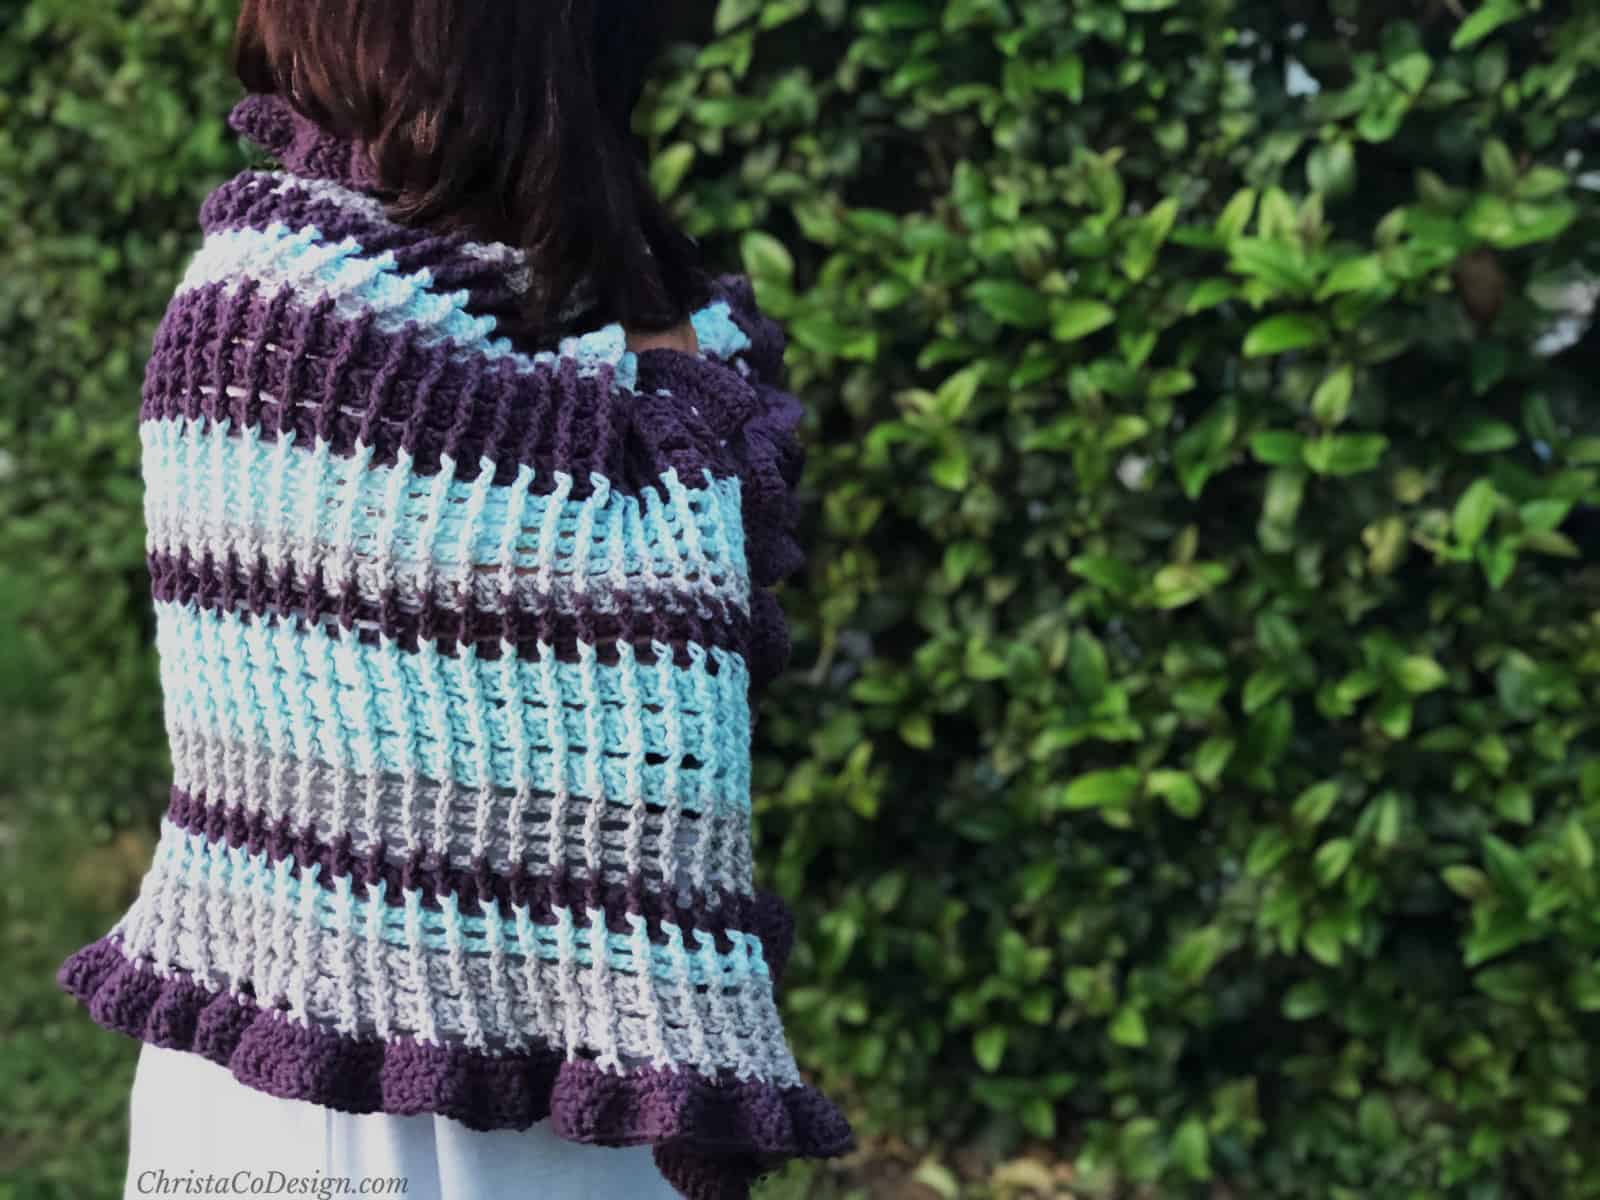
How to Add a Ruffle Edge to a Blanket or Rectangle Wrap
The first step is always to prep your border, this applies whether you’re crocheting a blanket or a wrap. You want the first row around to be in single crochet to have a nice, even edge for the rest of the stitches.
To crochet a ruffle, like on this rectangle wrap, you increase in the first dc, but not in the next dc. To increase, place 2 double crochets in the first stitch and then only place 1 double crochet in the next stitch. Then repeat that pattern around.
Then follow this round with 2 double crochets in one stitch and 1 double crochet in each of the next 2 stitches.
This simple double crochet pattern is a great way to add a ruffle because we don’t a need specific stitch count. If you have a few stitches, more or less, that’s ok here!
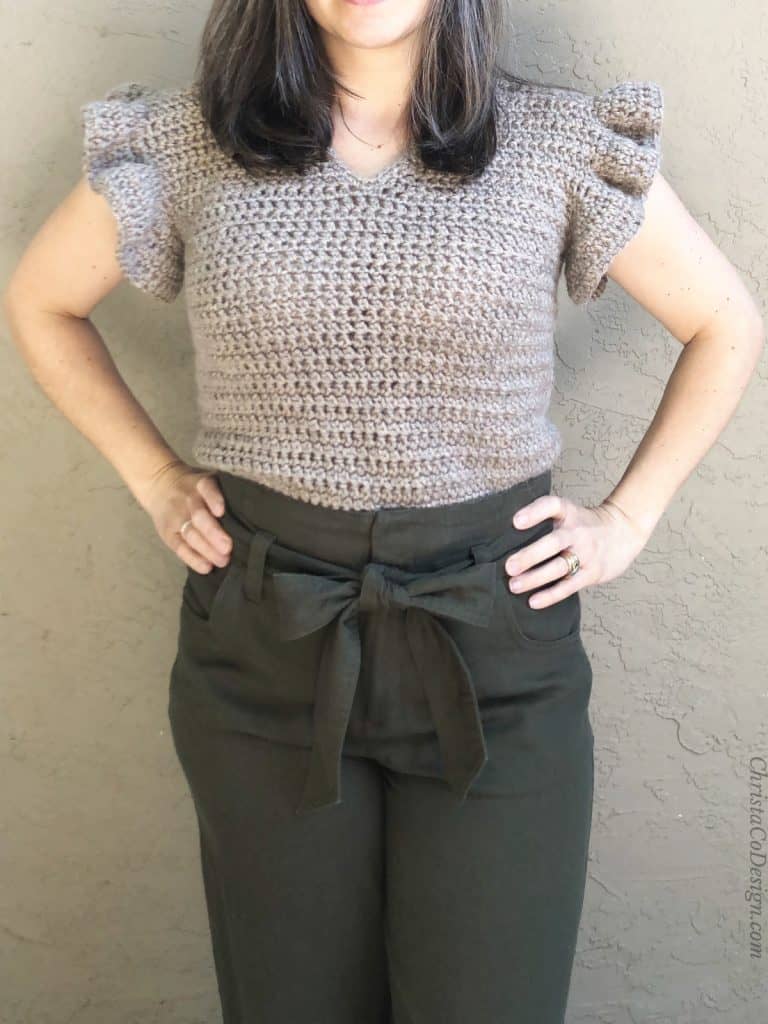
How to Add a Ruffle Sleeve or Hem to a Garment
If you want to crochet a ruffle sleeve, first you need to determine how ruffly you want it. This will help you decide how many rows or stitches to use to get the ruffle look you want.
For the Gia Top I add only one row of increases because I want a looser ruffle. For the sleeves: place 2 extended single crochets in one stitch, then 1 extended sc in the next stitch.
The sleeve length will also come into play here. The Gia has very short, almost cap sleeves. For the Gia, we add 2-4 rows of regular stitches (with no increases). So just one row of increases is plenty to create the type of ruffle I want.

To create a longer sleeve length and more ruffle-age, you might need to add another row of increases to keep the ruffle from flattening out too much.
You would do it with the same stitch pattern as the edging from the example above. Place 2 extended single crochet in one stitch, then place 1 extended single crochet in each of the next 2 stitches.
Check out the free crochet pattern for the Gia Top which features these easy ruffle sleeves.
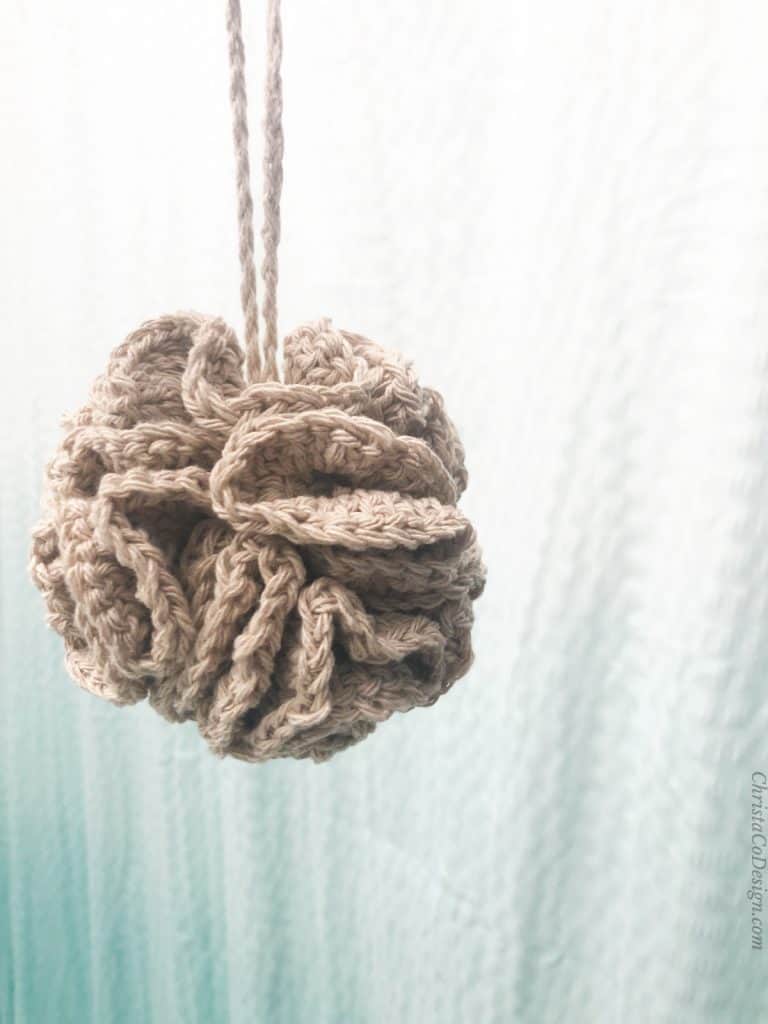
The Crochet Loofah is just a Ruffle in a Circle
If you’ve never made a loofah before it may look very complicated. But, in fact, it’s super easy.
To crochet a loofah, you crochet a ruffle in the round. It starts off just like a hat in the round. You start with way more stitches than a hat and slip stitch to join in the round.
And in each round you keep increasing those stitches. The closer together you place your stitches, the tighter your loofah will be.
I think I need more ruffle patterns! Rockin Mama has a great tutorial on how to use Sashay Yarn for a ruffle scarf.
Scroll down for the free pattern for these ruffles!
How to Crochet a Ruffle Easy Tutorial
How to crochet a ruffle edge on a blanket or wrap. Plus how to crochet a ruffle sleeve. This easy tutorial walks you through the process of crocheting a ruffle.
Materials
- You'll need your finished projects: a blanket, shawl or wrap, or completed garment ready for sleeves.
- Yarn in your chosen color and weight. In this tutorial, all these ruffles use a #4 yarn weight.
Tools
- Crochet hook to match your yarn or pattern.
- Scissors
- Yarn needle
- Measuring tape
Instructions
- Skill Level: Easy
- Notes
Ch 3 counts as a stitch, I highly recommend using a ch 3 alternative, here’s my favorite. - Stitches/Abbreviations
- ch(s) - chain(s)
- dc - double crochet
- esc – extended single crochet
- st(s) - stitch(es)
- rep - repeat
- sc- single crochet
- Ruffle Edge Border on Blanket or Rectangle Wrap
- Worked in the round. Start with a slip knot on your hook.
- On RS join with sl st to any corner.
- Rnd 1. Ch 1, SC evenly around all 4 edges. Place 3 sc in each corner. Check my tutorial for tips on working into the sides of rows. Join with a sl st to first sc. Continue working in the same direction for the next row.
- Rnd 2. Ch 3, dc in same sc, dc in next sc, *{2 dc in next stitch, dc in next st} rep from * around, join with a sl st to top of ch 3. Since we are adding ruffles we don't need to do anything special to the corner stitches.
- Rnd 3. Ch 3, dc in same, dc in each of next two sts, *{2 dc in next st, dc in the next st, dc in next st} repeat from * around, sl st to top of the ch 3. Counting tip: You're placing your increases one stitch later than the previous row.
- Cut yarn and Weave in ends.
- For Ruffle Sleeves
Work on the RS of your crochet top. - Make 2
- Join and turn each round.
- Rnd 1. Join with sl st to bottom of armhole. Place 2 esc in the side of each row around the armhole. Join with sl st to first st of rnd, and turn.
- Rnd 2. Ch 1, *{2 esc, 1 esc in next st} rep from * around, join with sl st and turn. This is the row where the ruffling will happen.
- Rnd 3. Ch 1, esc in each st around, sl st to first st to join, turn.
- Rep Rnd 3 for 2-4 rows or to your desired length.
- Cut yarn + weave in ends.
- Rep for other sleeve.
Notes
This is how to add a simple ruffle. You can of course, use variations like working into the back loop or front loops. Adding more or less increase stitches for a tighter or looser ruffle. You can play around with using the different stitches like half double crochet or treble crochet to create your ruffles.