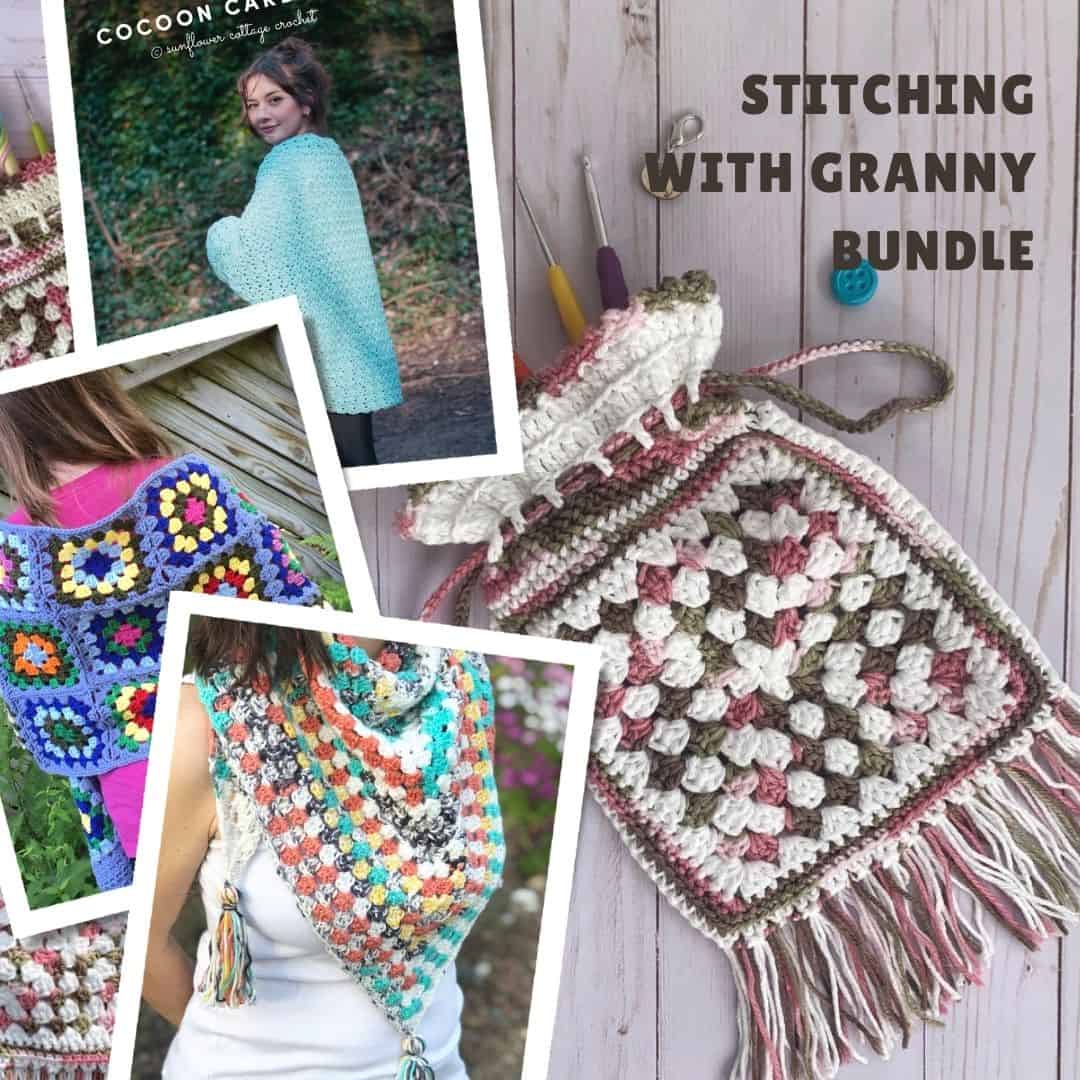
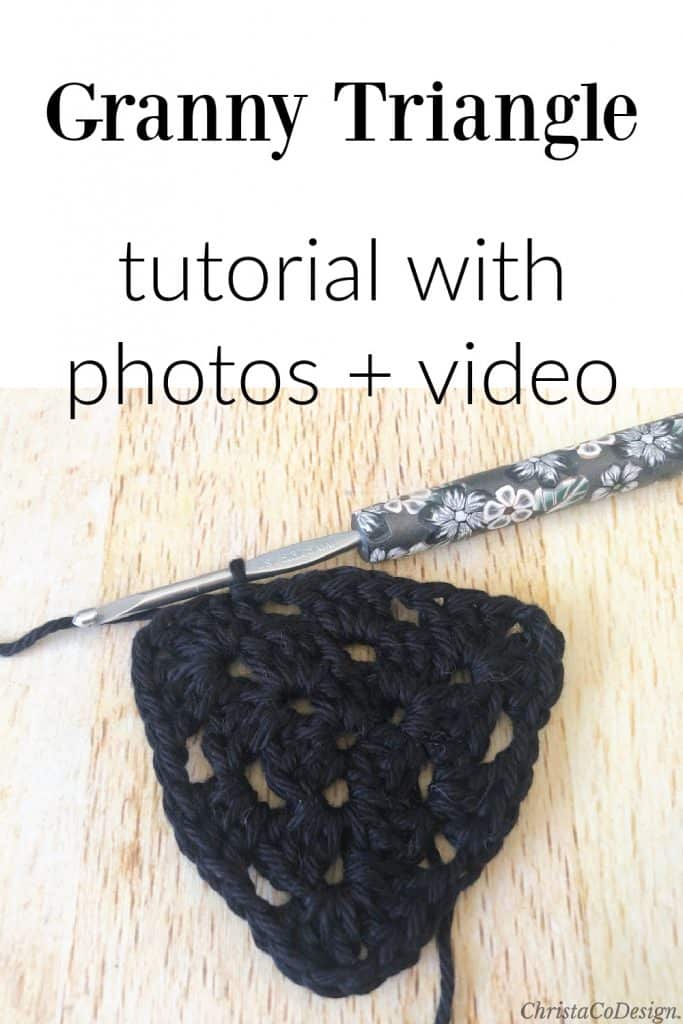
Easy Granny Triangle Crochet Pattern for Beginners
Learn how to crochet a granny triangle. This free crochet pattern includes written instructions with in this step by step photo tutorial.
In crochet, a granny is a cluster of 3 double crochet stitches. Usually we use this in a granny square, but you can also make a triangle granny square this way.
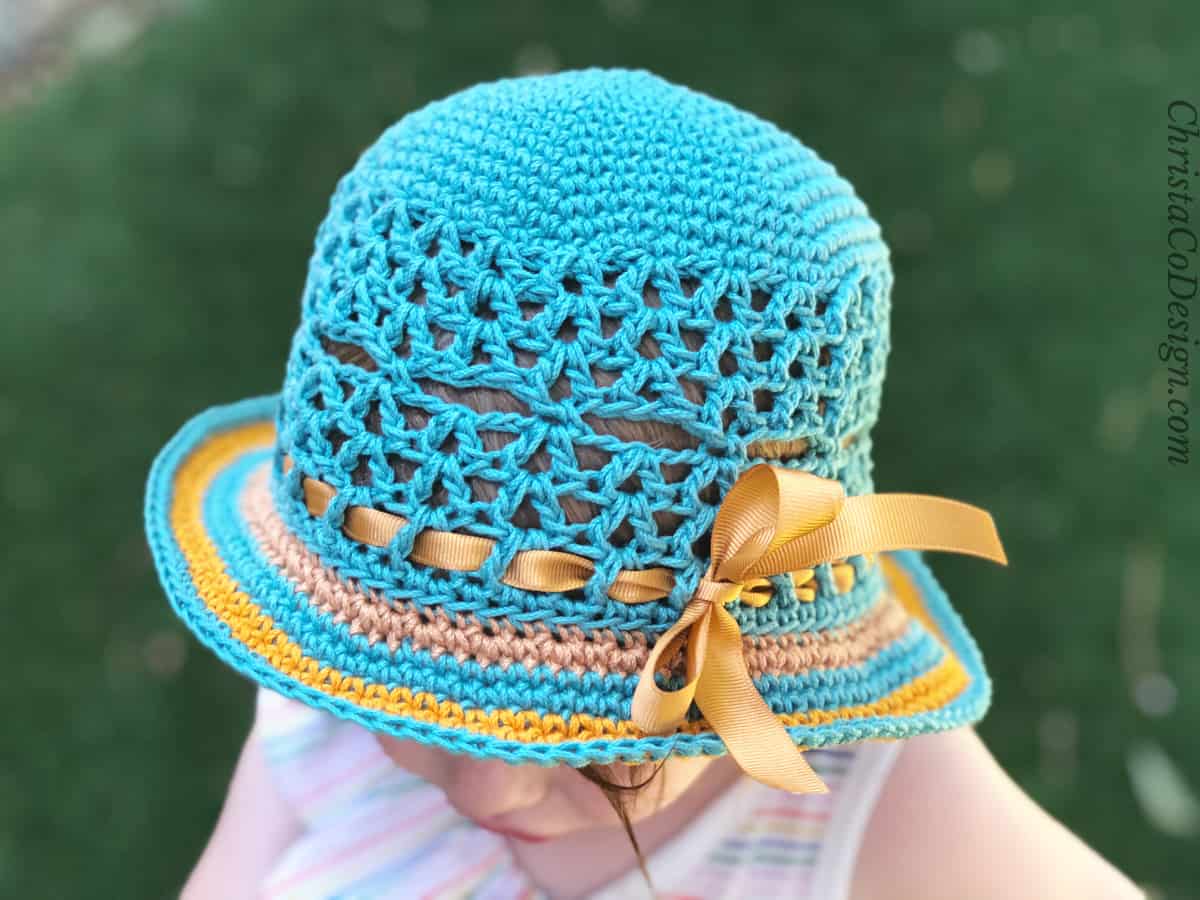
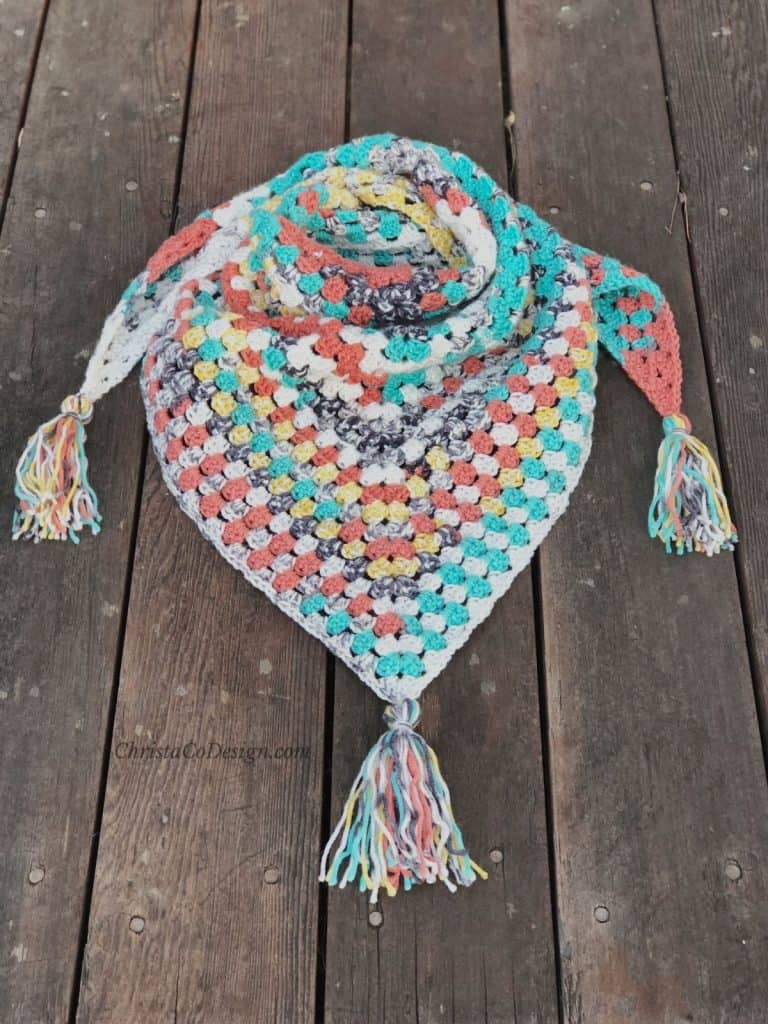
The granny triangle makes an easy crochet shawl pattern that is perfect for beginners and still a favorite of advanced crocheters.
This post contains affiliate links, I may earn a fee. Read more disclosure policy.
Crochet grannies are popular because they’re so easy to make and even easier to increase. Using basic stitches the granny creates a beautiful, classic crochet triangle shawl.
When you start using up scrap yarn, a granny triangle or square is an easy way to do it.
The Yarn for this Granny Triangle
I’m using a #4 medium weight cotton yarn. You can use a variety of yarn weights and fibers to make granny triangles.
It’s important that you match your hook to your yarn. Or use what your pattern suggests.
Crochet Granny Triangle Patterns
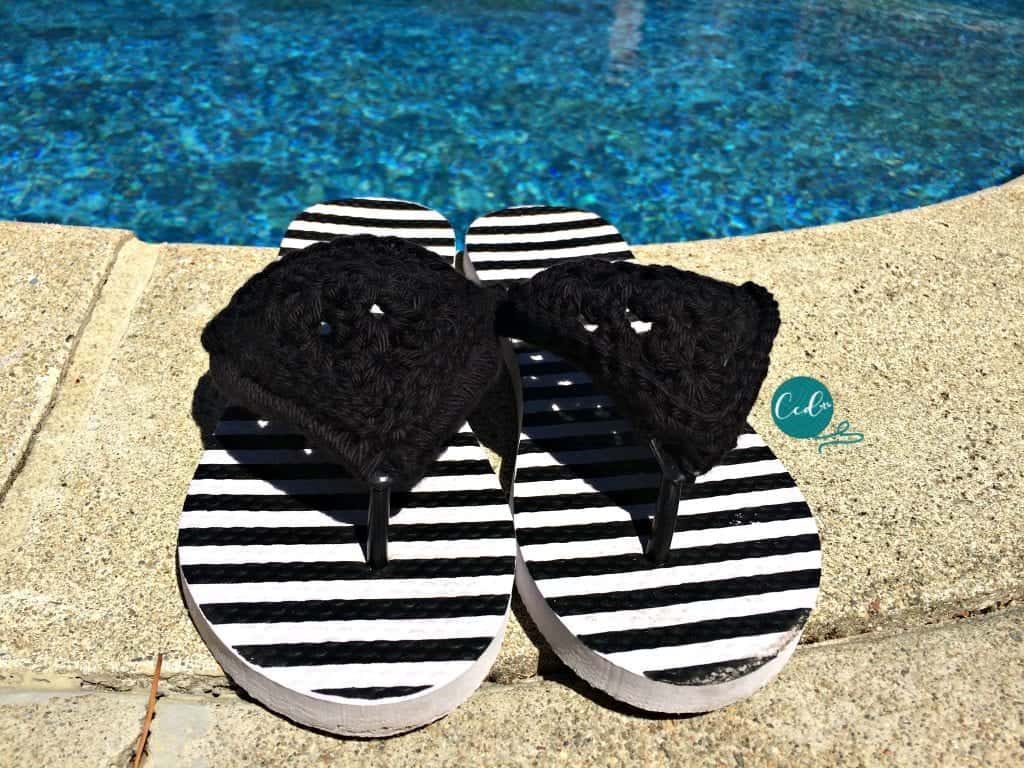
You can add a crochet granny triangle to a simple pair of flip flops.
Or show off that pretty yarn in a granny triangle shawl or scarf. The Canyon Scarf makes a great first triangle shawl pattern!
If granny squares are more your thing, then check out the Bettie Bear Lovey.
More Free Crochet Shawl Patterns
If you love shawl patterns then you might enjoy these free crochet patterns.
The Littorina is an easy rectangle shawl pattern. Rectangular shawls are very easy for beginners. The Vera is a crochet wrap pattern that is simple pattern that’s beautiful.
Materials
You can use any weight yarn, #4 medium yarn is the most commonly used.
For this tutorial I use:
- I Love This Cotton Yarn is a #4 medium weight yarn (100% acrylic; 180 yds / 165 m; 3 oz / 85 g).
- 3.75mm (F) hook
- Stitch markers
- Yarn needle
- scissors
Stitches/Abbreviations {US Terms}
ch-chain
ch sp-chain space
mc-magic circle or you can ch 3 and sl st to the first ch to form a circle.
rep-repeat
rnd-round
sl st-slip stitch
Level
Beginner
Construction
This granny triangle is worked in the round. This means you will crochet in a circle, and join the rounds with a slip stitch, and then continue crocheting in the same direction for the next round.
Adjustment
To adjust the size of your granny triangle you can crochet more or less rounds of the repeat. This will increase or decrease the overall size of your triangle.
Changing the weight of your yarn and hook will change the size of your individual stitches, and then also your granny triangle.
So usually a #3 light weight yarn will yield a smaller stitch and triangle than a #4 medium weight yarn. However, much depends on your personal tension.
The thinner yarns are great when you want a lightweight shawl.
Pin It
Scroll down for the free pattern: Granny Triangle Crochet Tutorial
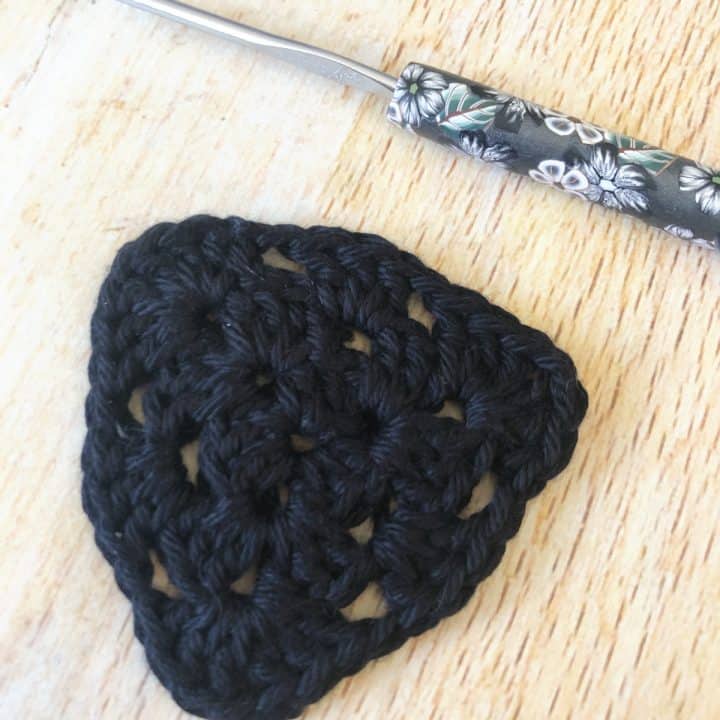
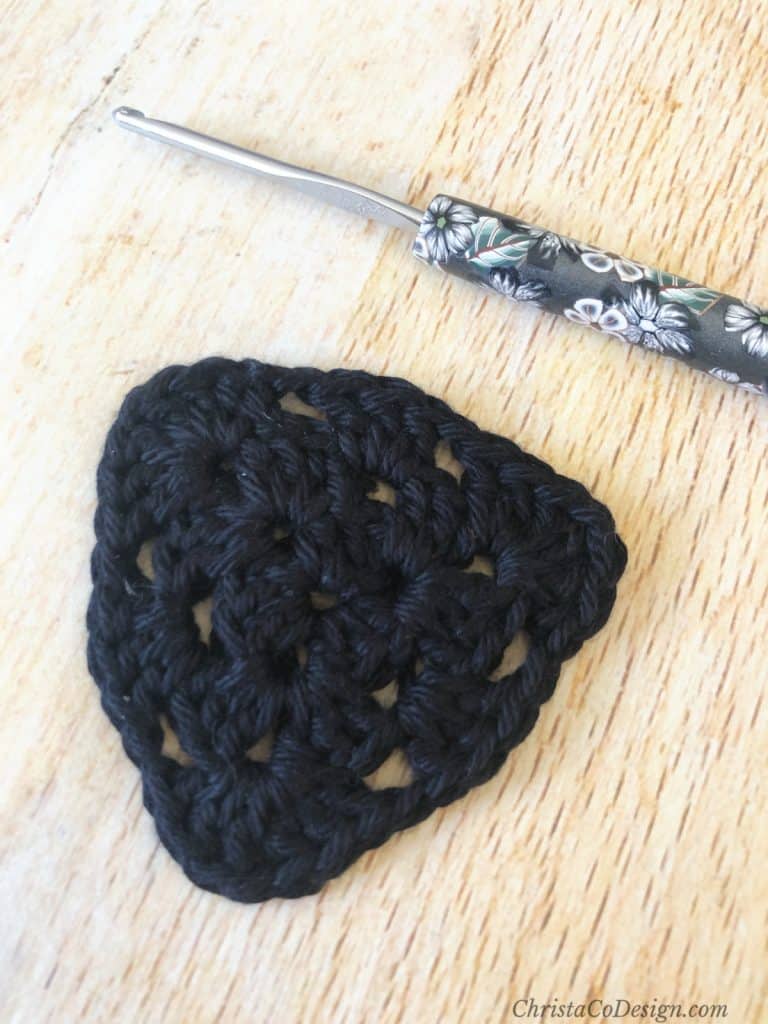
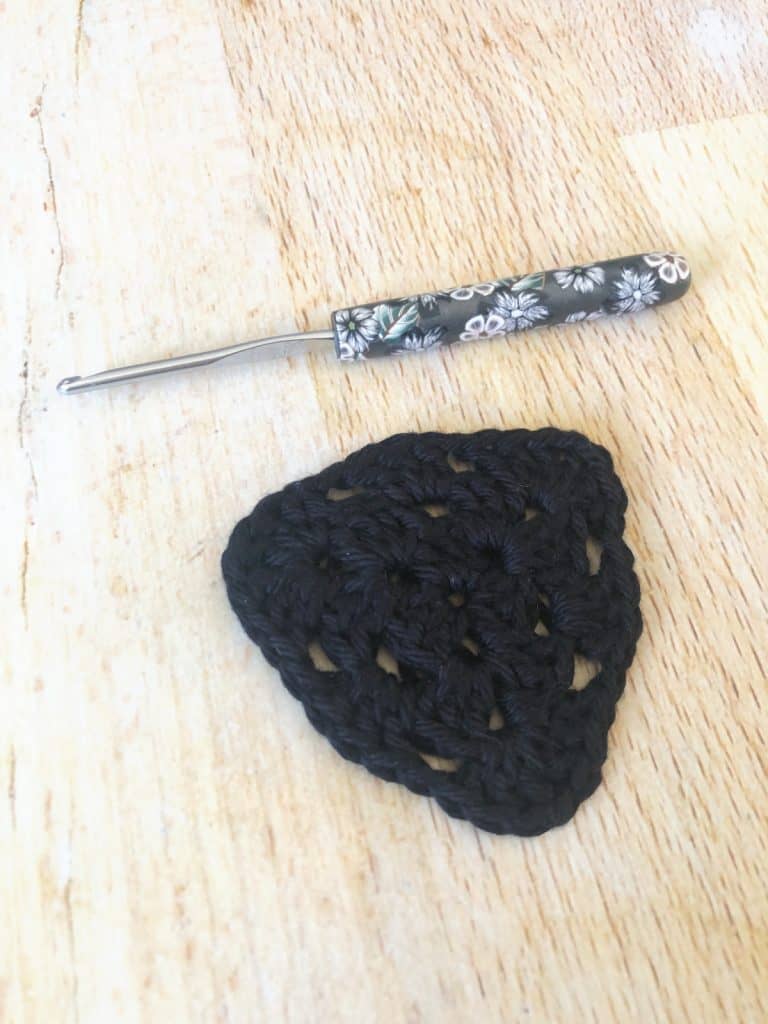
Easy Granny Triangle Crochet Pattern
Learn how to crochet the classic granny triangle in this easy crochet pattern with step by step tutorial for beginners.
Materials
- 20 yds / 18.5 m of #4 medium worsted weight yarn, I used what I had on hand, I Love This Cotton yarn in black. You can use any yarn.
Tools
- 3.75 mm Hook size F. You can use any hook that's compatible with your yarn.
Instructions
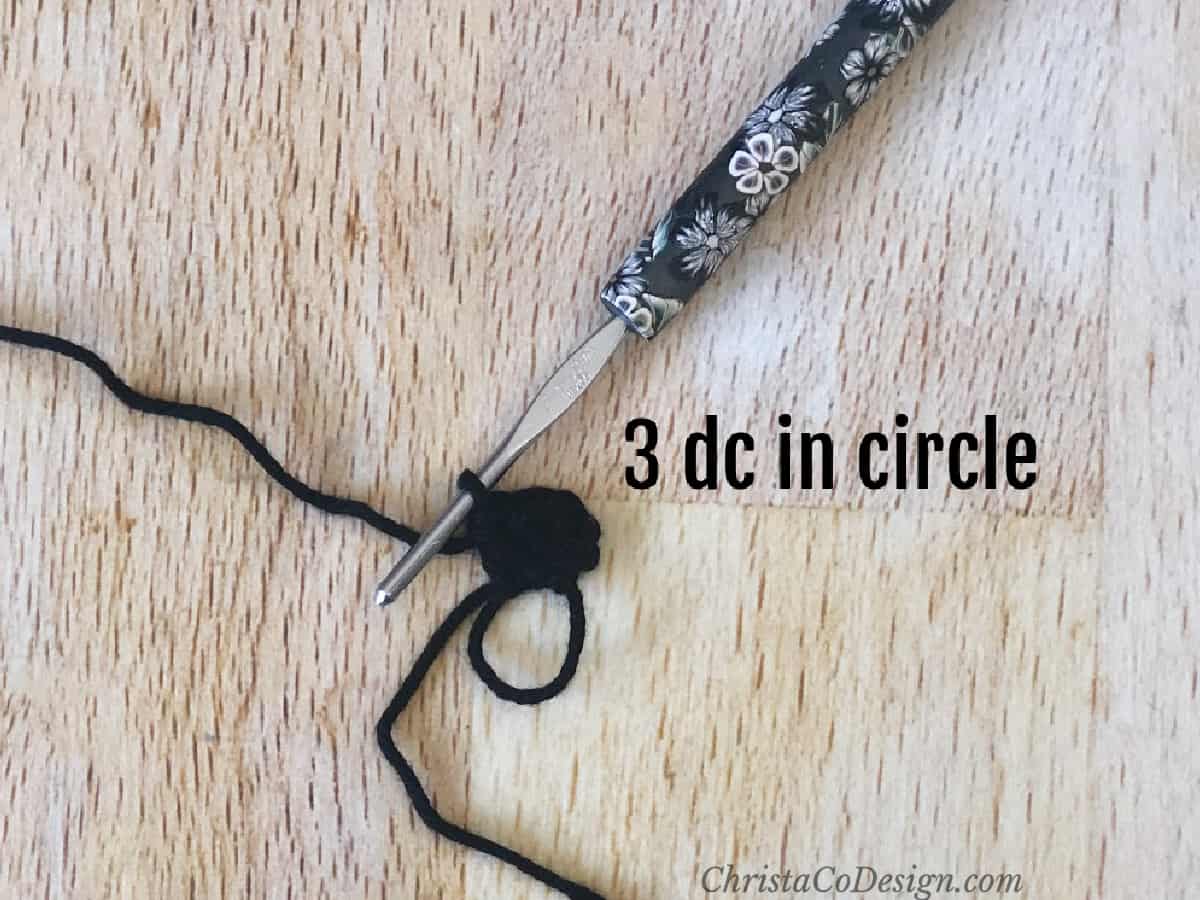
 Rnd 1. Ch 3 (this counts as the first dc), place 2 dc into the circle formed from first step, then ch 1
- Continue and place 3 dc into the circle, then ch 1
- Place 3 dc into the circle, ch 1 and sl st to 3rd ch to join. Rnd 1 is complete.
- Rnd 2. Sl st over to the next ch 1 space and place (ch 3, 2 dc, ch 1, 3 dc) all into that space. This forms the first corner of the triangle.
 Sk to next ch 1 sp and place (Ch 3, 2 dc, ch 1, 3 dc) this is the second corner.
- Sk to last ch 1 sp and place (Ch 3, 2 dc, ch 1, 3 dc, ch 1), join to 3rd chain of 1st stitch. This forms the 3 corners of your triangle. Rnd 2 is complete.
- On the next round, sl st over to the next ch sp. Rnd 3. Ch 3, 2 dc, ch 1, 3 dc, ch 1 all in the same ch 1 sp,
- Sk to next ch 1 sp and place (3 dc, ch 1) all in this ch 1 sp.
- Continue to the next ch 1 sp and place (3 dc, ch 1, 3 dc, ch 1) all in the ch 1 sp, this is a corner.
- Continue to the next ch 1 sp and place (3 dc, ch 1) all in the ch 1 sp, this is a side.
- Rep the last two steps one more time.
- Sl st to 3rd ch to join. This completes Rnd 3.
- Rnd 4. Sl st to the next corner, (Ch 3, 2 dc, ch 1, 3 dc) all in same ch sp, *{ch 1, sk 3 dc, in next ch sp place 3 dc}, rep * until the next corner, then ch 1 sk 3 dc, place (3 dc, ch 1, 3 dc) in the corner then continue to rep the * along the sides until the next corner, always placing (3 dc, ch 1, 3 dc) in each corner, sl st to 3rd ch to join the rnd.
- Keep repeating the last step until your granny triangle is as large as you like.
Start with a magic circle, or Ch 3 + sl st to first chain. You will crochet into the circle formed here.
 Rnd 1. Ch 3 (this counts as the first dc), place 2 dc into the circle formed from first step, then ch 1
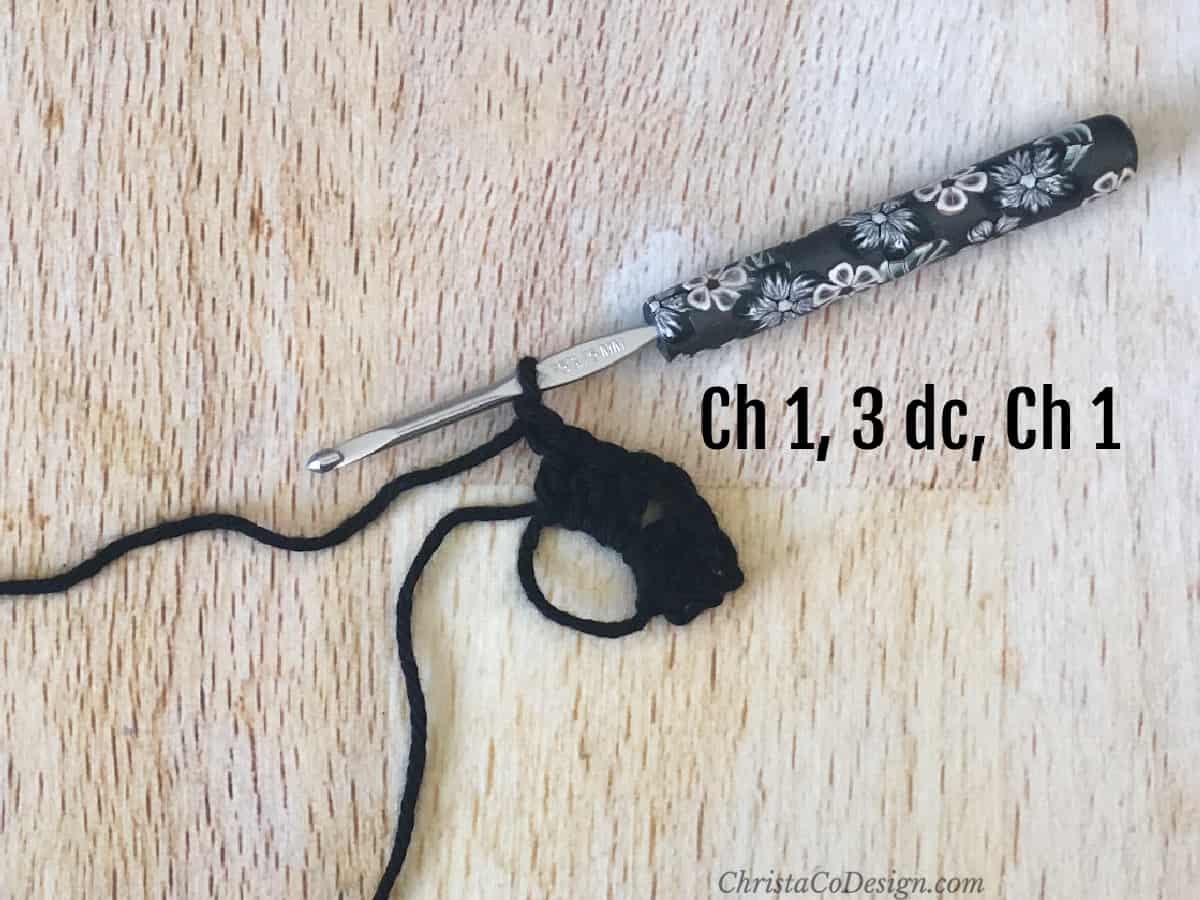 Continue and place 3 dc into the circle, then ch 1
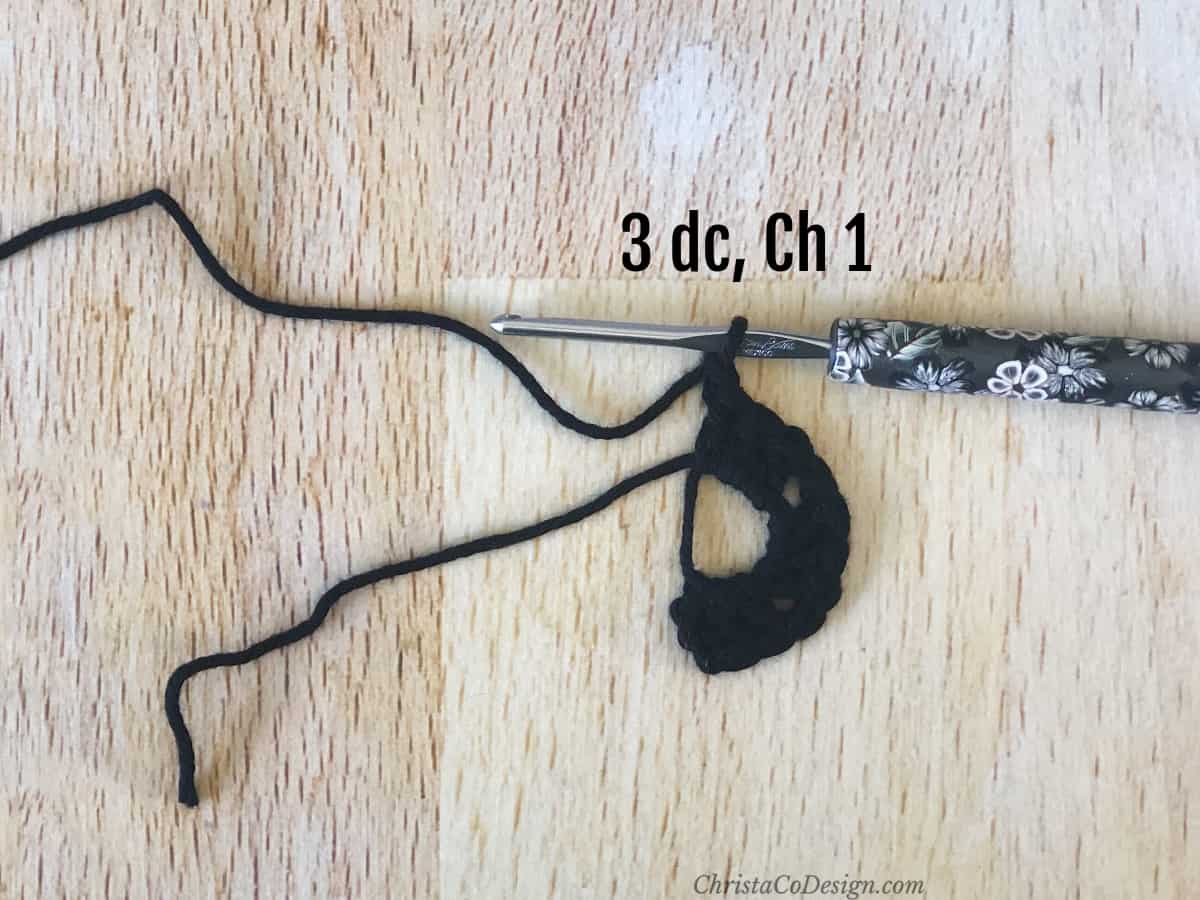 Place 3 dc into the circle, ch 1 and sl st to 3rd ch to join. Rnd 1 is complete.
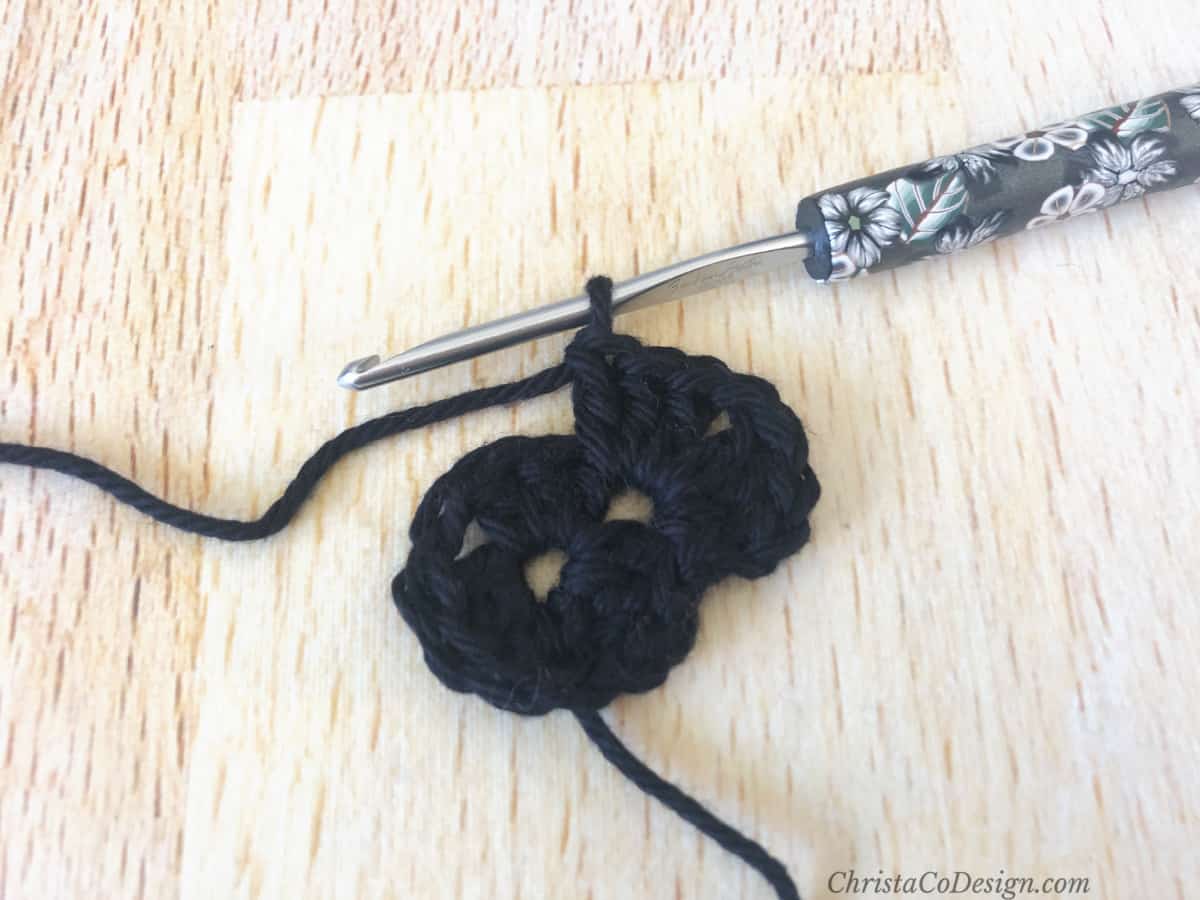 Rnd 2. Sl st over to the next ch 1 space and place (ch 3, 2 dc, ch 1, 3 dc) all into that space. This forms the first corner of the triangle.
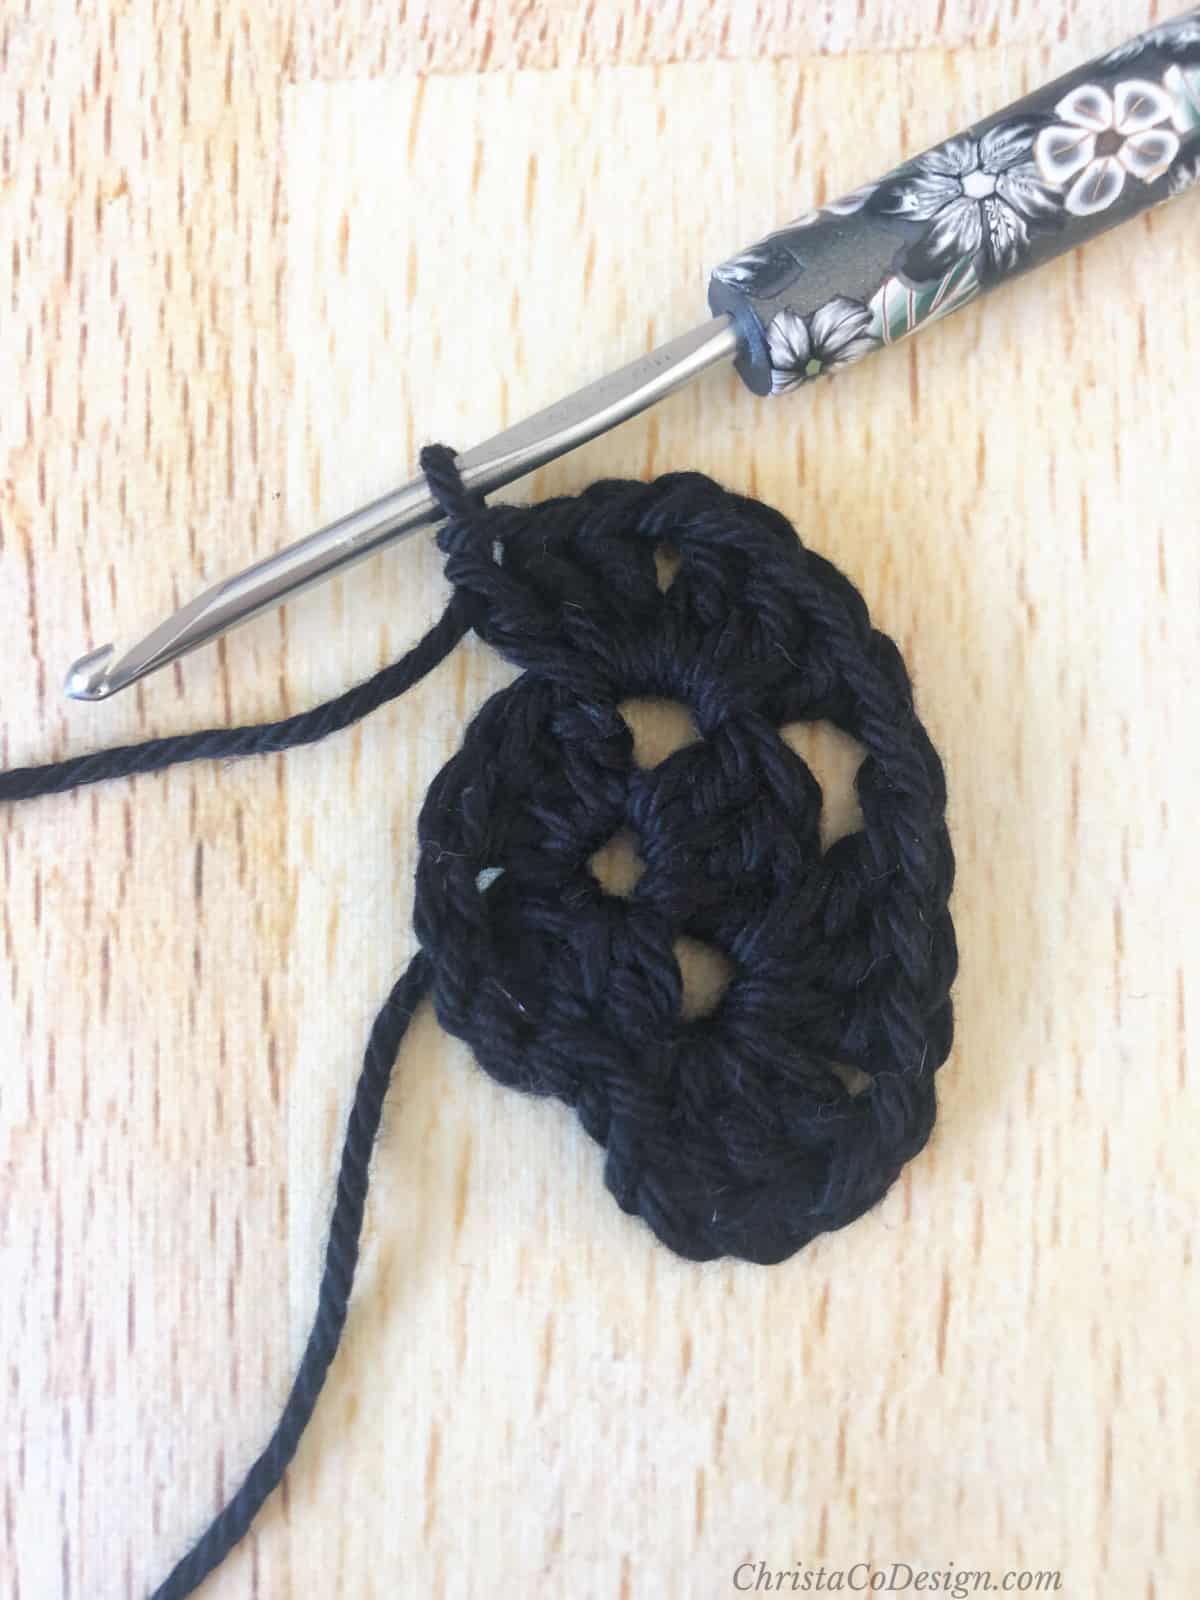 Sk to next ch 1 sp and place (Ch 3, 2 dc, ch 1, 3 dc) this is the second corner.
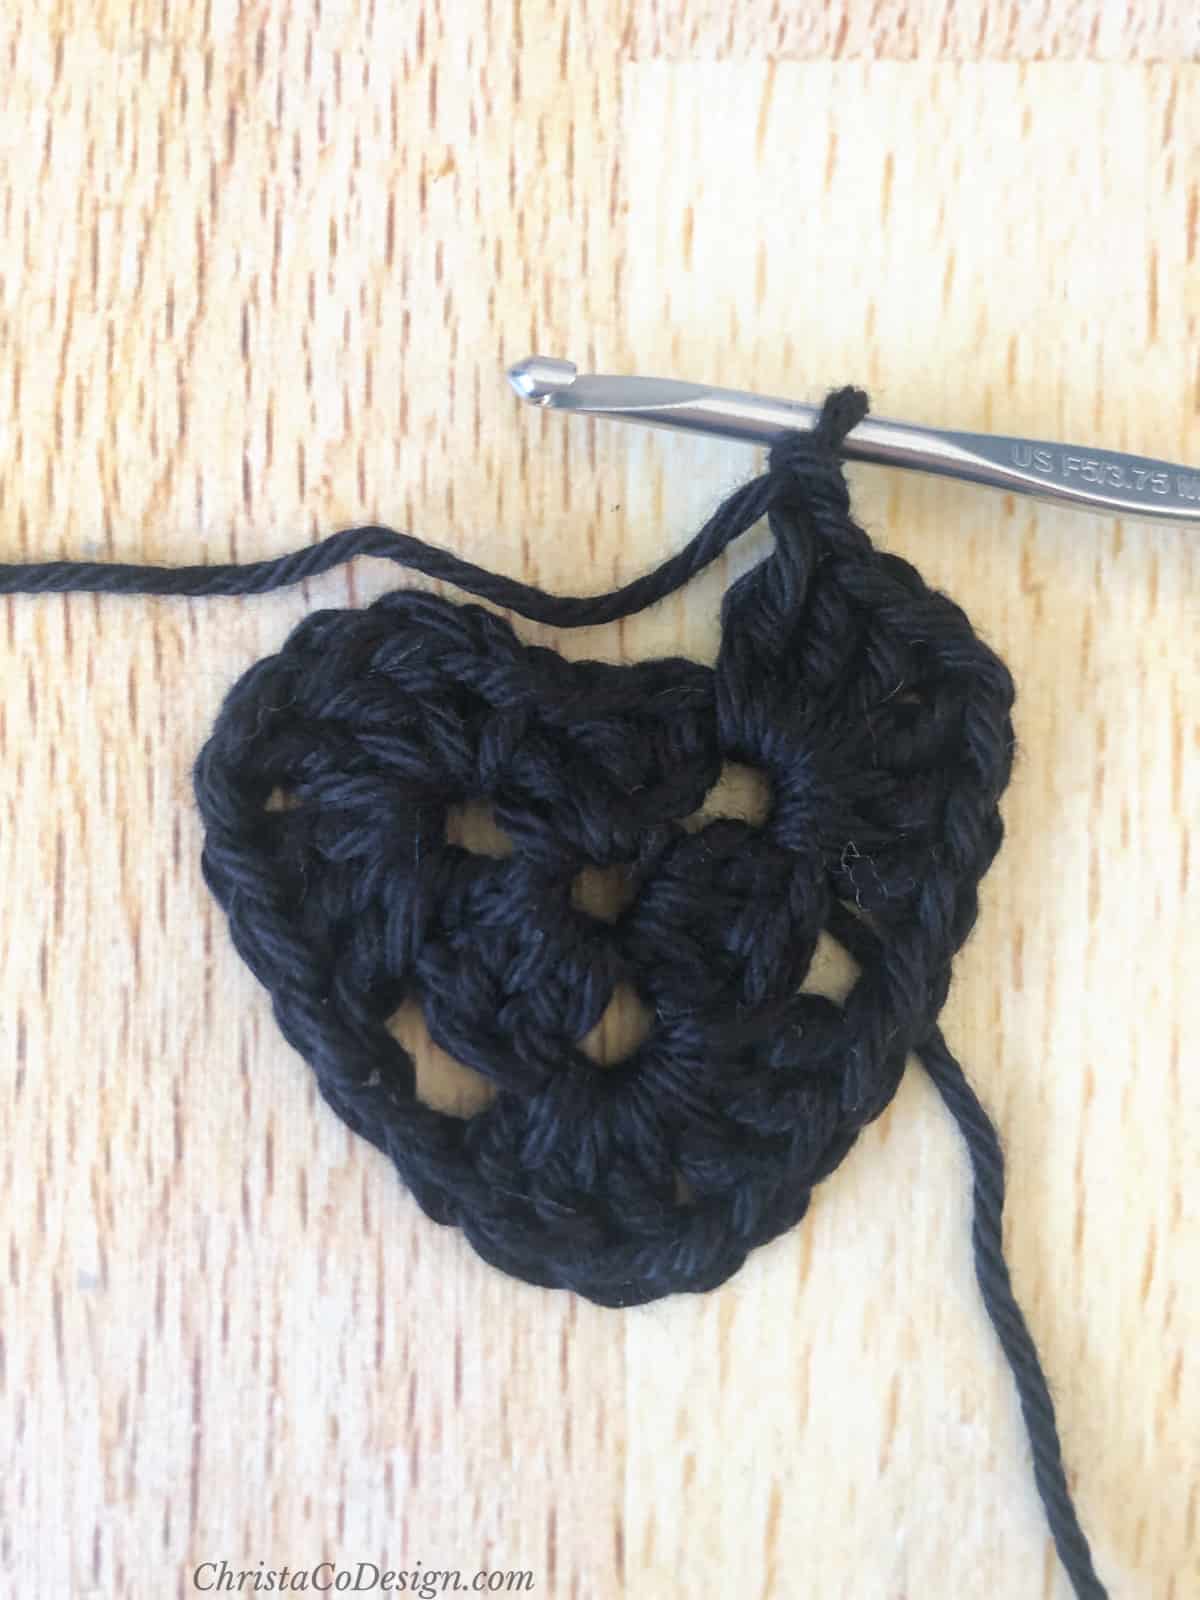 Sk to last ch 1 sp and place (Ch 3, 2 dc, ch 1, 3 dc, ch 1), join to 3rd chain of 1st stitch.
 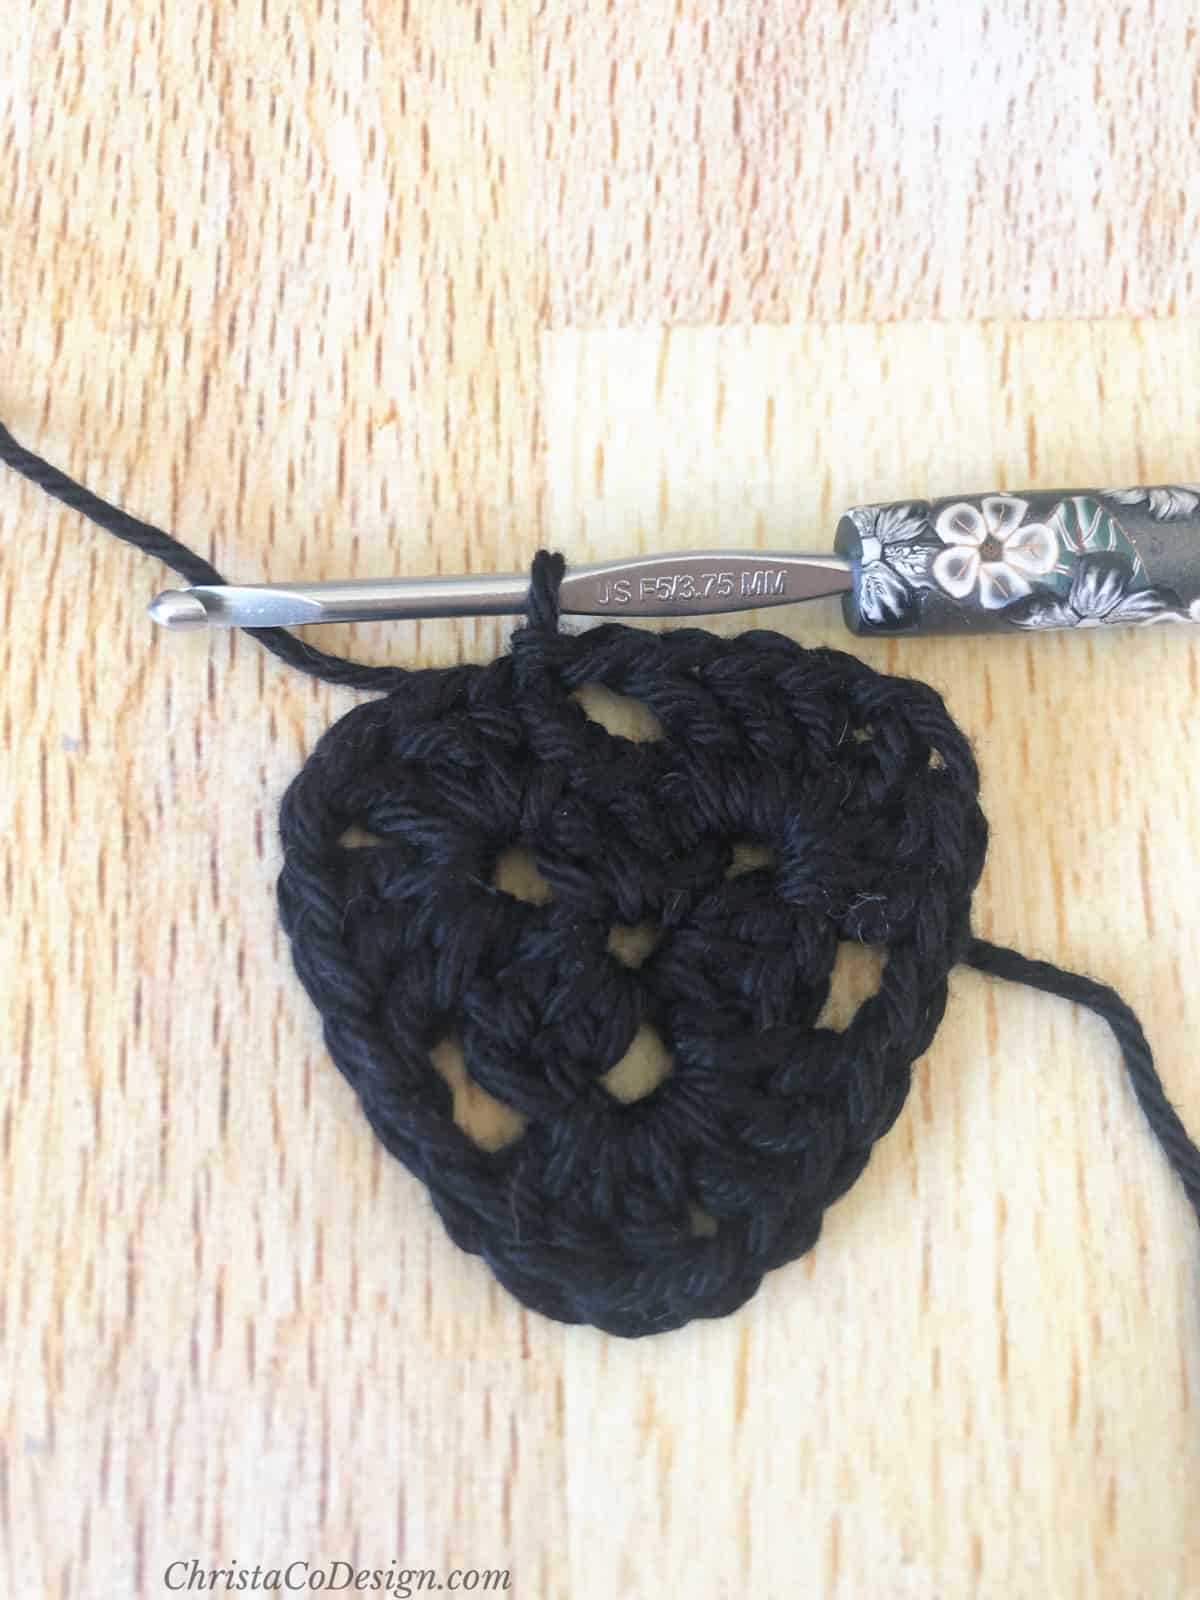 This forms the 3 corners of your triangle. Rnd 2 is complete.
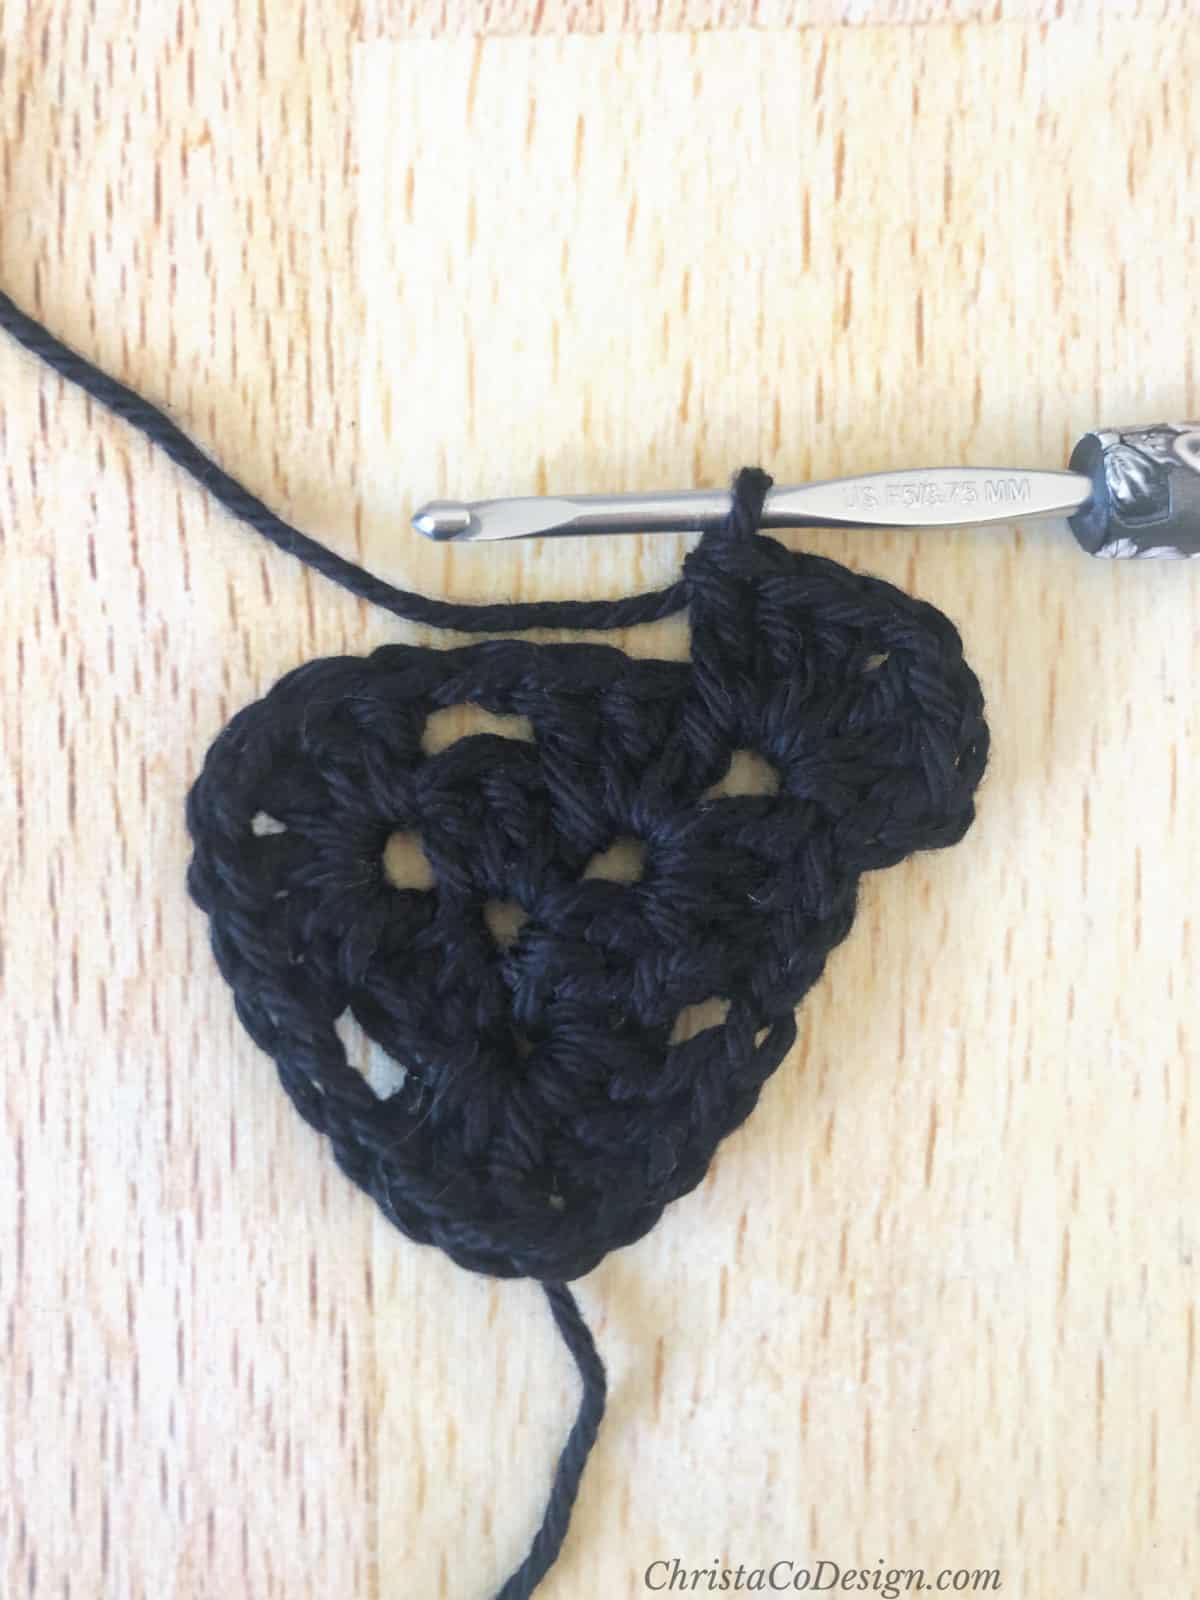 On the next round, sl st over to the next ch sp. Rnd 3. Ch 3, 2 dc, ch 1, 3 dc, ch 1 all in the same ch 1 sp,
 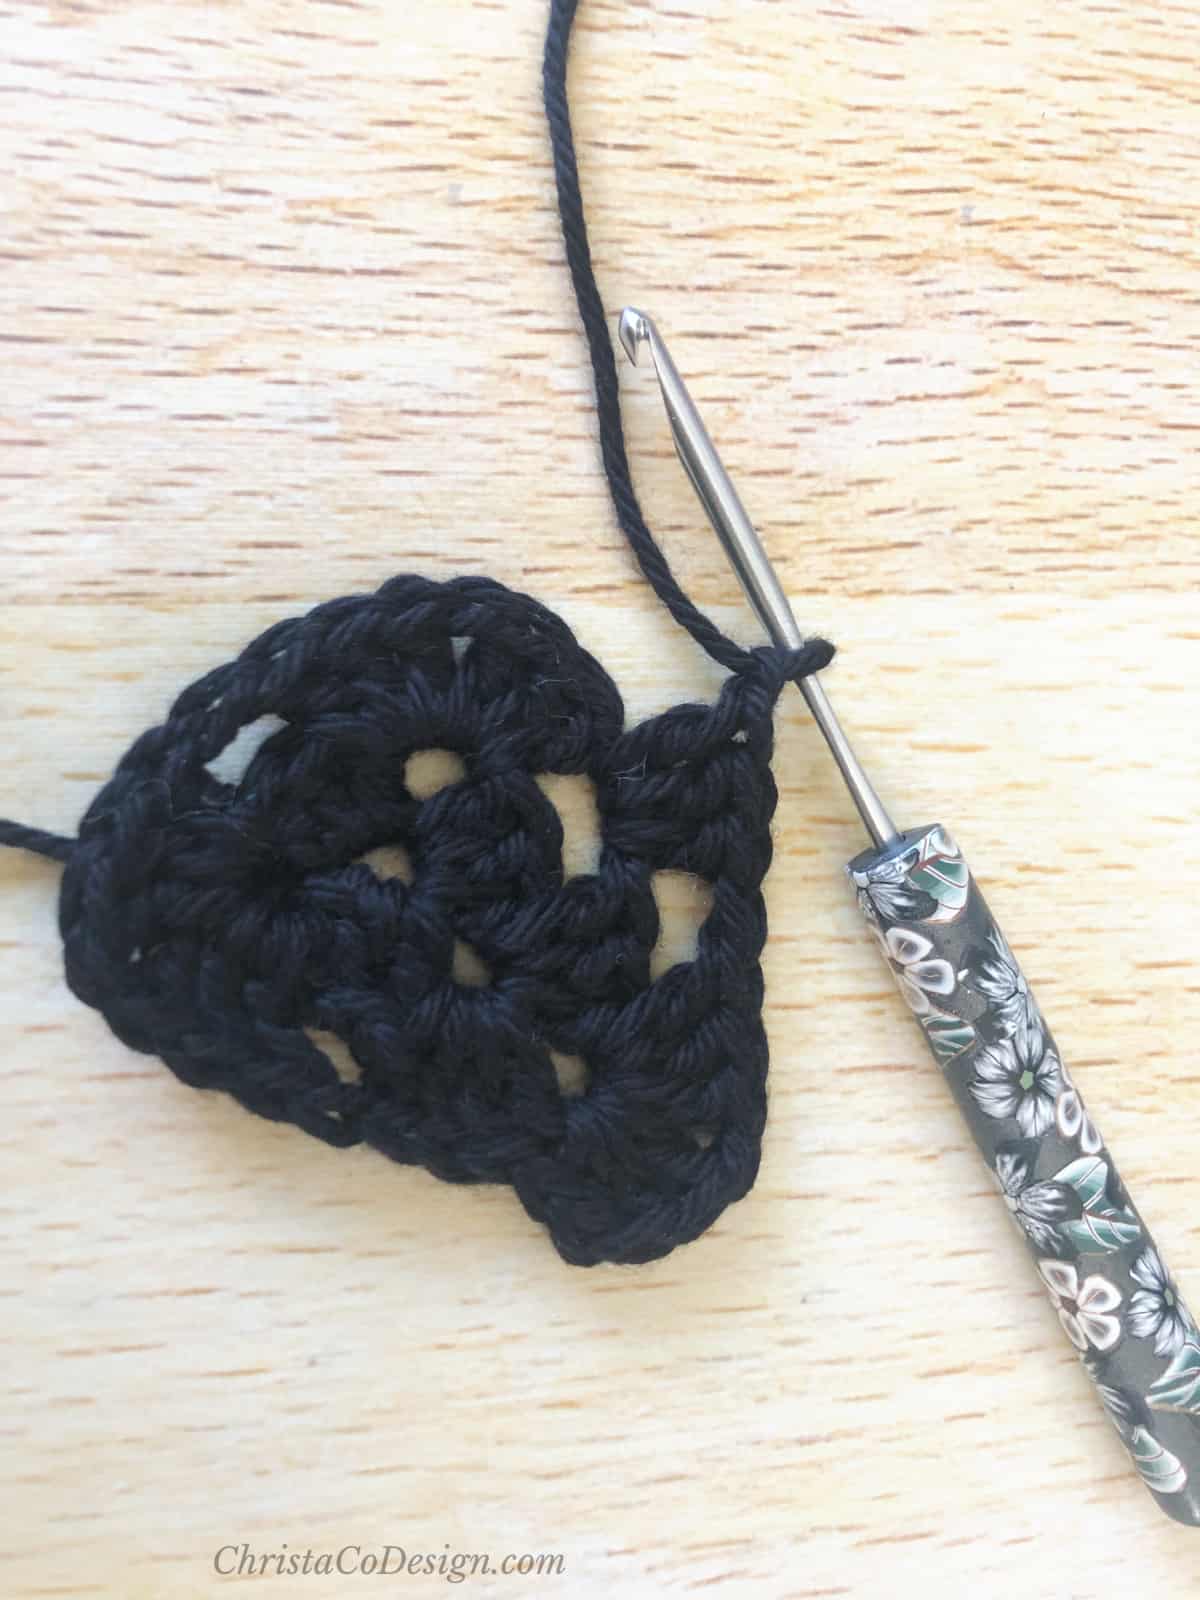 Sk to next ch 1 sp and place (3 dc, ch 1) all in this ch 1 sp.
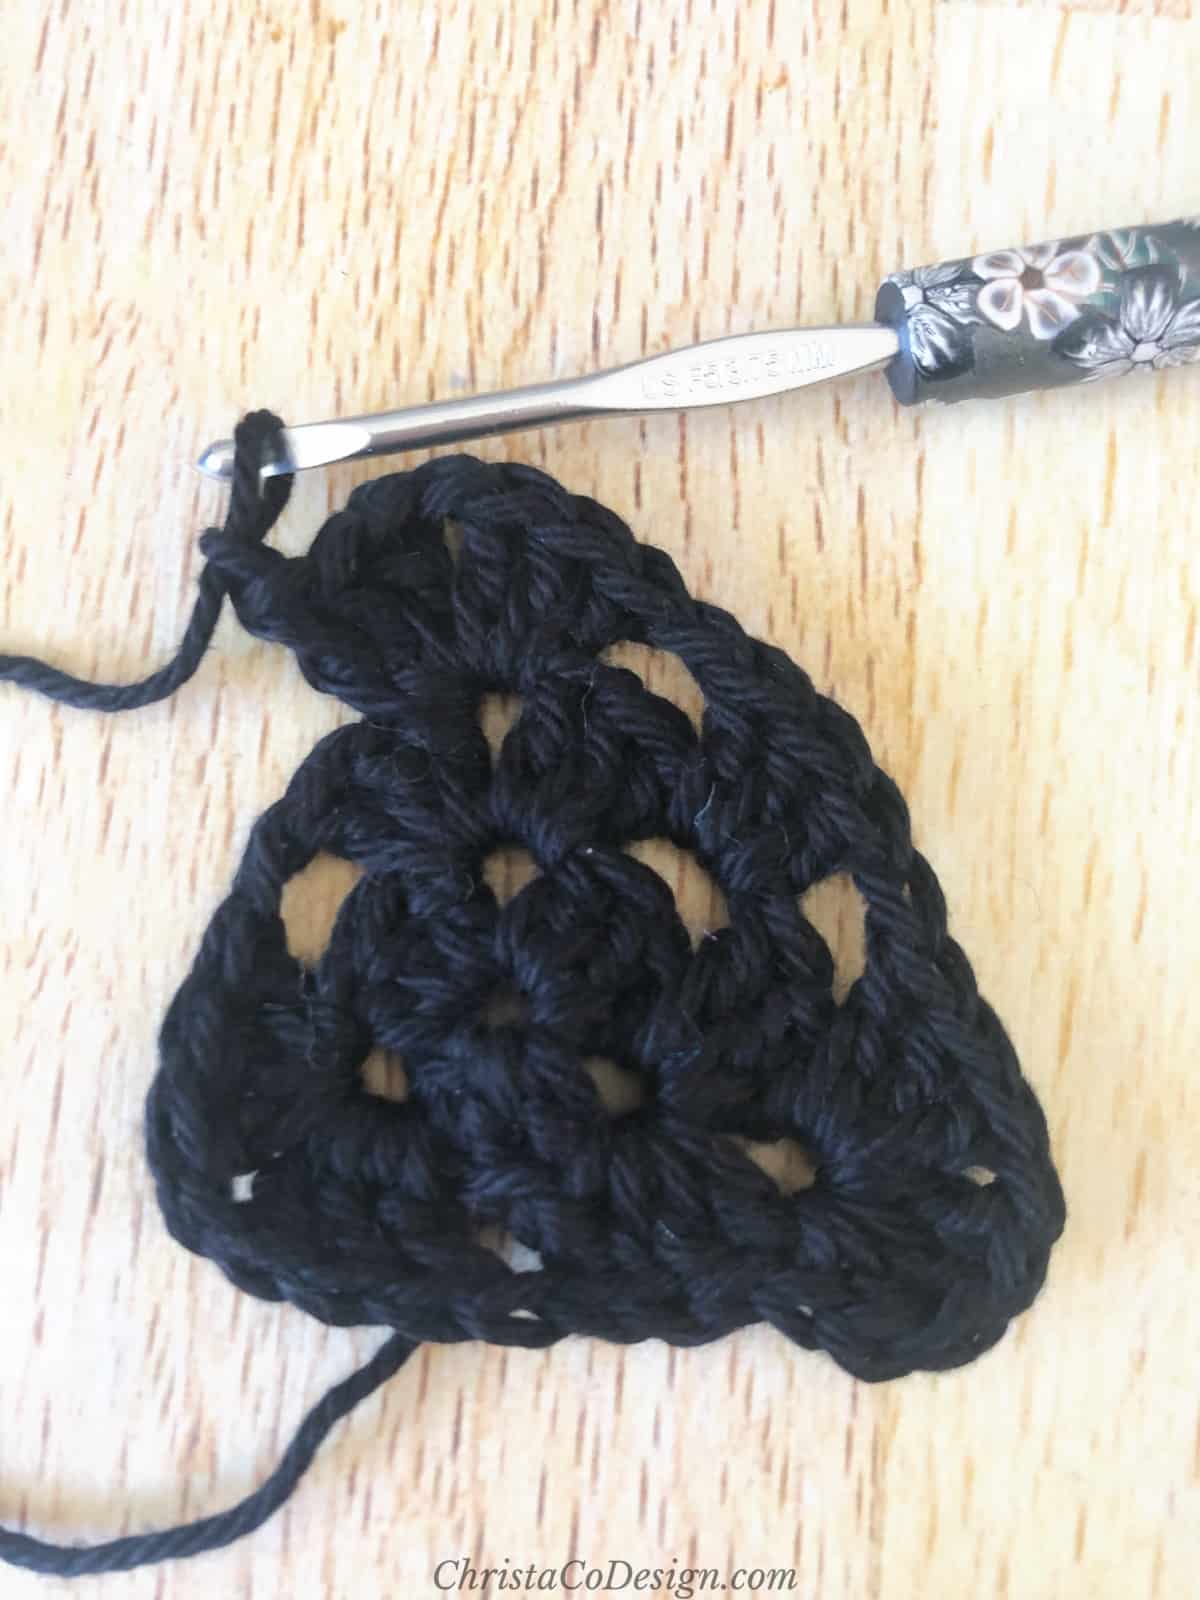 Continue to the next ch 1 sp and place (3 dc, ch 1, 3 dc, ch 1) all in the ch 1 sp, this is a corner.
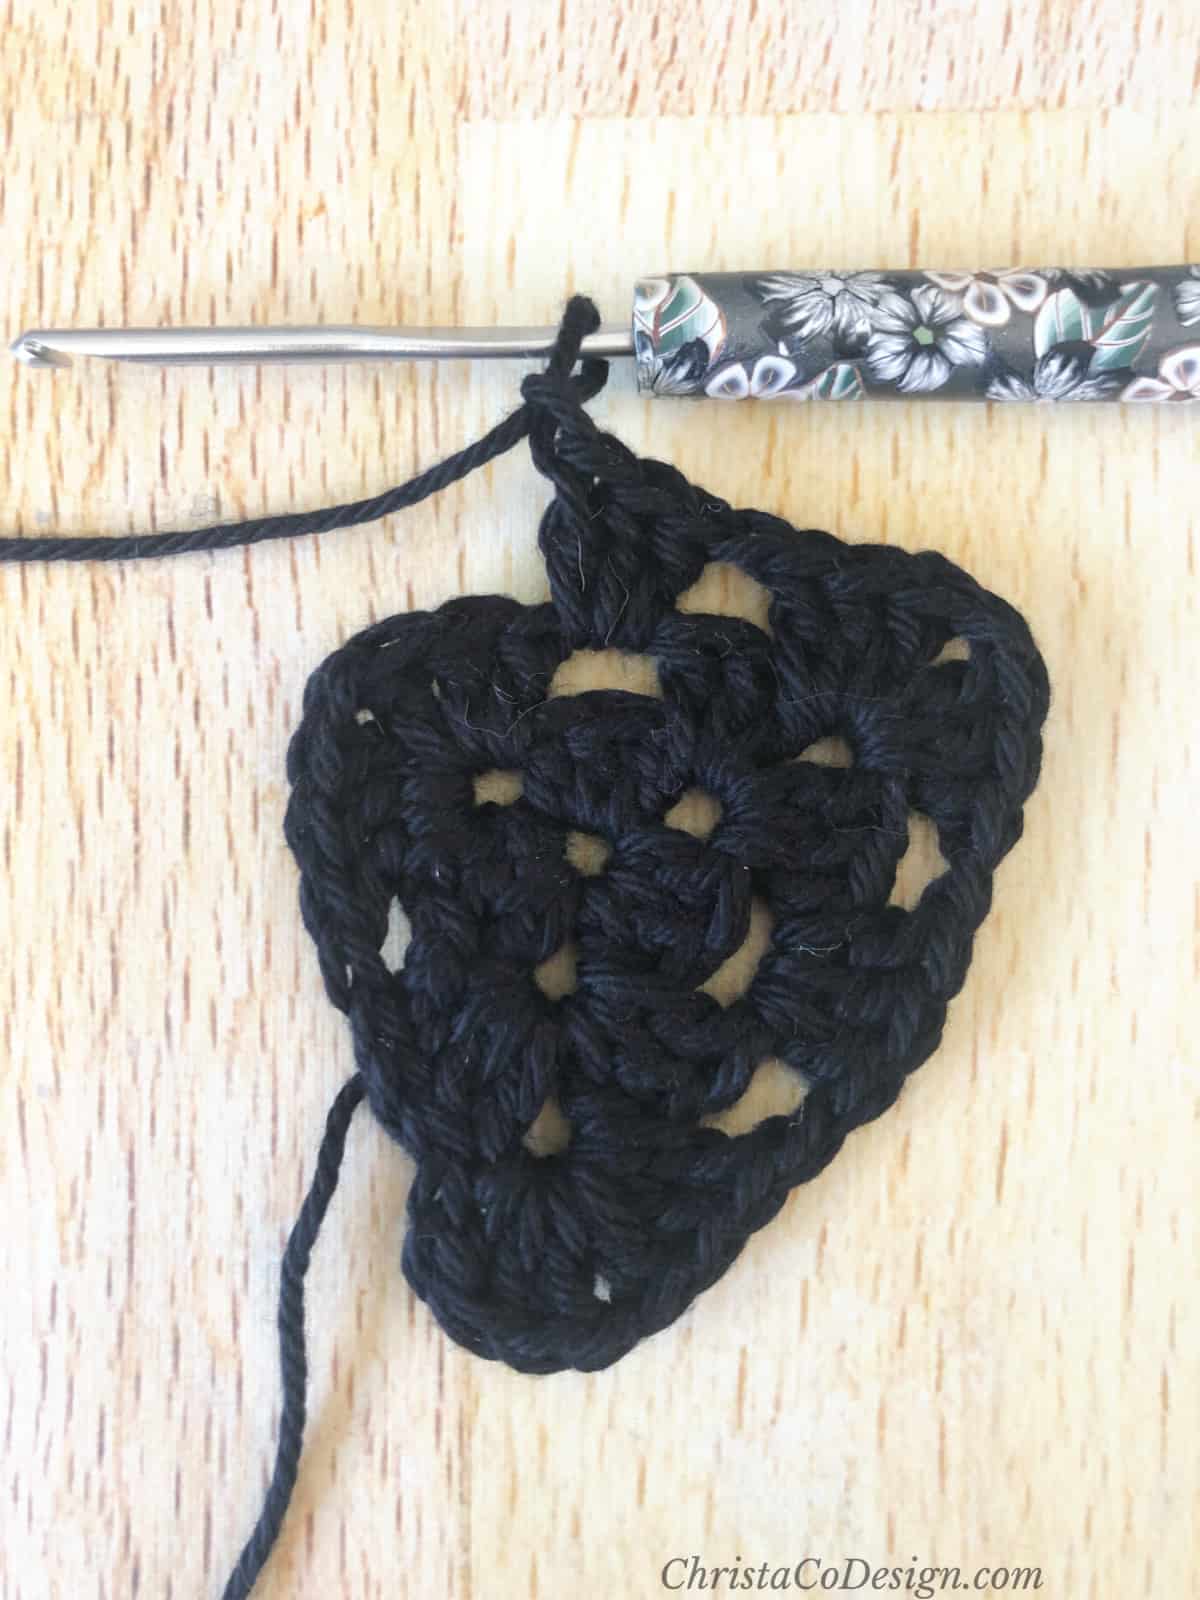 Continue to the next ch 1 sp and place (3 dc, ch 1) all in the ch 1 sp, this is a side.
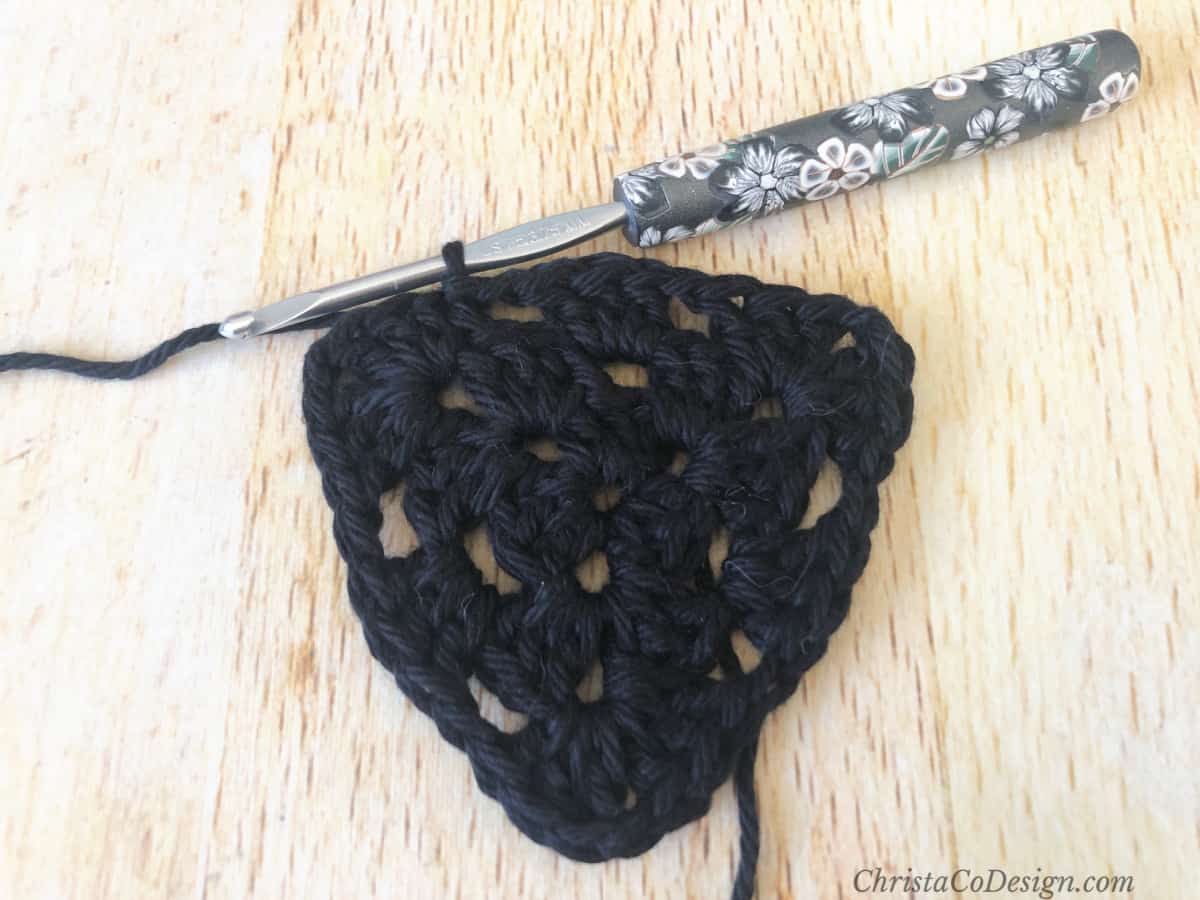 Sl st to 3rd ch to join. This completes Rnd 3.
 Rnd 4. Sl st to the next corner, (Ch 3, 2 dc, ch 1, 3 dc) all in same ch sp, *{ch 1, sk 3 dc, in next ch sp place 3 dc}, rep * until the next corner, then ch 1 sk 3 dc, place (3 dc, ch 1, 3 dc) in the corner then continue to rep the * along the sides until the next corner, always placing (3 dc, ch 1, 3 dc) in each corner, sl st to 3rd ch to join the rnd.
Notes
Alternately you can use a ch 2 in each corner and a ch 1 on the sides to help define them.
To change colors, cut the yarn and join new color with a sl st to any corner and continue.
Recommended Products
As an Amazon Associate and member of other affiliate programs, I earn from qualifying purchases.