
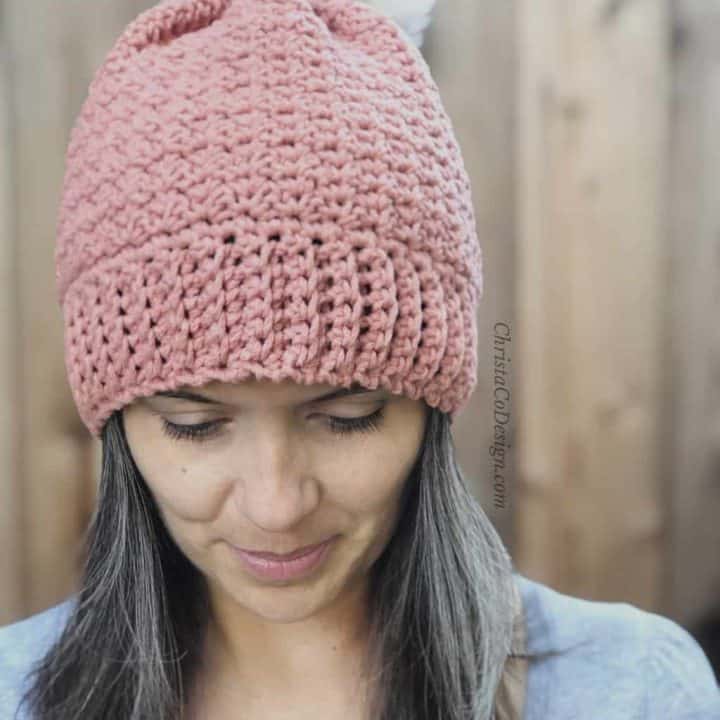
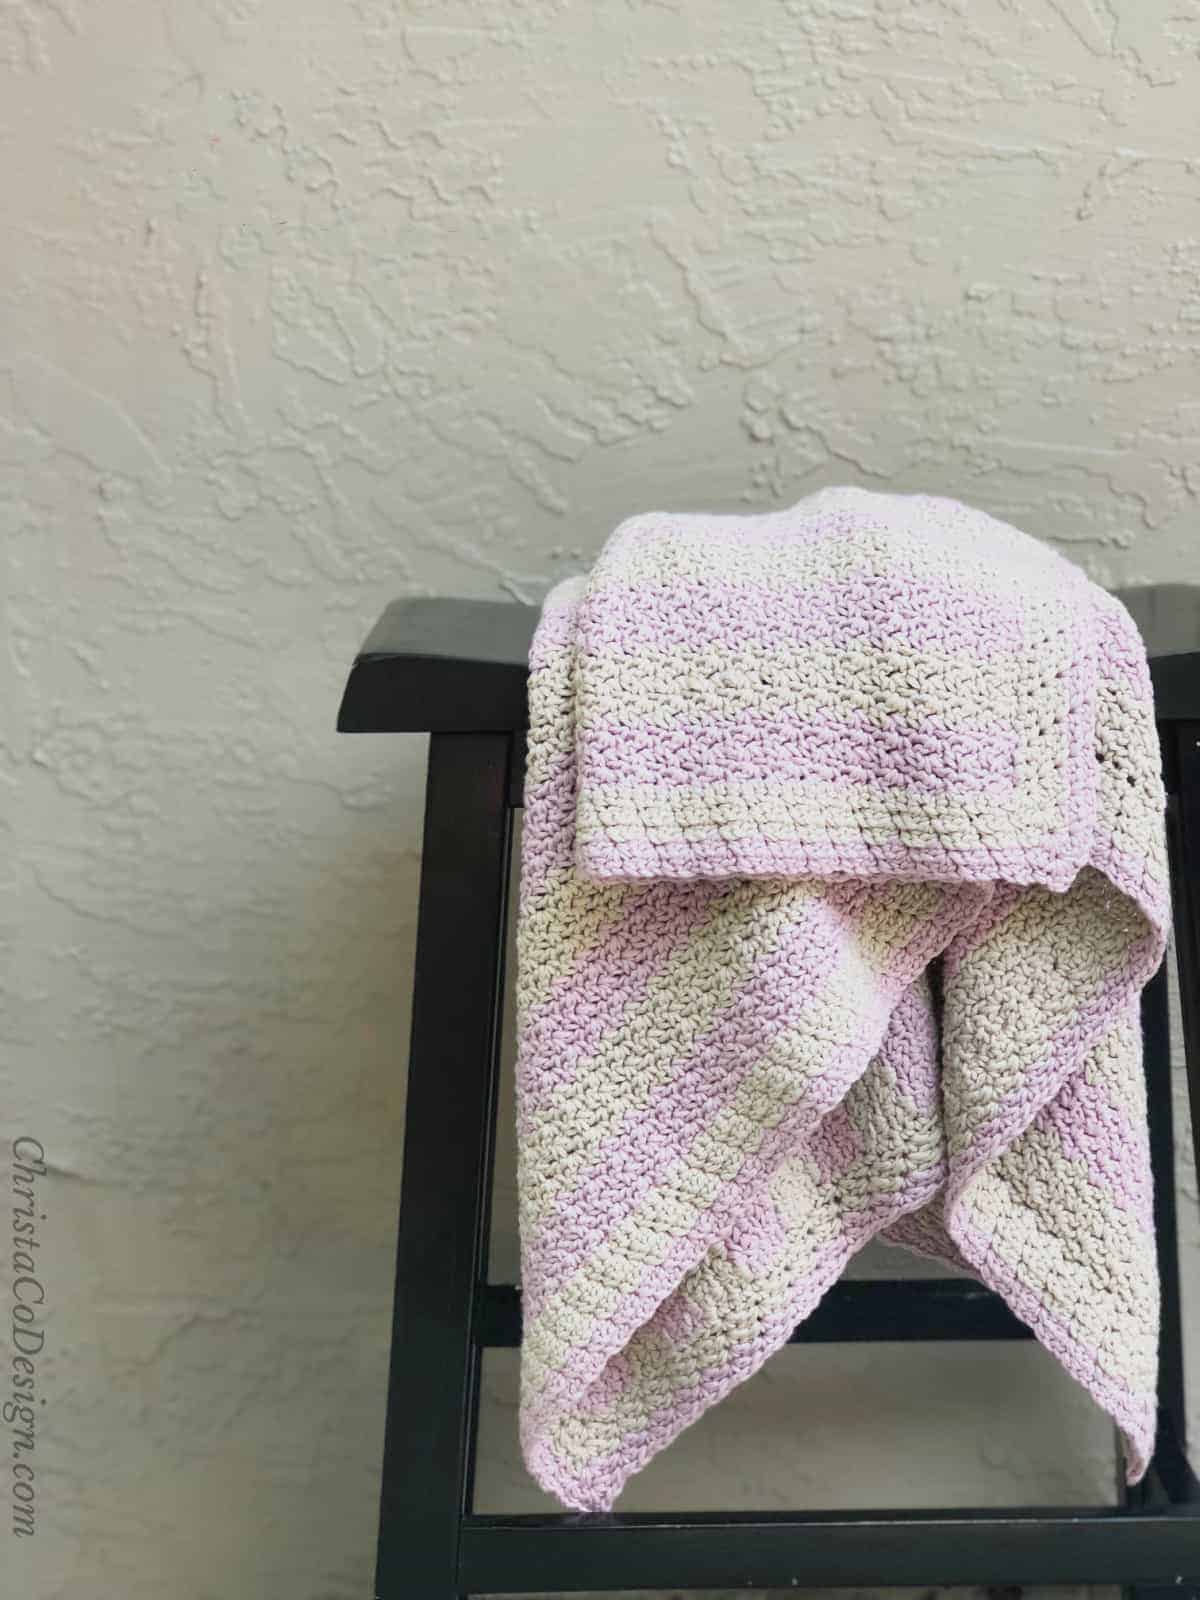
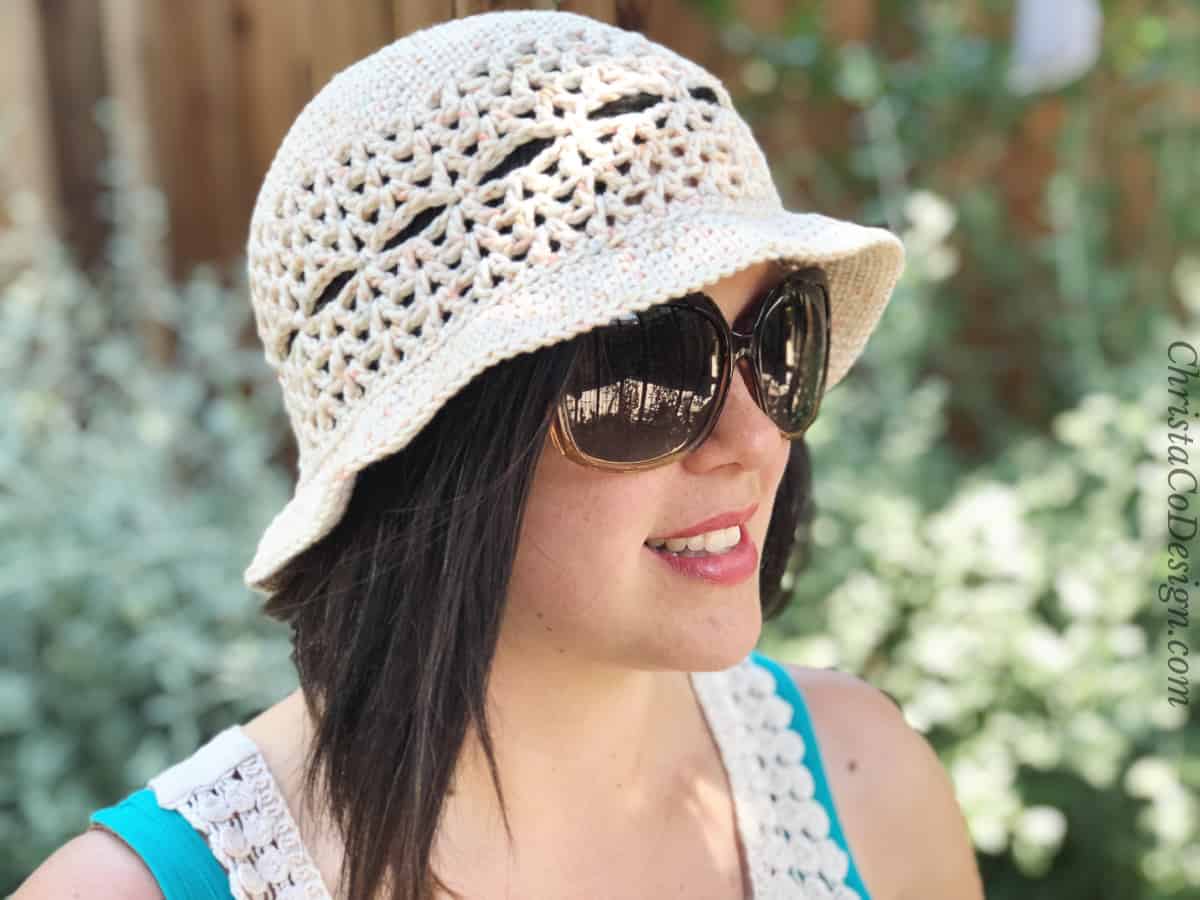
Positano Hat Crochet a Bottom Up Hat Free Pattern
Crochet this bottom up hat and top it with a luscious pom to keep you warm and stylish this season. The Positano Hat is a free crochet pattern in 4 sizes from toddler through adult.
The Positano Hat is worked from the bottom up. First you’ll start with the crochet brim. Then you’ll add on the body, or main section of the hat.
To finish your bottom up hat, you’ll crochet a few rows of decreases. Then just seam the top together. Lastly add your favorite color of faux fur pom pom and eccolá!
Scroll on down for the free hat pattern + details. Or read more about crocheting a bottom up hat.

This post contains affiliate links, I may earn a fee. Read more disclosure policy.
You can purchase the ad-free, well formatted PDF Pattern in one of my shops. Scroll down for the free pattern!
How do you crochet a brim for a hat?
The brim for the Positano hat is worked flat, in rows of single crochet. For a bottom up hat, you’ll crochet a band of stretchy ribbing. I’ve used an easy crochet ribbing technique for this hat.
You’ll work a row single crochet stitches equal to the width of your hat brim. Then on the next row (and each subsequent one) you’ll crochet into the back loop only (blo). This makes rows of simple single crochet stitches super stretchy.
Which means the crochet ribbing on this bottom up hat has a negative ease. Since it stretches, the ribbing is written to be 2″ smaller than the actual head size. If you’re crocheting a bottom up hat for an adult with a head circumference size of 23″ then you’ll want your crochet ribbing to be 21″ total.
I’ve included all the sizing, stitch counts and details in the Positano Hat pattern below. Plus there are photos to help you along if you need them.

Now, if the stretchy ribbed edge on our hat is smaller than the wearer’s head, how does the rest of it fit? Once you get your crochet brim made and seamed into a circle, you’ll start crocheting the hat body.
After the starter row of regular single crochets, you’ll start the pretty stitch pattern you see on the Positano. This stitch naturally increases because you put 3 stitches into one. This allows the hat body to grow large enough.
Again, this will all make sense when you work through the crochet pattern below. I find it helpful to have an overview of what I’m going to make before I start. Especially if I’m starting something new or a different technique.
The Yarn
The yarn I chose for the Positano Hat is from Red Heart called Amore. I first used this yarn in the Positano Pocket Cardigan. The subtle, muted color palette of these chainette yarns are gorgeous. The hat pictured + the cardigan are in the color Chai.
Amore yarn is a #4 medium worsted weight yarn, so you can easily substitute yarns for this hat pattern. This yarn comes in a 198 yard ball which means one ball of yarn will crochet any size hat with this pattern.
If you need to substitute yarns, and would still like to use a chainette yarn Lion Brand makes the Feels Like Butta yarn. I used this yarn in the Mila Color Block Shawl. It was so fun picking the colors for this one.
Add this pattern to your Ravelry queue.
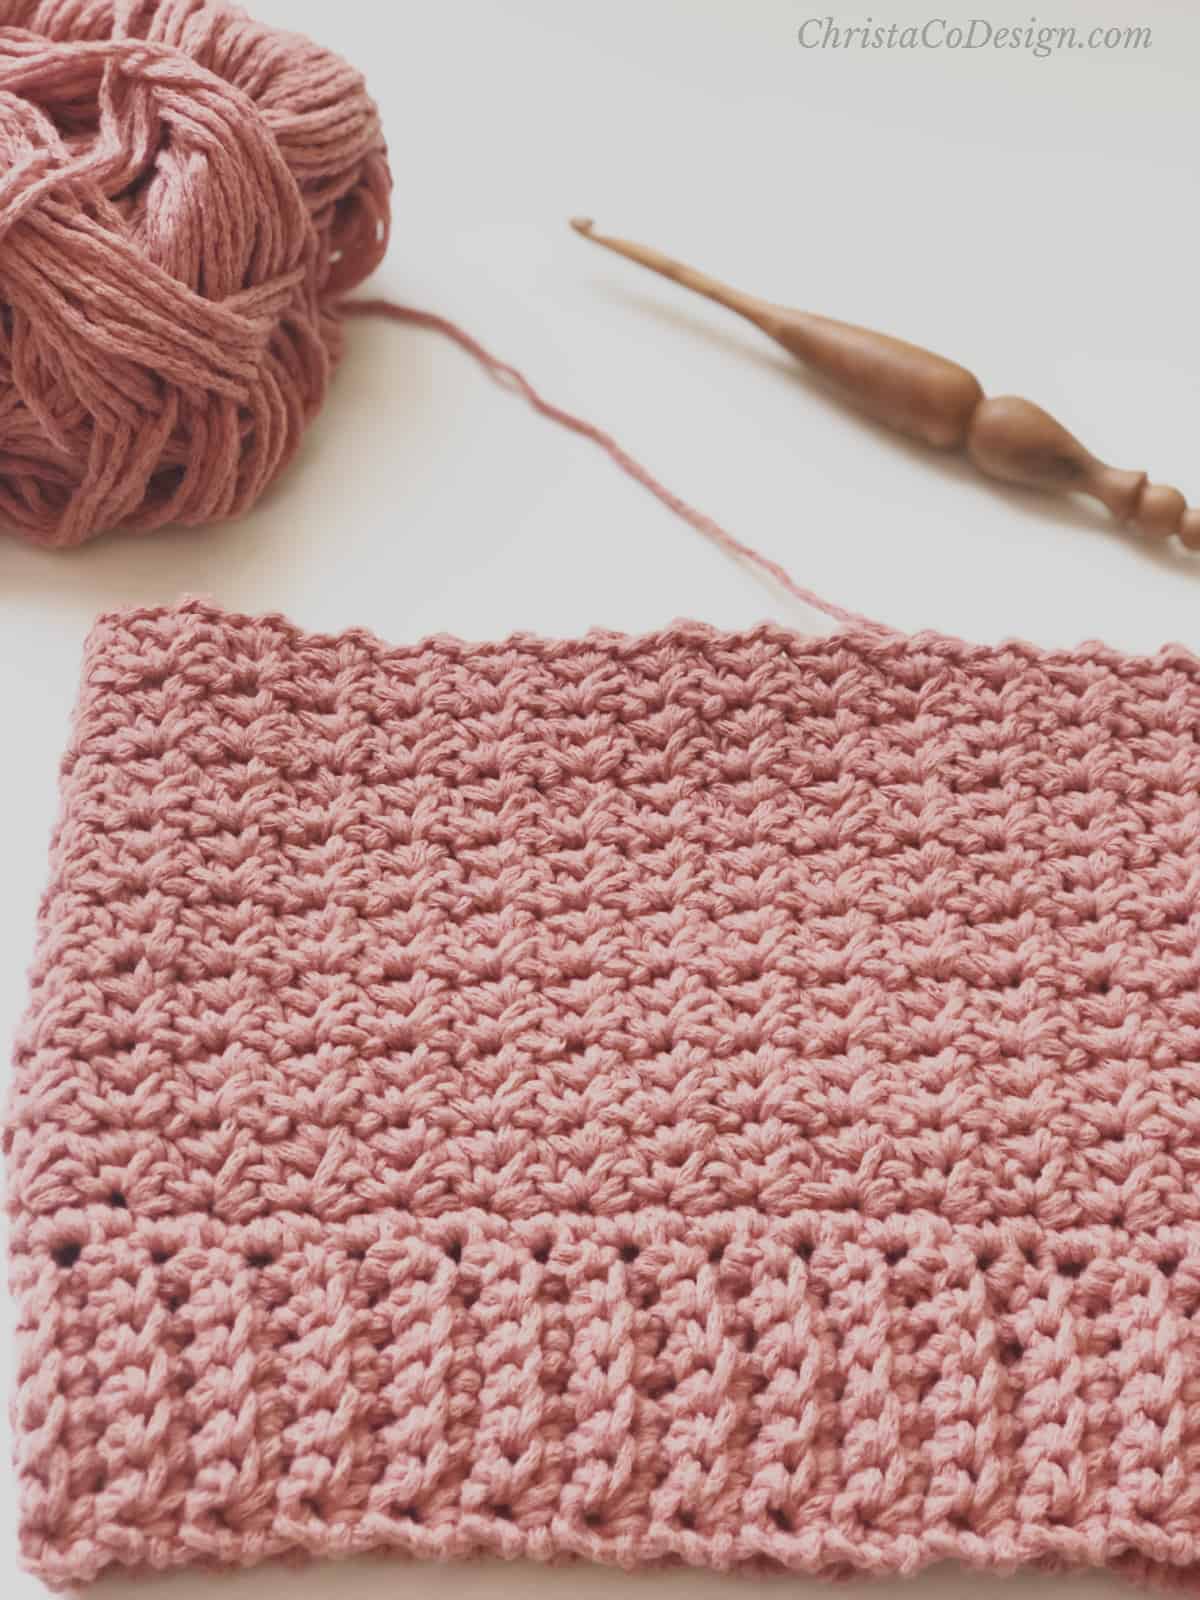
The Stitch
The stitch I used for the Positano Bottom Up Crochet Hat pattern is called the spider stitch. It consists of 3 stitches: single crochet, chain 1, single crochet all in the same stitch. On each row you crochet those 3 stitch in the ch 1 sp, so they’re stacked.
I love the combination of the soft Amore yarn and the texture of the spider stitch. Do you know this stitch by another name? It seems like so many crochet stitches have multiple names.
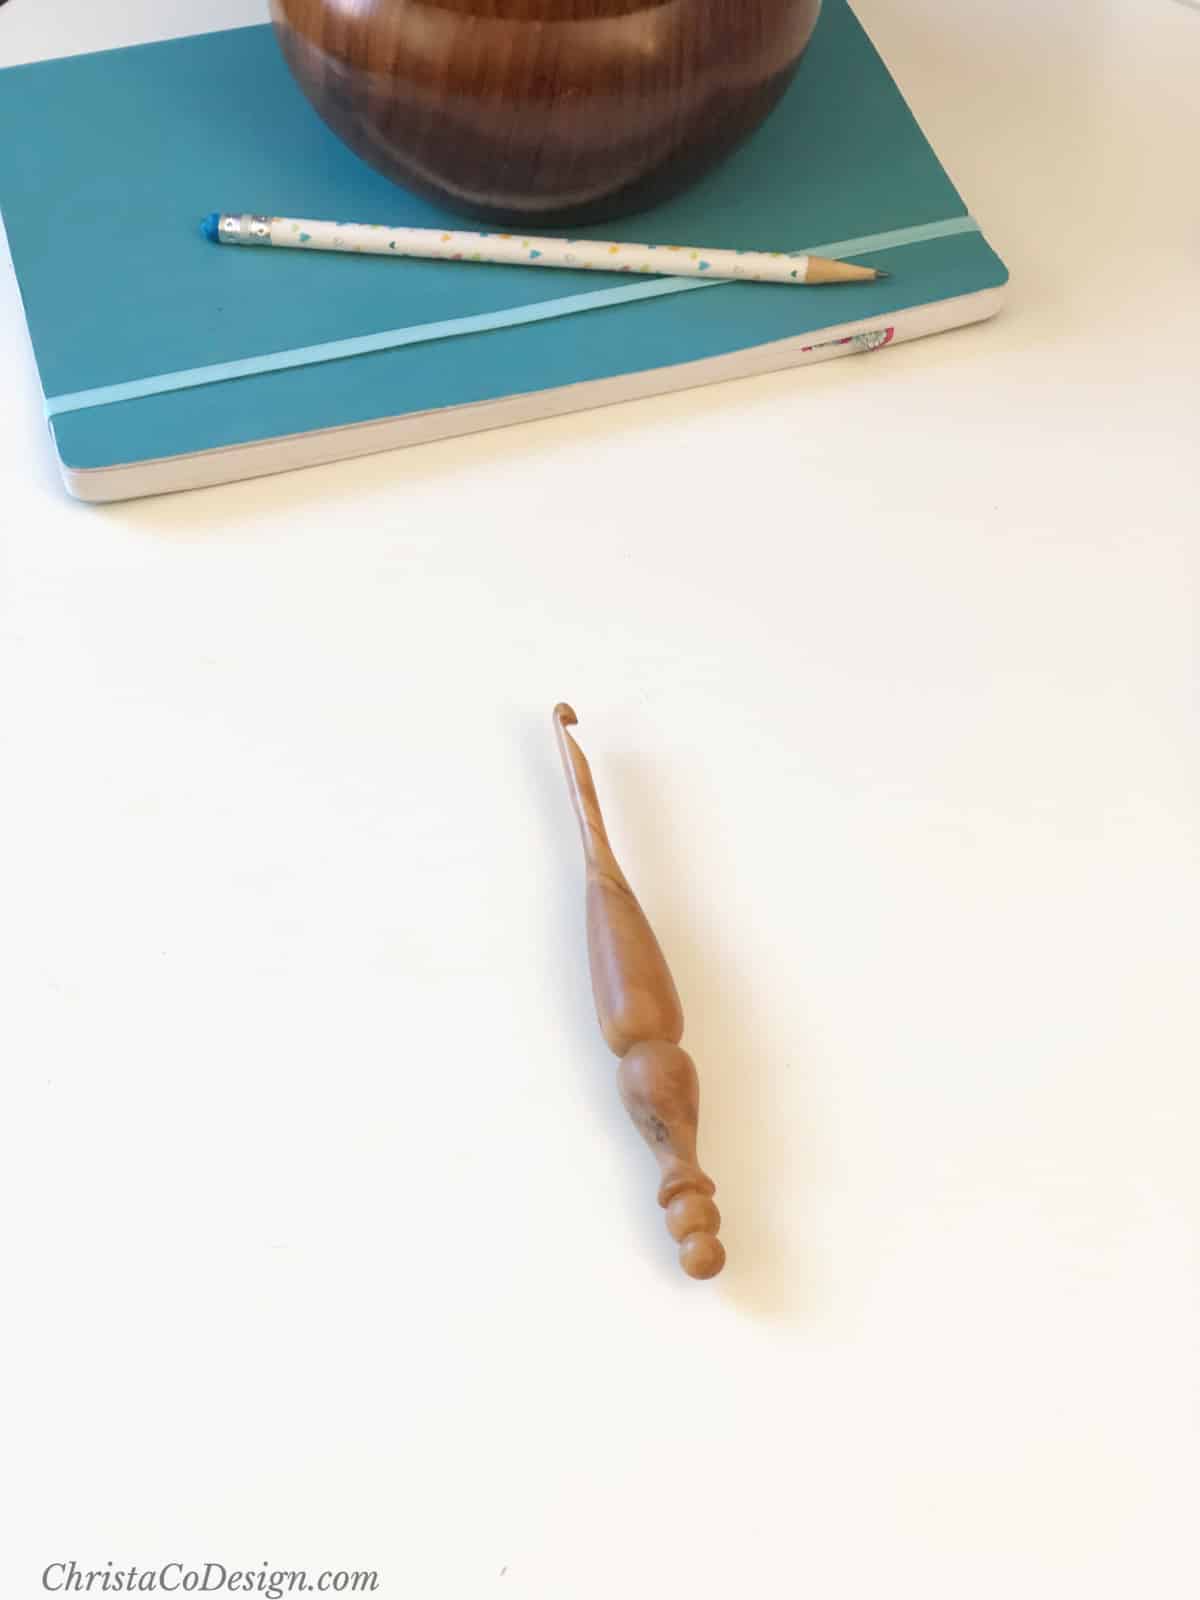
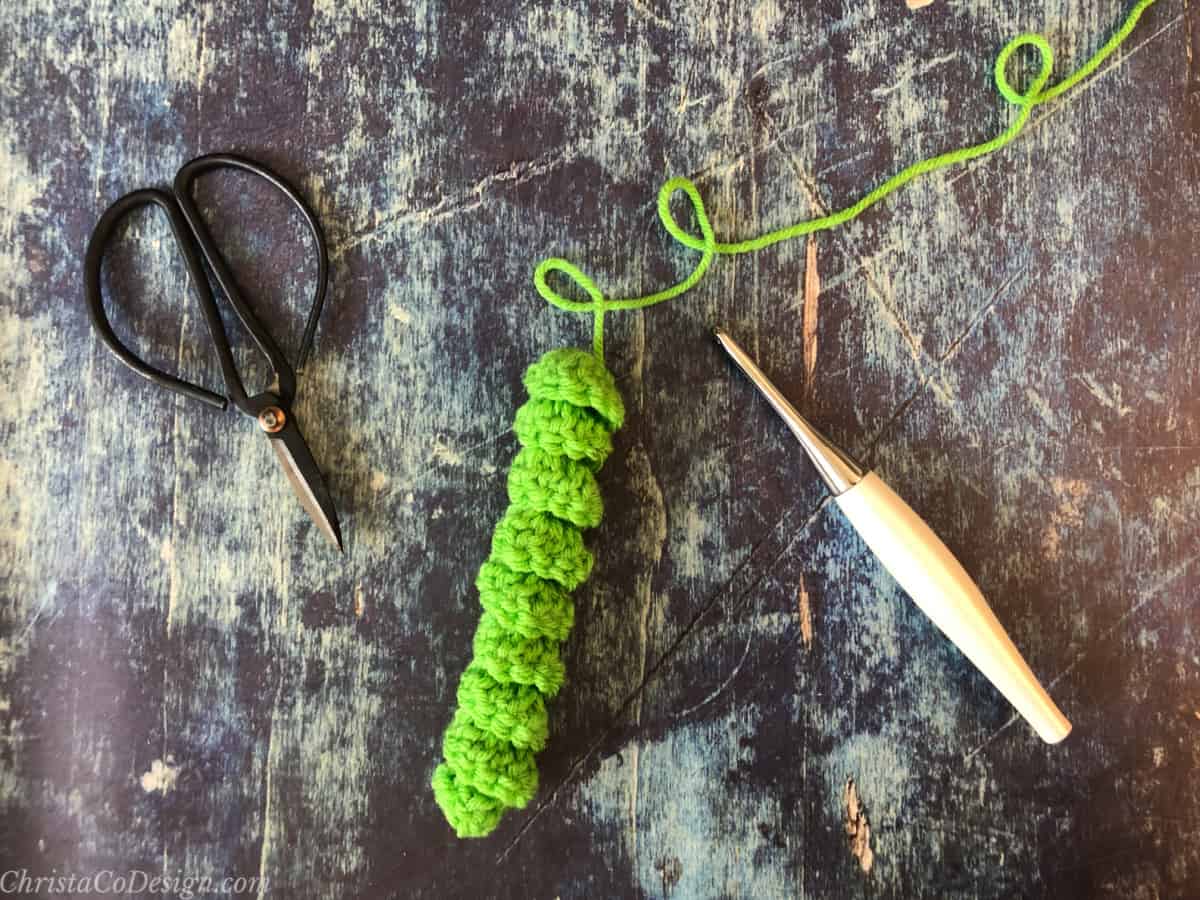
The Hook
To crochet the Positano Hat I used my Alpha Series Olivewood Hook. I adore how the hand carved wood fits so well in my crocheting hand. Beautiful easy stitches and ergonomic comfort are hard to beat in a crochet hook.
Materials
- #4 medium worsted weight yarn, hat pictured is Red Heart’s Amore yarn in color Chai. Recommended yards by size: toddler-108 (child-138, teen-168, adult-198) yds.
- 5.5mm hook
- Pom pom-optional
- Stitch marker-recommend
- Yarn needle, Measuring tape/ruler, Scissors
Notes
- The Positano Hat pattern includes 4 sizes: toddler (child, teen, adult).
- Stitch multiple is 2
- Pattern is written with smaller size first and larger sizes in parenthesis. For example 15 (17, 19, 21) where 15 is toddler size and 21 is adult. When not otherwise indicated, instructions apply to all sizes.
- Stitch counts are given at the end with all sizes inside the parenthesis.
- Ch 1 at the start of a round does not count as a stitch.
Stitches/Abbreviations (US Terms)
ch(s)-chain(s)
ch sp-chain space
sk-skip the indicated stitch
st(s)-stitch(es)
rep-repeat
blo-back loop only- insert your hook into the back, or loop that is farthest away from you. Normally you would insert your hook under both top loops, for blo you crochet into only the back loop.
Gauge
2” x 2” = 7 sc x 7.5 rows of sc
Construction
Brim ribbing is crocheted flat, then seamed to make a circle. The hat body is worked along the top of the ribbing, in the round, but turned after each round. To finish the hat, there are a couple of decrease rounds, then hat is seamed closed.
Fit/Adjustment
It’s often easiest to go up or down a size in the pattern to suit your fit. Here are more specifics on how to make adjustments.
Ribbing is 2″ wide as written, simply increase or decrease your starting stitch count to change the brim width.
Ribbed brim is designed to have 2” of negative ease. You can easily adjust this to your liking. For a snugger fit, crochet fewer ribbing rows. For a looser fit, crochet more ribbing rows.
If you’re adjusting the stitch count for the main hat section, keep the number of stitches a multiple of 2.
You can shorten or lengthen the hat height by working less or more rounds before the decrease section.
Level
Easy
You can purchase the ad-free, well formatted PDF Pattern in one of my shops. Scroll down for the free pattern!
How to Crochet this Bottom Up Hat Video
For the full length, step by step, slow video you can watch it on YouTube. In this video tutorial I take you throw all the steps to crochet the Positano Hat.
Scroll down to free bottom up hat crochet pattern!
Positano Bottom Up Crochet Hat Pattern
Learn how to crochet the Positano bottom up hat pattern. Free crochet pattern in multiple sizes.
Materials
- #4 medium worsted weight yarn, hat pictured is Red Heart’s Amore yarn in color Chai. Recommended yards by size: toddler-108 (child-138, teen-168, adult-198) yds.
Tools
- 5.5mm US Size I-9 hook
- Pom pom-optional
- Stitch marker-recommend
- Yarn needle
- Measuring tape/ruler
- Scissors
Instructions
Brim
Measures 2” wide
Ch 8,
Row 1. Sc in 2nd ch and in each ch across, turn. (7 sts)
Row 2. Ch 1, sc in first st, blo sc in next 5 sts, sc in last st, turn. (7 sts)
Row 3. Rep last row til your brim length is 15 (17, 19, 21)” long.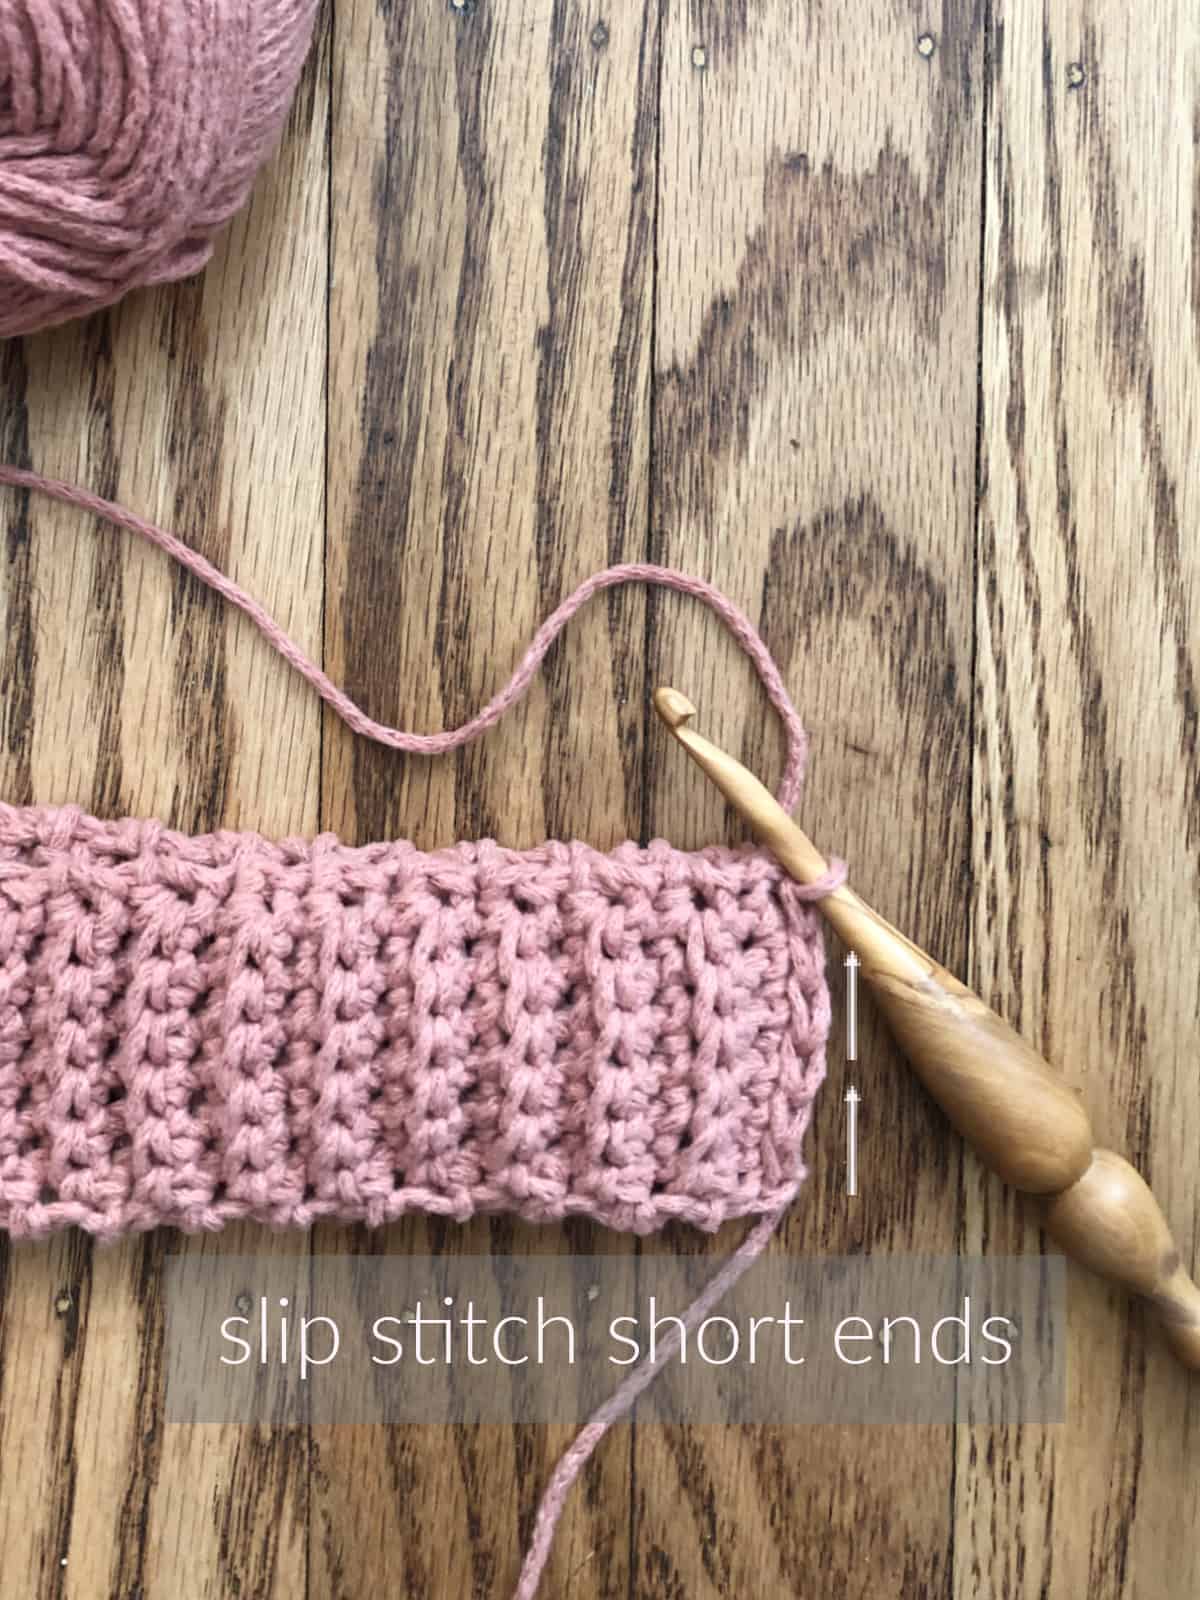
Match short ends and slip stitch together to form a circle.
Work rest of hat along the top, long edge of this brim.
Hat Pattern

Rnd 1. Ch 1, work 54 (60, 66, 72) sc evenly around brim, join with a sl st, turn. (54 ,60, 66, 72 sts)
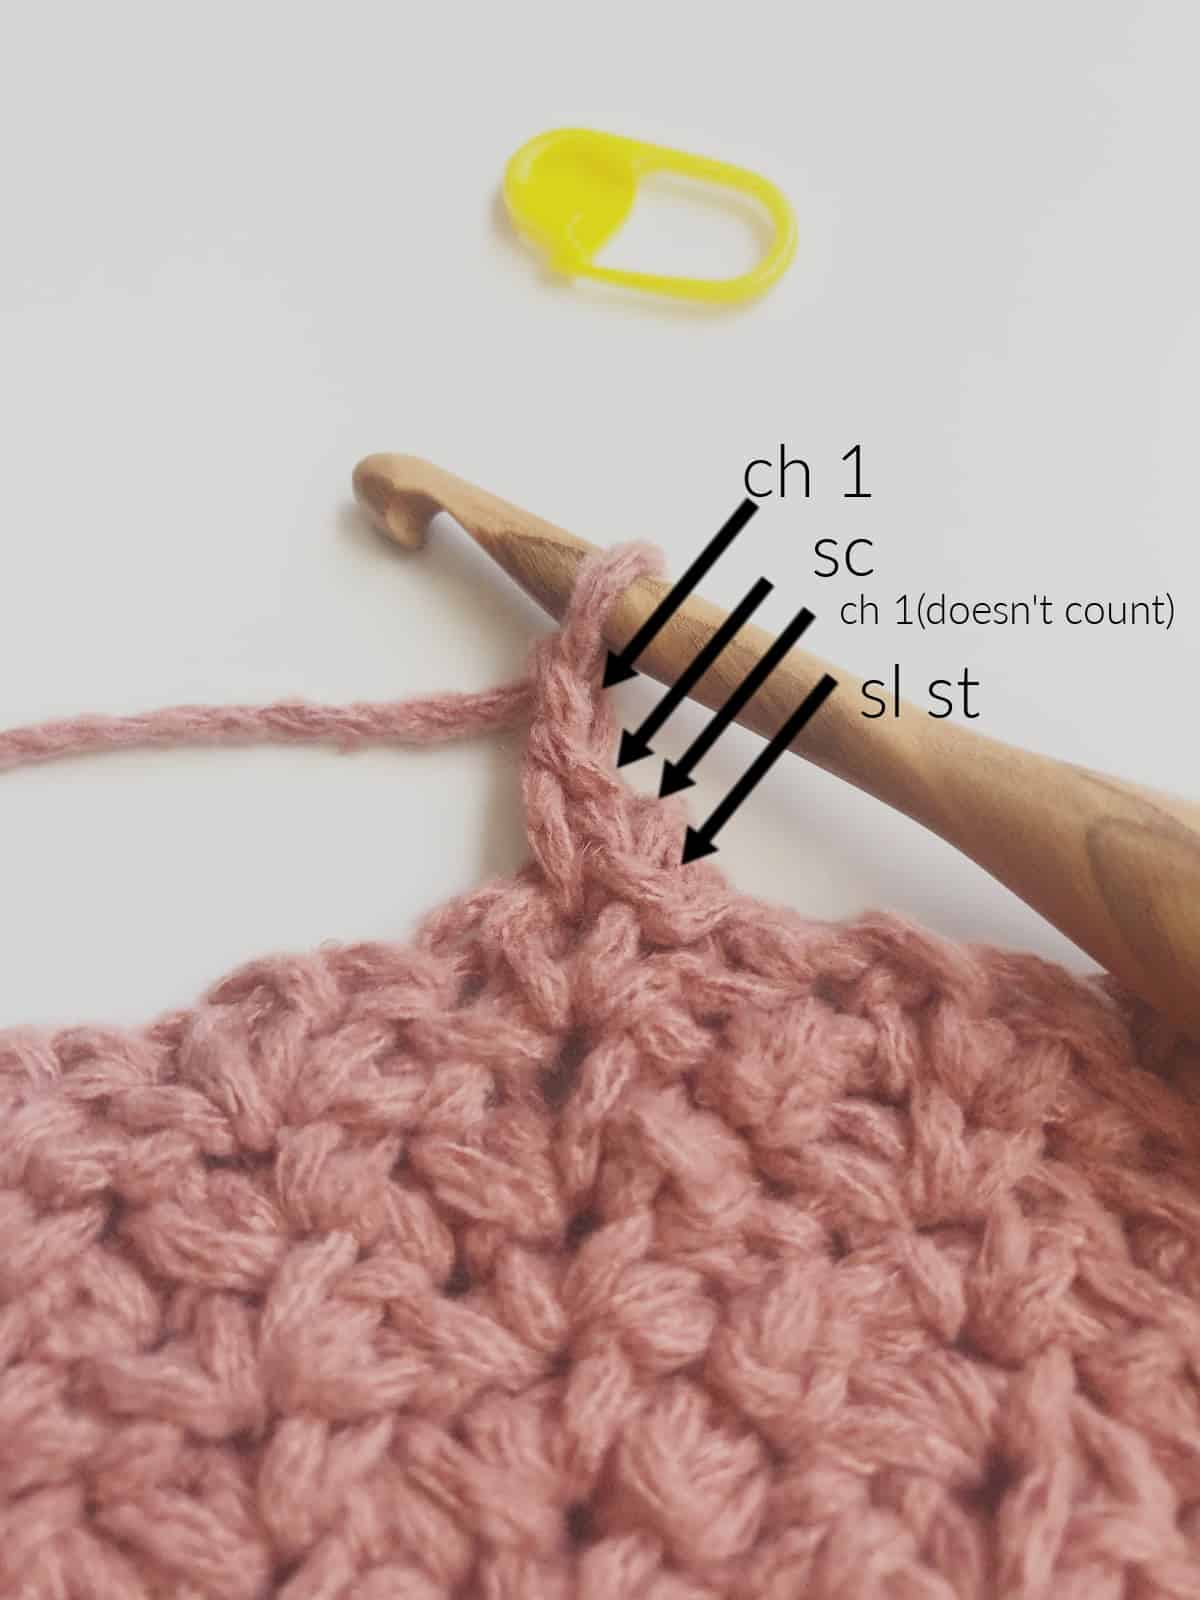
Rnd 2. Ch 1, in same st *(sc, ch 1, sc), sk next st, rep from * to end, join to first sc with a sl st, turn. (81, 90, 99, 108 sts) 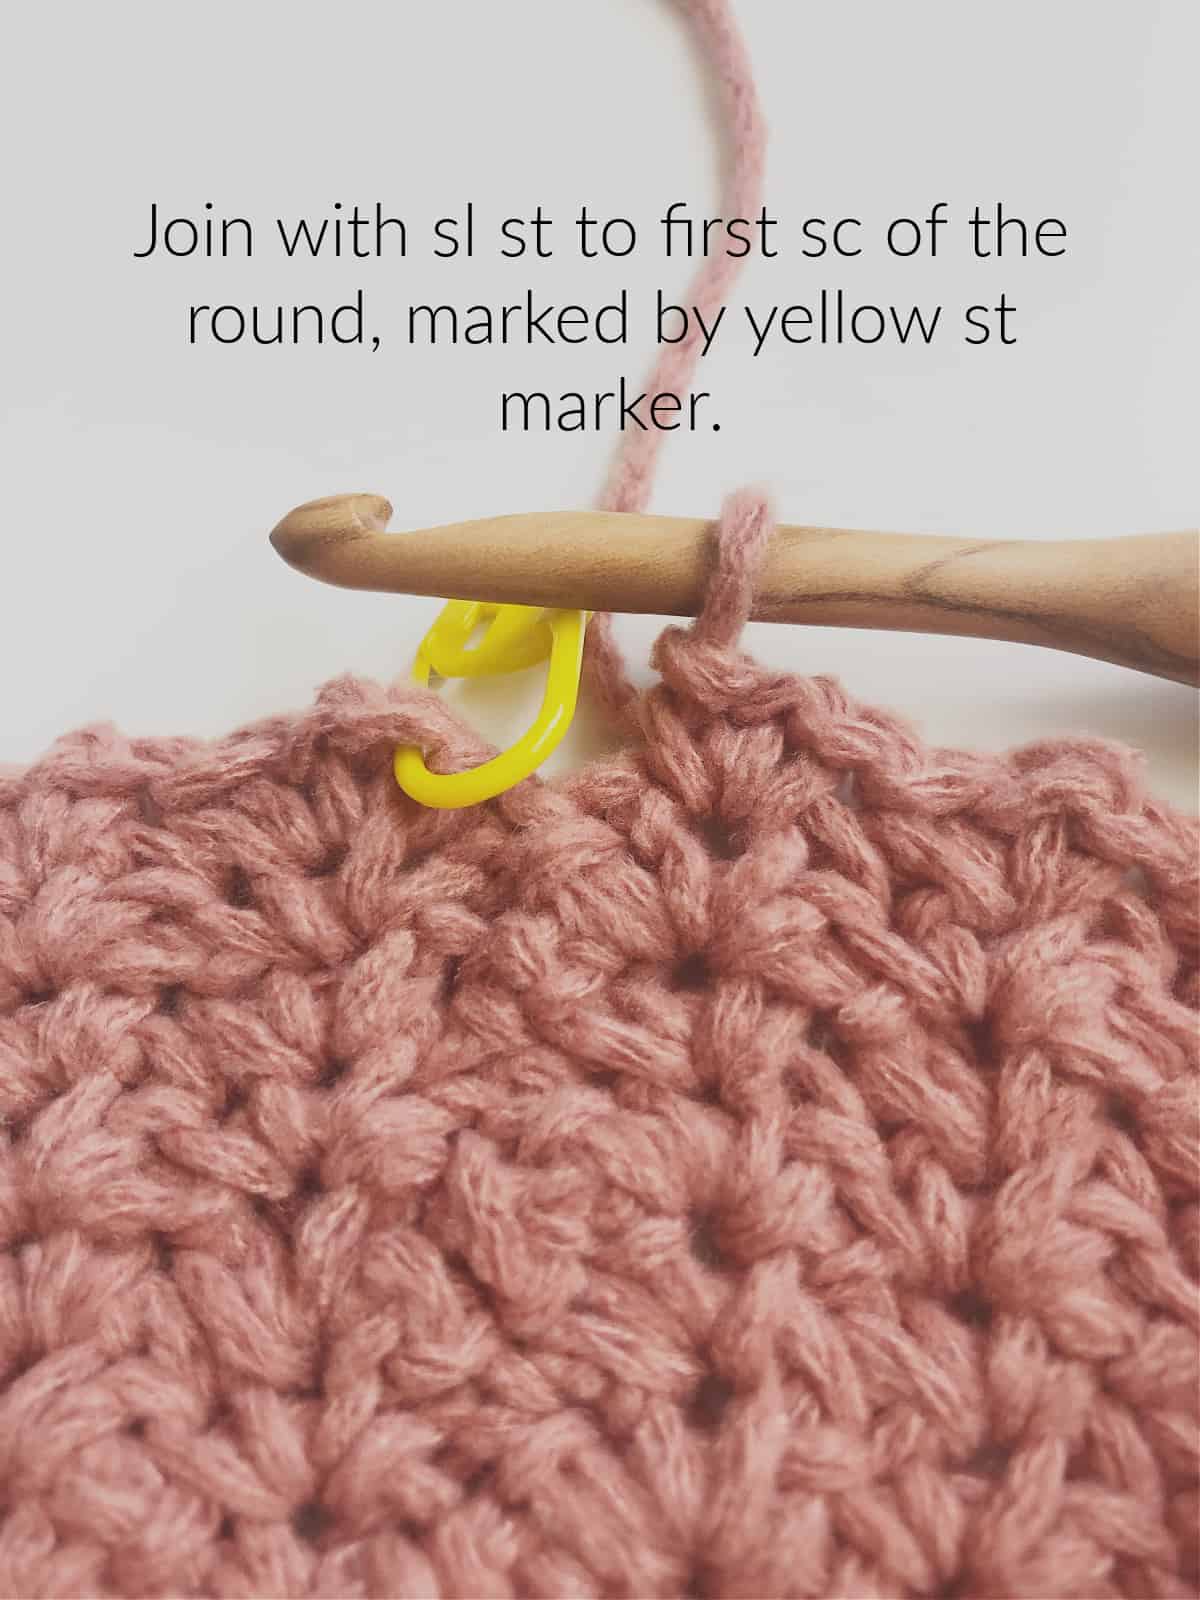
*From here and on, you will work a (sc, ch 1, sc) into the ch 1 sp of the (sc, ch 1, sc) from the previous round.
Rnd 3. Sl st over to ch 1 sp, ch 1, in same st *(sc, ch 1, sc), sk next 2 sts, rep from * to end, join to first sc with a sl st, turn. (81, 90, 99, 108 sts) 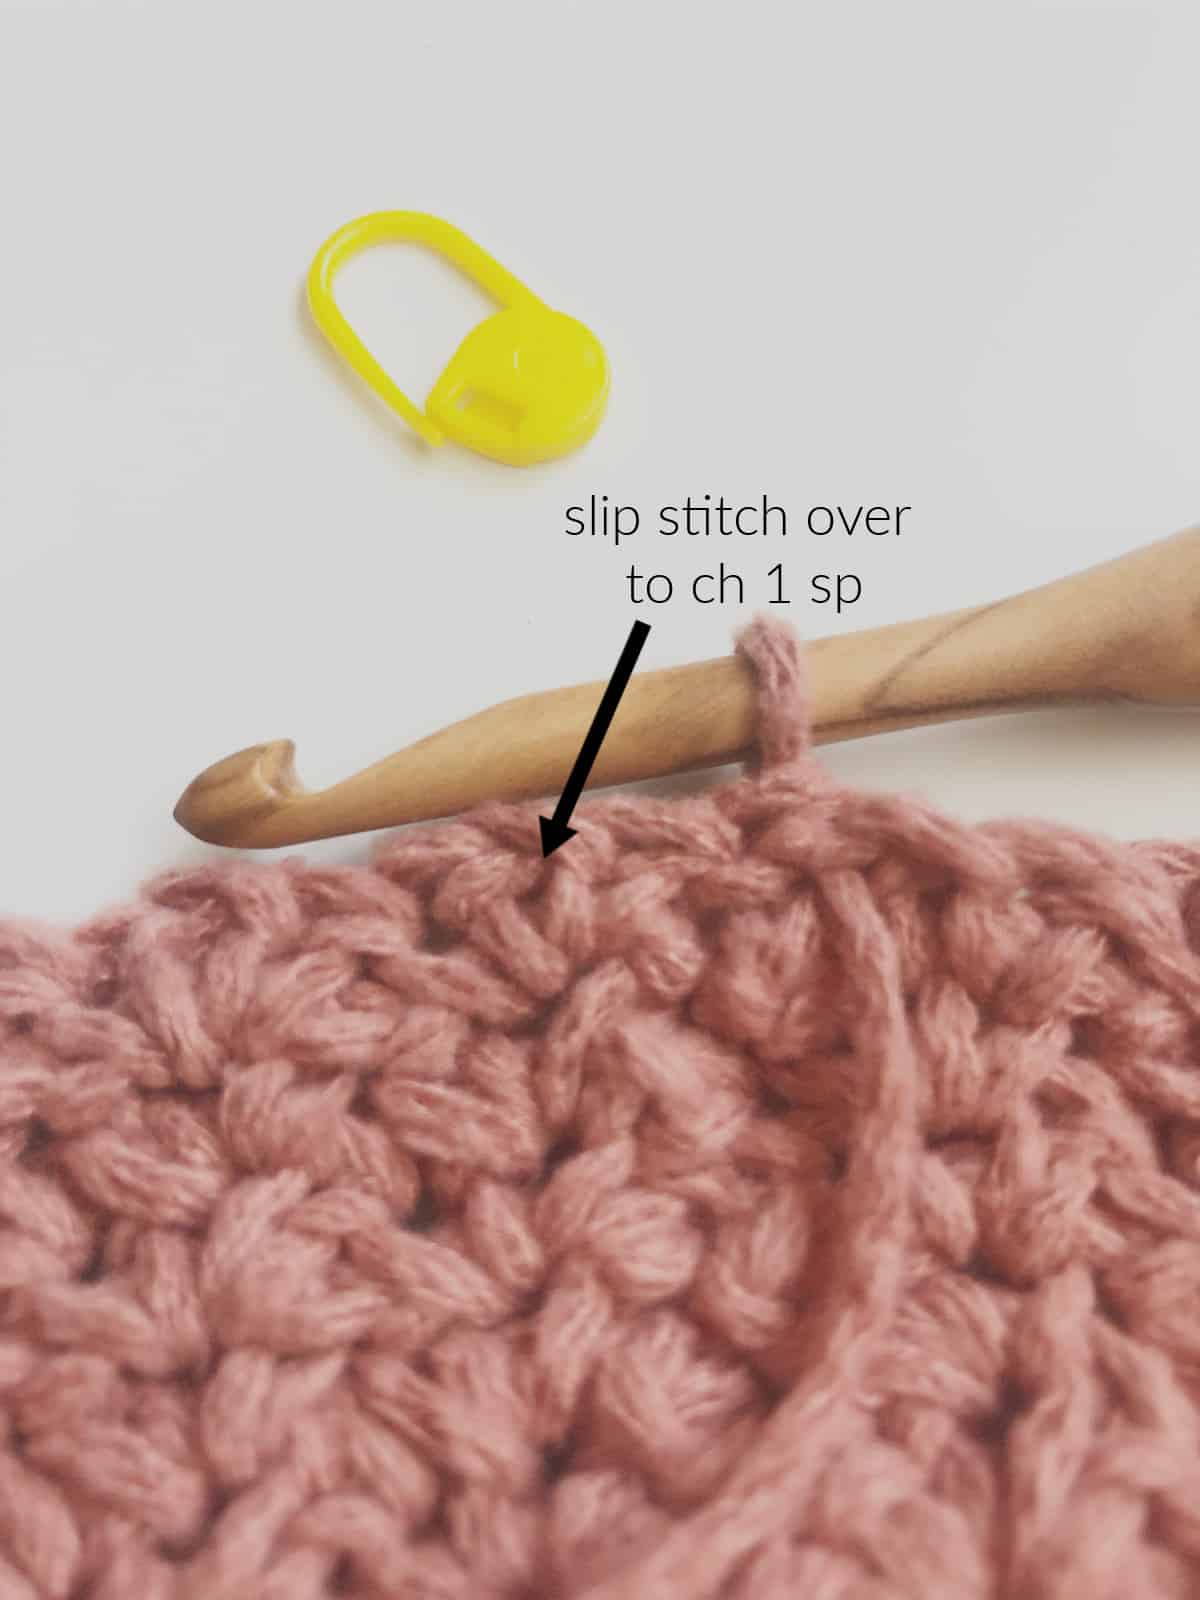
Rep Rnd 3 til hat (including ribbing) measures 6.5 (7, 7.5, 8)” tall.
Decrease
Rnd 1. Ch 1, in same st *(2 sc, sk next 2 sts), rep from * to end, join to first sc with a sl st, turn.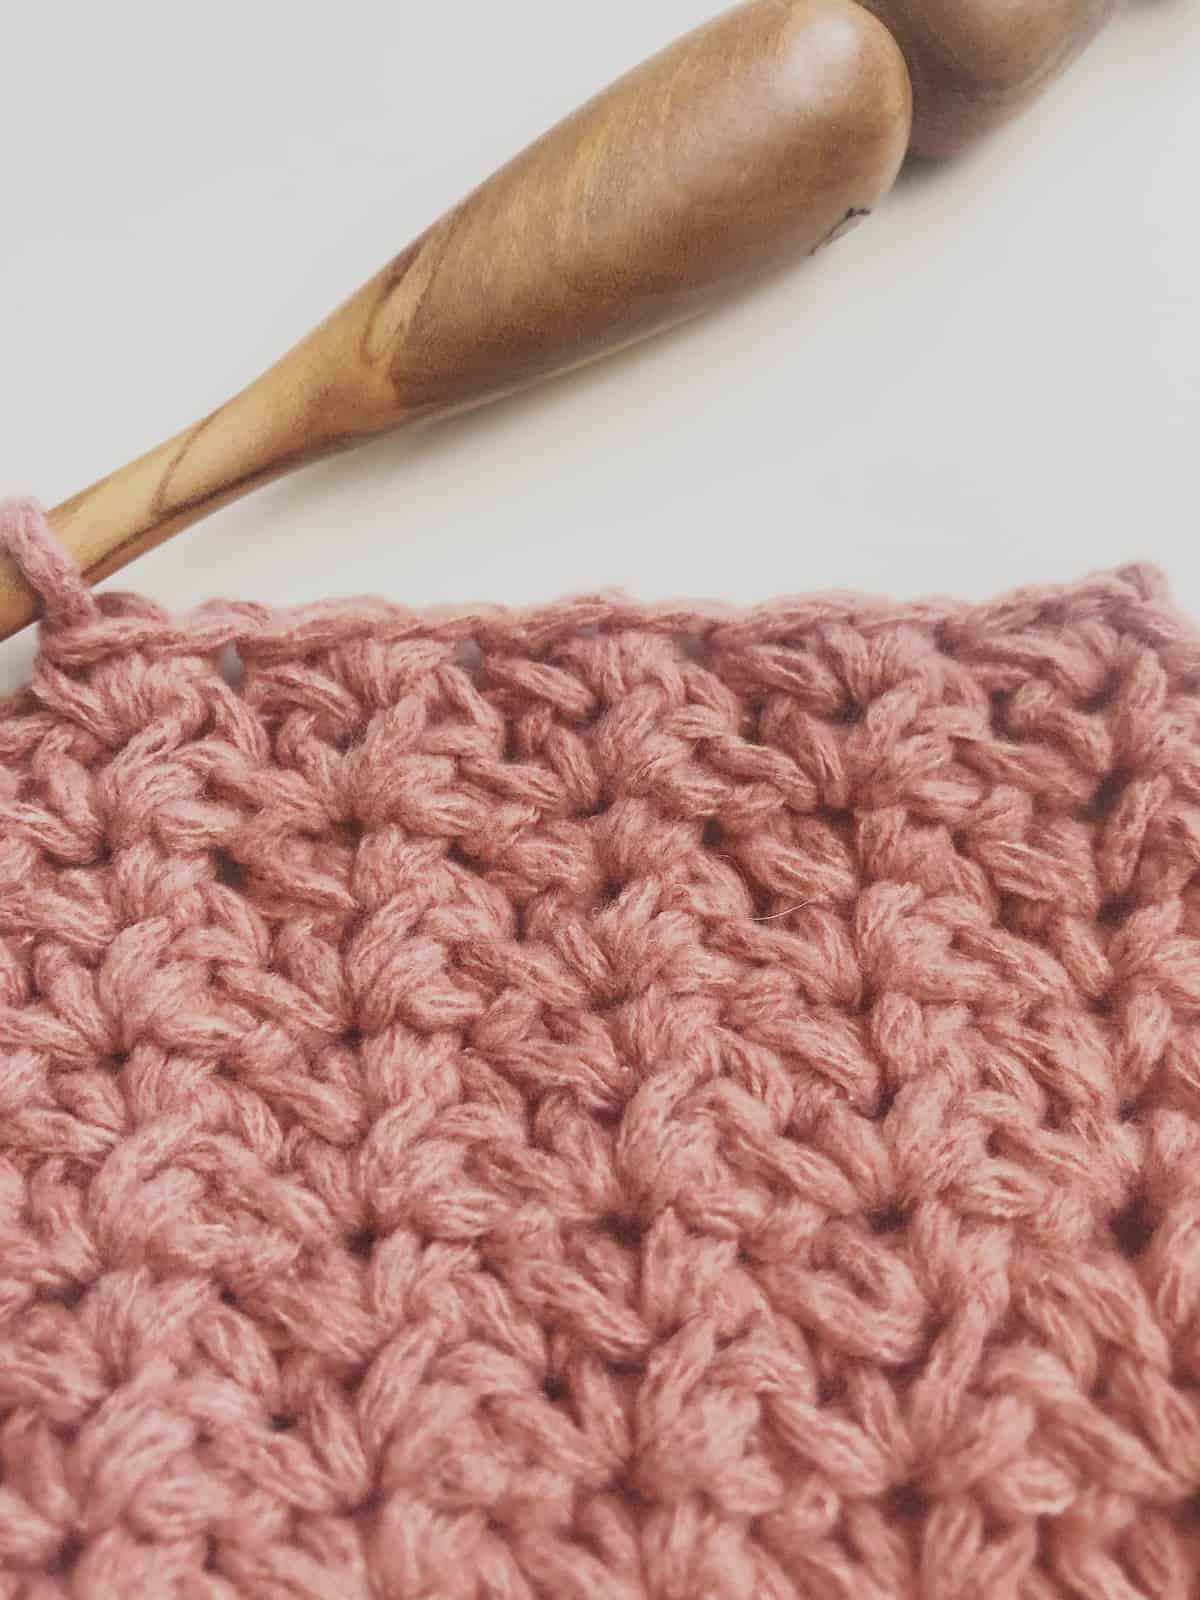
Rnd 2. Rep Rnd 1.
Rnd 3. Ch 1, in same st *(1 sc, sk next 1 st), rep from * to end, join to first sc with a sl st, turn.
Finishing
Cut yarn leaving a long tail for seaming.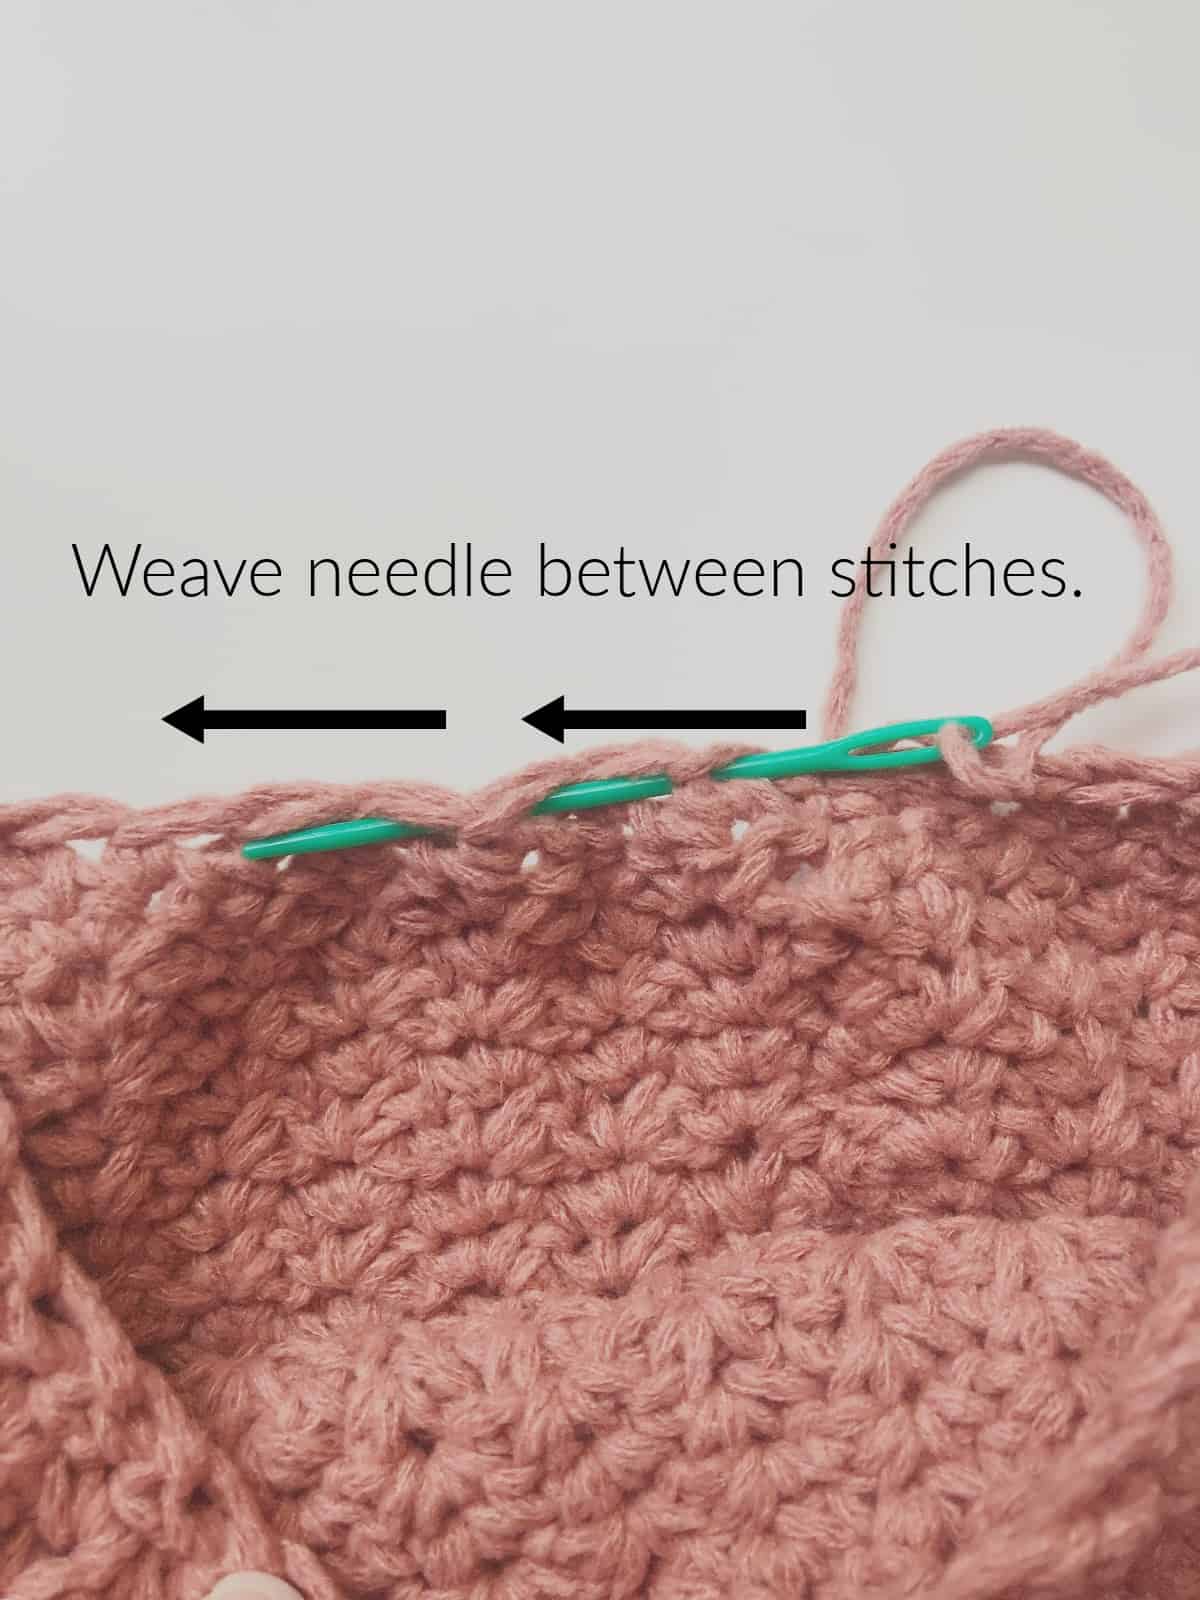
Weave tail with needle between stitches.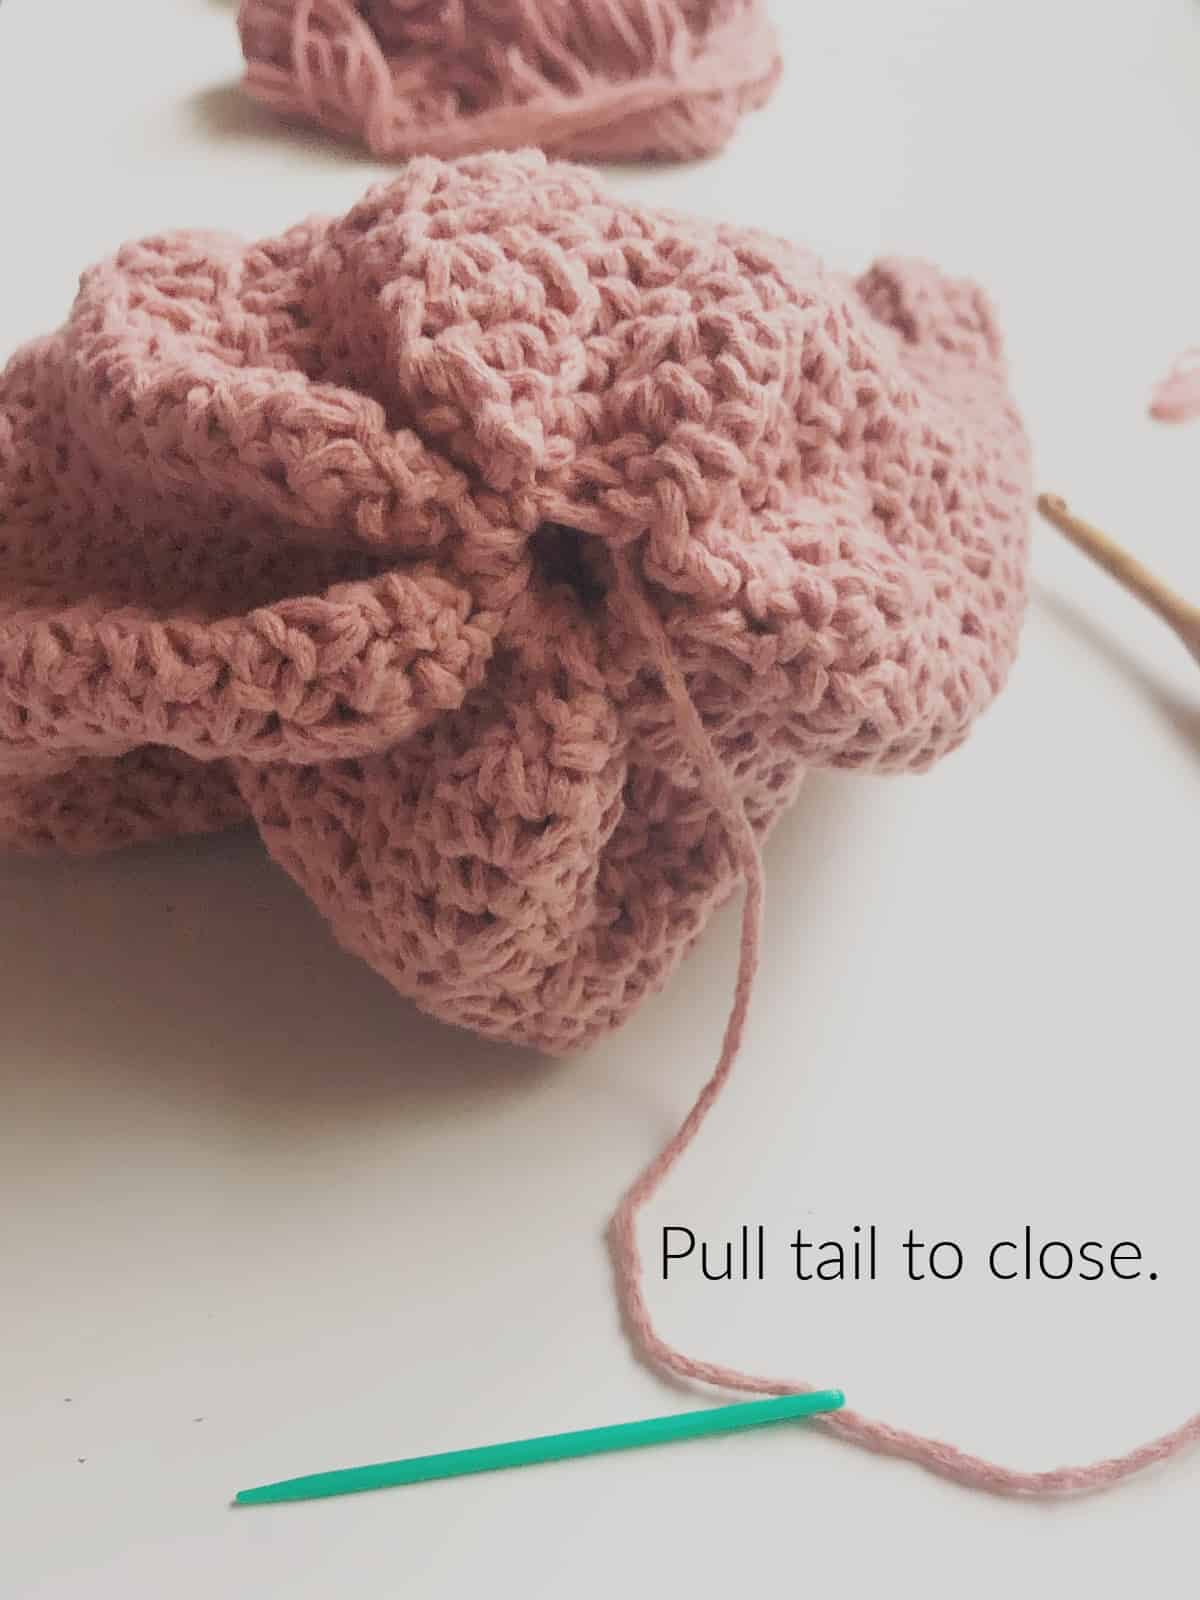
Pull tail to close the circle.
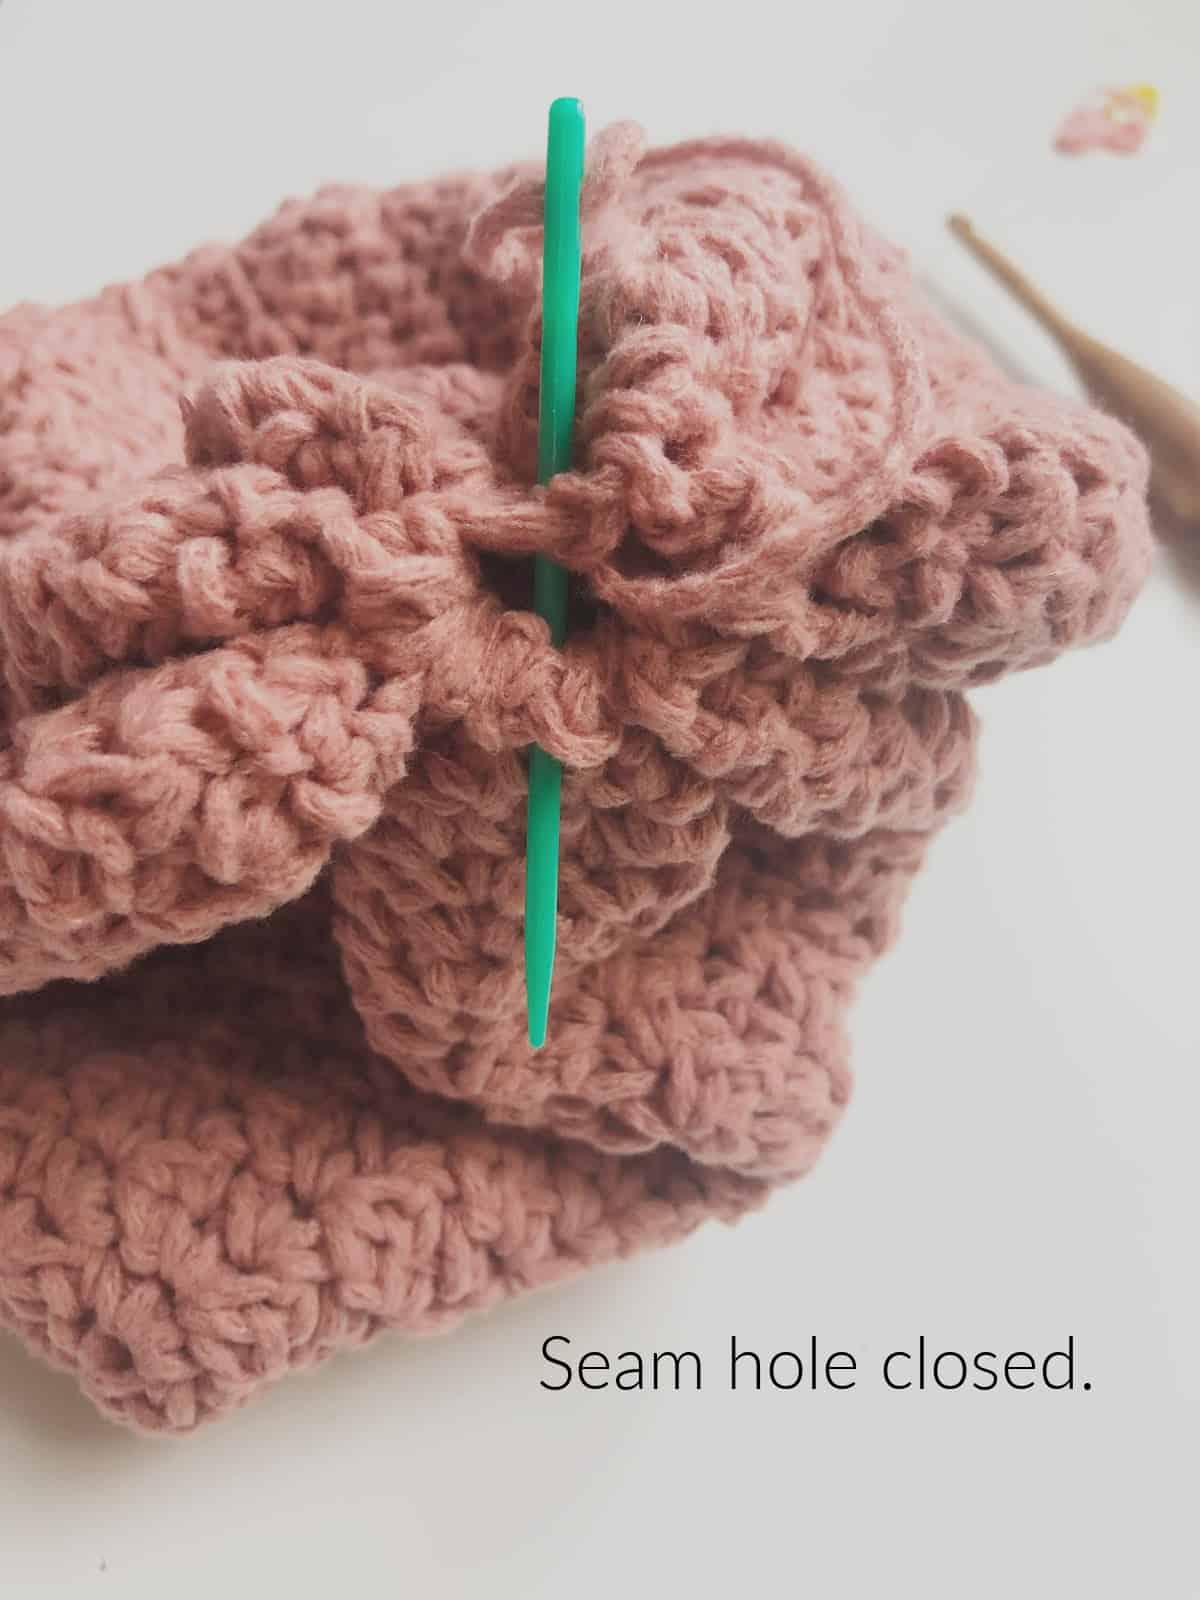 Once closed, weave away end-back and forth through hole to secure it further.
Finish off with a pom pom.
If you would like to make your own faux fur pom pom Meghan from MeghanMakesDo has a great diy snap on faux fur pom tutorial. I love that she even includes the snap to make it removable.
Recommended Products
As an Amazon Associate and member of other affiliate programs, I earn from qualifying purchases.


Hi, I’m currently trying to crochet the Positano hat. It tells me to do a single crochet, chain one and single crochet in one stitch then skip the next. I started out with 66 and it says after that process I should end up with 88 but the math does not add up. For every three spaces you end up with six stitches. I end up with 102 stitches. What could I be doing wrong?
Hi Kristie,
Thanks for reaching out with your question. You’re right that there is an error in the stitch counts on some sizes. The size you’re working on should end with 99 sts (not 88). Since you have 102, it’s possible you have missed a skipped stitch somewhere, and have one extra set of 3, but otherwise you’re spot on. Thanks for letting me know, I’ve updated the stitch counts to the correct numbers. I hope this helps, let me know if you have any other questions.
Thank you,
Crystal