
Easy Crochet Summer Vest Pattern Free Women’s Sizes
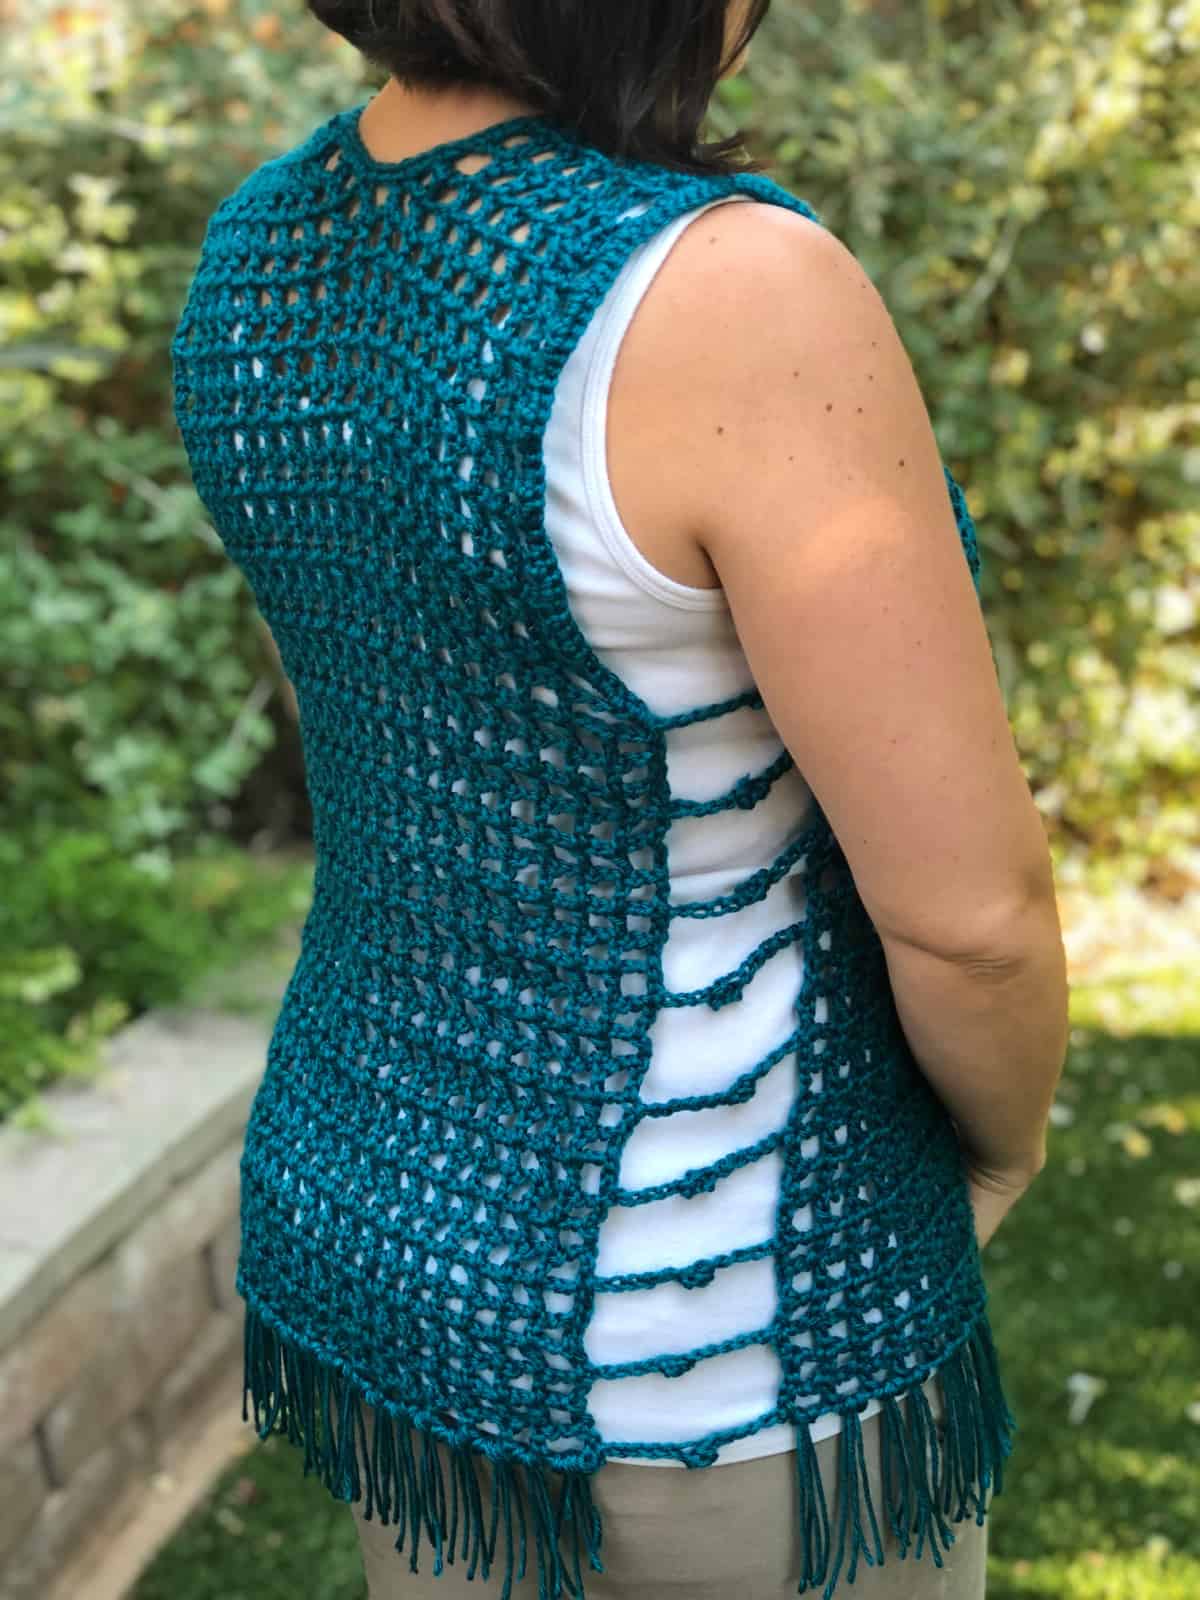
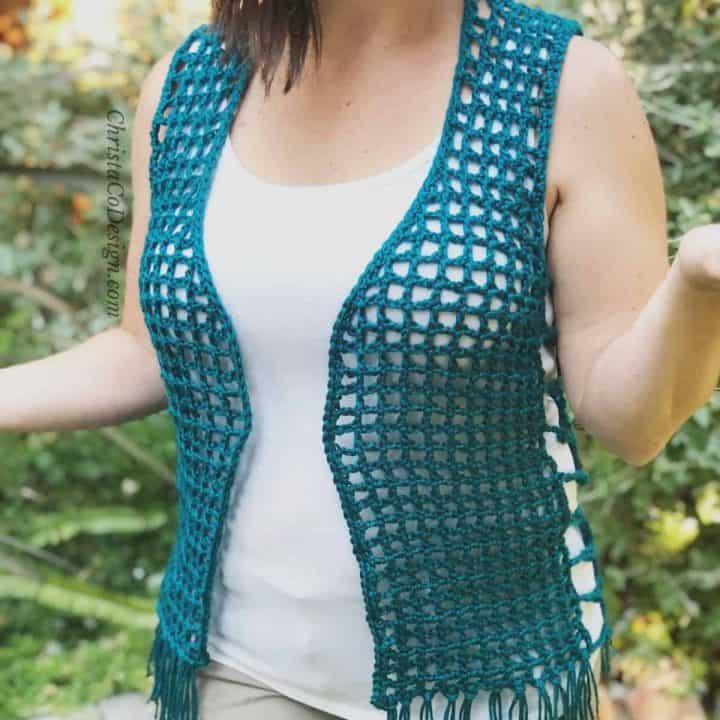
The Maglia Crochet Mesh Vest is a light and breezy open front top that’s great for summer. This free crochet vest pattern is available in sizes XS-5X.
This easy pattern includes size by size written instructions and video tutorials. One of the great things about crochet mesh is that it works up so fast!
I love how customizable this crochet summer vest is for everyone. You can leave off the fringe, or make the length longer, or even go up a size for a looser fit.

This post contains affiliate links, I may earn a fee. Read more disclosure policy.

You can purchase the ad-free, well formatted PDF Pattern in one of my shops. Scroll down for the free pattern!
I love a lightweight summer vest, for the warmer months. The Maglia Crochet Vest is perfect for adding to your summer wardrobe.
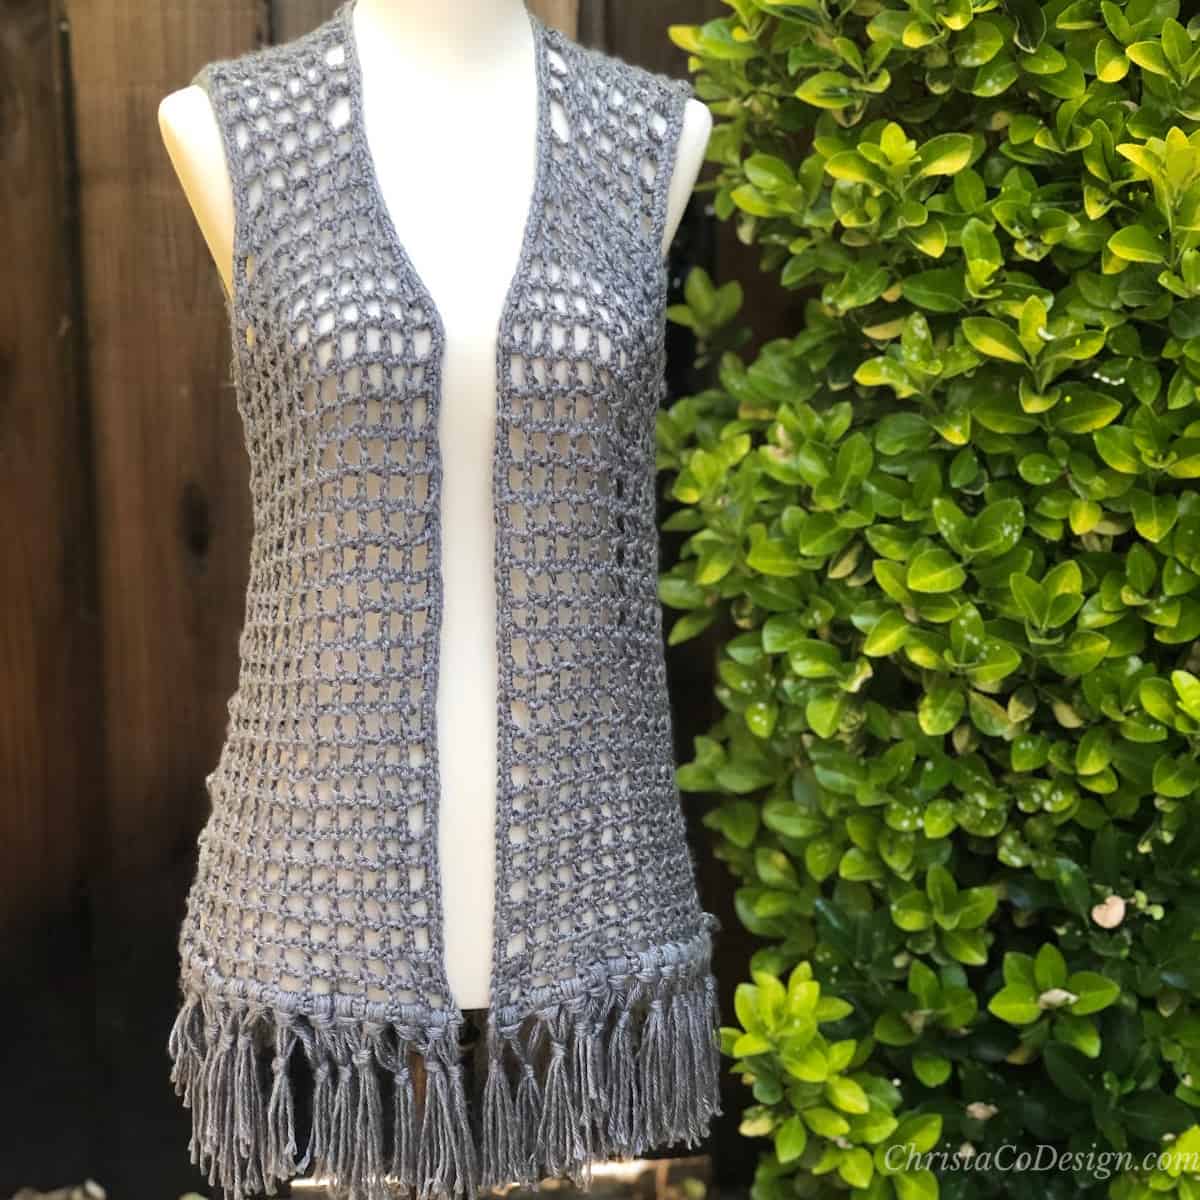
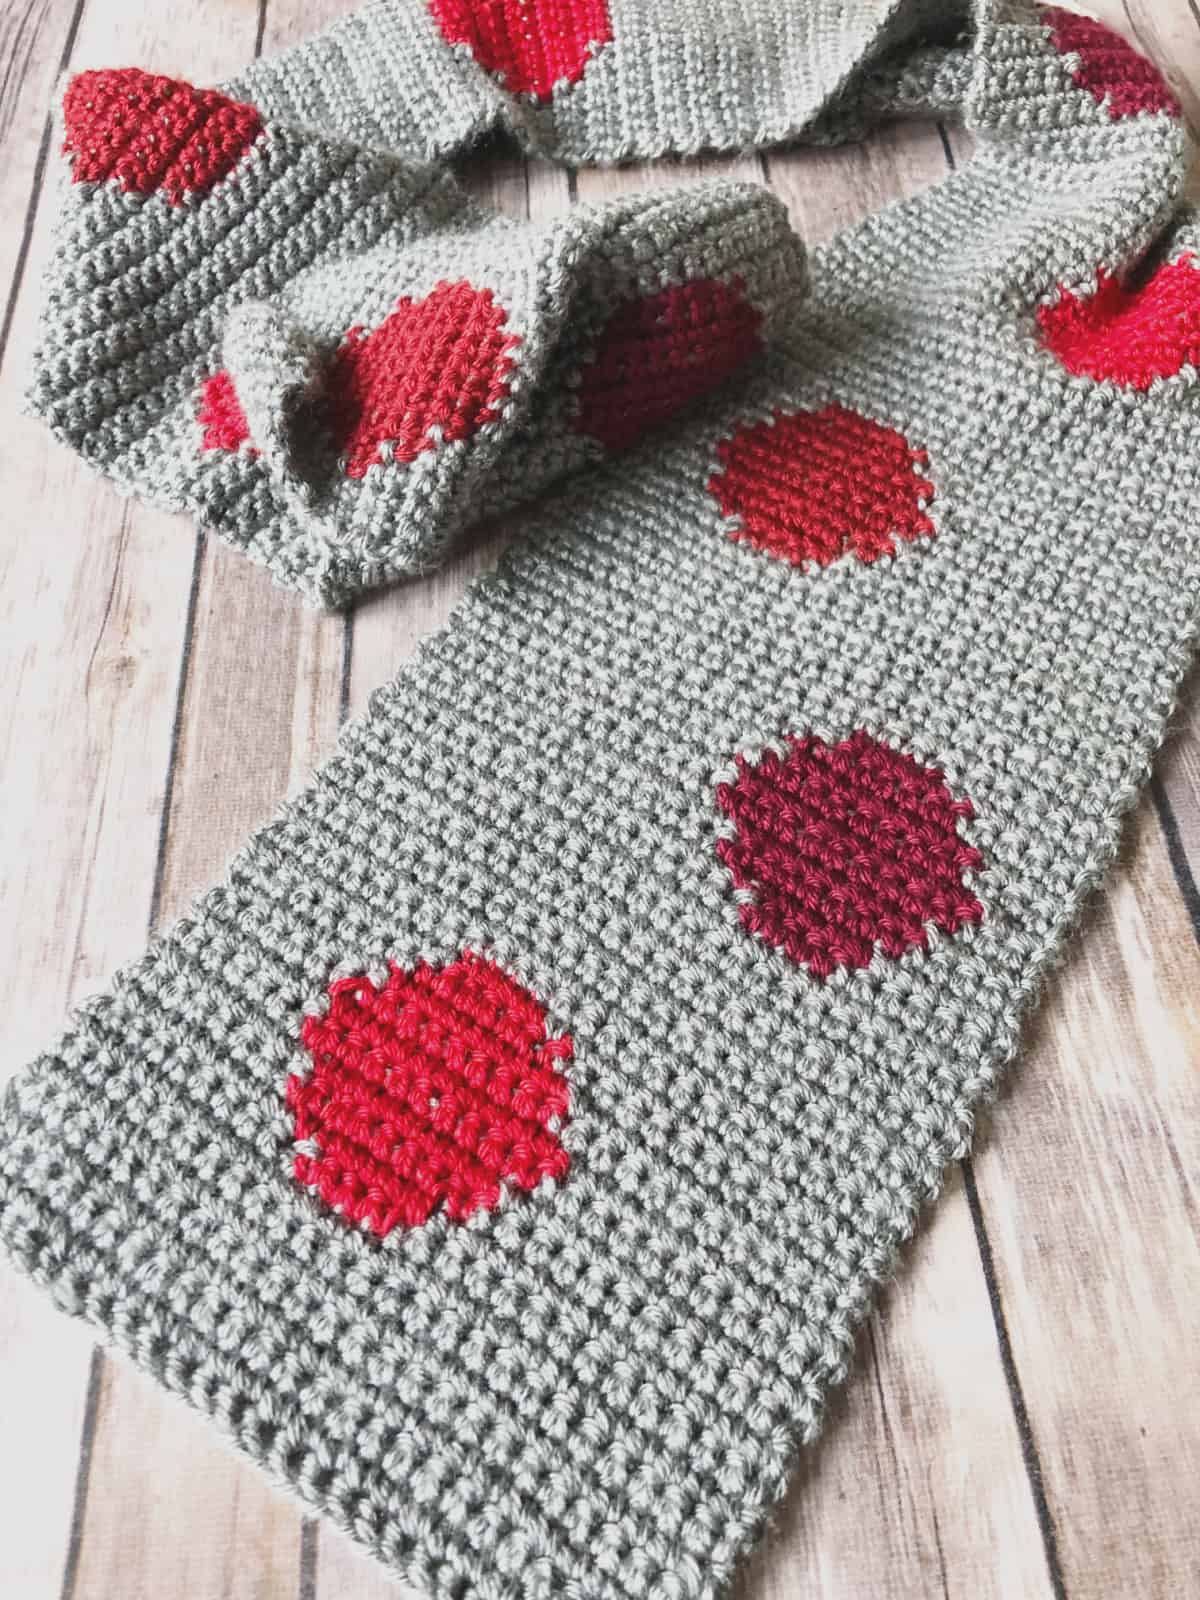
It was such a fast and easy crochet pattern that I made two mesh vest. One is in this teal color, named Pagoda and one in Heather Grey. I got my color and neutral covered.

I chose two different styles of fringe also. I love giving you options and seeing all your beautiful choices in turn.
The Maglia (just ignore the g-if you don’t know Italian) is a free crochet pattern here on the blog.
I designed easy crochet vest to be worn open in the front. I kept the length short to accommodate the added fringe. I give you some tips on adjusting this vest for your liking below.
One of my lovely testers gifted the XS size vest to her granddaughter and she looks amazing in it! She wanted a long look and she got it. This vest crochet pattern is truly versatile.
Construction:
The Maglia Crochet Mesh Vest is worked in all one piece. First you begin with the back panel working from the bottom up to the neck.
Once the back is complete, you’ll begin one shoulder. You’ll continue to work down, increasing for the front panel. Then you’ll repeat for the other side.
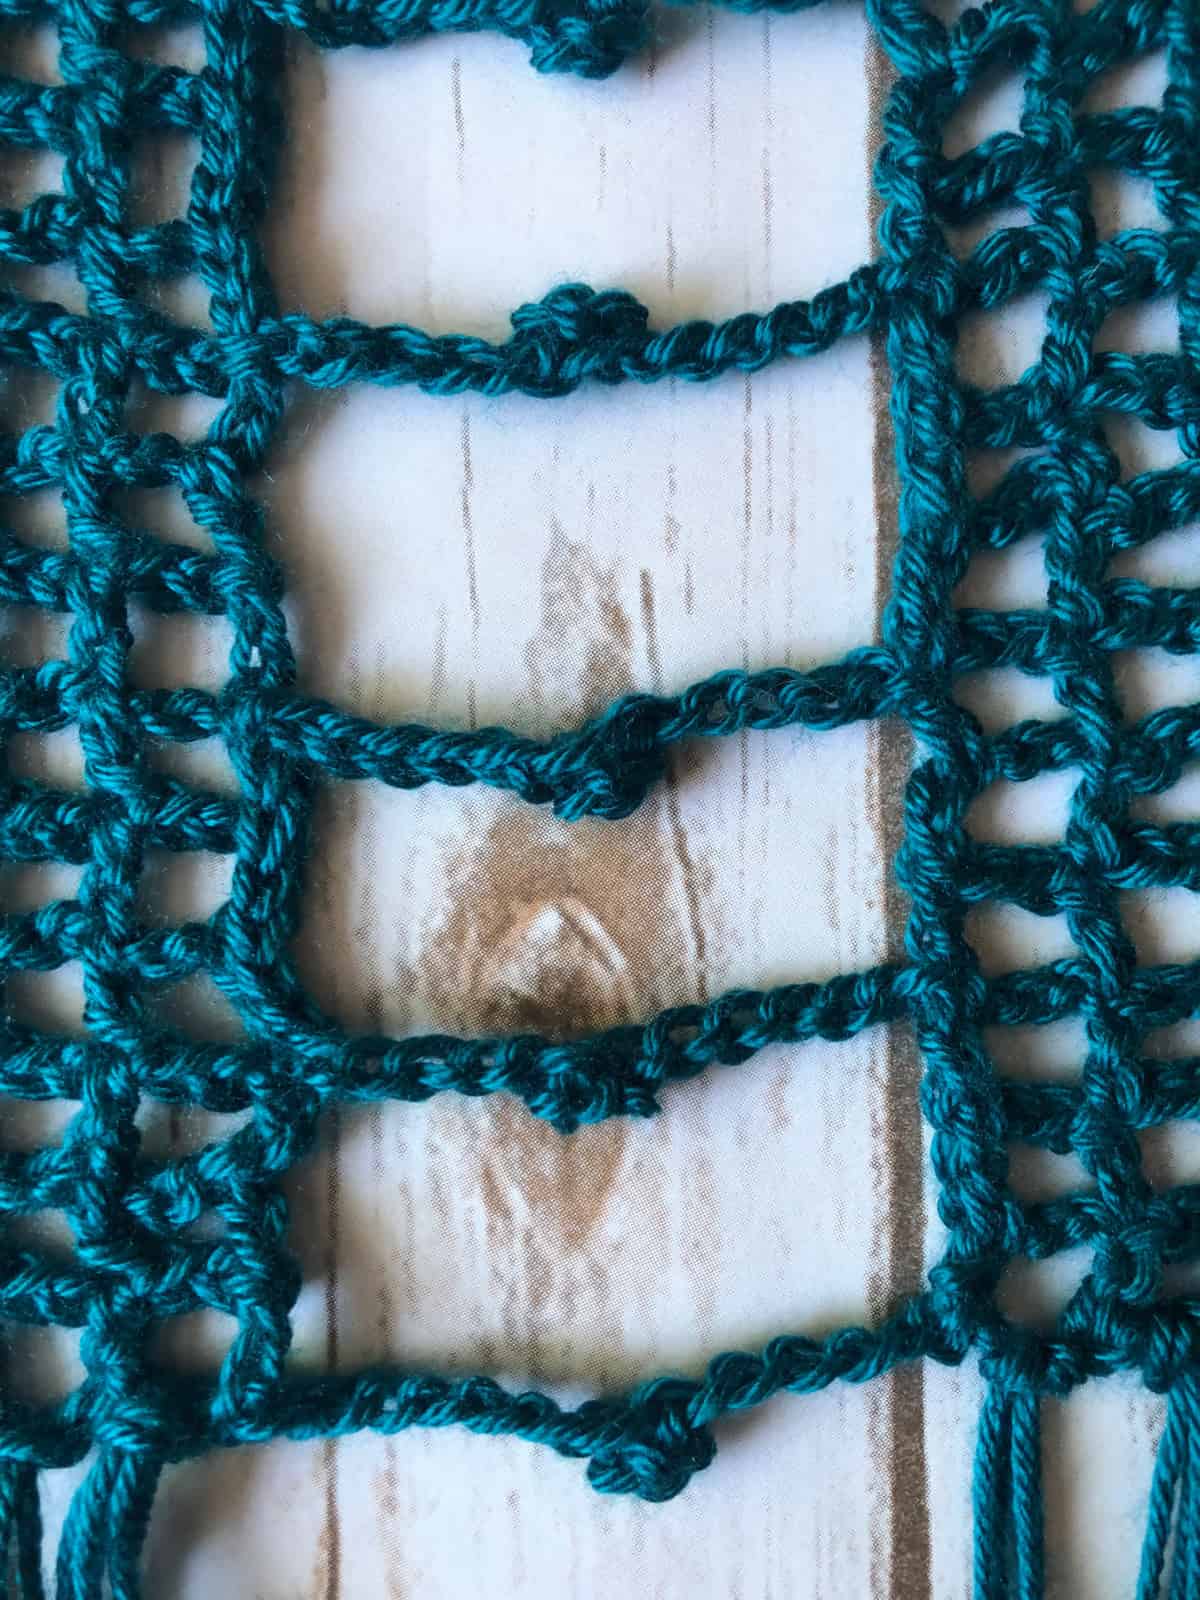
This crochet mesh stitch is so easy and works up quickly in double crochet. It’s the perfect stitch for crochet vest patterns for summer.
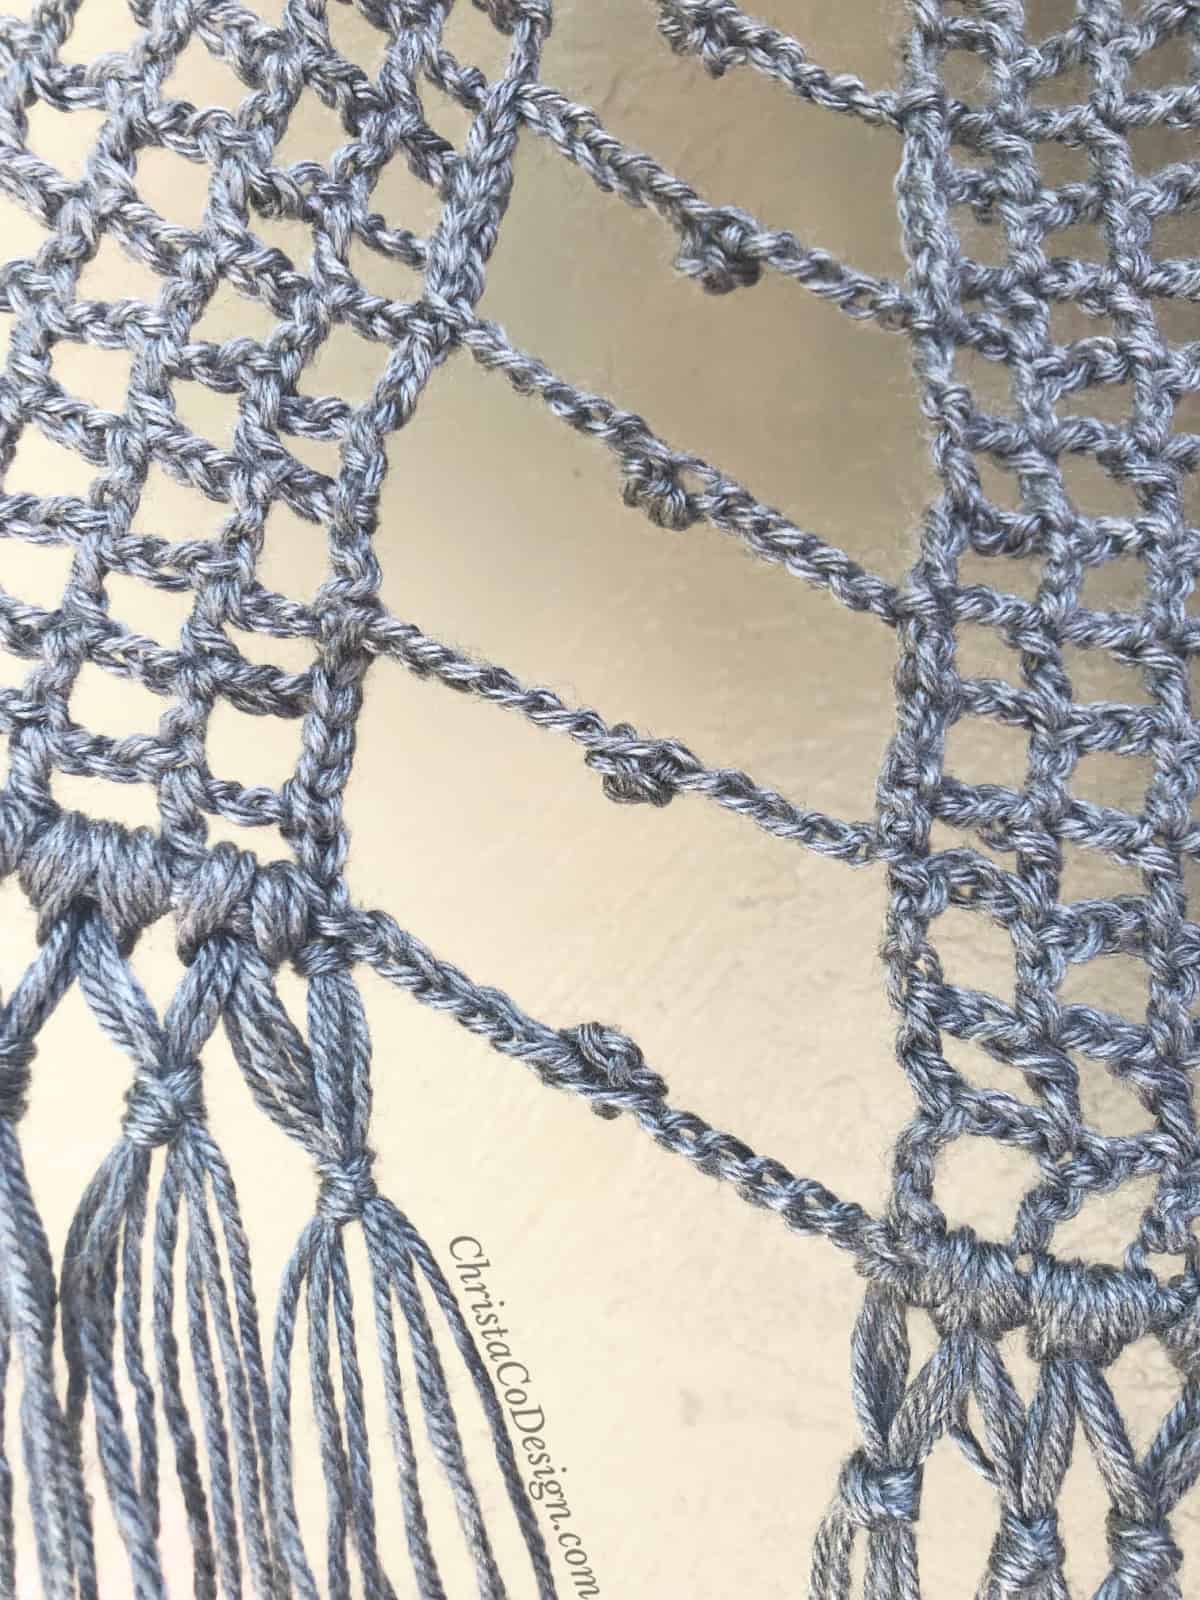
To finish it up you’ll add the side detail, which is my favorite part of this design. I love a picot, even though it was a bit tricky to learn when I first came across it years ago. (Don’t worry there’s a video for that!)
I’ve also included video tutorials for all the parts of the vest. The video tutorials are linked up at the beginning of the pattern. The photos are also at the beginning. Just check back if you need them.
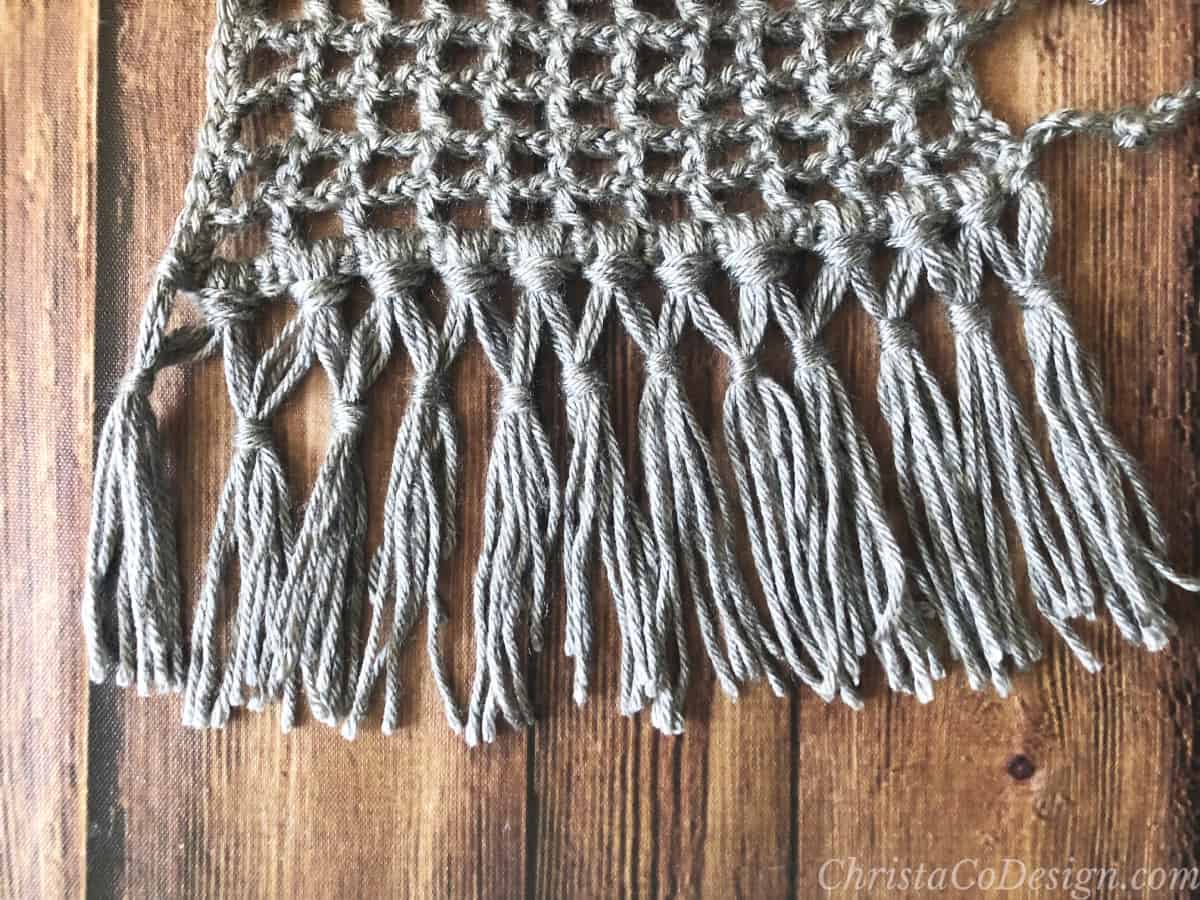
Like I mention earlier, the fringe is optional. If you choose to add the fringe, you’ll do so at the very end.
More Free Crochet Patterns for Summer
- The Berryessa Scarf crochet pattern is light and beautiful for any season.
- Crochet the Lilla Shawl in luxury cotton for a gorgeous summer shawl pattern.
- The Toddler Sun Hat is both cute and useful for those sunny days!
Materials
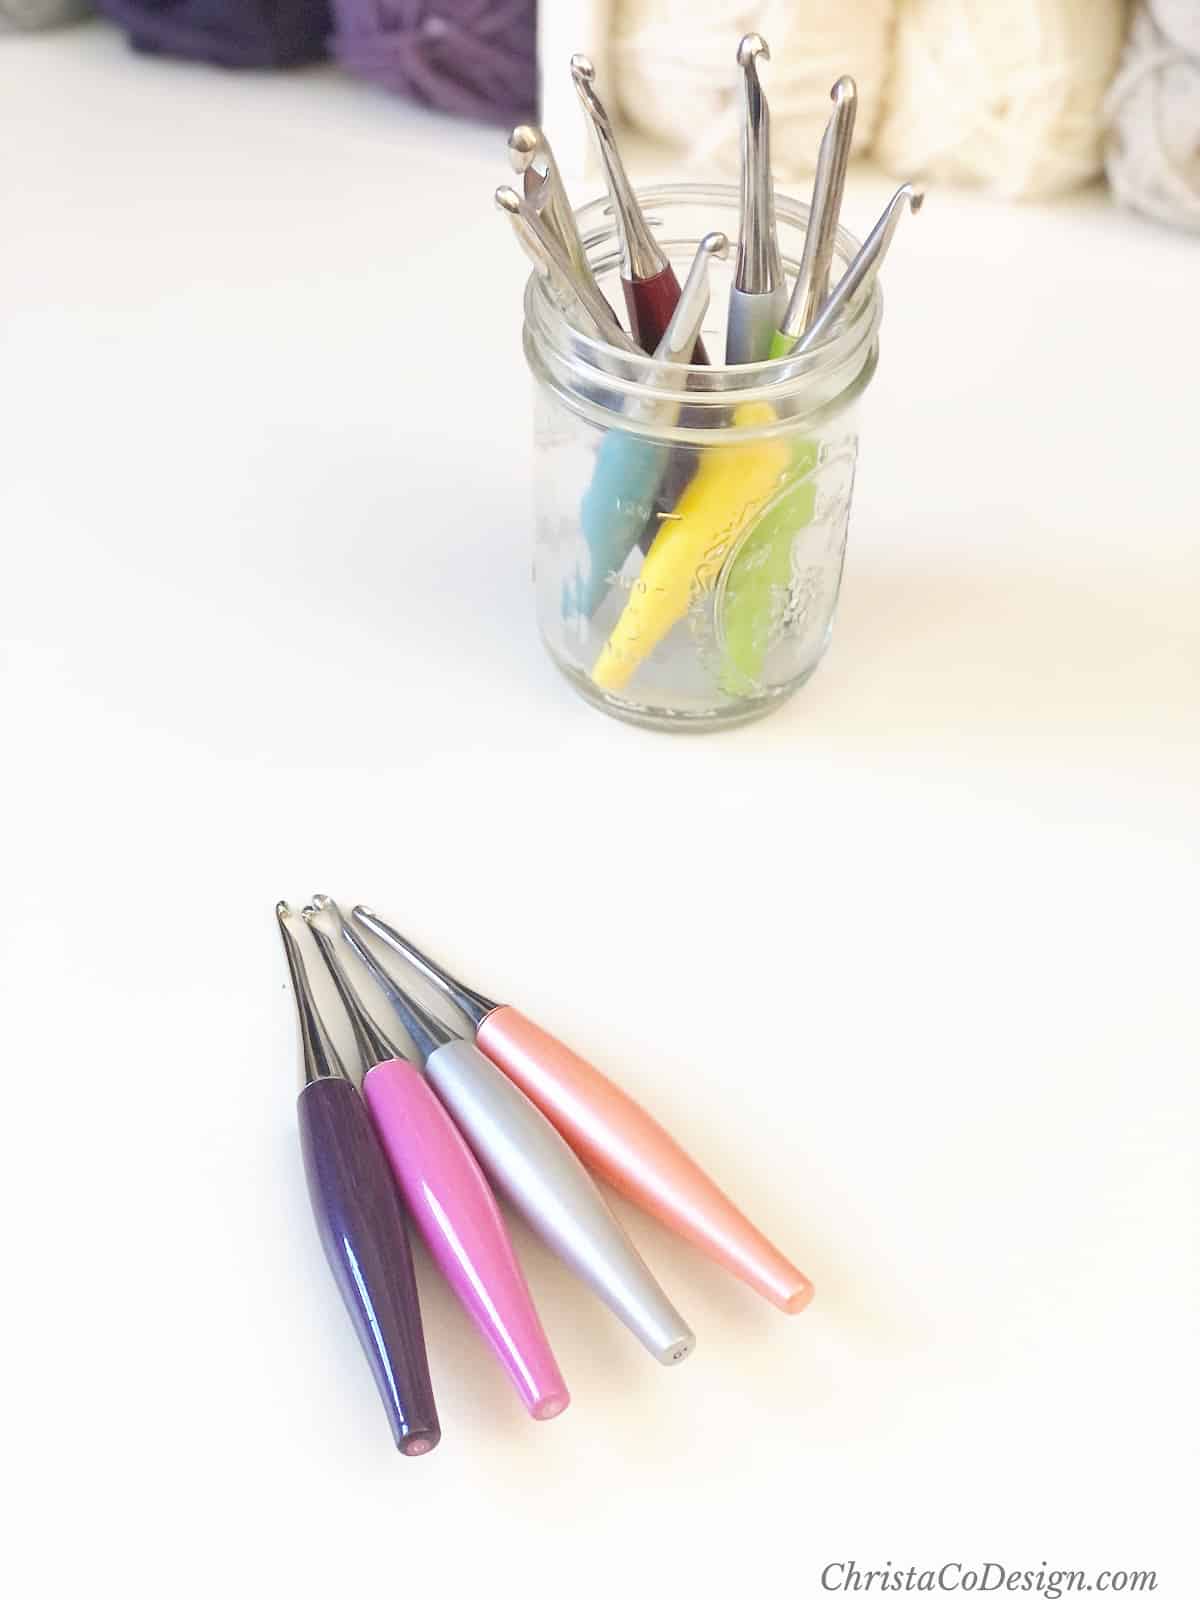
- 6mm US Size J-10 crochet hook size*, yarn needle, measuring tape, scissors
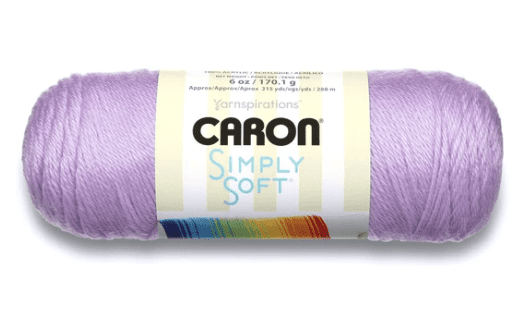
- #4 worsted weight yarn, pictured in Caron Simply Soft (100% acrylic; 315 yd / 288 m, 6 oz / 170 g); shown in colors: Pagoda and Heather Grey.
Yarn By Size
XS 1 ball = 205 yd / 188 m
S 1 ball = 315 yd / 288 m
M 2 balls =473 yd / 433 m
L 2 balls = 630 yd / 576 m
XL 3 balls = 735 yd / 672 m
2X 3 balls = 788 yd / 721 m
3X 3 balls = 945 yd / 864 m
4X 4 balls = 1103 yd / 1008 m
5X 4 balls = 1260 yd / 1152 m
Remember if you adjust or lengthen your vest to order an extra ball of yarn.
You can purchase the ad-free, well formatted PDF Pattern in one of my shops. Scroll down for the free pattern!
Crochet Mesh Video Tutorial:
Scroll down for the free crochet summer vest pattern!
Maglia Women's Crochet Summer Vest Pattern
Free crochet mesh vest pattern in women's sizes XS-5X. Crochet this fun summer vest with or without the fringe.
Materials
- #4 worsted weight yarn, pictured in Caron Simply Soft (100% acrylic; 315 yd / 288 m, 6 oz / 170 g); shown in colors: Pagoda and Heather Grey.
- Yarn By Size:
- XS 1 ball = 205 yd / 188 m
- S 1 ball = 315 yd / 288 m
- M 2 balls =473 yd / 433 m
- L 2 balls = 630 yd / 576 m
- XL 3 balls = 735 yd / 672 m
- 2X 3 balls = 788 yd / 721 m
- 3X 3 balls = 945 yd / 864 m
- 4X 4 balls = 1103 yd / 1008 m
- 5X 4 balls = 1260 yd / 1152 m
- Remember if you adjust or lengthen your vest to order an extra ball of yarn.
Tools
- 6mm J (10) hook, or hook needed to achieve gauge.
- Yarn needle, measuring tape and scissors
Instructions
Gauge:
1′′ / 2.5 cm x 1′′ / 2.5 cm = 4 sts in pattern x 2 rows in pattern. Here 4 sts = (dc, ch 2, dc).
To check gauge Ch 20, and follow back panel instructions for 4”.
Notes:
- Ch 5 = dc + ch 2 The vest is worked in crochet mesh: dc + ch 2. You will always dc into the previous row’s dc, so “dc in next” means to double crochet into the next double crochet and “sk 2” means to skip the next two chains.
- Ch 5 counts as dc + ch 2.
- Stitch multiple is 3 + 2 for the starting chain
Fit/Adjustments
- The fit of this vest is very close fitting, and it’s intended to be worn open. If you would like a looser fit, go up a size or two in the pattern.
- To increase the panel width, continue to follow the increase rows repeat in the front panel section to your desired width. Check the next size up first to see if that may be what you need.
- The length (without fringe) hits around the top to mid hip. To add length just repeat more rows, be sure to make both the back panel & front panels the same length. To customize your length, measure from the top of your shoulder to down to where you want the hem of your vest to stop. Keep in mind, if you will add the fringe length or not here.
- The sides can also be easily modified by increasing or decreasing the number of chains.
- If you would like to start with a wider back panel, you will need a stitch multiple of 3 + 2 for the starting chain.
Stitches/Abbreviations
ch - chain
dc - double crochet
sl st - slip stitch
Picot: ch 5, sl st back to the first ch made.
rep - repeat
RS - right side
sc - single crochet
sk - skip the indicated stitch
sl st - slip stitch
st (s) - stitch (es)
WS - wrong side
Maglia Mesh Vest Video Tutorials:
Back Panel Video
Front Panel Video
Vest Sides Video
Bust Sizes:
If you are in between sizes, then go up a size in the pattern.
XS-30”, S-34”, M-38”, L-42”, XL-46”, 2X-50”, 3X-54”, 4X-58", 5X-62"
Increase-Decrease Photos
Here are a few pictures of the finished decreases and increases in the front panel. These might be helpful to look back on once you get to those sections.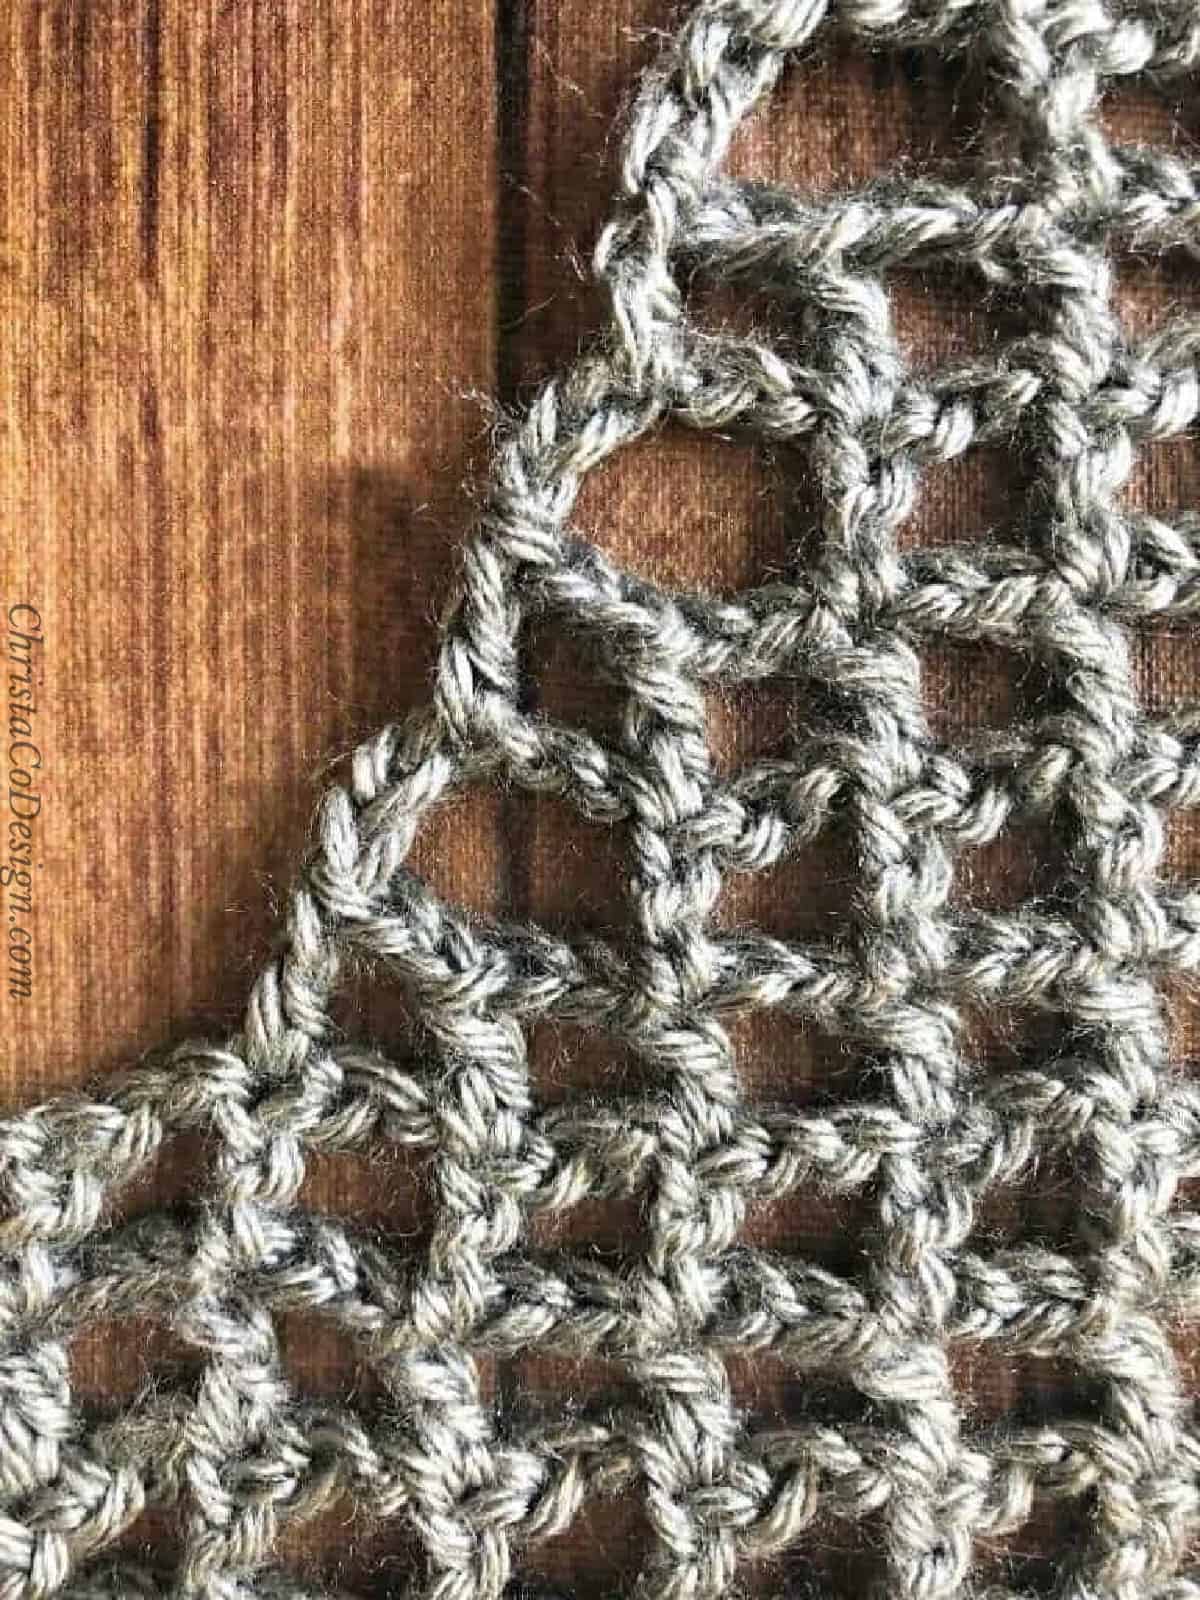
The portion of the front panel where you “Ch 5, sk all of the next: (2 chs, dc, 2 chs) and dc in the next dc.”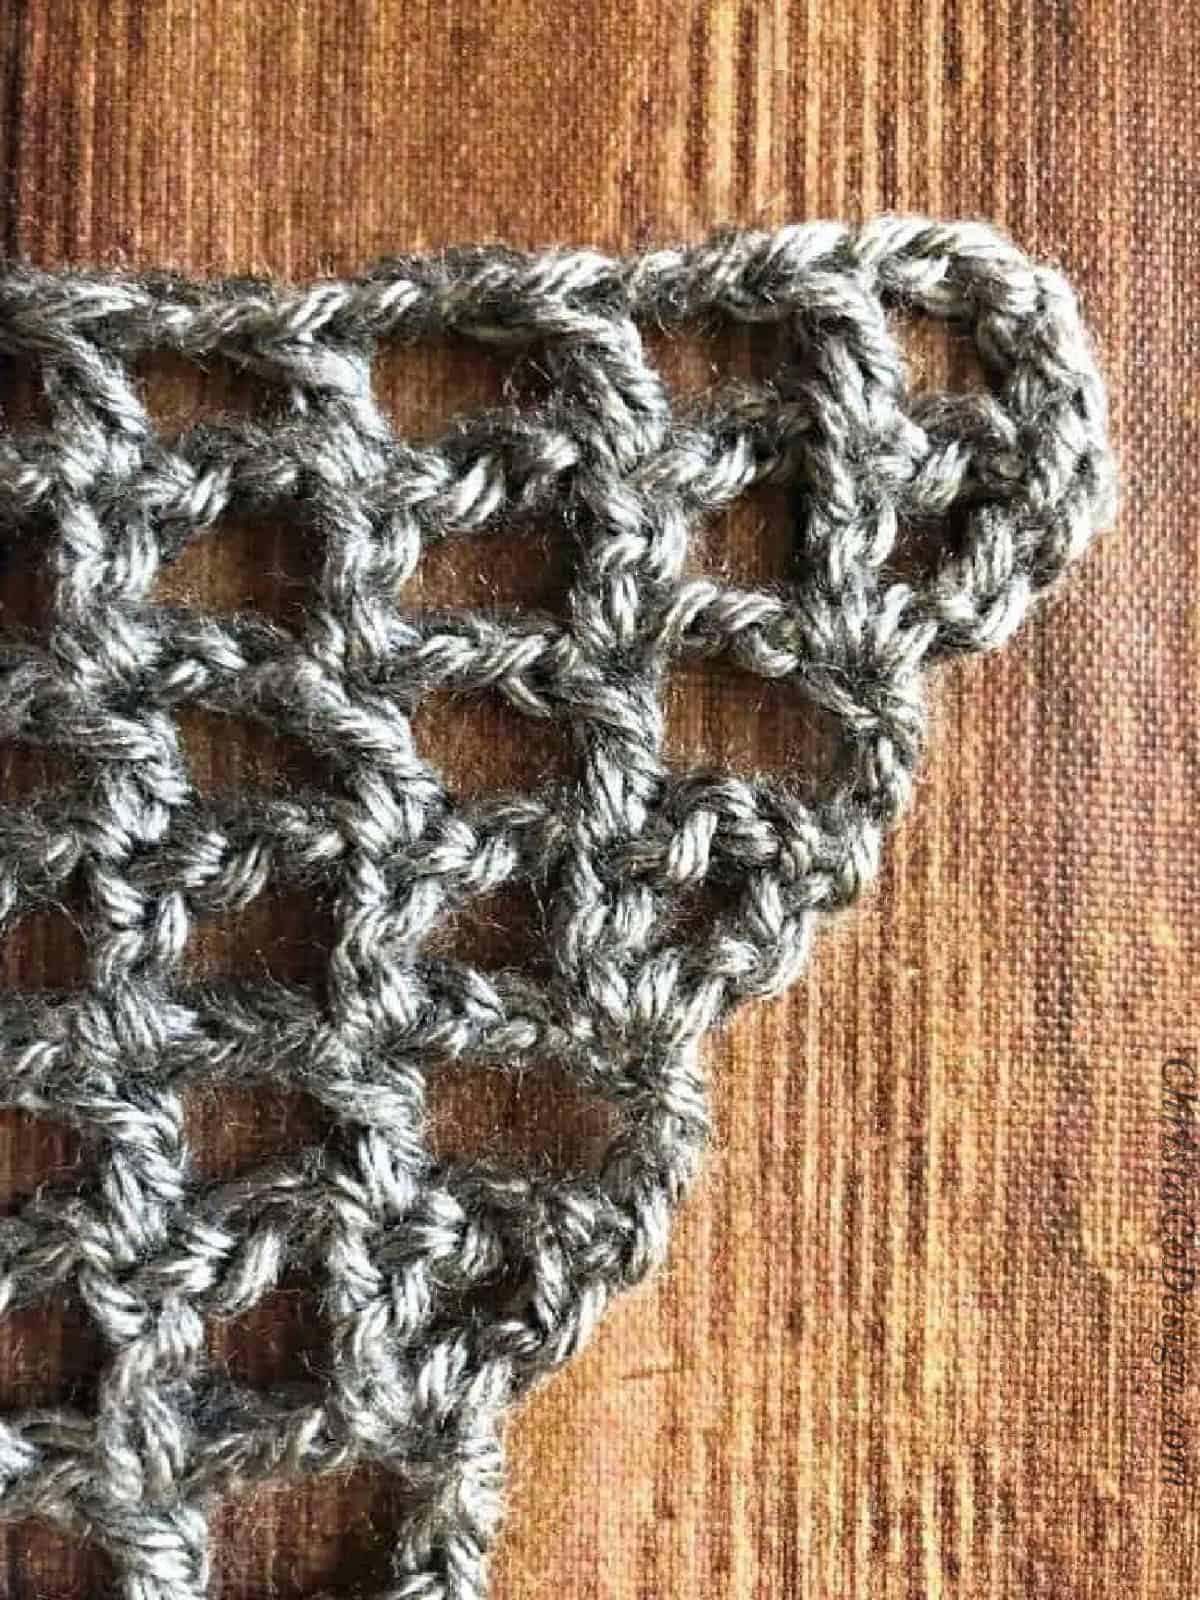
The front panel section where you, “Ch 5, dc in the same dc, *{ch 2, sk 2 chs, dc in next dc} rep from * across, after last dc, ch 2 and dc in same.”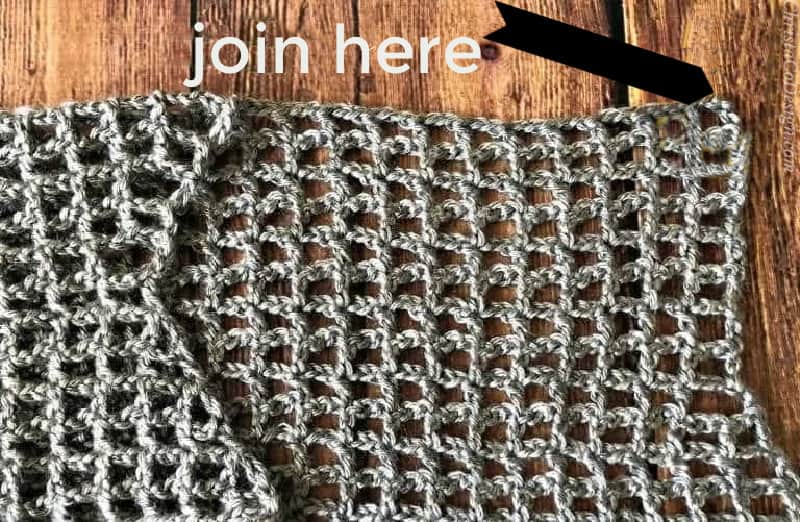
The front panel is continued from the back. Attach to the opposite side of the back panel (labeled with with a blank arrow) to repeat the front panel on the other side.
Pattern:
- Teen/X-Small:
Back Panel
Ch 59
Row 1. DC in 8th ch from your hook (dc, ch 2, dc formed), *{ch 2, sk 2 chs, dc in the next ch} rep from * to end, turn. (19 dcs, 36 chs)
Row 2. Ch 5 (counts as dc + ch 2 throughout), sk 2 chs, dc in the next dc, *{ch 2, sk 2 chs, dc in the next dc} rep from * to end, last dc will be in 3rd ch, turn. (19 dcs)
Rows 3-25. Rep Row 2. - Decrease
Row 26. Ch 5, sk all of the next: (2 chs, dc, 2 chs) and dc in the next dc, *{ch 2, sk 2 chs, dc in the next dc} rep from * until last 6 sts, then ch 2, sk all of the next: (2 chs, dc, 2 chs) and dc in the 3rd ch, turn. (17 dcs)
Rows 27-33. Rep Row 2. (17 dcs) Don’t finish off, continue on to the front panel below. - Front Panel:
Row 34. Ch 5, sk 2 chs, dc in the next dc, *{ch 2, sk 2 chs, dc in the next dc} rep from * 7X, turn. (9 dcs, 16 chs)
Row 35. Ch 5, sk all of the next: (2 chs, dc, 2 chs) and dc in the next dc, *{ch 2, sk 2 chs, dc in the next dc} rep from * 6X, last dc will be in 3rd ch, turn. (8 dcs, 14 chs) see photos above
Row 36. Ch 5, sk 2 chs, dc in the next dc, *{ch 2, sk 2 chs, dc in the next dc} rep from * across, last dc will be in 3rd ch, turn. (8 dcs, 14 chs) - Repeat:
Row 37. Rep Row 35.(7 dcs, 12 chs)
Row 38. Rep Row 36. (7 dcs, 12 chs)
Row 39. Rep Row 35. (6 dcs, 10 chs)
Row 40. Rep Row 36. (6 dcs, 10 chs)
Row 41. Ch 5, dc in the same dc, *{ch 2, sk 2 chs, dc in next dc} rep from * across, after last dc, ch 2 and dc in same, turn. (8 dcs, 14 chs) see photos above
Row 42. Ch 5, sk 2 chs, dc in the next dc, *{ch 2, sk 2 chs, dc in the next dc} rep from * across, turn. (8 dcs, 14 chs)
Rows 43-66. Rep last row.
Row 67. Ch 1, sc in the same and in each ch and dc across. (22)
Finish off. - Second Front Panel
First join the yarn with a sl st to the opposite side. You can see where, indicated by the black arrow, in the picture under “Increase-Decrease Photos.” Now repeat the Front Panel rows. When you’ve finished the second panel, continue down to “All Sizes” to finish.
This will actually make the second panel facing the “wrong side” but crochet mesh has such a similar appearance on both sides so it’s not noticeable.
**For Row 34 of the second panel the last dc (9th st) will share a space with the last st from the other panel-so there will be two stitches in the center, one from each panel. Continue down to “All Sizes” to finish. - Small:
Back Panel
Ch 62
Row 1. DC in 8th ch from your hook (dc, ch 2, dc formed), *{ch 2, sk 2 chs, dc in the next ch} rep from * to end, turn. (20 dc, 38chs)
Row 2. Ch 5 (counts as dc + ch 2 throughout), sk 2 chs, dc in the next dc, *{ch 2, sk 2 chs, dc in the next dc} rep from * to end, last dc will be in 3rd ch, turn. (20 dc)
Rows 3-25. Rep Row 2. - Decrease
Row 26. Ch 5, sk all of the next: (2 chs, dc, 2 chs) and dc in the next dc, *{ch 2, sk 2 chs, dc in the next dc} rep from * until last 6 sts, then ch 2, sk all of the next: (2 chs, dc, 2 chs) and dc in the 3rd ch, turn. (18 dcs)
Rows 27-34. Rep Row 2. (18 dcs)
Don’t finish off, continue on to the front panel below. - Front Panel:
Row 35. Ch 5, sk 2 chs, dc in the next dc, *{ch 2, sk 2 chs, dc in the next dc} rep from * 7X, turn. (9 dcs, 16 chs)
Row 36. Ch 5, sk all of the next: (2 chs, dc, 2 chs) and dc in the next dc, *{ch 2, sk 2 chs, dc in the next dc} rep from * 6X, last dc will be in 3rd ch, turn. (8 dcs, 14 chs) see photos above
Row 37. Ch 5, sk 2 chs, dc in the next dc, *{ch 2, sk 2 chs, dc in the next dc} rep from * across, last dc will be in 3rd ch, turn. (8 dcs, 14 chs) - Repeat:
Row 38. Rep Row 36. (7 dcs, 12 chs)
Row 39. Rep Row 37. (7 dcs, 12 chs)
Row 40. Rep Row 36. (6 dcs, 10 chs)
Row 41. Rep Row 37. (6 dcs, 10 chs) - Increase
Row 42. Ch 5, dc in the same dc, *{ch 2, sk 2 chs, dc in next dc} rep from * across, after last dc, ch 2 and dc in same, turn. (8 dcs, 14 chs) see photos above
Row 43. Ch 5, sk 2 chs, dc in the next dc, *{ch 2, sk 2 chs, dc in the next dc} rep from * across, turn. (8 dcs, 14 chs)
Row 44. Ch 5, dc in the same dc, *{ch 2, sk 2 chs, dc in the next dc} rep from * after last dc, ch 2 and dc in the same dc, turn. (10 dcs, 18 chs)
Row 45. Ch 5, sk 2 chs, dc in the next dc, *{ch 2, sk 2 chs, dc in the next dc} rep from * across, turn. (10 dcs, 18 chs)
Rows 46-68. Rep last row. (10 dcs, 18 chs)
Row 69. Ch 1, sc in the same and in each ch and dc across. (28)
Finish off. - Second Front Panel
First join the yarn with a sl st to the opposite side. You can see where, indicated by the black arrow, in the picture under “Increase-Decrease Photos.” Now repeat the Front Panel rows. When you’ve finished the second panel, continue down to “All Sizes” to finish.
This will actually make the second panel facing the “wrong side” but crochet mesh has such a similar appearance on both sides so it’s not noticeable. - Med:
Back Panel
Ch 68
Row 1. DC in 8th ch from your hook (dc, ch 2, dc formed), *{ch 2, sk 2 chs, dc in the next ch} rep from * to end, turn. (22 dcs, 42 chs)
Row 2. Ch 5 (counts as dc + ch 2 throughout), sk 2 chs, dc in the next dc, *{ch 2, sk 2 chs, dc in the next dc} rep from * to end, last dc will be in 3rd ch, turn.(22 dc)
Rows 3-25. Rep Row 2. - Decrease
Row 26. Ch 5, sk all of the next: (2 chs, dc, 2 chs) and dc in the next dc, *{ch 2, sk 2 chs, dc in the next dc} rep from * until last 6 sts, then ch 2, sk all of the next: (2 chs, dc, 2 chs) and dc in the 3rd ch, turn. (20 dcs)
Rows 27-34. Rep Row 2. (20 dcs)
Don’t finish off, continue on to the front panel below. - Front Panel:
Row 35. Ch 5, sk 2 chs, dc in the next dc, *{ch 2, sk 2 chs, dc in the next dc} rep from * 7X, turn. (9 dcs, 16 chs)
Row 36. Ch 5, sk all of the next: (2 chs, dc, 2 chs) and dc in the next dc, *{ch 2, sk 2 chs, dc in the next dc} rep from * 6X, last dc will be in 3rd ch, turn. (8 dcs, 14 chs) see photos above
Row 37. Ch 5, sk 2 chs, dc in the next dc, *{ch 2, sk 2 chs, dc in the next dc} rep from * across, last dc will be in 3rd ch, turn. (8 dcs, 14 chs) - Repeat:
Row 38. Rep Row 36. (7 dcs, 12 chs)
Row 39. Rep Row 37. (7 dcs, 12 chs)
Row 40. Rep Row 36. (6 dcs, 10 chs)
Row 41. Rep Row 37. (6 dcs, 10 chs) - Increase
Row 42. Ch 5, dc in the same dc, *{ch 2, sk 2 chs, dc in next dc} rep from * across, after last dc, ch 2 and dc in same, turn. (8 dcs, 14 chs) see photos above
Row 43. Ch 5, sk 2 chs, dc in the next dc, *{ch 2, sk 2 chs, dc in the next dc} rep from * across, turn. (8 dcs, 14 chs)
Row 44. Ch 5, dc in the same dc, *{ch 2, sk 2 chs, dc in the next dc} rep from * after last dc, ch 2 and dc in the same dc, turn. (10 dcs, 18 chs)
Row 45. Ch 5, sk 2 chs, dc in the next dc, *{ch 2, sk 2 chs, dc in the next dc} rep from * across, turn. (10 dcs, 18 chs)
Row 46. Ch 5, dc in the same dc, *{ch 2, sk 2 chs, dc in next dc} rep from * across, after last dc, ch 2 and dc in same, turn. (12 dcs, 22 chs)
Row 47. Ch 5, sk 2 chs, dc in the next dc, *{ch 2, sk 2 chs, dc in the next dc} rep from * across, turn.
Rows 48-68. Rep last row. (12 dcs, 22 chs)
Row 69. Ch 1, sc in the same and in ea ch and dc across. (34)
Finish off. - Second Front Panel
First join the yarn with a sl st to the opposite side. You can see where, indicated by the black arrow, in the picture under “Increase-Decrease Photos.” Now repeat the Front Panel rows. When you’ve finished the second panel, continue down to “All Sizes” to finish.
This will actually make the second panel facing the “wrong side” but crochet mesh has such a similar appearance on both sides so it’s not noticeable. - Large:
Back Panel
Ch 74
Row 1. DC in 8th ch from your hook (dc, ch 2, dc formed), *{ch 2, sk 2 chs, dc in the next ch} rep from * to end, turn. (24 dcs, 46 chs)
Row 2. Ch 5 (counts as dc + ch 2 throughout), sk 2 chs, dc in the next dc, *{ch 2, sk 2 chs, dc in the next dc} rep from * to end, last dc will be in 3rd ch, turn.(24 dc)
Rows 3-25. Rep Row 2. - Decrease
Row 26. Ch 5, sk all of the next: (2 chs, dc, 2 chs) and dc in the next dc, *{ch 2, sk 2 chs, dc in the next dc} rep from * until last 6 sts, then ch 2, sk all of the next: (2 chs, dc, 2 chs) and dc in the 3rd ch, turn. (22 dcs)
Row 27. Ch 5, sk 2 chs, dc in the next dc, *{ch 2, sk 2 chs, dc in the next dc} rep from * to end, the last dc will be in the 3rd ch, turn. (22 dcs)
Row 28. Rep Row 26. (20 dcs)
Row 29. Rep Row 27. (20 dcs)
Rows 30-35. Rep last row. (20 dcs) Don’t finish off, continue on to the front panel below. - Front Panel:
Row 36. Ch 5, sk 2 chs, dc in the next dc, *{ch 2, sk 2 chs, dc in the next dc} rep from * 7X, turn. (9 dcs, 16 chs)
Row 37. Ch 5, sk all of the next: (2 chs, dc, 2 chs) and dc in the next dc, *{ch 2, sk 2 chs, dc in the next dc} rep from * 6X, last dc will be in 3rd ch, turn. (8 dcs, 14 chs) see photos above
Row 38. Ch 5, sk 2 chs, dc in the next dc, *{ch 2, sk 2 chs, dc in the next dc} rep from * across, last dc will be in 3rd ch, turn. (8 dcs, 14 chs) - Repeat:
Row 39. Rep Row 37. (7 dcs, 12 chs)
Row 40. Rep Row 38. (7 dcs, 12 chs)
Row 41. Rep Row 37. (6 dcs, 10 chs)
Row 42. Rep Row 38. (6 dcs, 10 chs) - Increase
Row 43. Ch 5, dc in the same dc, *{ch 2, sk 2 chs, dc in next dc} rep from * across, after last dc, ch 2 and dc in same, turn. (8 dcs, 14 chs) see photos above
Row 44. Ch5, sk2 chs, dc in the next dc,*{ch2, sk2 chs, dc in the next dc} rep from * across, turn. (8 dcs, 14 chs)
Row 45. Ch 5, dc in the same dc, *{ch 2, sk 2 chs, dc in the next dc} rep from * after last dc, ch 2 and dc in the same dc, turn. (10 dcs, 18 chs)
Row 46. Ch 5,sk 2 chs,dc in the next dc,*{ch 2, sk2 chs, dc in the next dc} rep from *across, turn. (10 dcs, 18 chs)
Row 47. Ch 5, dc in the same dc, *{ch 2, sk 2 chs, dc in next dc} rep from * across, after last dc, ch 2 and dc in same, turn. (12 dcs, 22 chs)
Row 48. Ch 5, sk 2 chs, dc in the next dc, *{ch 2, sk 2 chs, dc in the next dc} rep from * across, turn. (12 dcs, 22 chs)
Row 49. Ch 5, dc in the same dc, *{ch 2, sk 2 chs, dc in next dc} rep from * across, after last dc, ch 2 and dc in same, turn. (14 dcs, 26 chs)
Row 50. Ch 5, sk 2 chs, dc in the next dc, *{ch 2, sk 2 chs, dc in the next dc} rep from * across, turn. (14 dcs, 26 chs)
Rows 51-70. Rep last row. (14 dcs, 26 chs)
Row 71. Ch 1, sc in the same and in each ch and dc across. (40)
Finish off. - Second Front Panel
First join the yarn with a sl st to the opposite side. You can see where, indicated by the black arrow, in the picture under “Increase-Decrease Photos.” Now repeat the Front Panel rows. When you’ve finished the second panel, continue down to “All Sizes” to finish.
This will actually make the second panel facing the “wrong side” but crochet mesh has such a similar appearance on both sides so it’s not noticeable. - X-Large:
Back Panel
Ch 83
Row 1. DC in 8th ch from your hook (dc, ch 2, dc formed), *{ch 2, sk 2 chs, dc in the next ch} rep from * to end, turn. (27 dc, 52 chs)
Row 2. Ch 5 (counts as dc + ch 2 throughout), sk 2 chs, dc in the next dc, *{ch 2, sk 2 chs, dc in the next dc} rep from * to end, last dc will be in 3rd ch, turn.(27 dc)
Rows 3-25. Rep Row 2. - Decrease
Row 26. Ch 5, sk all of the next: (2 chs, dc, 2 chs) and dc in the next dc, *{ch 2, sk 2 chs, dc in the next dc} rep from * until last 6 sts, then ch 2, sk all of the next: (2 chs, dc, 2 chs) and dc in the 3rd ch, turn. (25 dcs)
Row 27. Ch 5, sk 2 chs, dc in the next dc, *{ch 2, sk 2 chs, dc in the next dc} rep from * to end, the last dc will be in the 3rd ch, turn. (25 dcs)
Row 28. Rep Row 26. (23 dcs)
Row 29. Rep Row 27. (23 dcs)
Rows 30-35. Rep last row. (23 dcs)
Don’t finish off, continue on to the front panel below. - Front Panel:
Row 36. Ch 5, sk 2 chs, dc in the next dc, *{ch 2, sk 2 chs, dc in the next dc} rep from * 7X, turn. (9 dcs, 16 chs)
Row 37. Ch 5, sk all of the next: (2 chs, dc, 2 chs) and dc in the next dc, *{ch 2, sk 2 chs, dc in the next dc} rep from * 6X, last dc will be in 3rd ch, turn. (8 dcs, 14 chs) see photos above
Row 38. Ch 5, sk 2 chs, dc in the next dc, *{ch 2, sk 2 chs, dc in the next dc} rep from * across, last dc will be in 3rd ch, turn. (8 dcs, 14 chs) - Repeat:
Row 39. Rep Row 37. (7 dcs, 12 chs)
Row 40. Rep Row 38. (7 dcs, 12 chs)
Row 41. Rep Row 37. (6 dcs, 10 chs)
Row 42. Rep Row 38. (6 dcs, 10 chs) - Increase
Row 43. Ch 5, dc in the same dc, *{ch 2, sk 2 chs, dc in next dc} rep from * across, after last dc, ch 2 and dc in same, turn. (8 dcs, 14 chs)
Row 44. Ch 5, sk 2 chs, dc in the next dc, *{ch 2, sk 2 chs, dc in the next dc} rep from * across, turn. (8 dcs, 14 chs) see photos above
Row 45. Ch 5, dc in the same dc, *{ch 2, sk 2 chs, dc in the next dc} rep from * after last dc, ch 2 and dc in the same dc, turn. (10 dcs, 18 chs)
Row 46. Ch 5, sk 2 chs, dc in the next dc, *{ch 2, sk 2 chs, dc in the next dc} rep from * across, turn. (10 dcs, 18 chs)
Row 47. Ch 5, dc in the same dc, *{ch 2, sk 2 chs, dc in next dc} rep from * across, after last dc, ch 2 and dc in same, turn. (12 dcs, 22 chs)
Row 48. Ch 5, sk 2 chs, dc in the next dc, *{ch 2, sk 2 chs, dc in the next dc} rep from * across, turn (12 dcs, 22 chs)
Row 49. Ch 5, dc in the same dc, *{ch 2, sk 2 chs, dc in next dc} rep from * across, after last dc, ch 2 and dc in same, turn. (14 dcs, 26 chs)
Row 50. Ch 5, sk 2 chs, dc in the next dc, *{ch 2, sk 2 chs, dc in the next dc} rep from * across, turn. (14 dcs, 26 chs)
Row 51. Ch 5, dc in the same dc, *{ch 2, sk 2 chs, dc in next dc} rep from * across, after last dc, ch 2 and dc in same, turn. (16 dcs, 30 chs)
Row 52. Ch 5, sk 2 chs, dc in the next dc, *{ch 2, sk 2 chs, dc in the next dc} rep from * across, turn. (16 dcs, 30 chs)
Rows 53-70. Rep last row. (16 dcs, 30 chs)
Row 71. Ch 1, sc in the same and in each ch and dc across. (46)
Finish off. - Second Front Panel
First join the yarn with a sl st to the opposite side. You can see where, indicated by the black arrow, in the picture under “Increase-Decrease Photos.” Now repeat the Front Panel rows. When you’ve finished the second panel, continue down to “All Sizes” to finish.
This will actually make the second panel facing the “wrong side” but crochet mesh has such a similar appearance on both sides so it’s not noticeable.
2X:
Back Panel
Ch 89
Row 1. DC in 8th ch from your hook (dc, ch 2, dc formed), *{ch 2, sk 2 chs, dc in the next ch} rep from * to end, turn. (29 dcs, 54 chs)
Row 2. Ch 5 (counts as dc + ch 2 throughout), sk 2 chs, dc in the next dc, *{ch 2, sk 2 chs, dc in the next dc} rep from * to end, last dc will be in 3rd ch, turn.(29 dc)
Rows 3-25. Rep Row 2.- Decrease
Row 26. Ch 5, sk all of the next: (2 chs, dc, 2 chs) and dc in the next dc, *{ch 2, sk 2 chs, dc in the next dc} rep from * until last 6 sts, then ch 2, sk all of the next: (2 chs, dc, 2 chs) and dc in the 3rd ch, turn. (27 dcs)
Row 27. Ch 5, sk 2 chs, dc in the next dc, *{ch 2, sk 2 chs, dc in the next dc} rep from * to end, the last dc will be in the 3rd ch, turn. (27 dcs)
Row 28. Rep Row 26. (25 dcs)
Row 29. Rep Row 27. (25 dcs)
Row 30. Rep Row 26. (23 dcs)
Row 31. Rep Row 27. (23 dcs)
Rows 32-38. Rep last row. (23 dcs) Don’t finish off, continue on to the front panel below. - Front Panel:
Row 39. Ch 5, sk 2 chs, dc in the next dc, *{ch 2, sk 2 chs, dc in the next dc} rep from * 7X, turn. (9 dcs, 16 chs)
Row 40. Ch 5, sk all of the next: (2 chs, dc, 2 chs) and dc in the next dc, *{ch 2, sk 2 chs, dc in the next dc} rep from * 6X, last dc will be in 3rd ch, turn. (8 dcs, 14 chs) see photos above
Row 41. Ch 5, sk 2 chs, dc in the next dc, *{ch 2, sk 2 chs, dc in the next dc} rep from * across, last dc will be in 3rd ch, turn. (8 dcs, 14 chs) - Repeat:
Row 42. Rep Row 38. (7 dcs, 12 chs)
Row 43. Rep Row 39. (7 dcs, 12 chs)
Row 44. Rep Row 38. (6 dcs, 10 chs)
Row 45. Rep Row 39. (6 dcs, 10 chs) - Increase
Row 46. Ch 5, dc in the same dc, *{ch 2, sk 2 chs, dc in next dc} rep from * across, after last dc, ch 2 and dc in same, turn. (8 dcs, 14 chs) see photos above
Row 47. Ch 5, sk 2 chs, dc in the next dc, *{ch 2, sk 2 chs, dc in the next dc} rep from * across, turn. (8 dcs, 14 chs)
Row 48. Ch 5, dc in the same dc, *{ch 2, sk 2 chs, dc in the next dc} rep from * after last dc, ch 2 and dc in the same dc, turn. (10 dcs, 18 chs)
Row 49. Ch 5, sk 2 chs, dc in the next dc, *{ch 2, sk 2 chs, dc in the next dc} rep from * across, turn. (10 dcs, 18 chs)
Row 50. Ch 5, dc in the same dc, *{ch 2, sk 2 chs, dc in next dc} rep from * across, after last dc, ch 2 and dc in same, turn. (12 dcs, 22 chs)
Row 51. Ch 5, sk 2 chs, dc in the next dc, *{ch 2, sk 2 chs, dc in the next dc} rep from * across, turn (12 dcs, 22 chs)
Row 52. Ch 5, dc in the same dc, *{ch 2, sk 2 chs, dc in next dc} rep from * across, after last dc, ch 2 and dc in same, turn. (14 dcs. 26 chs)
Row 53. Ch 5, sk 2 chs, dc in the next dc, *{ch 2, sk 2 chs, dc in the next dc} rep from * across, turn. (14 dcs, 26 chs)
Row 54. Ch 5, dc in the same dc, *{ch 2, sk 2 chs, dc in next dc} rep from * across, after last dc, ch 2 and dc in same, turn. (16 dcs, 30 chs)
Row 55. Ch 5, sk 2 chs, dc in the next dc, *{ch 2, sk 2 chs, dc in the next dc} rep from * across, turn. (16 dcs, 30 chs)
Row 56. Ch 5, dc in the same dc, *{ch 2, sk 2 chs, dc in next dc} rep from * across, after last dc, ch 2 and dc in same, turn. (18 dcs, 34 chs)
Row 57. Ch 5, sk 2 chs, dc in the next dc, *{ch 2, sk 2 chs, dc in the next dc} rep from * across, turn. (18 dcs, 34 chs)
Rows 58-77. Rep last row.
Row 78. Ch 1, sc in the same and in each ch and dc across. (52)
Finish off. - Second Front Panel
First join the yarn with a sl st to the opposite side. You can see where, indicated by the black arrow, in the picture under “Increase-Decrease Photos.” Now repeat the Front Panel rows. When you’ve finished the second panel, continue down to “All Sizes” to finish.
This will actually make the second panel facing the “wrong side” but crochet mesh has such a similar appearance on both sides so it’s not noticeable. - 3X:
Back Panel
Ch 92
Row 1. DC in 8th ch from your hook (dc, ch 2, dc formed), *{ch 2, sk 2 chs, dc in the next ch} rep from * to end, turn. (30 dcs, 58 chs)
Row 2. Ch 5 (counts as dc + ch 2 throughout), sk 2 chs, dc in the next dc, *{ch 2, sk 2 chs, dc in the next dc} rep from * to end, last dc will be in 3rd ch, turn.(30 dc)
Rows 3-25. Rep Row 2. - Shoulder Decrease
Row 26. Ch 5, sk all of the next: (2 chs, dc, 2 chs) and dc in the next dc, *{ch 2, sk 2 chs, dc in the next dc} rep from * until last 6 sts, then ch 2, sk all of the next: (2 chs, dc, 2 chs) and dc in the 3rd ch, turn. (28 dcs)
Row 27. Ch 5, sk 2 chs, dc in the next dc, *{ch 2, sk 2 chs, dc in the next dc} rep from * to end, the last dc will be in the 3rd ch, turn. (28 dcs) - Repeat:
Row 28. Rep Row 26. (26 dcs)
Row 29. Rep Row 27. (26 dcs)
Row 30. Rep Row 26. (24 dcs)
Row 31. Rep Row 27. (24 dcs)
Row 32. Rep Row 26. (22 dcs)
Row 33. Rep Row 27. (22 dcs)
Rows 34-38. Rep last row. (22 dcs) Don’t finish off, continue on to the front panel below. - Front Panel:
Row 39. Ch 5, sk 2 chs, dc in the next dc, *{ch 2, sk 2 chs, dc in the next dc} rep from * 7X, turn. (9 dcs, 16 chs)
Row 40. Ch 5, sk all of the next: (2 chs, dc, 2 chs) and dc in the next dc, *{ch 2, sk 2 chs, dc in the next dc} rep from * 6X, last dc will be in 3rd ch, turn. (8 dcs, 14 chs) see photos above
Row 41. Ch 5, sk 2 chs, dc in the next dc, *{ch 2, sk 2 chs, dc in the next dc} rep from * across, last dc will be in 3rd ch, turn. (8 dcs, 14 chs) - Repeat:
Row 42. Rep Row 38. (7 dcs, 12 chs)
Row 43. Rep Row 39. (7 dcs, 12 chs)
Row 44. Rep Row 38. (6 dcs, 10 chs)
Row 45. Rep Row 39. (6 dcs, 10 chs) - Increase
Row 46. Ch 5, dc in the same dc, *{ch 2, sk 2 chs, dc in next dc} rep from * across, after last dc, ch 2 and dc in same, turn. (8 dcs, 14 chs) see photos above
Row 47. Ch 5, sk 2 chs, dc in the next dc, *{ch 2, sk 2 chs, dc in the next dc} rep from * across, turn. (8 dcs, 14 chs)
Row 48. Ch 5, dc in the same dc, *{ch 2, sk 2 chs, dc in the next dc} rep from * after last dc, ch 2 and dc in the same dc, turn. (10 dcs, 18 chs)
Row 49. Ch 5, sk 2 chs, dc in the next dc, *{ch 2, sk 2 chs, dc in the next dc} rep from * across, turn. (10 dcs, 18 chs)
Row 50. Ch 5, dc in the same dc, *{ch 2, sk 2 chs, dc in next dc} rep from * across, after last dc, ch 2 and dc in same, turn. (12 dcs, 22 chs)
Row 51. Ch 5, sk 2 chs, dc in the next dc, *{ch 2, sk 2 chs, dc in the next dc} rep from * across, turn (12 dcs, 22 chs)
Row 52. Ch 5, dc in the same dc, *{ch 2, sk 2 chs, dc in next dc} rep from * across, after last dc, ch 2 and dc in same, turn. (14 dcs, 26 chs)
Row 53. Ch 5, sk 2 chs, dc in the next dc, *{ch 2, sk 2 chs, dc in the next dc} rep from * across, turn. (14 dcs, 26 chs)
Row 54. Ch 5, dc in the same dc, *{ch 2, sk 2 chs, dc in next dc} rep from * across, after last dc, ch 2 and dc in same, turn. (16 dcs, 30 chs)
Row 55. Ch 5, sk 2 chs, dc in the next dc, *{ch 2, sk 2 chs, dc in the next dc} rep from * across, turn. (16 dcs, 30 chs)
Row 56. Ch 5, dc in the same dc, *{ch 2, sk 2 chs, dc in next dc} rep from * across, after last dc, ch 2 and dc in same, turn. (18 dcs, 34 chs)
Row 57. Ch 5, sk 2 chs, dc in the next dc, *{ch 2, sk 2 chs, dc in the next dc} rep from * across, turn. (18 dcs, 34 chs)
Row 58. Ch 5, dc in the same dc, *{ch 2, sk 2 chs, dc in next dc} rep from * across, after last dc, ch 2 and dc in same, turn. (20 dcs, 38 chs)
Row 59. Ch 5, sk 2 chs, dc in the next dc, *{ch 2, sk 2 chs, dc in the next dc} rep from * across, turn. (20 dcs, 38 chs)
Rows 60-77. Rep last row.
Row 78. Ch 1, sc in the same and in each ch and dc across. (58)
Finish off.
Second Front Panel
First join the yarn with a sl st to the opposite side. You can see where, indicated by the black arrow, in the picture under “Increase-Decrease Photos.” Now repeat the Front Panel rows. When you’ve finished the second panel, continue down to “All Sizes” to finish.
This will actually make the second panel facing the “wrong side” but crochet mesh has such a similar appearance on both sides so it’s not noticeable.
4X Back Panel
Ch 116
Row 1. DC in 8th ch from your hook (dc, ch 2, dc formed), *{ch 2, sk 2 chs, dc in the next ch} rep from * to end, turn. (112 sts)
Row 2. Ch 5 (counts as dc + ch 2 throughout), sk 2 chs, dc in the next dc, *{ch 2, sk 2 chs, dc in the next dc} rep from * to end, last dc will be in 3rd ch, turn. (112 sts)
Rows 3-27. Rep Row 2.
4X Upper Back Decrease
Row 28. Ch 5, sk all of the next: (2 chs, dc, 2 chs) and dc in the next dc, *{ch 2, sk 2 chs, dc in the next dc} rep from * until last 6 sts, then ch 2, sk all of the next: (2 chs, dc, 2 chs) and dc in the 3rd ch, turn. (106 sts) -6 sts
Row 29. Ch 5, sk 2 chs, dc in the next dc, *{ch 2, sk 2 chs, dc in the next dc} rep from * to end, the last dc will be in the 3rd ch, turn. (106 sts)
Row 30. Rep Row 28. (100 sts) -6 sts
Row 31. Rep Row 29. (100 sts)
Row 32. Rep Row 28. (94 sts) -6 sts
Row 33. Rep Row 29. (94 sts)
Row 34. Rep Row 28. (88 sts) -6 sts
Row 35. Rep Row 29. (88 sts)
Rows 36-40. Rep last row. (88 sts) Don’t finish off, continue on to the front panel below.
4X Front Panel / Shoulder
Here you will only work 28 of the sts for the first shoulder, and then come back and repeat again for the other shoulder.
Row 41. Ch 5, sk 2 chs, dc in the next dc, *{ch 2, sk 2 chs, dc in the next dc} rep from * 8X, turn. (28 sts)
Row 42. Ch 5, sk all of the next: (2 chs, dc, 2 chs) and dc in the next dc, *{ch 2, sk 2 chs, dc in the next dc} rep from * across, last dc will be in 3rd ch, turn. (25 sts) see photos above
Row 43. Ch 5, sk 2 chs, dc in the next dc, *{ch 2, sk 2 chs, dc in the next dc} rep from * across, last dc will be in 3rd ch, turn. (25 sts)
Row 44. Rep Row 42. (22 sts)
Row 45. Rep Row 43. (22 sts)
Row 46. Rep Row 42. (19 sts)
Row 47. Rep Row 43. (19 sts)
4X Front Increase
Row 48. Ch 5, dc in the same dc, *{ch 2, sk 2 chs, dc in next dc} rep from * across, after last dc, ch 2 and dc in same, turn. (25 sts) see photos above
Row 49. Ch 5, sk 2 chs, dc in the next dc, *{ch 2, sk 2 chs, dc in the next dc} rep from * across, turn. (25 sts)
Row 50. Ch 5, dc in the same dc, *{ch 2, sk 2 chs, dc in the next dc} rep from * after last dc, ch 2 and dc in the same dc, turn. (31 sts)
Row 51. Ch 5, sk 2 chs, dc in the next dc, *{ch 2, sk 2 chs, dc in the next dc} rep from * across, turn. (31 sts)
Row 52. Ch 5, dc in the same dc, *{ch 2, sk 2 chs, dc in next dc} rep from * across, after last dc, ch 2 and dc in same, turn. (37 sts)
Row 53. Ch 5, sk 2 chs, dc in the next dc, *{ch 2, sk 2 chs, dc in the next dc} rep from * across, turn (37 sts)
Row 54. Ch 5, dc in the same dc, *{ch 2, sk 2 chs, dc in next dc} rep from * across, after last dc, ch 2 and dc in same, turn. (43 sts)
Row 55. Ch 5, sk 2 chs, dc in the next dc, *{ch 2, sk 2 chs, dc in the next dc} rep from * across, turn. (43 sts)
Row 56. Ch 5, dc in the same dc, *{ch 2, sk 2 chs, dc in next dc} rep from * across, after last dc, ch 2 and dc in same, turn. (49 sts)
Row 57. Ch 5, sk 2 chs, dc in the next dc, *{ch 2, sk 2 chs, dc in the next dc} rep from * across, turn. (49 sts)
Row 58. Ch 5, dc in the same dc, *{ch 2, sk 2 chs, dc in next dc} rep from * across, after last dc, ch 2 and dc in same, turn. (55 sts
) Row 59. Ch 5, sk 2 chs, dc in the next dc, *{ch 2, sk 2 chs, dc in the next dc} rep from * across, turn. (55 sts)
Row 60. Ch 5, dc in the same dc, *{ch 2, sk 2 chs, dc in next dc} rep from * across, after last dc, ch 2 and dc in same, turn. (61 sts)
Row 61. Ch 5, sk 2 chs, dc in the next dc, *{ch 2, sk 2 chs, dc in the next dc} rep from * across, turn. (61 sts)
Rows 62-79. Rep last row.
Row 80. Ch 1, sc in the same and in each ch and dc across. (61 sts)
Finish off.
4X Second Front Panel
First join the yarn with a sl st to the opposite side. You can see where, indicated by the black arrow, in the picture under “Increase-Decrease Photos.” Now repeat the Front Panel rows. When you’ve finished the second panel, continue down to “All Sizes” to finish.
This will actually make the second panel facing the “wrong side” but crochet mesh has such a similar appearance on both sides so it’s not noticeable.
5X Back Panel
Ch 125
Row 1. DC in 8th ch from your hook (dc, ch 2, dc formed), *{ch 2, sk 2 chs, dc in the next ch} rep from * to end, turn. (121 sts)
Row 2. Ch 5 (counts as dc + ch 2 throughout), sk 2 chs, dc in the next dc, *{ch 2, sk 2 chs, dc in the next dc} rep from * to end, last dc will be in 3rd ch, turn. (121 sts)
Rows 3-27. Rep Row 2.
5X Upper Back Decrease
Row 28. Ch 5, sk all of the next: (2 chs, dc, 2 chs) and dc in the next dc, *{ch 2, sk 2 chs, dc in the next dc} rep from * until last 6 sts, then ch 2, sk all of the next: (2 chs, dc, 2 chs) and dc in the 3rd ch, turn. (115 sts) -6 sts
Row 29. Ch 5, sk 2 chs, dc in the next dc, *{ch 2, sk 2 chs, dc in the next dc} rep from * to end, the last dc will be in the 3rd ch, turn. (115 sts)
Row 30. Rep Row 28. (109 sts) -6 sts
Row 31. Rep Row 29. (109 sts)
Row 32. Rep Row 28. (103 sts) -6 sts
Row 33. Rep Row 29. (103 sts)
Row 34. Rep Row 28. (97 sts) -6 sts
Row 35. Rep Row 29. (97 sts)
Rows 36-40. Rep last row. (97 sts) Don’t finish off, continue on to the front panel below.
5X Front Panel / Shoulder
Here you will only work 28 of the sts for the first shoulder, and then come back and repeat again for the other shoulder.
Row 41. Ch 5, sk 2 chs, dc in the next dc, *{ch 2, sk 2 chs, dc in the next dc} rep from * 8X, turn. (28 sts)
Row 42. Ch 5, sk all of the next: (2 chs, dc, 2 chs) and dc in the next dc, *{ch 2, sk 2 chs, dc in the next dc} rep from * across, last dc will be in 3rd ch, turn. (25 sts) see photos above
Row 43. Ch 5, sk 2 chs, dc in the next dc, *{ch 2, sk 2 chs, dc in the next dc} rep from * across, last dc will be in 3rd ch, turn. (25 sts)
Row 44. Rep Row 42. (22 sts) -3 sts
Row 45. Rep Row 43. (22 sts)
Row 46. Rep Row 42. (19 sts) -3 sts
Row 47. Rep Row 43. (19 sts)
5X Front Increase
Row 48. Ch 5, dc in the same dc, *{ch 2, sk 2 chs, dc in next dc} rep from * across, after last dc, ch 2 and dc in same, turn. (25 sts) see photos above +6 sts
Row 49. Ch 5, sk 2 chs, dc in the next dc, *{ch 2, sk 2 chs, dc in the next dc} rep from * across, turn. (25 sts)
Row 50. Ch 5, dc in the same dc, *{ch 2, sk 2 chs, dc in the next dc} rep from * after last dc, ch 2 and dc in the same dc, turn. (31 sts)
Row 51. Ch 5, sk 2 chs, dc in the next dc, *{ch 2, sk 2 chs, dc in the next dc} rep from * across, turn. (31 sts)
Row 52. Ch 5, dc in the same dc, *{ch 2, sk 2 chs, dc in next dc} rep from * across, after last dc, ch 2 and dc in same, turn. (37 sts)
Row 53. Ch 5, sk 2 chs, dc in the next dc, *{ch 2, sk 2 chs, dc in the next dc} rep from * across, turn (37 sts)
Row 54. Ch 5, dc in the same dc, *{ch 2, sk 2 chs, dc in next dc} rep from * across, after last dc, ch 2 and dc in same, turn. (43 sts)
Row 55. Ch 5, sk 2 chs, dc in the next dc, *{ch 2, sk 2 chs, dc in the next dc} rep from * across, turn. (43 sts)
Row 56. Ch 5, dc in the same dc, *{ch 2, sk 2 chs, dc in next dc} rep from * across, after last dc, ch 2 and dc in same, turn. (49 sts)
Row 57. Ch 5, sk 2 chs, dc in the next dc, *{ch 2, sk 2 chs, dc in the next dc} rep from * across, turn. (49 sts)
Row 58. Ch 5, dc in the same dc, *{ch 2, sk 2 chs, dc in next dc} rep from * across, after last dc, ch 2 and dc in same, turn. (55 sts)
Row 59. Ch 5, sk 2 chs, dc in the next dc, *{ch 2, sk 2 chs, dc in the next dc} rep from * across, turn. (55 sts
) Row 60. Ch 5, dc in the same dc, *{ch 2, sk 2 chs, dc in next dc} rep from * across, after last dc, ch 2 and dc in same, turn. (61 sts)
Row 61. Ch 5, sk 2 chs, dc in the next dc, *{ch 2, sk 2 chs, dc in the next dc} rep from * across, turn. (61 sts)
Rows 62-79. Rep last row.
Row 80. Ch 1, sc in the same and in each ch and dc across. (61 sts)
Finish off.
5X Second Front Panel
First join the yarn with a sl st to the opposite side. You can see where, indicated by the black arrow, in the picture under “Increase-Decrease Photos.” Now repeat the Front Panel rows. When you’ve finished the second panel, continue down to “All Sizes” to finish. This will actually make the second panel facing the “wrong side” but crochet mesh has such a similar appearance on both sides so it’s not noticeable
All Sizes:
- Now attach yarn with sl st to the bottom right corner of the back panel when laid in front of you. Then Ch 1 and sc in the same st. Continue to sc in each dc and in each ch across. Don’t cut yarn, next continue to the sides below:

- Sides:
Step 1. Ch 5, picot, ch 5, sl st to first row of front panel. (lined up with the same row of back panel)
Step 2. Sl st up three rows, ch 5, picot, ch 5, sl st to same row on back panel.
Step 3. Sl st up three rows, ch 5, picot, ch 5, sl st to same row on front panel.
Step 4. Rep steps 2 and 3 until you’ve reached Row 21 of the back panel. (8 ch 5-picot-ch 5s) Continue to sc around the armhole, sl st and finish off.
Repeat for the other side. - Finishing Your Maglia Crochet Mesh Vest
Sc around the inside neck/front panels.
To add fringe cut about 6” pieces of yarn-2 per ch 2 space is what I used on the teal vest-and loop it through each ch spc around the bottom.
For the grey vest I cut 4-13” pieces per ch sp for the double knot fringe.
Recommended Products
As an Amazon Associate and member of other affiliate programs, I earn from qualifying purchases.
I wish I would have tested this pattern, it is COOL!!
Thank you, me too ?
Is this pattern free somewhere. I started it last year & want to finish but can’t find the written pattern that was free when I started it.
Hi Lynda,
Thanks for asking. It seems most of the pattern disappeared. I’ve put it back to right again. Sorry about that, and thanks for letting me know.
Would this work in cotton fingering yarn? I have quite a bit that was gifted to me and I’d like to make up a very light long vest to go over a long plain dress.
It’s possible that you could make it work, but fingering weight yarn is significantly thinner than the #4 medium yarn this pattern is written for. You’d have to work a gauge swatch to compare, and possibly go up several sizes in the pattern.