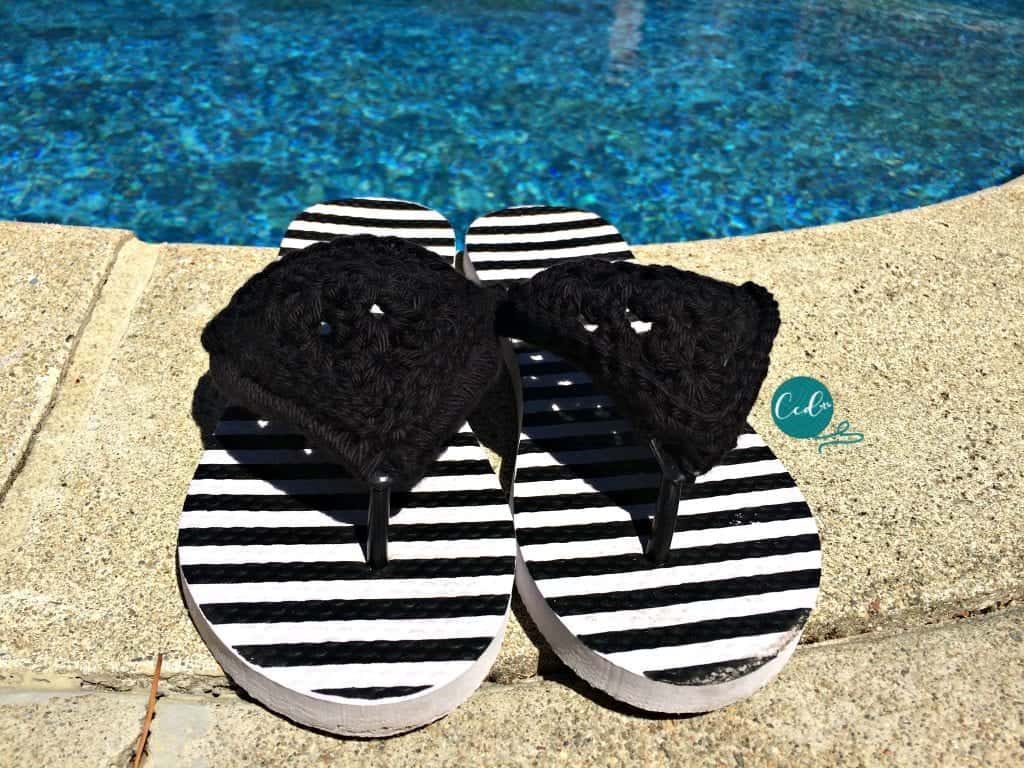
Crochet Sandals From a Simple Granny Triangle
Add a unique crochet granny triangle to a basic pair of plastic sandals with this easy tutorial. Crochet around the straps in cotton yarn for an even more comfortable Summer sandal.
To create these crochet sandals, I snagged a cheapie pair of flip flops from HEB, one of my favorite Texas grocery stores. They only cost $2!
My niece mentioned that she needed new flip flops. She’s also learning to crochet so I knew she would appreciate a pair of crochet sandals.
This post contains affiliate links, I may earn a fee. Read more disclosure policy.
You can purchase the ad-free, well formatted PDF Pattern in one of my shops. Scroll down for the free pattern!
She was so excited to wear them that she couldn’t wait for me to finish them. She wore one plain and one finished, haha. I wish everyone showed such excitement for handmade gifts.
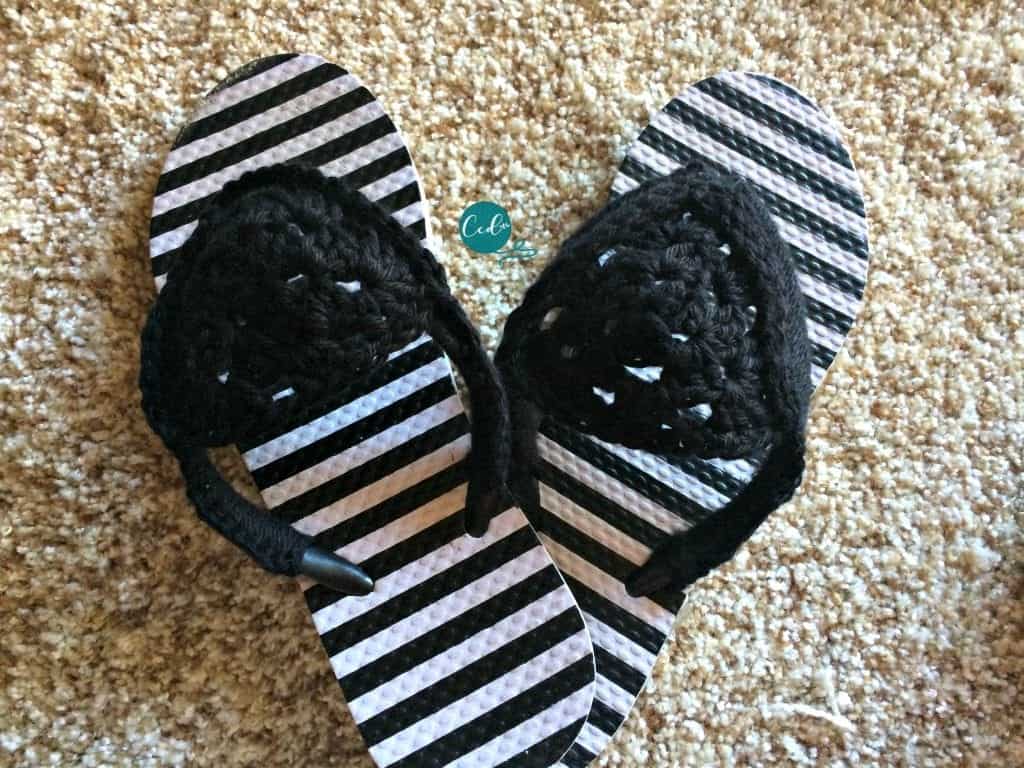
This is a great beginner pattern if you’re new to crochet. It’s a basic granny triangle attached with single crochet stitches to a pair of flip flops. Easy peasy for everyone, read on for the full tutorial.
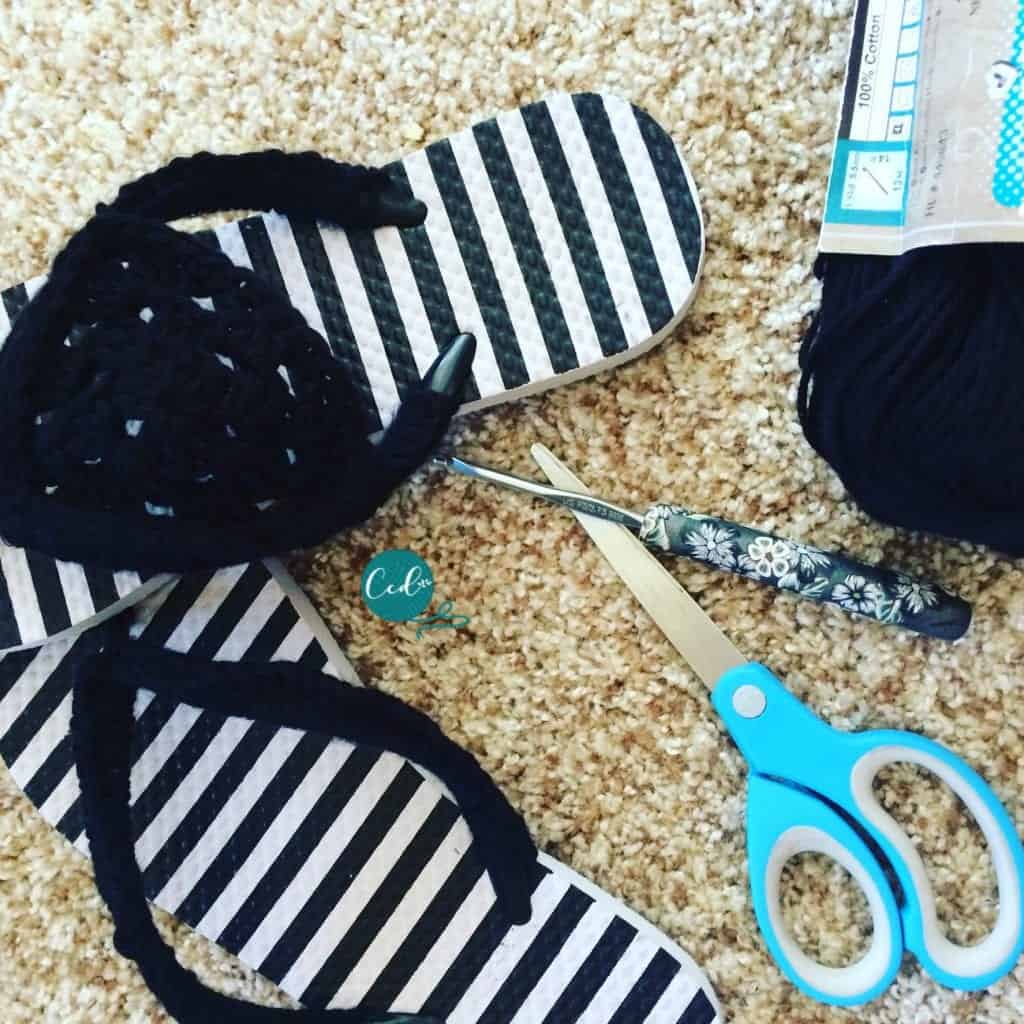
Materials
- 20 yd (18 m) #4 medium worsted weight yarn, pictured in I Love This Yarn Cotton* (97% Cotton & 3% Metallic Polyester, 180 yd / 3.5 oz) in shade black: 1 skein.
- 3.75 mm US Size F hook,* or hook size to meet gauge.
- Flip flops*
- Yarn needle, scissors, measuring tape.
Gauge
6 dc x 2 rows dc = 1” x 1” (2.5 cm x 2.5 cm)
Skill Level
Easy
Finished Size
4” wide, it is easy to adjust by continuing the granny triangle pattern.

Stitches/Abbreviations
(US Terms)
Ch – chain
DC – double crochet
Rnd – round
SC – single crochet
sl st – slip stitch
Finish off – cut yarn and weave in
Pattern Notes
- The granny triangle is worked in the round so you will join with a slip stitch and continue in the same direction.
- To start a round you will use a ch 3, which counts as the first double crochet stitch. I love using a ch 3 alternative for these.
Pin it
Crochet Flip Flops
Crochet Granny Triangle Sandals Photo Tutorial
Crochet a cute pair of sandals with a simple granny triangle. Crochet photo tutorial for a crocheting on flip flops.
Materials
- 20 yds (18 m), black cotton yarn; I used what I had on hand, I Love This Cotton in black
Tools
- 3.75mm Hook size F
- Flip flops or Sandals
- Yarn needle
- Scissors
Instructions
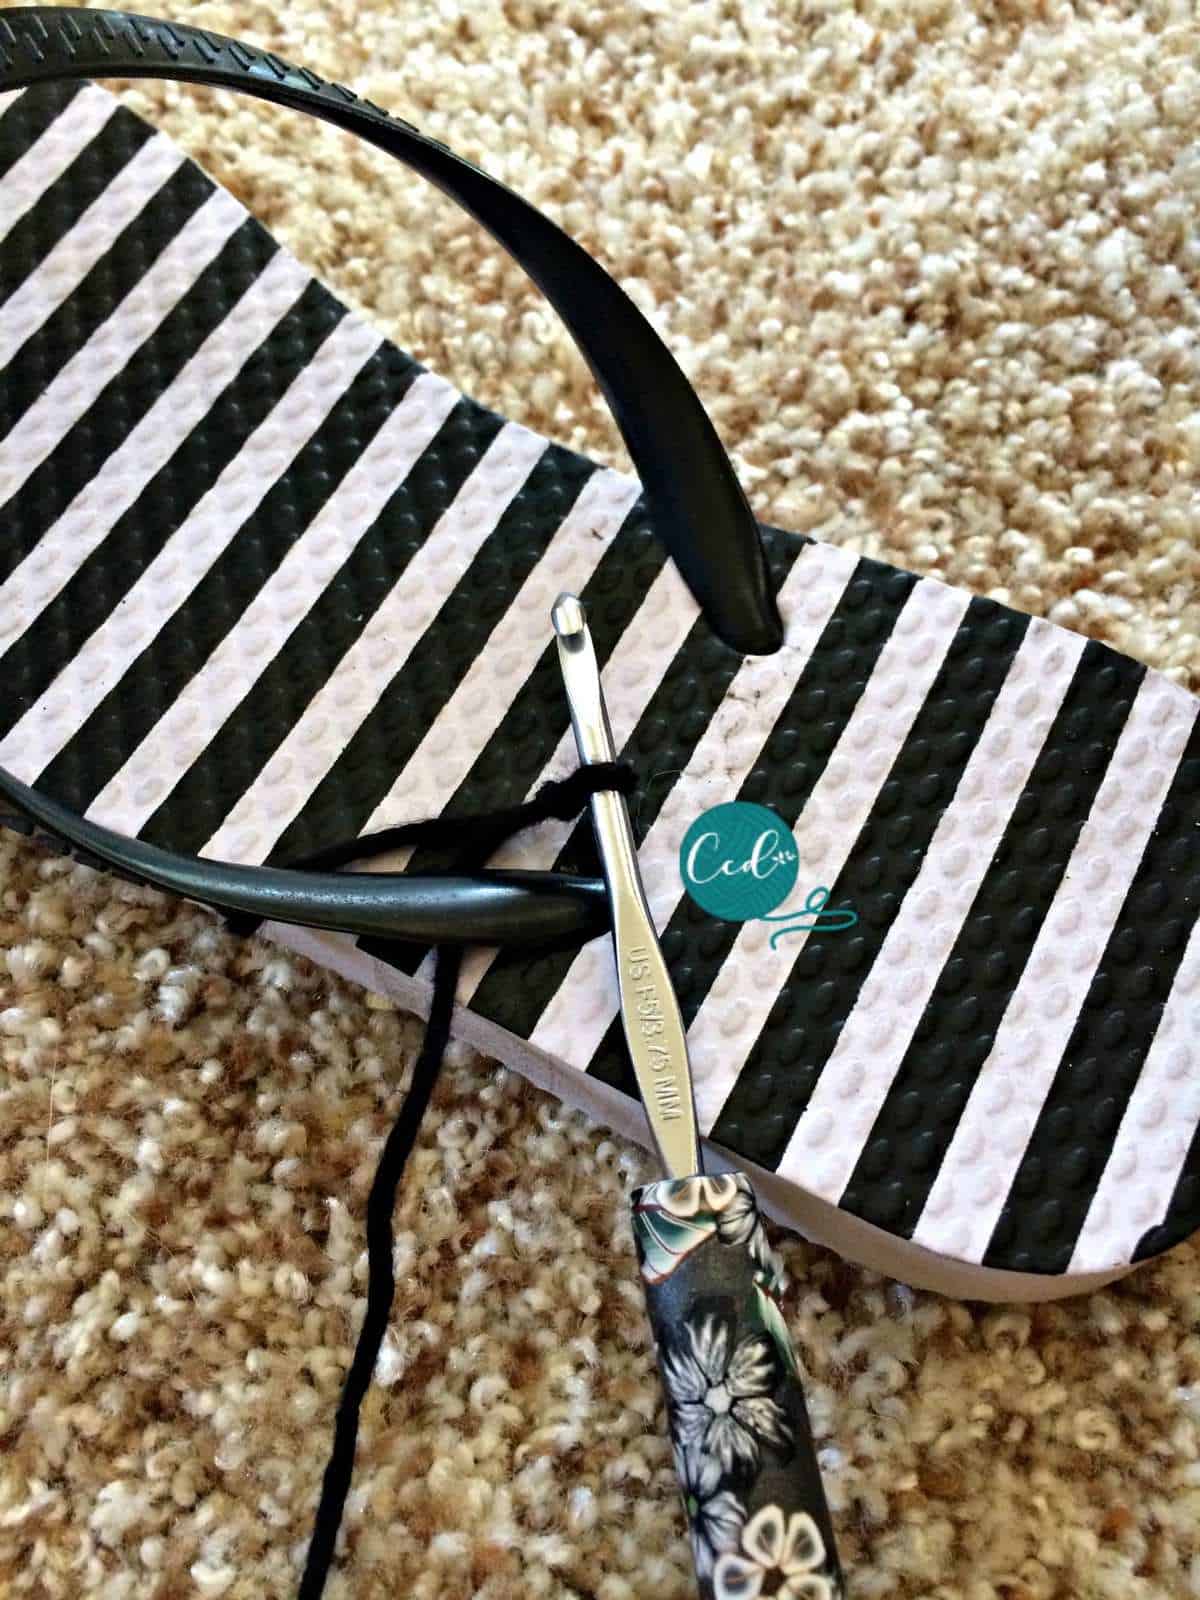
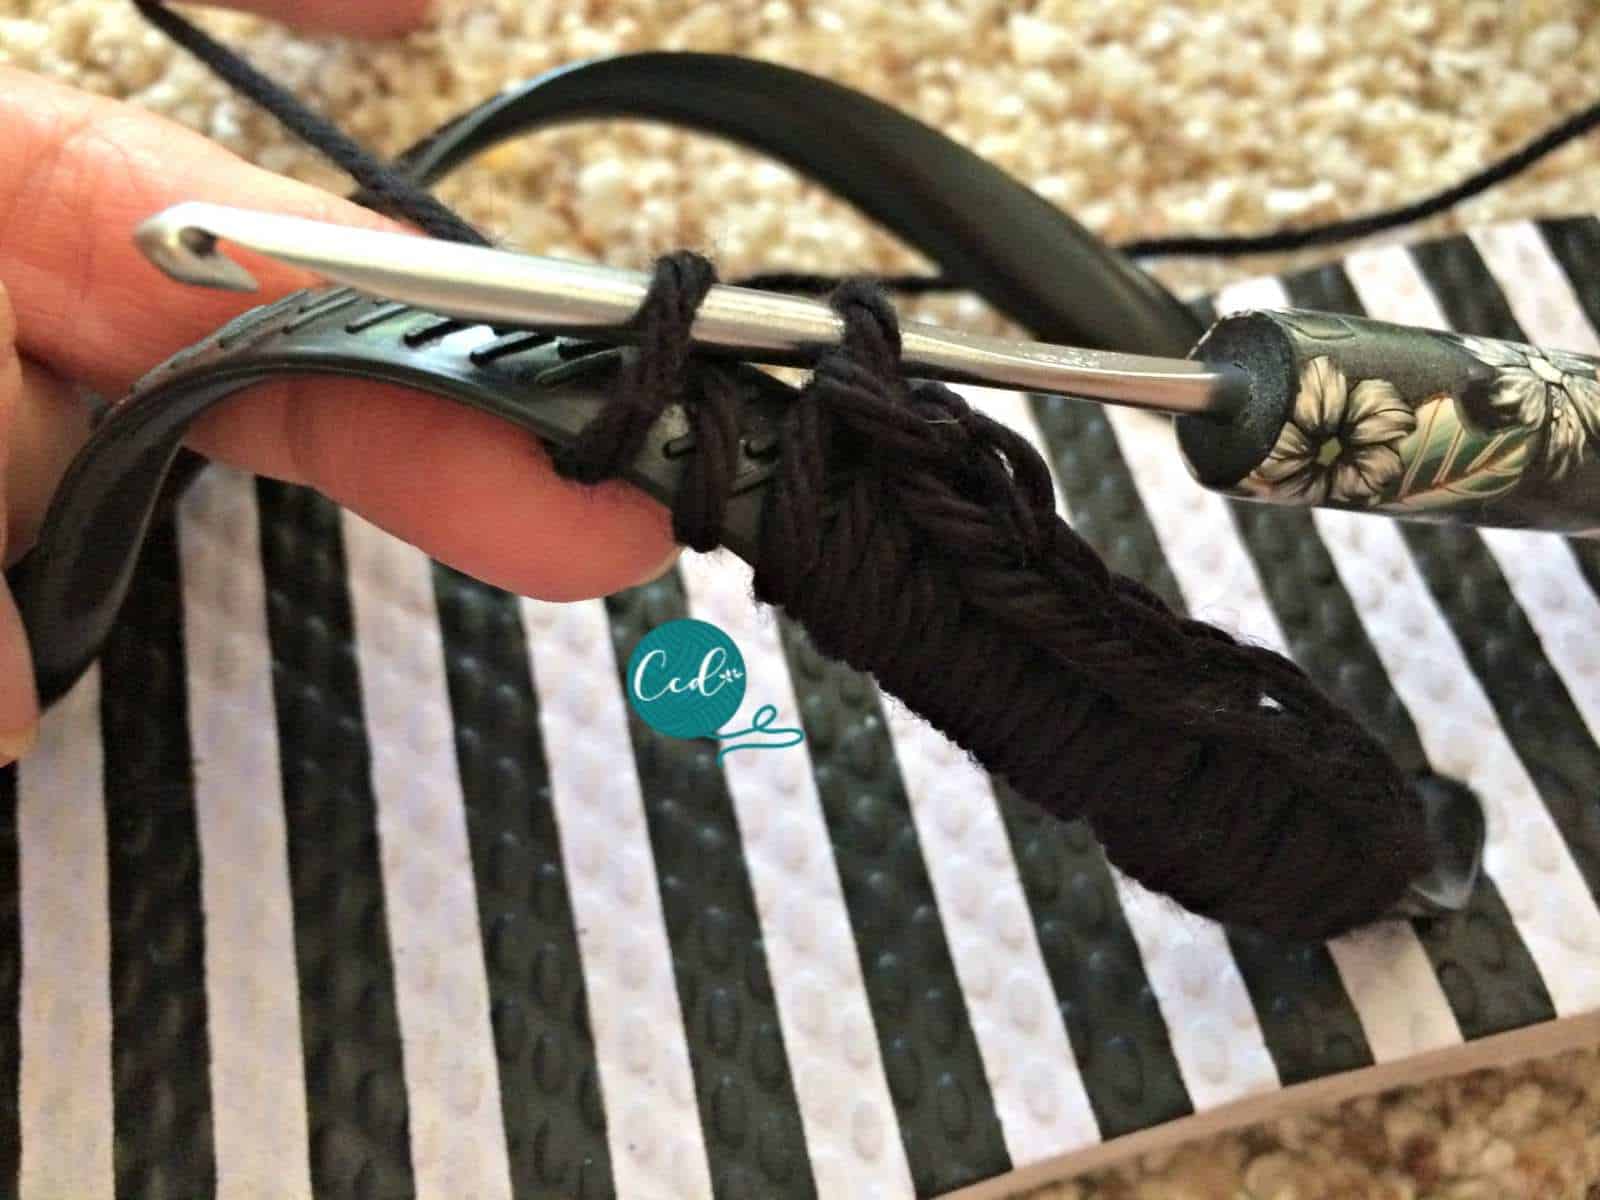
- Join yarn to sandal strap with a sl st.

- SC around the straps.

- Push and slide the stitches down as you go to keep them close together, not bunched, but close.
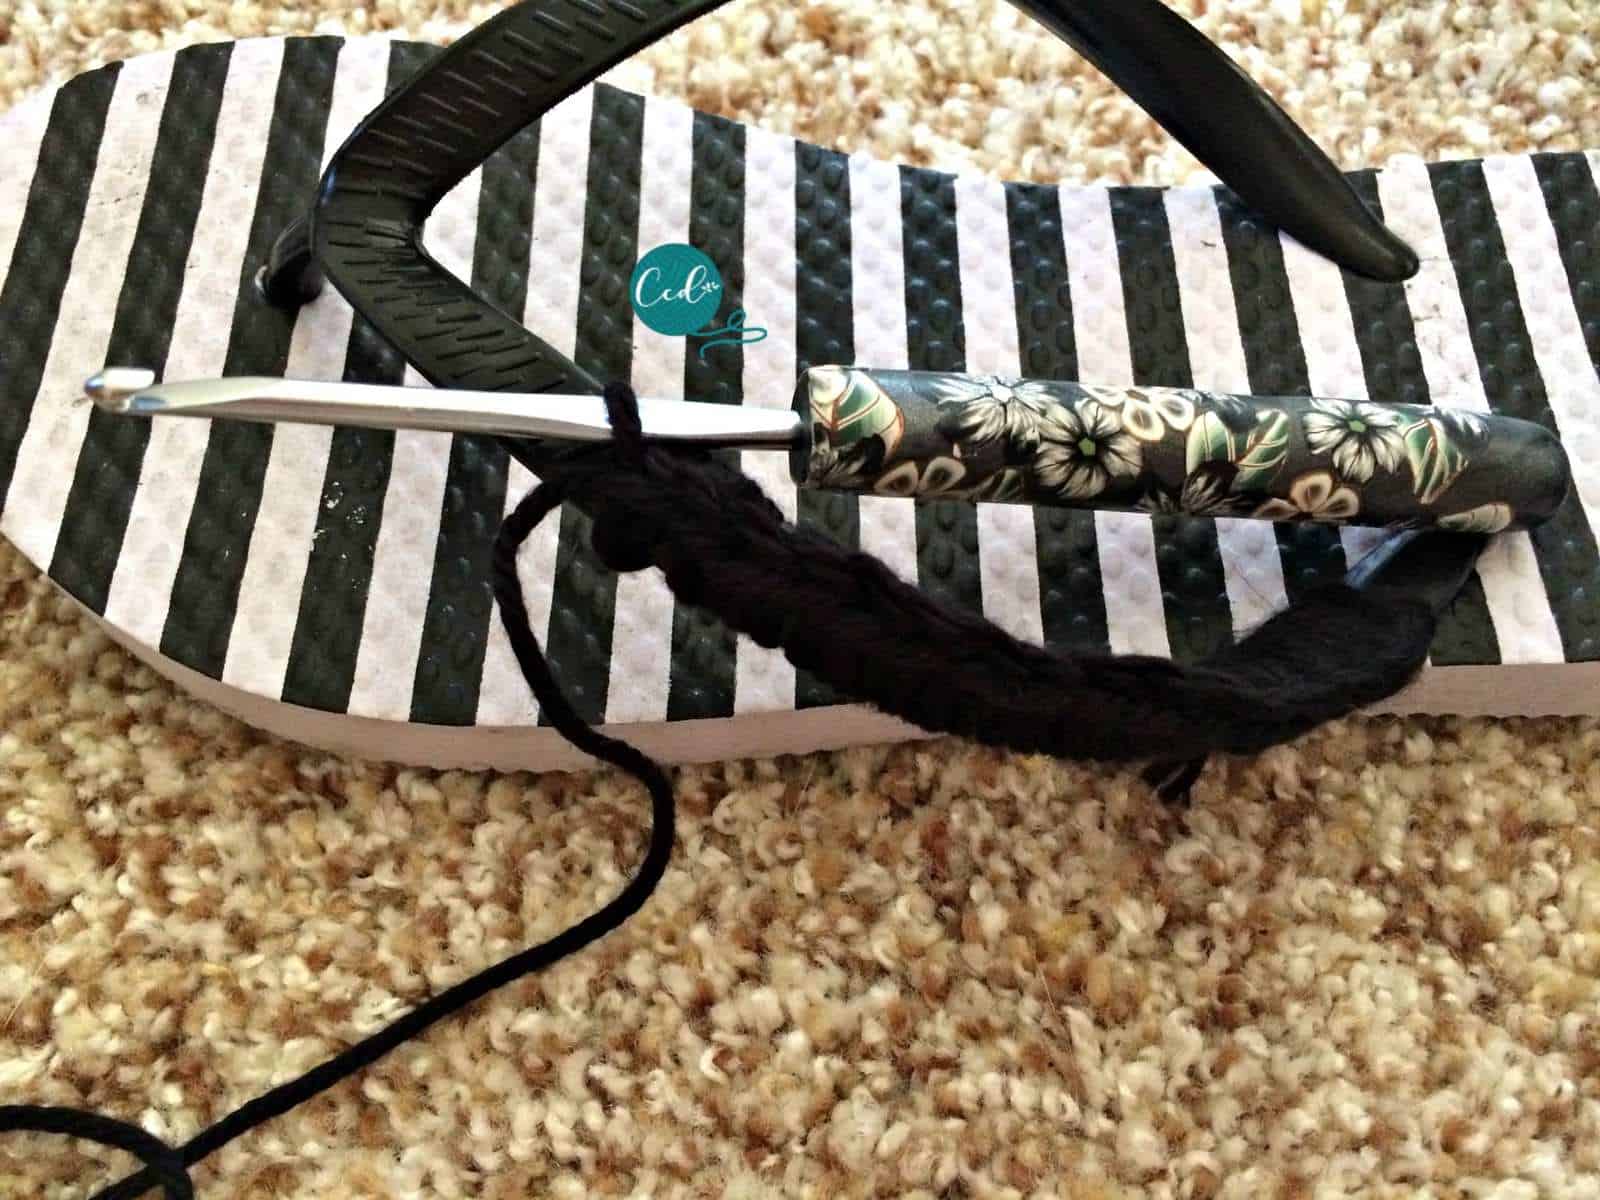
- I added a slip stitch around the center toe piece to secure it a bit more before continuing to sc around the other side. Finish off and set aside.

Basic Granny Triangle Pattern:
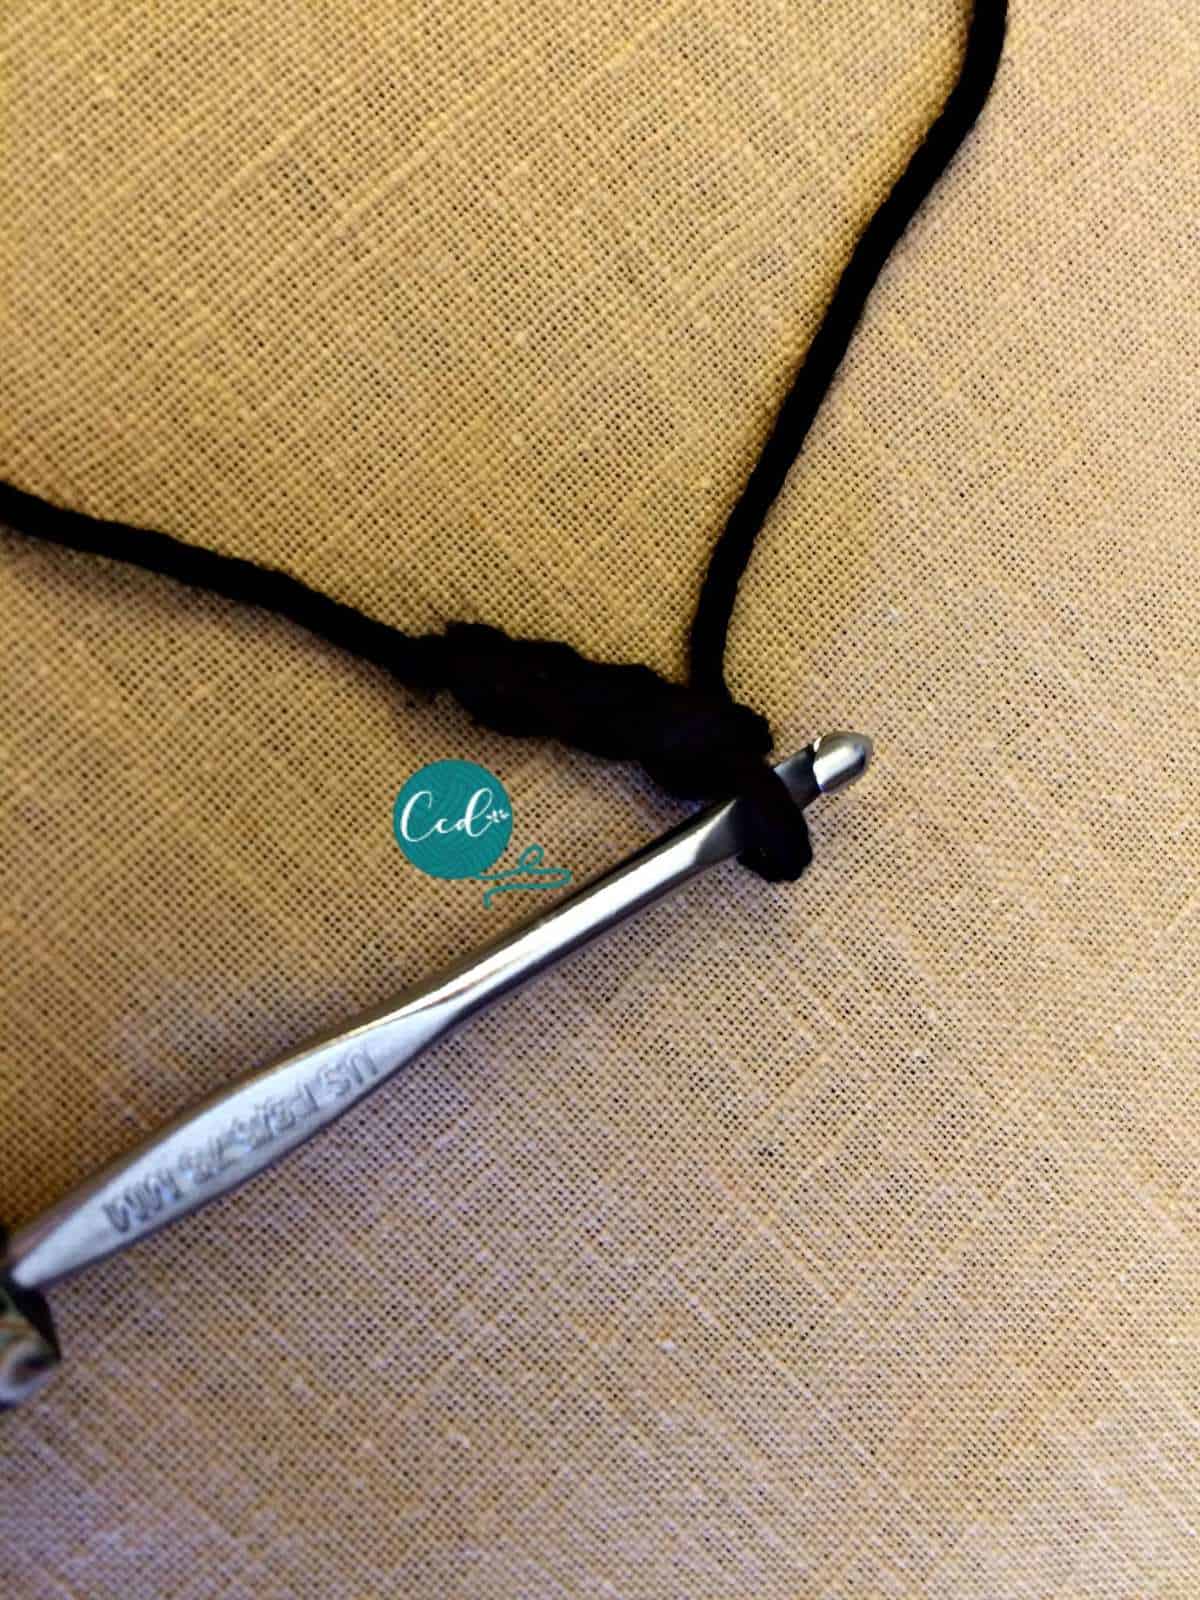
- Start with a magic circle, or Ch 3
- Slip stitch to first chain. You will crochet into the circle formed here.
- Rnd 1. Ch 3, place 2 DC into the circle formed from first step, then ch 1
 Continue and place 3 DC into the circle, then ch 1
- Place 3 DC into the circle, ch 1 and join to 3rd chain of the beginning Ch 3. Round 1 is complete.
- Rnd 2. Slip stitch over to the next ch 1 space and place (ch 3, 2 DC, ch 1, 3 DC) all into that space. This forms the first corner of the triangle.
- Skip to next chain 1 space and place (Ch 3, 2 DC, ch 1, 3 DC) this is the second corner.
- Skip to last chain 1 space and place (Ch 3, 2 DC, ch 1, 3 DC, ch 1), join to 3rd chain of 1st stitch. This forms the 3 corners of your triangle. Round 2 is complete.
- On the next round, slip stitch over to the next chain space.
- Rnd 3. Ch 3, 2 DC, ch 1, 3 DC, ch 1 all in the same chain 1 space, skip to next chain 1 sp and place (3 DC, ch 1) all in this chain 1 space.
- Continue to the next chain 1 space and place (3 dc, ch 1, 3 dc, ch 1) all in the chain 1 space, this is a corner.
- Continue to the next chain 1 space and place (3 dc, ch 1) all in the chain 1 space, this is a side.
- Repeat the last two steps one more time.
- To finish your granny triangle slip stitch to the top of the 3rd chain from the beginning of the round. This completes Rnd 3.
- My sandals were crocheted for my niece so they were womens’ size 5-6. So this granny triangle was perfect for these crochet sandals. For larger sizes you might need another round, just follow the pattern of (3 DC, ch 1, 3 DC, ch 1) for the corners and 3 DC, ch 1 on the side chain spaces.
 Start with a
 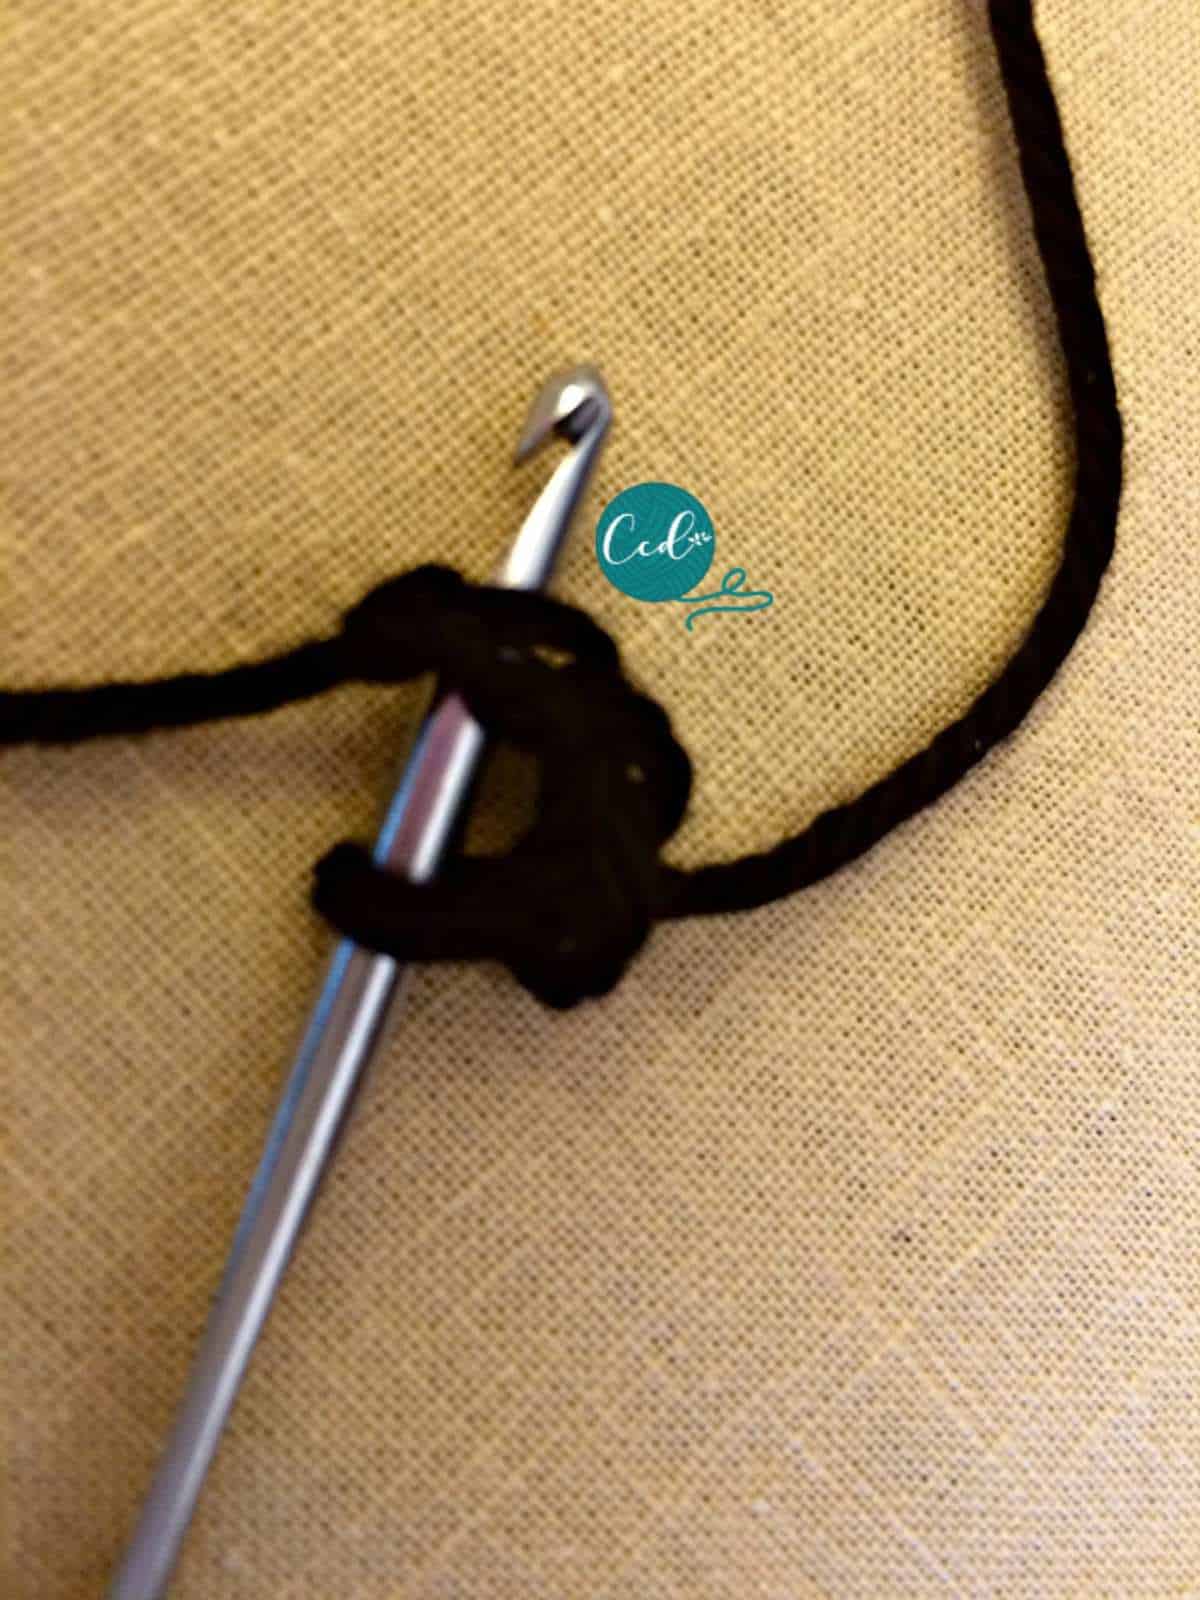 Slip stitch to first chain. You will crochet into the circle formed here.
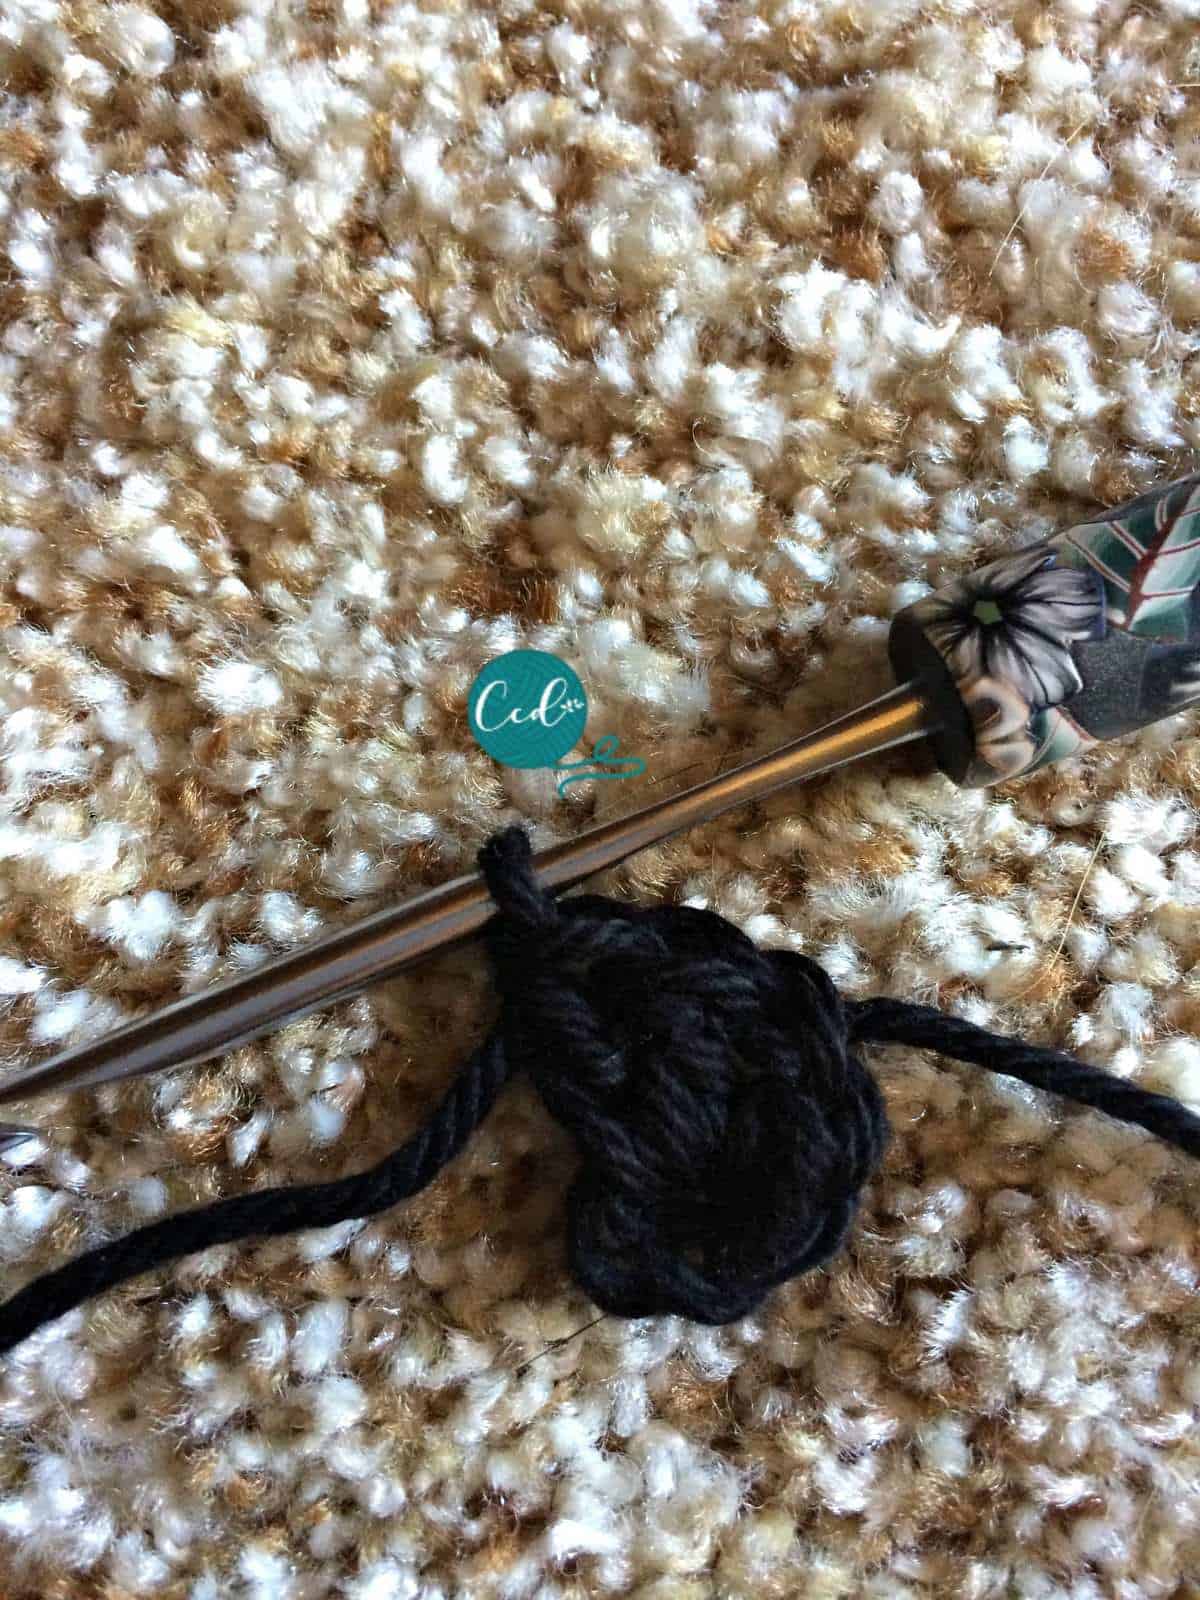 Rnd 1. Ch 3, place 2 DC into the circle formed from first step, then ch 1
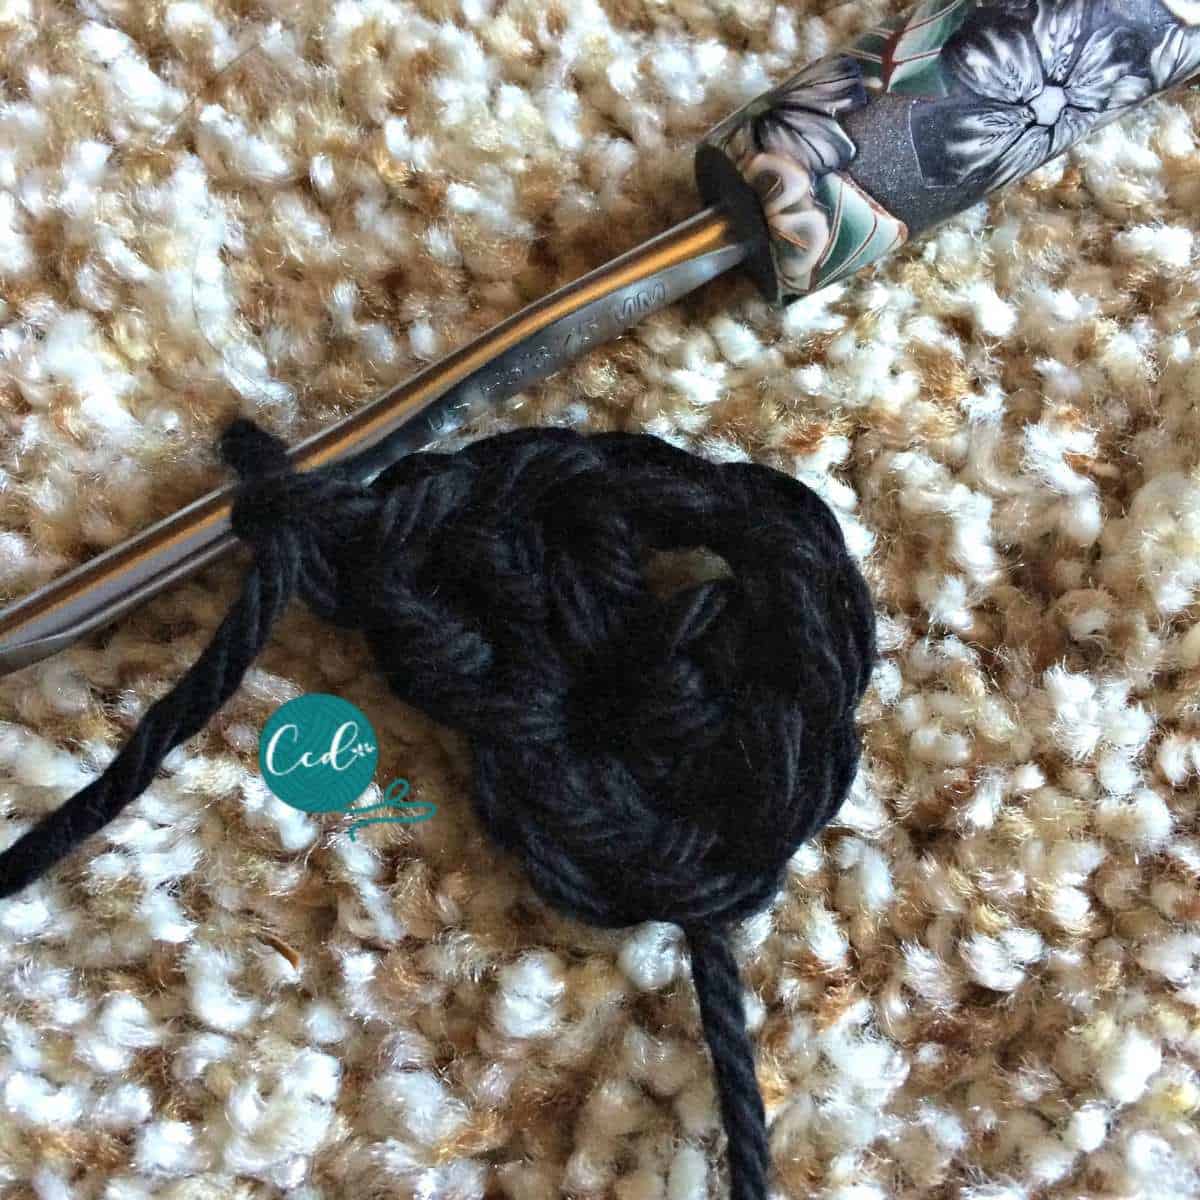 Continue and place 3 DC into the circle, then ch 1
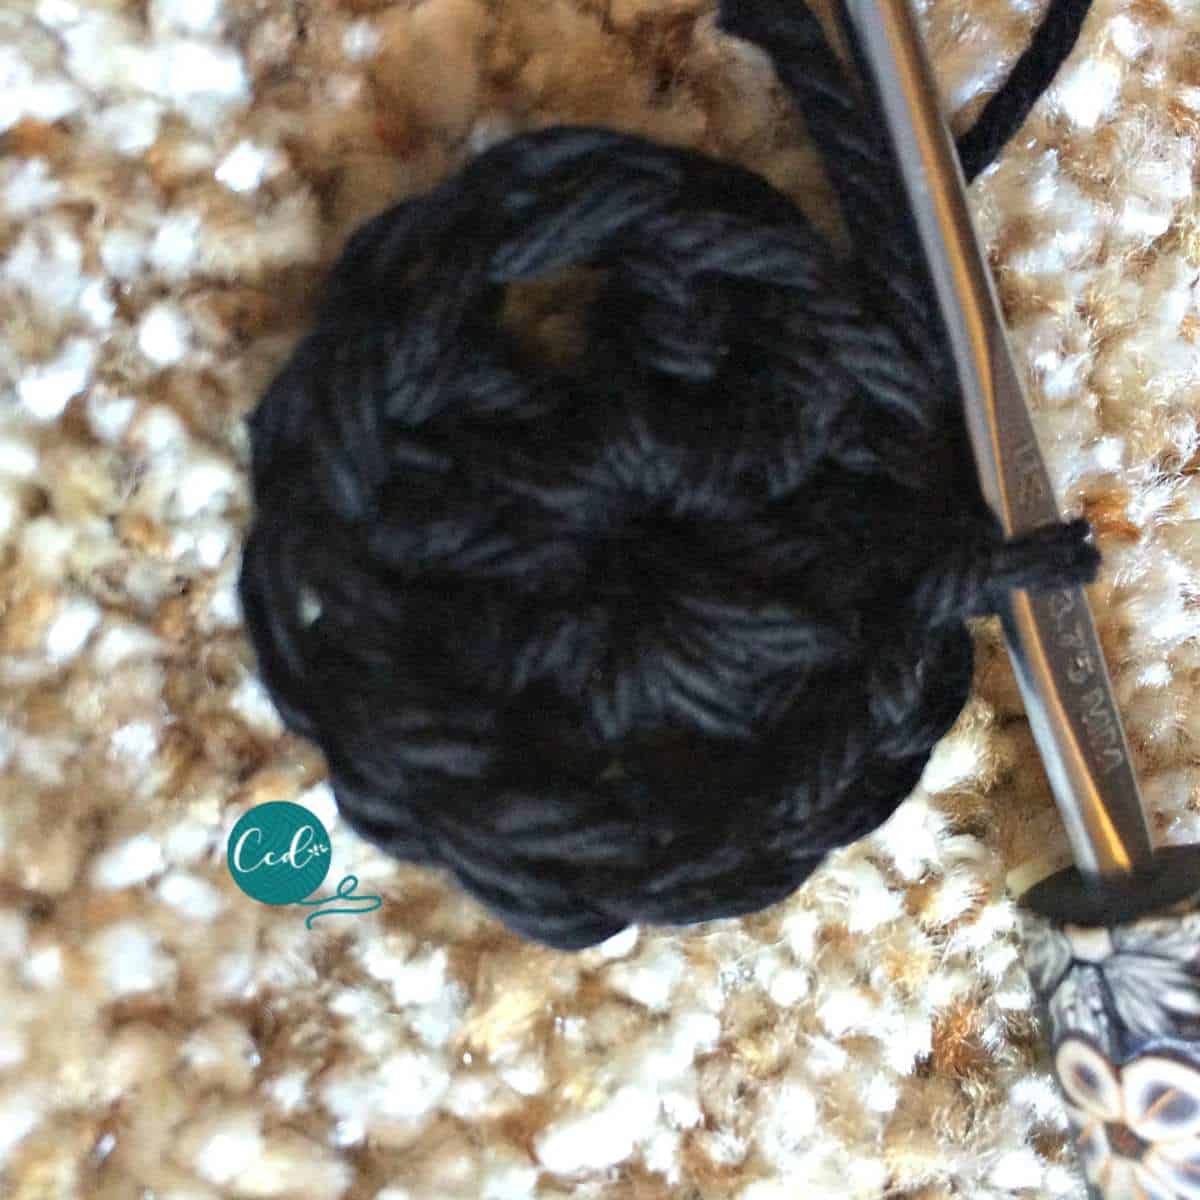 Place 3 DC into the circle, ch 1 and join to 3rd chain of the beginning Ch 3. Round 1 is complete.
 Rnd 2. Slip stitch over to the next ch 1 space and place (ch 3, 2 DC, ch 1, 3 DC) all into that space. This forms the first corner of the triangle.
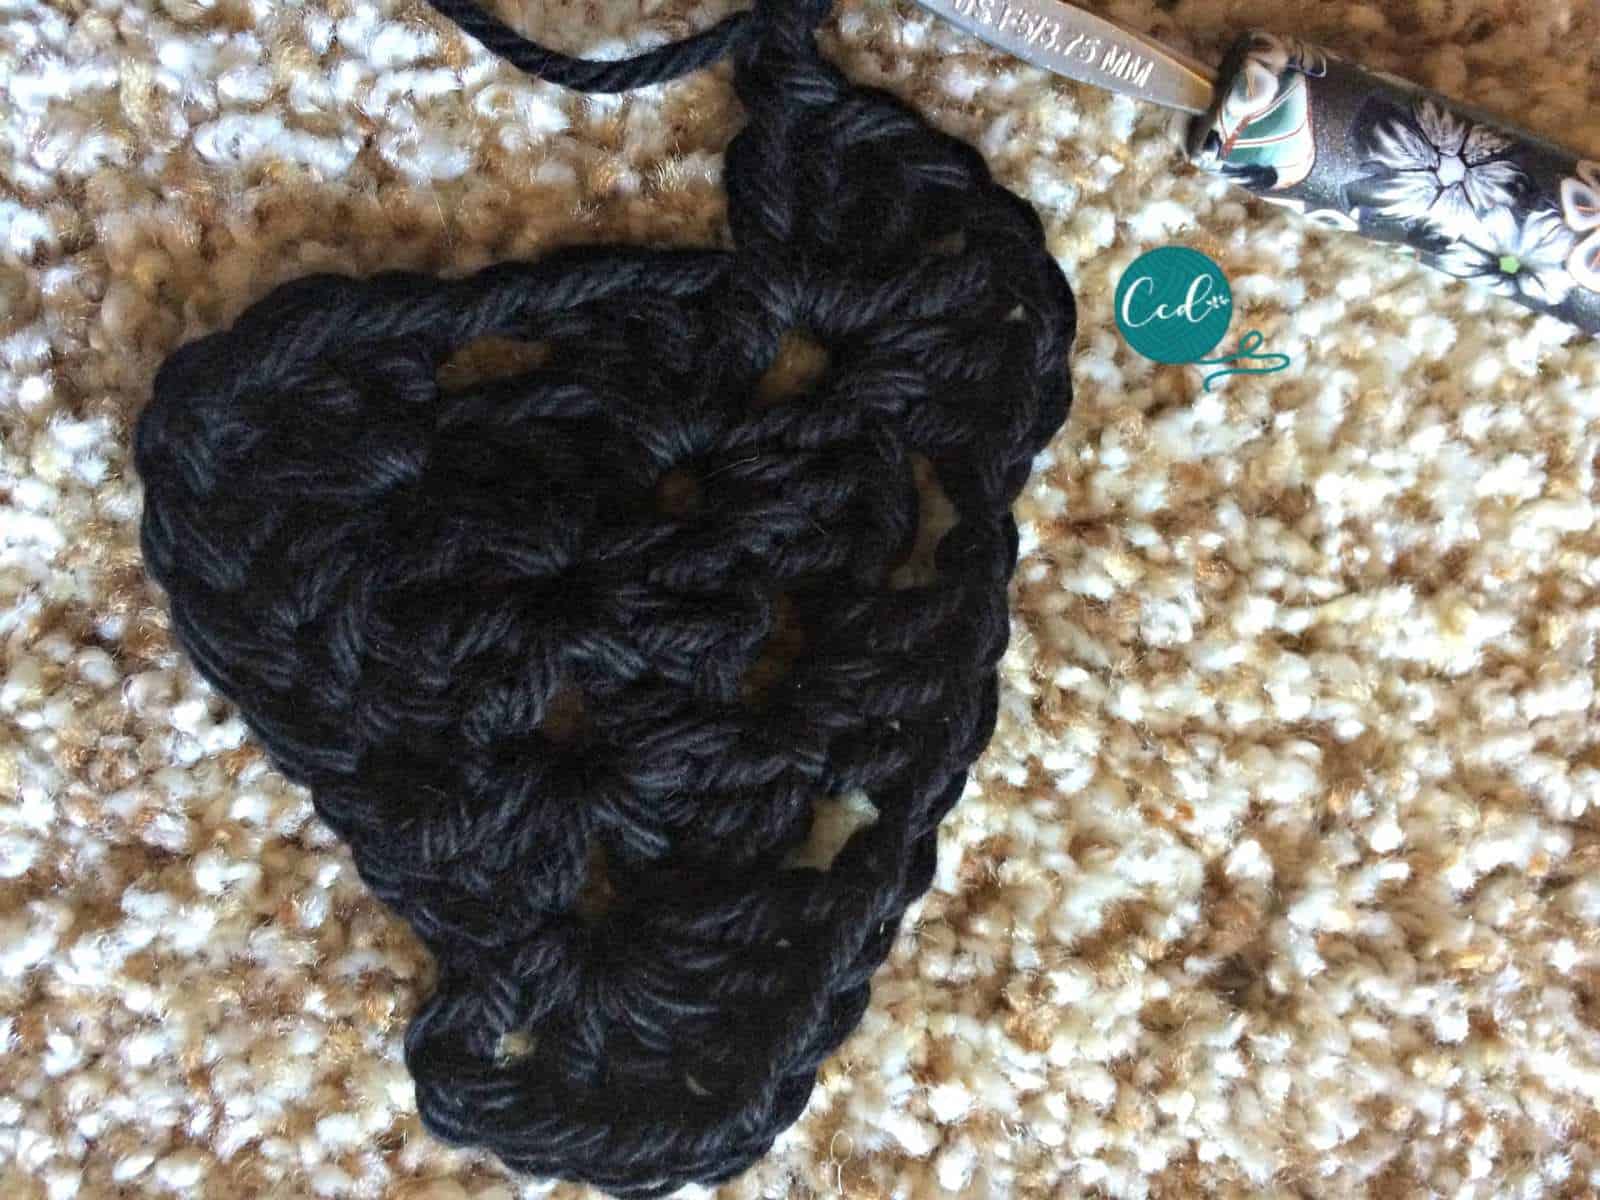 Skip to next chain 1 space and place (Ch 3, 2 DC, ch 1, 3 DC) this is the second corner.
 Skip to last chain 1 space and place (Ch 3, 2 DC, ch 1, 3 DC, ch 1), join to 3rd chain of 1st stitch. This forms the 3 corners of your triangle. Round 2 is complete.
 Rnd 3. Ch 3, 2 DC, ch 1, 3 DC, ch 1 all in the same chain 1 space, skip to next chain 1 sp
 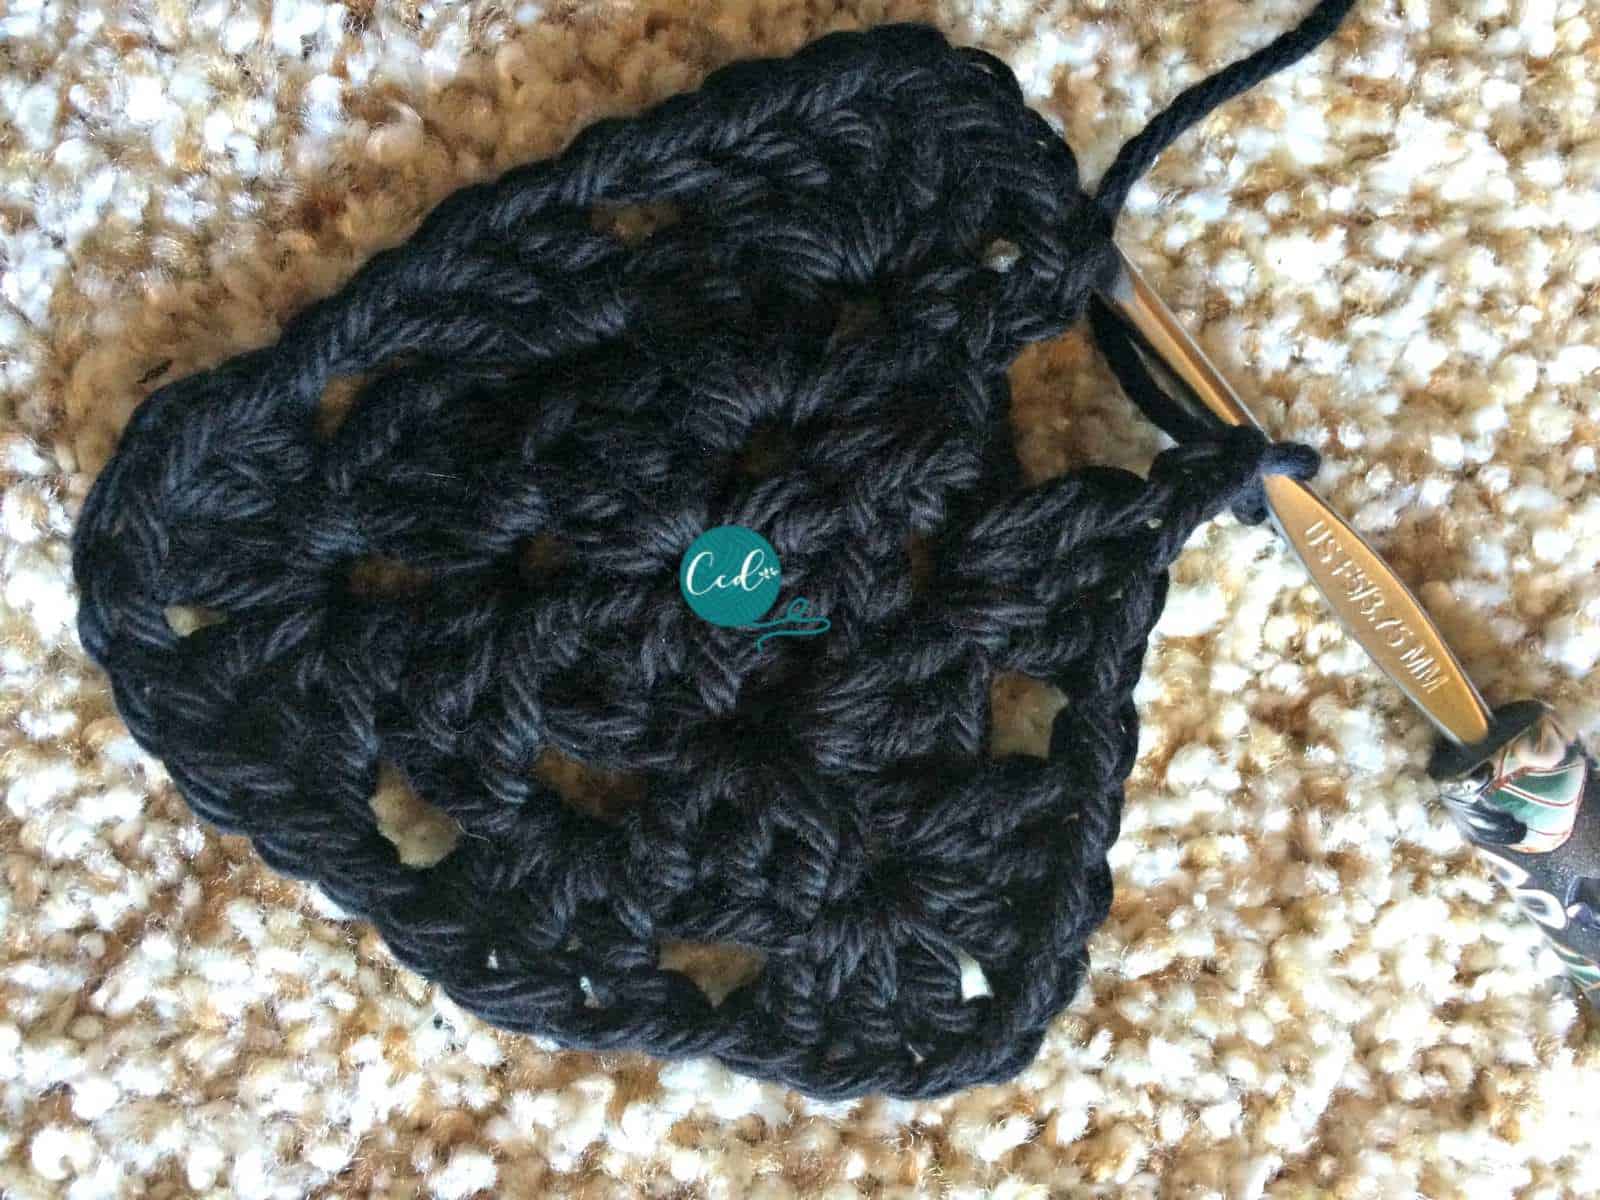 and place (3 DC, ch 1) all in this chain 1 space.
 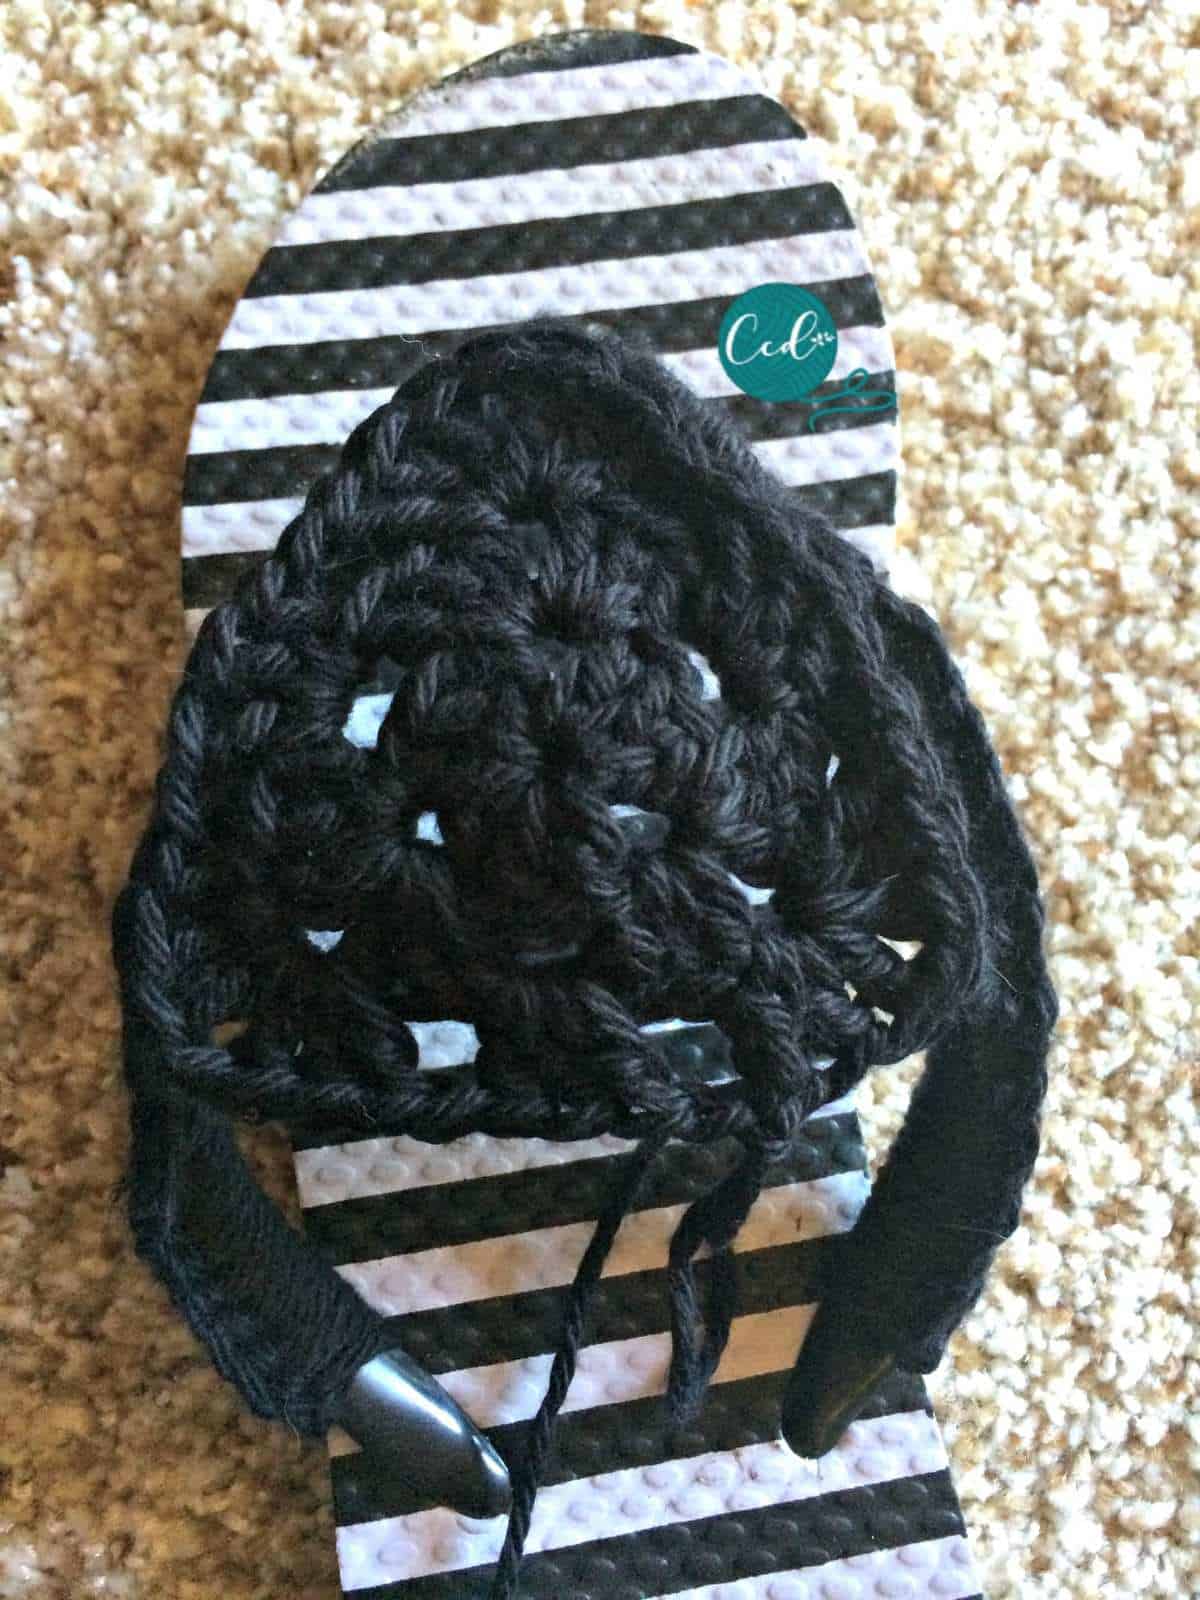 My sandals were crocheted for my niece so they were womens’ size 5-6. So this granny triangle was perfect for these crochet sandals. For larger sizes you might need another round, just follow the pattern of (3 DC, ch 1, 3 DC, ch 1) for the corners and 3 DC, ch 1 on the side chain spaces.
Finishing:
- When your granny triangle is as large as needed, line up the top corner of your triangle with the top toe piece of your sandals to check fit.
- Start from the bottom left corner of your granny and sc the triangle to the straps.
- If your model is available check sizing and fit. Yarn stretches so you don’t want them to be too loose.
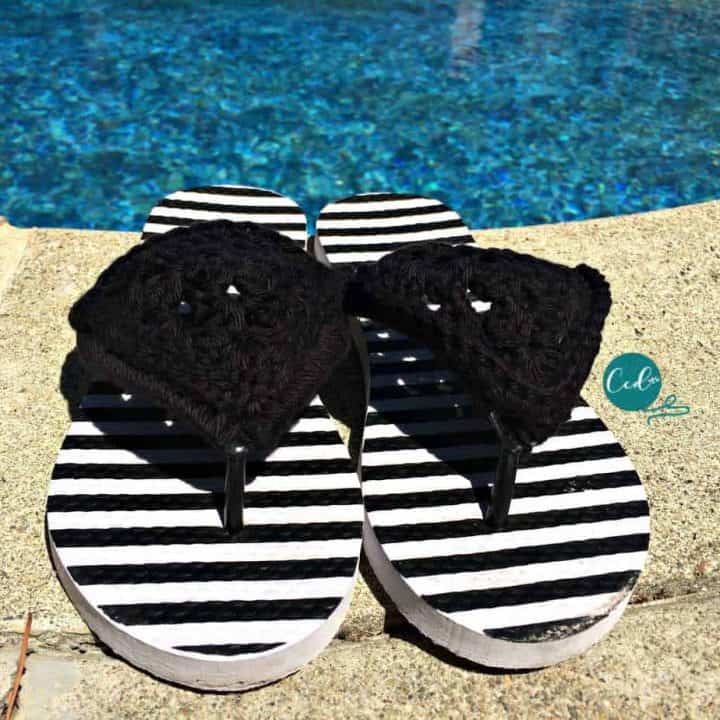
- Now repeat for the other one and eccola! Crochet sandals for your summer fun!
 When your granny triangle is as large as needed, line up the top corner of your triangle with the top toe piece of your sandals to check fit.
 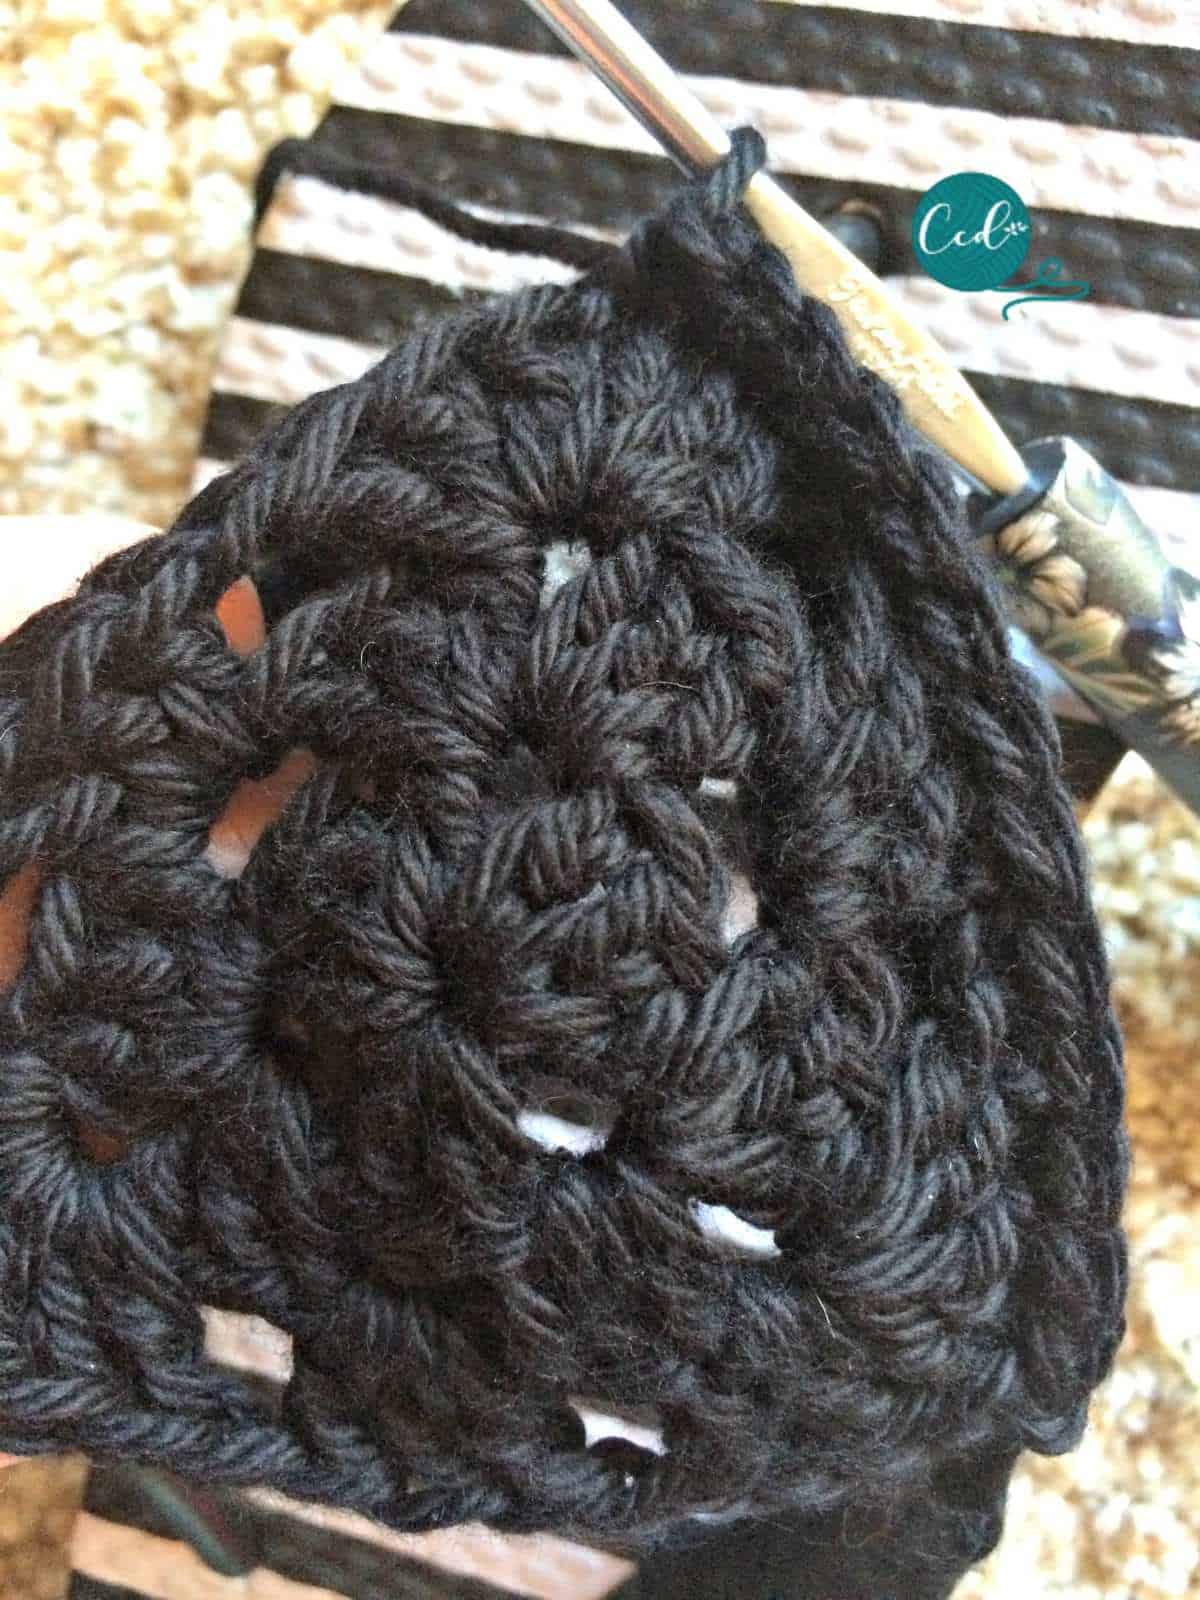 Start from the bottom left corner of your granny and sc the triangle to the straps.
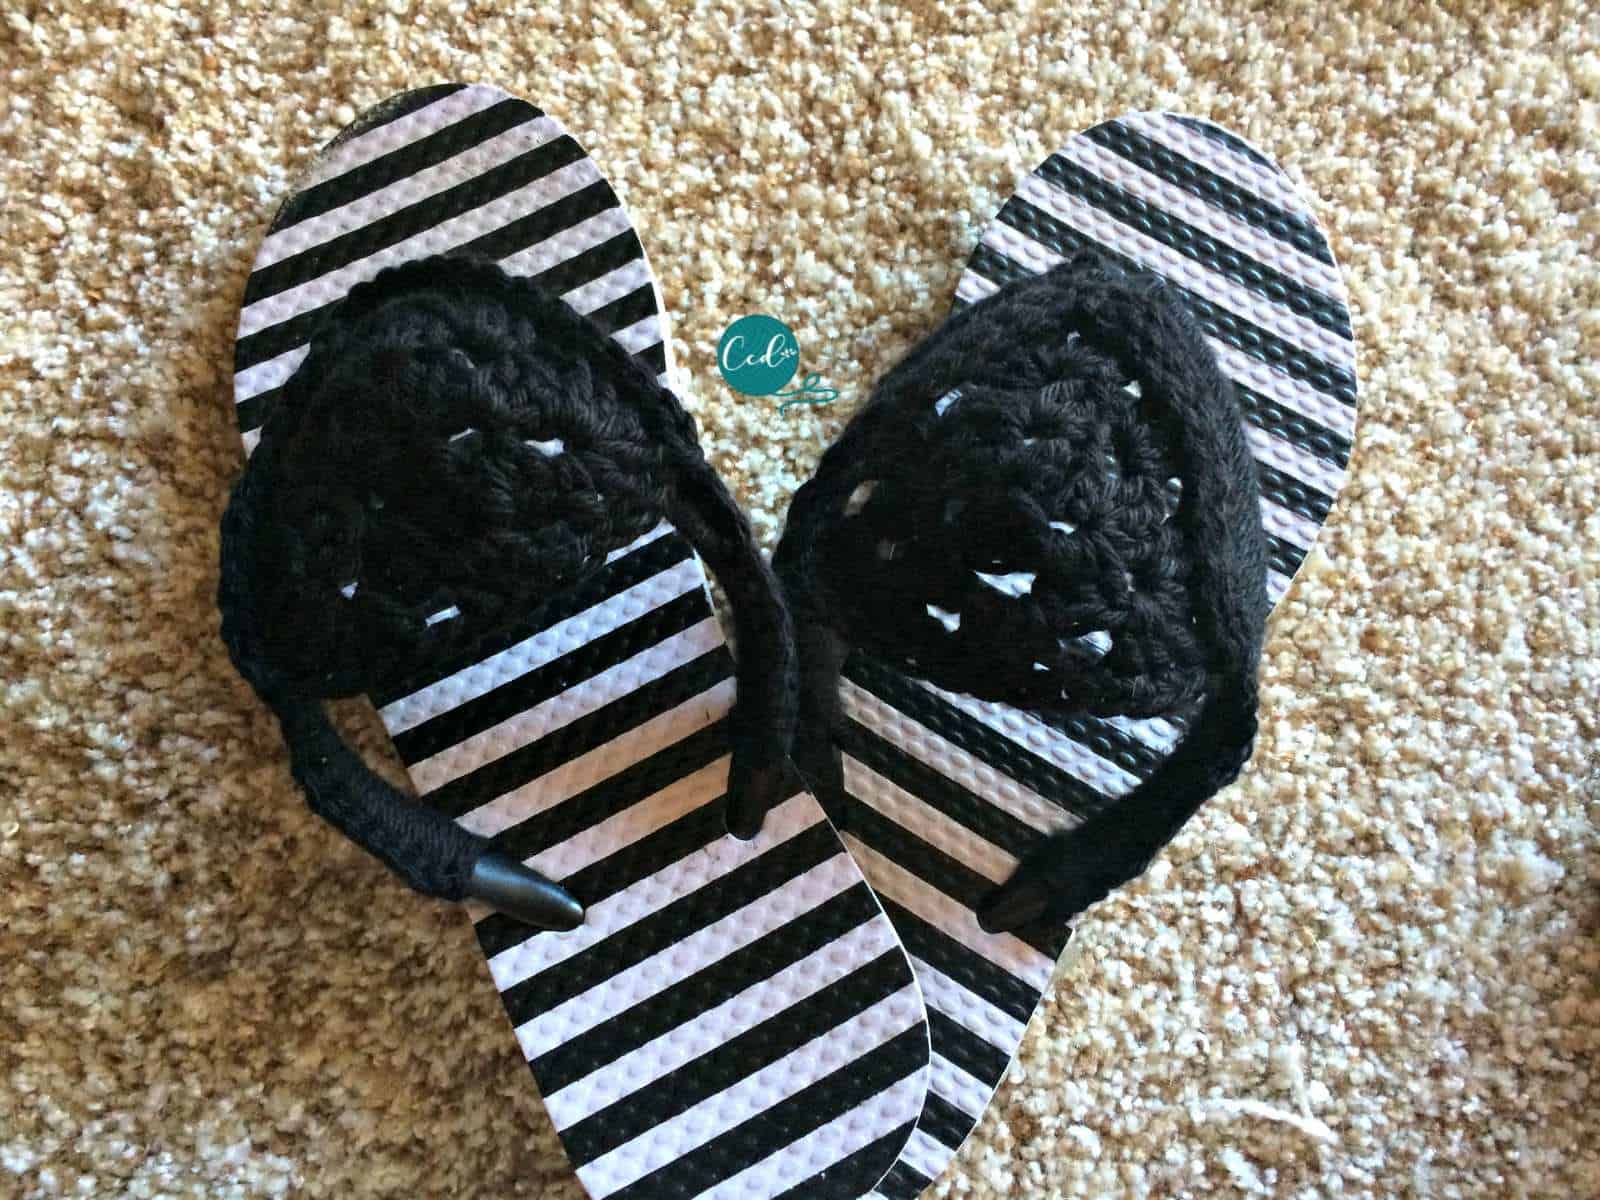 Now repeat for the other one and eccola! Crochet sandals for your summer fun!
Recommended Products
As an Amazon Associate and member of other affiliate programs, I earn from qualifying purchases.