Baby Quilt Part 1: Quilt Top
Learn how to piece together a simple quilt top for a baby blanket in this step by step tutorial.
I am not a quilter by any means, but I have made a few baby quilts for friends. A simple quilt is actually quite easy, although intimidating if you’ve never done it before.
A friend is expecting so I thought I would make a small baby quilt for her from some of the beautiful purples and complimentary fabrics I have in my stash. Which brings me to our first need: fabric.
If you have been sewing a while you probably have a “stash” of fabric. Quilts are great for using up those smaller pieces which you just can’t use for larger projects.

This post contains affiliate links, I may earn a fee. Read more disclosure policy.
It’s important to determine the size of your blanket before you shop for fabric. A yard of fabric is 45 inches wide by 36 inches long so this quilt or a standard 30″ x 40″ baby quilt will fit on one yard of fabric for the backing.
We’ll be using the backing fabric for our binding as well so it needs to be 1-2″ larger than your quilt top (the squares we’ll be sewing together) all the way around.
So you will need one piece of fabric for your backing, 1 yd is enough for these small quilts. If you plan to make your quilt larger then you’ll need 2 yds of fabric or more. Be sure to measure. I would recommend sewing your quilt top and then measuring for your backing so you can get exactly what you need.
Materials:
various coordinating or contrasting fabrics (around 1 yd total)-quilting cotton, fat quarters, flannel are all good places to start if you’re buying all of it new
1 yard lightweight interfacing (fusible webbing)
sewing machine, coordinating thread, scissors, iron, ironing board
*You’ll also need 1 yard (or more if making a larger quilt) of fabric for your backing, I used flannel. I’ll be adding a Part 2: Backing and Binding Your Quilt post soon!
*There are also pre-cut quilting sets you can purchase and sew together like this cute one on Amazon.
Steps:
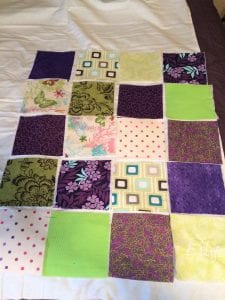
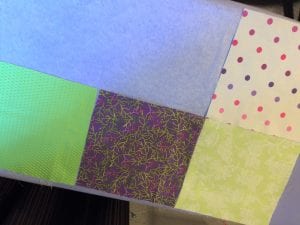
First I sorted my ‘less than a yard’ fabrics, grouping them by complimentary color. For this quilt I chose purples, creams and green.
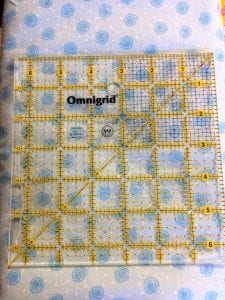
I have plenty of these colors in larger pieces so I decide to make my quilt squares 6.5 inches. I used my 6.5″ Omnigrid Ruler.
Amazon has them in multi-packs, which is a great deal compared to buying them individually. http://amzn.to/2m8C4v5
You can make your squares any size that works with what you have on hand.
Next I decided about what size to make my quilt. A standard baby quilt is 30″ by 40.” When I crochet baby blankets I often refer to this chart https://www.pinterest.com/pin/39265827976544951/ but for this quilt I wanted to make it smaller to fit a car seat, stroller or swing. My finished quilt measures 24″ X 29.” Again, make yours the size you feel would be best. This tutorial will apply to any size!
Cut:
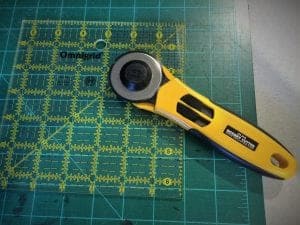
Once I had a rough idea of size, I laid out my fabric on my self healing cutting mat http://amzn.to/2mUnIP5, laid my 6.5″ Omnigrid ruler on top and cut out my squares using my rotary cutter. http://amzn.to/2mUkFpZ
*side note here on these tools: My cutting mat and rotary cutter are the two things I use the most in all my sewing projects. They have made measuring and cutting straight, neat and correctly sized lines so much easier. By far these are two of my most important tools… next to my seam ripper!
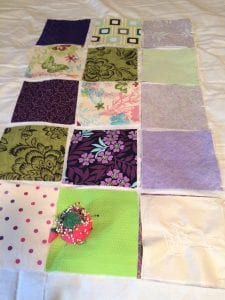
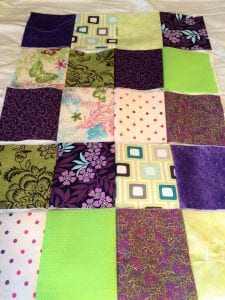
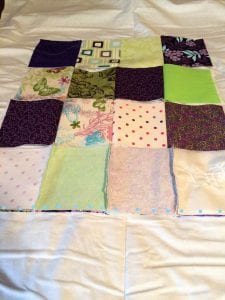
Back to cutting, I cut two squares of each fabric, laying them out next to each other as I went. Rearranging here and there to achieve the look I like. I take a picture when I think I like it, in case they get out of order. If I wanted to make my quilt larger I would cut one or two more squares of each fabric. The very first quilt I made was small squares from just two types of fabric. Have fun arranging and ordering your fabrics!
I also chose not to add the inner layer of batting that most quilts use. If this is your first quilt I would skip the batting layer. If you want to use batting then follow the same size guidelines for your fabric backing (you need a single piece larger than your quilt top) See picture below:

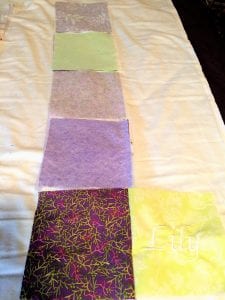
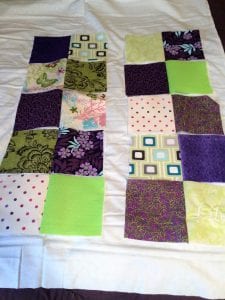
As you can see, I cut 20 squares and laid them out 4 blocks by 5 blocks.
Iron:
After all my squares were cut, I laid them out on some lightweight fusible interfacing, ironed them on, cut them out and laid the squares back out in order. Interfacing http://amzn.to/2mUnqrl
Adding interfacing is not required but I knew it would make sewing them into place easier. I also chose some fabrics, like minky, that stretch and interfacing helps minimize that, as well as strengthen some of my lighter weight materials. I used a lightweight interfacing so as not to weigh them down. http://amzn.to/2mqBKKt
Pin:
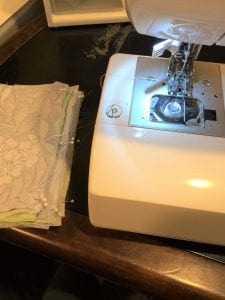
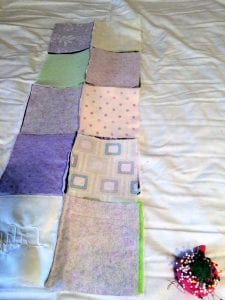
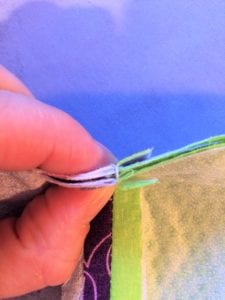
Once all my squares had interfacing and were laid back into position I folded one column on to another and pinned them along the edge I would sew them together on.


Stack the folded squares in the order to be sewn-my bottom square there with the pin cushion will be on the bottom of my stack and go in my machine last.
Sew:
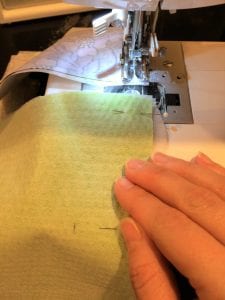
Start sewing with the first square and just keep going with the whole column of squares, without cutting the thread. Be sure to back-tack when you start sewing on the first square and when you finish at the last square. next sewew the second column of squares together.
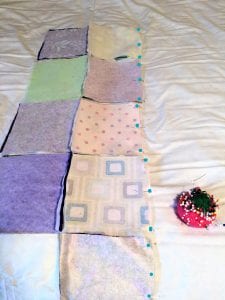
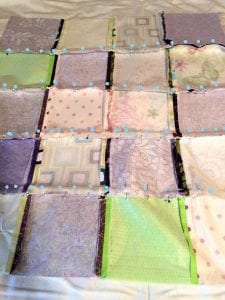
Place these two columns of squares on top of one another and pin on the right side (side to be sewn together).
Sew the two columns together (along the blue dots). Here’s what it looks like opened back up:
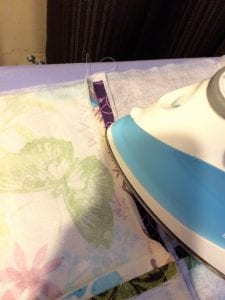
Before we sew the horizontal lines, it’s time to iron the vertical seams we just sewed. Ironing now will make it easier to match up corners when pinning to sew the horizontal rows.
Iron:
Turn your quilt top (almost!) over and using your iron press the sewn seams open flat.
Now when you fold your rows together for sewing it’ll be easy to line up the corners.
Once your vertical seams are ironed lay your quilt top (almost!) back out and fold up the bottom row.
Pin:
Line up your seams at the junctions and pin.
Sew:
Sew your vertical rows together be sure to back-tack at the start and stop of each row to secure your ends.
Now you know how to sew together a quilt top! My next post will be on the backing and binding for your quilt!